
I have seven months to pull off the daunting task of building an entire World War II Jeep — with a new frame, new body, new engine, and pretty much anything else I can buy new from eBay — in preparation for the off-road trails of the 60th Easter Jeep Safari in Moab, Utah. Here’s my initial plan for how I’m going to pull this off.
So, first things first: I have purchased an entire body and frame from eBay. These (especially the latter) represent the backbone of the World War II Jeep; they are the proverbial Christmas tree that I can now begin decorating.
So let’s go step by step.
Buy Some Literature

Though I’m quite familiar with flat-fender Jeeps (having owned a CJ-2A and CJ-3B), I am going to resist the urge to just jump right in without looking, so to speak. No, a World War II Jeep is a more complex machine than the civilian flat-fender Jeeps I’m used to, and understanding how they go together is something I should spend time on.
I’ve purchased the book “Building a WWII Jeep,” shown above, and I have a few other WWII Jeep books already on my bookshelf (plus some great government-issue ones I’ll be receiving soon); I’m looking forward to seeing step-by-step instructions on how to complete this rather ambitious project.
Get The Chassis Rolling

Step one is: I need to get the frame you see above rolling. That means I need to get a pair of axles, some leaf springs, and some leaf spring shackles. That’s job one: I have to get this thing to the point where I can roll it around. Plus, the axles represent the final part of the drivetrain, and building backwards from them — to the driveshafts, transfer case, transmission, and ultimately the engine — makes tons of sense.
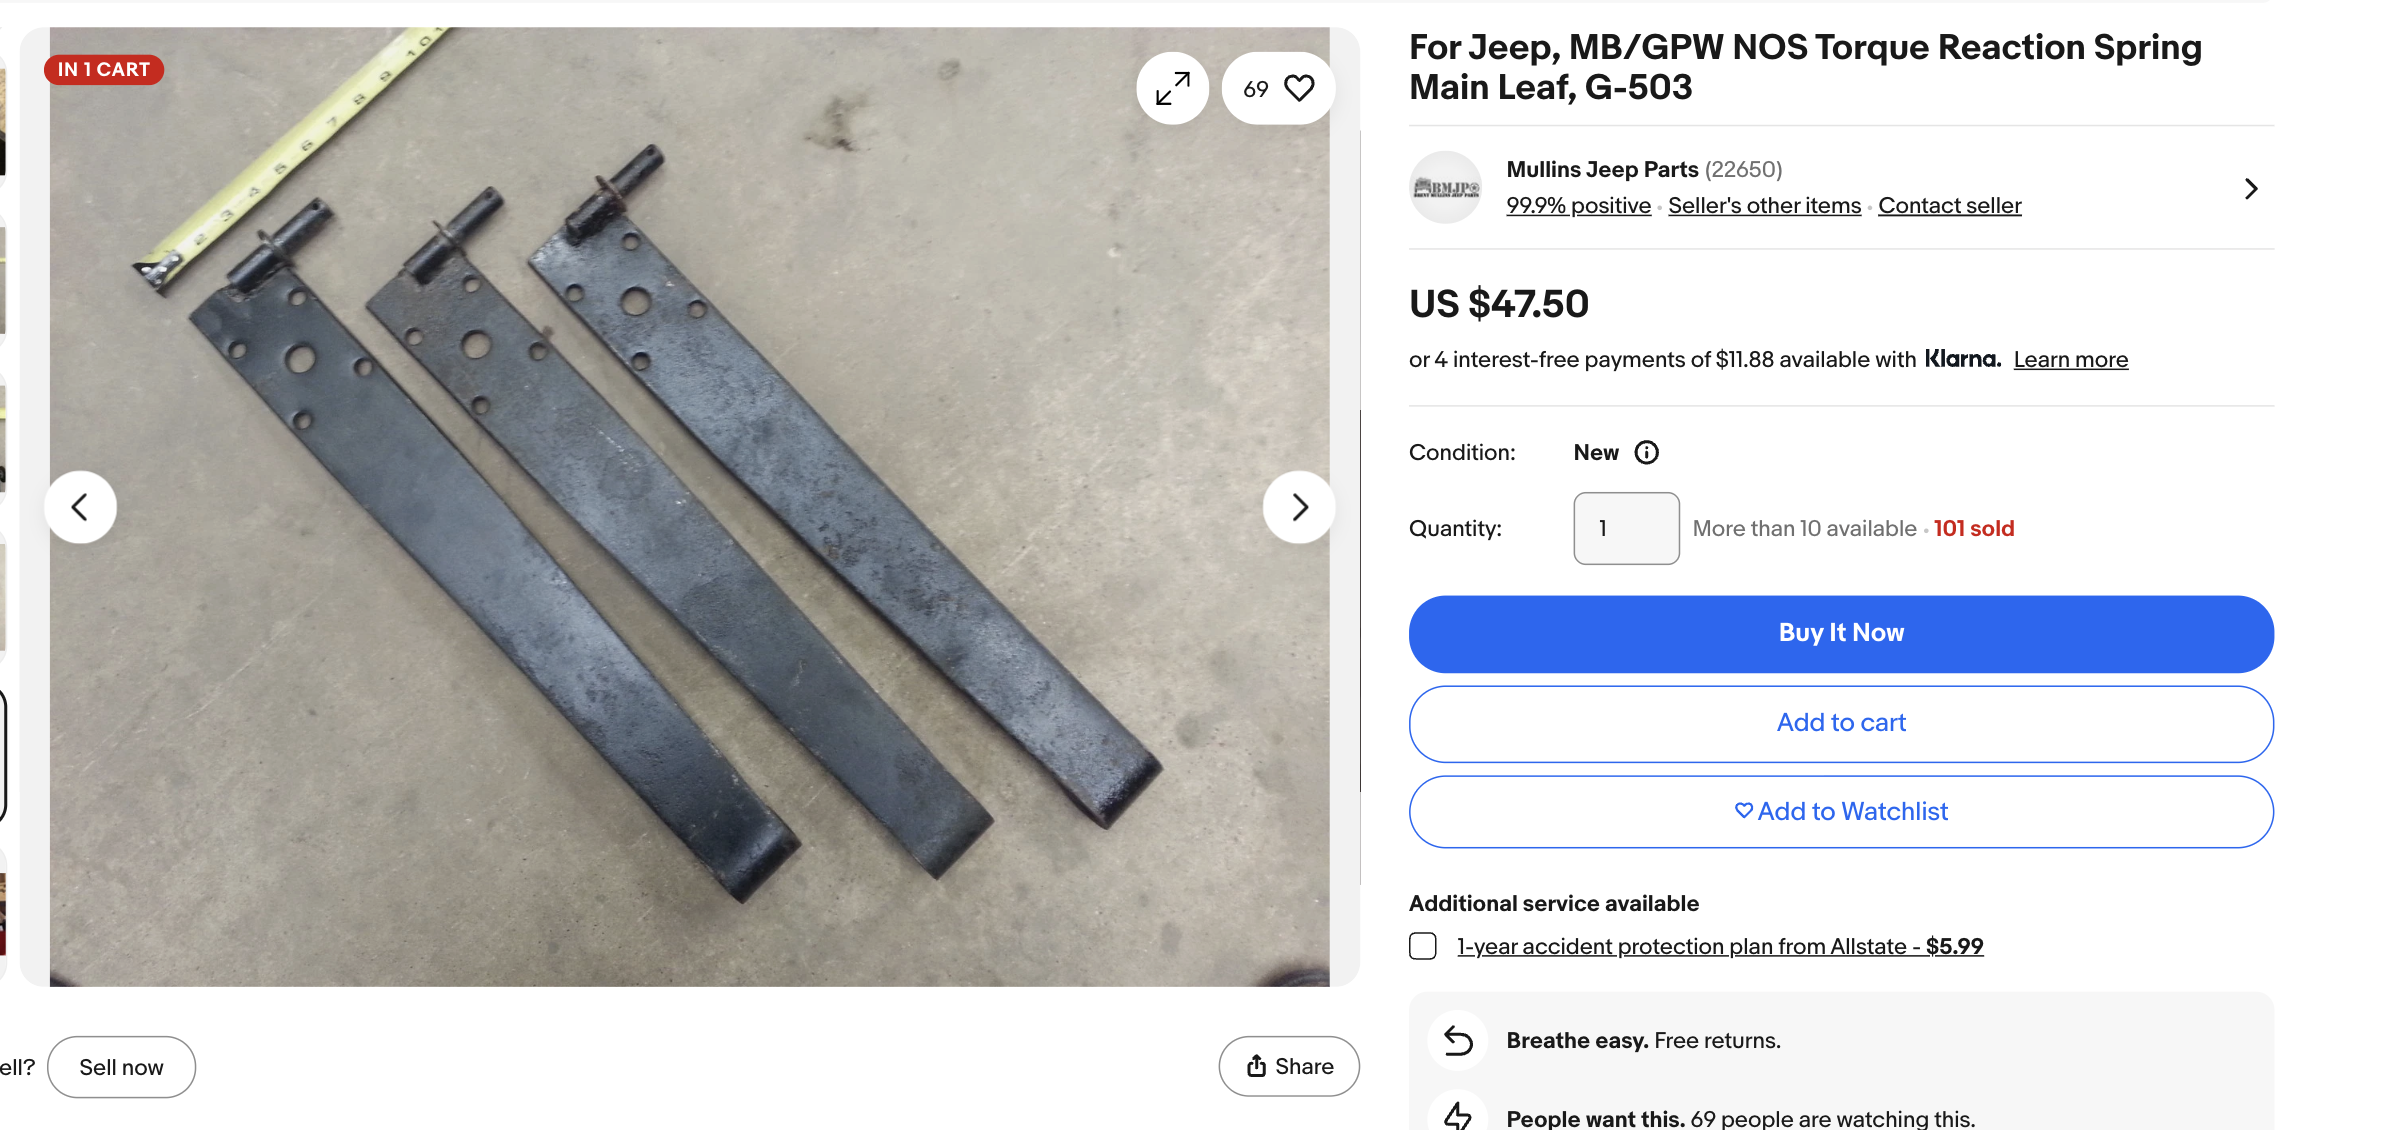
To pull off step one, I need to buy some leaf springs, shackles, shock absorbers, wheels, and tires, all of which are easily purchase-able on eBay. I also have to buy what’s called a “Torque Reaction Spring,” which is just a stiff metal bar that’s meant to mitigate the World War II’s inherent tendency to turn under braking due to the rather funky steering bell crank-on-axle-housing design — something I covered a number of years ago in an article.
Check this out; I can buy a New Old Stock one right here on eBay from a College Station, Texas-based seller named Mullins Jeep Parts:
So the springs and shocks and shackles should be no big deal, but what could be a problem is the axles. Nobody makes new axles for World War II Jeeps, and finding New Old Stock ones isn’t going to happen, since they’re big and bulky and nobody wanted to store them for 80 years. Ditto on transfer cases.
So I need to find a used set of axles and a transfer case somewhere. And that brings me to this…
I Need A Parts Car
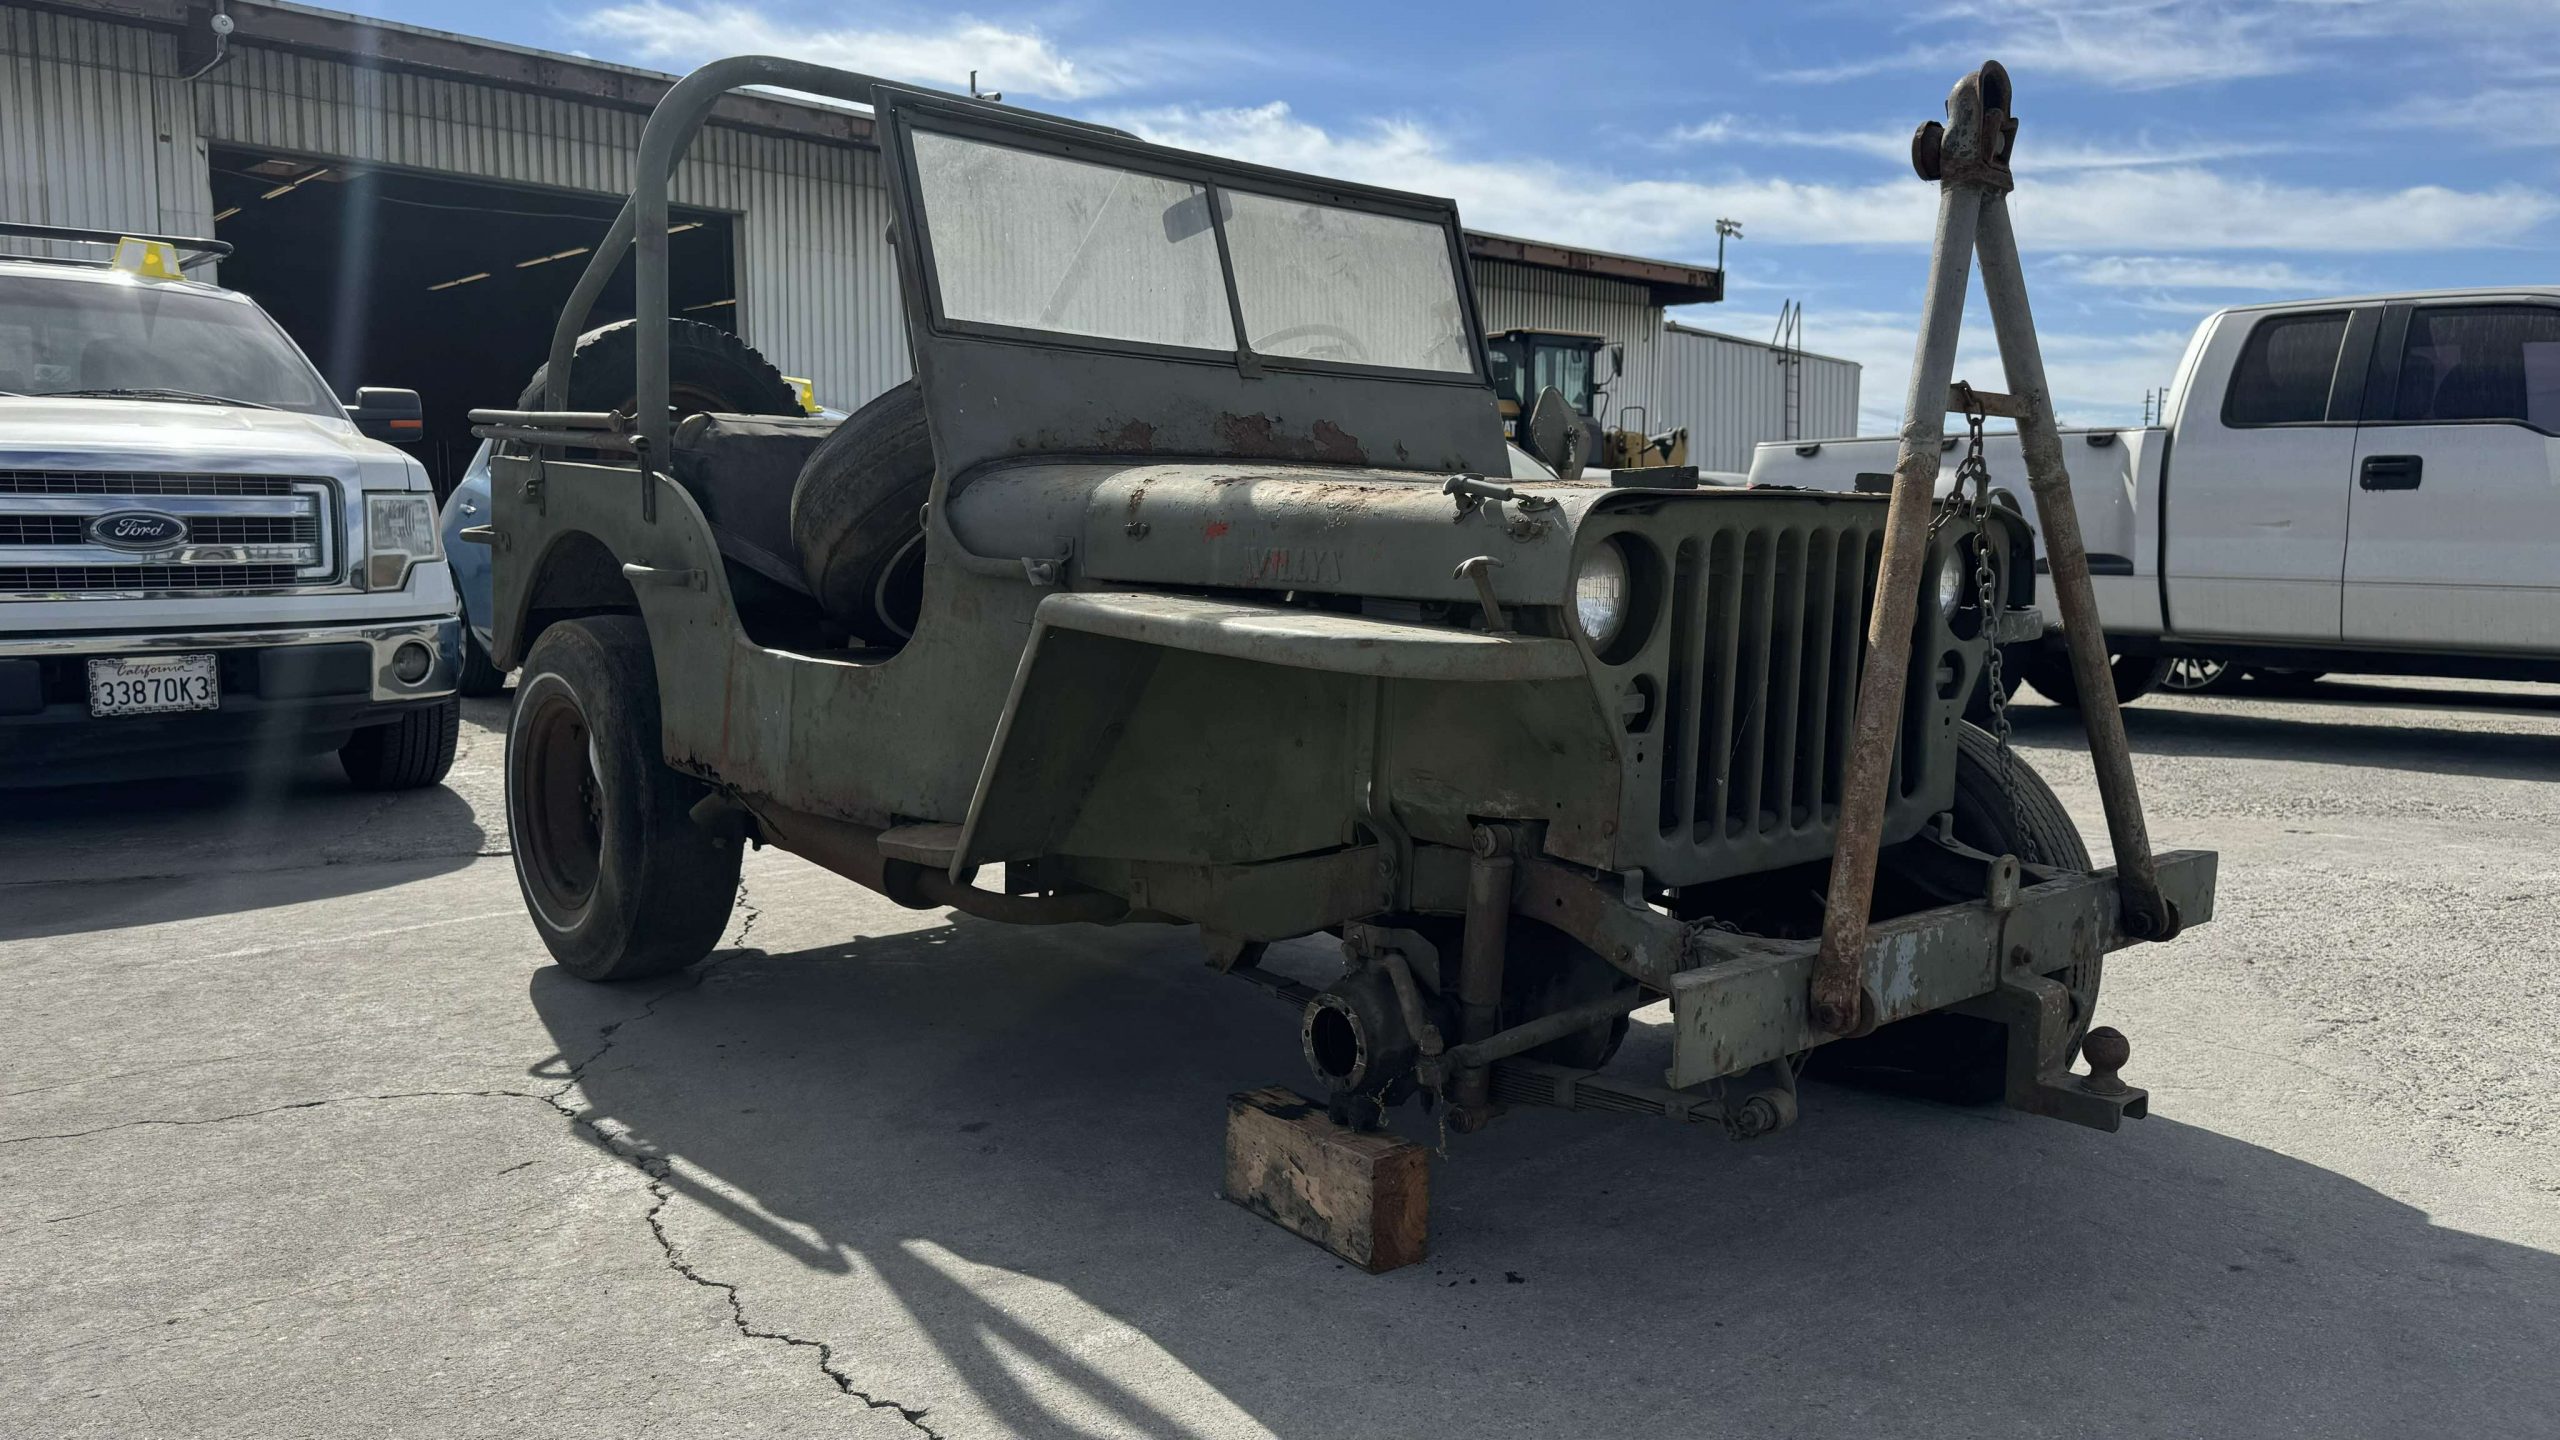
While I plan to use as many new parts as possible, I will not be able to find every tiny piece brand new. To have a vehicle that I can reference and snag a small part or two from is going to make this project go much, much faster.
I have a few friends in the Jeep community who are working some magic to put me in touch with someone who might have a rotted-out World War II Jeep they might be able to sell me for cheap. We’ll see how that goes.
Next I’ll Do The Brakes And Steering
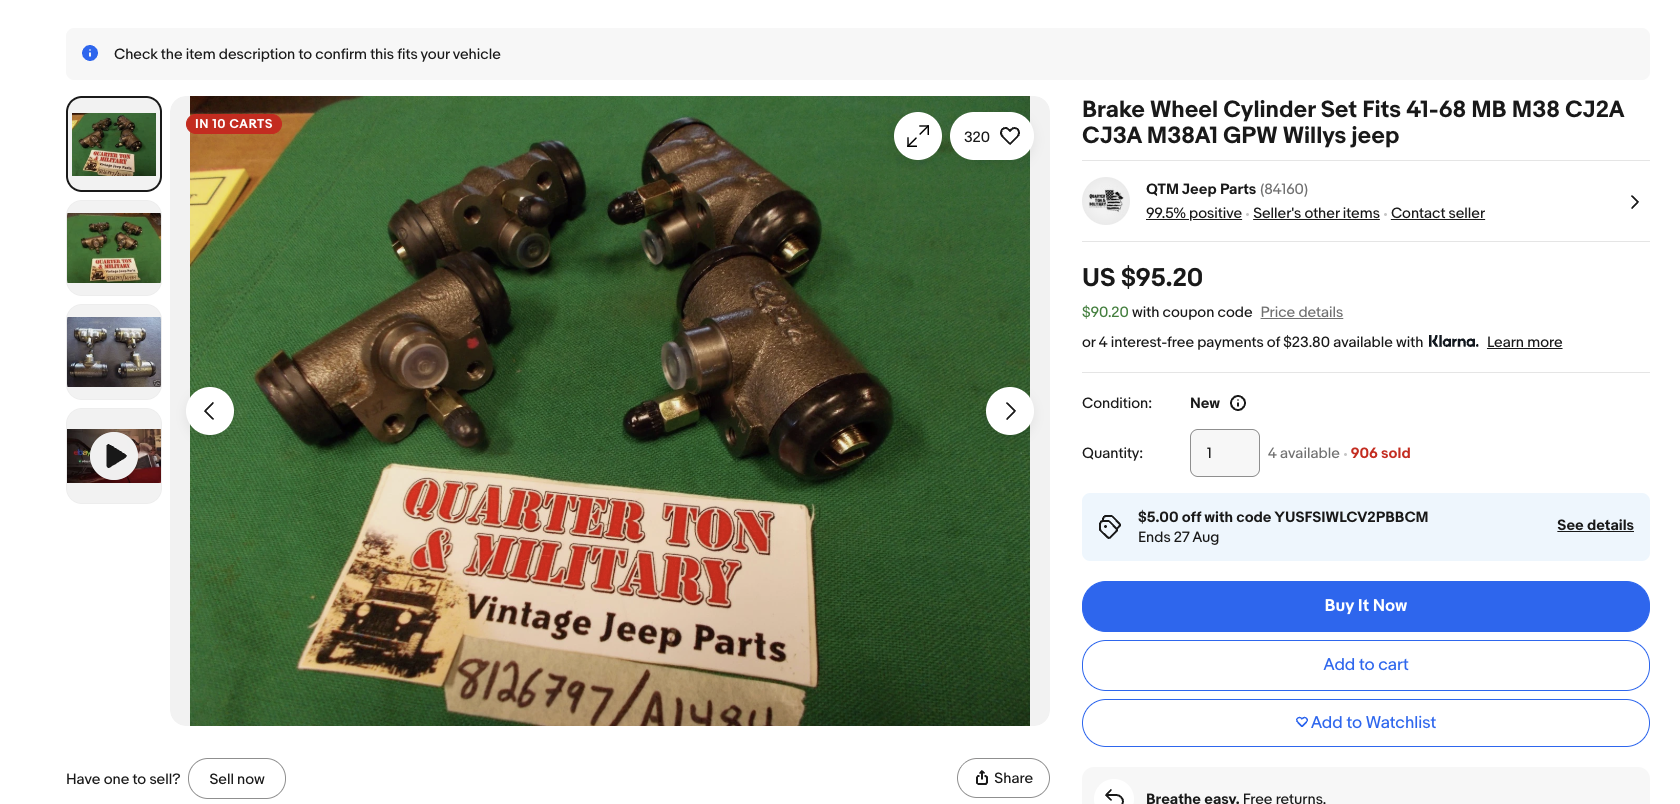
I want to get the chassis to the point where I can easily maneuver it around my driveway or tow it to a friend’s shop (Fred Williams) for some weekend fun, so I’ll install new wheel cylinders (see above), brake shoes, brake hardware, brake lines, a new master cylinder, and a new pedal. Then I’ll bleed the brakes. This is a job I did recently on my 1954 Willys CJ-3B, so it shouldn’t be too challenging, especially with the body out of the way.

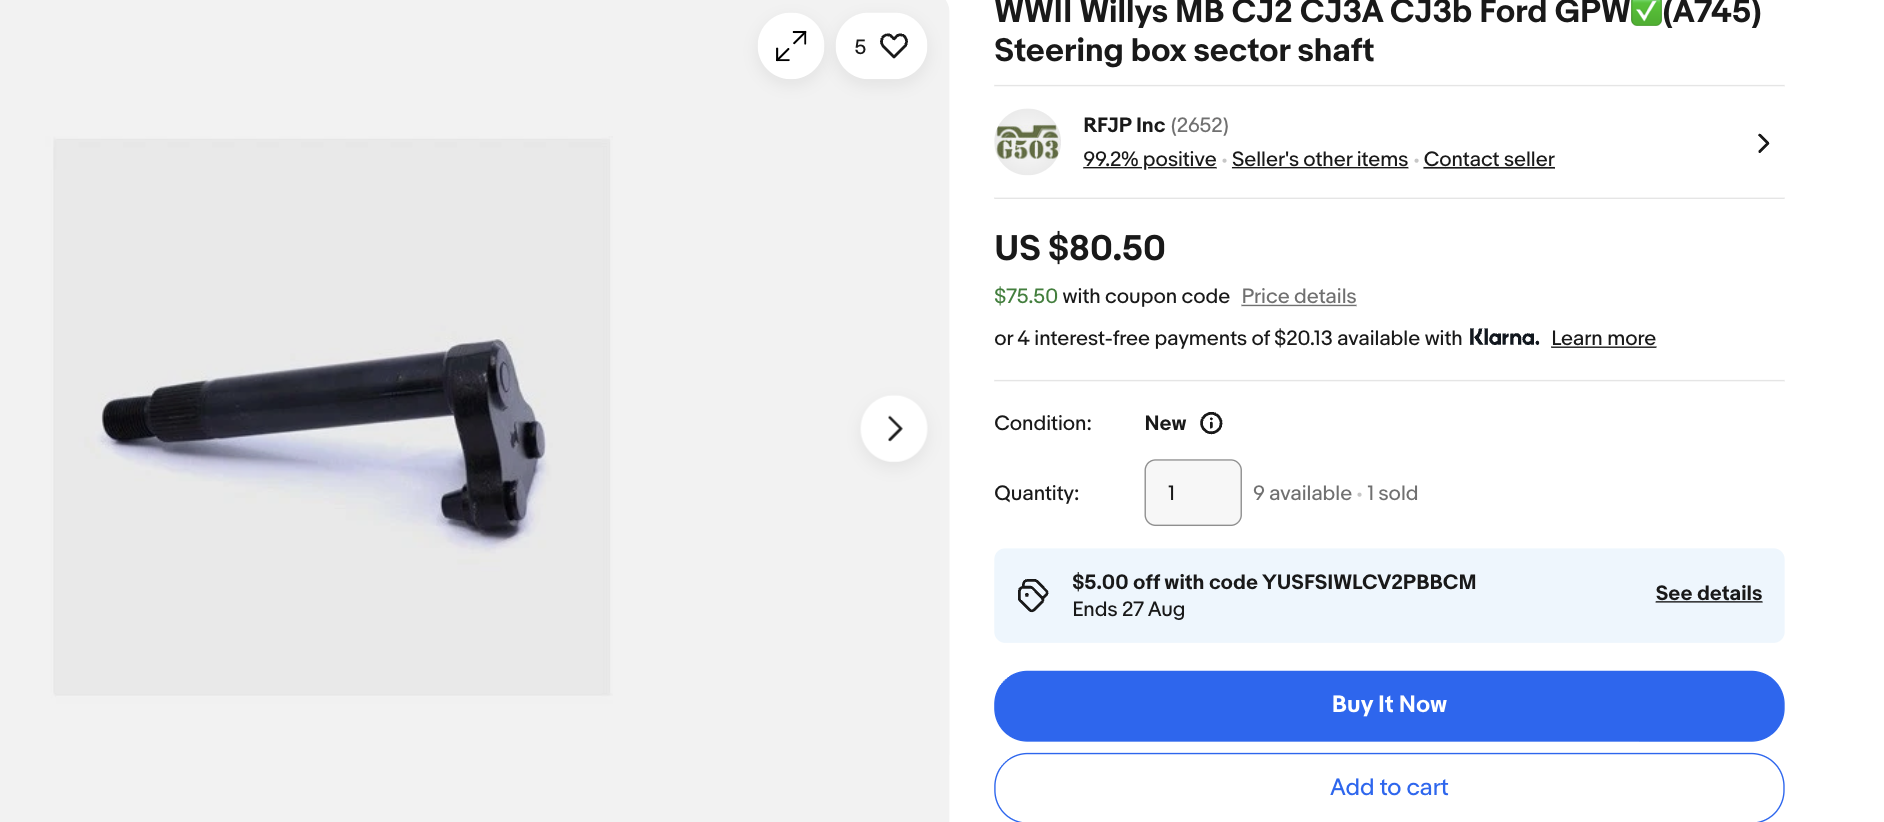
I’m not sure that I can actually buy a new steering box, so I’ll have to rebuild an old one using a new sector shaft and some new bushings. Once the chassis in on a suspension, and it can steer and brake, then it’s time for the drivetrain.
Drivetrain, Then Engine
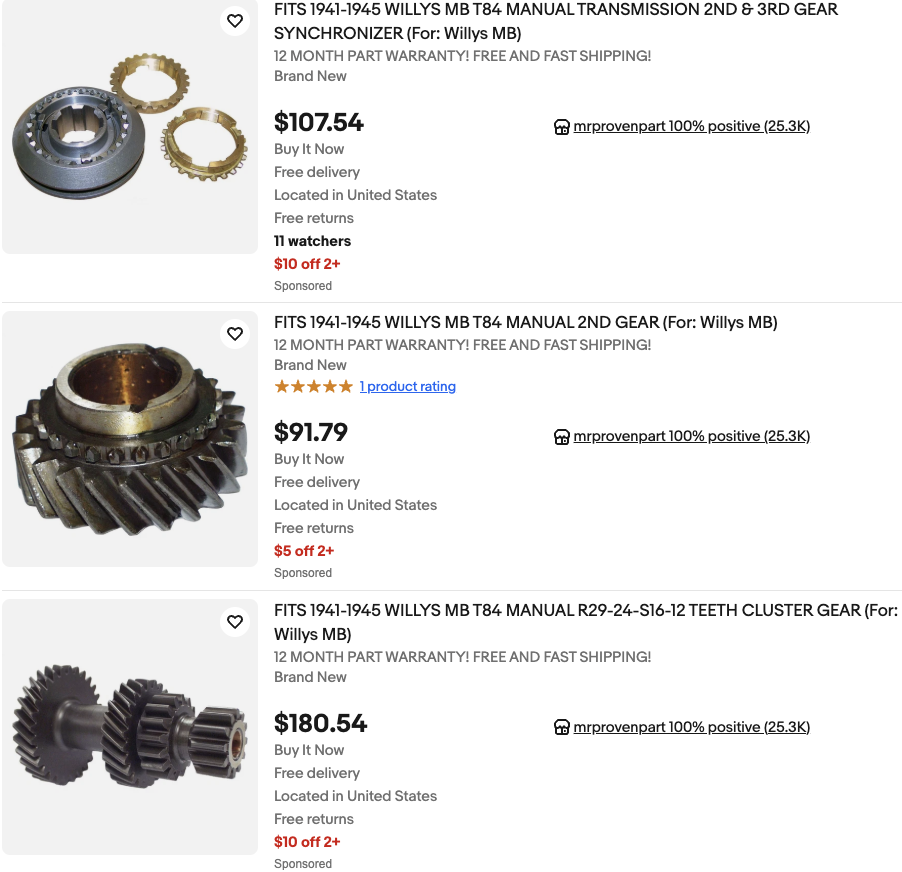
My goal is to bolt up the driveshafts, transfer case, and transmission prior to installing the engine. Of course, I won’t simply be “bolting” anything on; I’ll replace as many guts as I can – gears, bearings, synchronizers, etc. I want the Jeep to be as new as possible. If I can find a new transmission, I’ll see about buying it; if not, I’ll just swap out the guts, as they’re readily available.
When I have the brakes and drivetrain all bolted up to the rolling chassis, then I’ll start on the powertrain. That’s going to be a huge job.
One can purchase a new Go-Devil engine block with pistons, but on top of that, I’ll need a crankshaft, camshaft, lifters, valves, seals, an oil pump, a carburetor, an intake and exhaust manifolds/exhaust pipe, water pump, radiator, timing gears, generator, and on and on — this is not trivial stuff, and it’s going to be very time consuming to put it all together.
I have to make sure all the clearances on the new block are on point, that all the bearings caps are tightened just right, that all the seals are installed properly, that mechanical timing is right, and on and on. I could see the powertrain alone taking an entire month.
Painting
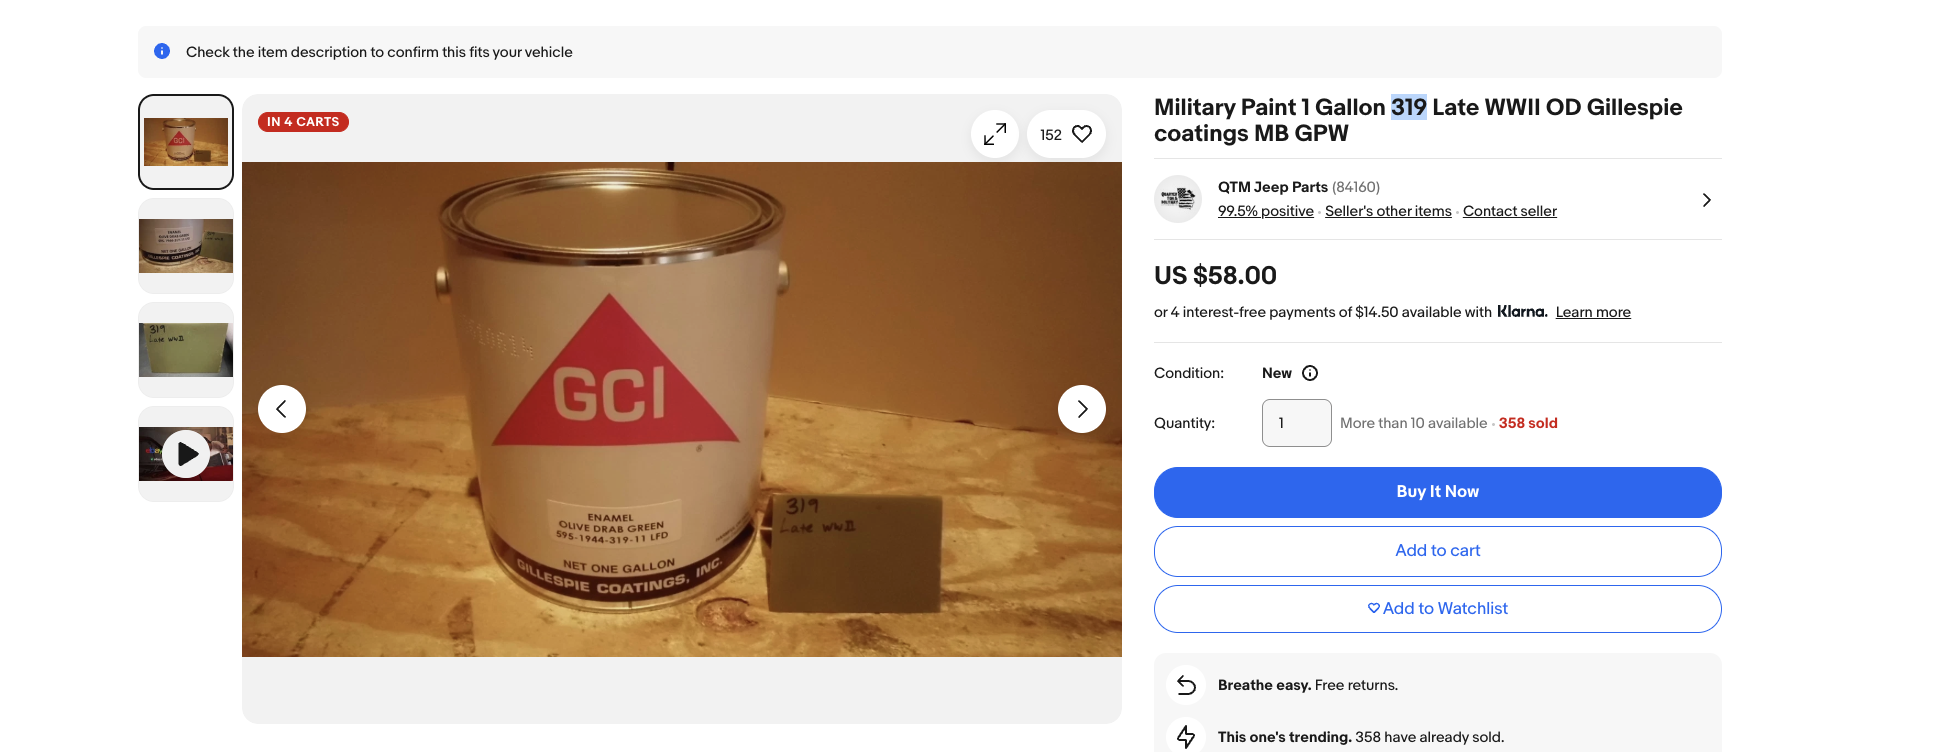
Once I have the engine running, and the vehicle driving quietly via a nicely rebuilt transmission and an exhaust, it’s time to do some painting. While typically I’d never try to paint car on my own — it is an art after all — a friend of mine tells me that Olive Drab paint is quite easy to spray and rather forgiving. So I’ll need to buy a big tent, a spray gun, a compressor, and a bunch of OD Green. I’ll spray the chassis down (blocking the tires off to avoid them getting painted) and I’ll paint the body panels separately so I can get the bottom of the tub before I install it onto the chassis.
It’s Time To Mount The Body Panels
Once I mount the body to the chassis, I’ll permanently install the steering column, throw in the gauges, fasten up the shifters and shift boot, bolt in the fuel tank and seats, put some glass in the windshield before bolting it to the tub, install the spare tire and jerry cab, and on and on. This phase of the project is very, very far out, though I could see myself doing a test fit so I know if I need to make any small modifications to the body prior to decking.
This Only Works With Great Project Management
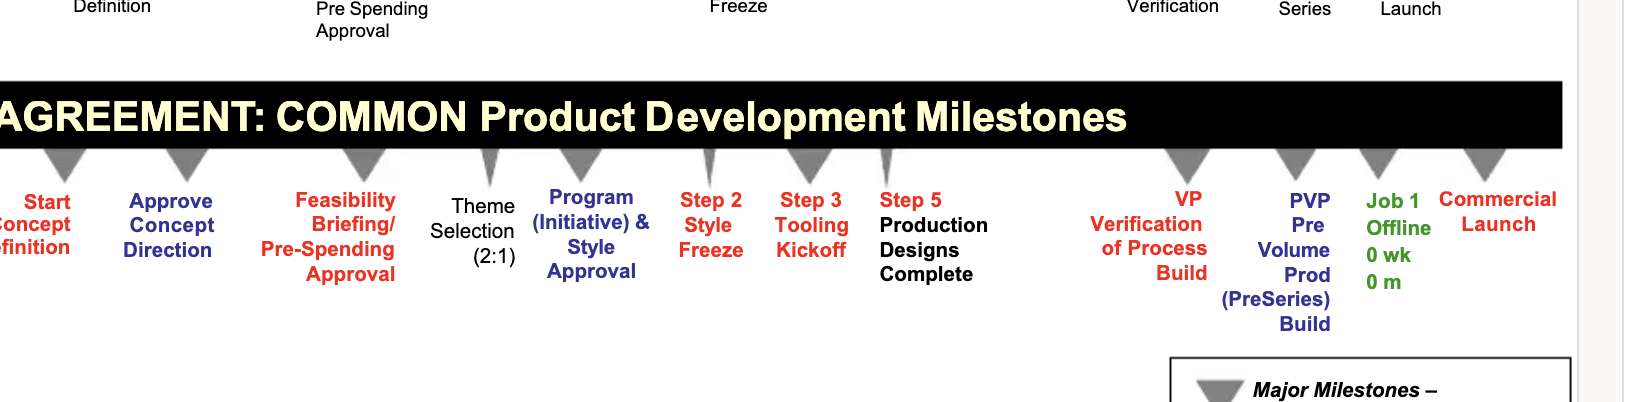
I’m building a spreadsheet that’s going to track progress. My plan is to manage the build similar to how Chrysler used to manage its vehicle programs when I worked there — via various milestones called “steps.” At Chrysler, these were called “CAD Steps,” because they involved determining the maturity of the vehicle’s CAD (i.e. packaging); in my case, I won’t be using CAD, but I’ll come up with equivalent milestones.
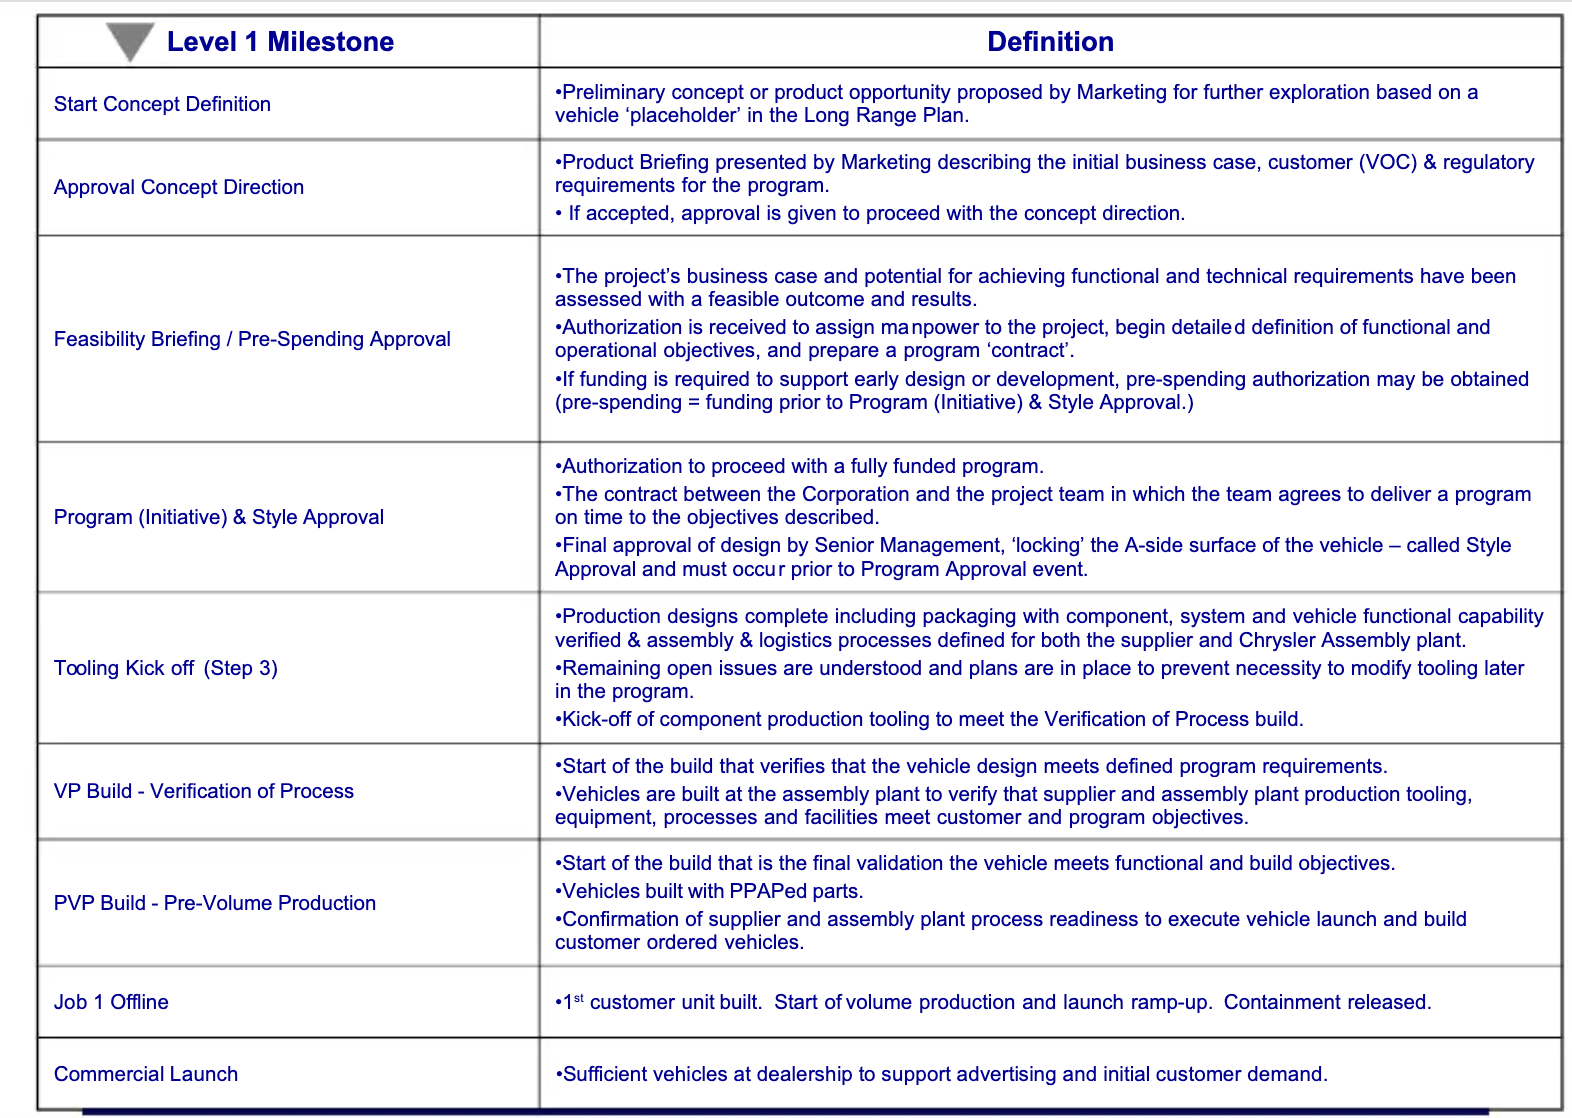

As you can see, the big milestones are Feasibility Briefing (called Fies Brief), Step 2 (style freeze), Step 3 (tooling kickoff), Step 5 (production designs complete), VP and then Job 1. Job 1 is, in my case, the Easter Jeep Safari; that ends on April 5 — Easter, so I need to be there by April 3, meaning I should leave no later than the 1st. VP-builds will happen by March 5 — that’s when I need a running, driving machine. As for the other steps, I’m just going to redefine them; here’s my rough schedule.
- Start Concept Definition: Preliminary concept pitched. Complete
- Feas-Brief: Business case and assessment of feasibility. Complete
- Step 0: Create a full schedule and bill of materials (BOM): Sept: 17
- Step A: Chassis rolling on axles/suspension: Oct 15
- Step B: Chassis brakes and steering complete: October 30
- Step C: Parts vehicle attained: November 15
- Step 2: Powertrain complete: December 1
- Step 3: Paint compete: Jan 1
- Step 5: Body Installed: Jan 15
- VP: Early build running and driving: March 15
- Job 1: Vehicle heads to Moab: April 1
I’m still working through my project management spreadsheet/bill of materials, so I’ll be refining a few of these dates in the coming days, but those look about right.
This is going to be a heck of a project.
[Ed Note: David mentioned the idea of building a brand new WWII Jeep to the team at eBay, and they loved the idea so much they said, “How can we help?” Their financial support and David’s Jeep-obsession are the fuel behind this crazy build.]


Tip: I don’t think you’ll need a tent to shoot flat olive drab paint. Just do it in the full sun, wet down the ground first to avoid making dust while you walk around, and it’ll dry right quick from the inside out due to the warm metal, which will actually make it a stronger finished (think baked enamel).
On that… I think you should consider painting a DIFFERENT color. There are a billion ww2 olive drab jeeps. Doing something BRIGHT that is easily recognizable might be advantageous from an Autopian Marketing perspective. Neon Green? Flourescent yellow? Hypercolor thermal reactive purple? Up to you, but a bright color might help with the click through due to differentiation.
Teal and Red
That color combo buzzes the eyes for a while and then you get used to it, you just have to hope other people don’t. Also with my race car it didn’t film well, but you know, film. I remember Richard Petty’s Pontiac was almost fluorescent to pull it off.
How many colors were used in WWII? Navy Gray seems obvious, but were there specialized high visibility pain jobs?
Pro Tip – don’t spray on an evening in October in PA if you don’t like orange peel.
TBH – on the ’89 Cherokee in 2002 I didn’t give a F***.
I agree, that Jeep that BigTime on YouTube were trying to get rid of had a nice color scheme that felt appropriate for a decommissioned WW2 jeep. A muted Yellow with dark Red wheels.
Harlequin.
Barbie pink?
VP: Early build running and driving:
March 15October 12, 2026… -ish. “We can all agree that ‘viable’ is an ambiguous term, yes?”I was going to suggest using program management software like quickbase or smartsheet, but it looks like you’ve got the sw tool already. They’re a whole lot easier than building your own spread sheets, charts, lists, etc. Back in my early program manager days these did not exist and only the earliest variations were coming on the market when I moved on, but even these basic tools eliminated a bunch of data grunt work. Good luck!
I still like using spreadsheets for most projects due to shareability: everyone has access to a spreadsheet program that can open an Excel file. Not everyone has access to Quickbase, JIRA, etc. Microsoft has some good Excel Gantt chart and kanban templates to build off of.
For bigger projects, 100% dedicated tools like Quickbase are helpful.
Paint the underbody and chassis parts after test fit but BEFORE final assembly.
Happy to see you can take the Detroit out of David, but you can’t take the crazy jeep easter safari build. Love to see it!
Still voting you name this project “Jeep (NIRN)”
And look on the bright side here – you don’t have to twist all of pieces off of plastic frames, then trim all the flash with an exact-o.
Are you solictiting member/Autopian assistance? I’m most of the country away, but a few days wrenching with you would be an honor.
I would love that.
You heard it here folks! Let’s try to make this happen as a group project.
Dave, do you hate yourself? I ask this because you MUST be able to find someone with a shop bay or garage who would love to have you use to put this together.
The heat. The rain. The scratchy surface of the rough concrete.
You are in LA, you are doing LA things, just embrace it and go inside for God’s sake!
Otherwise, interested to see how this turns out and how you think it drives. Is it a possible daily in nice weather?
This could be one of those projects you hear about where someone builds a car in their living room and has to take the wall down to get it out!
“I knew I was forgetting something”
I am reminded of the old maxim that if you want to make God laugh, make a plan. I look forward to seeing this new old jeep at Moab sometime around 2032.
Is it legal to even THINK about painting a car in your driveway in California?
No worries they are too busy getting a committee together to figure out how to fast track rebuilding permits for the Palisades fire damaged property to start in the year 2050
It’s legal if you don’t get caught.
That timeline is … ambitious.
I bet Rick Pewe has the parts you need. Fred surely can put you in touch with him.
A good idea list parts needed and let members search for you.
That’s a good call
We need a count down timer on every post in this series that changes color depending on how on schedule(HA!) or behind schedule the project is.
After reading the scanned instruction sheets in your unboxing article, I was thinking you already had wheels and accoutrement – d’oh.
Yes, even Jeep body kits have suffered from trimflation over the years. 😮
Best of luck!
Looking forward to reading about it!
I had a relationship fall apart because I spent too much time in the garage working on projects. Beware. That it’s “for work” may or may not matter.
Were the projects cool, at least?
Is anyone else bothered by the lack of Step 4? And are Steps A, B, and C essentially 1A, 1B, and 1C? This is making my brain hurt.
We don’t talk about step 4.
Step 1 – steal underwear
Step 2 – ?
Step 3 – Profit!!
When you get to Moab, have a printed list of all the not new parts so you will not have to repeat yourself a 100 times. Just tape it to the hood in a sheet protector.
*nervous sweating*
I worry you’re not giving yourself enough time. October 15th is exactly a month away and in the absence of having a parts car with a complete rolling chassis, sourcing the axles and t-case, waiting for them to arrive, reconditioning and installing… You have help on this project, right?
Instead of OD green it should be a 2025 color. Primer gray, clearcoated with just a hint of pearl.
Subaru purple.
At least the drive to Moab will be way shorter than the drive from Michigan.
Is a full assortment of hardware included in the list of parts to buy? I feel like these types of projects always get derailed by not having the right bolt/nut/washer/clip/spacer/whatever on hand.
This ^
You need a Gantt Chart, we use them in construction all the time. Very important when you have many different trades putting in different pieces all over the place, and they all have to fit together in the end.
Used to use something like that to schedule units on firing ranges and other training sites. With the color coding for each unit and site, we started calling it a “horse blanket”.
Crazy as it sounds, building an MJ from the ground up actually sounds easier than what he went through with Project Go Devil and the USPS Jeep.
Foreshadowing.
Front seats first, so you don’t end up with a picture of teenage Delmar like the one Jason posted of Otto this morning.
Dude, for your sake I hope I’m foreshadowing a relatively easy build. I’ve done the new dad thing and I don’t see how anyone could handle one of those projects along with new parenthood.
This is going to be extremely, extremely difficult.
Damn I’m sorry. If it’s any consolation, it’s likely going to make for entertaining reading just like all of your most challenging projects.
I hope there’s no trenchfoot this time…
Trenchfoot, hantavirus, maybe Valley Fever. Whatever it takes.
I predict an article in the future where Delmar (NHRN) is painted OD green.
as long as he doesnt get herculiner on his hootus
I love how (not his real name) has effectively become part of Delmar’s name. It just gives me a little chuckle…
No get him in camo to start, heck even Elise NHRN and show her in camo and face paint and still be unrecognizable
We know what David’s entire family is wearing for Halloween.
Way in the future. “Here’s my plan for finishing the project car my dad started 30 years ago.”
Will you be using American-made rust on this build?
Luckily you can go down to your local Jeep dealer and buy some- they still stock it for Wranglers to this day.
David strictly grows his own by staring at a bar of domestic steel.