
I have seven months to pull off the daunting task of building an entire World War II Jeep — with a new frame, new body, new engine, and pretty much anything else I can buy new from eBay — in preparation for the off-road trails of the 60th Easter Jeep Safari in Moab, Utah. Here’s my initial plan for how I’m going to pull this off.
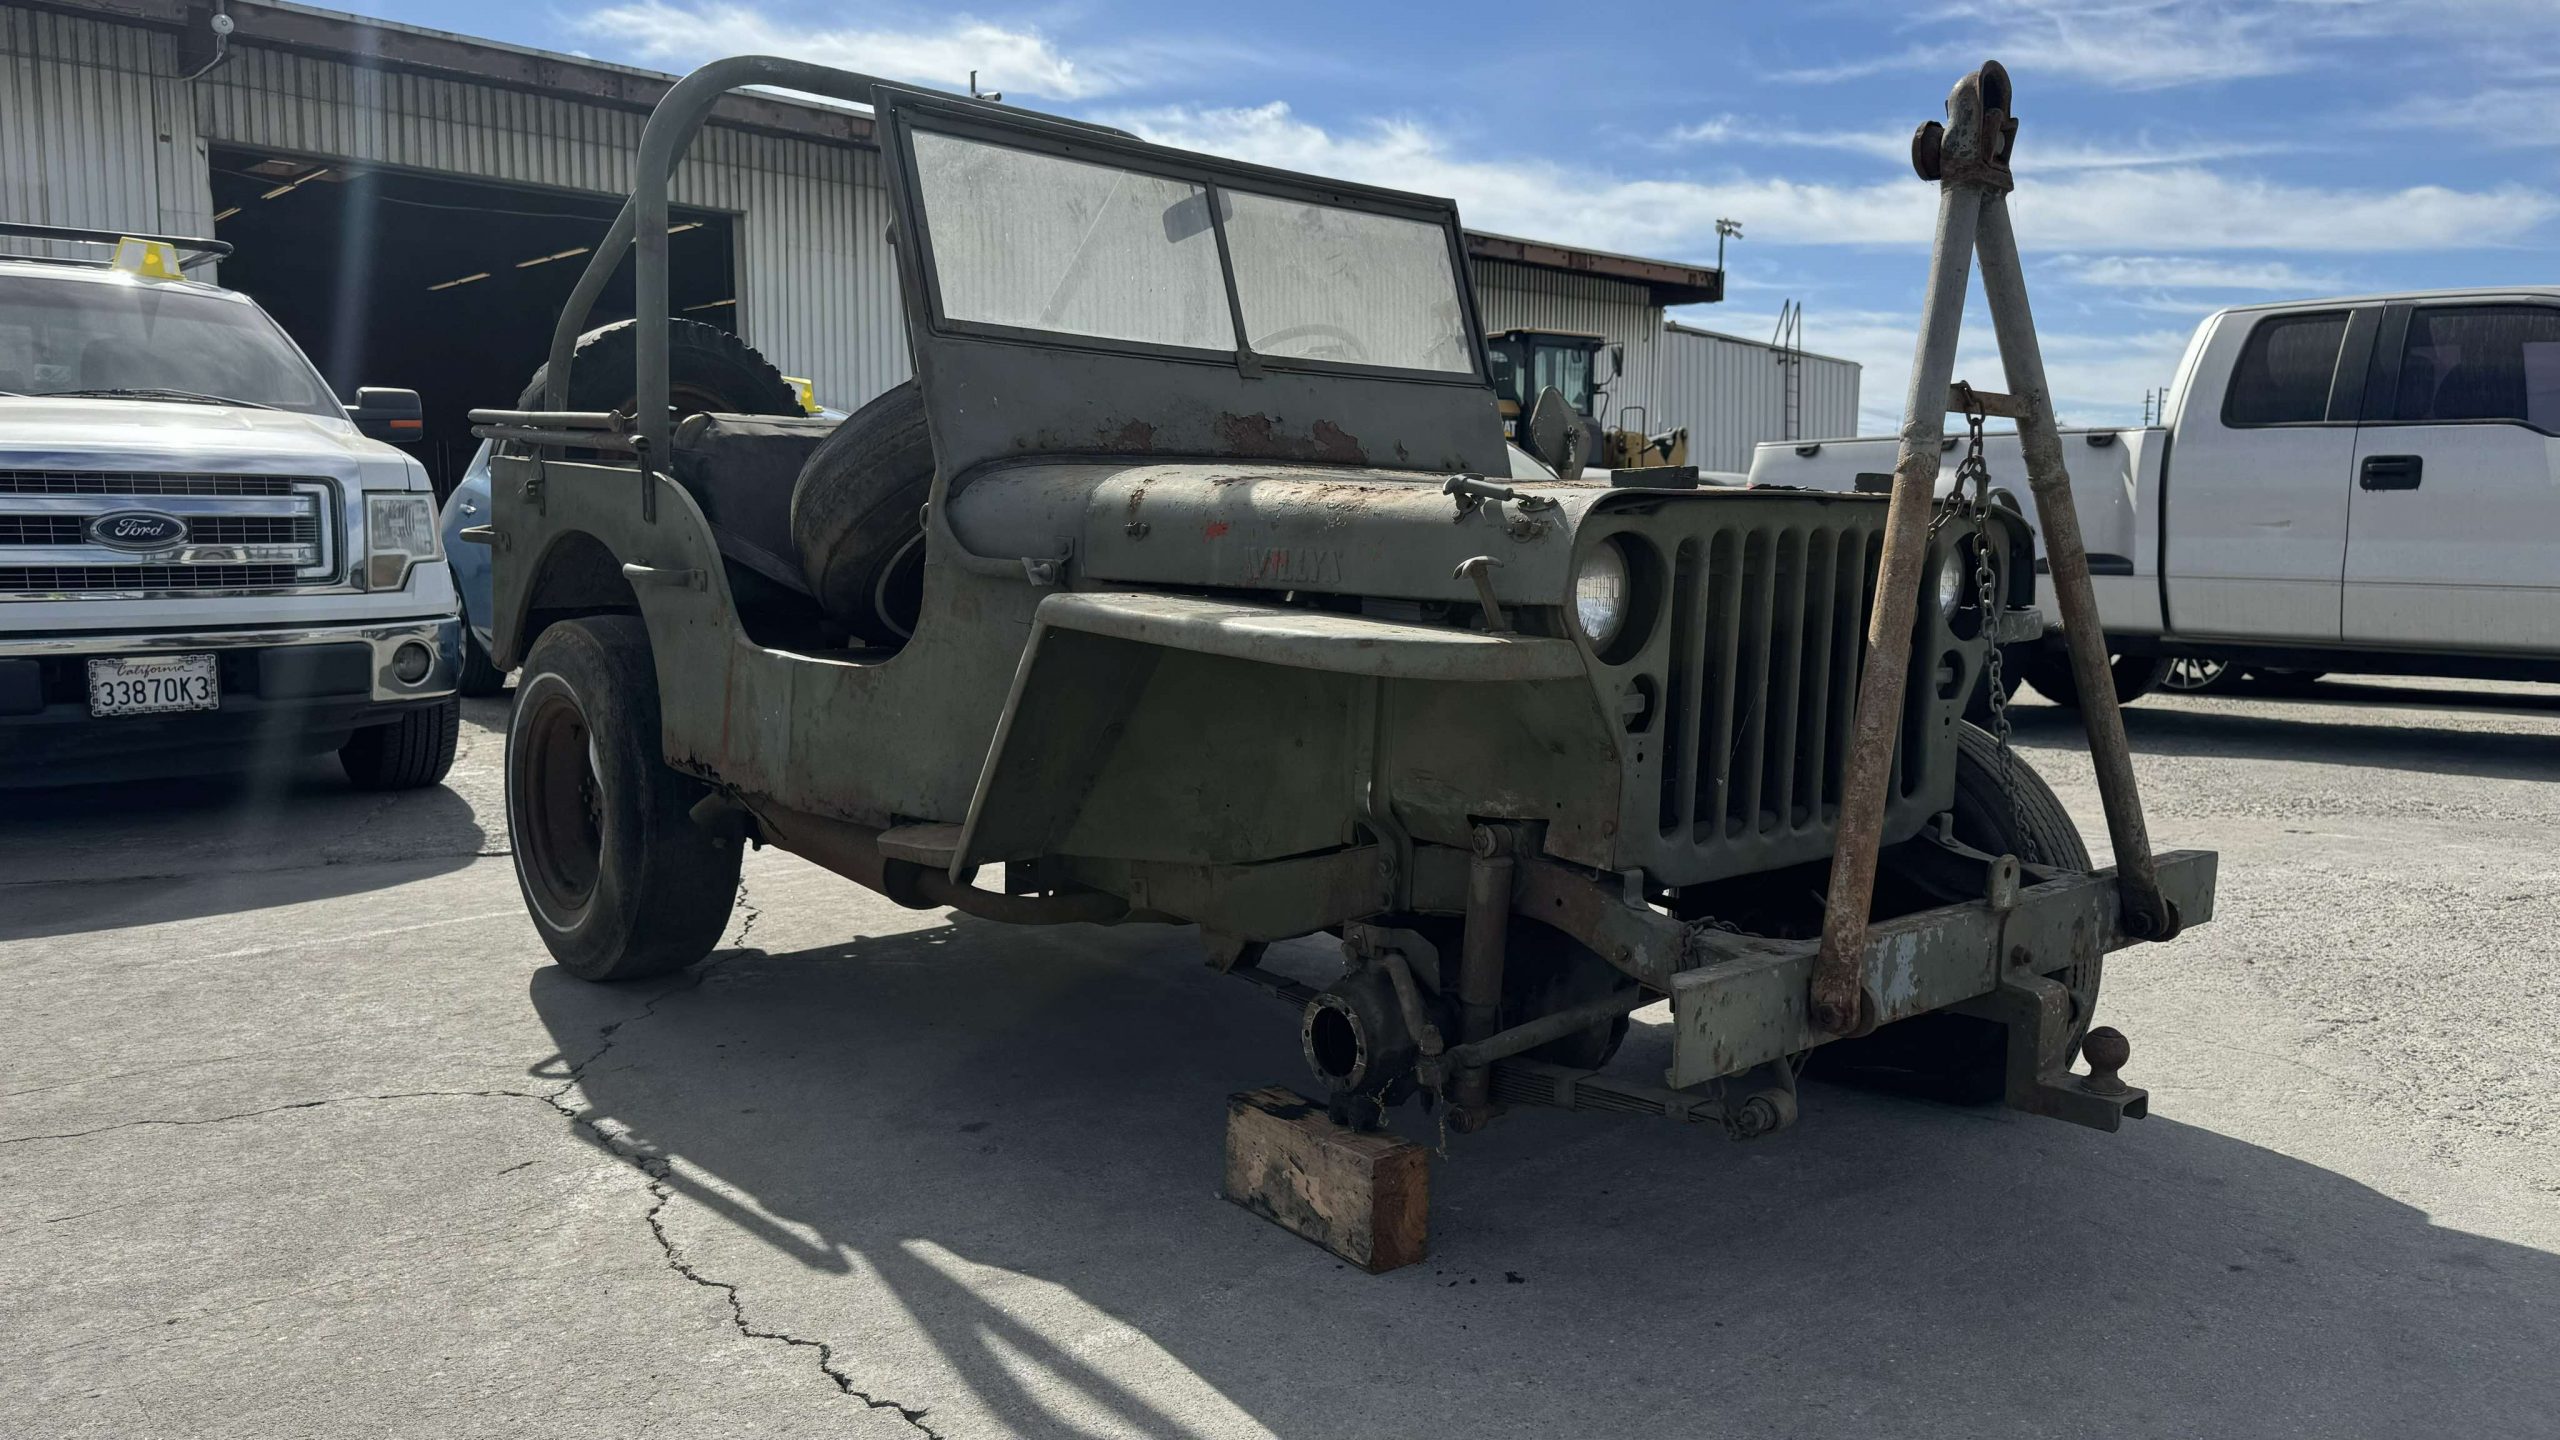
So, first things first: I have purchased an entire body and frame from eBay. These (especially the latter) represent the backbone of the World War II Jeep; they are the proverbial Christmas tree that I can now begin decorating.
So let’s go step by step.
Buy Some Literature

Though I’m quite familiar with flat-fender Jeeps (having owned a CJ-2A and CJ-3B), I am going to resist the urge to just jump right in without looking, so to speak. No, a World War II Jeep is a more complex machine than the civilian flat-fender Jeeps I’m used to, and understanding how they go together is something I should spend time on.
I’ve purchased the book “Building a WWII Jeep,” shown above, and I have a few other WWII Jeep books already on my bookshelf (plus some great government-issue ones I’ll be receiving soon); I’m looking forward to seeing step-by-step instructions on how to complete this rather ambitious project.
Get The Chassis Rolling

Step one is: I need to get the frame you see above rolling. That means I need to get a pair of axles, some leaf springs, and some leaf spring shackles. That’s job one: I have to get this thing to the point where I can roll it around. Plus, the axles represent the final part of the drivetrain, and building backwards from them — to the driveshafts, transfer case, transmission, and ultimately the engine — makes tons of sense.
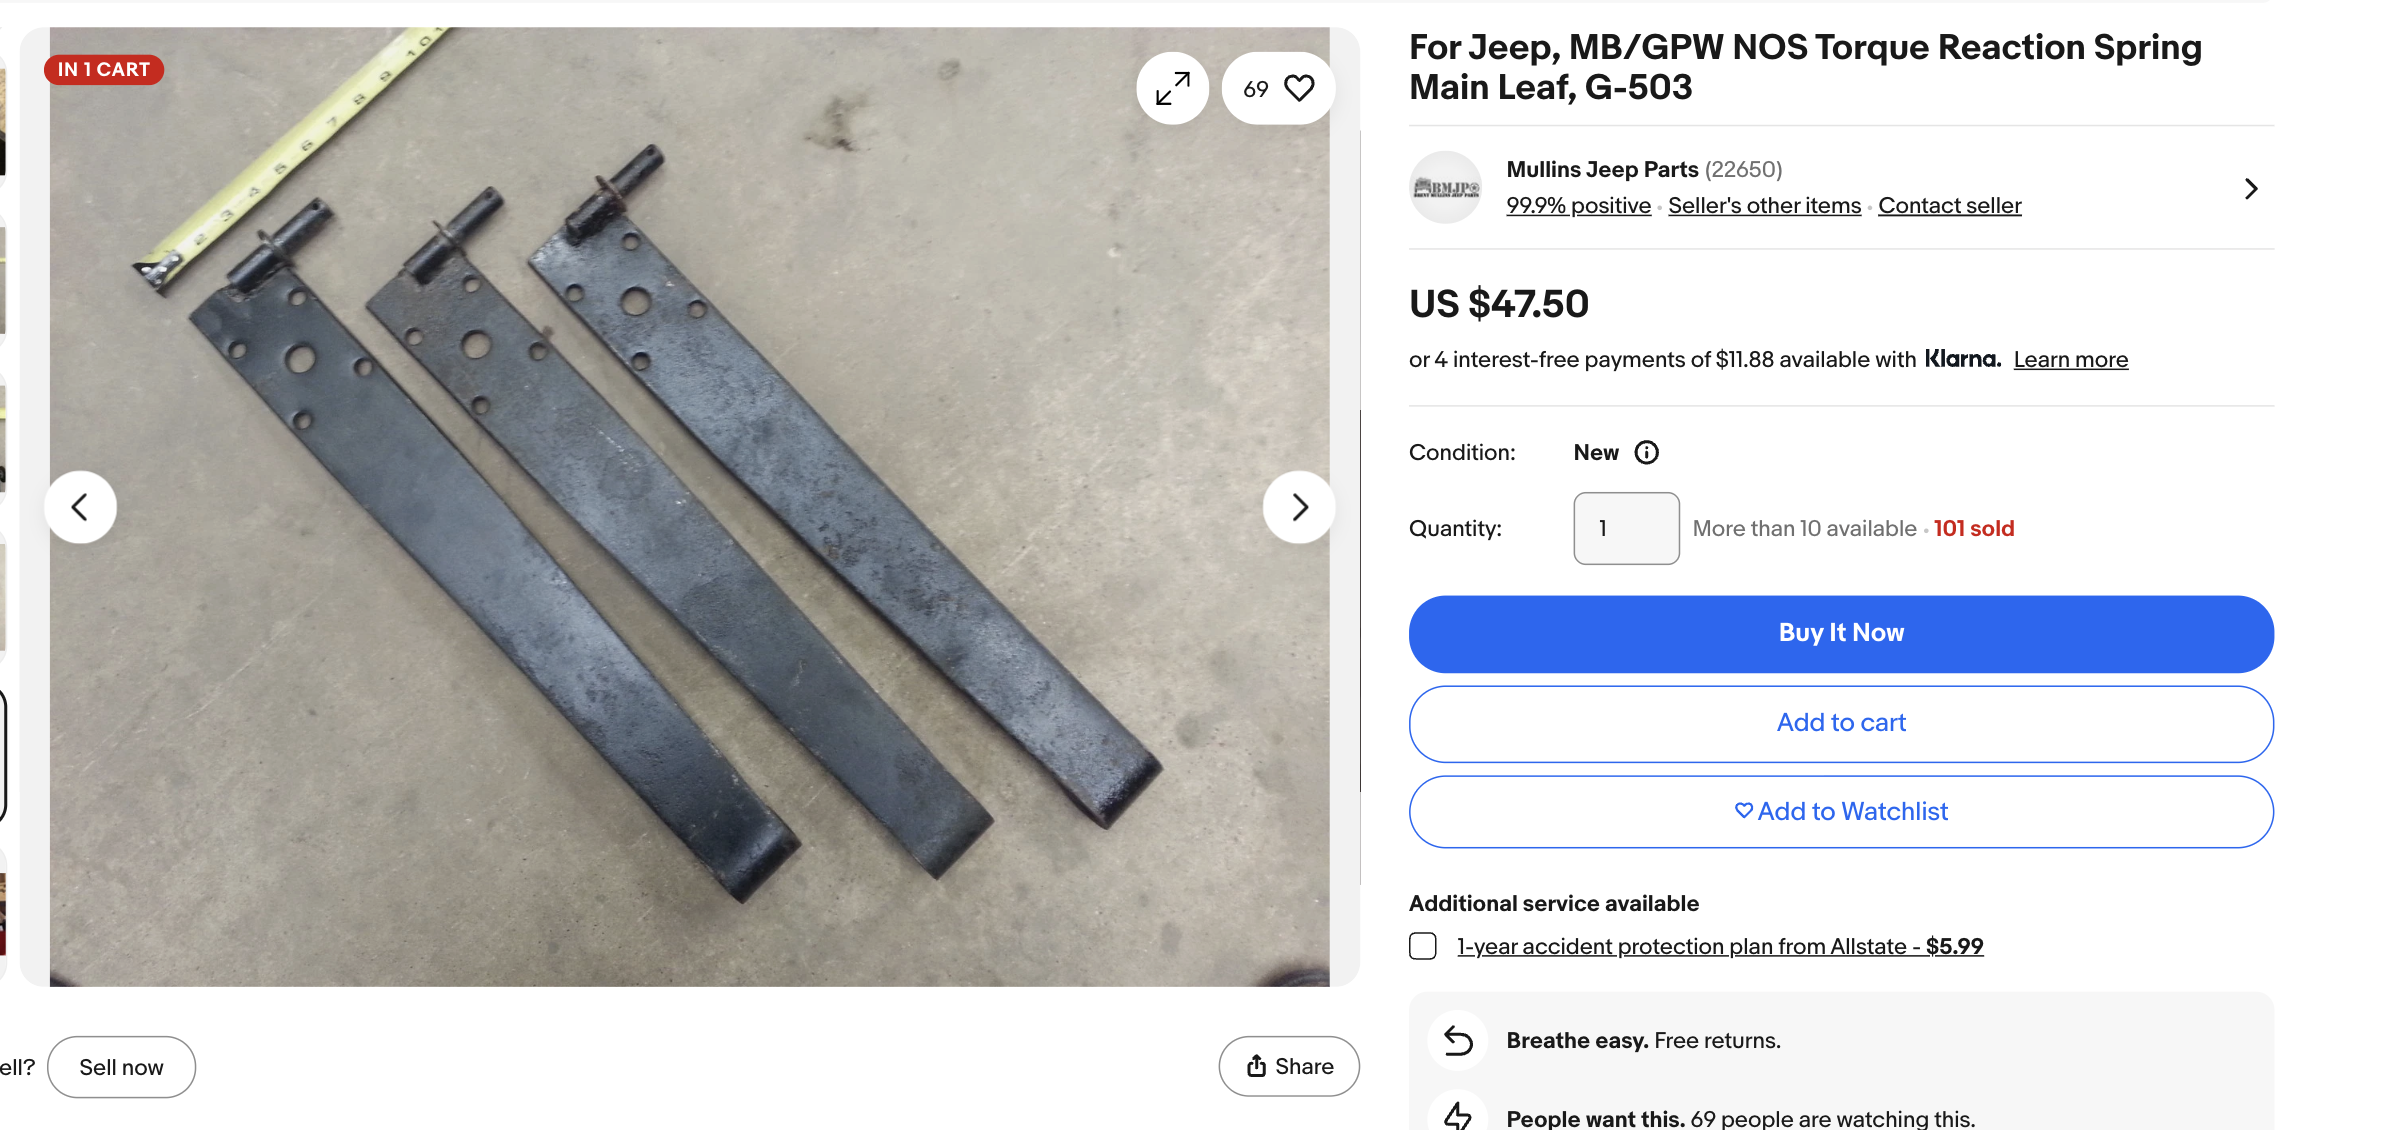
To pull off step one, I need to buy some leaf springs, shackles, shock absorbers, wheels, and tires, all of which are easily purchase-able on eBay. I also have to buy what’s called a “Torque Reaction Spring,” which is just a stiff metal bar that’s meant to mitigate the World War II’s inherent tendency to turn under braking due to the rather funky steering bell crank-on-axle-housing design — something I covered a number of years ago in an article.
Check this out; I can buy a New Old Stock one right here on eBay from a College Station, Texas-based seller named Mullins Jeep Parts:
So the springs and shocks and shackles should be no big deal, but what could be a problem is the axles. Nobody makes new axles for World War II Jeeps, and finding New Old Stock ones isn’t going to happen, since they’re big and bulky and nobody wanted to store them for 80 years. Ditto on transfer cases.
So I need to find a used set of axles and a transfer case somewhere. And that brings me to this…
I Need A Parts Car
While I plan to use as many new parts as possible, I will not be able to find every tiny piece brand new. To have a vehicle that I can reference and snag a small part or two from is going to make this project go much, much faster.
I have a few friends in the Jeep community who are working some magic to put me in touch with someone who might have a rotted-out World War II Jeep they might be able to sell me for cheap. We’ll see how that goes.
Next I’ll Do The Brakes And Steering
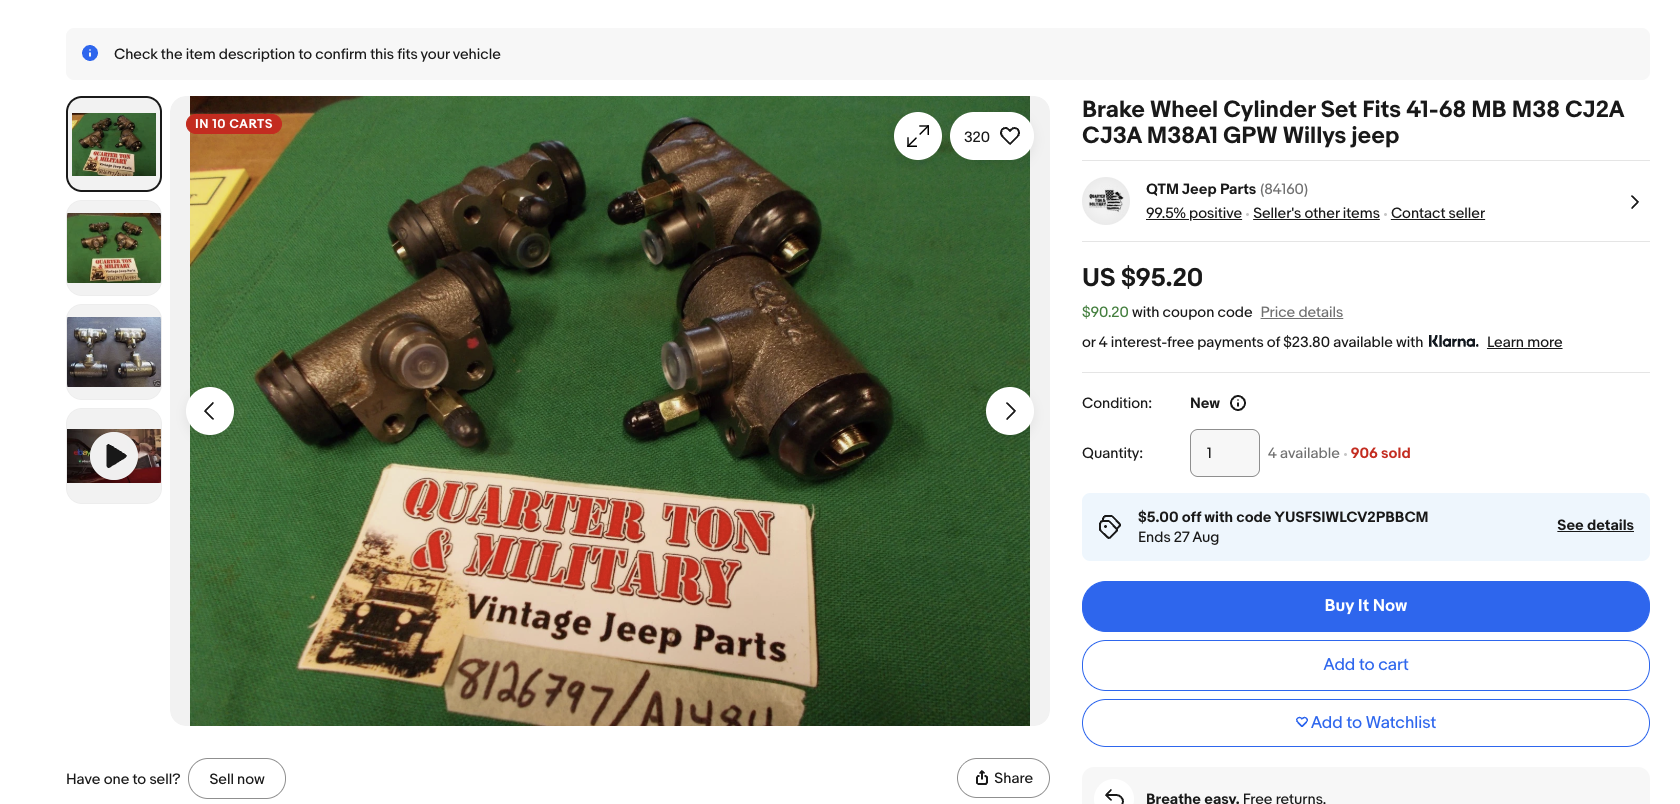
I want to get the chassis to the point where I can easily maneuver it around my driveway or tow it to a friend’s shop (Fred Williams) for some weekend fun, so I’ll install new wheel cylinders (see above), brake shoes, brake hardware, brake lines, a new master cylinder, and a new pedal. Then I’ll bleed the brakes. This is a job I did recently on my 1954 Willys CJ-3B, so it shouldn’t be too challenging, especially with the body out of the way.

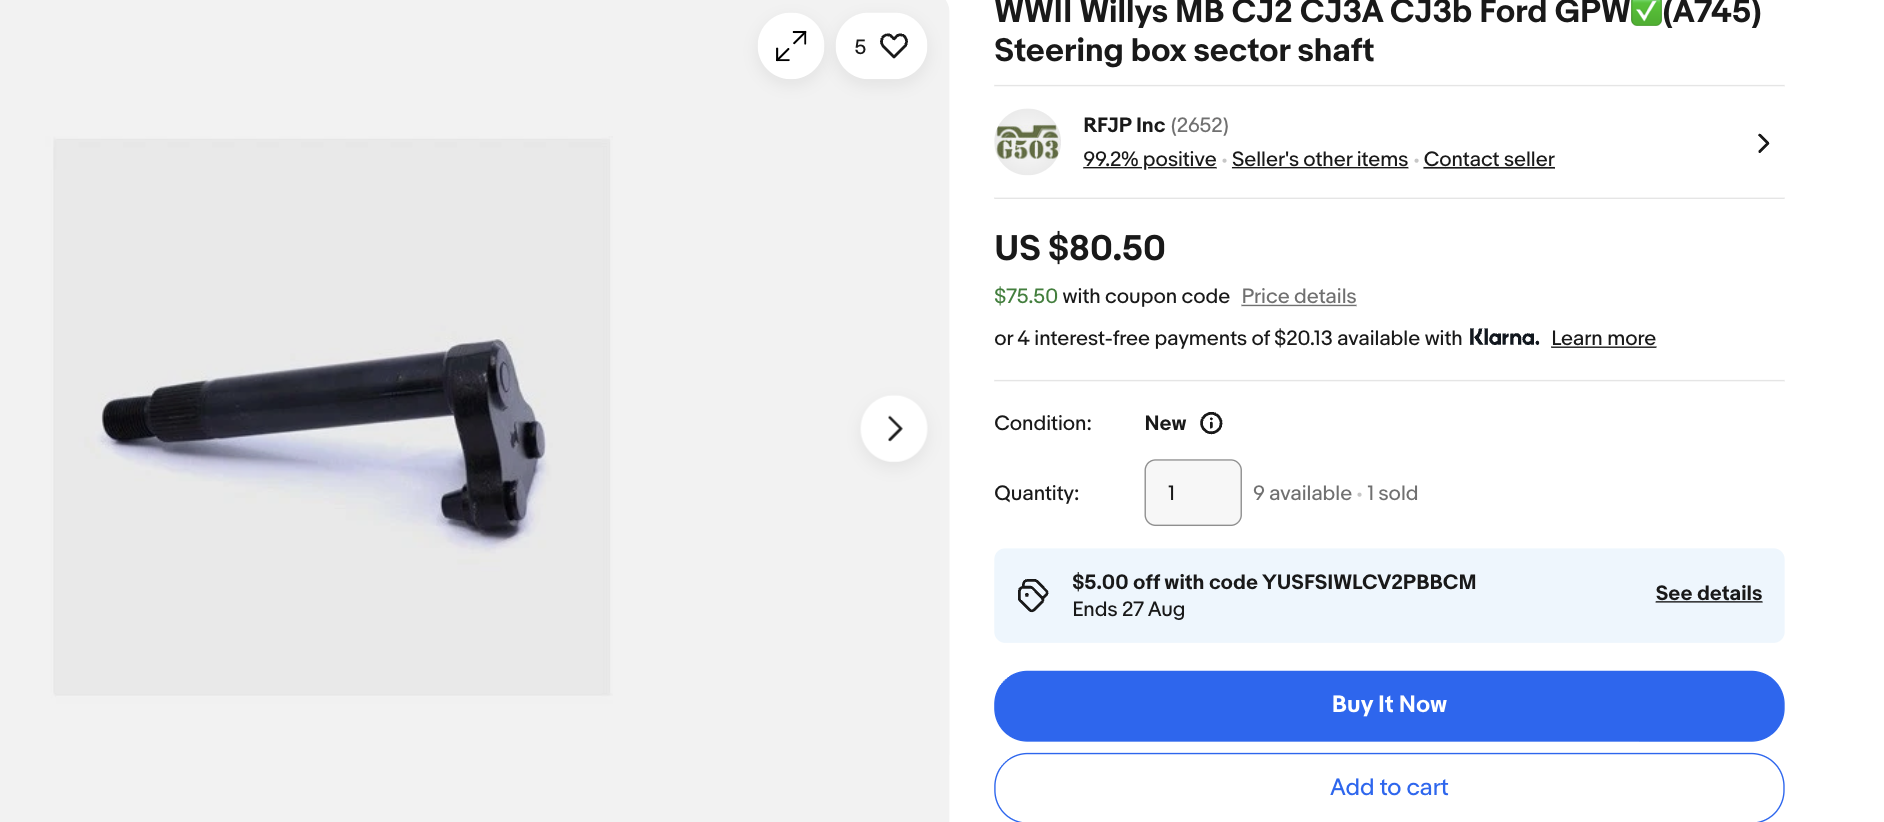
I’m not sure that I can actually buy a new steering box, so I’ll have to rebuild an old one using a new sector shaft and some new bushings. Once the chassis in on a suspension, and it can steer and brake, then it’s time for the drivetrain.
Drivetrain, Then Engine
My goal is to bolt up the driveshafts, transfer case, and transmission prior to installing the engine. Of course, I won’t simply be “bolting” anything on; I’ll replace as many guts as I can – gears, bearings, synchronizers, etc. I want the Jeep to be as new as possible. If I can find a new transmission, I’ll see about buying it; if not, I’ll just swap out the guts, as they’re readily available.
When I have the brakes and drivetrain all bolted up to the rolling chassis, then I’ll start on the powertrain. That’s going to be a huge job.
One can purchase a new Go-Devil engine block with pistons, but on top of that, I’ll need a crankshaft, camshaft, lifters, valves, seals, an oil pump, a carburetor, an intake and exhaust manifolds/exhaust pipe, water pump, radiator, timing gears, generator, and on and on — this is not trivial stuff, and it’s going to be very time consuming to put it all together.
I have to make sure all the clearances on the new block are on point, that all the bearings caps are tightened just right, that all the seals are installed properly, that mechanical timing is right, and on and on. I could see the powertrain alone taking an entire month.
Painting
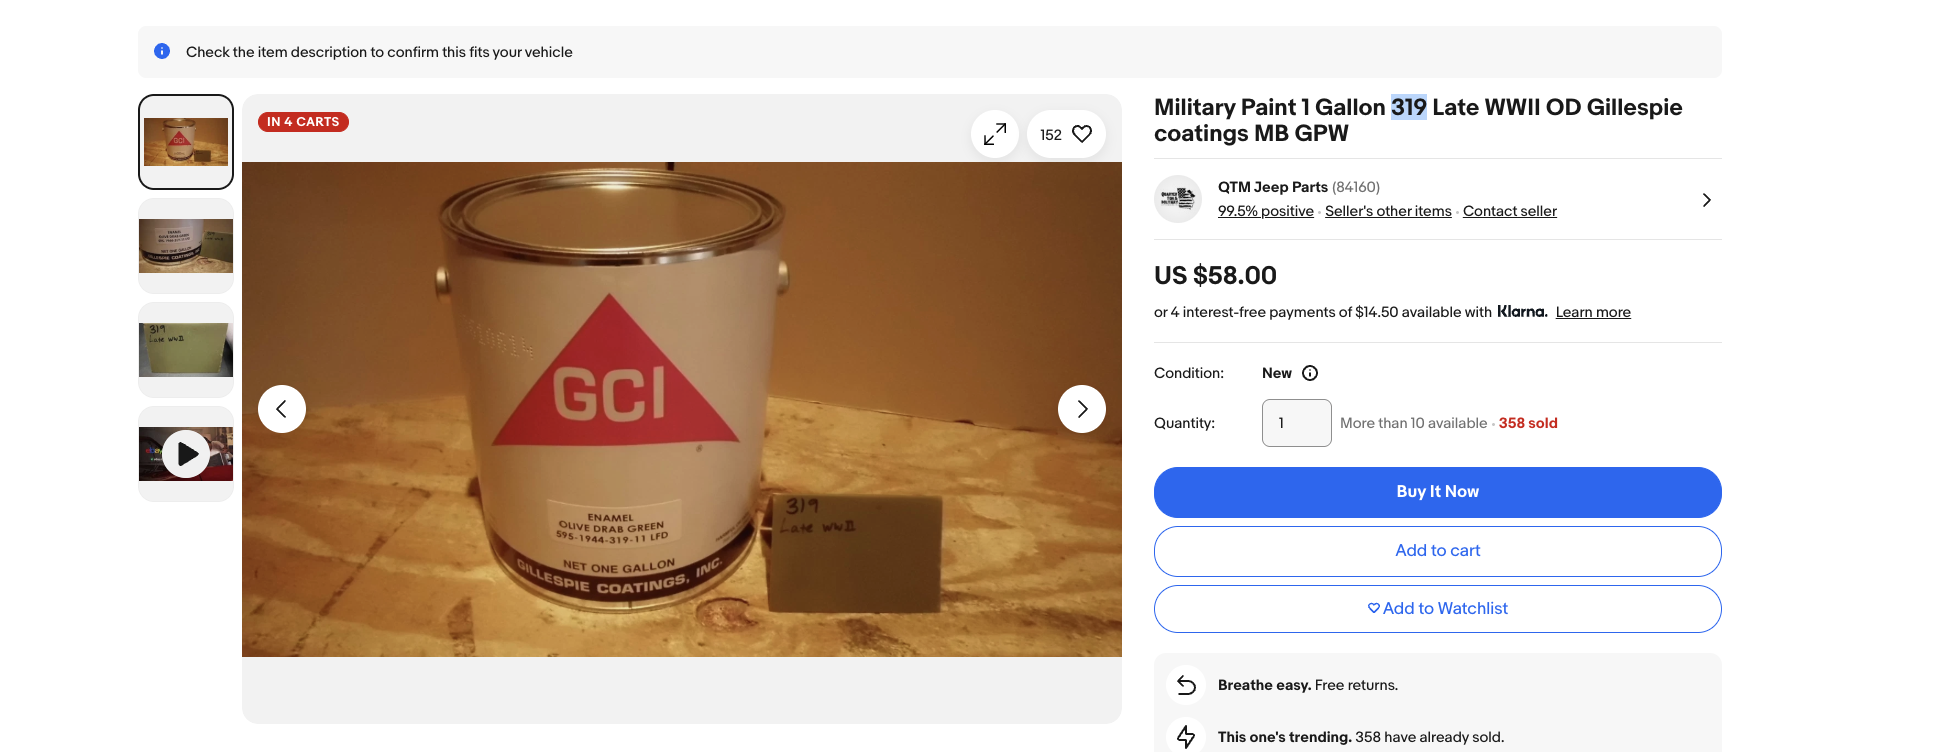
Once I have the engine running, and the vehicle driving quietly via a nicely rebuilt transmission and an exhaust, it’s time to do some painting. While typically I’d never try to paint car on my own — it is an art after all — a friend of mine tells me that Olive Drab paint is quite easy to spray and rather forgiving. So I’ll need to buy a big tent, a spray gun, a compressor, and a bunch of OD Green. I’ll spray the chassis down (blocking the tires off to avoid them getting painted) and I’ll paint the body panels separately so I can get the bottom of the tub before I install it onto the chassis.
It’s Time To Mount The Body Panels
Once I mount the body to the chassis, I’ll permanently install the steering column, throw in the gauges, fasten up the shifters and shift boot, bolt in the fuel tank and seats, put some glass in the windshield before bolting it to the tub, install the spare tire and jerry cab, and on and on. This phase of the project is very, very far out, though I could see myself doing a test fit so I know if I need to make any small modifications to the body prior to decking.
This Only Works With Great Project Management
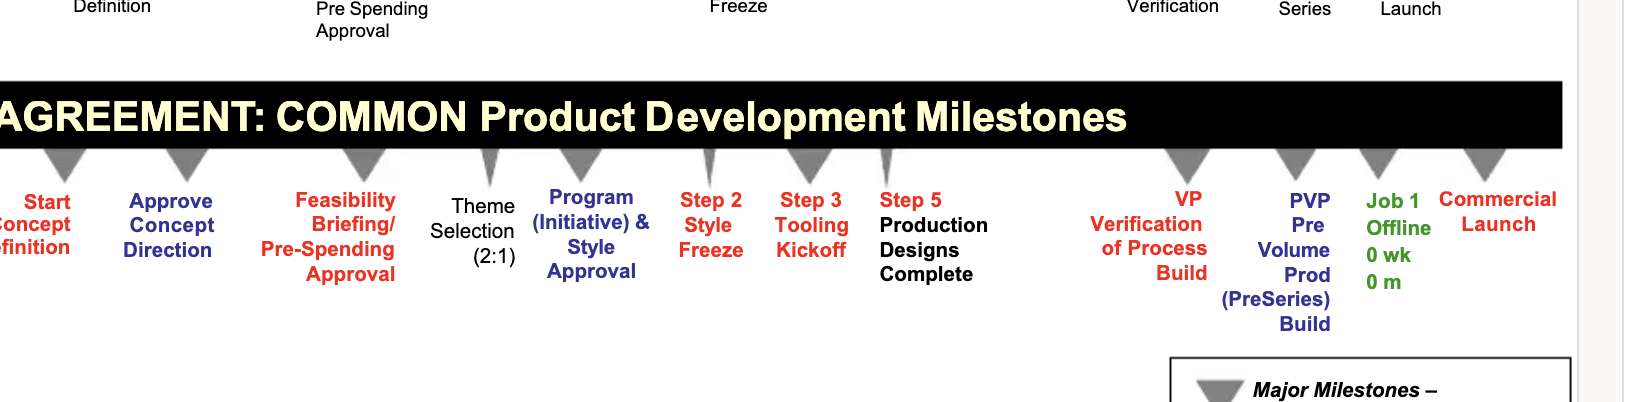
I’m building a spreadsheet that’s going to track progress. My plan is to manage the build similar to how Chrysler used to manage its vehicle programs when I worked there — via various milestones called “steps.” At Chrysler, these were called “CAD Steps,” because they involved determining the maturity of the vehicle’s CAD (i.e. packaging); in my case, I won’t be using CAD, but I’ll come up with equivalent milestones.
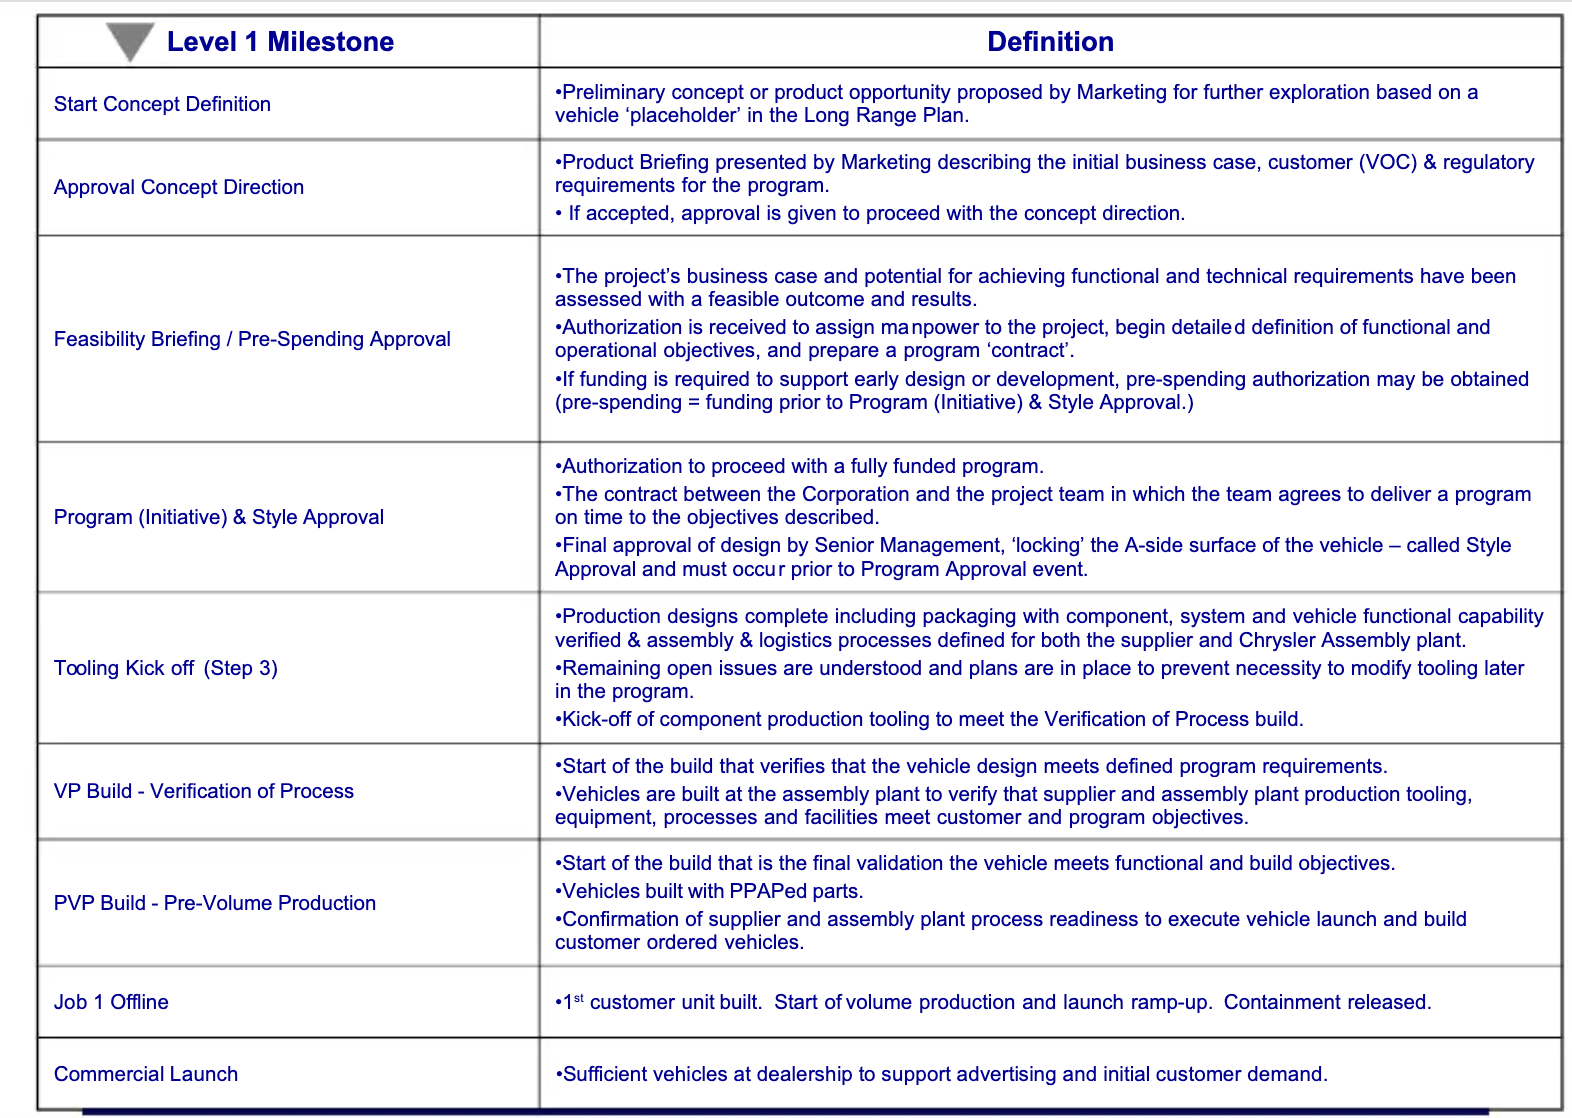

As you can see, the big milestones are Feasibility Briefing (called Fies Brief), Step 2 (style freeze), Step 3 (tooling kickoff), Step 5 (production designs complete), VP and then Job 1. Job 1 is, in my case, the Easter Jeep Safari; that ends on April 5 — Easter, so I need to be there by April 3, meaning I should leave no later than the 1st. VP-builds will happen by March 5 — that’s when I need a running, driving machine. As for the other steps, I’m just going to redefine them; here’s my rough schedule.
- Start Concept Definition: Preliminary concept pitched. Complete
- Feas-Brief: Business case and assessment of feasibility. Complete
- Step 0: Create a full schedule and bill of materials (BOM): Sept: 17
- Step A: Chassis rolling on axles/suspension: Oct 15
- Step B: Chassis brakes and steering complete: October 30
- Step C: Parts vehicle attained: November 15
- Step 2: Powertrain complete: December 1
- Step 3: Paint compete: Jan 1
- Step 5: Body Installed: Jan 15
- VP: Early build running and driving: March 15
- Job 1: Vehicle heads to Moab: April 1
I’m still working through my project management spreadsheet/bill of materials, so I’ll be refining a few of these dates in the coming days, but those look about right.
This is going to be a heck of a project.
[Ed Note: David mentioned the idea of building a brand new WWII Jeep to the team at eBay, and they loved the idea so much they said, “How can we help?” Their financial support and David’s Jeep-obsession are the fuel behind this crazy build.]


“.. and on and on.” oh man. While you’re building this project plan, remember the famous words of Eisenhower as he planned for D-Day.. “In planning for battle, I have found that plans are useless, but planning is indispensable.”
I don’t think matching the quality of OEM paint job on a WW2 Jeep is going to be an issue. These things were made go to the battlefield, not the showroom, so I doubt they were too concerned about a few paint runs.
My delicate suggestion: Paint the frame first. I suggest using the Rust Bullet family products. Had great success with their stuff over and over again, and quite forgiving when it comes to application.
Well that makes it look suspiciously easy… In all seriousness, that’s a good way to break this down into manageable chunks. I expect to see a video of you doing assembly to the tunes of Johnny Cash singing “One Piece at a Time”
Good thing you live in southern California, so you can book your paint work for fracking JANUARY! Jealous.
The one thing that concerns me you didn’t mention how you’re gonna get it to rust. I suggest a saltwater bath spraybottle elixir or leaving it parked as close to the Pacific you can get in Santa Monica in the winter. Should take care of that problem right quickety. DT canon is as precious as the Star Wars timeline….Don’t go all JJ Abrams on it. /justkidding
I’m waiting with Bated breath for the Gantt Chart!
“While typically I’d never try to paint car on my own — it is an art after all — a friend of mine tells me that Olive Drab paint is quite easy to spray and rather forgiving.”
I’ve fully painted three cars, two in satin black, and one (a LandRover “Lightweight”) in military spec black/green drab camo. As long as you avoid runs in the paint it’ll look fine.
The dull surface finish hides a lot of things.
Sorry for the novel. I just couldn’t stop at one story.
This makes me think of two early M*A*S*H episodes; the one where Radar mails a Jeep home, piece by piece, and another where Henry Blake is giving bomb-defusing instructions over the PA (“Unscrew the nut…but first…”).
There are two things I have learned during my history of existence on this planet. 1: Complex projects demand thorough, intense and detailed planning, with buffers in the schedule around milestones to account for equipment failures, delays in receiving parts/materials, unexpected absences of workers, weather, and the occasional bureaucratic snafu. 2: Complex projects delight in shitting all over your pretty little schedule. Over the years, my amazing wife and I have remodeled two houses while occupying them and raising the Kiddo (yes, we are Type A, and probably a little crazy), partly because we have the skills, partly because we both grew up in houses that were constantly being updated, and partly because it was there. We both have engineering degrees and we both have experience in construction. Absolutely zero of the projects that we have undertaken have been accomplished on time and under budget. There is also the Serpent of Mission Creep offering forbidden fruit; “while we have this wall open, why don’t we…”
I did a restomod on a 1963 Chevy C10, short bed, fleetside, original 230 ci six and three-speed. I chose to keep the six and go Clifford 6=8 because everyone has a warmed over 350 and a TH350 behind it. I swapped the 3-speed (the previous owner trashed the column shift for a janky JC Whitney floor shift, otherwise I would have kept the 3 on the tree) for a T-5 from an S-10 (Chevy Astro throwout bearing means you can skip the hydraulic conversion). 2003 GMC Sierra seats with integrated seat belts (safety third!), new gas tank wirh electric fuel pump under the bed, Dakota speedometer kit to keep the stock gauges (they all worked after some poking and prodding!), 2″ drop spindles and power disc brakes up front. Clifford intake with a Motorcraft 2bbl from a Lincoln (my father-in-law pulled a fast one on me; the box said Holley. At least he got Ford parts under the hood of a Chevy) and split exhaust. All of what I just described happened in the most haphazard sequence, despite my meticulous planning. I had to to a lot of stuff over again to make the new additions play nice with the existing items, and sometimes I had to do it a third time when a better product popped up.
My future son-in-law has been working on a 1985 Dodge D250 at my house. He is as disorganized as one can get without incurring a major injury. However, he has taken the initiative, and I provide nothing but a second pair of hands when asked. It takes every ounce of self-control for me not to step in and take over, because I am watching my 22 year old self live and in person. He will get there, I know, because he has already realized that nothing goes as planned.
I would love to see the initial cost estimate compared to the final build cost, and a side-by-side comparison of the critical path plan vs actual events. I wish you the best of luck on your project, and if the Fates allow, perhaps I can finagle a few days off to drive my busted-ass XJ to Moab to help you celebrate!
I have been thinking about that episode of M*A*S*H tooooo
When I swapped in a floor shifter on my ’66 C10 I just pulled the shift lever from the column and didn’t have to trash the shifter linkage. I bet they screwed up the column shift and then just went floor because it is easier than getting a column shifter set up right.
I’d love to get a dive into the spread sheet and how the auto biz does their project tracking. My specialty is software (video games specifically) and it would be interesting to see how they do things since we’d have similar “steps” often times called dev gates with various expectations.
At no point did I see the words “Apply The TruCoat”. You’ve got enough oxidation problems in your fleet, get the d@mn TruCoat!
No no no, it must rust. Please see my post above…a DT jeep without rust is like a night without stars
Dammit. Did I really just get suckered into a project management presentation?
Could be worse. Could be a time share seminar.
David is sandbagging. He’ll be done by Thanksgiving.
Does the frame come pre-rusted? There looks to be some red spots on there.
He is using the Chrysler project management techniques.
You sure that’s not a Toyota truck frame?
I don’t know if WordPress supports this kind of thing but it’d be nice to have an index page where you can see ever article on this project in order. Same with the “I imported XYZ” articles and their following improvement projects.
I think a judicious tag should suffice.
Isn’t that what the new Add to Glovebox button is for?
I mean more for the casual viewer that stumbles onto one of their articles. That way they can quickly find the whole series if they are intrigued enough to start from the beginning.
How determined are you to use period correct jeep parts? If you’re willing to compromise you may be able to find something like a samurai or jimny axle that fits, a gm steering box, etc., that are easier to find, better built or more refined or cheaper. Custom fabrication would be needed, but 95% can be done with just an angle grinder, mig Welder, vice, and hammer. If you choose to go down this road, may I recommend making friends with people that race in lemons as they already have the tools and the experience in creative ways cars find to fail. I’d love to help, but Chicago to LA is a long drive, maybe ltdscott is local / willing to help? (BTW Mercedes, if you need help and are willing to bring your problems to the wriggly field area I’m available for crazy projects)
tell me you’re not a sportsball fan without telling me that you’re not a sportsball fan. ‘wriggly’ field…jeeeeez
Lol, guilty as charged, however I blame this on iOS autocorrect and me being too lazy to fix it.
If there must be a parts car, shouldn’t you be buying it on ebay?
Yeah “this entire car was built from parts from eBay apart from the parts I harvested from an entire spare car I didn’t buy on eBay” isn’t an impressive title for a project, especially from the viewpoint of your friends at eBay.
You seem to have a lot of space that would be great for organizing and building this project except most of that space is occupied by clutter and junk. I’d start by organizing your workspace and tools
This is an insult to all of us guys that are actually building jeeps. From scratch with a parts car that rolling parts car, all the parts coming in brand new. Full support from eBay so this is a wallet builders car. In insult in writing and an insult in content
Sent DT a source for original Jeep parts from the town of the original Jeep.
Look up how to paint a car with Rustoleum and a foam roller, would work fine for a Jeep.
I see buzzbombs (spray cans) and foamrollers in the future. Just do chassis black, not olive drab. Make life easy on yourself.
I’m likely going to re-prime the frame with a roller. But I’m going to spray the frame with everything bolted up.
Why don’t you try building one from scratch, get an old Jeep without all the new parts coming in the mail. Anyone with a wallet could do what you’re doing. In fact, Kaiser Willie’s on their website have complete instructions on how to do it. Videos everything so this is not original
Posted this before, but check out Rust Bullet as a product.
Just get a Wagner power painter off FB for $10 and have fun. Also just put 33 gallons trash bags over the tires easier than taping it.
Good advice
If it’s like how helping paint a friends last offroad project went, there’ll be a lot of buzzballs involved, too.
yum
Does anyone powdercoat their Jeep bodies? That might be a little more durable
California has problems with people painting cars in their backyard.
Just don’t tell anyone
I doubt it California doesn’t have backyards anymore
Sorry, you’re right. Charcoal pits.
Huh?
How many of the bits from Mahindra Roxor would transfer over to WW2 Jeep?
Diesel WW2 Jeep is Holy Grail in my twisted mind.
Buy one and just do a body/VIN swap.
100% agree, and as an engineering program manager, I’d take the allotted time for every stage gate and double it, especially as it pertains to steps outside your control, like shipping parts or having something machined.
I’m also hopelessly optimistic about engineering lead times, but I’ve learned time and time again that doubling my expectations is usually reasonably accurate even if it comes across initially as super pessimistic.
Spot the expert: the project will take twice as long and cost twice as much.
In all seriousness, a consulting engineer we hired at an other company years ago implicitly trusted me after initial conversation. “You’re an engineer, you have grey in your hair, you’ve been around.”
Project engineering/ management is a specialty itself. I have most, but not all of the toolset.
I once worked full time as maintenance planner/engineer in a steel mill.
As a non expert I would have suggested making the plan having the support then suggesting the idea.