
I have until March 30th to put together an entire WWII Jeep from scratch, and if I’m honest: I have a long way to go. So far, I have only rebuilt the transmission, partially built the engine, and now I’ve got the suspension fully in. Here’s how I did it.
It’s demoralizing looking at a bare frame sitting in my yard. No matter how much my friend Brandon and I did to the engine and transmission, those aren’t mounted to the frame yet, and so the vehicle just looks like it’s sitting at square one.
As I start to build this frame up, I will hopefully feel less anxious about this whole project — an attempt to build an entire WWII Jeep using primarily parts sourced from eBay. That’s why I was so excited about mounting up the suspension.

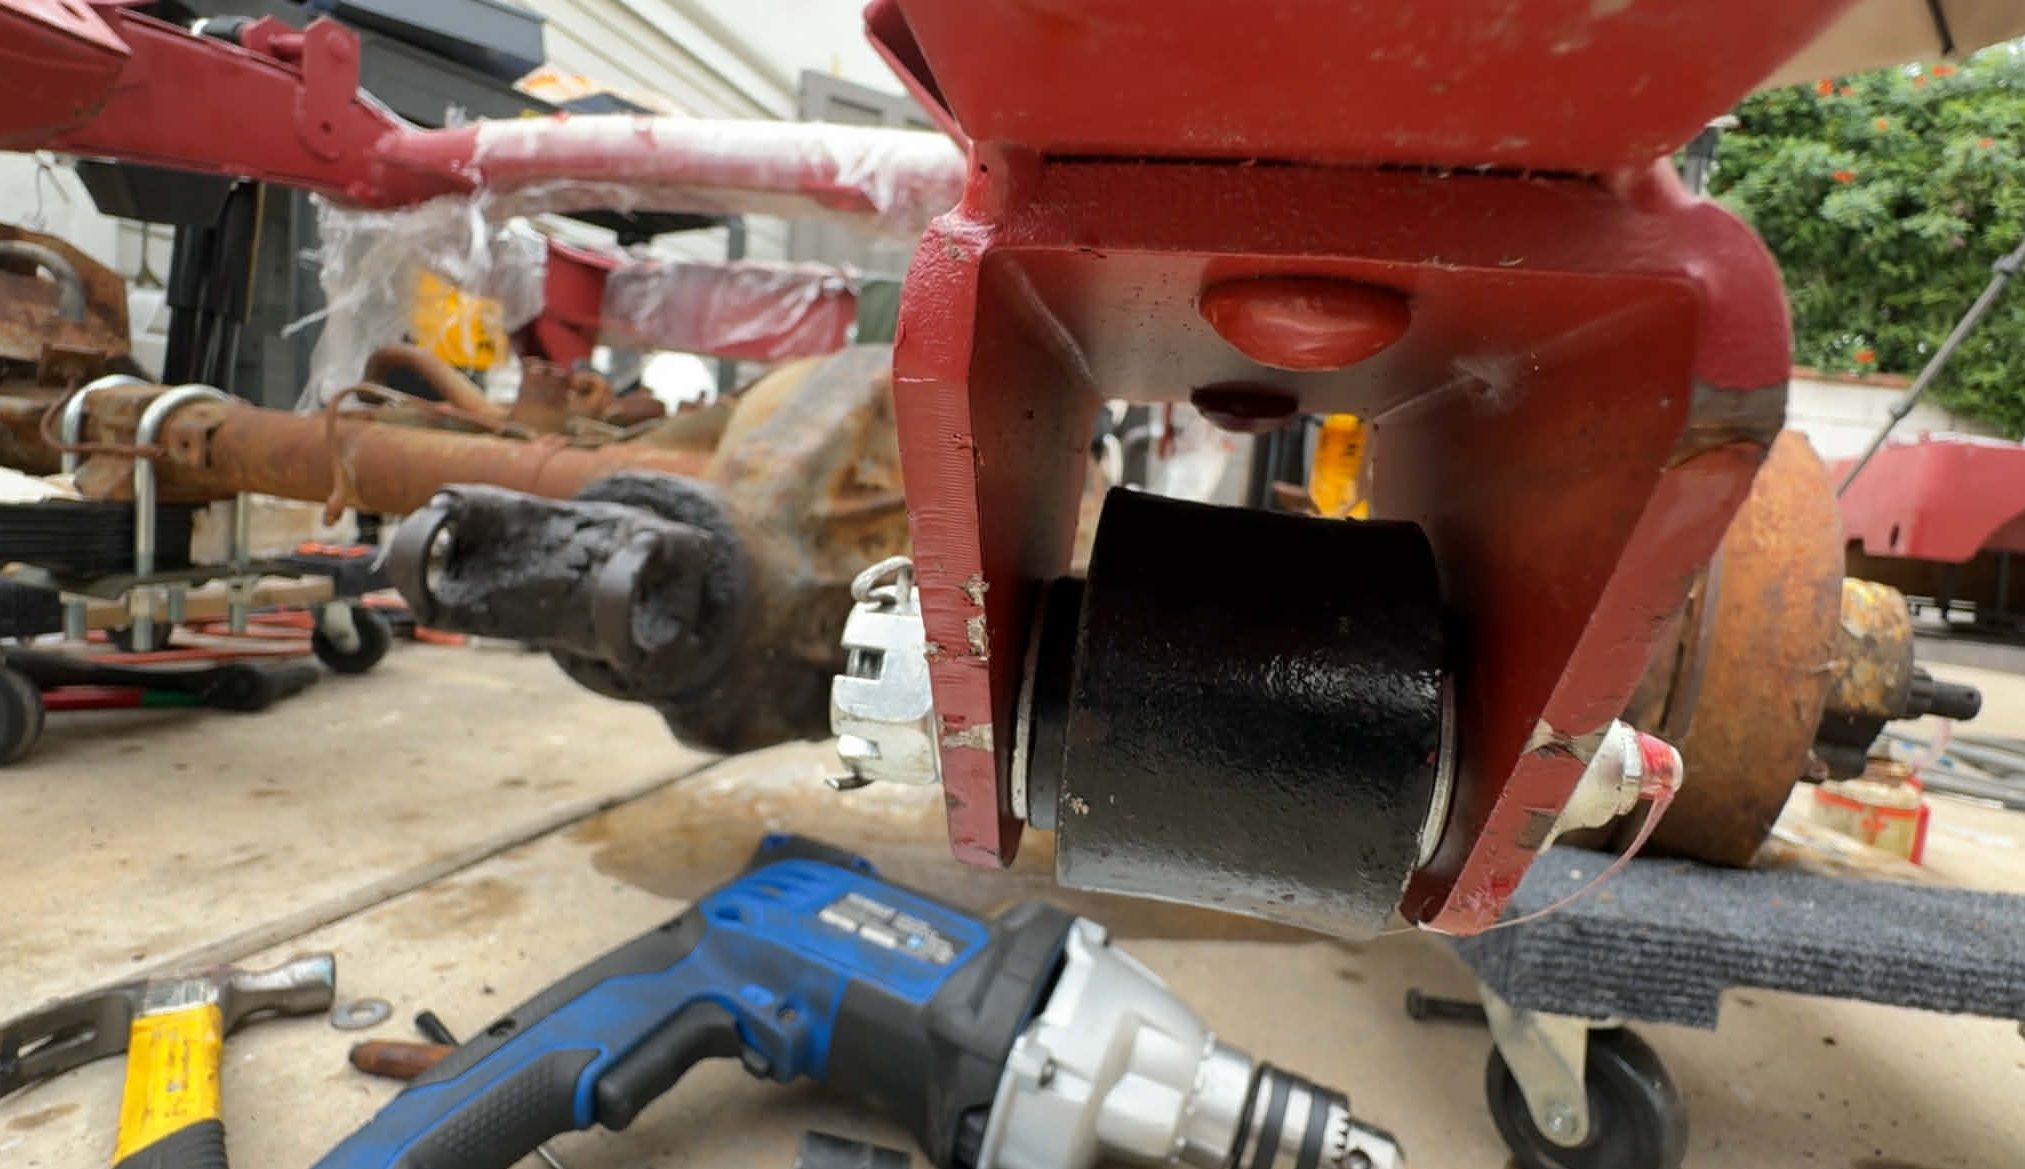
The suspension on a WWII Jeep is about as simple as a suspension can get. The centerpieces are the two solid axles, which I picked up from Washington state after buying them from eBay seller gpw9167: 
Those axles are held to the frame via leaf springs, which I bought for dirt cheap from some big car-parts retailers named parts_via and wundercarparts: 
The leaf springs are held to axles via U-bolts (number 6 in the diagram above). I bought mine from Chickamauga, Georgia-based company Quarter Ton & Military:
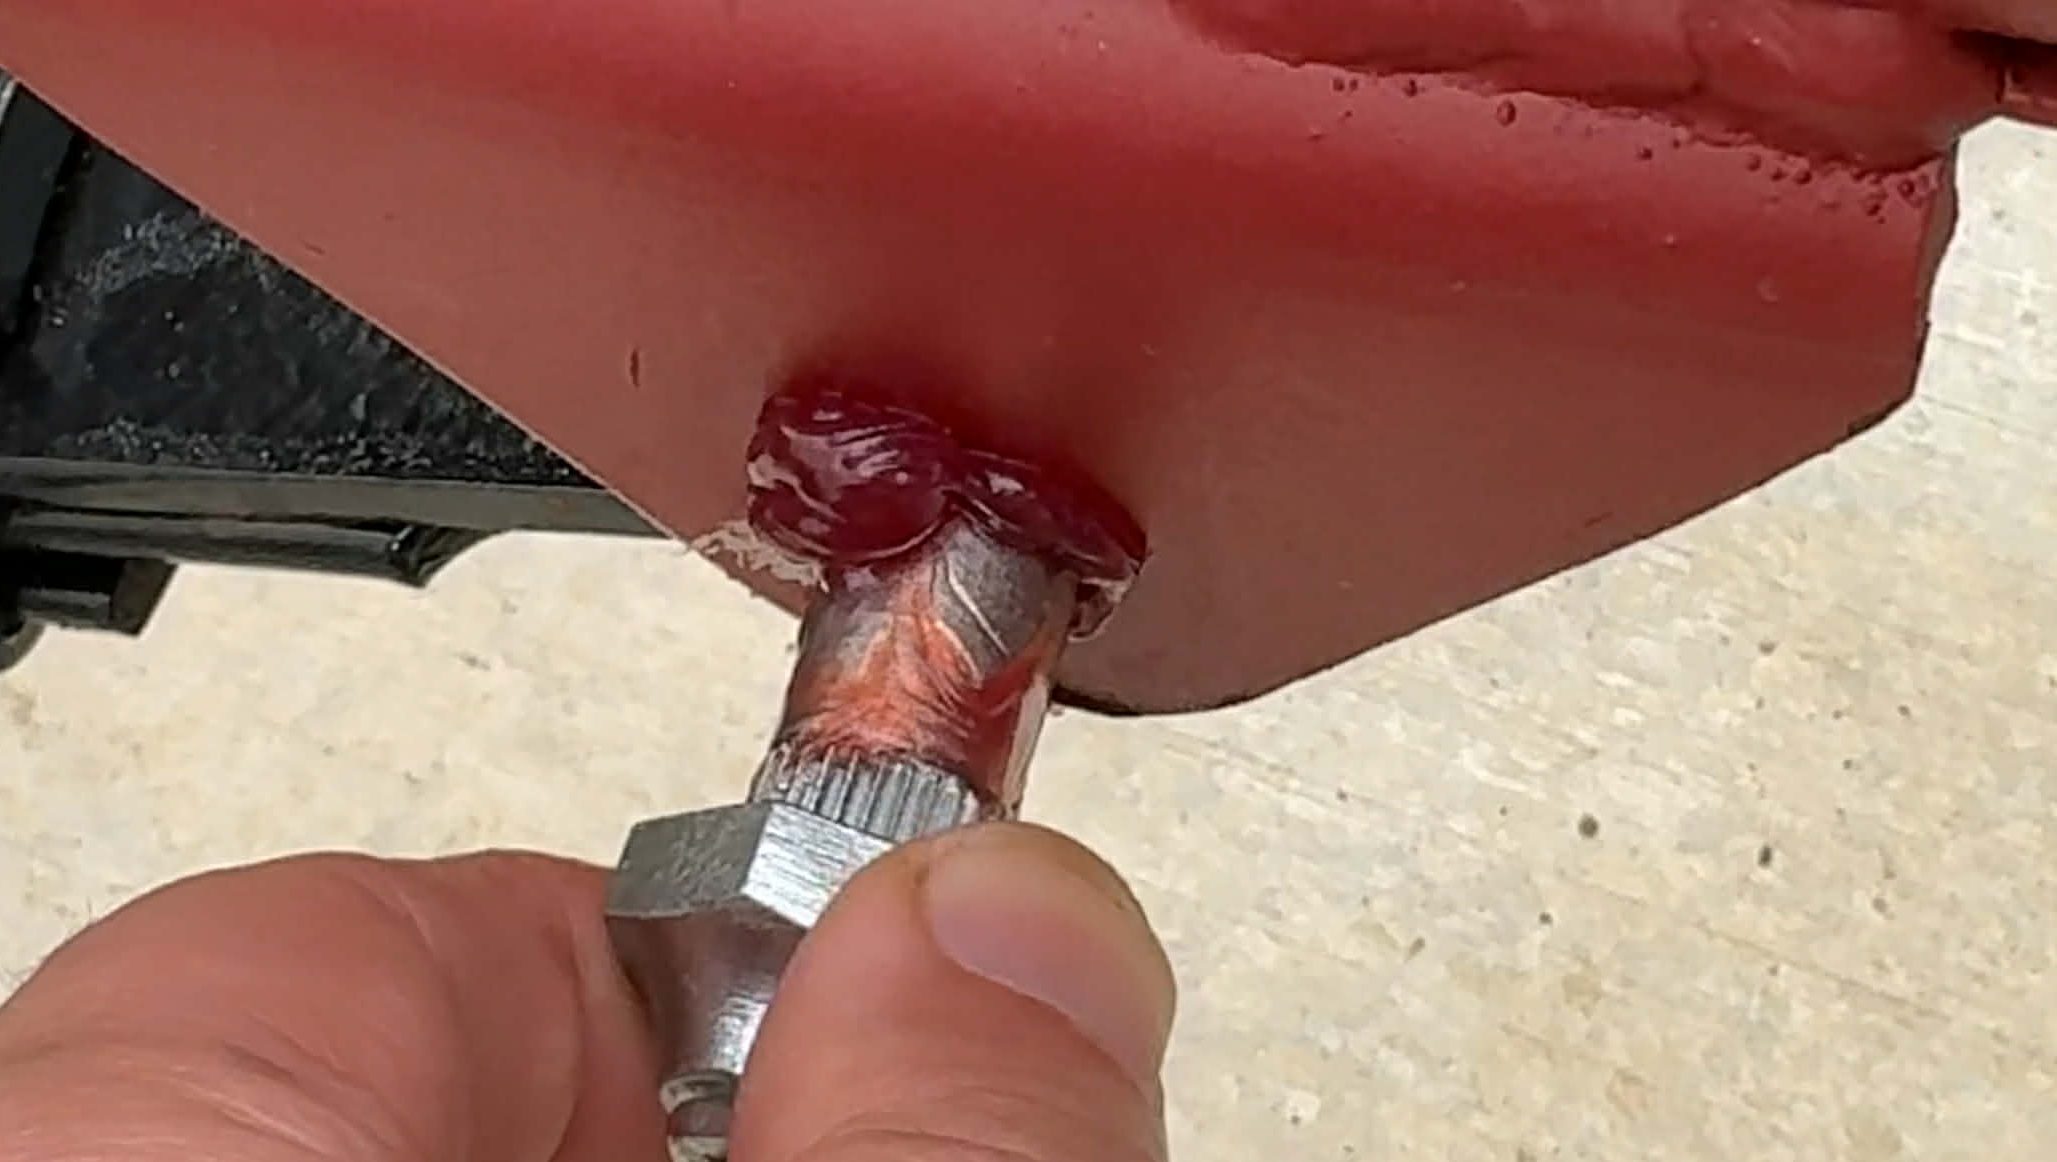
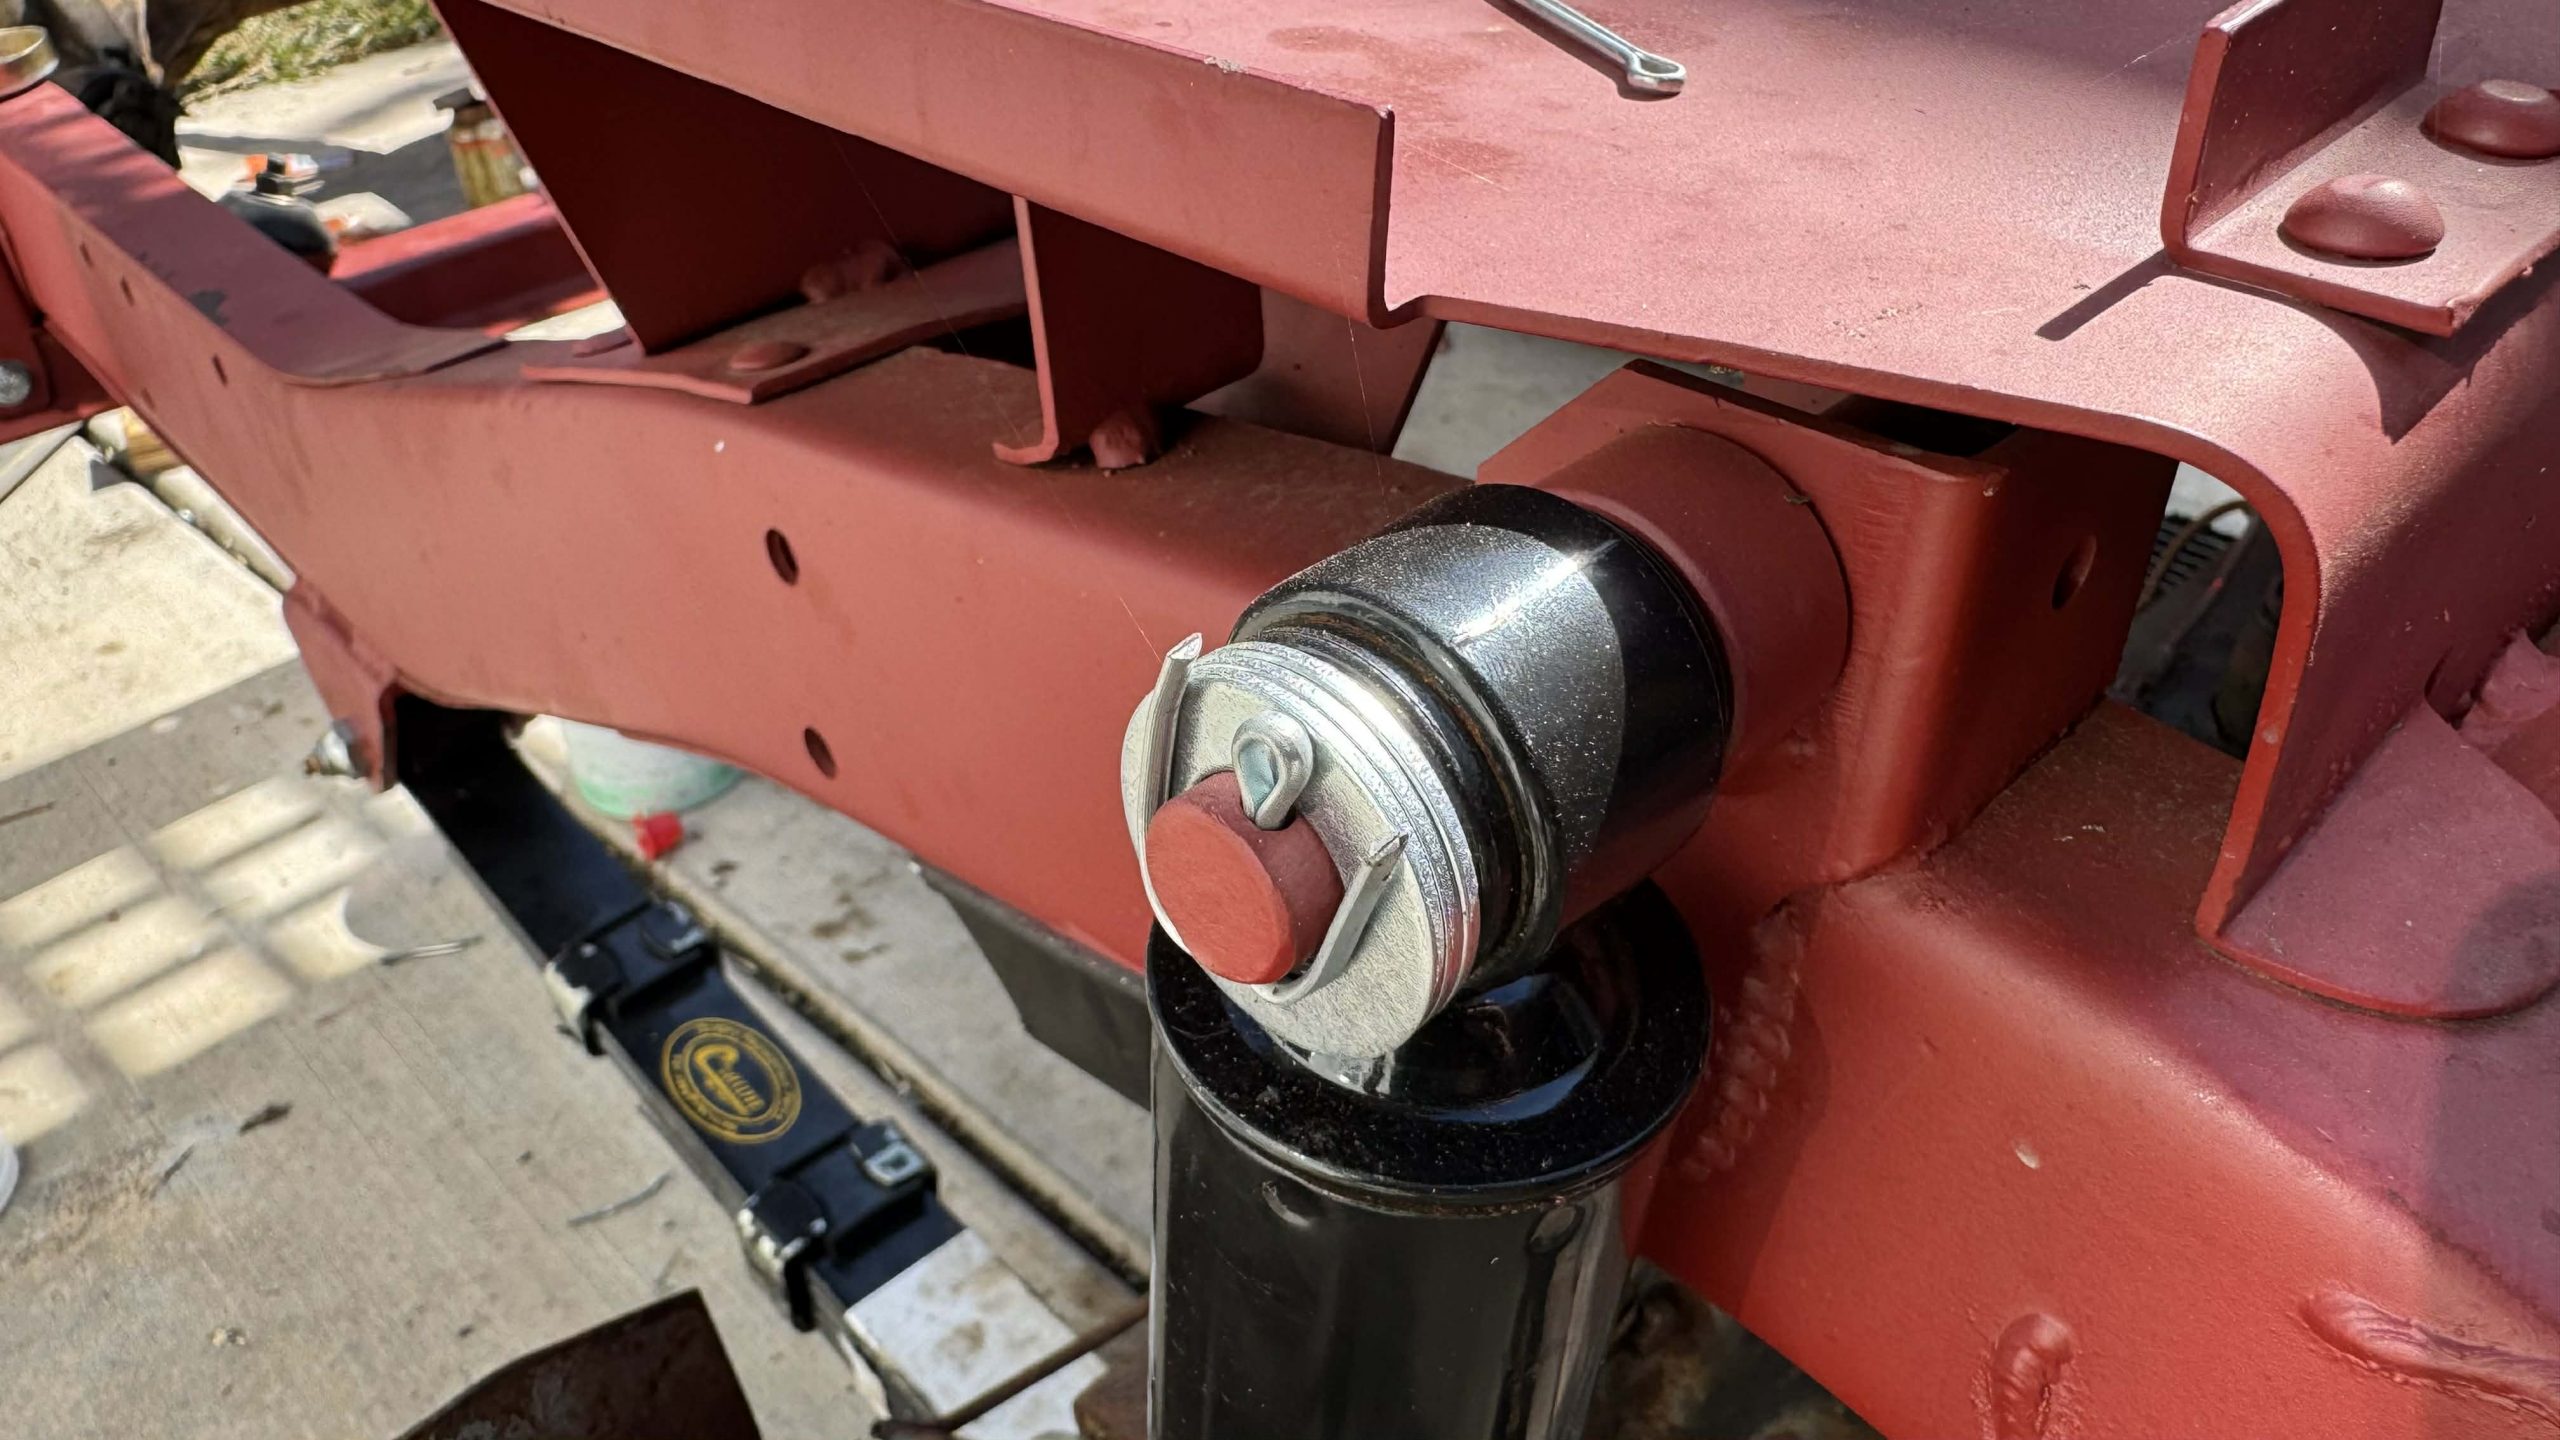
 The springs are held to the frame by a pivot pin on one end (number 5 in the diagram). I snagged mine from a seller called “Beach Audio,” a name that sounds very little like a WWII Jeep parts seller, but hey, I appreciate that they sold the parts I needed!

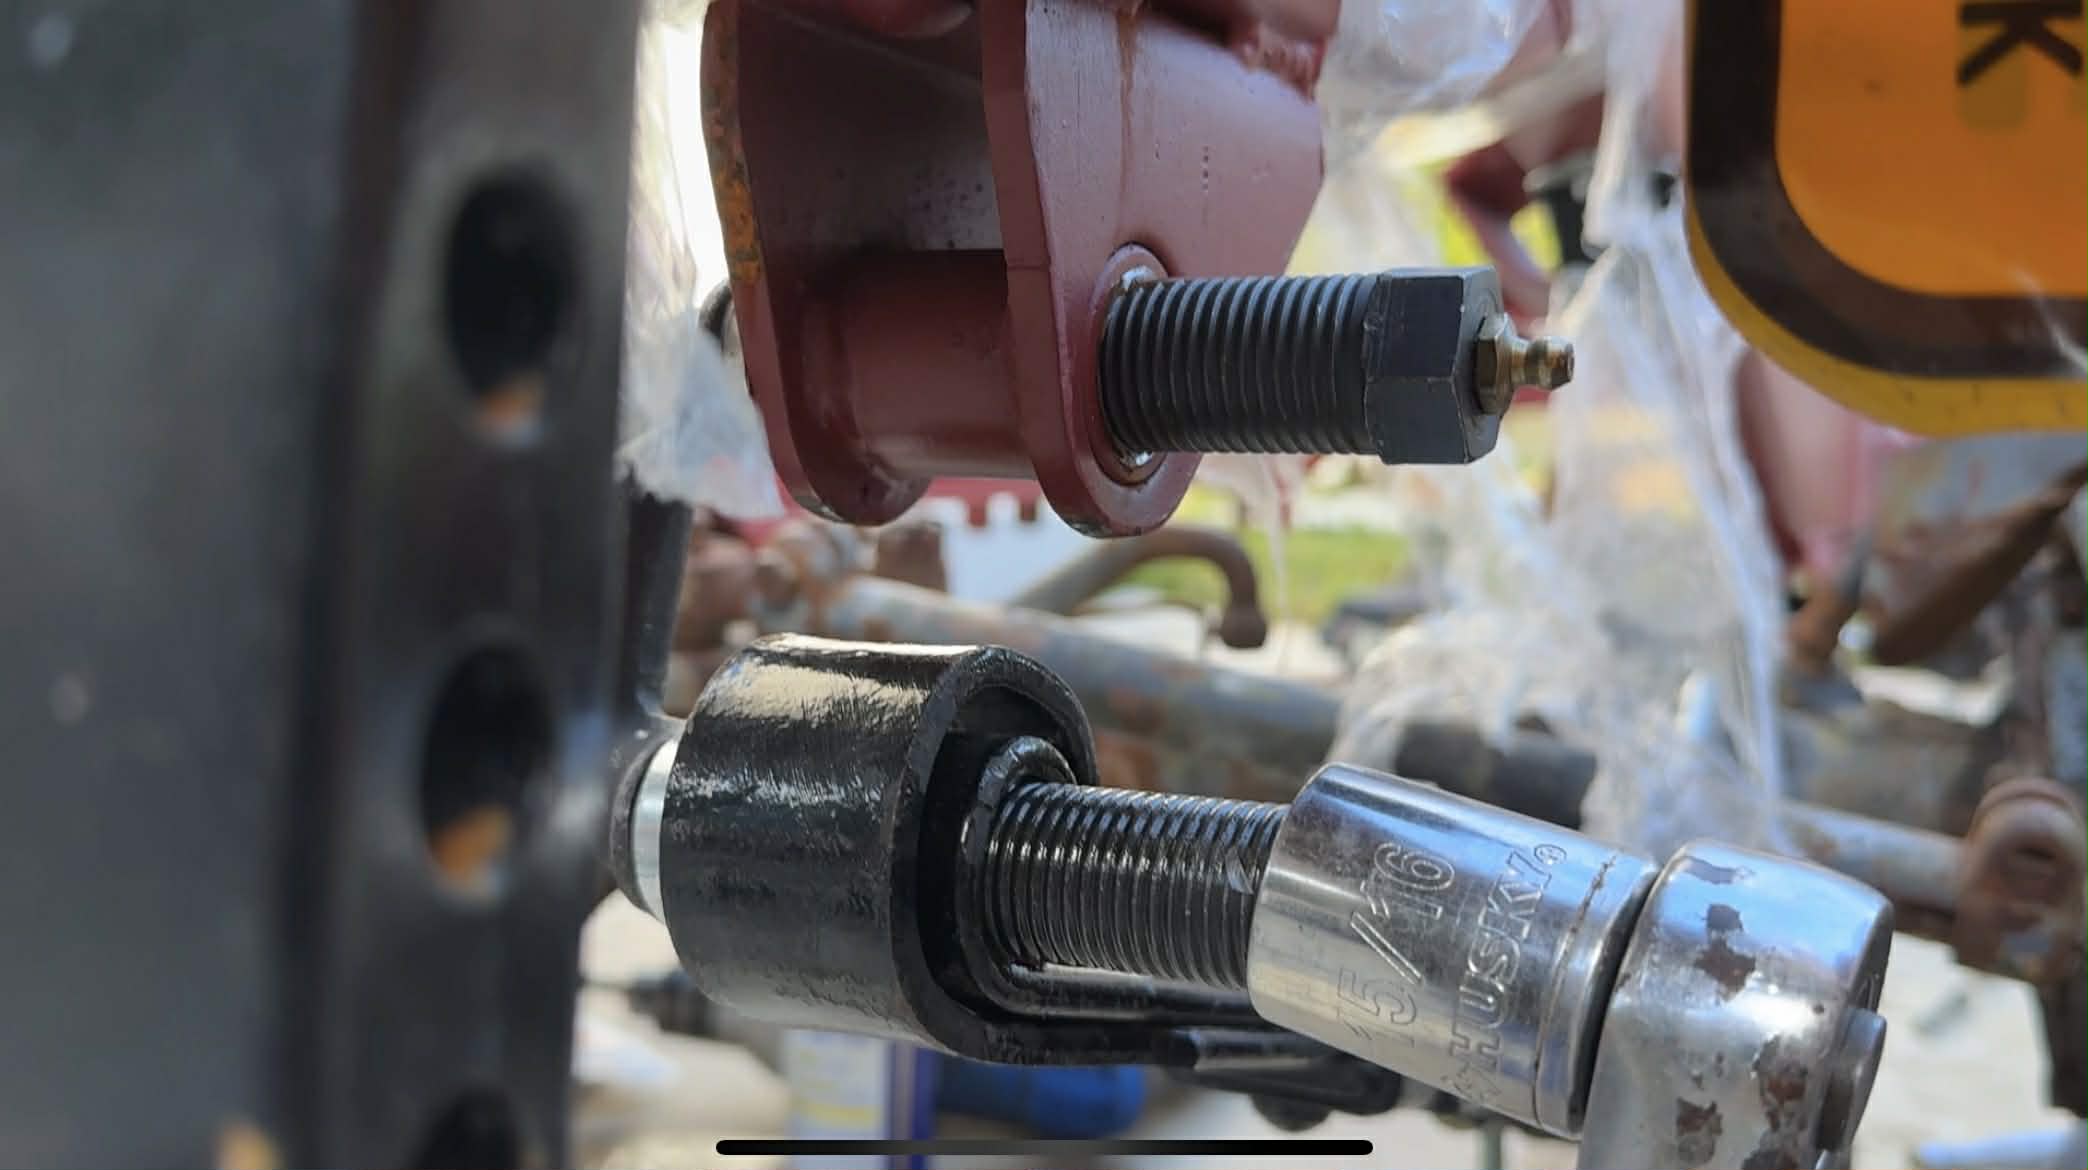
That pivot pin features splines that actually cut into the frame (Note: I did have to drill out the pivot pin holes in the Philippines-built new frame, as my pivot pins were a tiny bit too large in diameter):
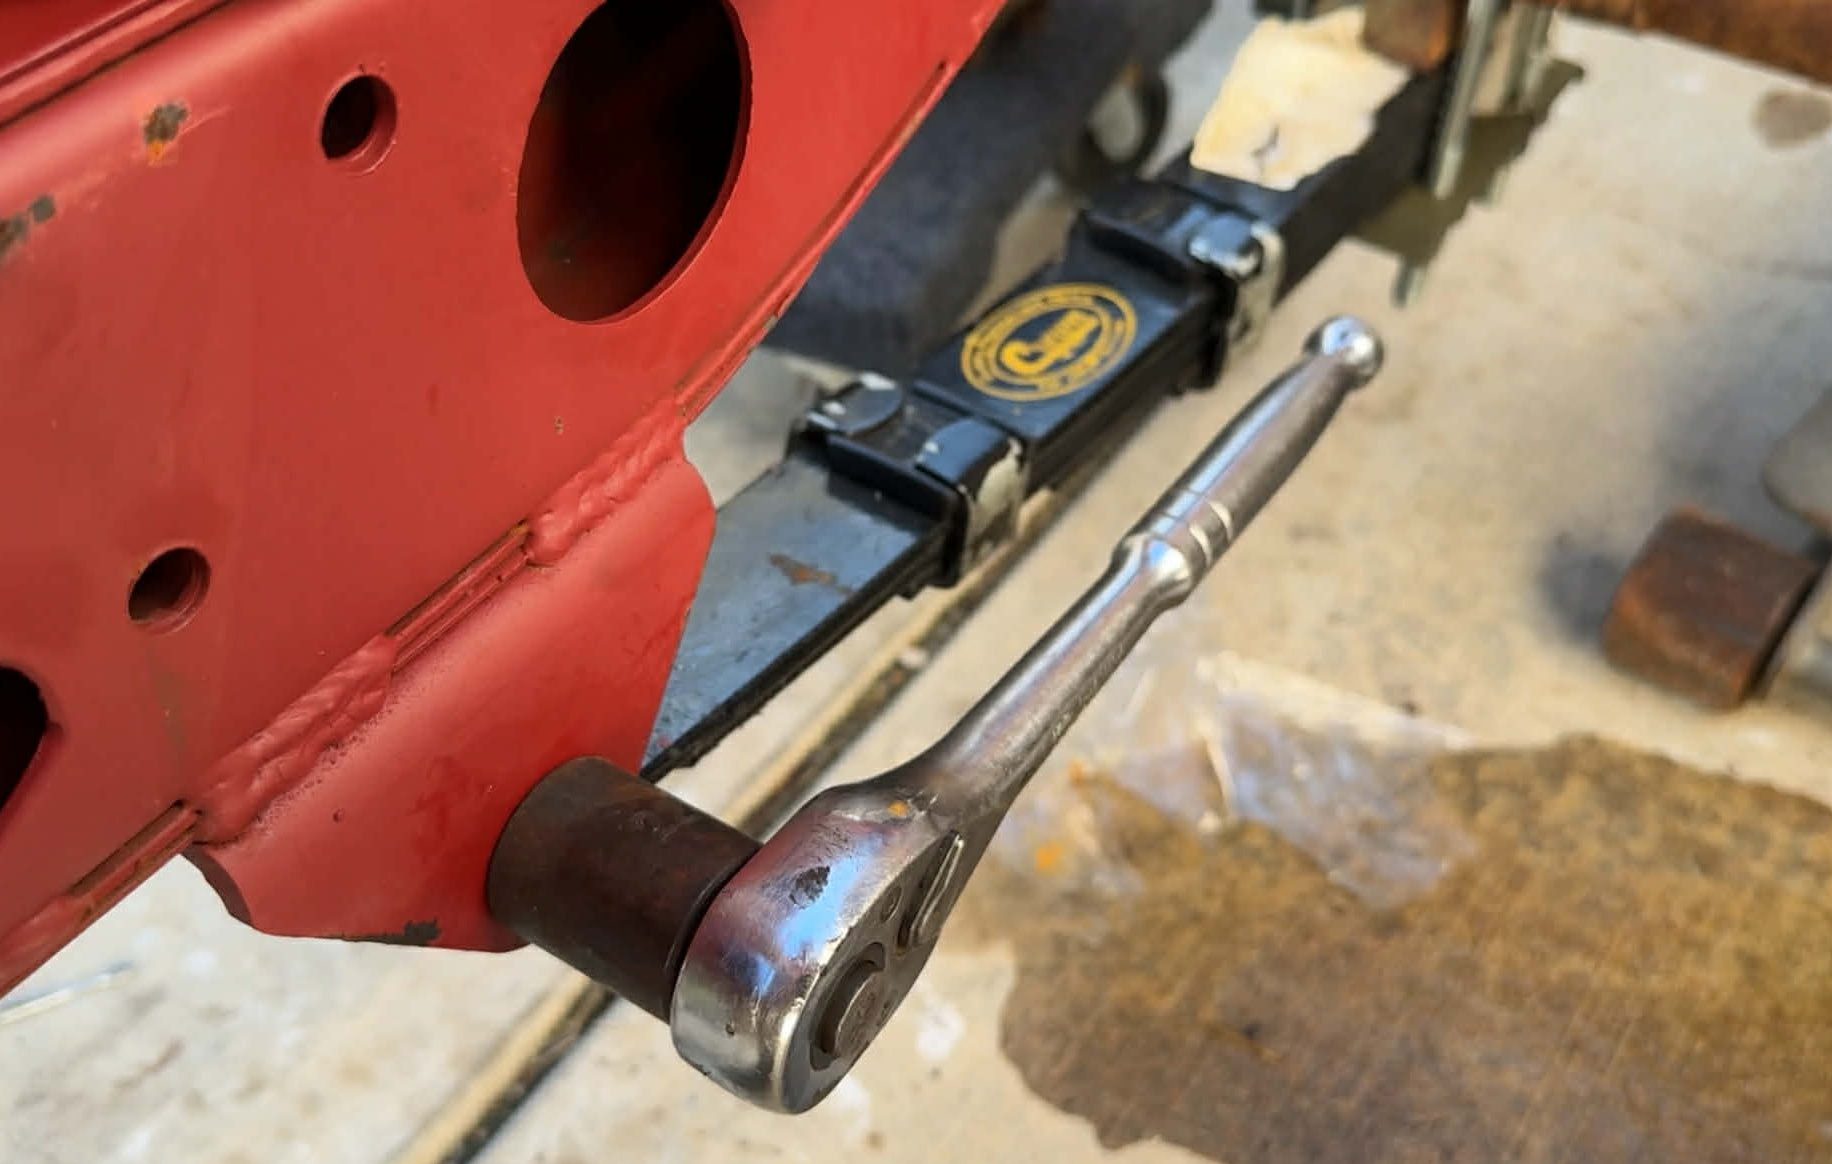
Installing the pins requires holding the splined side from spinning…:
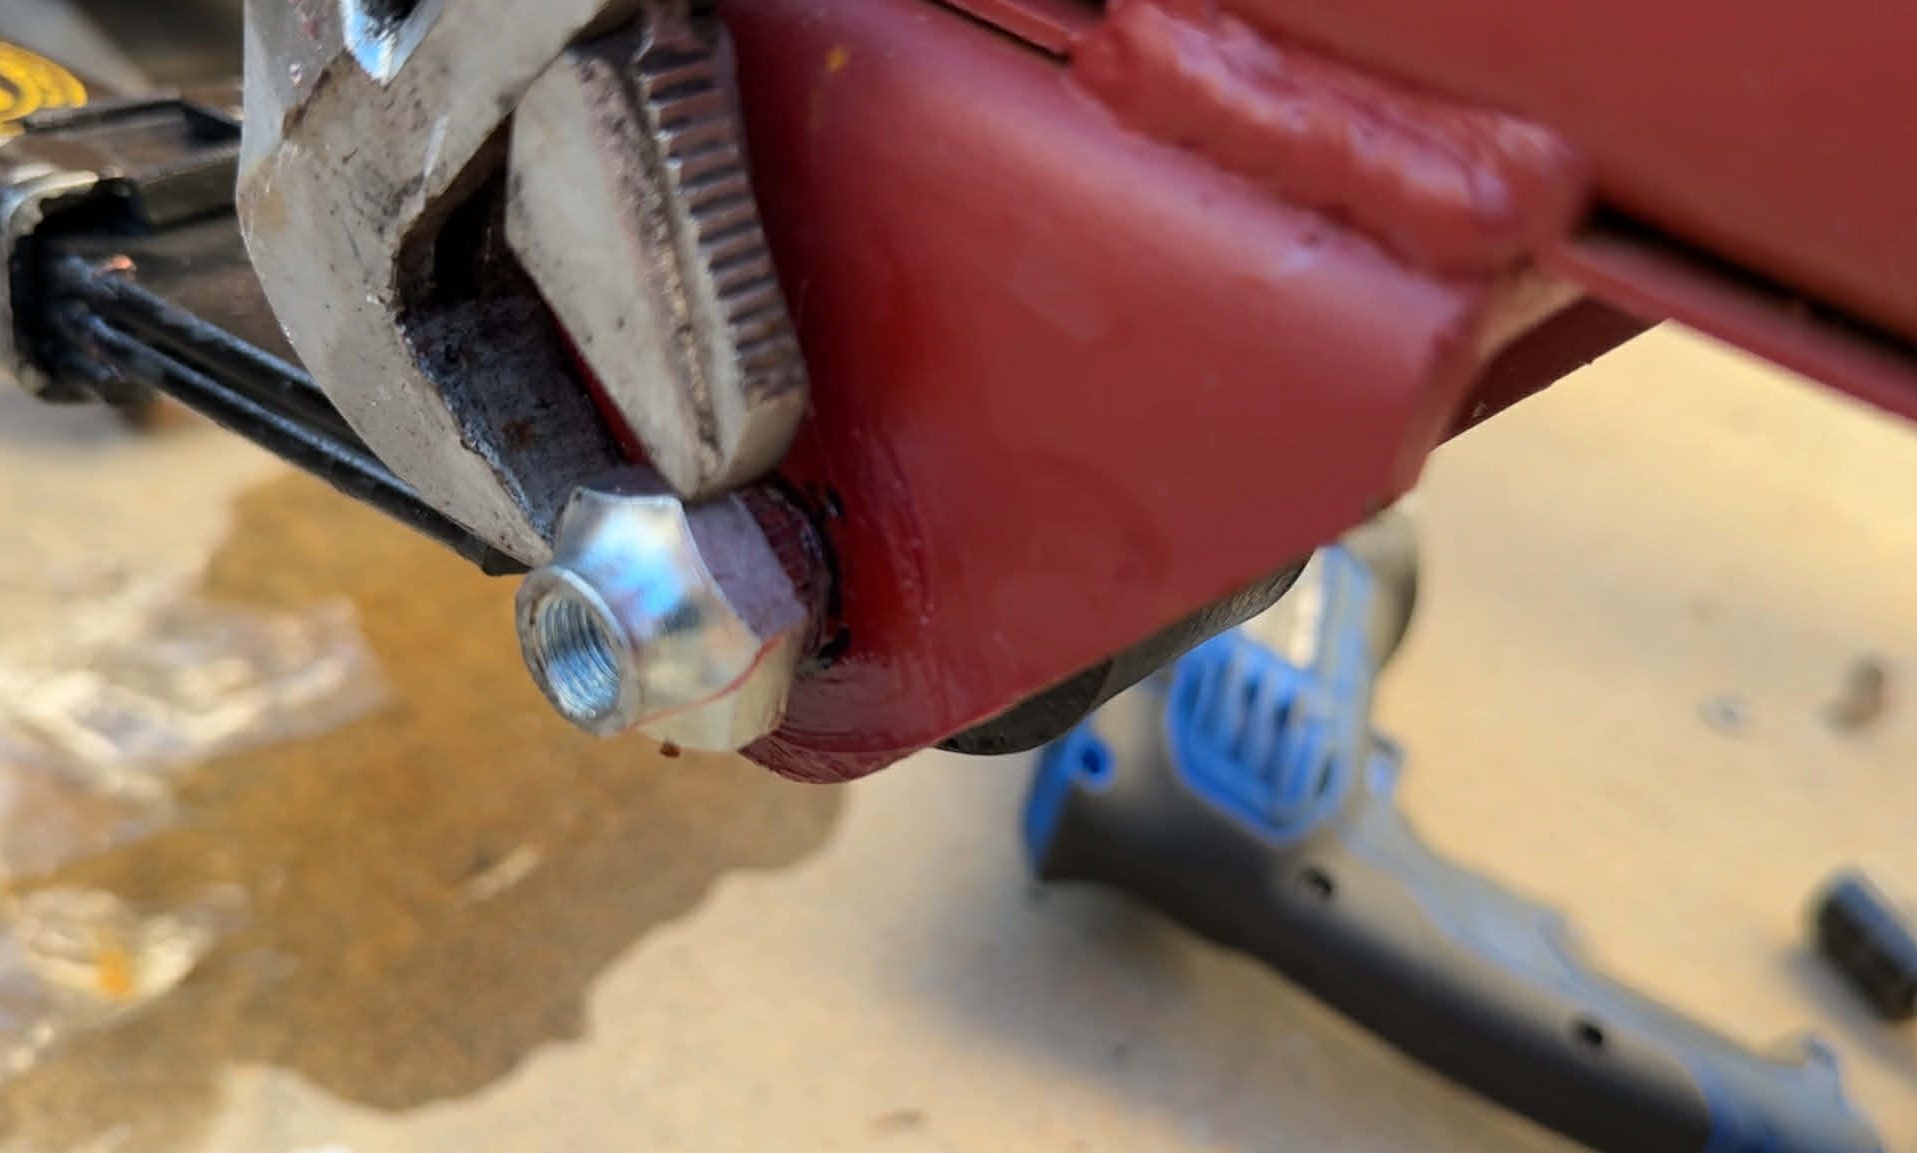
…then tightening the nut from the inboard side:
I noticed that the frame bracket was a bit too wide for the leaf springs I bought:
So I simply added washers to act as spacers.
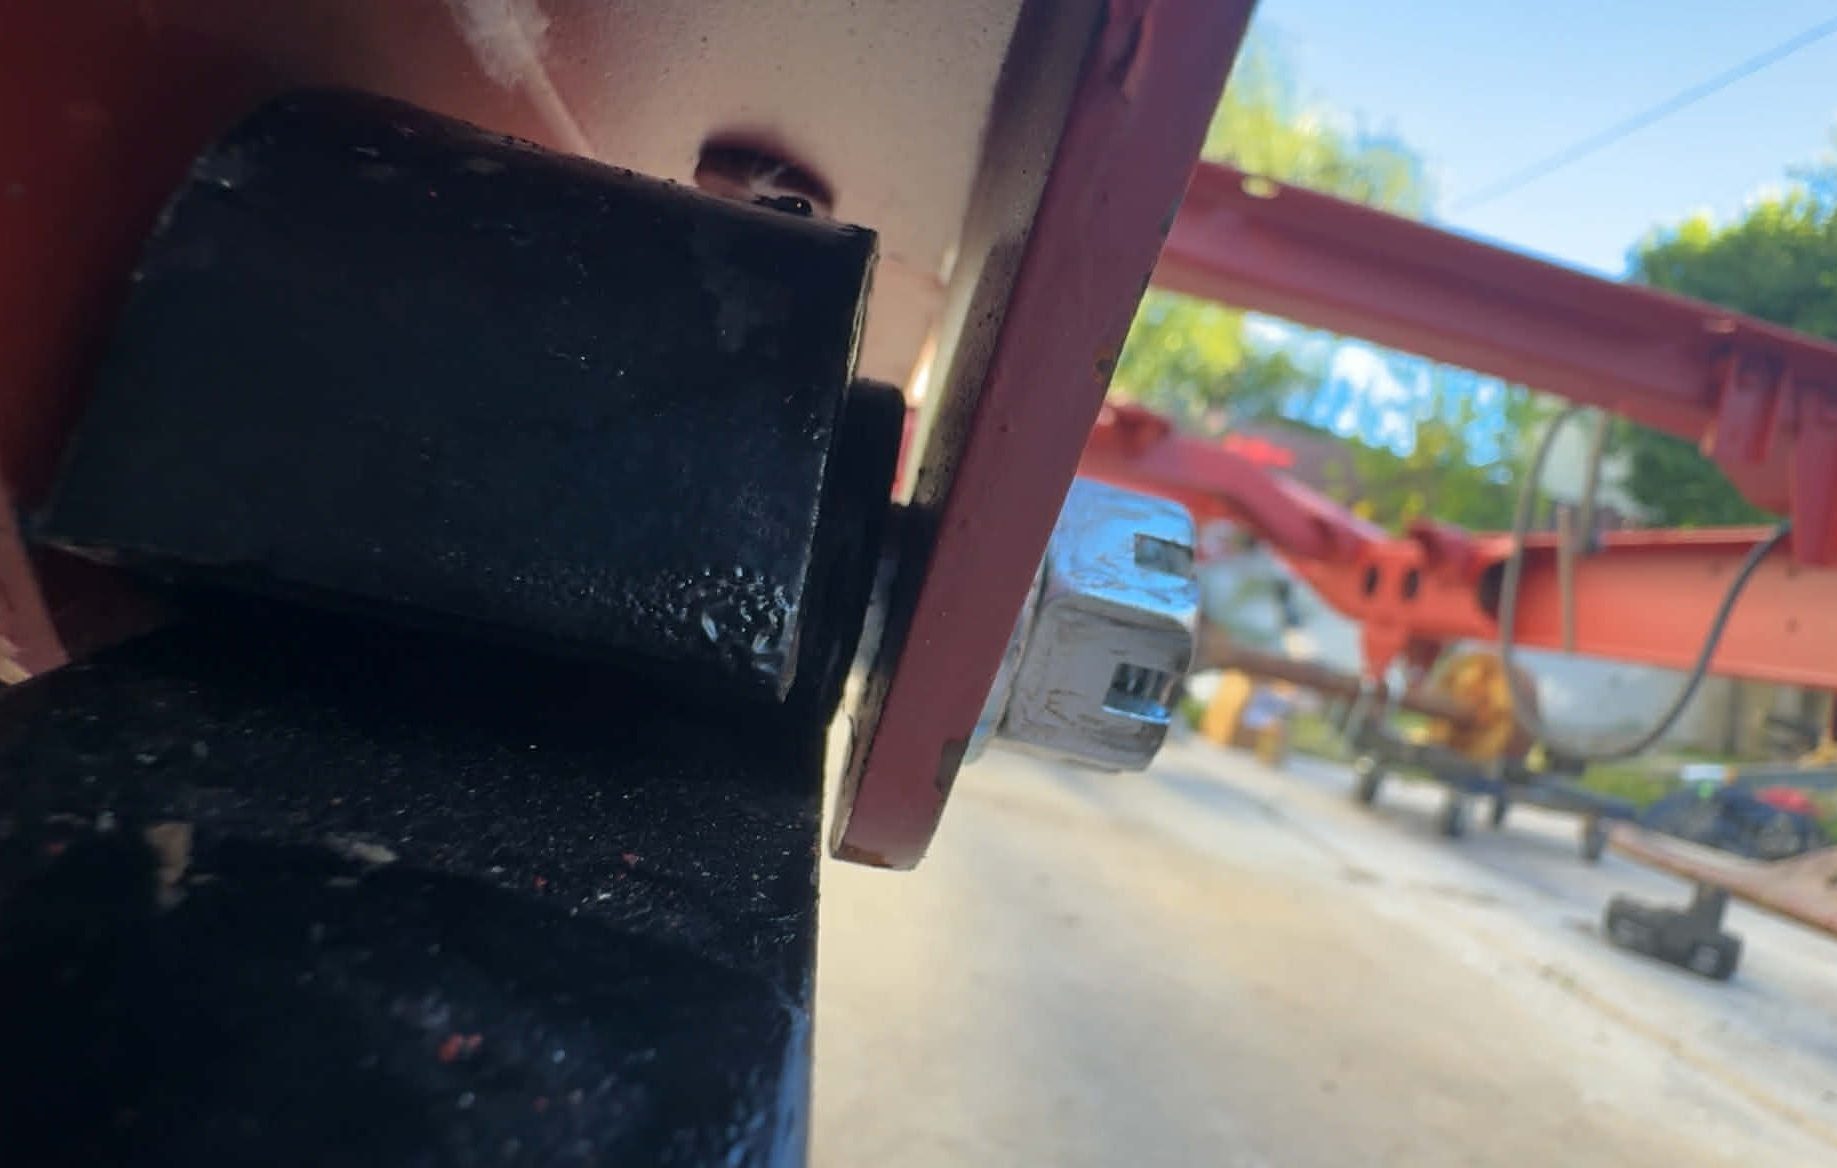
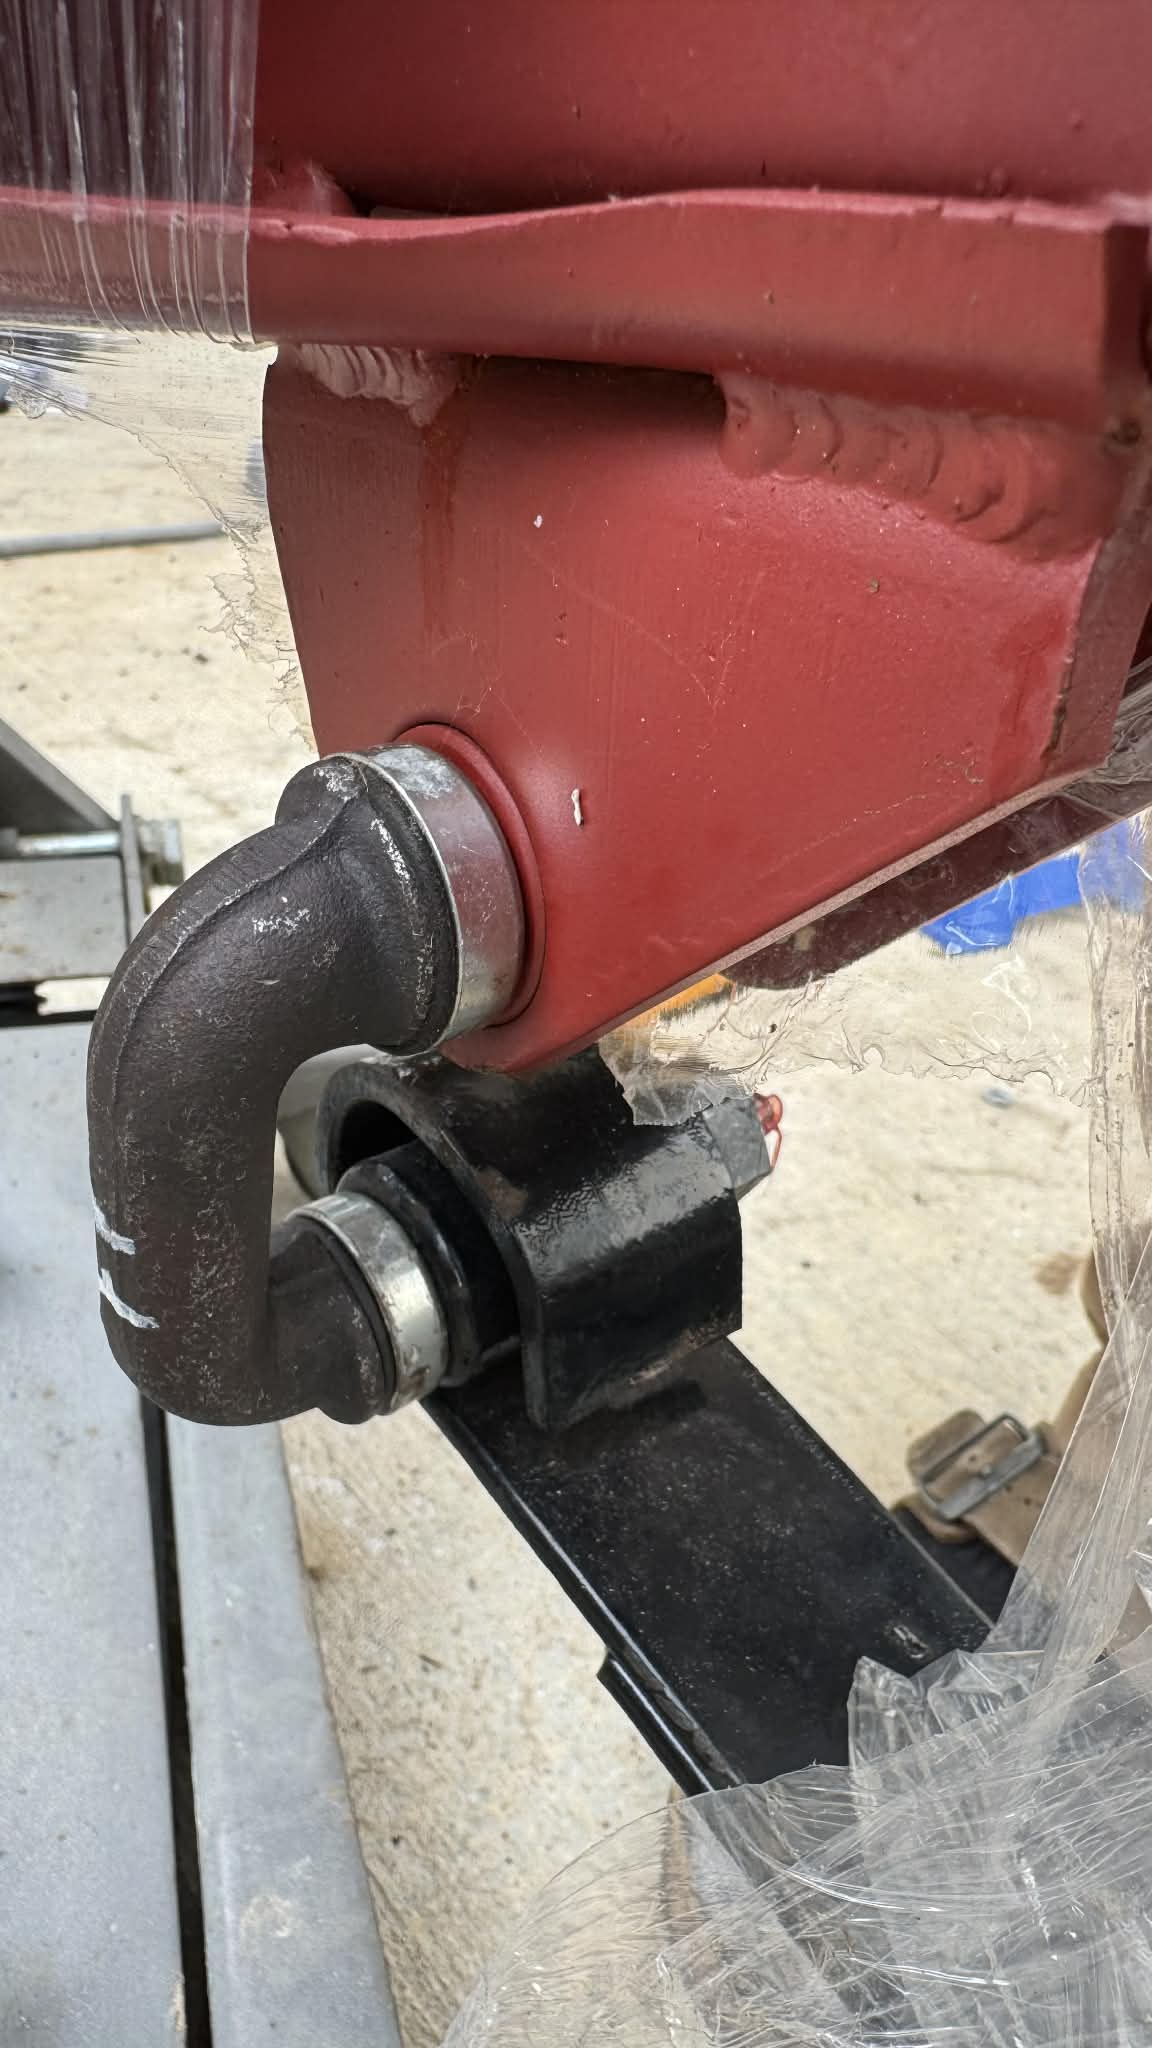
The other end of each spring is held to the frame by a C-shaped shackle:
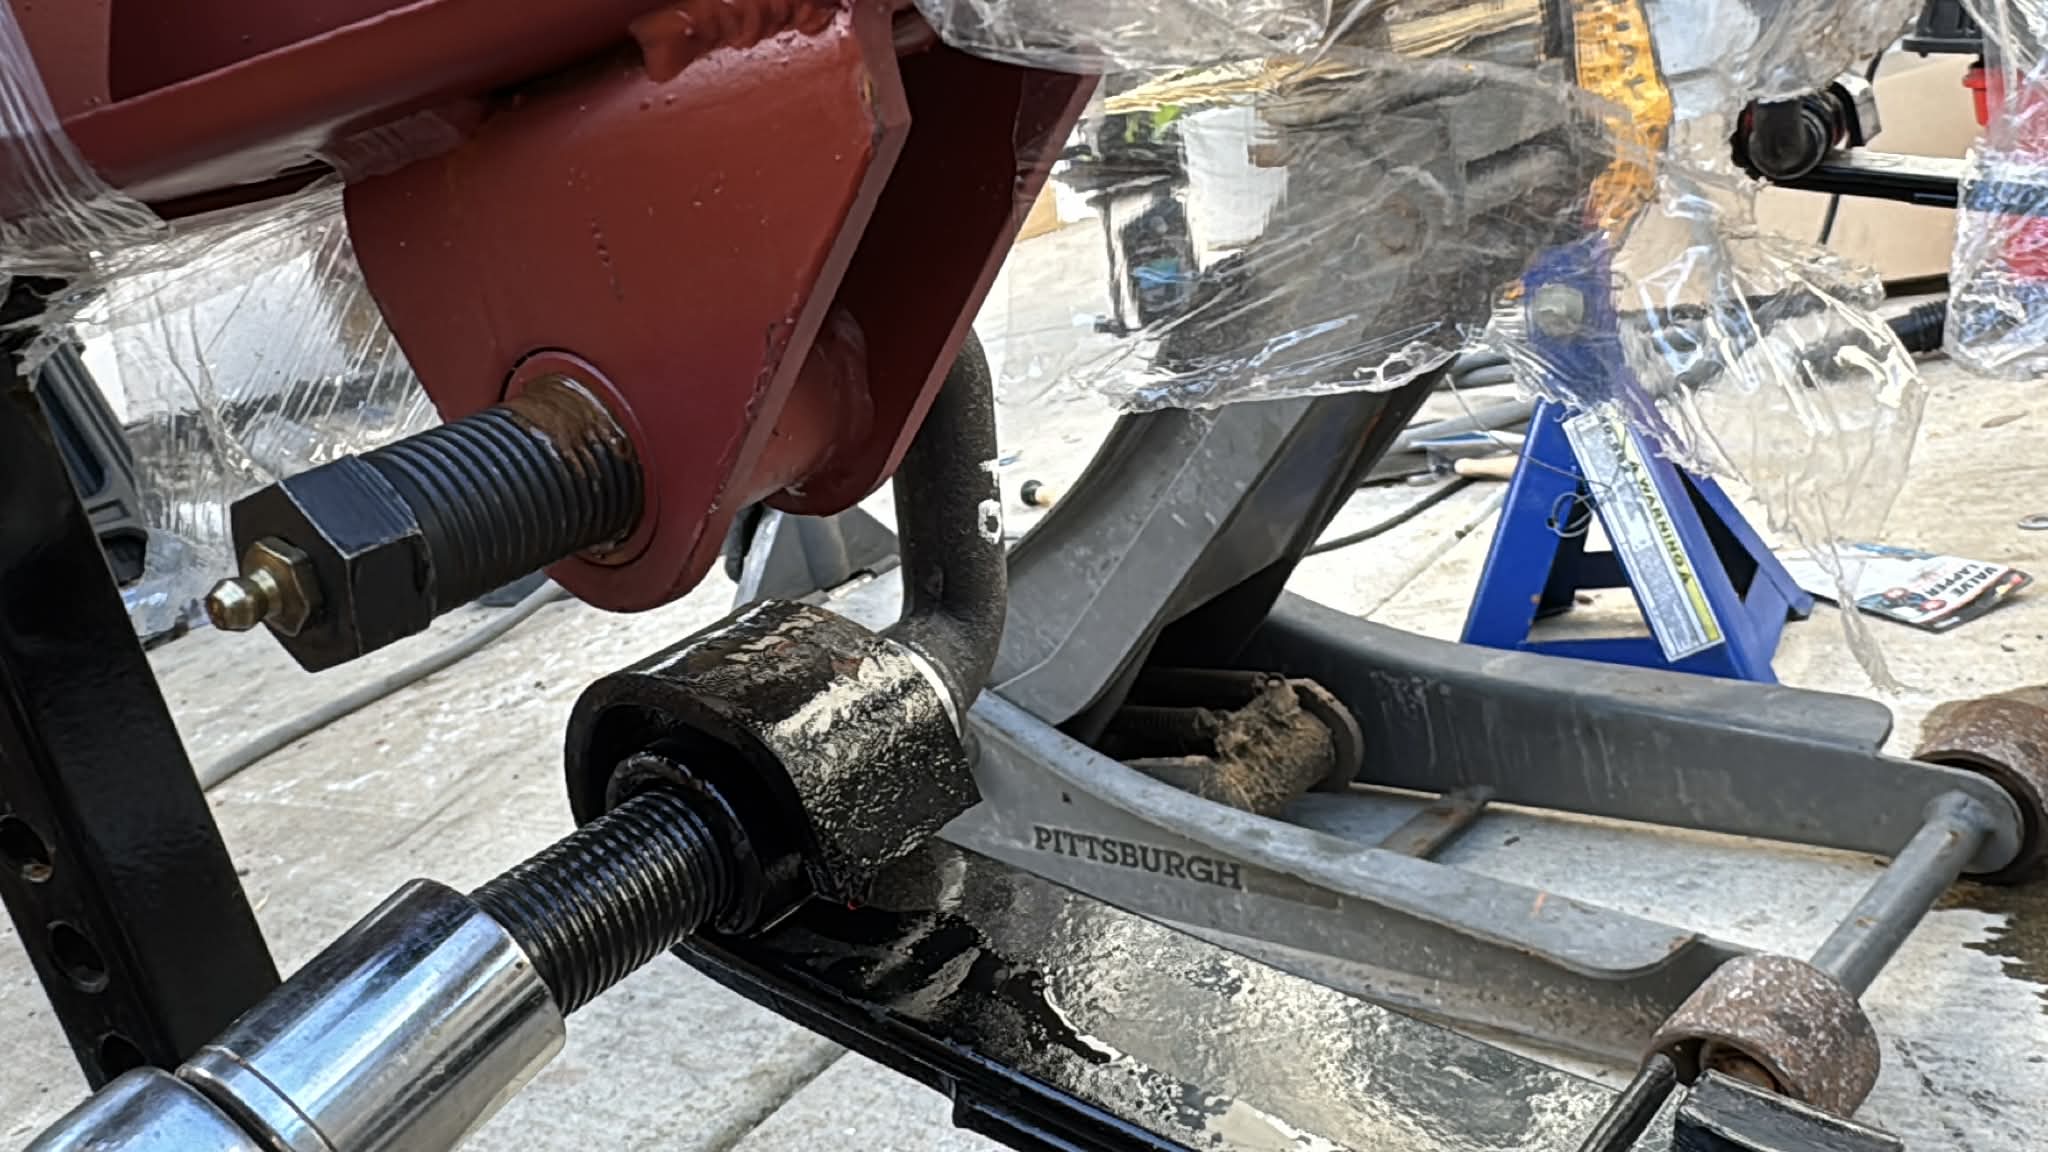
You might notice that the shackle above features the writing “FD” in white marker. This is because the shackles on the front driver’s side (FD) and rear passenger’s (RP) side actually feature left-hand threads where they go into the leaf springs. I labeled these shackles so I’d know where to put them.
The shackles on a WWII Jeep are quite interesting. They feature three main pieces: The C-shaped main “body” and then two threaded sections that spin onto the top and bottom of the “C.”

You simply place the body of the shackle into both the frame and leaf spring, then you take the top threaded portion and simultaneously thread it onto the frame (on the outside) and onto the C-shaped body on the inside.
The bottom threaded section gets spun onto the bottom part of the shackle body (on the inside), and on the outside, it actually cuts threads into the spring eye as you tighten it. Here you can see the final product once the shackle is mounted to the frame and spring:
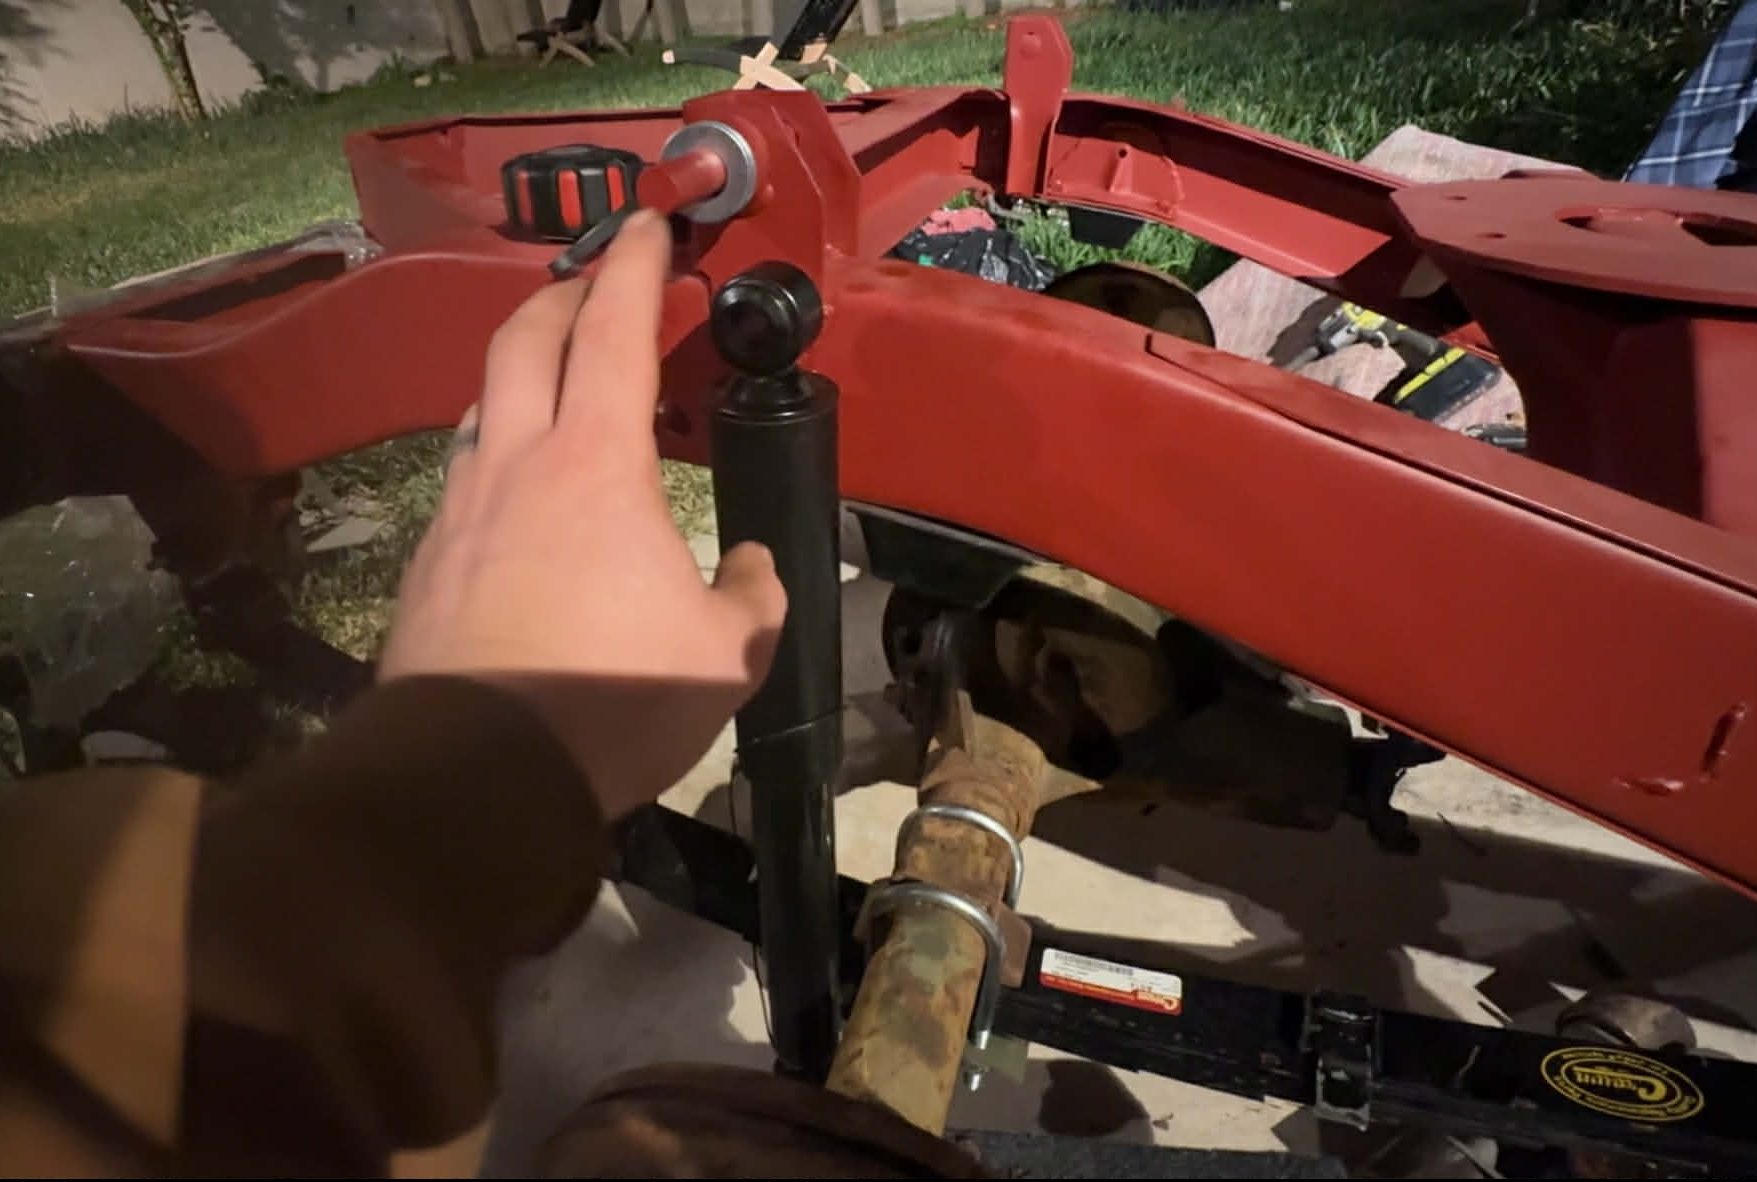
The last two bits of the suspension are the shocks and bump stops. I actually had to return a set of shocks after I noticed lots of folks online saying the fronts and rears are the same. This is not true; the rears need to be longer (as I confirmed in the Army repair manual):
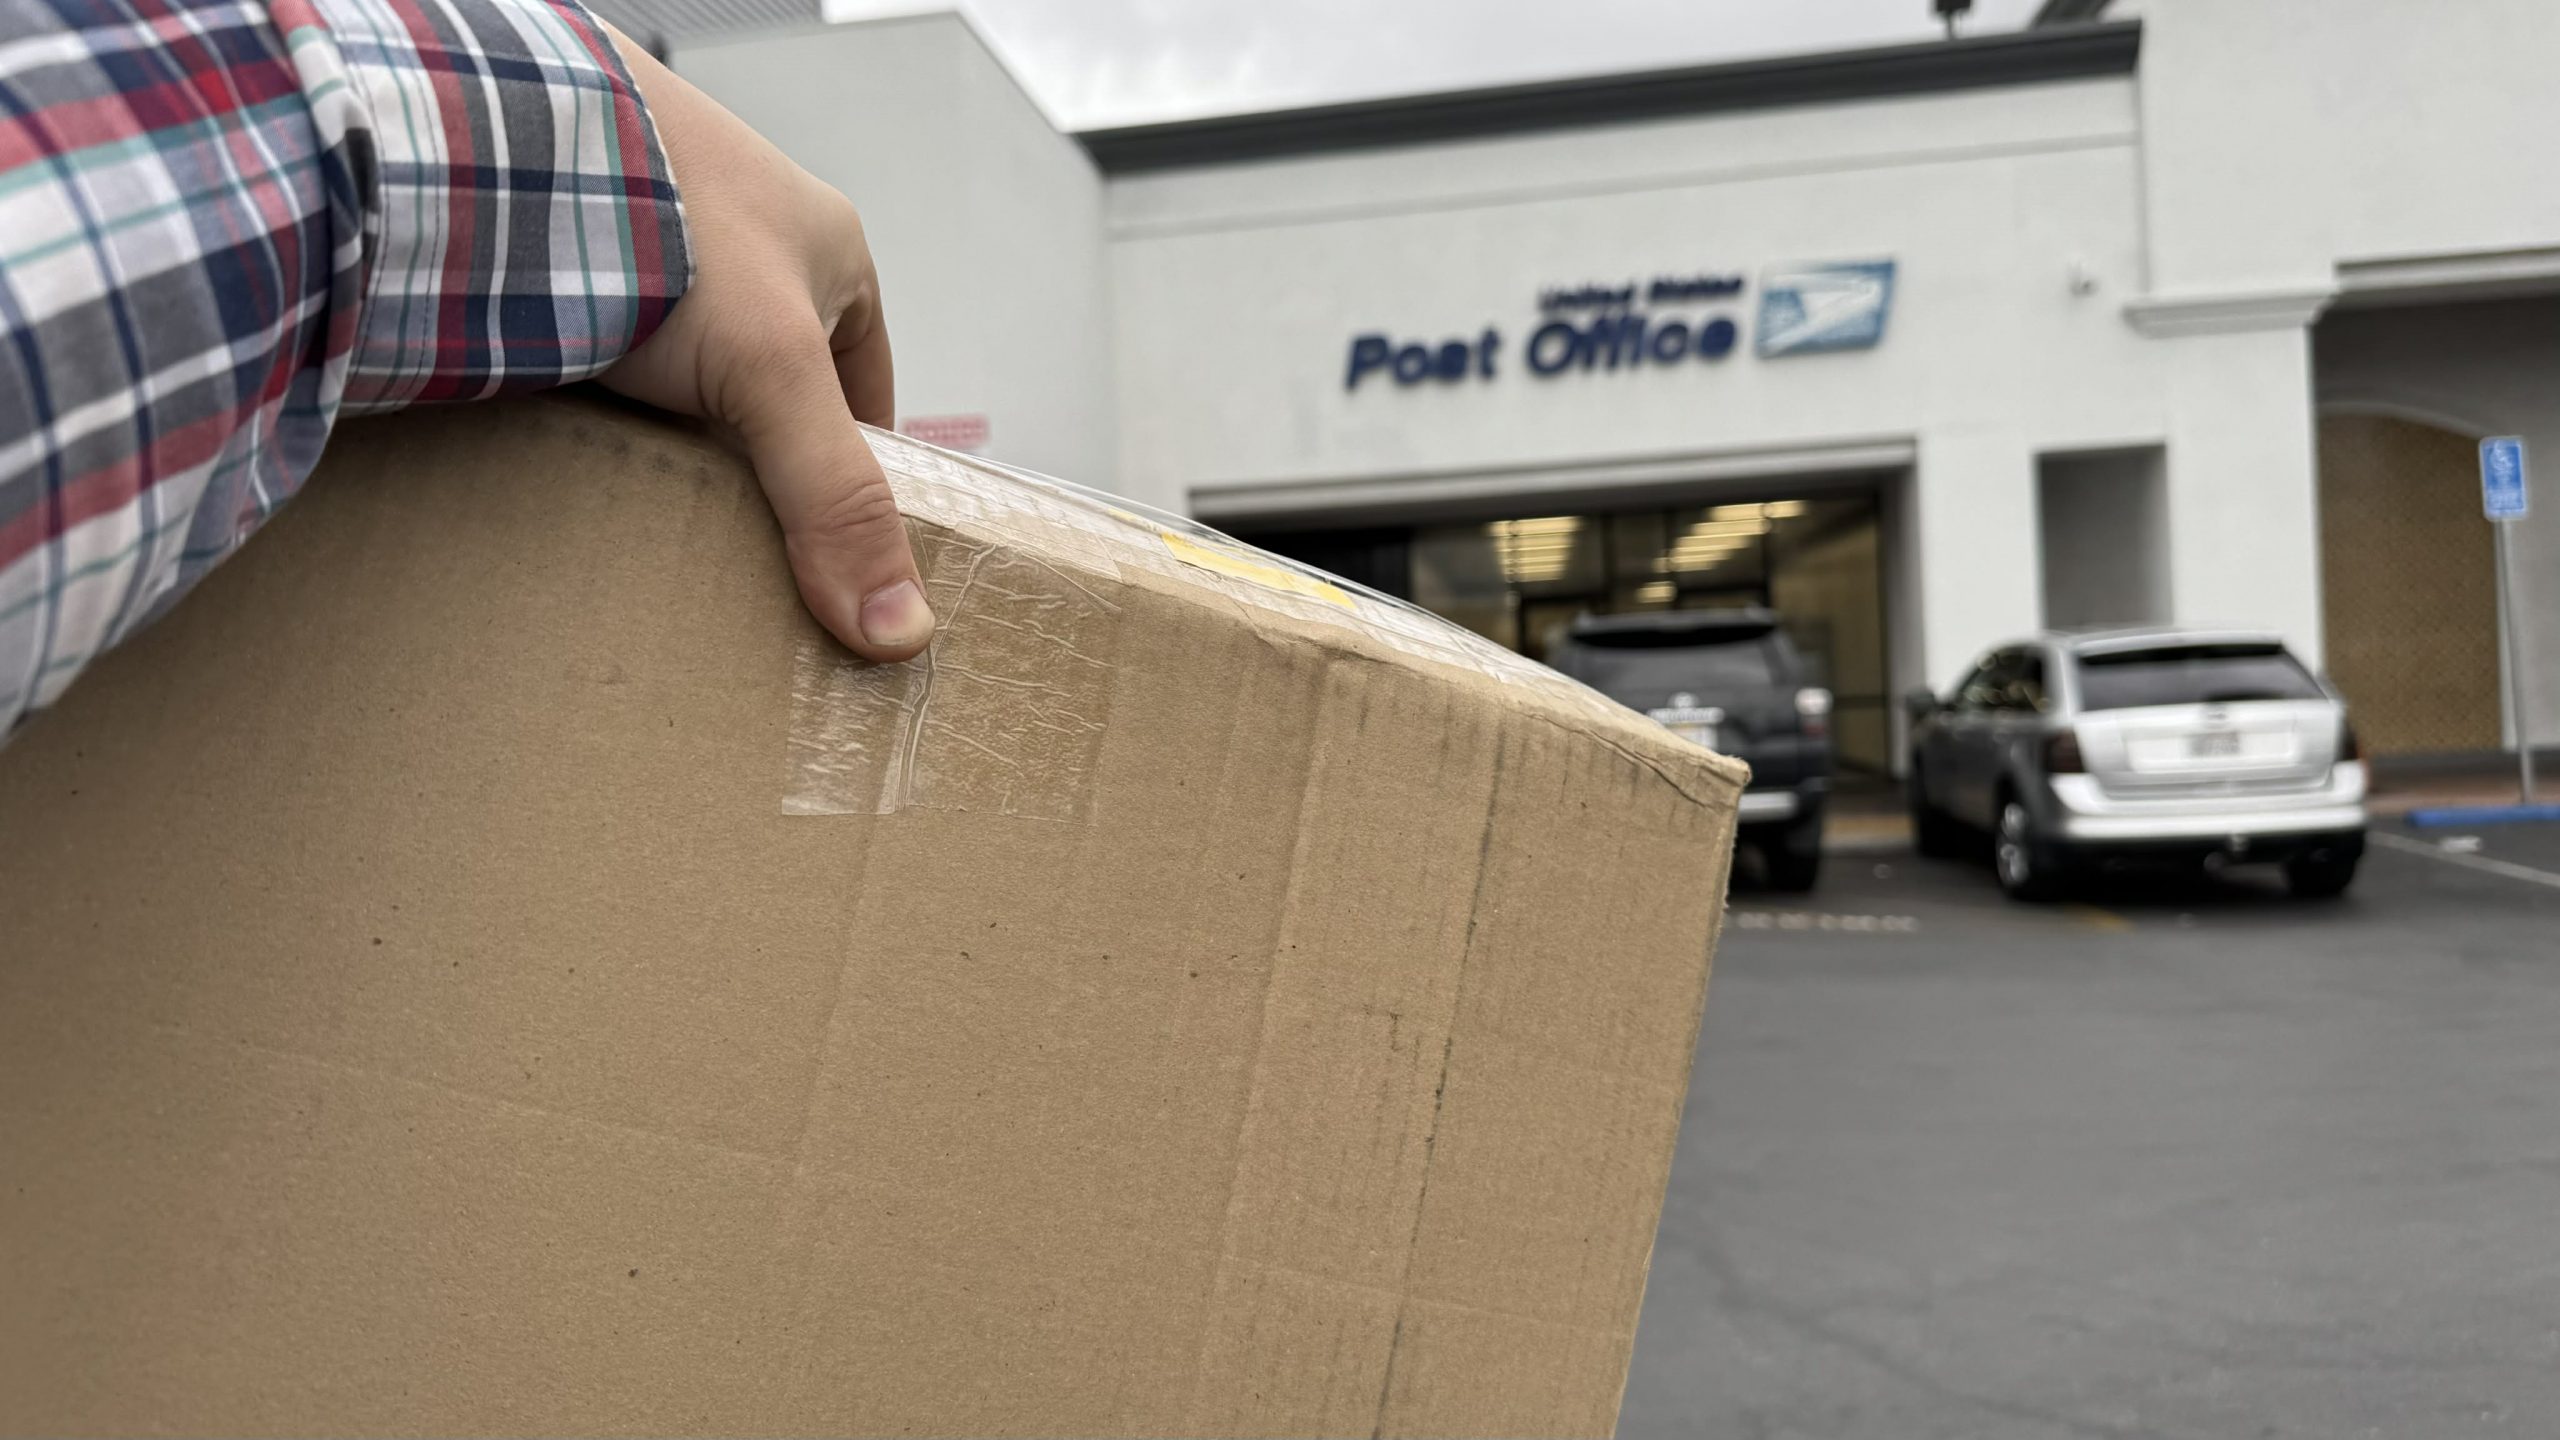
Returning the shocks was easy enough, as eBay Free Returns meant I just brought the box to a USPS store.

New shocks came quickly from Indiana-based Sixity Auto Parts, and now we’re looking good (you’ll see I installed the transmission mounts and engine mounts as well)!:
The shocks mounted with some washers and cotter pins; very simple:
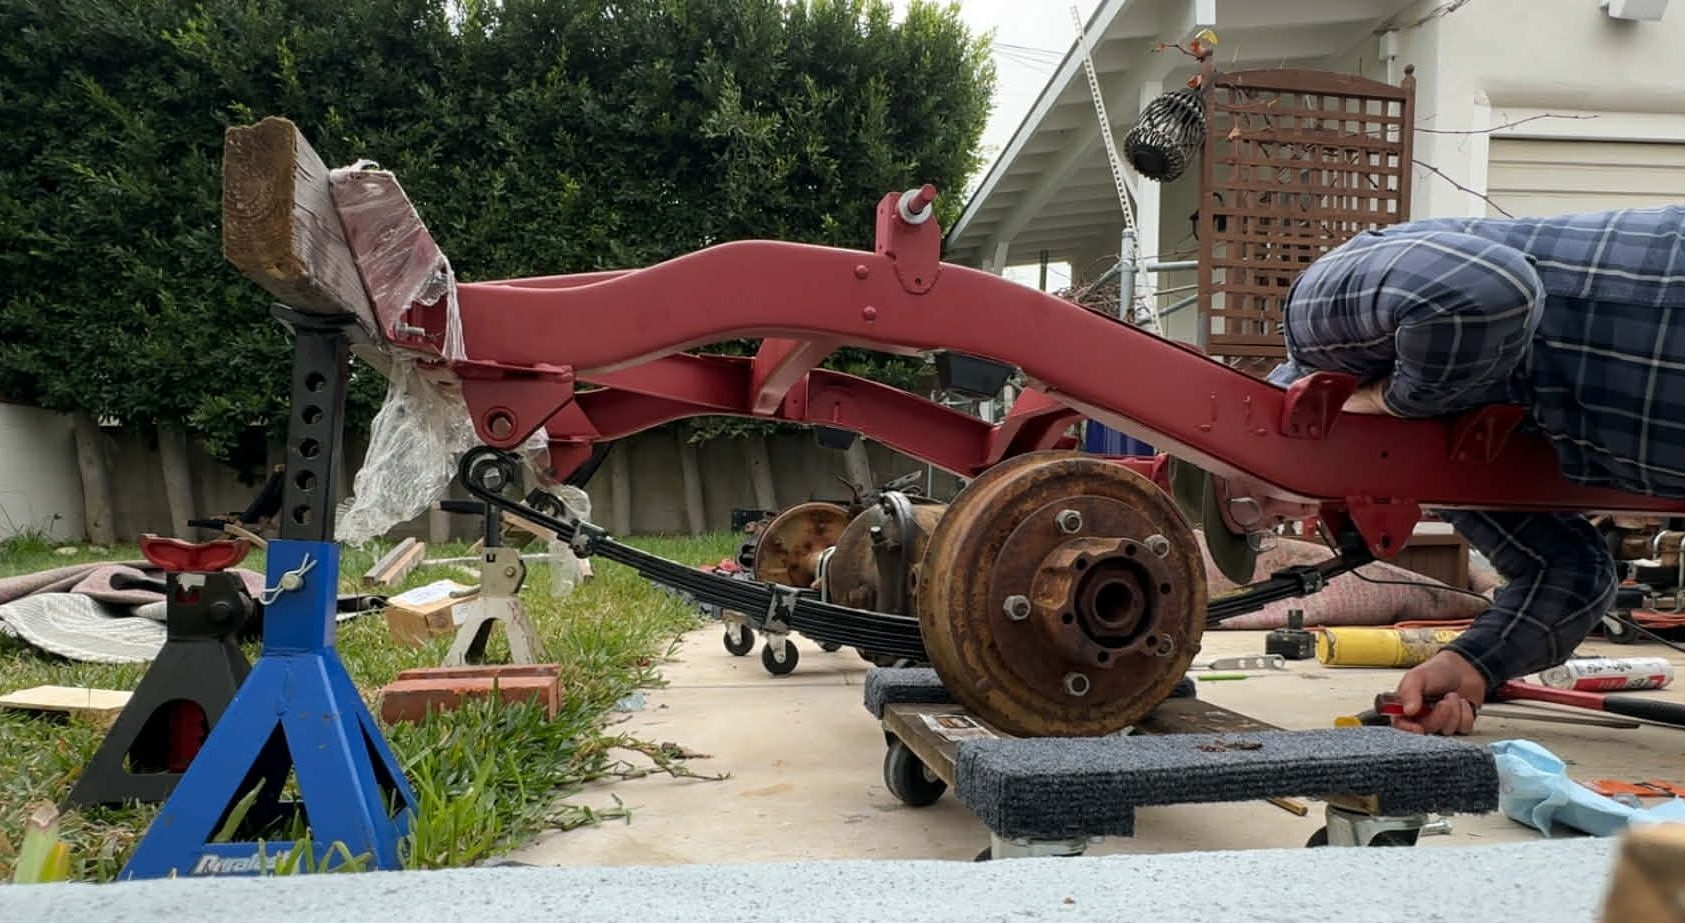
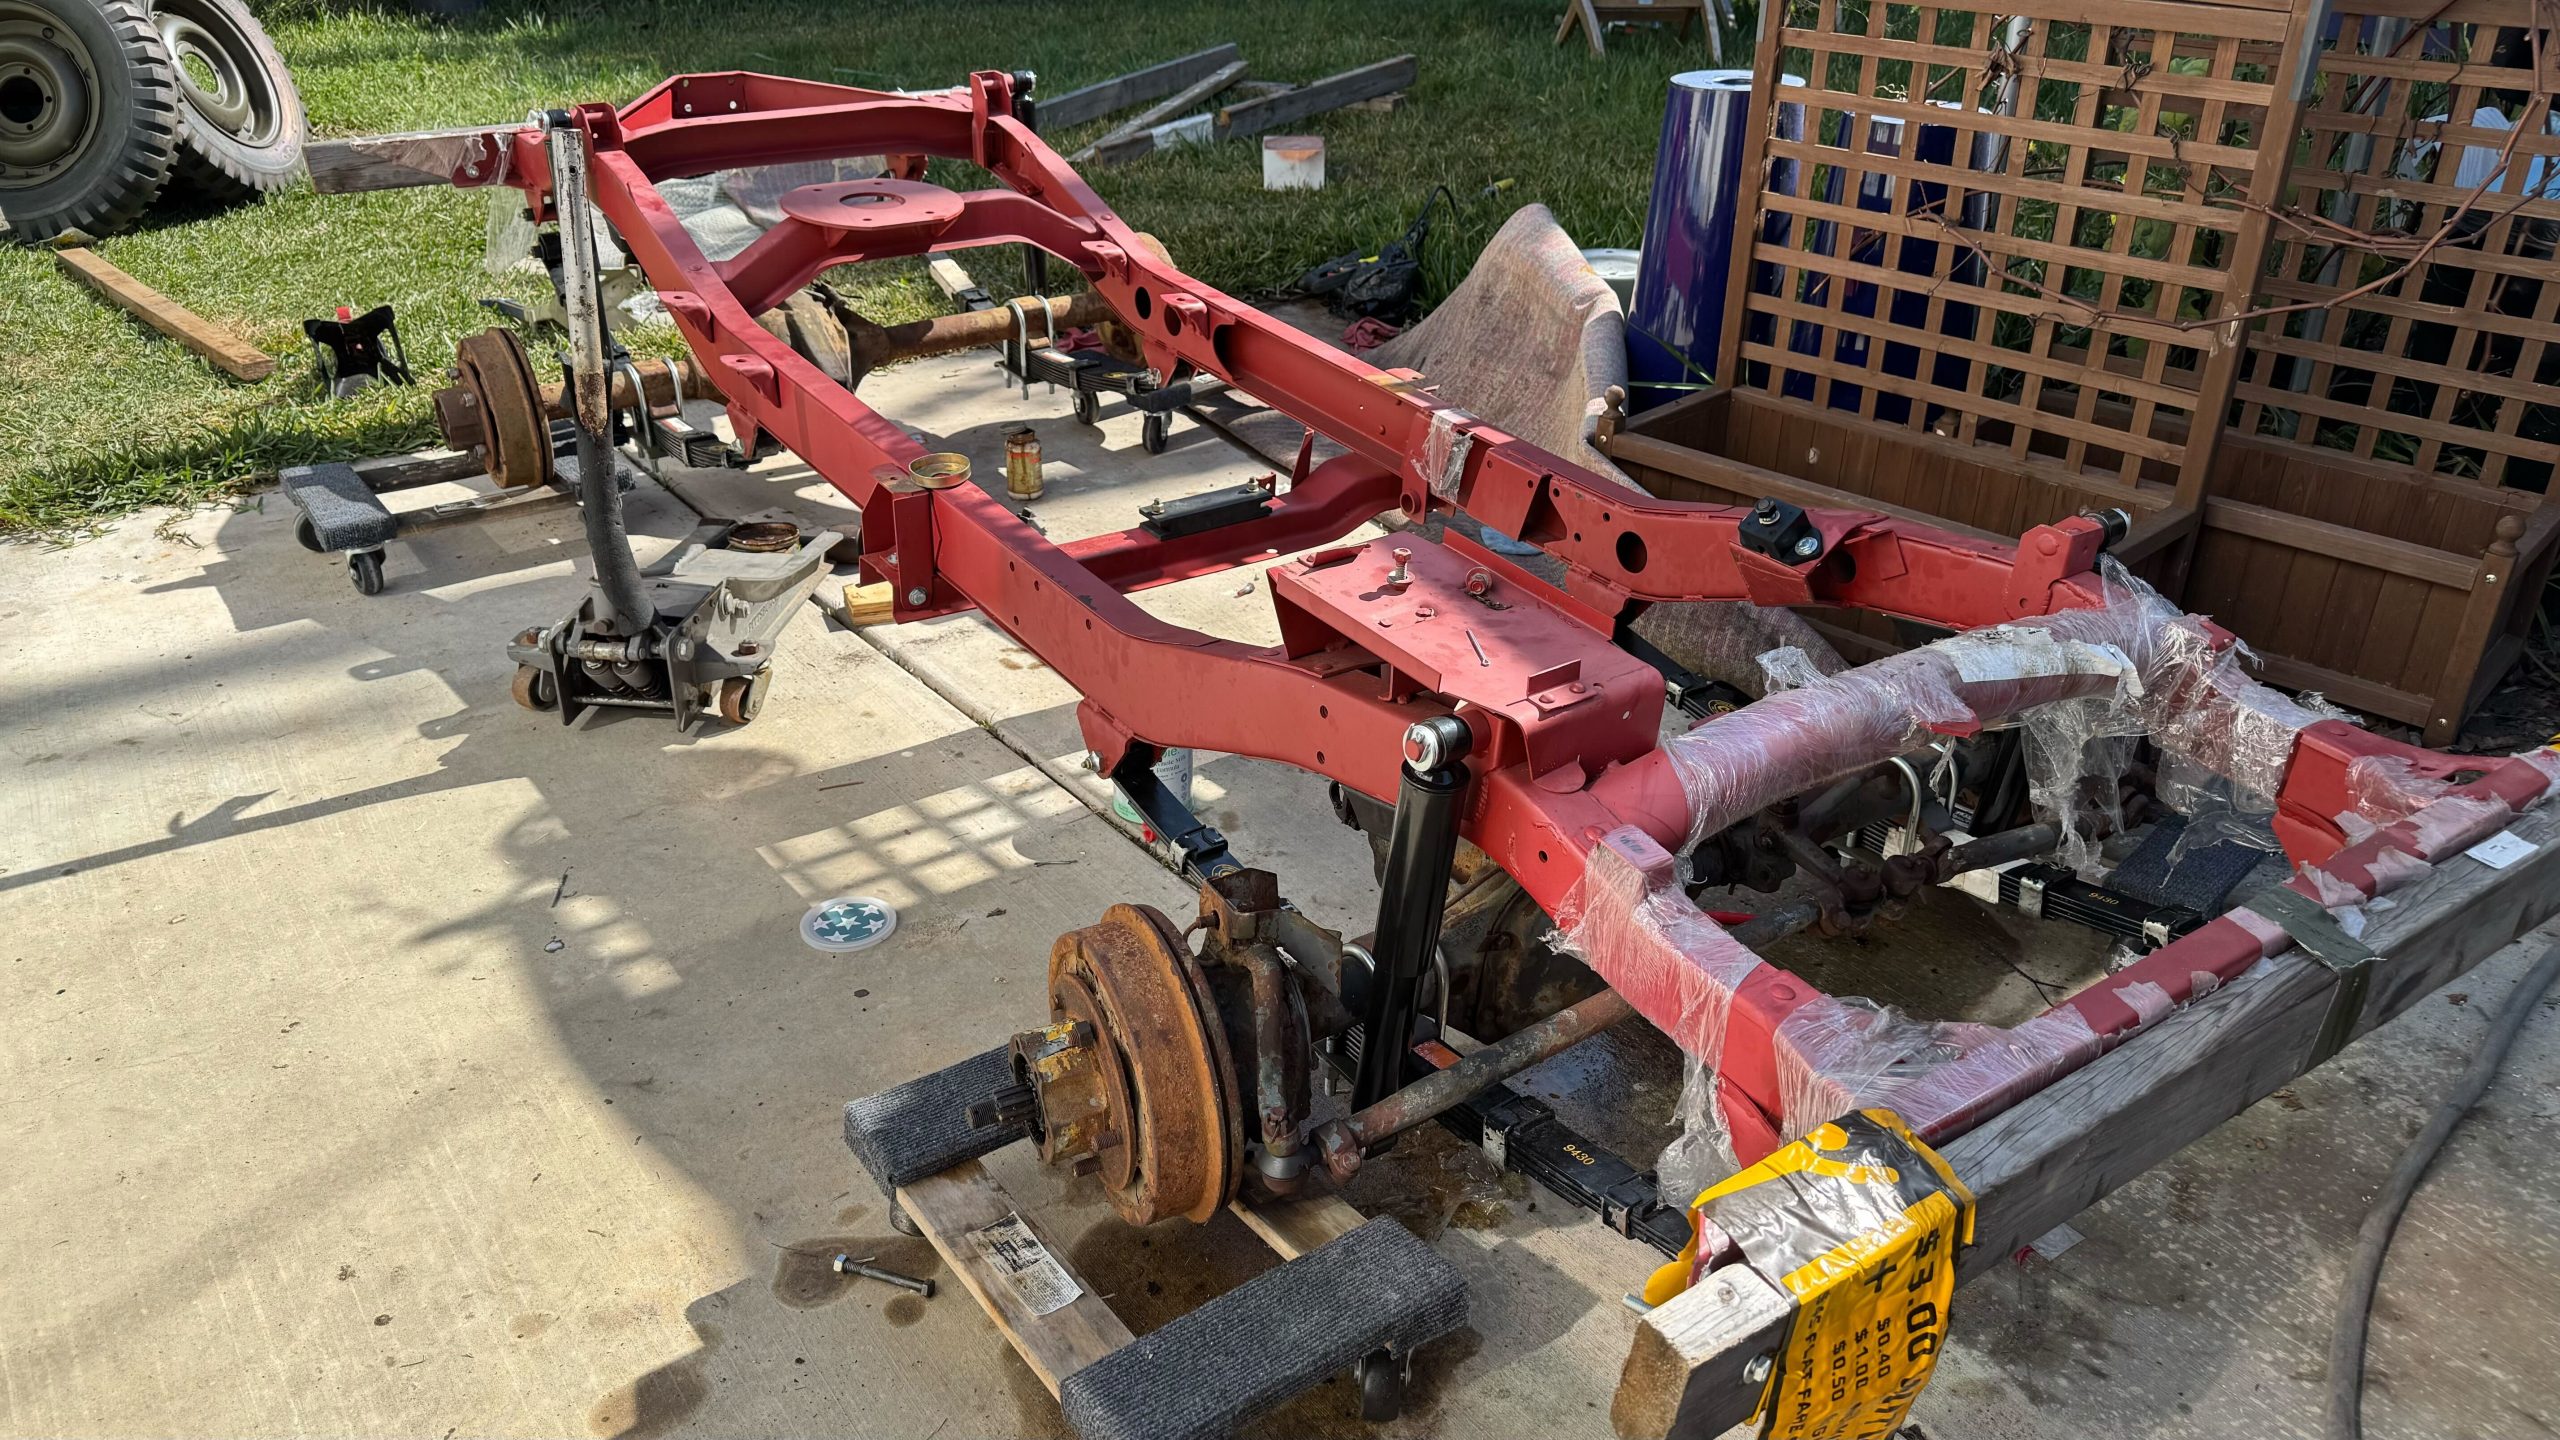
Here’s the front suspension:

And here’s the rear:
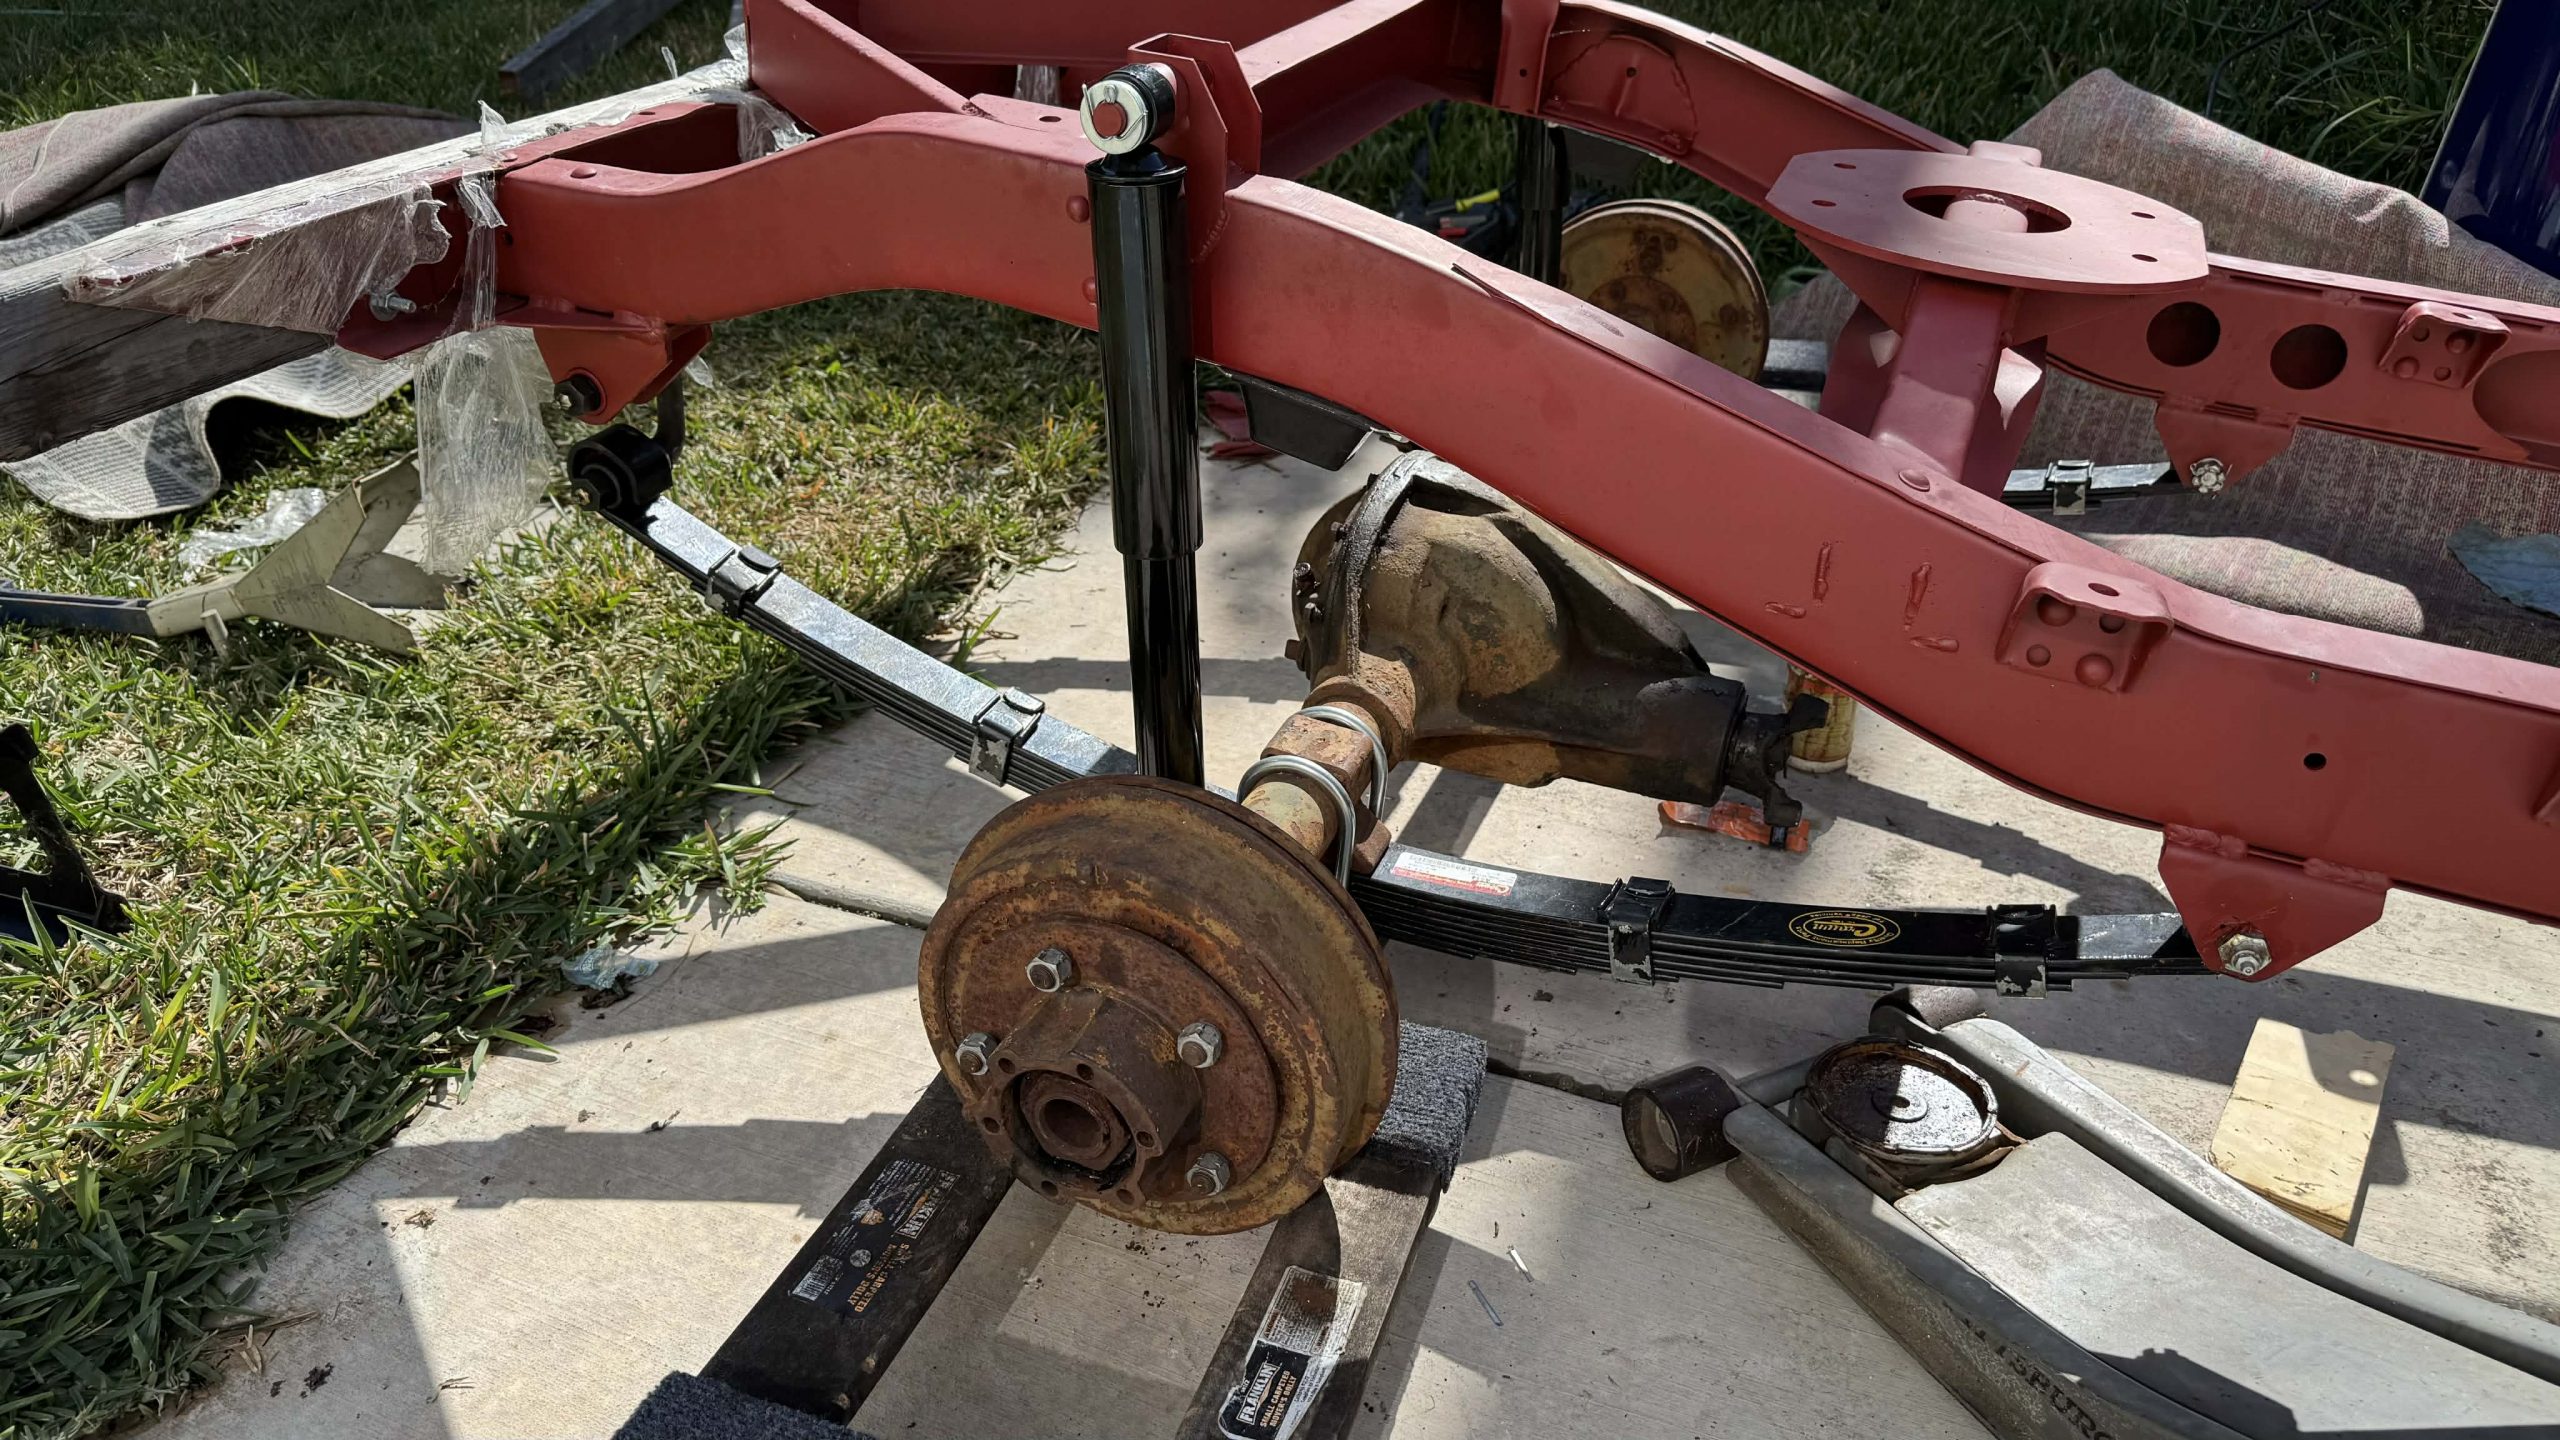
Obviously, my axles are old and grimy, and in an ideal world, I’d have painted them nicely. But this is a different kind of build: A battle against time. I have less than two months to build a whole car, and I’m lucky because WWII Jeeps were just sprayed all over in olive-drab — something I can easily do after the fact.
Even though my articles are quite delayed and I’ve done a lot since writing this (follow our Instagram page for more up-to-date progress!), I still have so much more work to do, but it’s nice having this frame suspended, and I’m thrilled all the parts — from the axle springs to the shocks to the U-Bolts to the shackles to the pivot pins — were all available on eBay for a good price.

After I buttoned up the suspension, I got to rebuilding the transfer case, which I planned to then bolt to my rebuilt transmission. Then the plan was to finish the motor (see piston installation sneak-peek above), bolt it up to the transmission/transfer case, and bolt that whole assembly to the frame. Once that’s done, it will finally feel like I’m getting somewhere. Until then, anxiety prevails.
[Ed note: David mentioned the idea of building a brand new WWII Jeep to the team at eBay, and they loved the idea so much they said, “How can we help?” Their financial support and David’s Jeep-obsession are the fuel behind this crazy build. – MH]


Not to give you any ideas… 😉
https://silodrome.com/warbird-jeep-hot-rod/
Great to see some significant progress! Keep up the good work.
David is awesome, but he confirms something I have long suspected. Chrysler engineering is where you learn to just paint over the rust.
I understand ebay is helping but there are small springs shops out there. We sell springs at my shop and we bend the ubolts in house
So, every few months we get an eBay ad? I can’t get behind the logic of rebuilding an engine, transmission, and xfer case when known good or decent ones can be acquired and would save months of time and effort. Seems like those things could be tackled later. Crossing fingers this plays out the way you want and it would be cool to see, but..
You’re not wrong, but as I’ve commented before, “We did a project in a climate-controlled bay at Galpin using the correct tools and brand new parts” does not make for an interesting story. Auto writers have to make bad decisions because bad decisions make for the best stories.
That’s not what this project is. This project is building a WWII Jeep from scratch, and that means LOTS of effort!
I know this is basically an AD for eBay, but recently I’ve actually gotten into using the site for selling and buying after a long hiatus and it’s surprisingly useful.
Currently rebuilding a old 70’s 2 Stroke outboard and it’s been really easy to find all the parts I need including discontinued manuals on eBay for really reasonable prices.
I’ve also been selling a lot of old parts and electronics at the same time.
I’ll choose eBay > Amazon whenever possible for these types of things.
I’ve been in the same boat. I’d pretty much ignored eBay for a few years, but I’m working on my 1st gen 4Runner and there are just enough parts that are different than the pickup that I need to find the specialist stuff. eBay does tend to have them, new or used, which has been nice.
What kind of build is it? Restoration or off-roader? I grew up in the back seat of an ’85. I couldn’t name a lot of the trails I went on save for the Rubicon and Slick Rock but the memories are there, nonetheless.
Little bit of both. I bought it with a complete 3.4 swap done on it, so now I’m just cleaning it up, basic updates, and making it reliable. I do have sliders and a new skid plate. It already had an ome lift.
85 is the magic year for most people! That’s awesome! I can’t wait to take mine on some trips
Right on! Come to think of it, my uncle’s is an 85 as well. He’s the original owner and he let me drive it through the Rubicon in 2024. 33s with dual cases. My first time off-roading a manual and it was a blast. Good luck with the rest of the build! If you’re local to northern Cal, sign up for the Rubithon!
eBay has been pretty helpful for finding obscure used stock car parts for my car. I was able to find an old Weaver Brothers dry sump pump for about $100, buying new (actually reman) would be at least $650.
I’ve been able to find all sorts of stuff on eBay that I never expected to find. Automotive and otherwise. I’ve found NOS parts for my air-cooled Beetle, upgrades and new/used parts for my Sportwagen, even tools. I even have a soap dish from the last ship built by White Star Line (who built the Titanic) that I stumbled upon by accident. I can get any book I want, usually for only a few dollars if I just want a paperback. In general I prefer to buy used/secondhand things where possible, but it’s hard to find good stuff locally. We have a time capsule 70s house and I’m sure we will be using eBay a lot to find just the right 70s-tastic things we need.
I just looked back at his original project schedule article. I’m getting nervous… “Rolling Chassis on suspension” was listed as… Oct 15th.
Classic DT…
Delmar spit it up on his shoulder.
He’s never ever going to live that down. His headstone will someday read “Husband, father, shower-spaghetti enjoyer”
This is fascinating and satisfies the kibitzer in me. Using a hammer to work on a Jeep? God bless America.
I’m just amazed that the only thing holding those shocks to the frame is a cotter pin that usually costs less than $1.
Love the article. I think David might have kept the axles looking the way they do so he still felt comfortable wrenching on this project!
So much different than Project POStal. 🙂
That made me twitch as well, then I thought about how if those shocks are even expericing ~100 pounds of outward force… still on the order of 1/10th the force needed to shear that cotter pin, David is already in some kind of gravitationally-compelled deep trouble.
The shocks *should* be angled in ever so slightly, so the pins shouldn’t have any load at all.
On an old Beetle, a cotter pin secures a castle nut that holds the brake drum, wheel, and tire onto the rear axle. Reusing that cotter pin is a bad idea. Ask me how I know.
I need to just buy a whole stock of those cotter pins, every time I’ve had to pull a rear drum I realize I need to order more.
I think the shock mounting is great and would love to see more of it. There really shouldn’t be any force in the direction that would shear the pin.
How amazing would it be if this all led to the availability of a financeable, title-able, full-on do-it-yourself crate jeep?
Like say its 10 grand. you put in a $1000 pre-order, company assigns you a vin, you take that to the credit union, get a loan for the other 9k, credit union sends the company the check, and a few days later your jeep shows up in a crate with instructions and an IKEA Allen wrench.
It would be the sickest thing ever.
I applaud the enthusiasm, but no credit union is issuing you a 10k loan on a vehicle that not only doesn’t meet modern safety standards, but that arrives on a crate where you, the user, would need to assemble it.
Maybe not an auto loan but if your credit is good you can get a signature loan and use the money for crack.
Maybe some “Italian-American Businessmen” can provide a small loan…
I promise you, there is at least one credit union that will loan out $7500 for a 2004 Jeep Wrangler with 106,000 miles.
The fact that it has no engine or interior, but a perfect frame, and comes with another Jeep that has a bad frame and a great drivetrain is none of their concern!
Alot more people could pay cash for a -10k$ car than could a 60$k car
You should look into the Caterham Academy in the UK. Not only do you get your crate of U-Build-It car, you also get driver training, a racing license and entry into a race series that’s restricted to novices like yourself.
Financing will likely require something other than the car for collateral. And it’s more than $10k.
Side rant: Do we really need to keep including crappy, throwaway tools with things? I know most people don’t keep a full set of tools, but does it really cost that much to go out and get your own set of halfway decent allen keys?
Although it’s rare that I buy anything from IKEA, and rarer still that I’m using a 2” long Allen head made out of paper clip metal, I do appreciate the gesture.
Where does on buy a decent set of Allen keys that are not the worst of Chineseium?
Eklind is pretty common to find at your local hardware stores. You can get a set of metric & English L-keys from them for 20-25, or upgrade to the ball end L-keys for 30-35. Nothing fancy, but gets the job done, and made in Usa, wherever that is 😉
I’ve also heard good stuff about Bondhus, but I don’t see them as much.
Honestly I’ve gotten as much mileage out of my Pittsburgh allen set as I have the Bondhus set I have at work. I work in semiconductor and just about every fastener is allen.
Maybe this was discussed at the onset of the project, but I’d be curious to know, when the dust settles and you have a “New” WWII Jeep in your driveway… what would it’s value be relative to what it cost to build it, and relative to other “real” examples?
He says he’s keeping careful track of the costs, so I expect to see a wrap-up article that tells us what it cost, if not market value.
It’s happening!!!
This project has been really fun to watch; I can’t wait for the next update!
I built a Crosley station wagon from a pile of parts. My experience is the project was slow-fast-slow.
Slow to start while gathering and sorting parts, cleaning and painting, and getting subassemblies ready.
Fast once all the thingmabobbies start bolting to the frame and pretty soon you have a running, driving chassis – maybe even with a painted body shell bolted to it.
Then slow again as you get into the minutiae of wiring, trim, upholstery, gauges, body fit, and final painting.
Looks like you’re phasing into the fast part. Enjoy! And don’t be discouraged when things bog down a bit again. By then you’ll be able to drive the Jeep around a bit even if it still needs work around the edges.
Huh, I’m curious why they have that u-shaped shackle for the rears of the leafs. The front bushings slot directly into the channel on the frame; why would they not do the same for the rear? Were they using an existing frame design they modified for different axles/leafs? The shackle design definitely seems like it would allow more movement so maybe that was the goal.
To allow elongation/ flattening of the leaf spring.
Ain’t got no spring without that swing.
Leaf springs get slightly longer between eyes/centers as they compress. The C shaped shackle will swing a good few degrees between Jeep-on-the-ground and Jeep-in-the-air. Same for other leaf spring vehicles and trailer chassis.
If you peek under a tandem axle trailer with leaf springs, they’re all connected by what I call jiggly bars because all 2 or 3 axles need to be able to independently compress, so one end of each spring is basically floating and the center axle in a 3-axle might be entirely floating.
Watch one go over a bump or pothole on the highway and the wheel spacing just kinda flutters everywhere for a second
Bravo!
However, the real question is this:
Now that you’re *so* much closer to Moab than you were in Michigan, are you gonna:
A) 45 mph that thing all the way there like Kelly’s Heroes?
or
2) do the smart thing and trailer it most/all of the way like a sane person?
I know which one I’m voting for 🙂
Godspeed, dude.
Dr. Buford, the GOAT!
I want to drive it; but at this point, I an so locked in on getting it running/driving, I can’t even imagine planning that far out. There are too many fires to put out at the moment!
Worst case, you have a writer who has proven she’ll drive anything anywhere for any reason! 😀
TOW IT WITH THE CROSSCAB
Jatco Xtronic would approve.
Huh, I wonder who that is!
Something about seeing the word CHINA so prominently on that hammer made me chuckle.
A needle scaler would make clean axles in a couple of hours. Then some primer and paint, ready to roll!
Nothing much more satisfying than descaling heavy metal.
Of the dozen or so times I’ve tried to use a needle scaler, I’ve been disappointed by the outcome every time. Either not removing enough, or damaging the underlying metal, or just being too damn slow.
I’d rather just buy a blaster and a bag of media and have at it. Or you can probably find a Mennonite that will blast it and powdercoat or paint it for less than the price of buying any of those tools
A dedicated needle scaler (not an adapter for an air hammer) runs under $100 CAD.
You gotta remember not to hold it tight to the piece.
We use them every week when descaling bus parts that don’t fit in the roto blaster. 10/10 every time.
I like the dry ice blasters. I’m sure there are any number of mobile businesses in LA that would work on cleaning up the axles.
Ever used a fluidized bed boiler? Certainly not as versatile, but boy, those things will remove almost anything.
You’ve all seen those videos of lasers removing rust, right? I have actually used one. It IS magic, and it really works. The machine is just $10000, so affordable, right? I had to look up the mechanism of how it works. The relatively loose flakes are turned into plasma when hit by the high power laser.
I hope you build this once to meet your deadline, then rebuild it a more proper way. I’m not an engineer, but I’m a little concerned about using ordinary flat washers as spacers for the leaf springs. And that’s just one example of doing things the expedient way and not the proper way.
Given that they were designed to be flat packed and assembled in situ with hand tools, I’m gonna take a wild guess that it’d probably be fine without the washers even being there.
Precision is the enemy of speed and serviceability. Good enough is all we’re after.
If only modern Stellantis and Ford were able to achieve good enough.
This is why I recently bought a 2000 excursion. The glory days of cost effective engineering.
There will be no need to rebuild it, because I’m building this the proper way the first time.
No, it’s not going to be perfectly painted initially because of my time constraints (I get that we all want it to be in mint condition OD-green right out of the gate, but that’s unlikely for a recent dad/EIC working in a driveway on a time constraint), but I’m making the concessions in all the right places. I’m following all the U.S.-Army handbooks, and using dial indicators, feeler gauges, plasti-gauges, micrometers, calipers, and more to make sure this gearbox and transfer-case are PERFECT, and this motor fires up and lasts a longggg time.
Transfer case end play? Checked and shimmed appropriately. Engine piston ring gap? Checked. Engine crankshaft endplay? Dial-indicated and shimmed appropriately. Steering box endplay? Checked and shimmed. And on and on.
This stuff takes a WHILE, which is why I’m focusing on it over painting some axles or worrying about leaf spring washers that are simply a non-issue. No shortcuts are being taken on the powertrain, and by the end of it, I’m basically just going to have to pretty the otherwise mechanically-solid Jeep up.
I’m curious, do your manuals include torques?
What was the torque on the leaf spring bolts and on the thread cutting shackles.
I think both were around 50 lb-ft. If I don’t have them in the manuals, they’re all online. Lots of great resources for a WWII Jeep.
If you want it realistic, don’t fuss too much about the paint. My Dad worked at Jeep during WWII, I remember him telling me how the Army would actually repaint the Jeeps in the out of doors because the factory olive drab was too shiny.
They probably came from the factory with flat washers as shims.
If I had to guess, a modern zinc/galvie flat washer is probably better than anything they used as a spacer back then…
AKA a regular DT Jeep build
Fair.
On one hand, those suspension mounting tabs on the frame look surprisingly beefy.
OTOH, given the intended purpose of the Jeep I shouldn’t be surprised. 🙂
Maybe you can find an inexpensive media blaster rig on eBay and clean up the axles when you get back.
Definitely enjoying this build. It also dawned on me that the best thing about building a car from scratch is that if something goes wrong, you can easily pinpoint whose fault it is.
I swear, someone else must have come in here last night and screwed around with my build!
Dammit, people need to keep their grubby hands off my stuff!
This is exactly the kind of thing I want to do when I retire. You get to get paid for doing it as part of your job!
Life is strange, but you’ve obviously made some great life choices along the way. Kudos!
Very interesting! I had no idea about the shackles or the pivot pins, and that’s an interesting way to retain the shocks, I always assumed it was bolts like anything else.
I’m kind of over wrenching on junk, but this project looks very satisfying – bolting mostly new parts up to a new frame with new hardware must be like assembling a 1:1 model kit. I could see myself doing this if I had the space and money.
I get that you’re in a time crunch, but personally I’d have at least wire brushed and painted the axles. You won’t be able to do as good a job once it’s assembled. I also find that kind of work satisfying.
This is triggering some obsessive-compulsive urges for me, too. If I lived closer to LA, I’d ask David to volunteer to scrape, sand and paint the old parts. I’m not a very good painter, put I can scrape, sand and wire-brush with great patience.
Yay! Dave “Last Minute Finish” Tracy is back!
He’s gonna lose the shop!