
If you want to install a tire on a modern car, you have a few options: 1. You use a special machine that hydraulically detaches the tire’s beads from the wheel, and then rotates the tire to yank the rubber from the rim. Or 2. You can use a mechanical tool involving a lever and a whole lot of grunting. Even if you get the tire off, if you find the wheel is damaged or rusty, you can gob a bunch of sealant on there, but the tire is likely going to leak. The WWII Jeep, though, doesn’t have these problems. Not only does its “Combat Wheel” make dismounting/installing tires extremely easy, but the design means the wheel can take an absolute beating without getting a flat.
Before I get into the genius of the WWII Jeep’s “Combat Wheel” design, let’s first look at how a modern car tire seals up. The bead on the rubber tire mates up with the smooth rim to create an airtight seal. The pressure from inside the tire helps keep that tire from de-beading, and thus ensures no leakage.
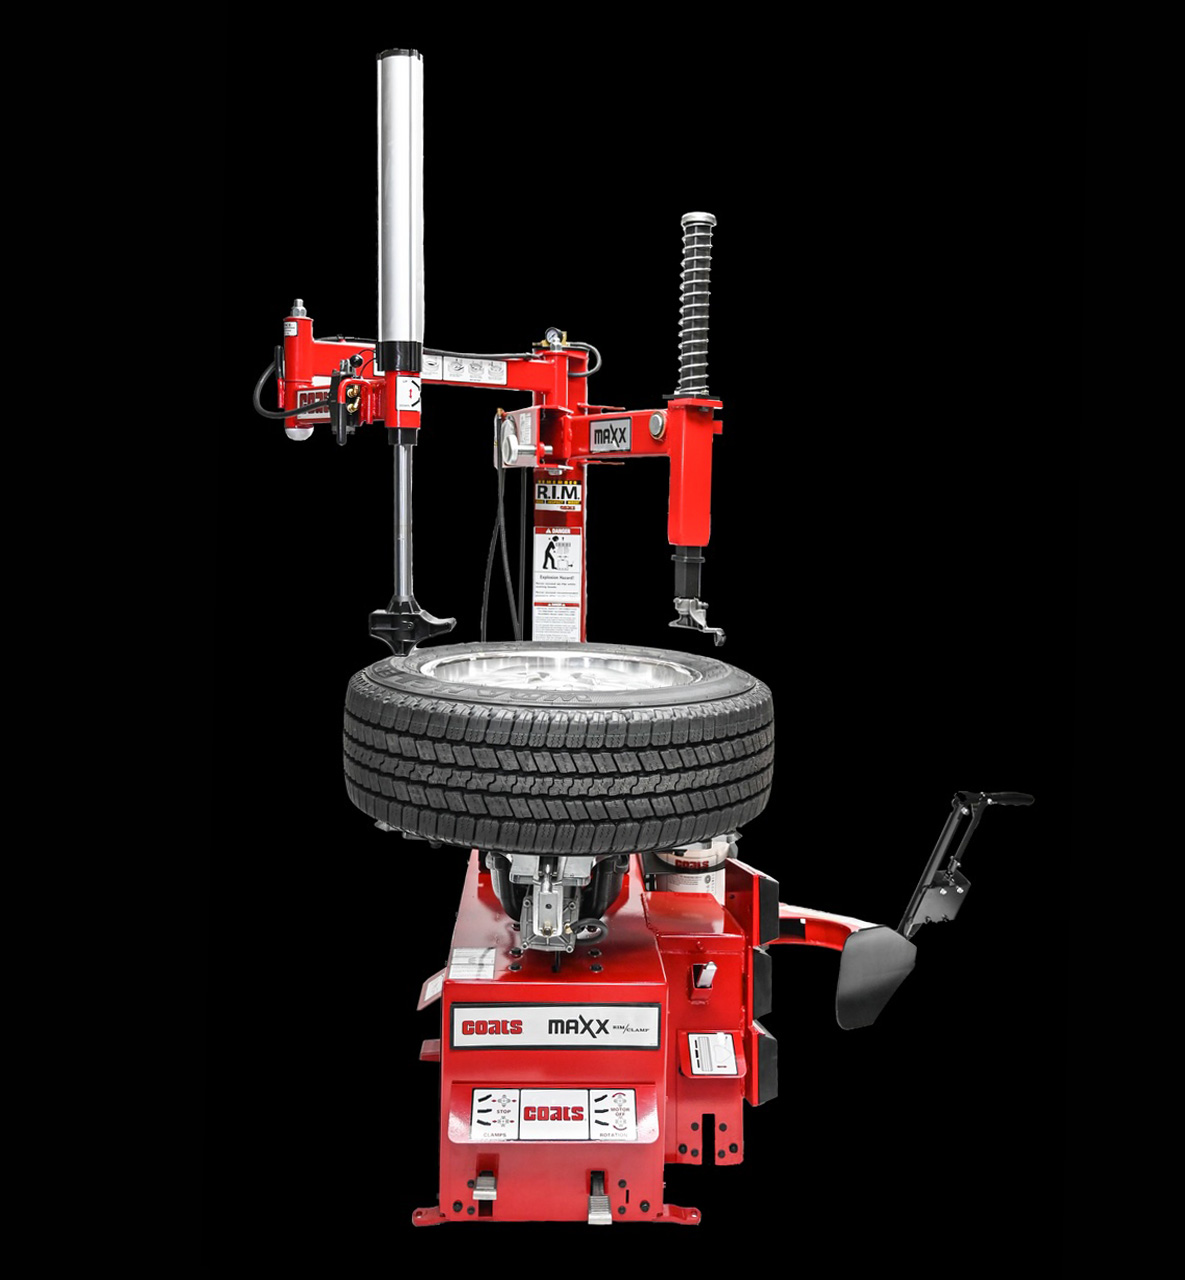
To install a tire, you have to first pry the tire onto the rim itself, a job that often takes a machine that looks like this:
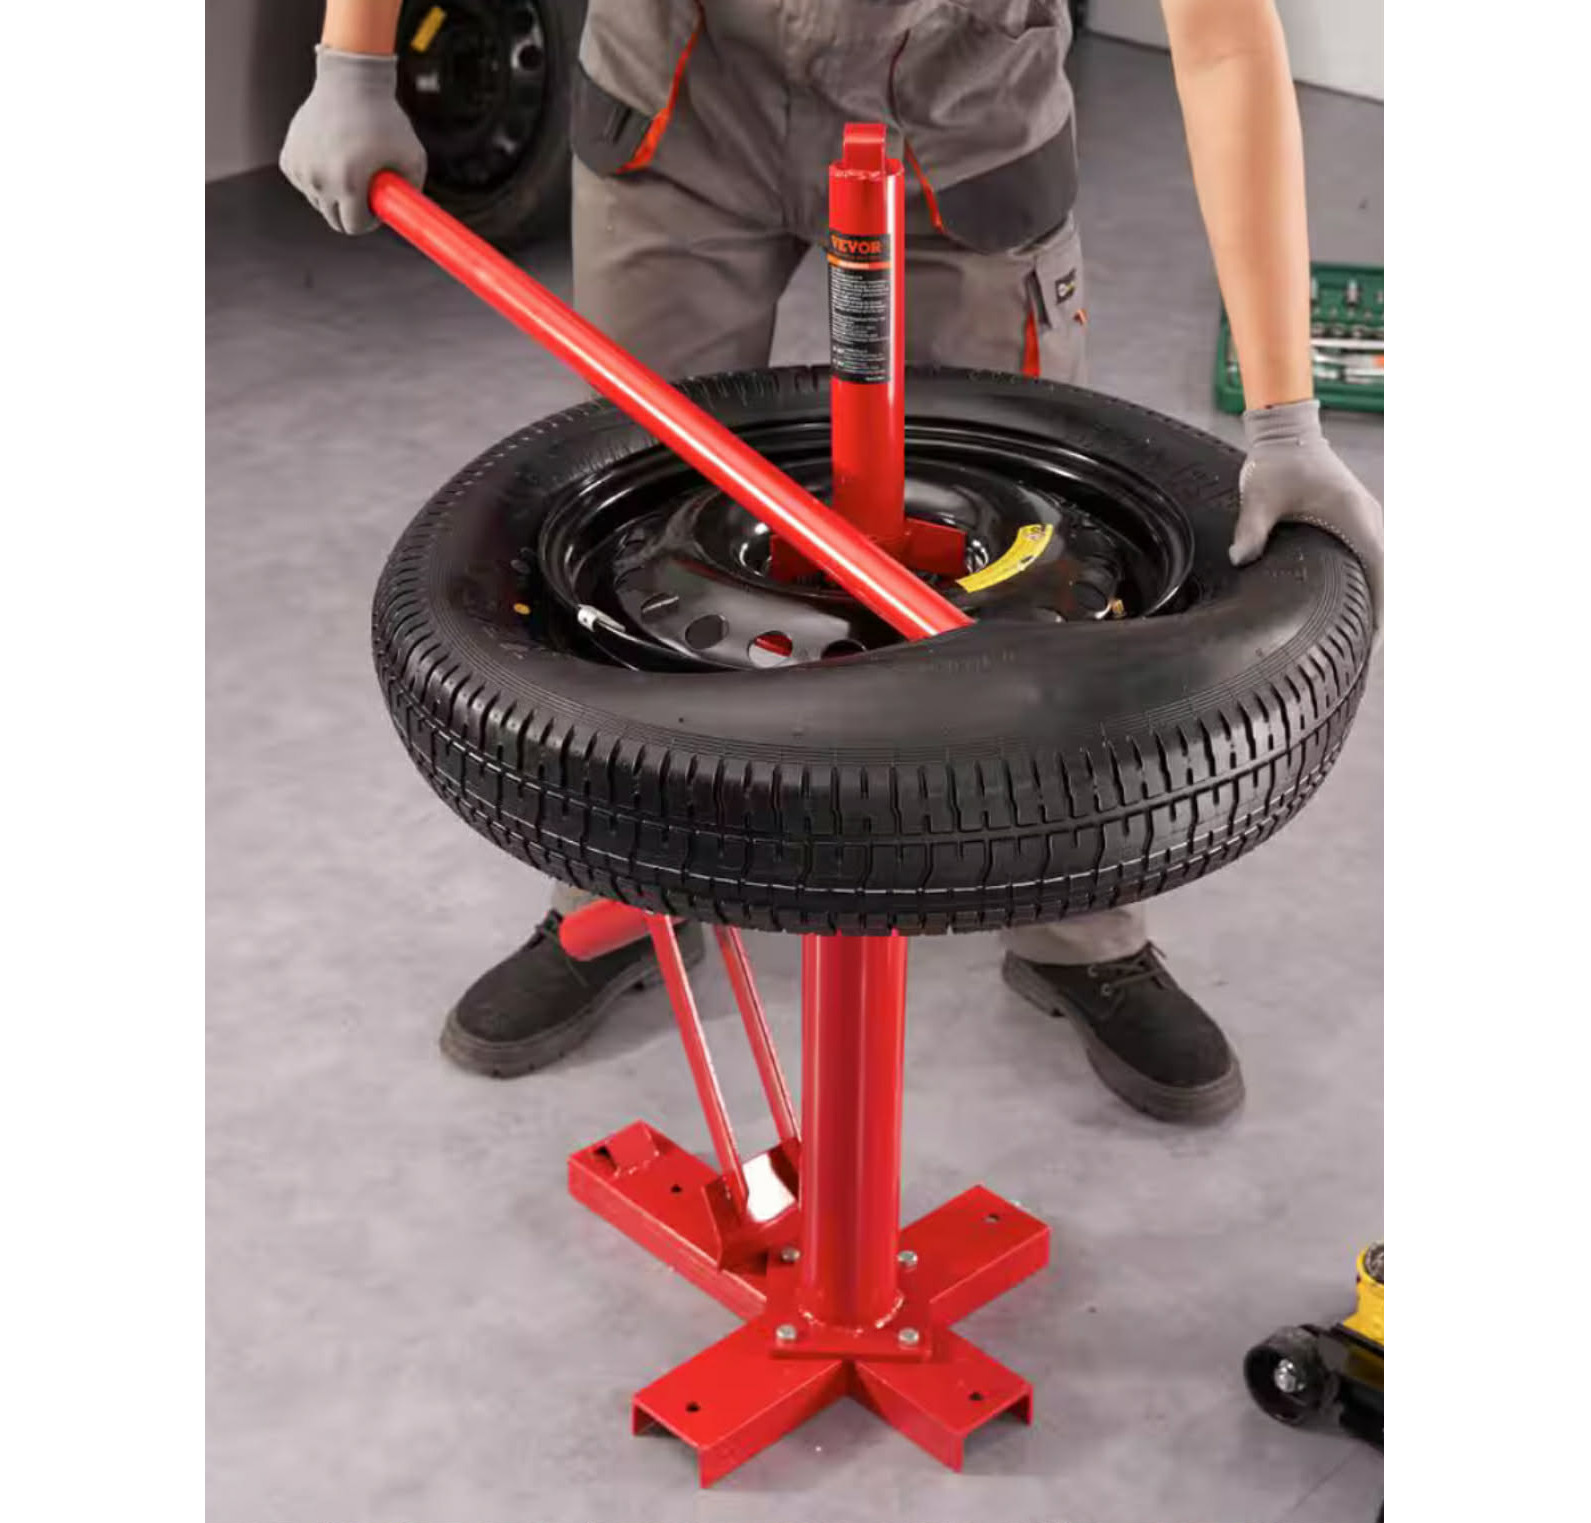
Or one could use this more primitive prying device:
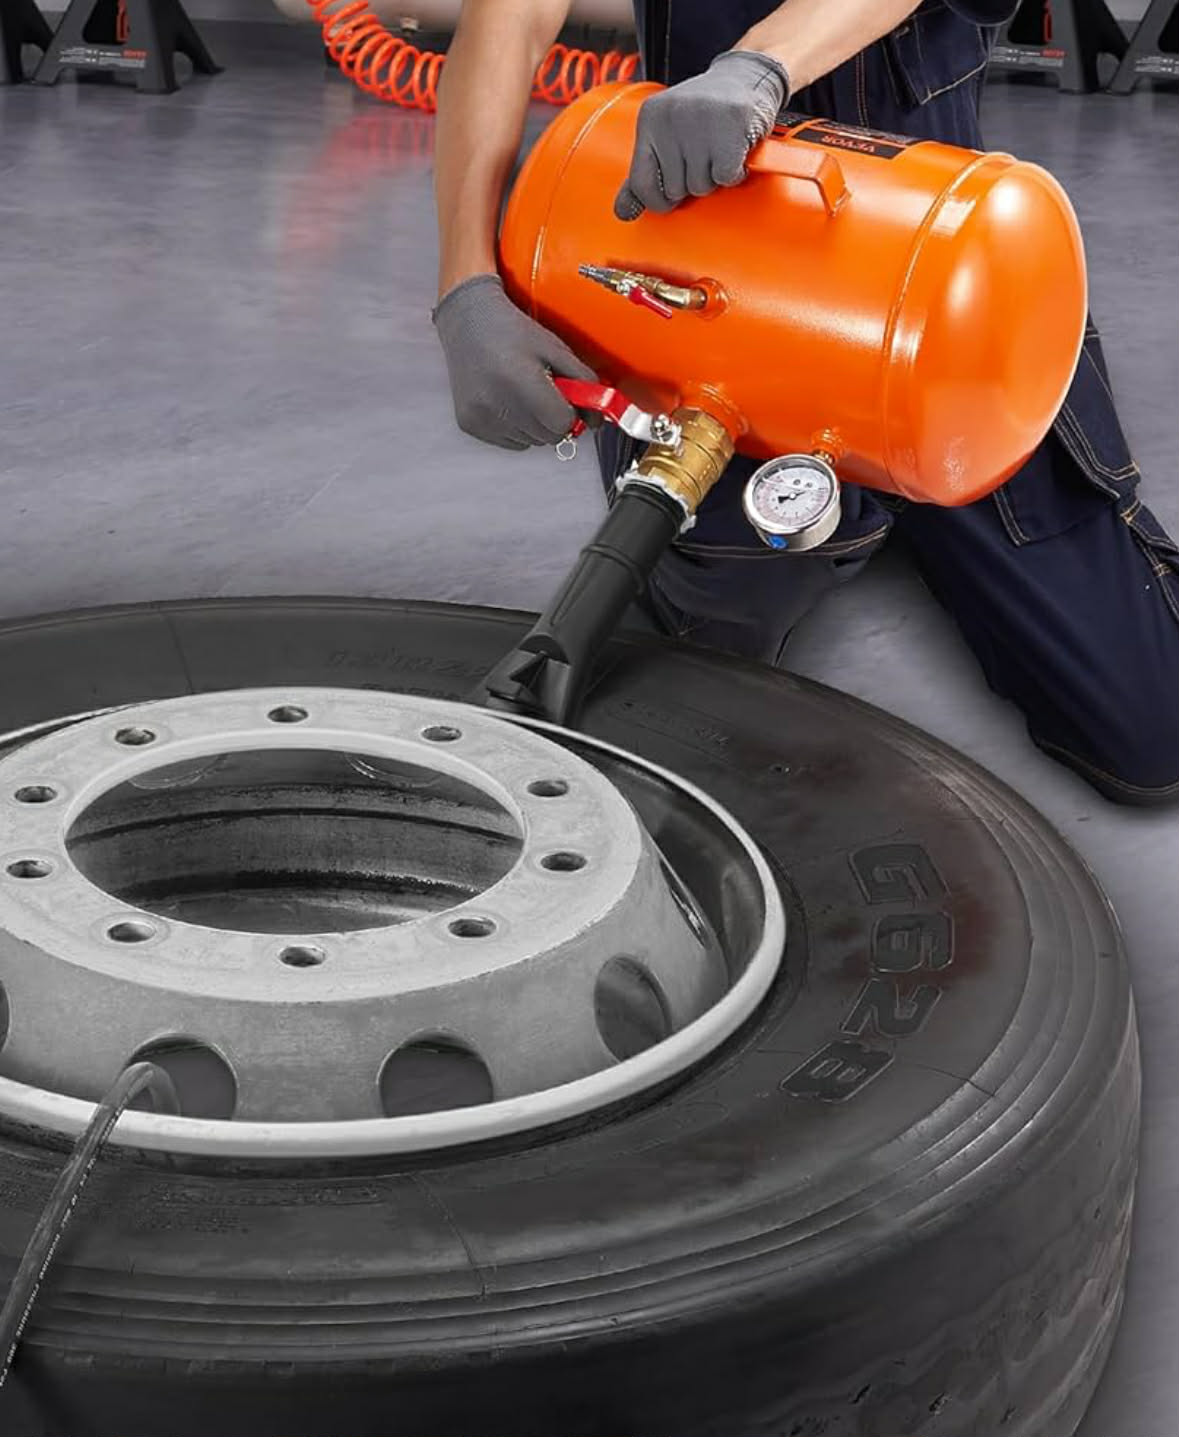
Even when the tire is on the rim, setting the bead is not trivial, and usually involves either a bead blaster that uses compressed air to “balloon” the tire into place in order to set the bead, or — in a pinch — one can spray a flammable atomized liquid into the tire and then light mixture to essentially “explode” the tire into place.
Here’s a look at a bead-blaster:
And here’s video of the more “backwoods” method involving the tire going ka-boom!:
The World War II Jeep, though, did not have to employ such tool-intensive methods to get tires on and off of vehicles, and while some of the vehicle’s genius has to do with the fact that cars in the 1940s almost all used inner tubes, it’s the split rim that really makes the World War II Jeep’s “Combat Wheels” so brilliant.
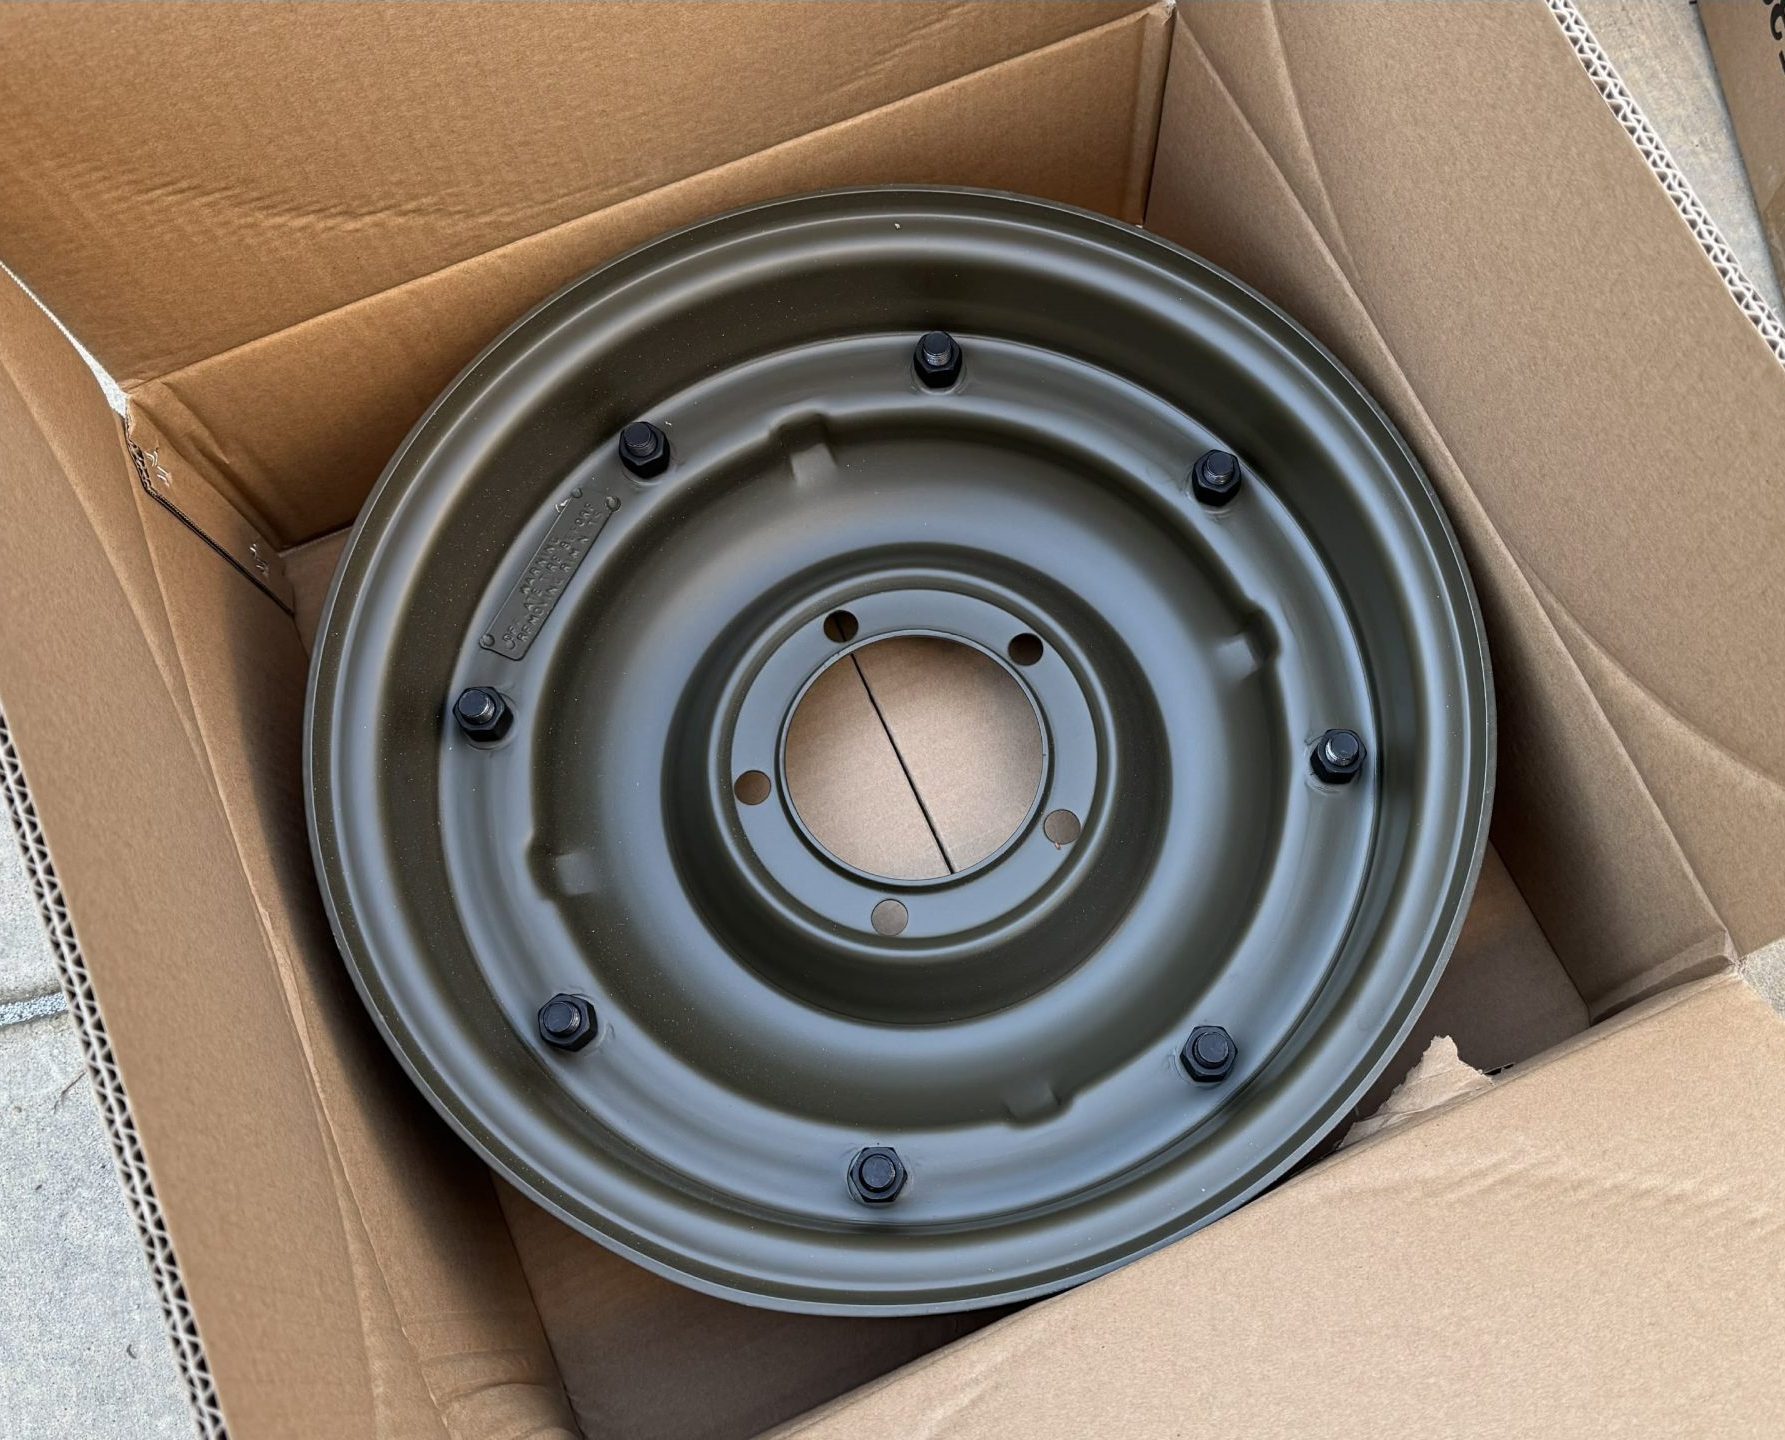
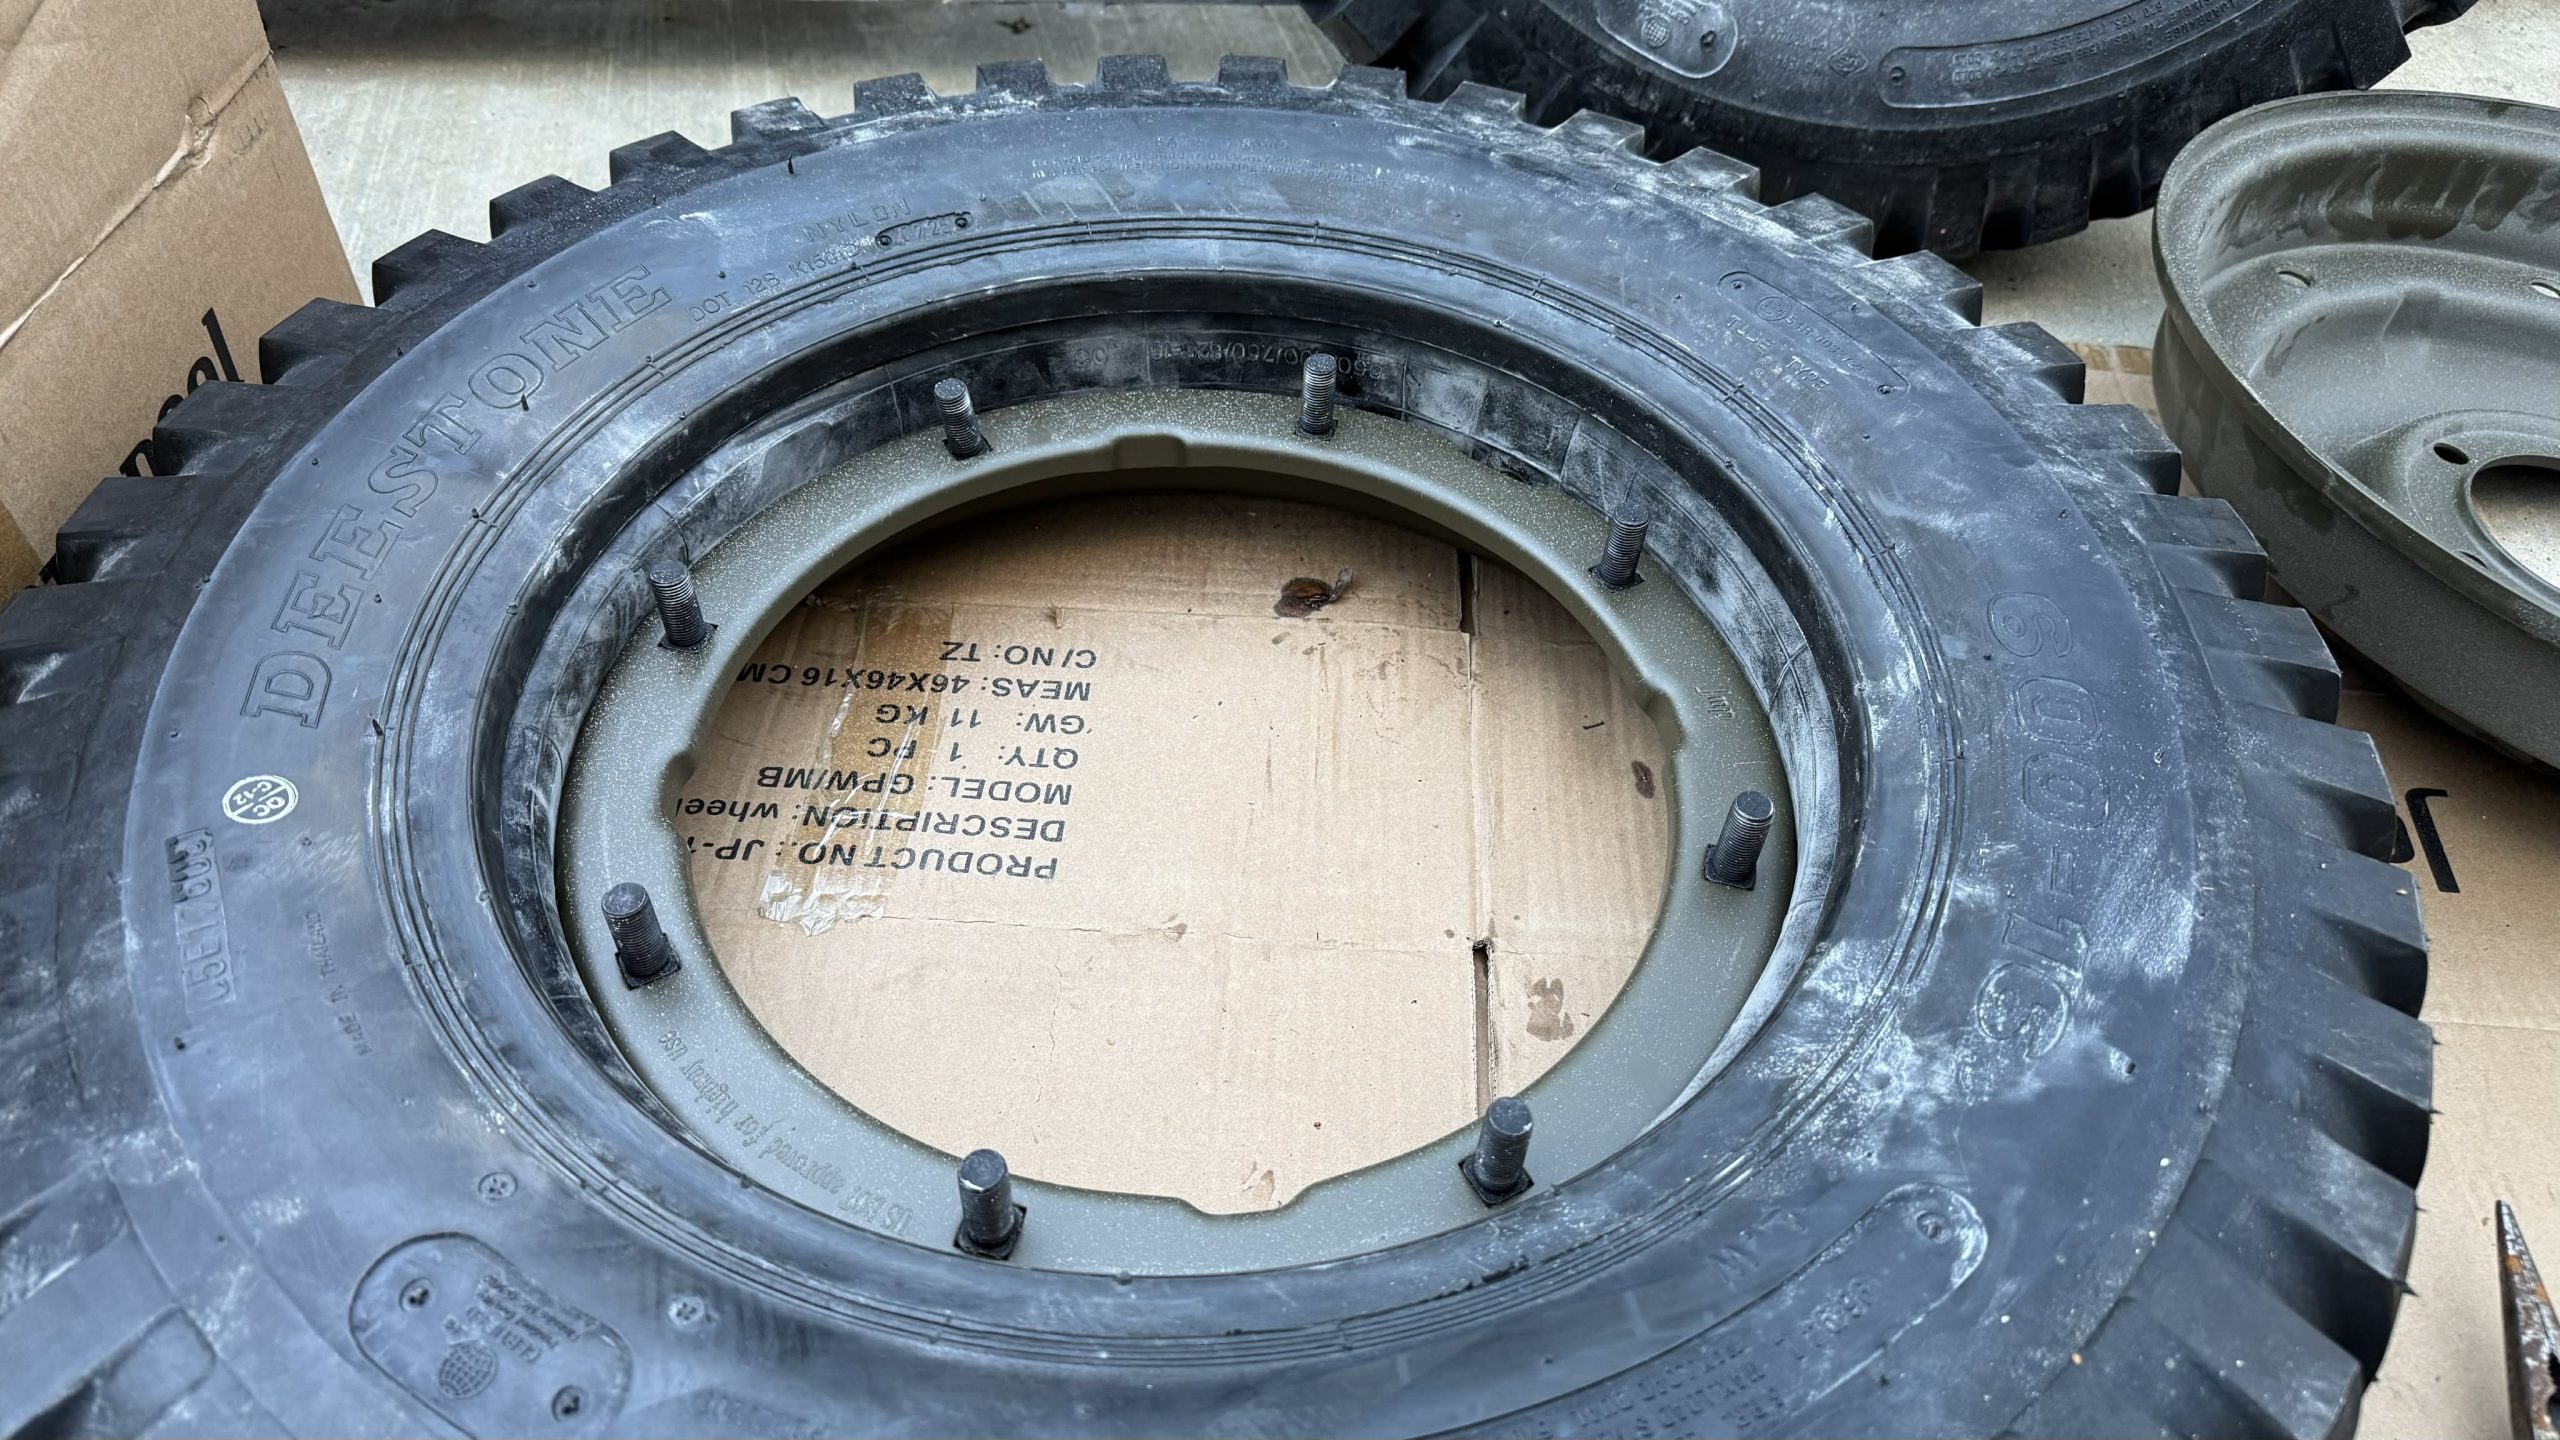
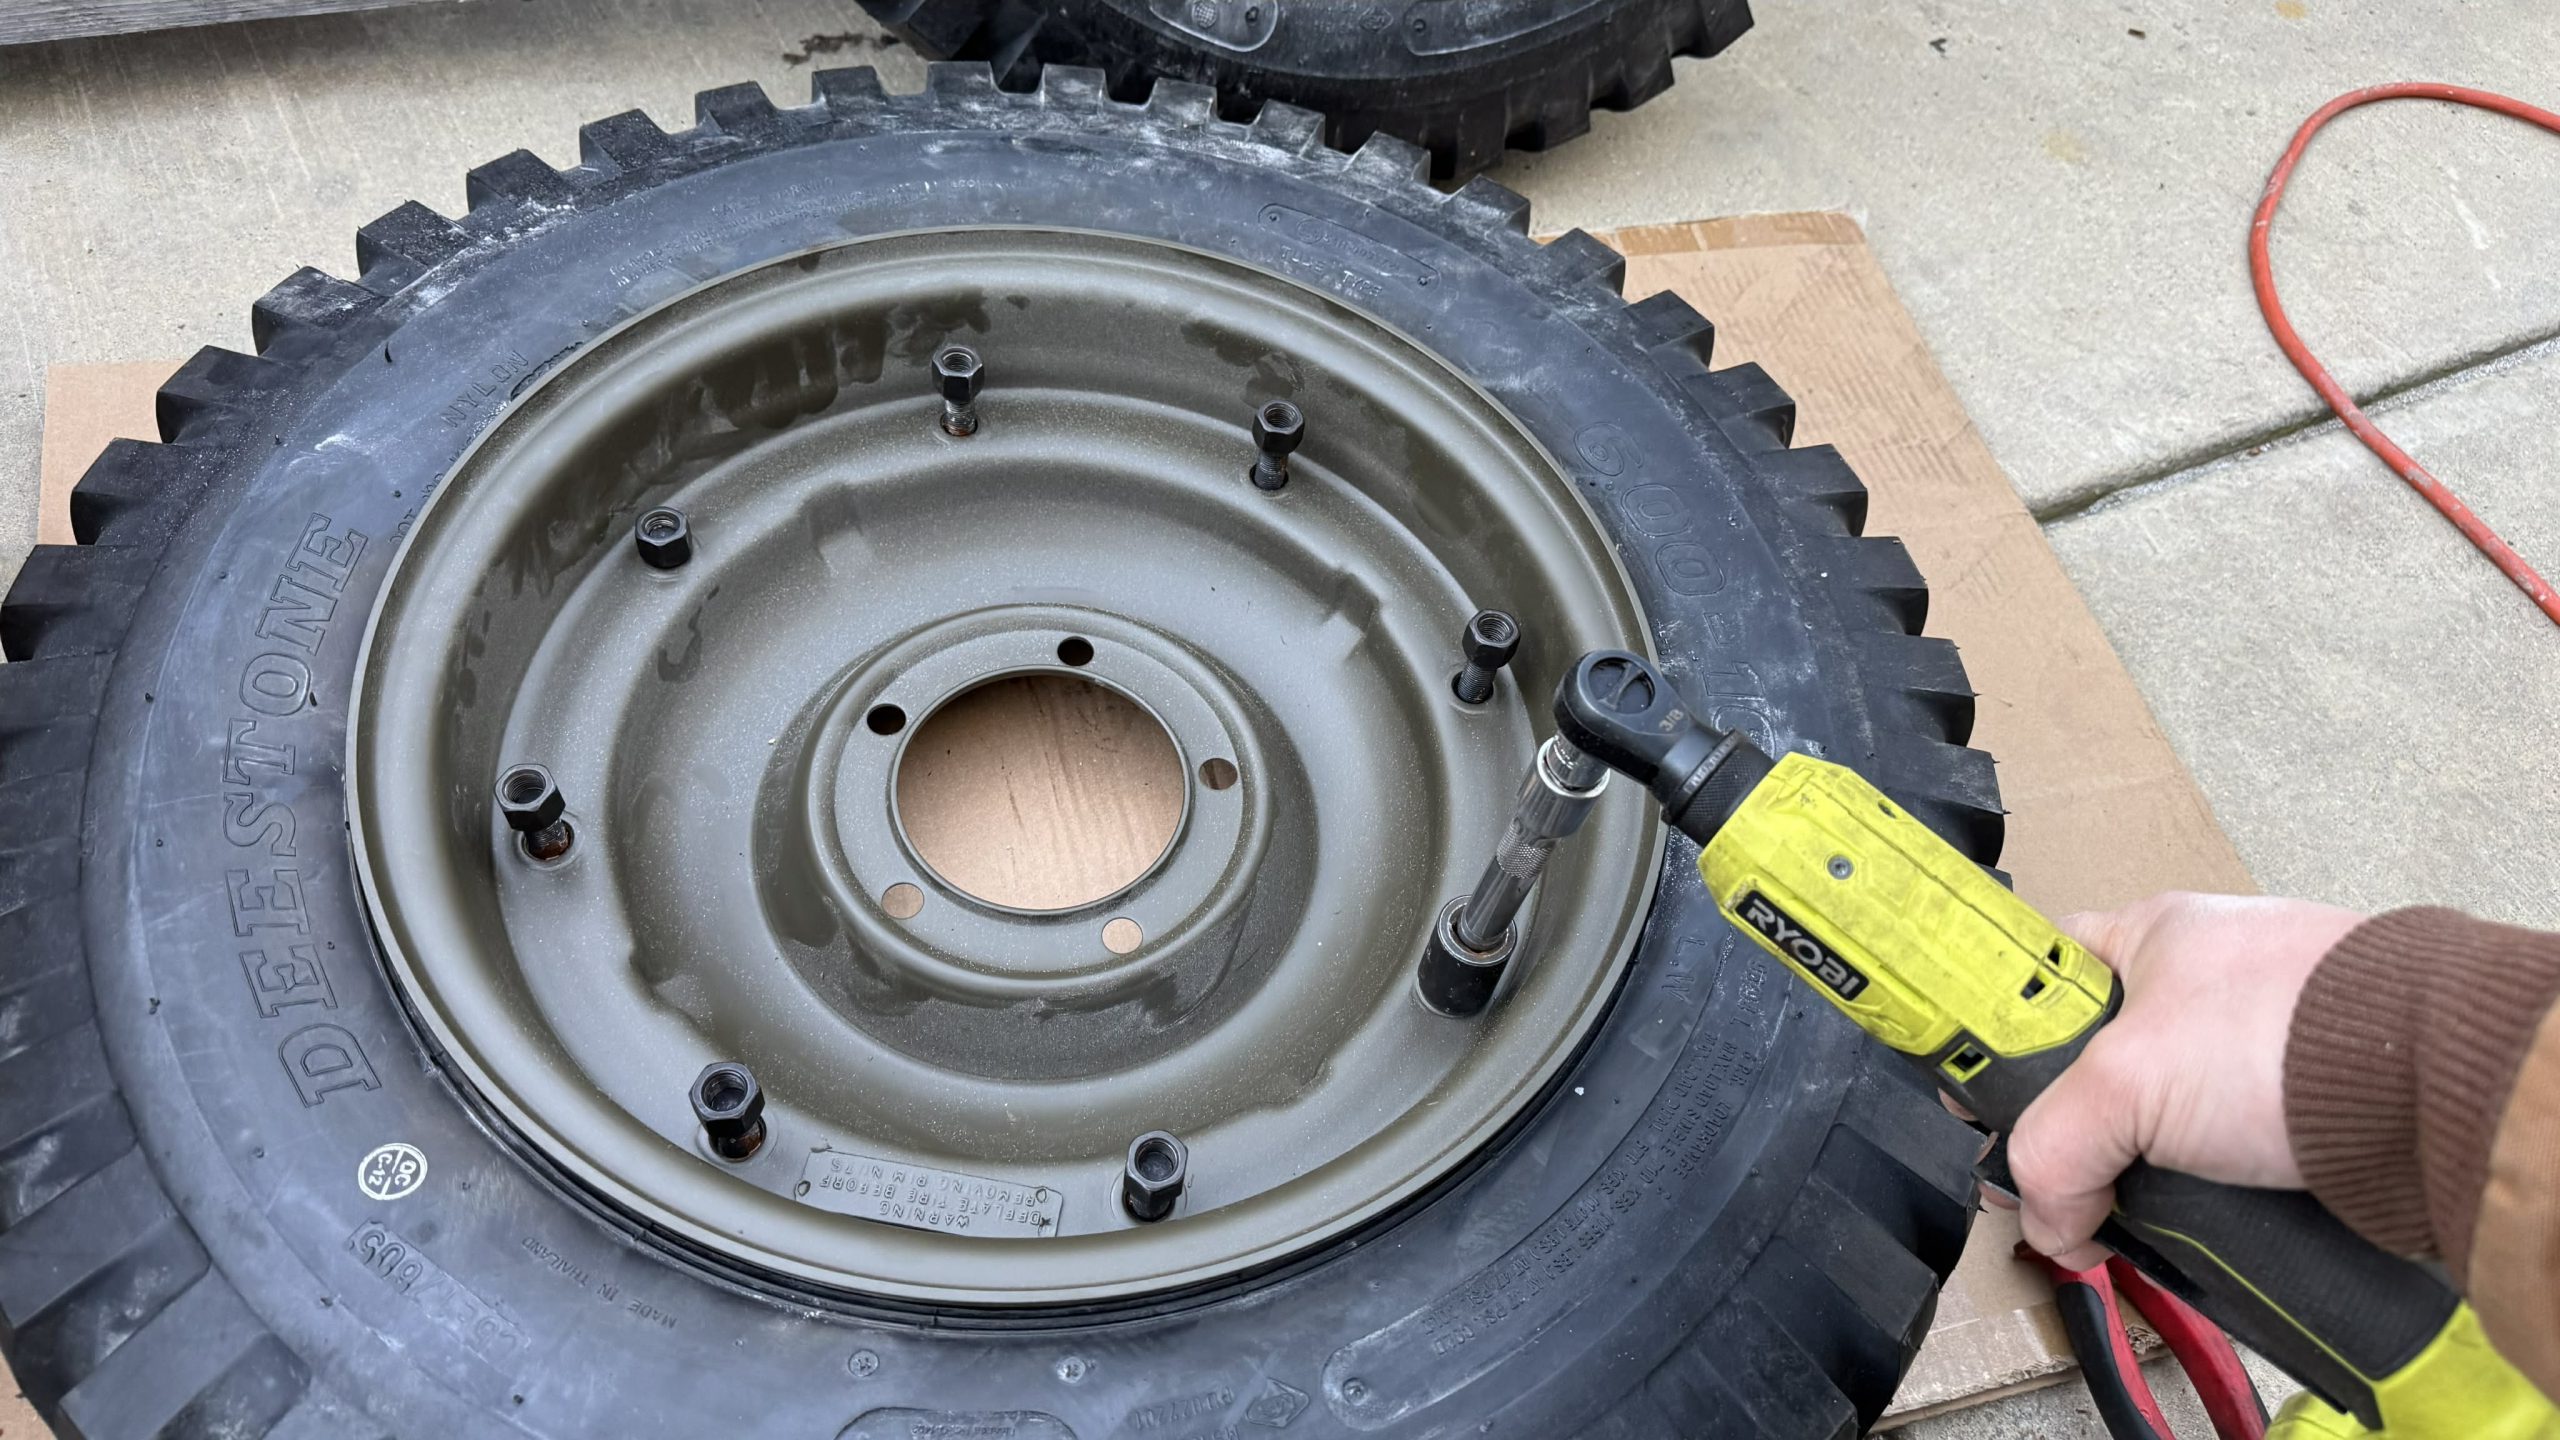
Have a look at these wheels. On one side you’ll see the smooth, round heads of eight studs, which poke through square holes so they don’t rotate:
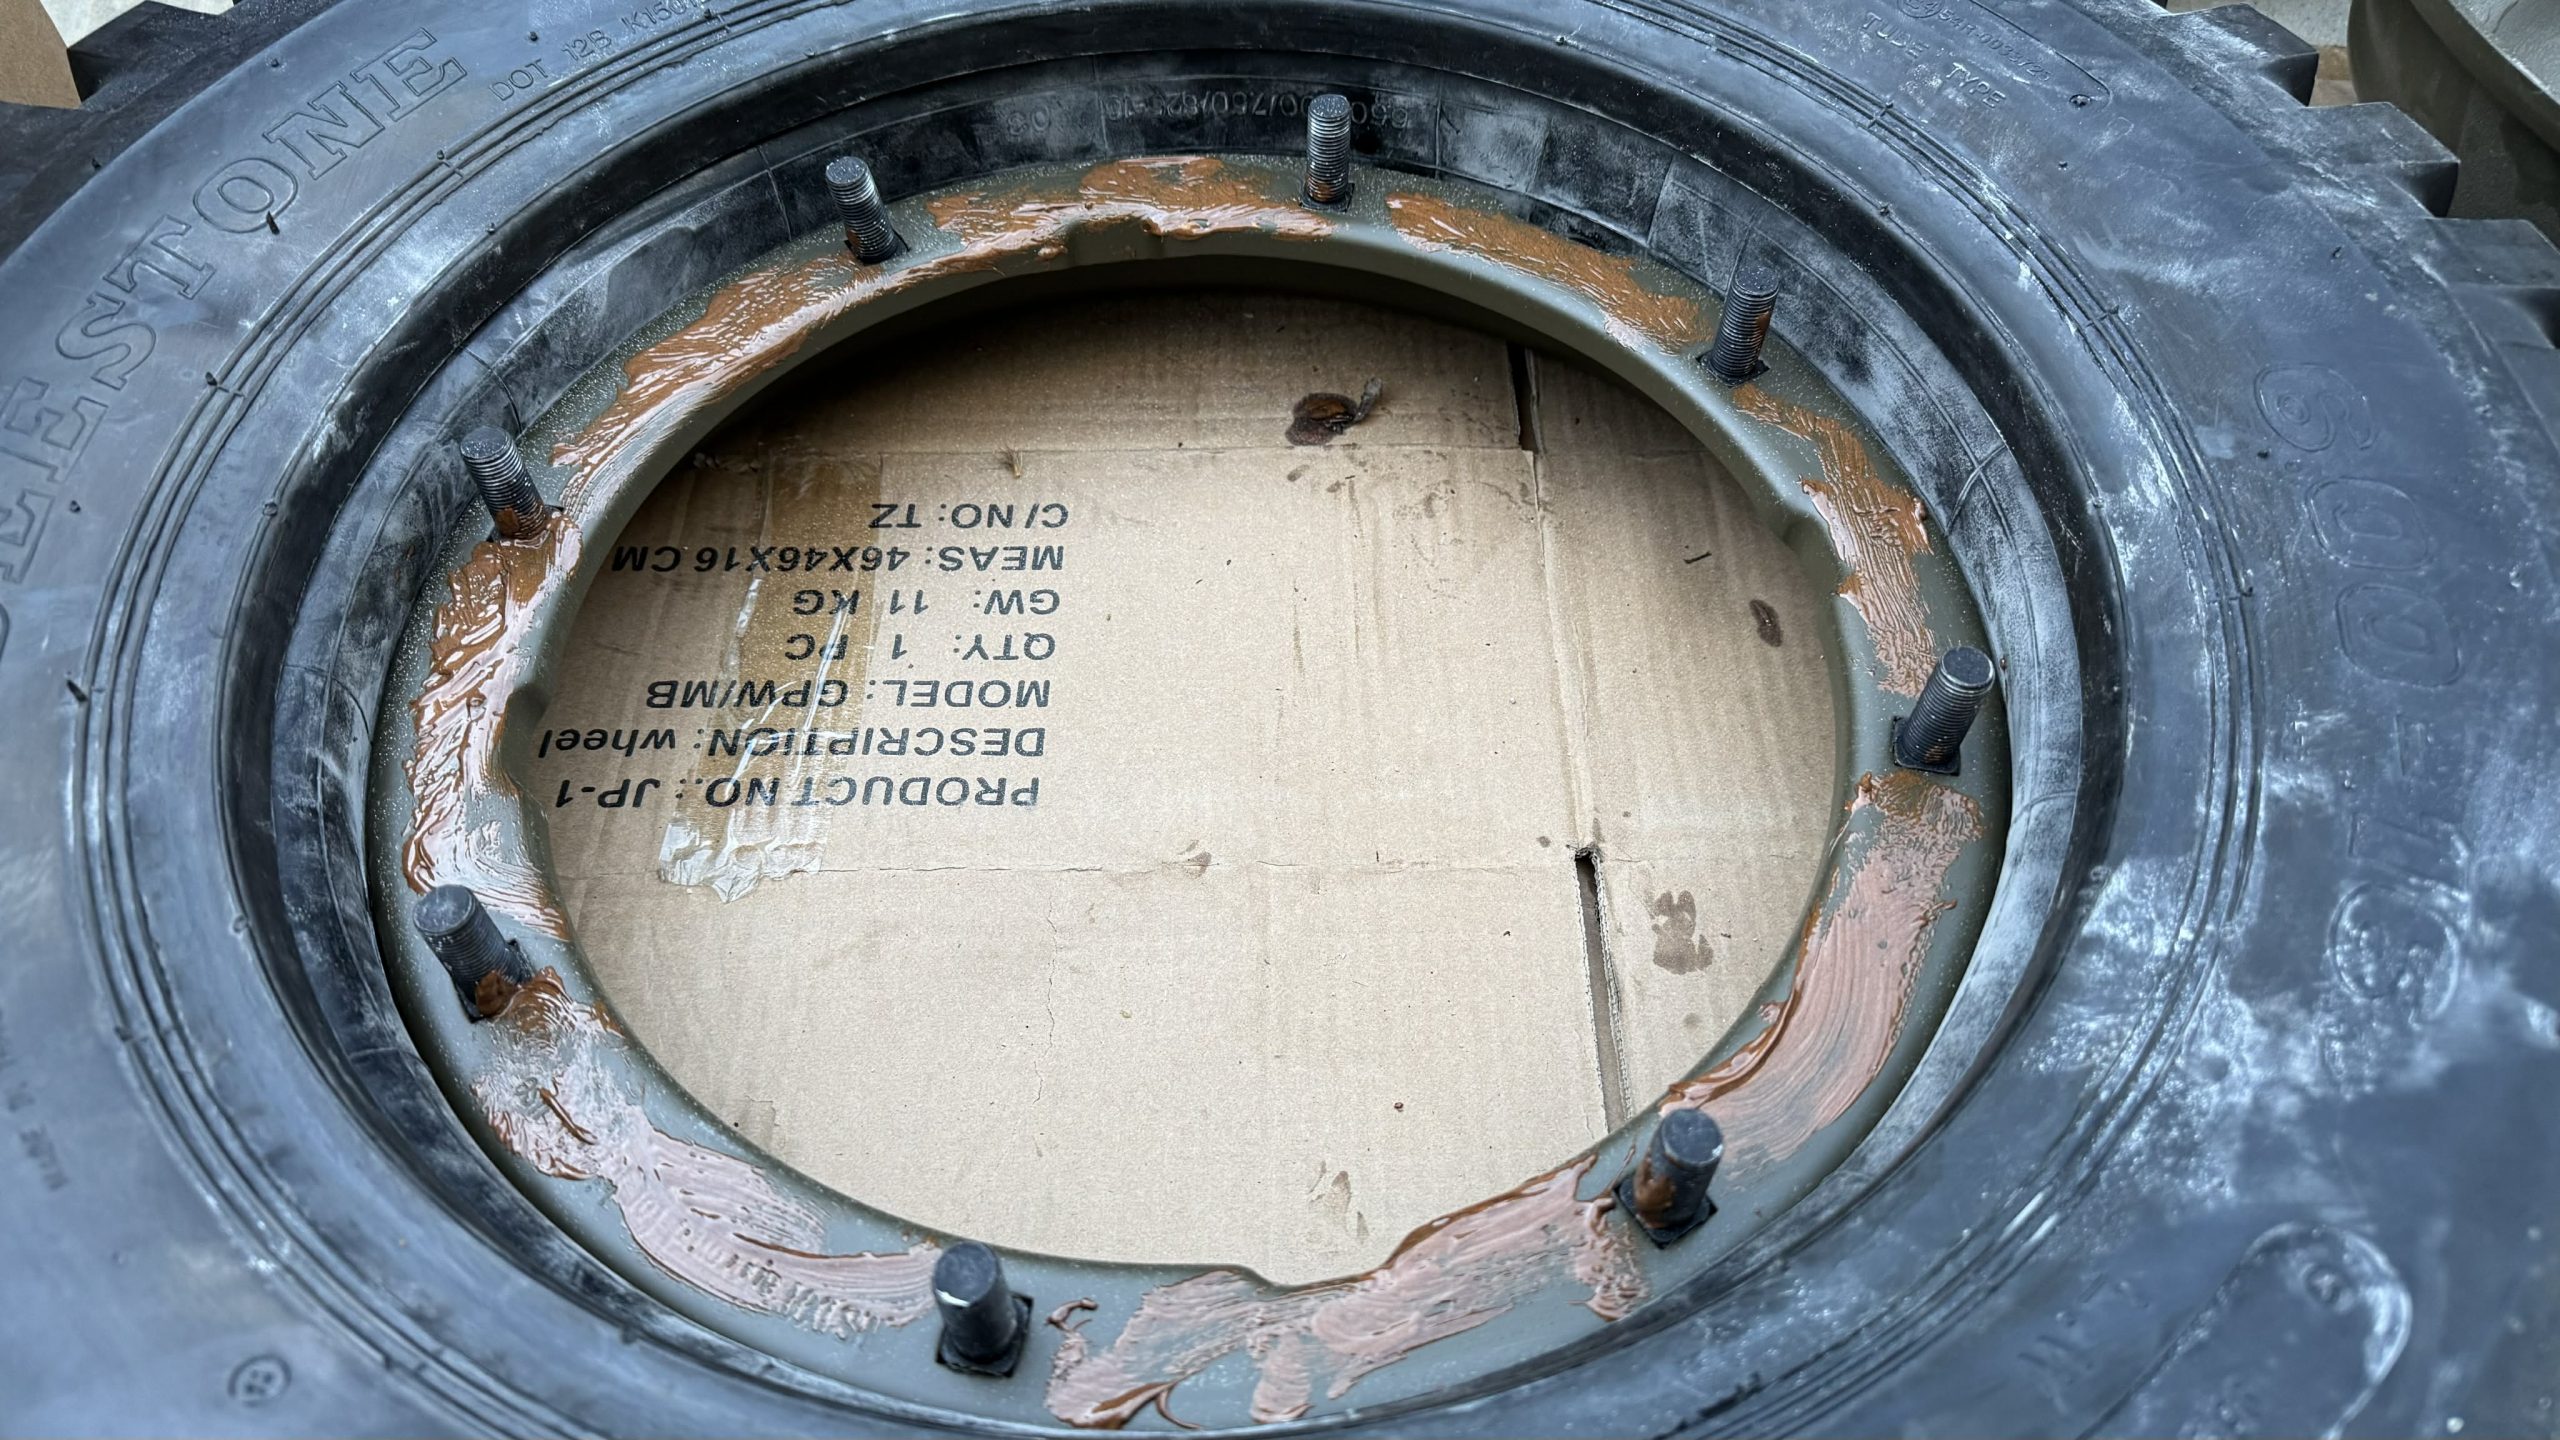
On the back side are nuts:
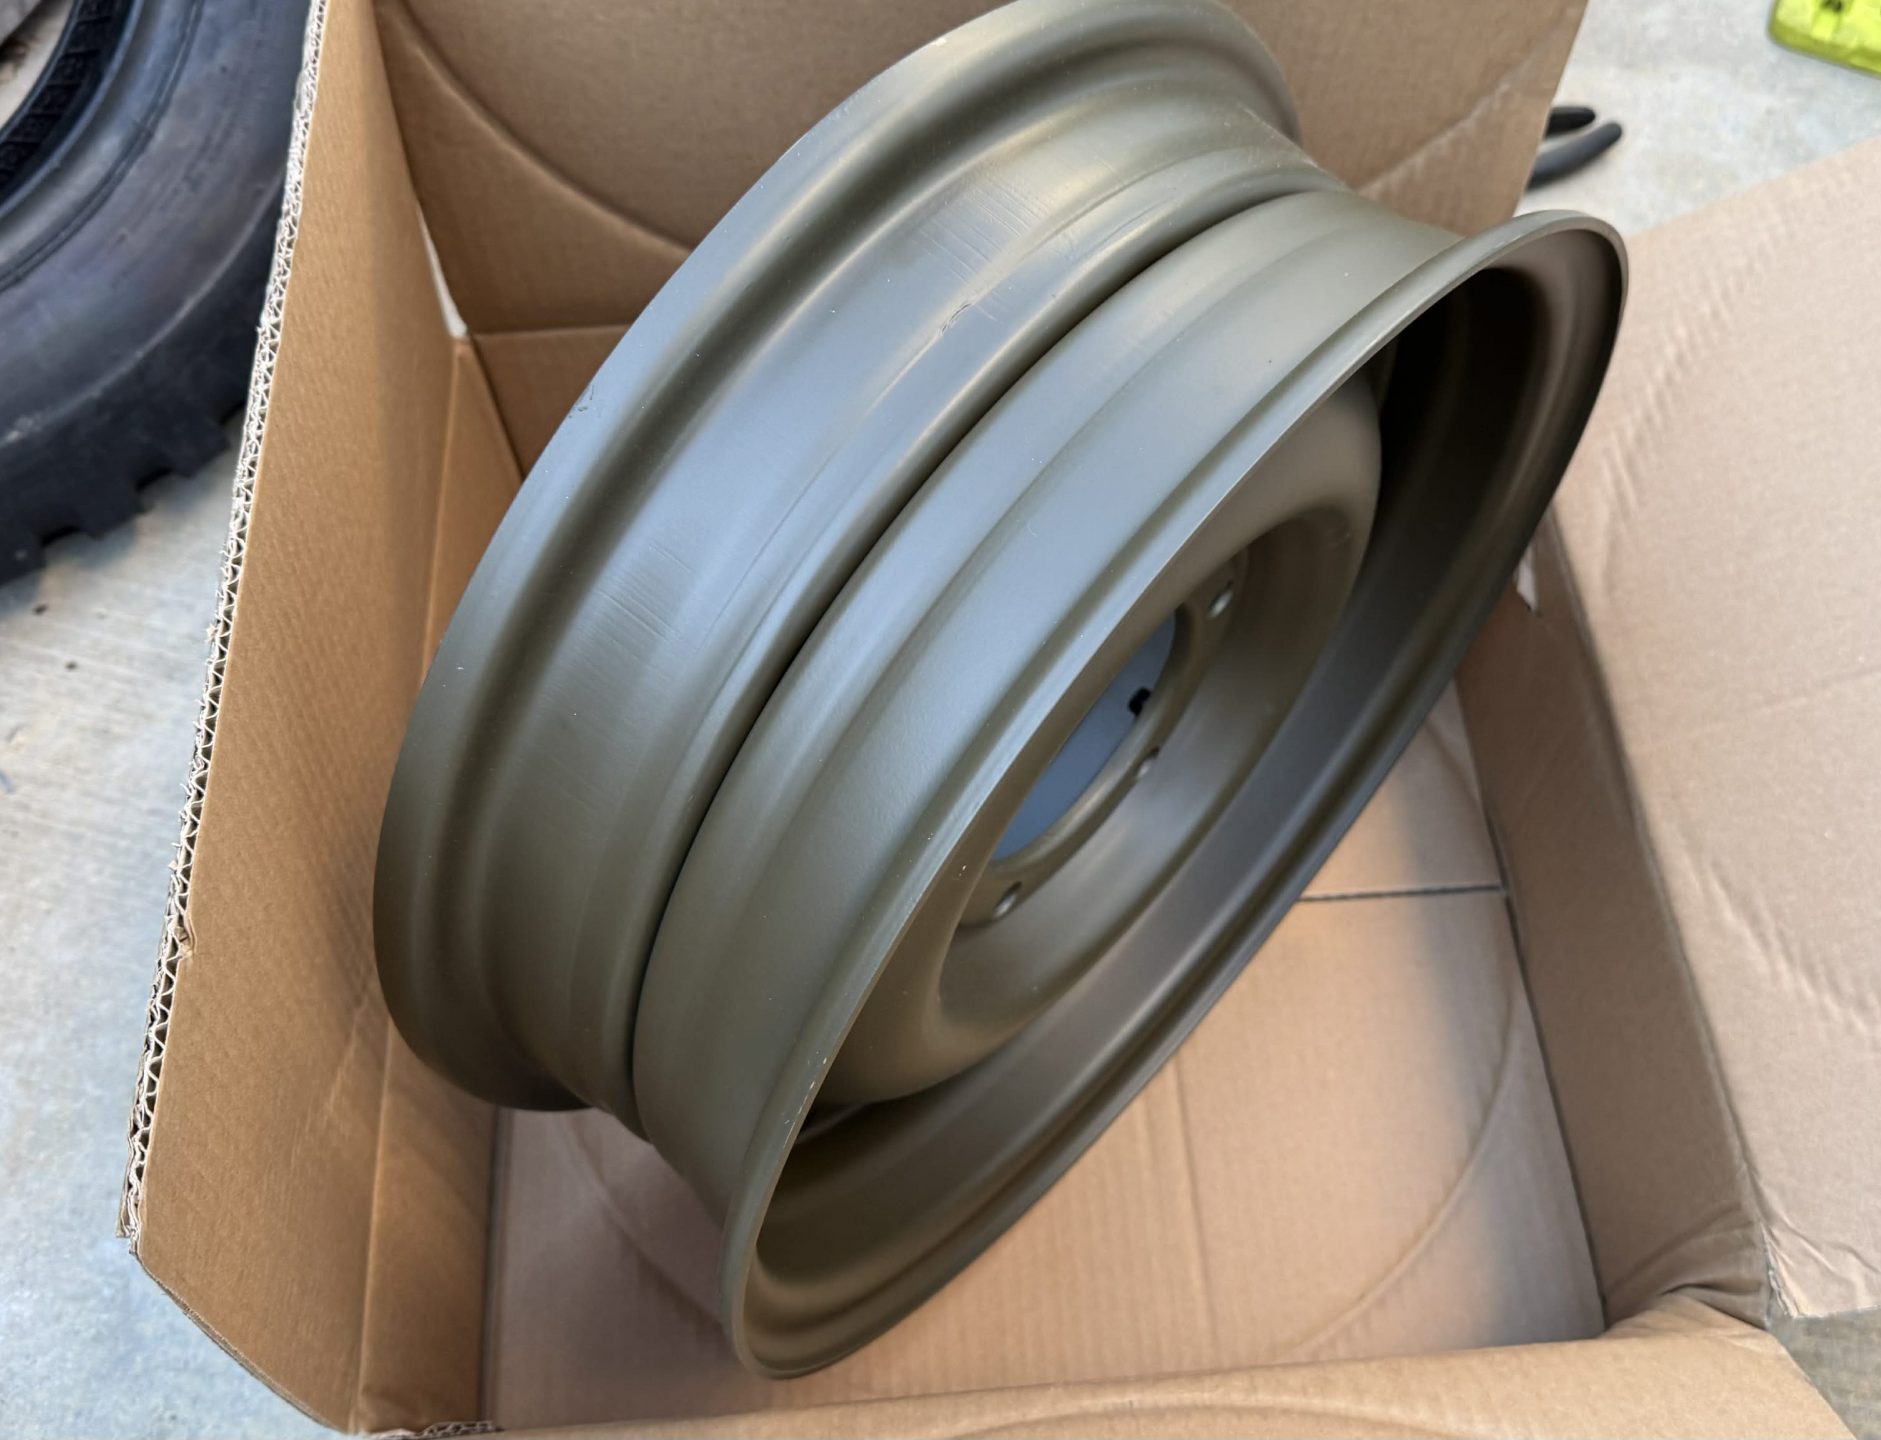
Looking at the barrel of the wheel, you see the seam between the two halves of the Combat Wheel:
Here’s a look at the wheel split apart:
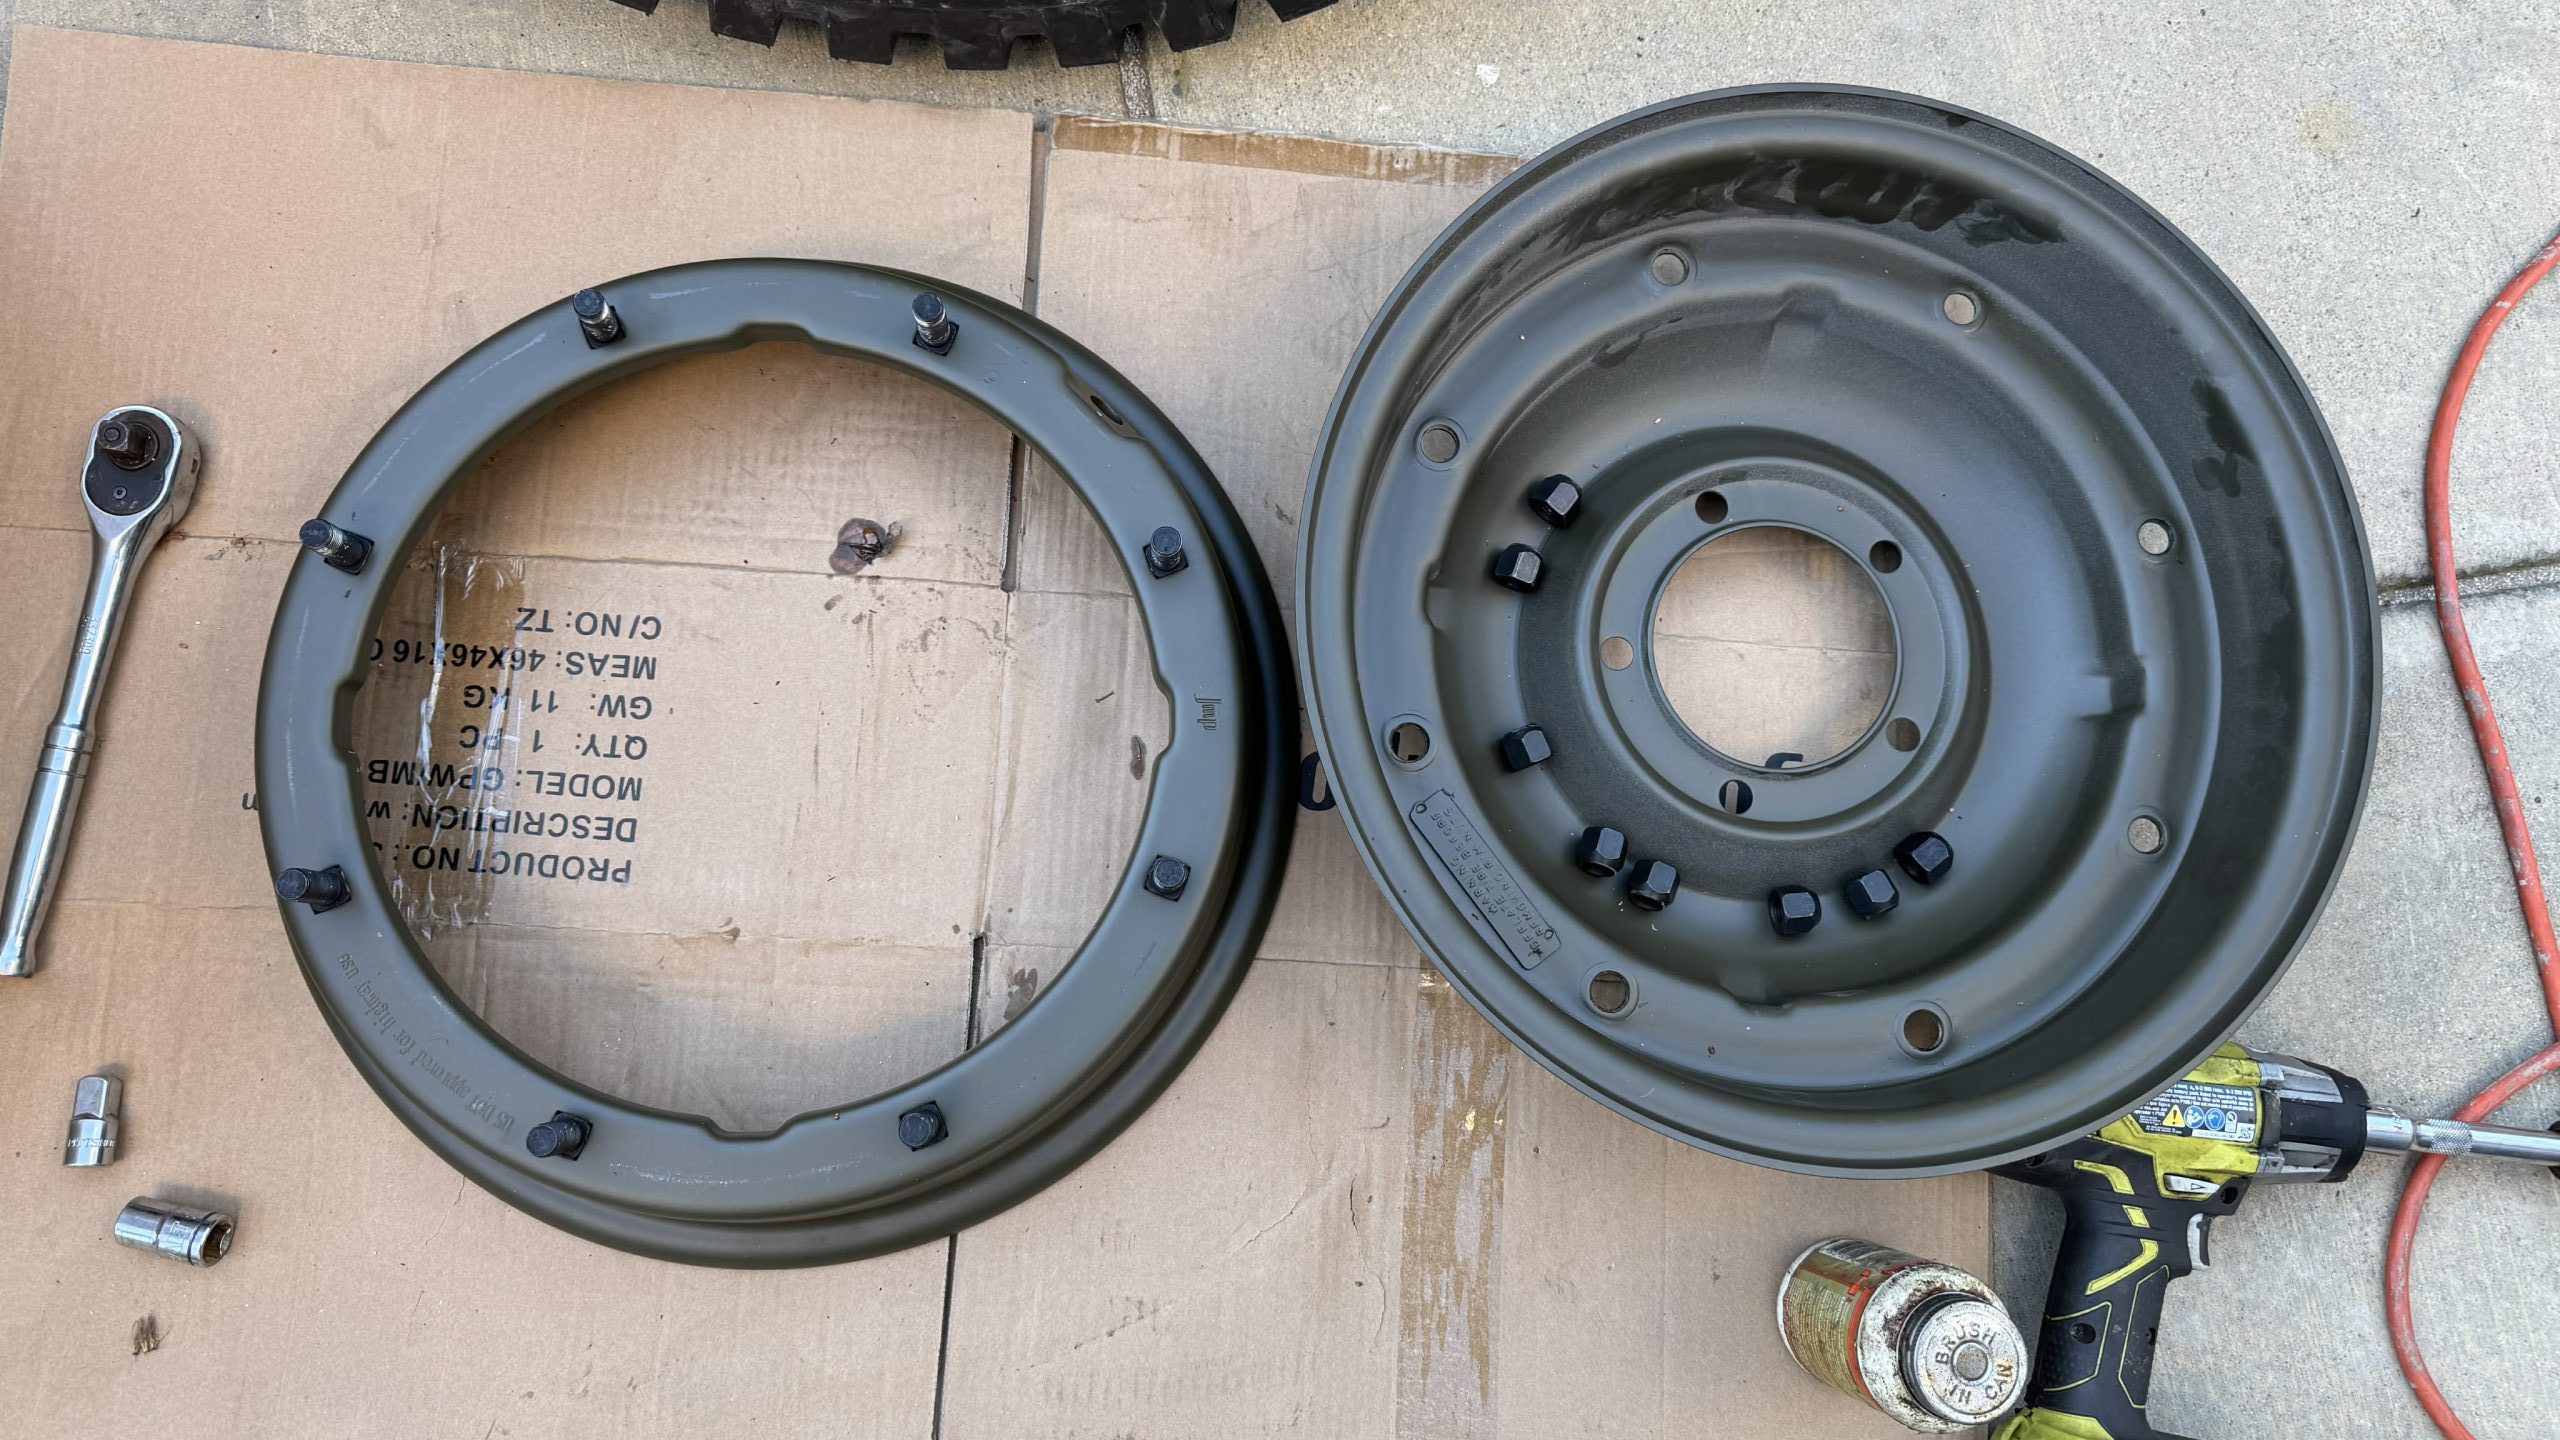
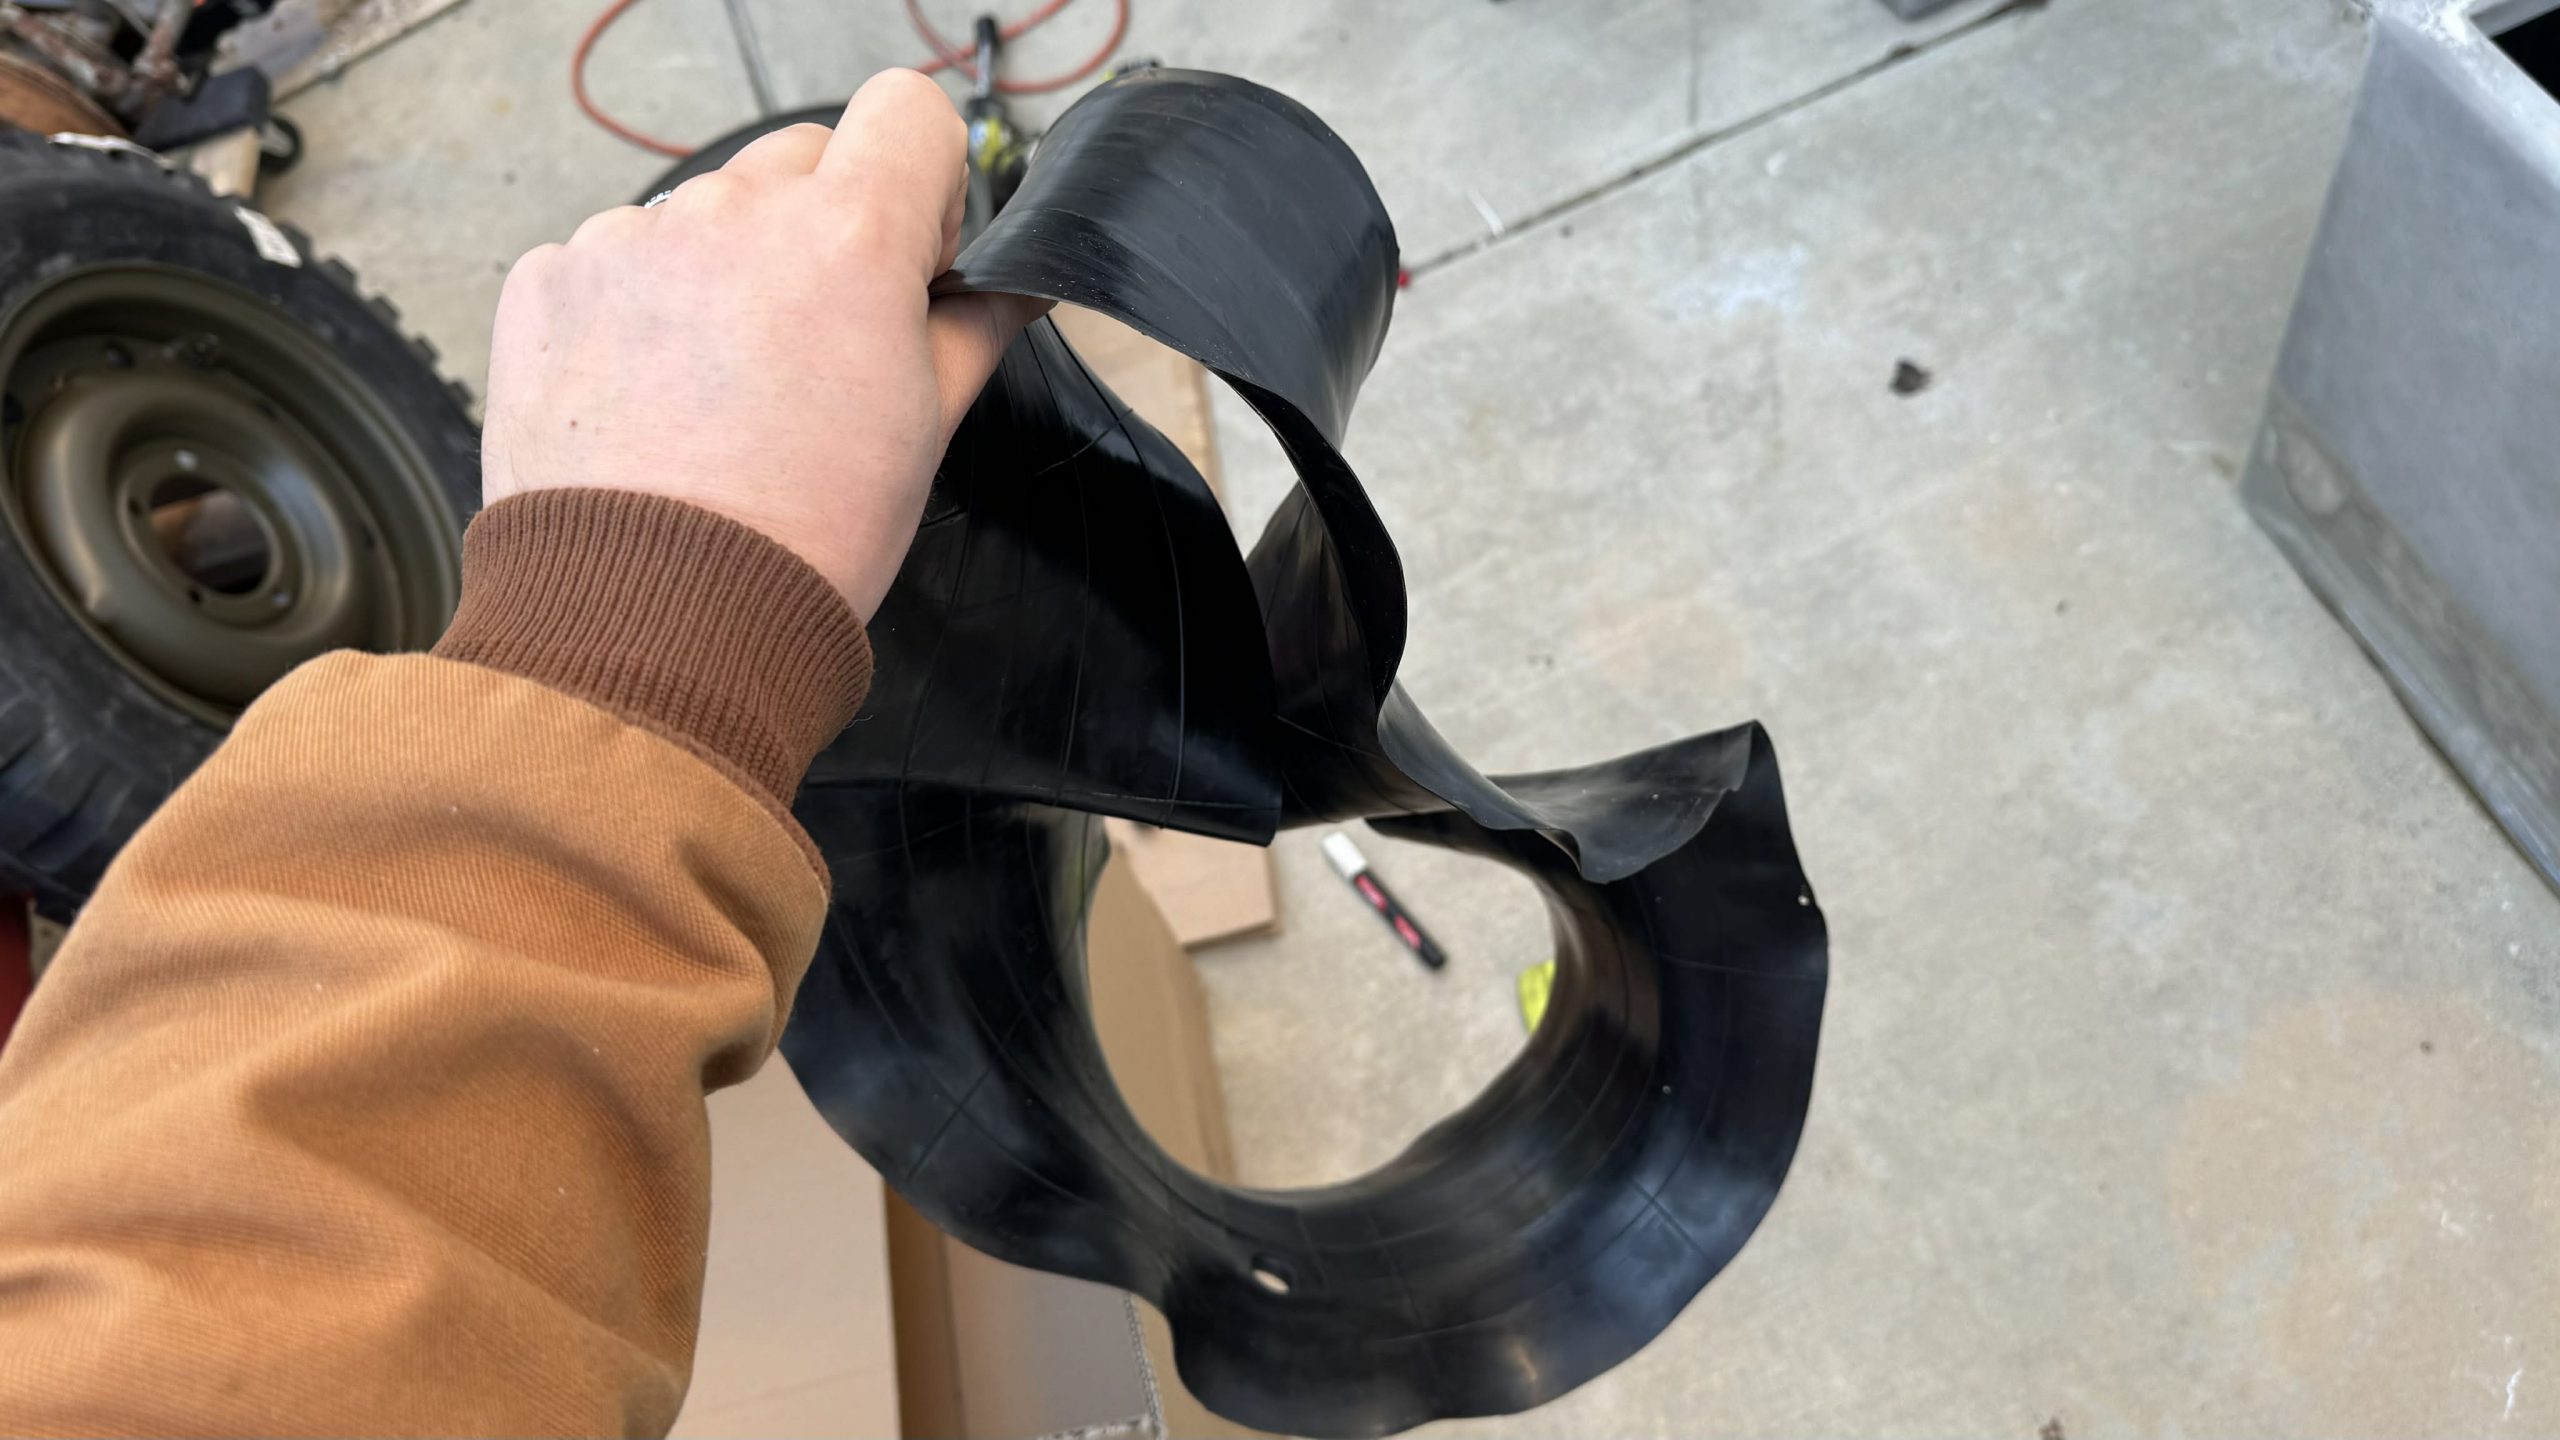
To install a tire, all a soldier had to do was use a 3/4-inch wrench and undo all eight nuts. Then, after separating the two halves of the Combat Wheel/Combat Rim, the soldier simply had to shove an inner tube like this one …
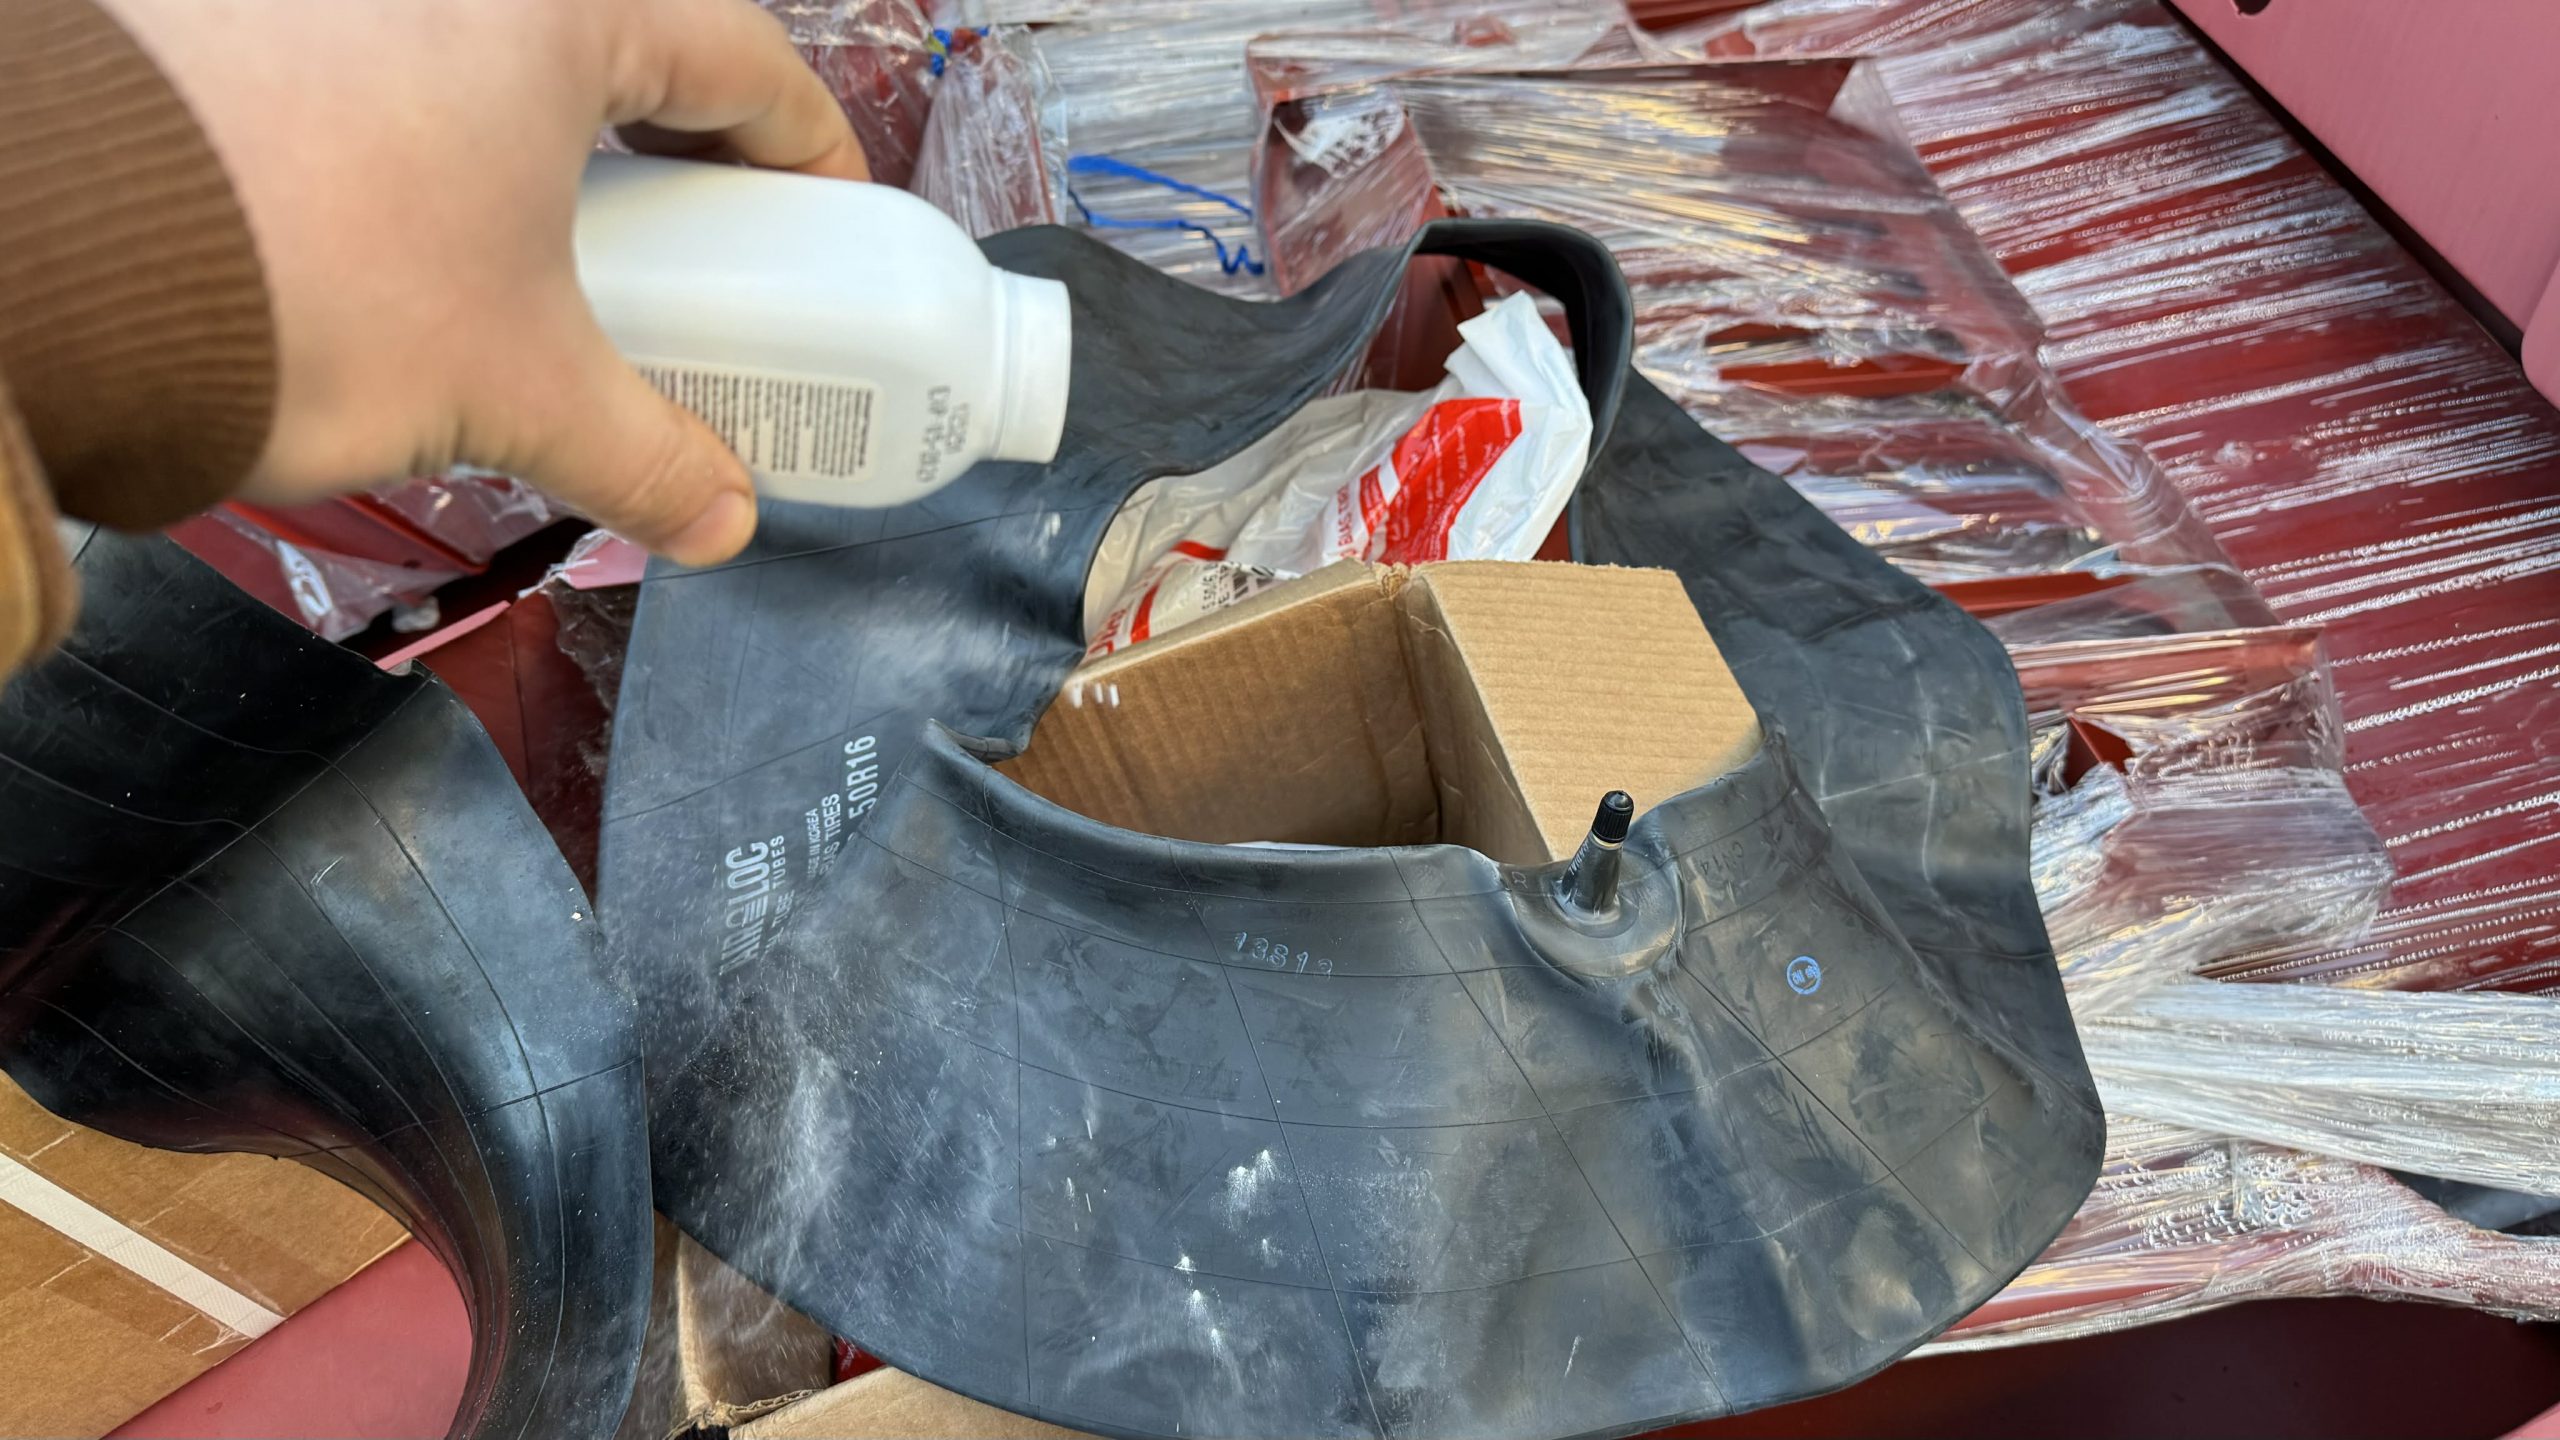
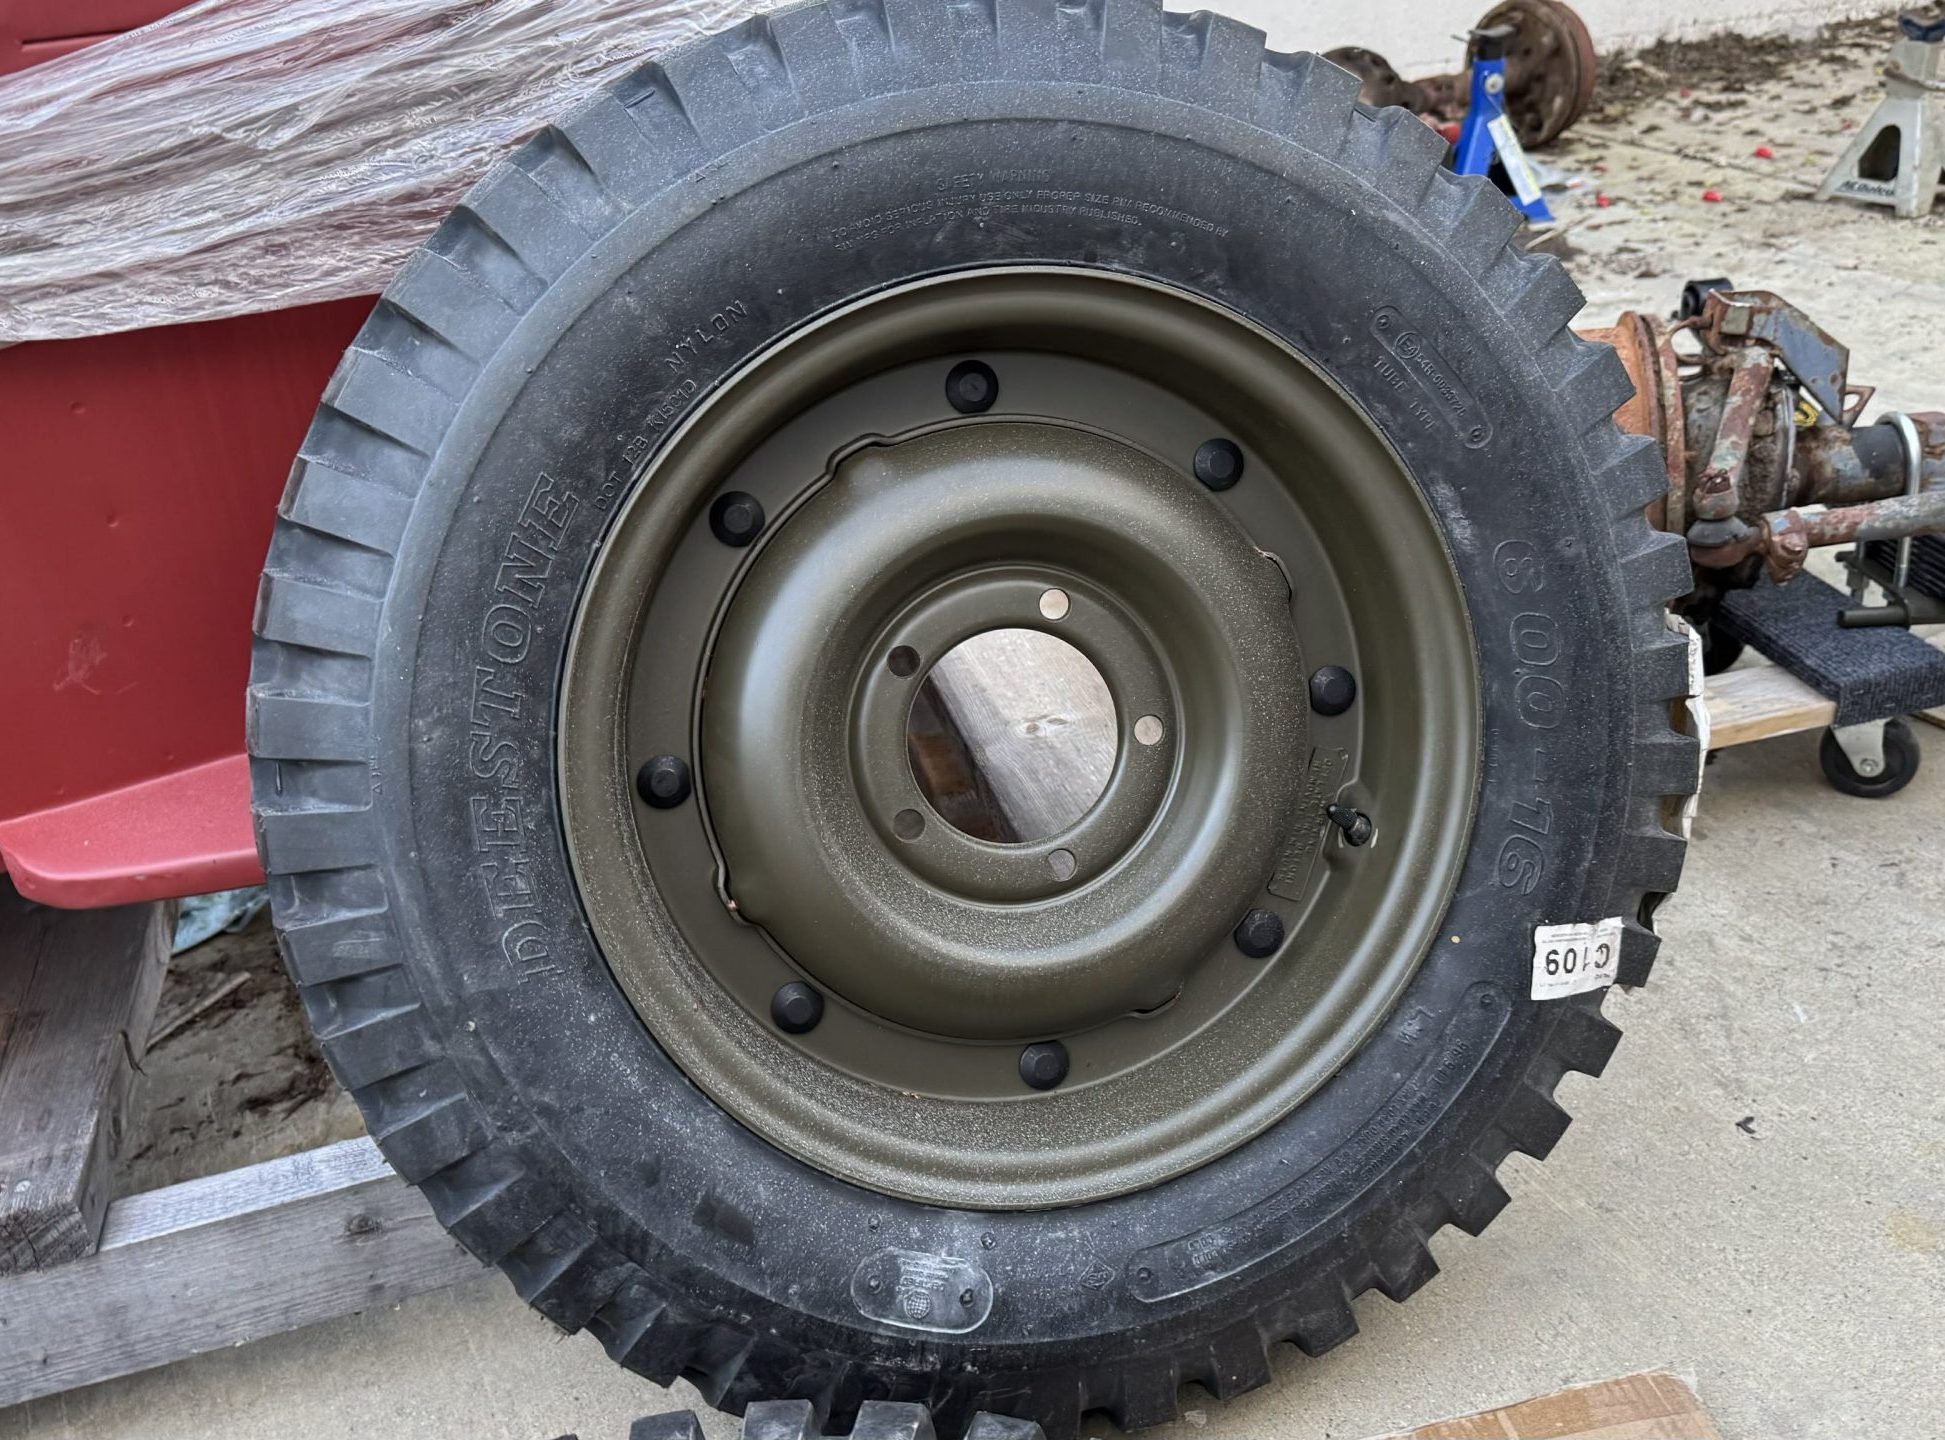
… into the new tire, which on a WWII Jeep would be an “NDT,” or “Non-Directional Tire.” Here’s a look at one:
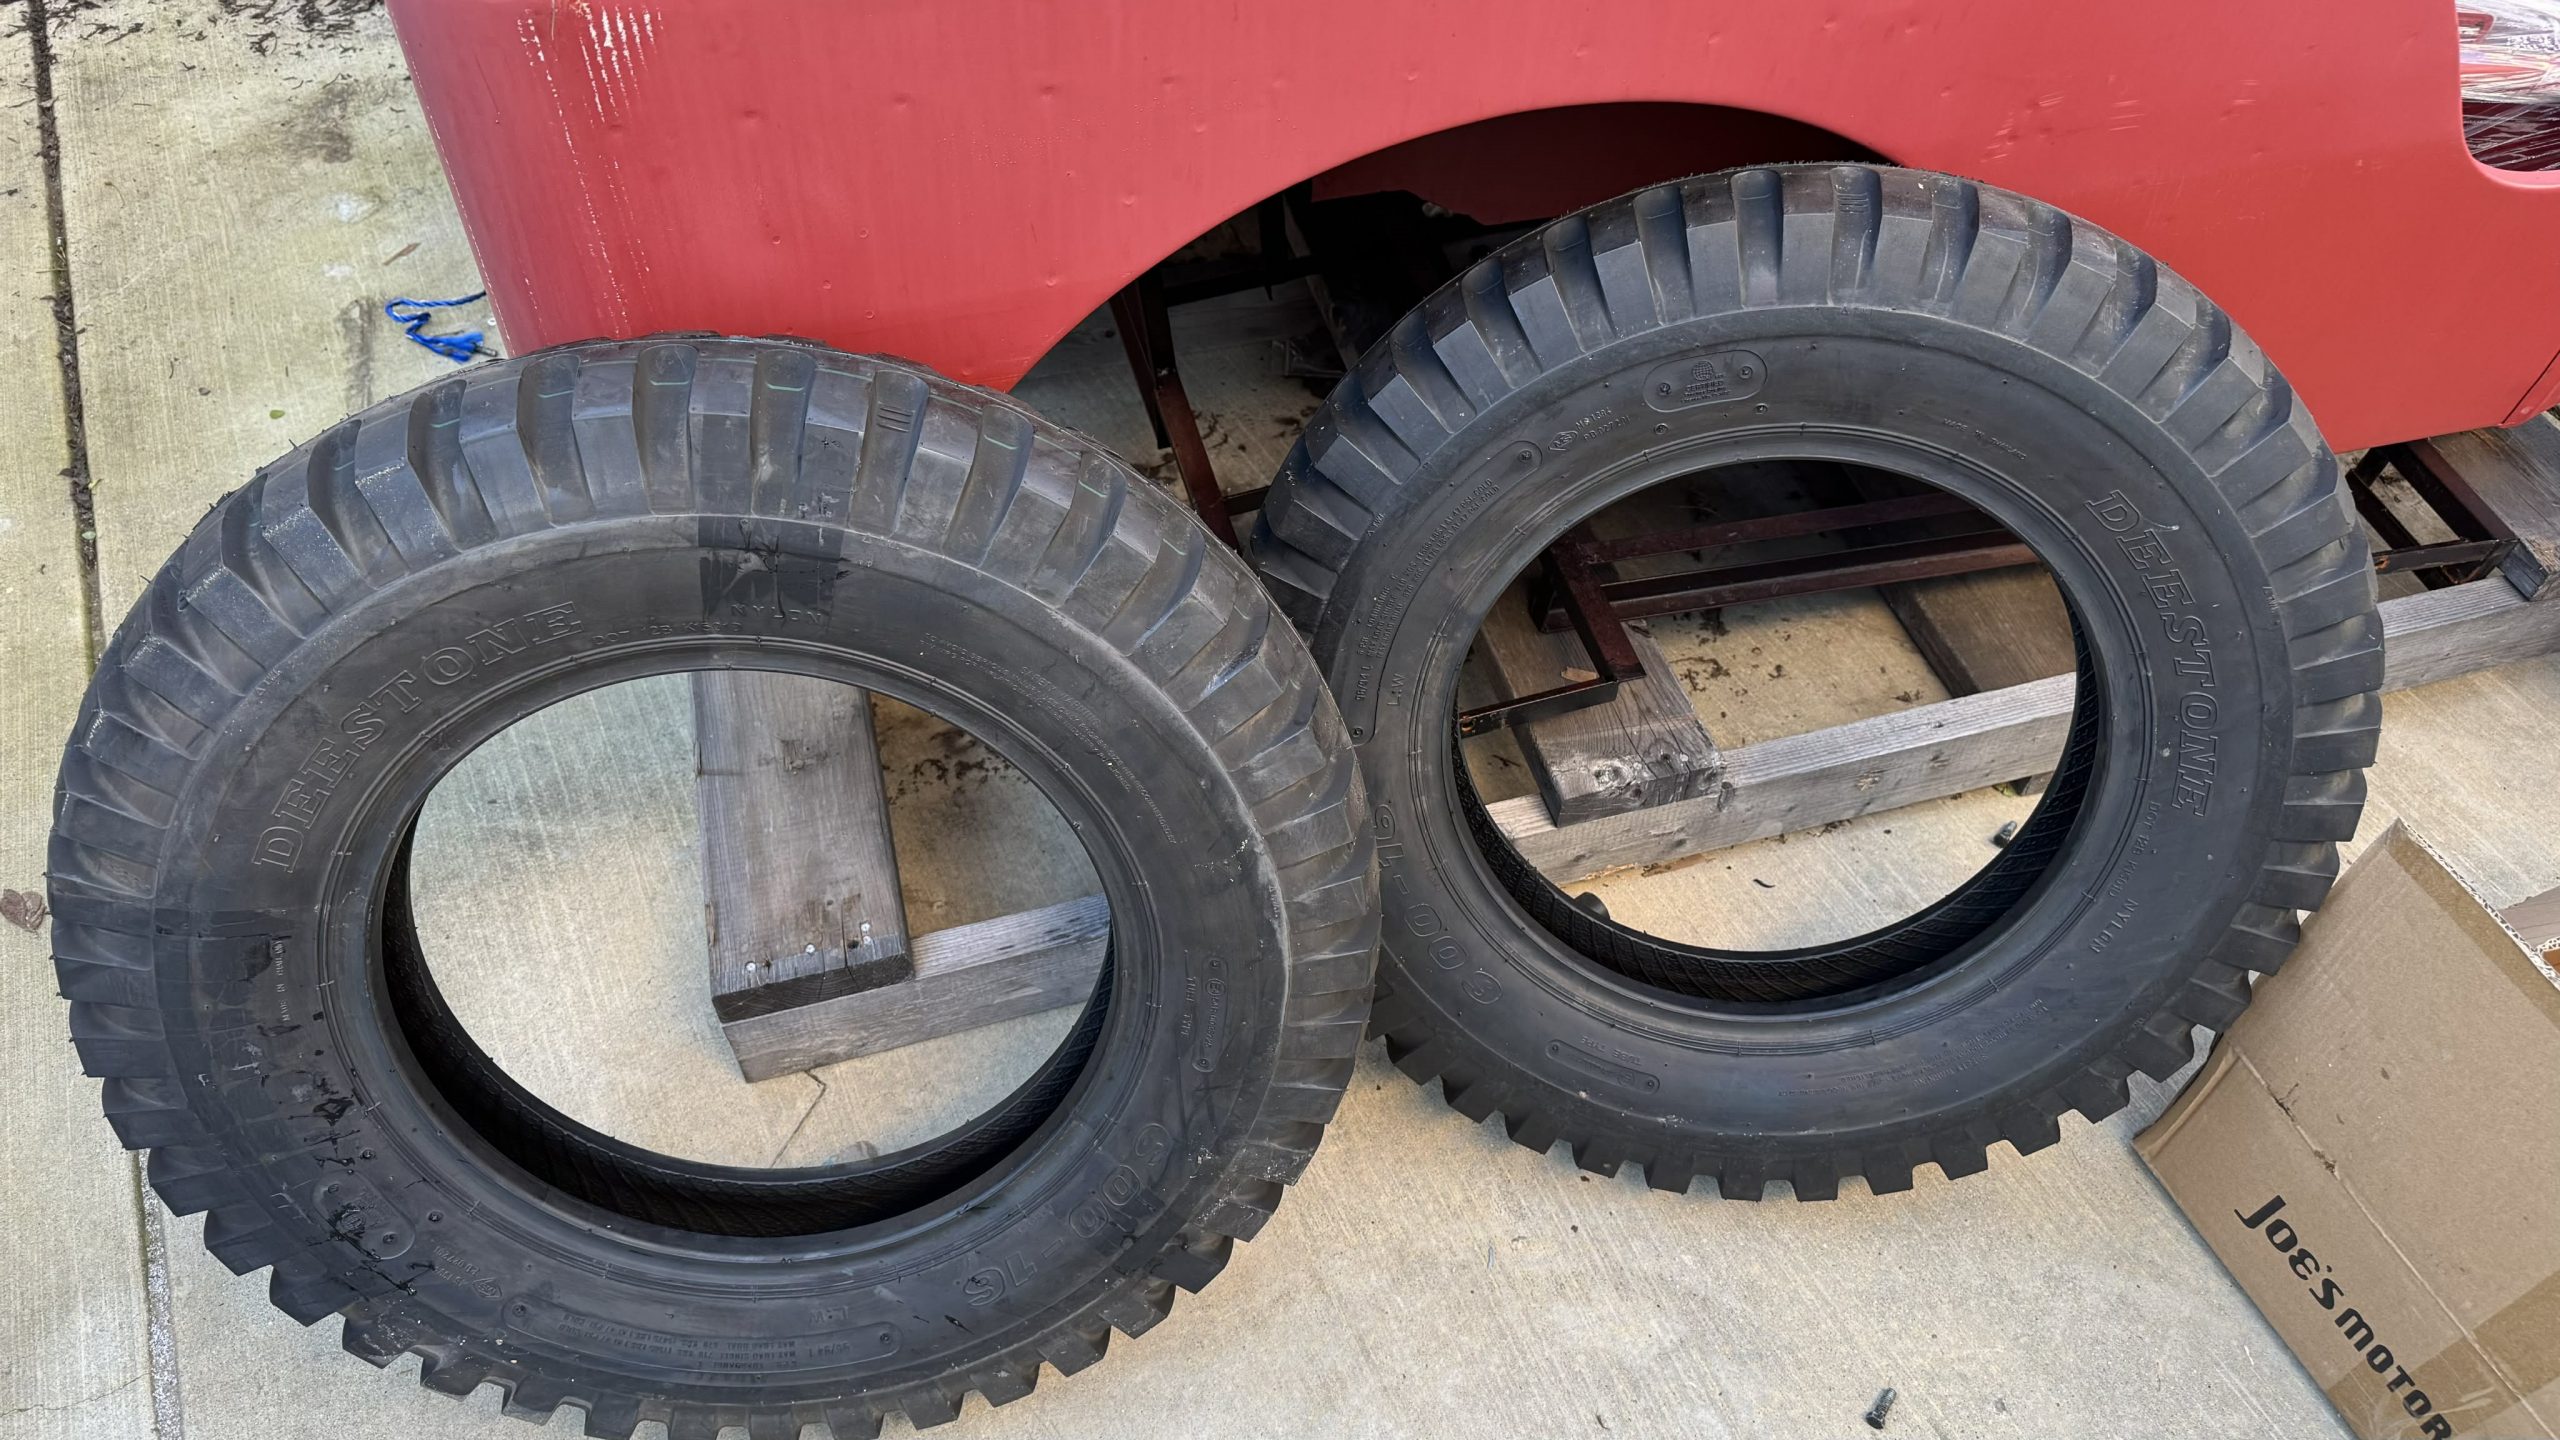
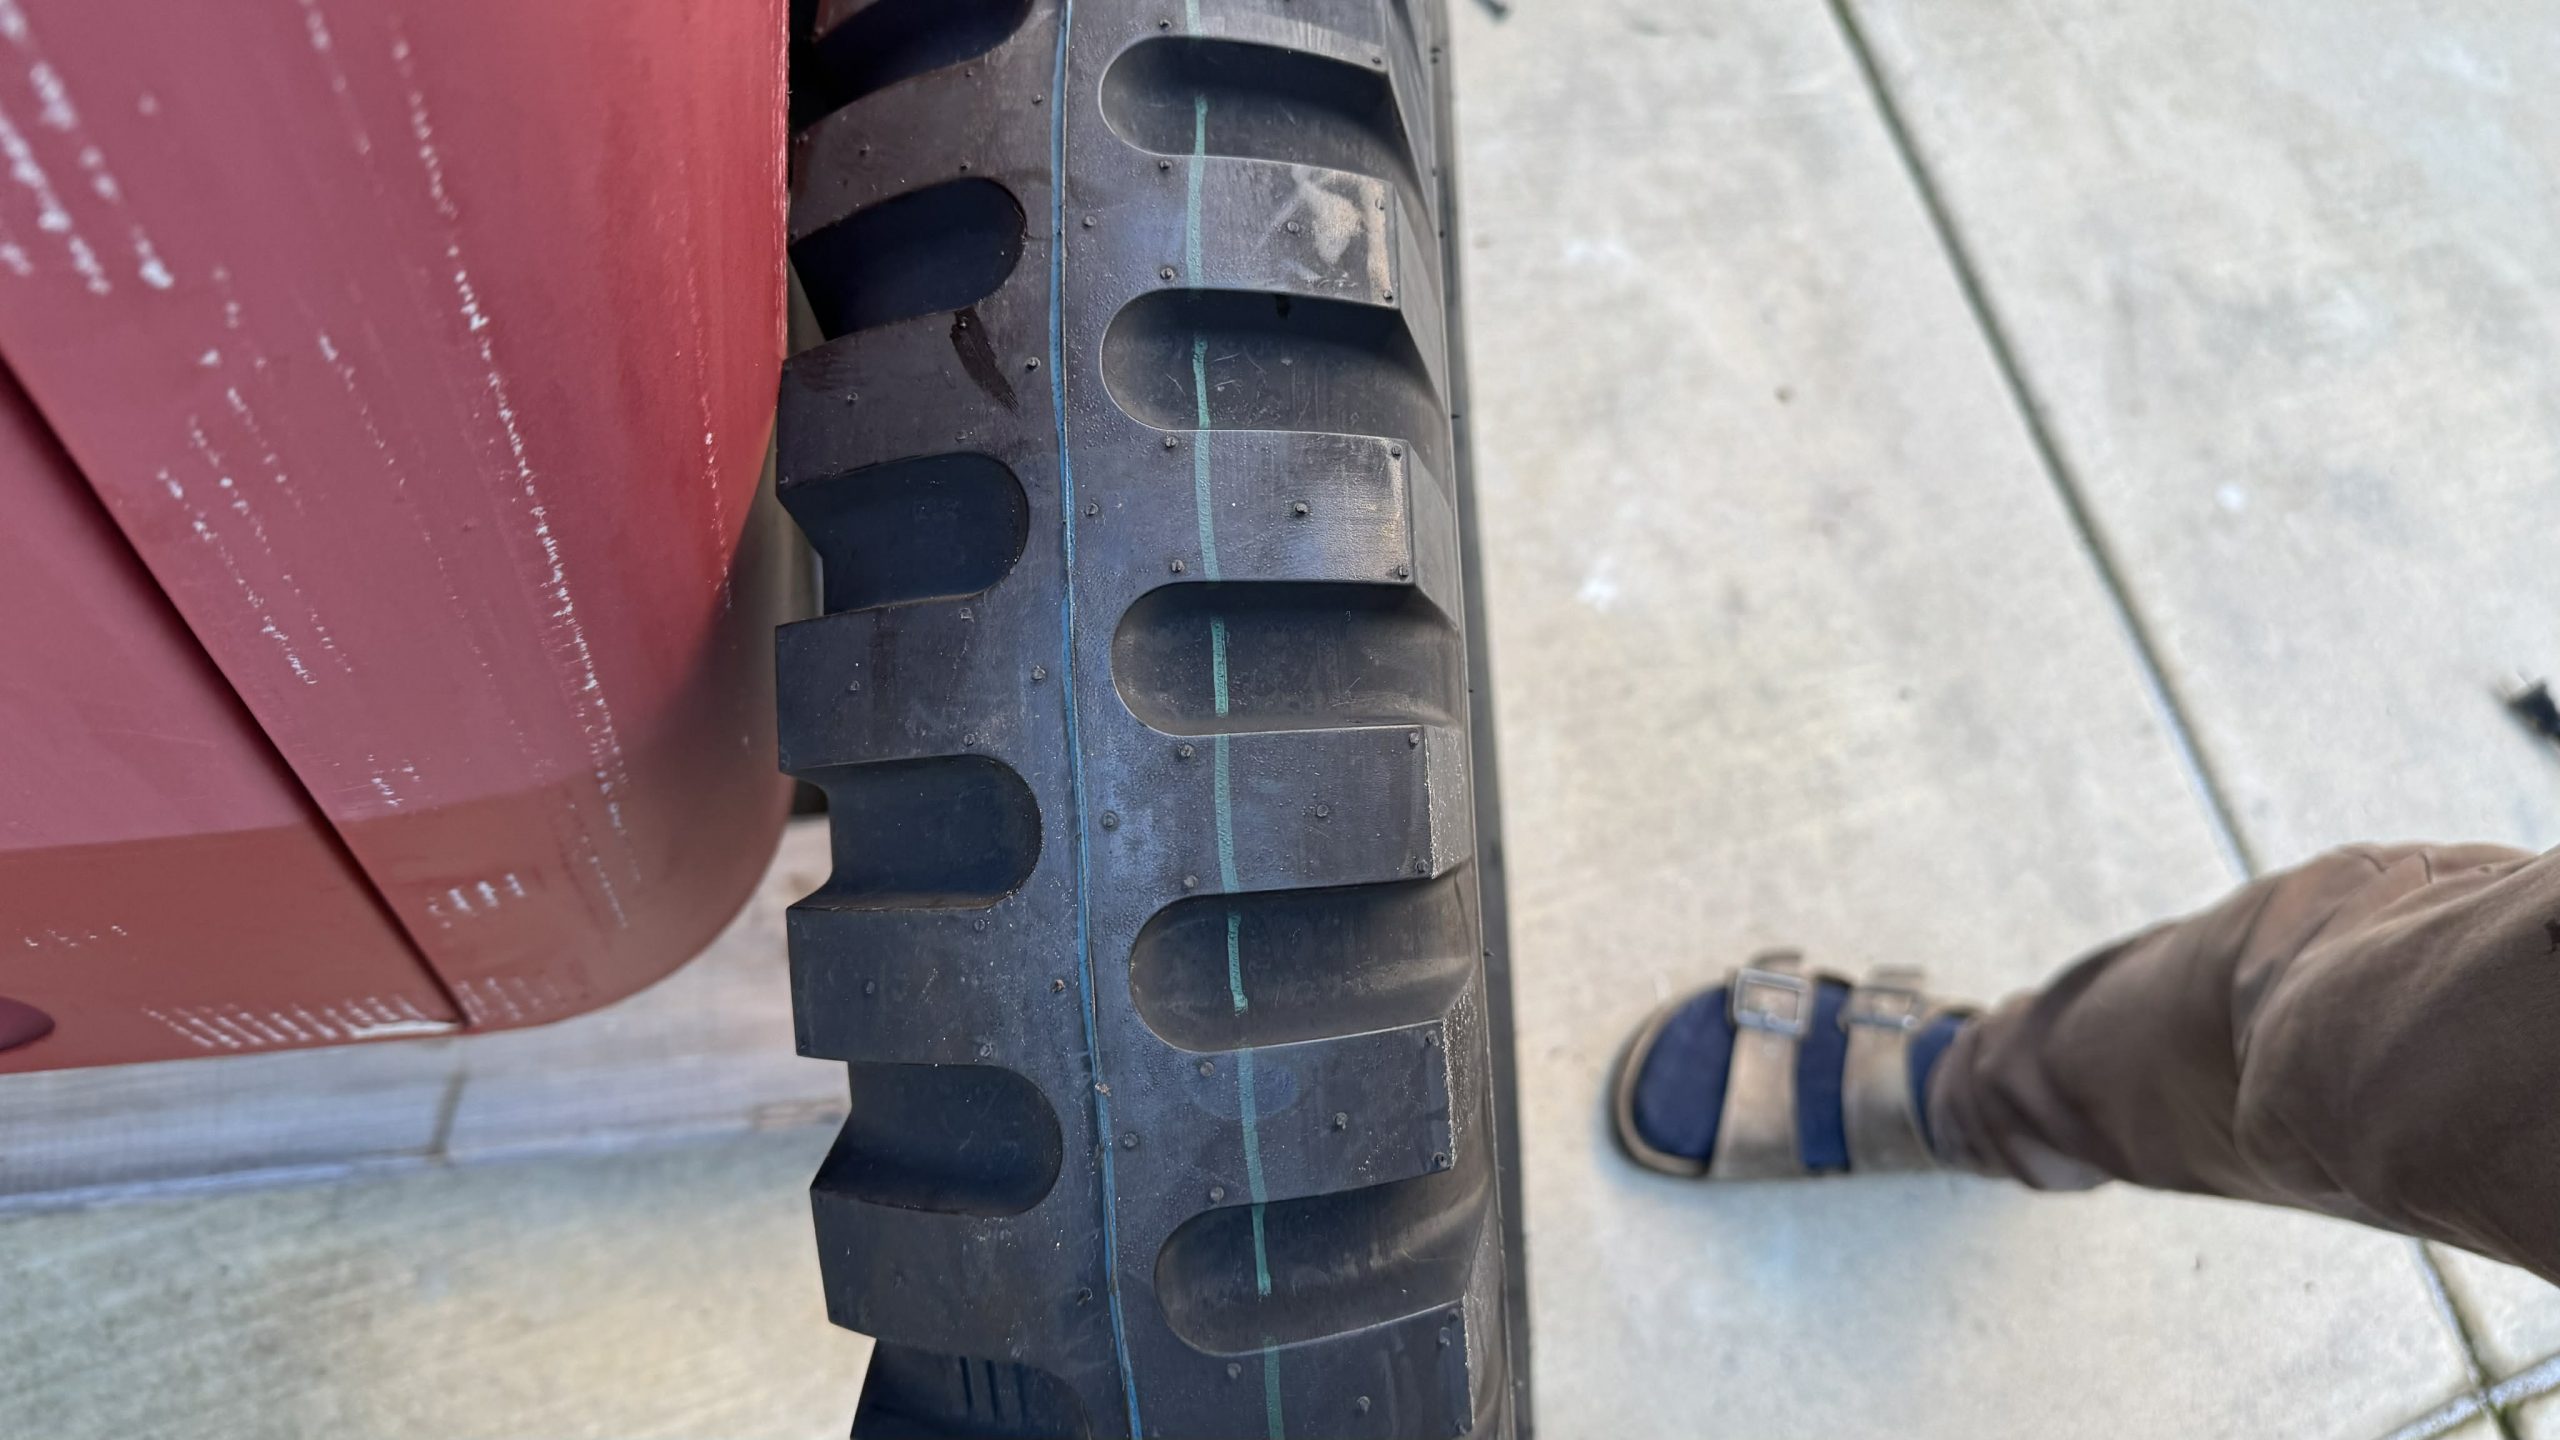
Here’s a closer look at the alternating tread pattern:
With the tube in the tire and slightly inflated, the soldier would shove the tube into the tire:
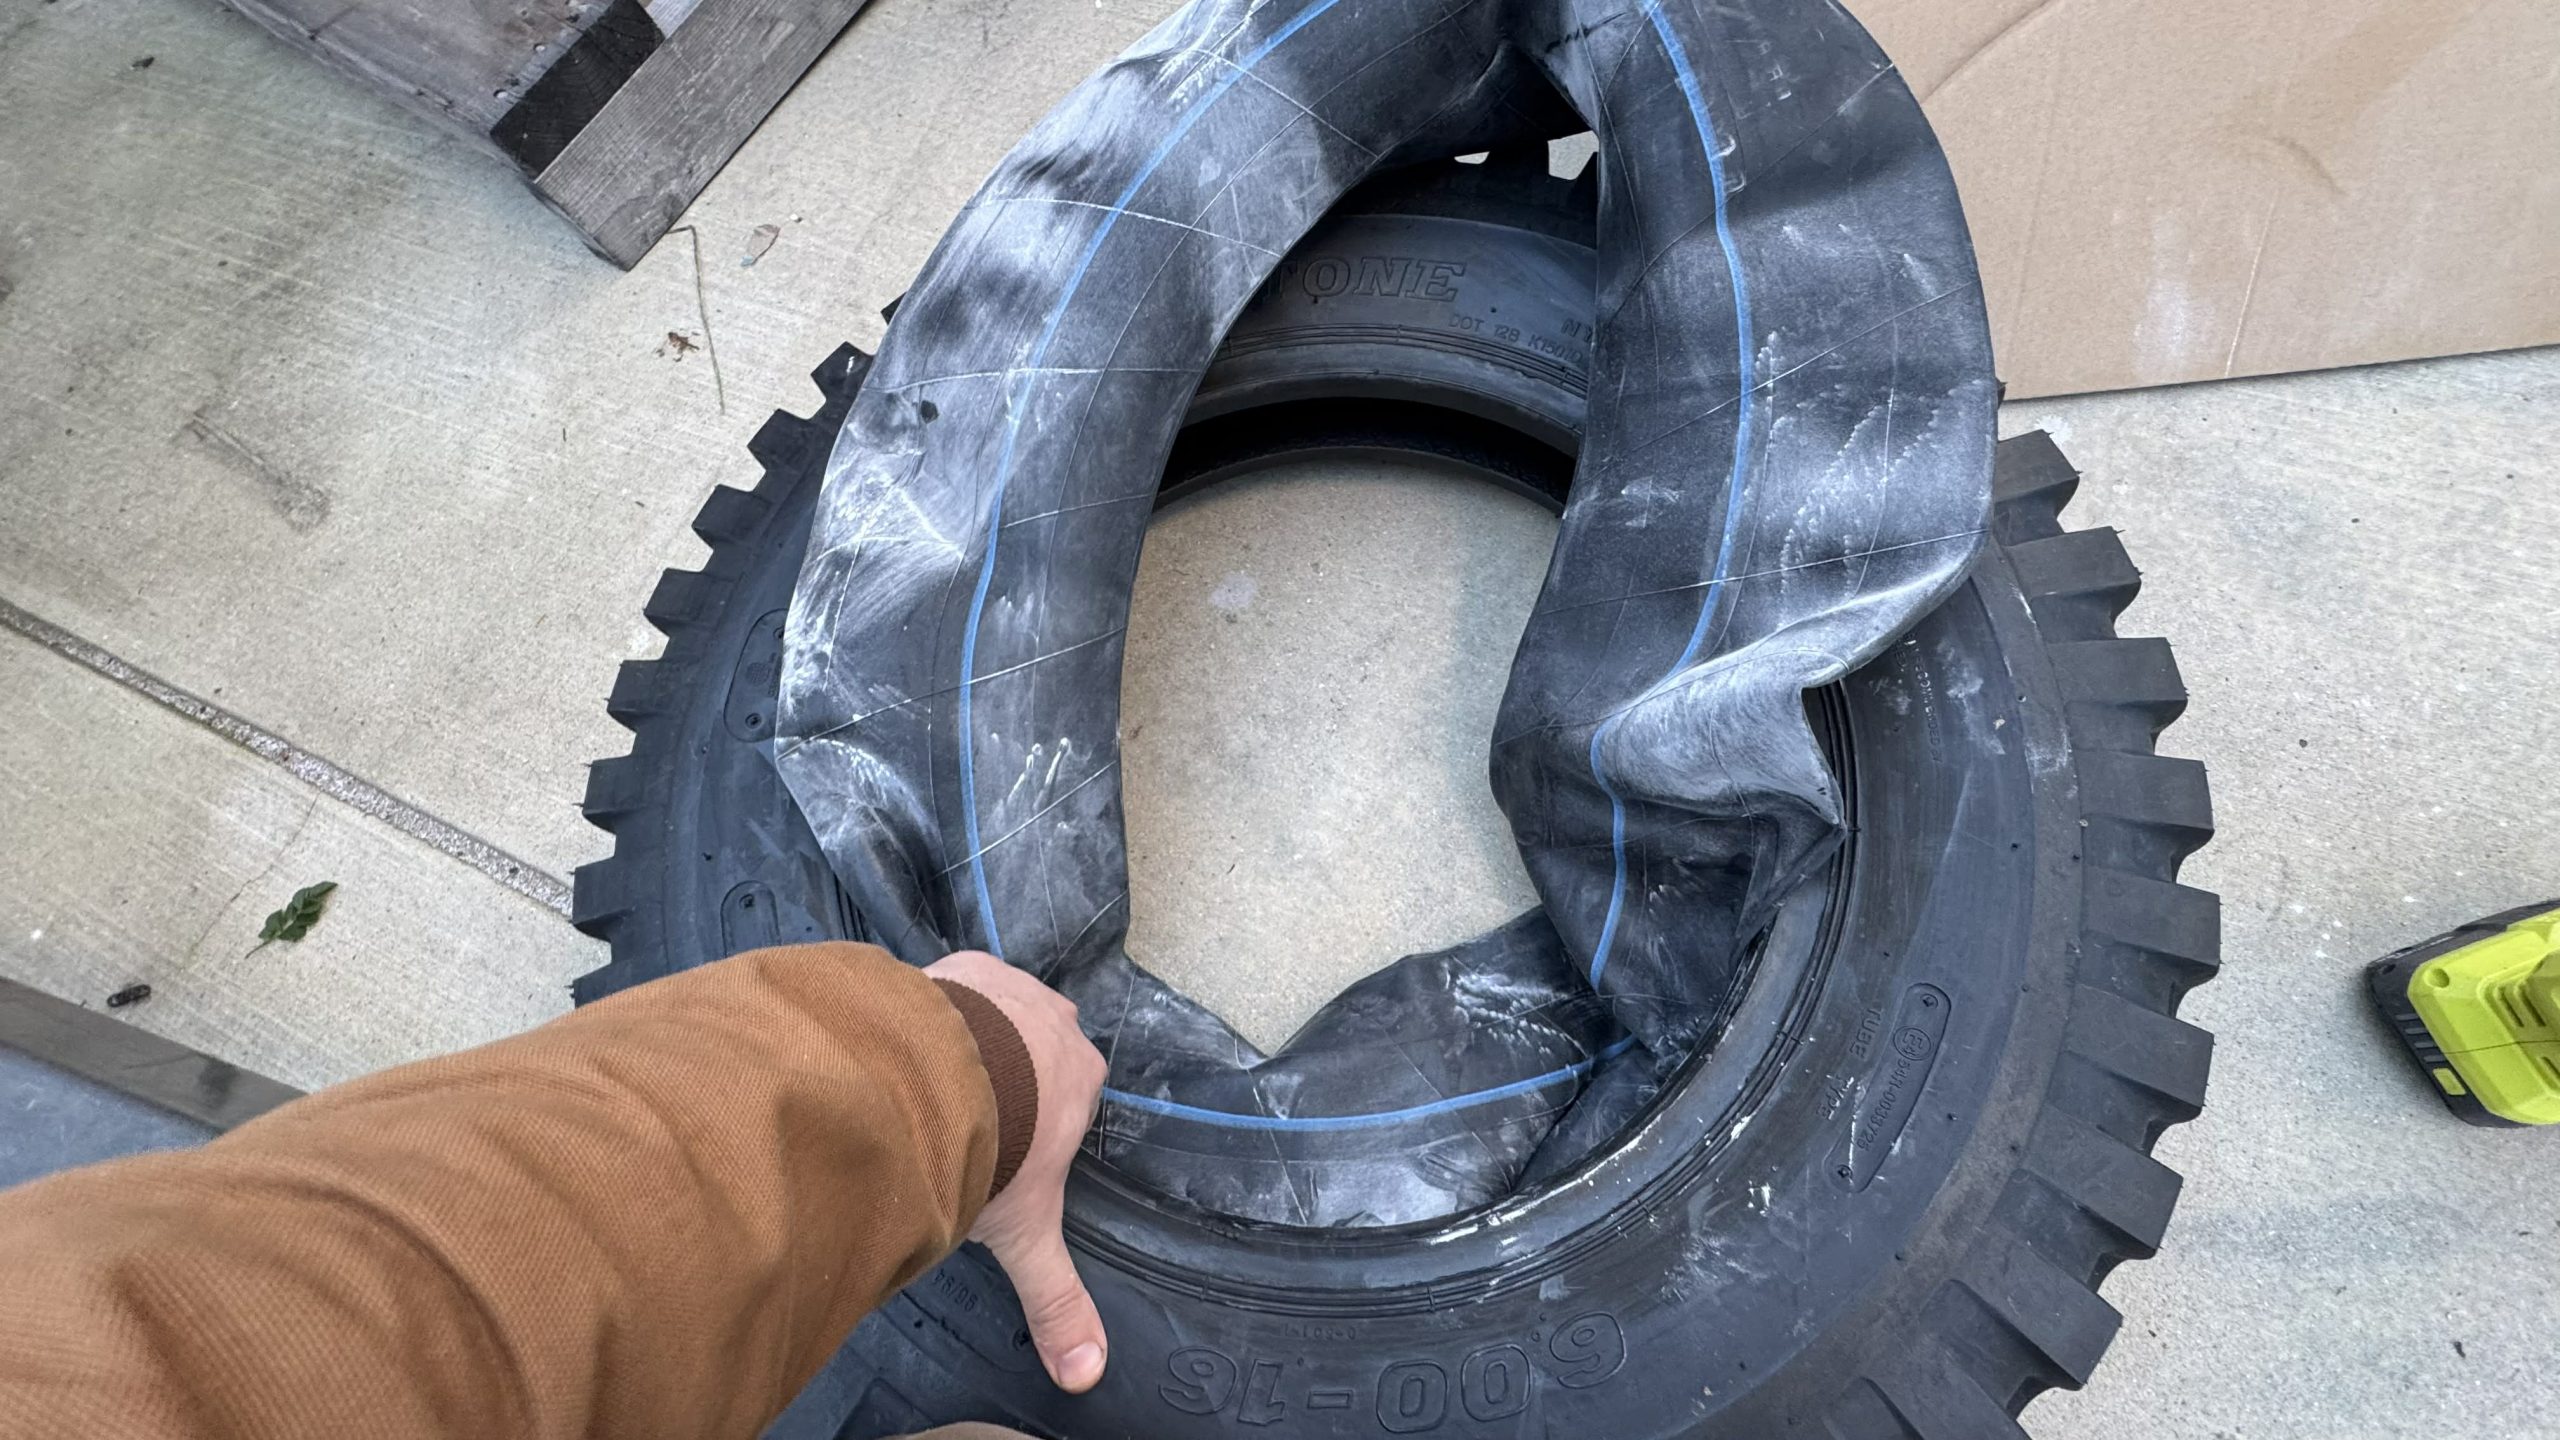
Then the solider would install an “inner tube flap,” which was meant to protect the inner tube from the wheel.
Tucking the inner tube flap around the inner tube yields a tire/inner tube/inner tube flap assembly that looks like this:
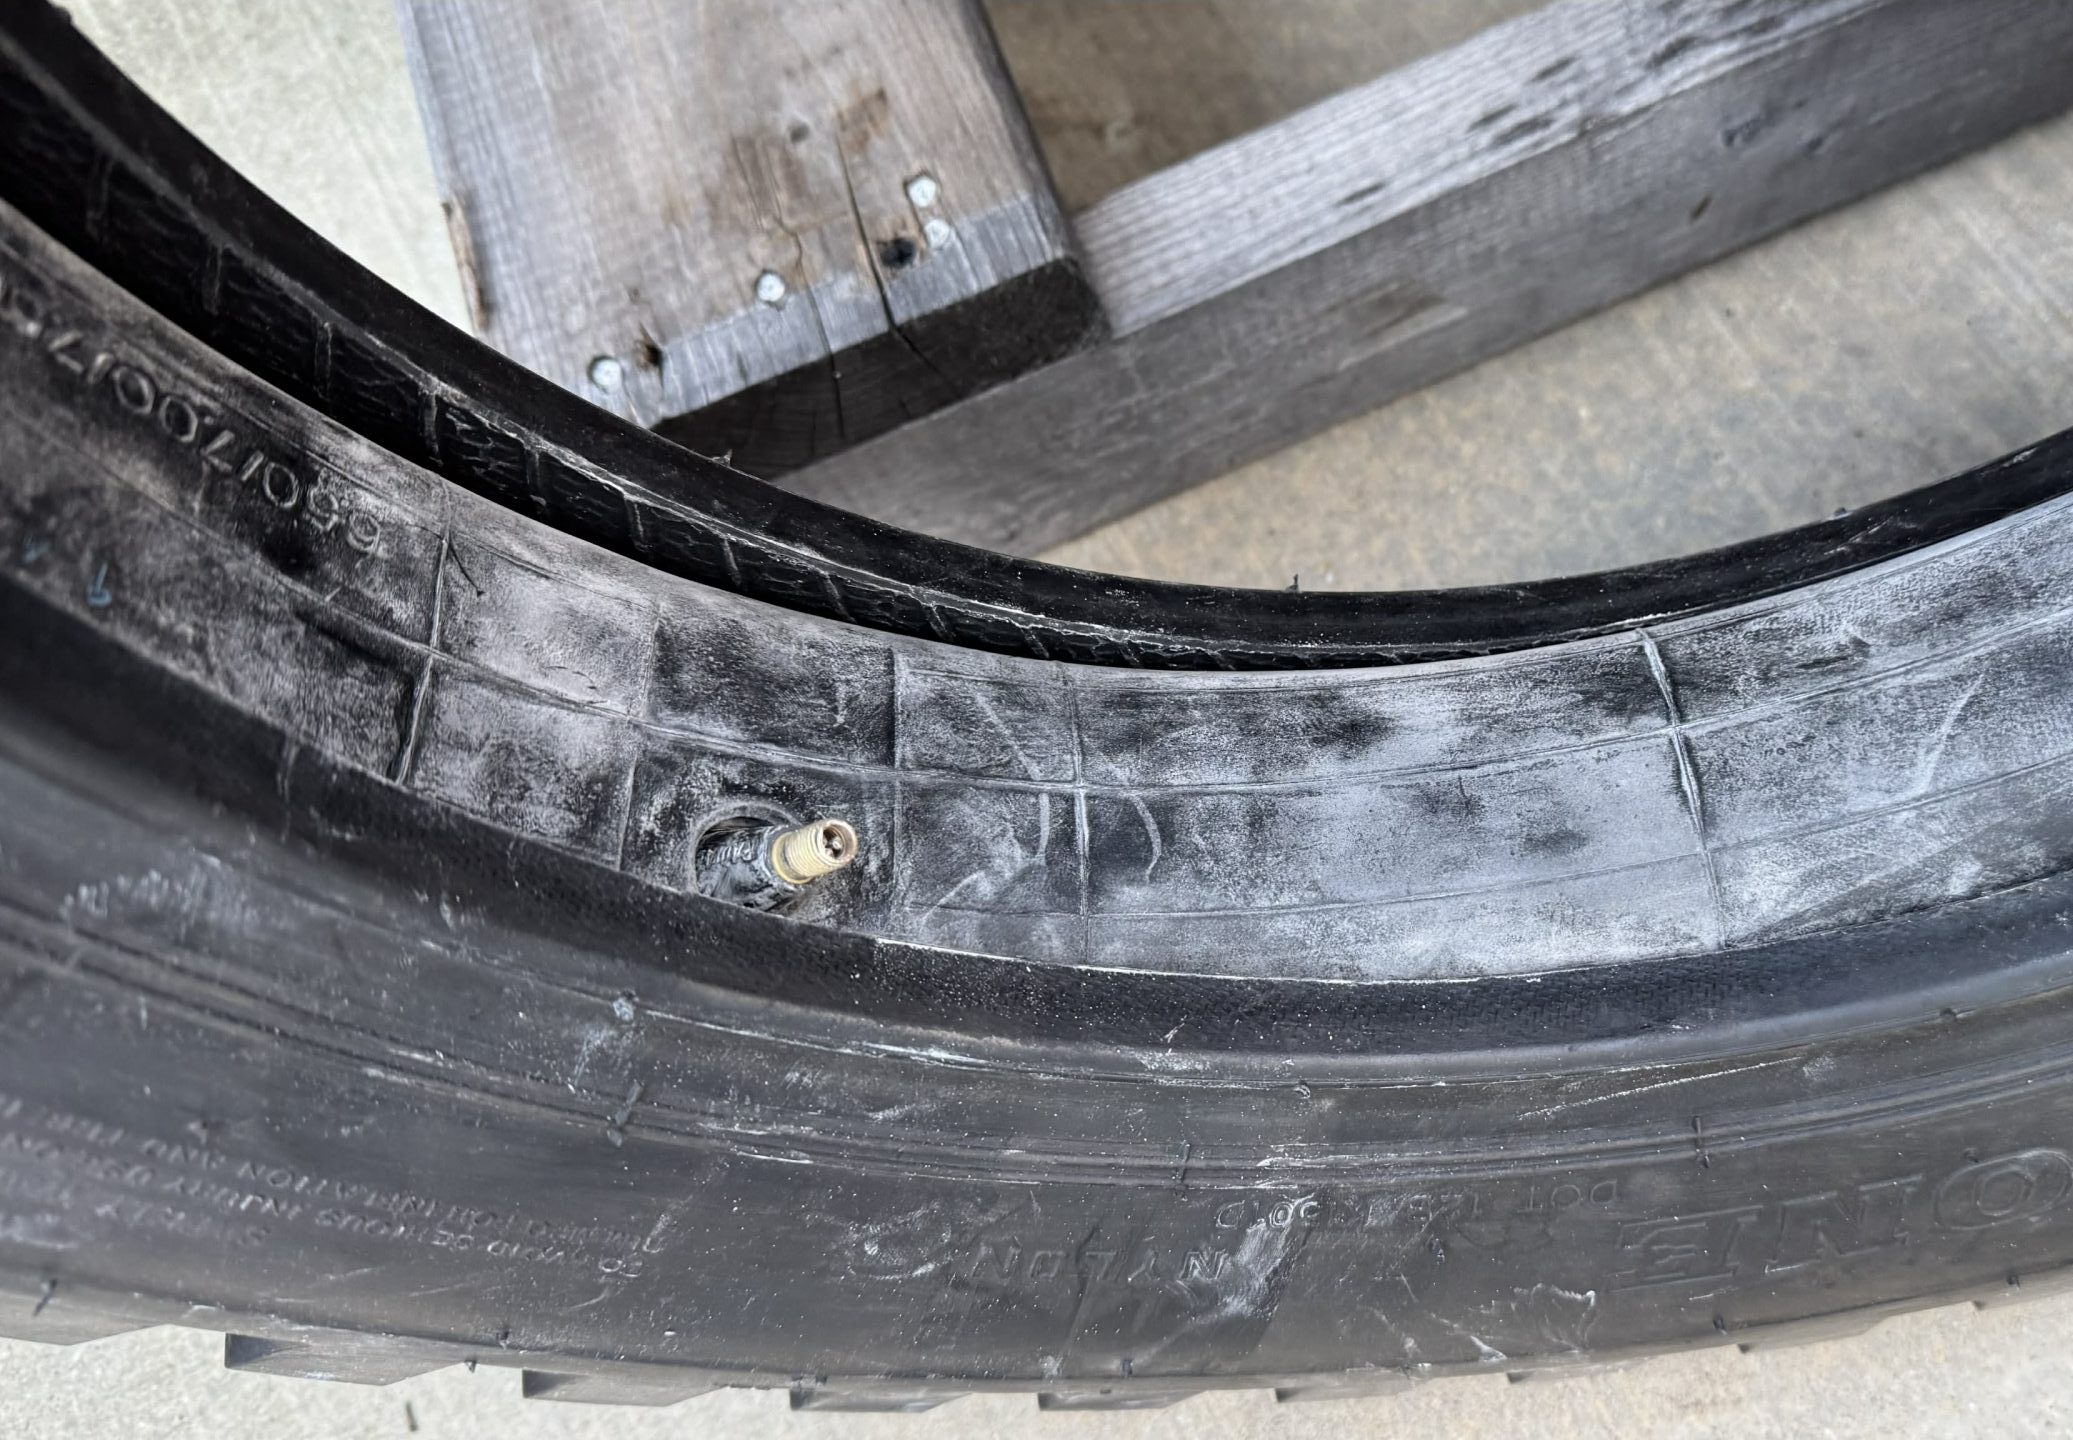
That whole assembly gets dropped onto half the wheel, with the inner tube’s valve stem lined up with the wheel’s valve stem hole.
Then the other half gets dropped into place and bolted down. And that’s it! Inflate the tire to 24 PSI and fight for freedom!:
I used some baby powder to help ensure that the rubber inner tube and flap don’t get stuck, but other than that, I used only a wrench, a tire inflator, and about 10 minutes of my time. A seasoned field mechanic could probably install a tire in less than two minutes.
If I wanted to be really legit, I’d install valve stem protectors/retainers like these (I tried, but they made inflating too difficult):

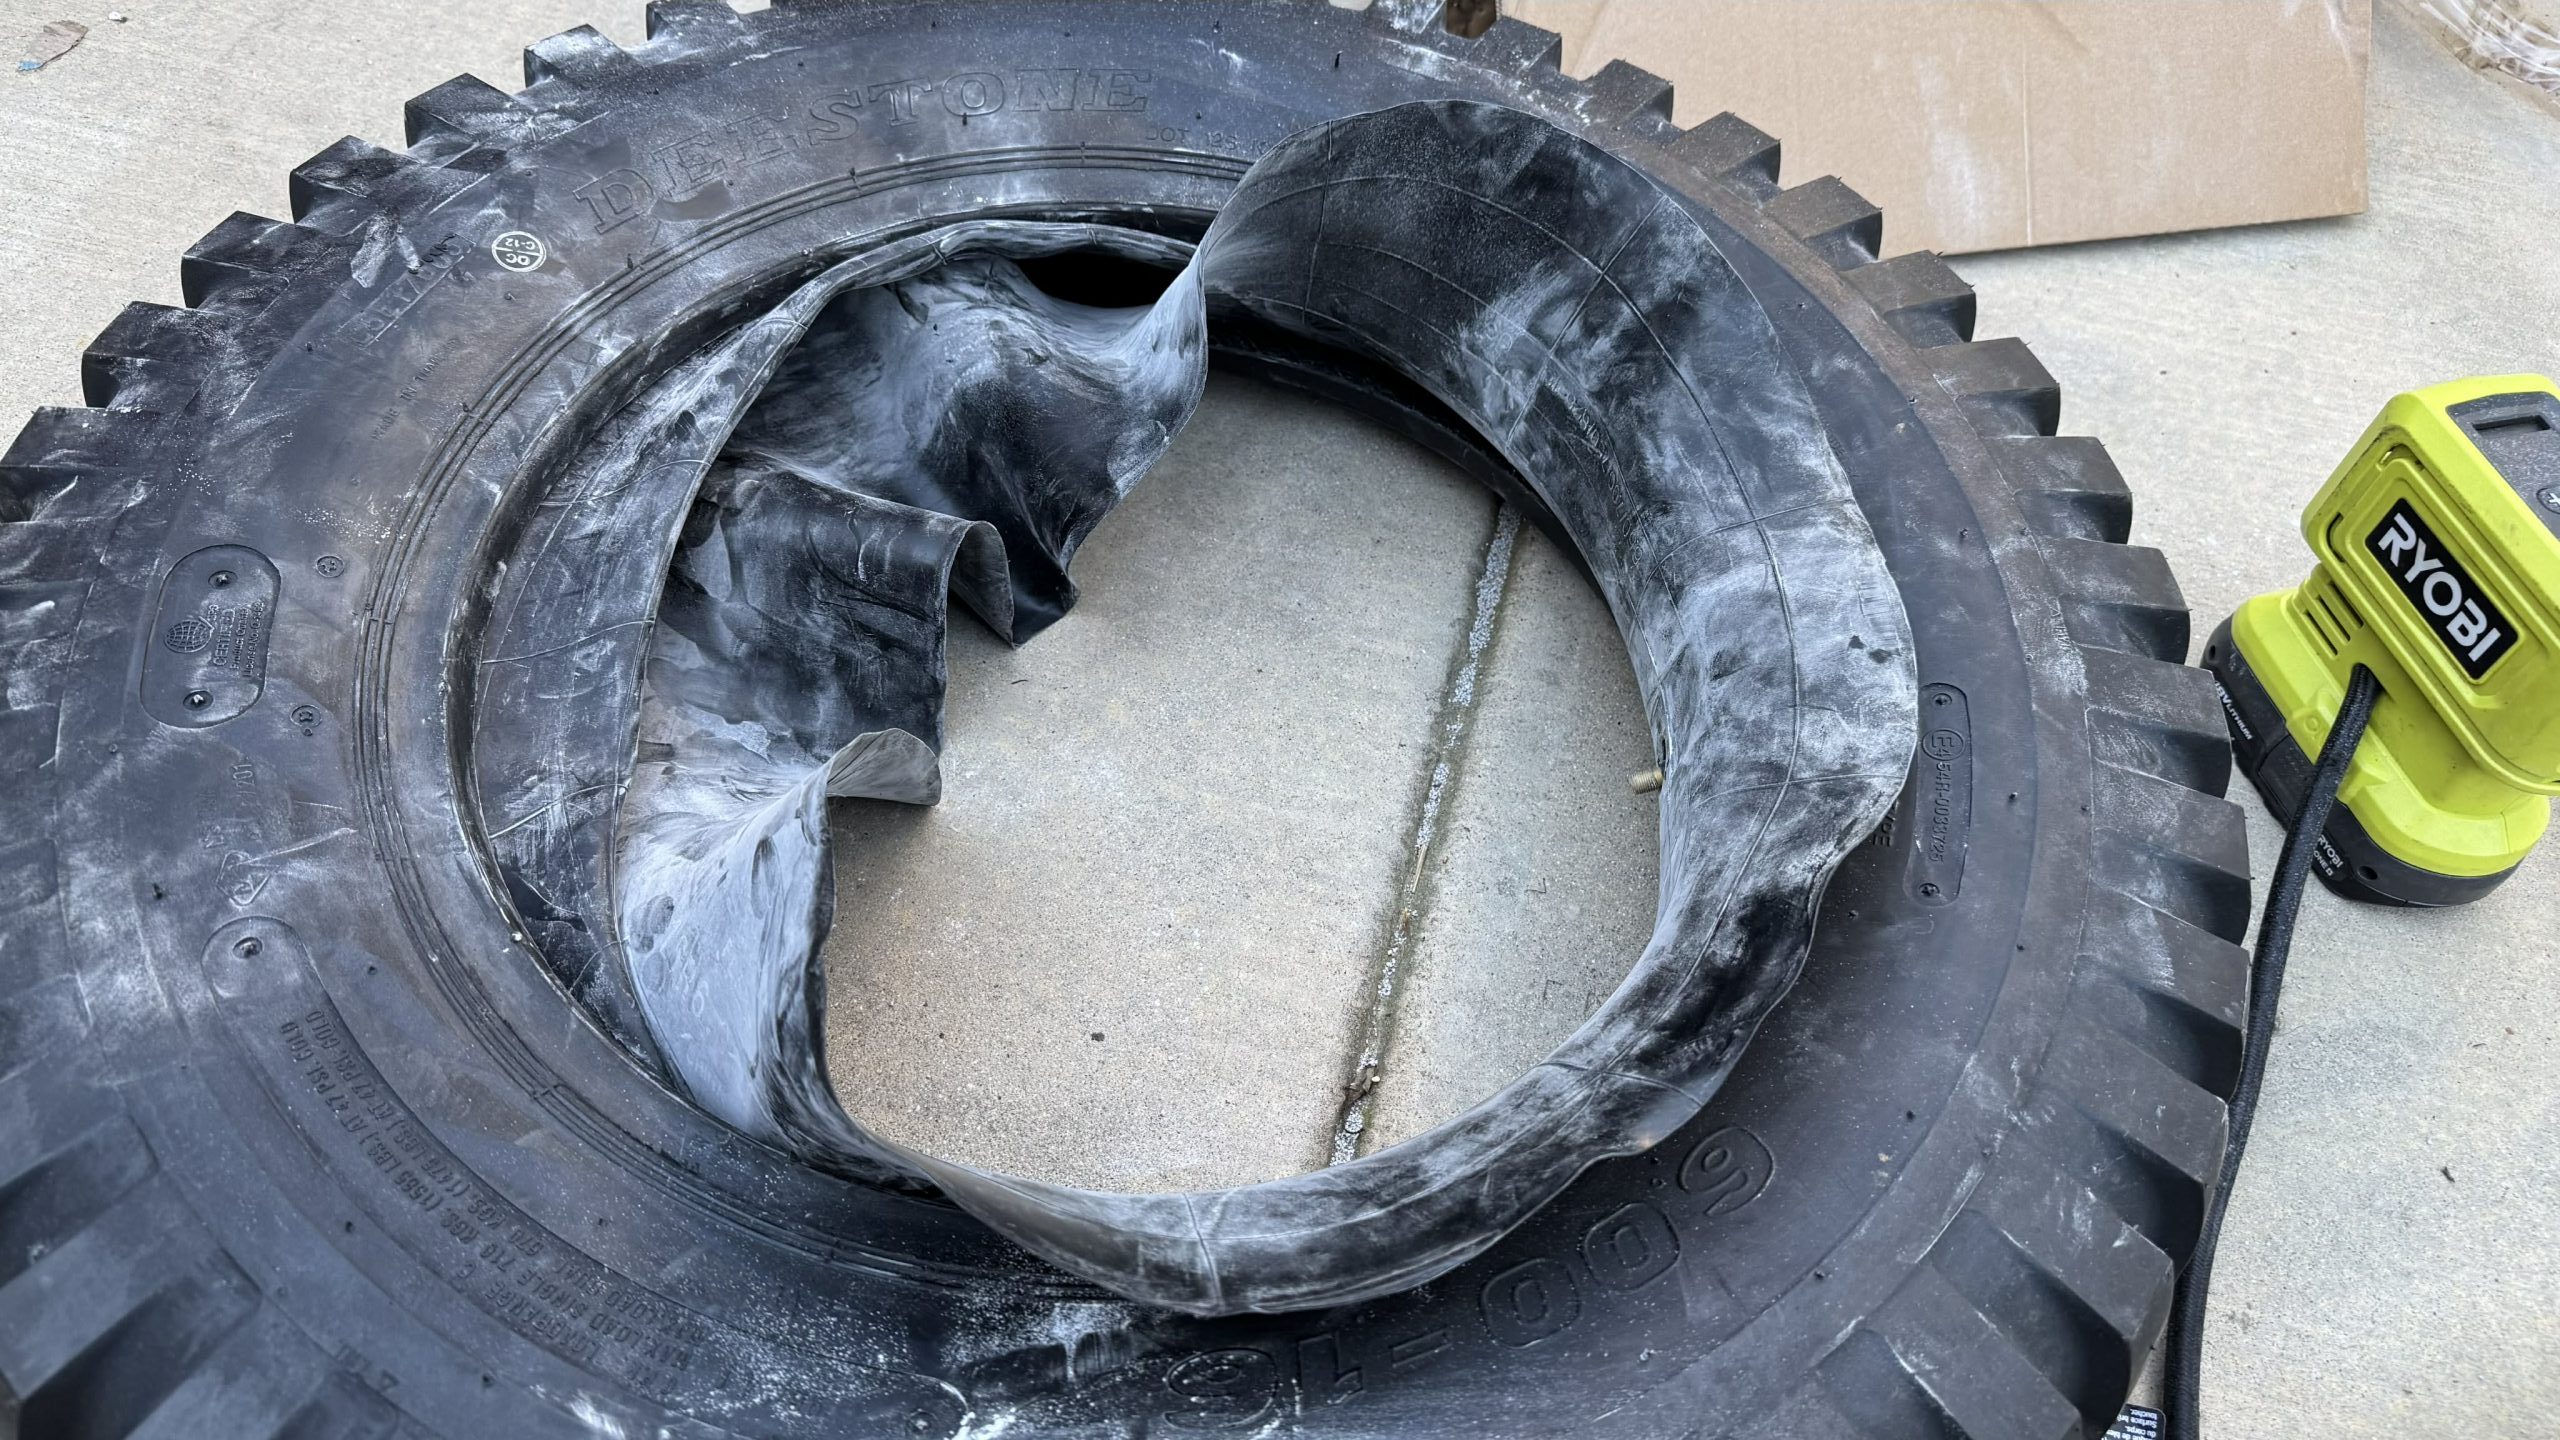
It’s a testament to the WWII Jeep’s brilliant, service-friendly design, and also to the value of inner tubes. With the tire and flap protecting the tubes — not just from the road and rocks outside and the rim inside, but also from the sun’s UV damage, WWII Jeep tires can go many, many decades before they won’t pump. up. In fact, have a look at this tire here:
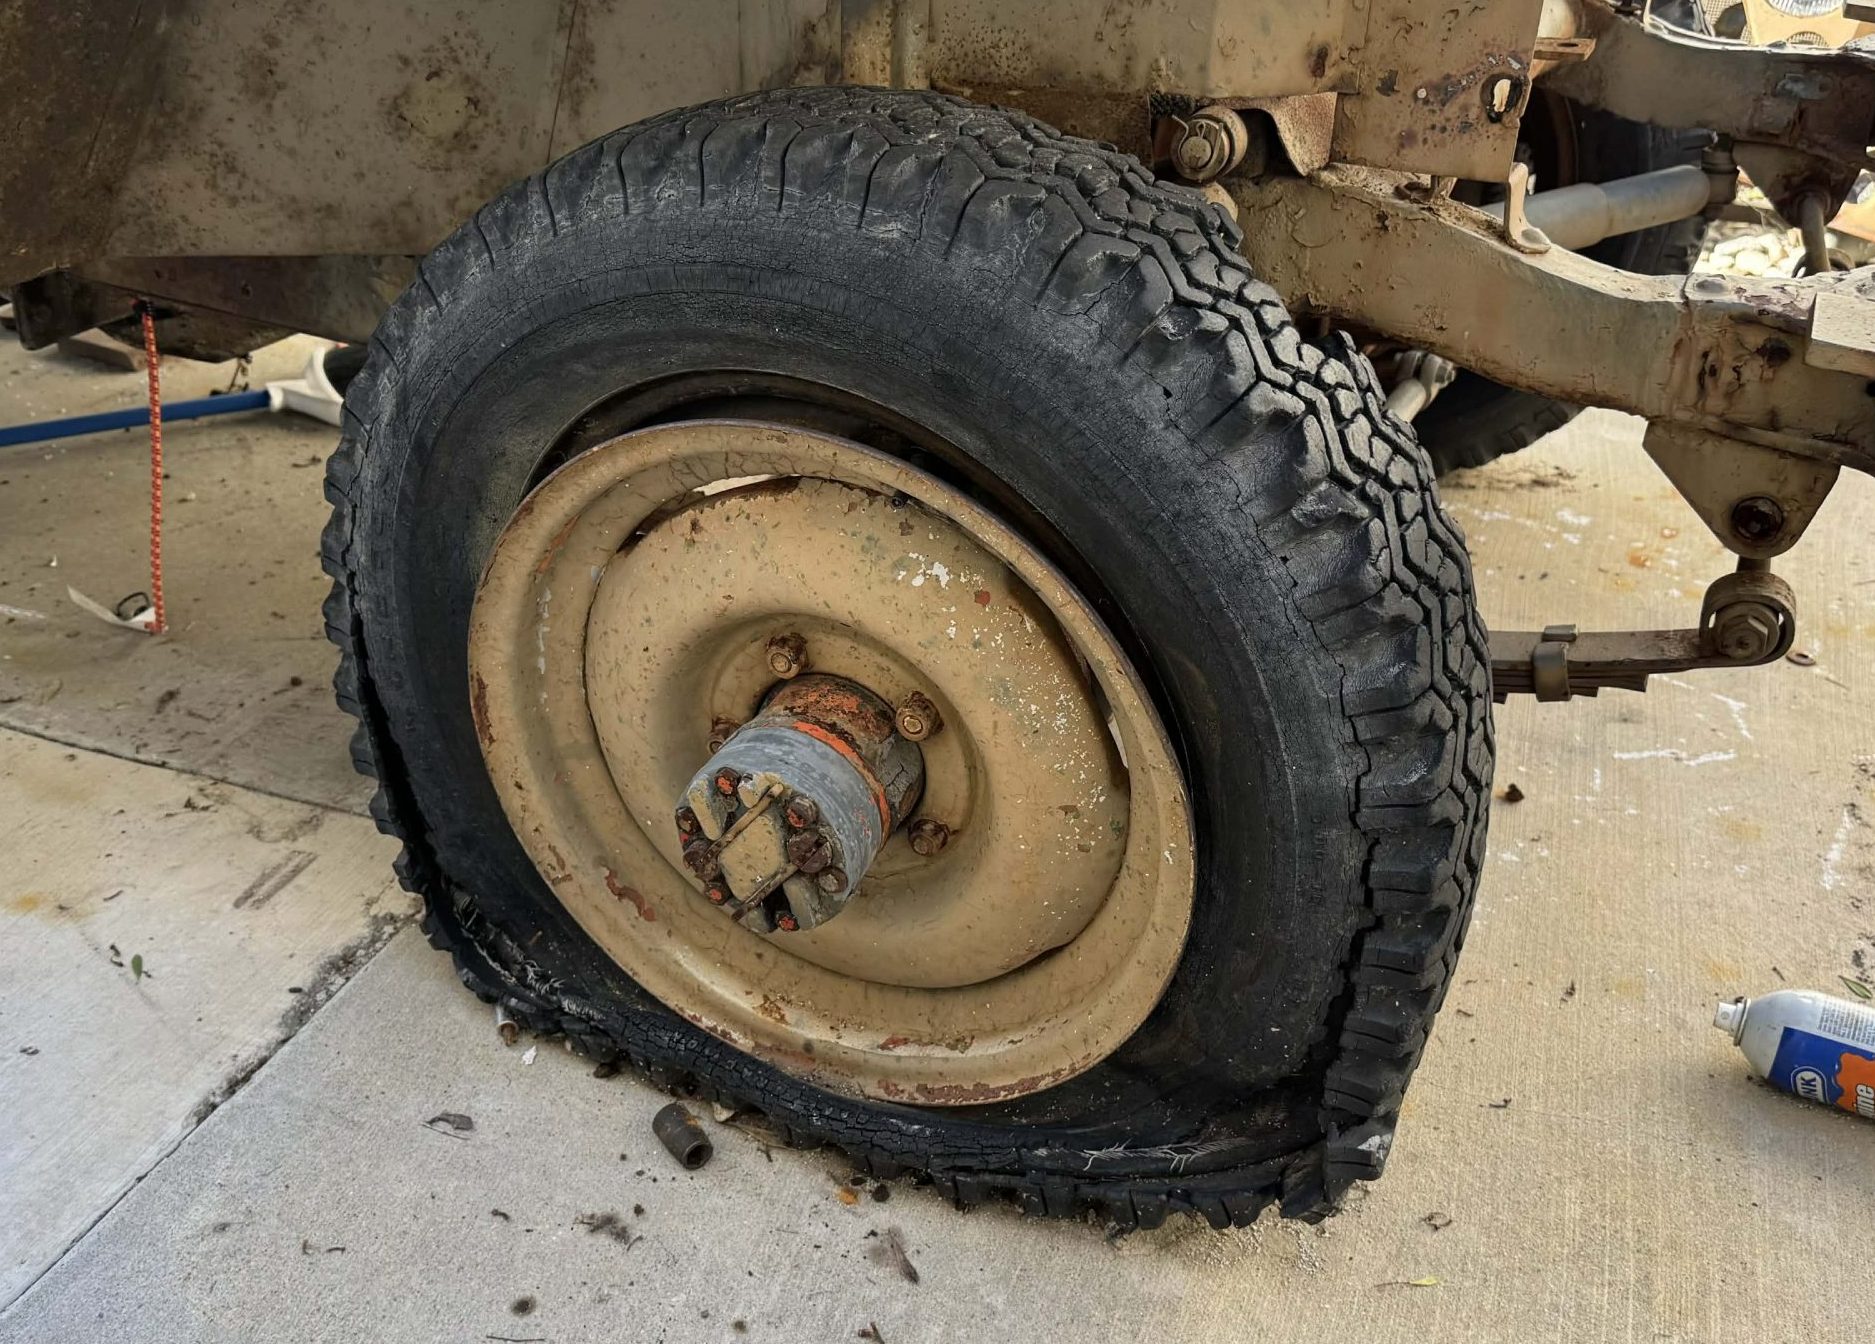
You’d never believe that it has any chance of inflating. And yet…
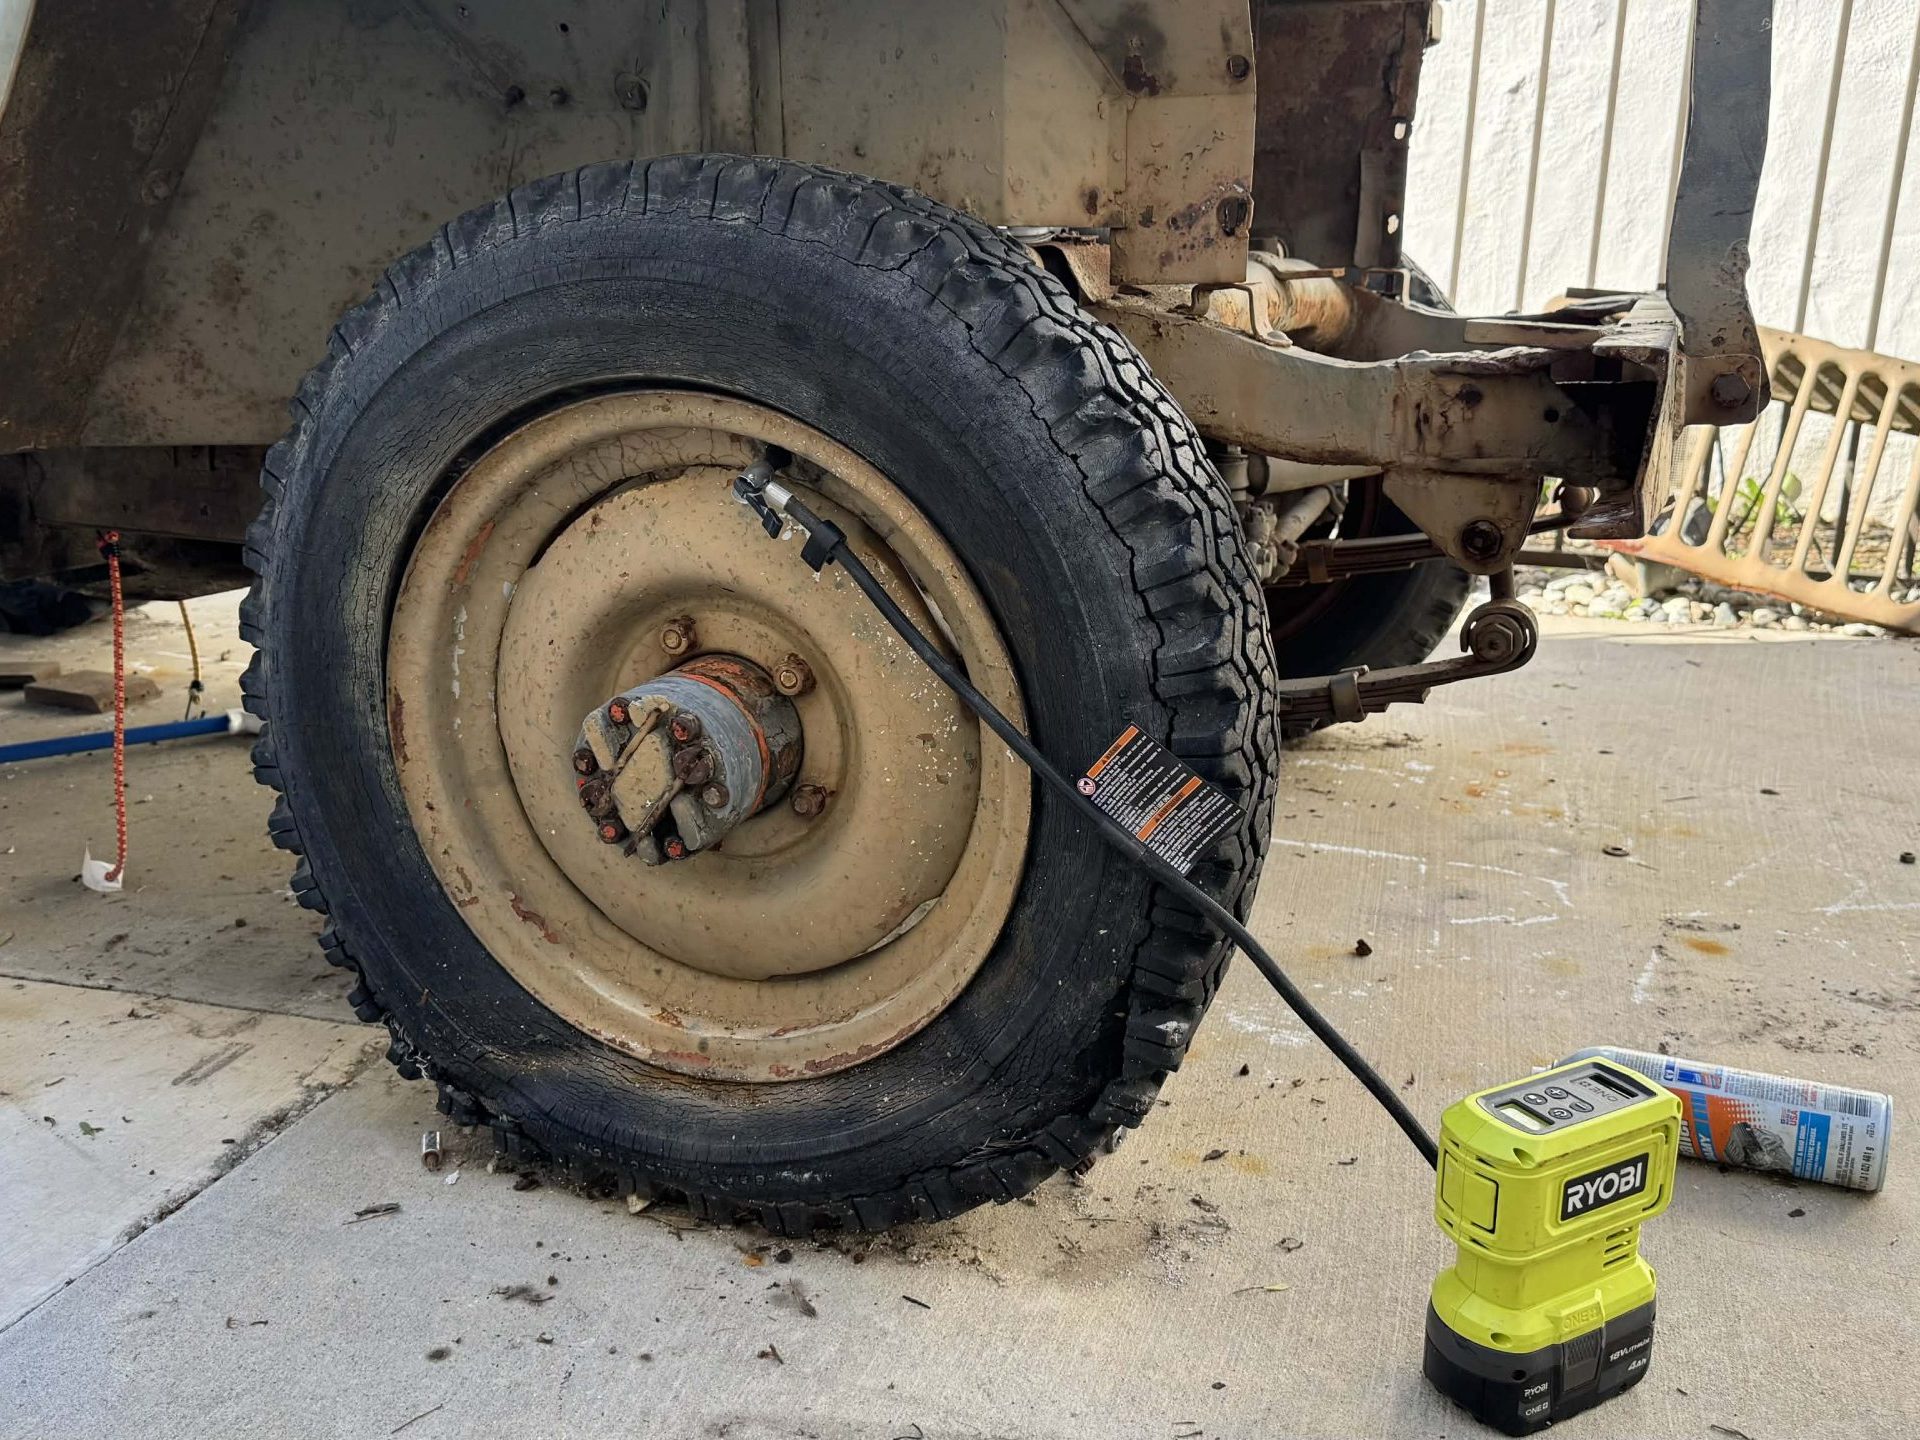
That’s the beauty of the inner tube, though it’s really that split-wheel design — and that incredibly quick and easy removal/installation process — that sets the WWII Jeep apart from most civilian cars.
View this post on Instagram
[Ed Note: This story is part of a series of articles involving the construction of a new WWII Jeep using parts sourced from eBay. David mentioned the idea of building a brand new WWII Jeep to the team at eBay, and they loved the idea so much that they said, “How can we help?” Their support and David’s Jeep-obsession are the fuel behind this crazy build. – MH]


Aircraft tires have similar 2 piece rims.
But without a tube. Wheel half joint is sealed with an o-ring.
Turns out that my Harbor Freight hand truck has “combat wheels” .
Who knew?
I have some 1950 Jeep tires that have been holding air since 1950.
https://www.youtube.com/watch?v=t8c6M9UCgaM
Those are not “split rims” they are two piece wheels. They are not widow makers nor are they particularly dangerous.
Split rims refer to wheels which use a lock ring that is removed to allow the tire to be removed. With Budd or Disc style wheels the lock ring is expanded over the rim. On the older Dayton or spoke style wheels the rim was split and was compressed to fit into the lock ring.
Also those bolts that hold the tow pieces together are called carriage bolts.
It really isn’t that frequent that you need to use a Bead Blaster or the Ether trick on normal sized tires mounted on wheels within the specified width range. Lift and hit the pedal for the seating blast.
If that doesn’t work back in the day they used to sell foam donuts that you would lube up slip over the rim to fit between the bead and tire. A bicycle tube or a pool noodle cut to length does the same thing. In either case they get popped out as the tire expands. Someone else mentioned the ratchet strap trick which also works well.
Yes, these are more like the old Centerline wheels, back when they sold the inner and outer halves separately, so you could play around with widths and offsets.
Thank you for calling all of these things out.
Edit: especially the difference between two piece and split-rim (widowmakers), and the basic fact that those are carriage bolts.
A bead blaster is a tool of last resort. Usually airing up the tire will seal the bead, and airing up the rest of the way to will seat the bead (note seal vs seat). Sometimes you’ll need to use an additional blast of air while airing up the inside to get that initial seal, and often times on low profile tires you’ll have to inflate beyond spec pressure to finalize the bead seat, then deflate to spec pressure. If anyone is still using fire to mount tires in a professional setting I haven’t seen it.
Source: I have personally mounted and unmounted hundreds, maybe thousands of tires using that exact Coats Maxx* machine. I can unmount and mount most common tires in about two minutes, barring complications.
*Note the Jeep wheel and tire is still vastly more field serviceable, but if you’re going to play up how difficult it is to seat modern tires – and they are tough sometimes! – I’d appreciate getting the basics right.
Yes I should have said sealing blast not seating. My experience was all back in the day with 100’s of tires done on the old Coats 20/20, which was pretty much the industry standard at the time.
Oh that wasn’t a criticism of your use of seat/seal at all. I will and do probably use them interchangeably in the moment. My point is that if you’re going to write an article about it, it matters, because it’s information supplied with the intention and presumption of accuracy. I’m grateful that there are so many people here that know so much – Autopian editors have to stay sharp.
In my experience removing a tire that has been on for a while can still be quite difficult on these rims.
Also does everyone not know the trick to seating beads is a ratchet strap around the tire diameter to squeeze the tire until sidewalls push on rim? You can then just add enough air to hold, remove strap, and seat beads.
Huh, I think I independently thought up that ratchet strap idea when I was mounting my winter tires onto rims, but unfortunately it didn’t work all that great for me! I ended up getting two of them seated myself, but had to take the others to a shop
I’ll take my civilian wheels and tubeless radials.
DT – maybe a link to this article in your story is warranted? https://www.theautopian.com/vintage-safety-ad-split-rims/
That spray-can-of-starting-fluid-ether + Zippo technique is a real hoot. I remember my old man doing that.
Helps to keep the rim bolted to tons of trailer and have a second person on an air tank connected to the tire.
They make cages for this sort of thing too.
Let’s you know when the tire is too weak.
Had sidewalls on one dissolve in blue flame.
Friend tried this on a lawn tractor tire, loose.
Used too much ether.
Went up 30 to 40 feet.
Worked though.
I hope it didn’t hit him in the head on the way down.
He managed to dodge it, so it stays funny!
Bonus points for the Landcruiser content in the background.
Split Rims on big trucks were known as widow makers, but this basic design is still employed in Hummers and other Military beadlock/run flat rims. Getting the bead lock insert into and out of the tires can be a pain though. But this does help on a jeep too as you can usually swap rubber with half of the rim still on the rig. though it does require some tools and a good on board air system.
Are truck split rims paired with tubeless tires? I can definitely see how that, paired with a truck’s higher tire pressure, would up the danger level substantially.
the old truck rims were friction fit, so there were no fasteners holding the rims together. tubes or not if they did not fit just right the result was a metal ring flying across the garage.
Ah, that’s horrific
15 to 20 min is probably reasonable as your WWII soldier did not have battery powered impact guns or portable compressors.
We had an old Cj2 at the farm, could change a tire in 10 minutes using levers without taking it off the vehicle
As a long ago tire-buster, I can tell you that regular split rims, which fit by friction only, are truly nasty to remove and reinstall. Nowadays I believe inflation at most tire dealers is done in a cage, but in the split-rim days, it was truly dangerous to air up a (tubeless) split-rim wheel-tire combination.
Also: Did WW II GIs have any way to balance the wheel/tire? Maybe it made no difference with skinny tires on rough terrain.
Commercials tires should ALL be inflated in cages, whenever possible.
Some equipment the tires are simply too large. So keep that sucker bolted to the machine and use a clip-on chuck with at least a 6ft hose to stand clear.
Max Speed of 40-45 on mostly non paved surfaces probably negated the need.
These look terrifyingly bad for on-highway use, and look like failures would be spectacular.
It’s a flat fender Jeep. It’s not meant for the highway.
0-60mph in… Shakes head and laughs…
Exactly. Top speed of these things is what? 45mph? 50mph?
Even IF it has a higher top speed, it would fall squarely into “just because you could doesn’t mean you should” territory.
If it had a higher top speed, the grunts/pfi would have exceeded that speed.
Absolutely!
I think they top out at around 55. Likely absolutely terrifying.
Probably!
Wait a minute. If these are Combat Wheels, and you’re building a Combat Jeep, does that make your son a Combat Baby?
(This post and TMD being Canadian focused made this song, from Canada’s Metric, pop into my head.)
Great song. Great band.
Or you can be like me with the help of my mentor, breaking the bead of 20y/o 2CV tires by using the adjustable suspension of his DS Break to force a block wood onto the tire and pop the bead. Then mount the new tires with lots of lube and a lot of standing and walking on the tire, followed by an air pump to force it up on the bead. Just one angry knee later and you have mounted tires 🙂
I did that on my Prius when one of my cheap TPMS sensors corroded and ruined the threads on my valve stem. It was so hard to break the bead on that tire. I was seriously afraid I was going to damage it with how much the wood was digging into the sidewall. I eventually got it, but I also decided that future valve stem replacements would be done by a tire shop.
Luckily, re-seating the bead was trivial since I only had to take off one side. I pulled the valve core out of the new stem, hooked up the rubber-tipped blower attachment to my air compressor and gave it a shot of air. Seated right up.
I did this on my 2012 Tacoma using a 2×4 T with the top flat part on the tire and the longer part under the frame. Slowly drop the truck onto the T with the tire under it after you pull the air stem out and it will pop the bead. Then wrestle the TPMS sensors out. I also did this on my wife’s Subi Legacy when her sensors wore out.
The US military is an organizational psychology research institute & logistics company, run by the government. The shooty bits are just the “face towards enemy” side.
Ah, split rims. Killing tire techs for over a century.
If you ever wanna talk tires more, one of the many trainer certifications I hold is in Commercial Vehicle Wheel Service (CVWS).
A certification Ontario came up with in 1996 after we were having an increasing number of commercial wheels failing to stay attached at speed.
Surely not so bad with an inner tube tire though. If the rim breaks, the tube will still hold air, it’s just your wheel falls apart. And if the tube bursts, well, you were screwed anyway. Or am I missing something?
No. Nearly all split rims are tube tires. Doesn’t make them any less deadly.
Noted, I was under the same assumption that they would have been less dangerous because of the tube…
https://i.makeagif.com/media/12-13-2019/2ppcDp.gif
The tube holds the air, not the pressure. The tire and rim contain the pressure, if that makes sense.
I can only extrapolate from a long history of cycling, but generally speaking when wheel/tire interface (or in the case of a split rim, a wheel/wheel interface) fails, the tube can insert itself into spaces it wasn’t intended to go and can exert incredible force in doing so, leading up to a CATASTROPHIC failure (usually accompanied by, at best, a *bang* loud enough to make any bystanders ears ring for hours).
The force of these explosions can easily tear huge holes in multi-layered kevlar/aramid reinforced tires or rupture steel or kevlar tire beads, and in some rare instances (generally limited to high pressure road bike tires), deform aluminum rims designed to deal with 100+ PSI on the regular.
I love my tubeless MTB tires, I absolutely despise dealing with the tubes in my road bike tires. One time while trying to change over a set of new tires I destroyed THREE new tubes before getting it right.
The only thing worse than tubes in road tires is tubeless in road tires.
I ran road tubeless for several years, but recently reverted back to TPU tubes – I got tired of topping up for every ride, minor punctures spraying me and my bike with sealant, and a difficult rim/tire interface on my primary wheelset.
If you do run tubes on your road bike, try just barely inflating them (just enough to give them a tiny bit of shape) before you install. It helps to push them into the tire instead of leaving a flat hunk of rubber that likes to get stuck between the tire bead and rim.
When I worked at sears we didn’t do split rims – there were a few commercial sized alloys I did for a Ram 5500 or something like that, but we didn’t have a cage.
My boss told me they used to, though. He’d seen a few burst in the cages. He said a previous coworker told him “I never saw one burst without the cage, but when I woke up in the ER they told me it was quite the sight”
Yeah, but aren’t all those split rims a friction fit? The two halves of this rim bolt together. Seems far less deadly.
I have case studies that prove the opposite
The first thing that comes to mind is improper torque (force, lug torque pattern, or both) – was there something else at play? The heaviest duty installation I’ve ever done was a dually, or full ton trucks and vans.
David, what is the goop between the wheel halves? I didn’t see in your notes, sorry if I missed.
Copper Anti-Seize? To prevent rust/seizing of the two halves?
What’s with the Windex on top of the electrical box? I could understand it being on the gas meter, but the electrical box? IG video
Keep up the great content David!
I think David has missed a bit: Modern rims have humps in the profile, about an inch inboard of the outside faces of the beads. These exist to prevent a tyre bead falling into the well of the rim in the event of a puncture, making the car uncontrollable.
It’s not too difficult to mount and demount tyres on older rims that have no humps just by using tyre irons. It’s almost impossible to push a bead inwards over the humps without the big machine that the tyre shop uses.
As somebody else has said, humpless rims have been outlawed in most countries.
Well, sure, there are a variety of good reasons you don’t see this design anymore. But that doesn’t take away from the ease of tire repair, which is what this article is all about
They were “combat rims” for a reason. The WWII era US Army intelliegently realized logisitics were king, based in part on Civil War lessons. An equipped, supplied army can fight.
I think the hand tools are simply larger.
Technically you could do this with a 3-piece motorsport wheel, like a BBS RS. You’d be insane, but you could.
I understand the application, but back when I was busting out tires in high school we stayed away from split rims and 16.5” rims/wheels
Ya want a couple!? I still have two of those 16.5″? ones!
I remember even 30 years ago my buddy trying to find a shop to deal with and tire mount on split rims and all but one junkyard said hell no.
There is another name for combat wheels, or split rims – Widow Makers. They aren’t DOT approved anymore as far as I know. If I recall, you can still get a Land Cruiser with split rims in the African market for reasons of serviceability.
Luckily, the DOT isn’t running checkpoints where armed, masked agents in full tactical gear verify the compliance of your tires and lights. Yet.
Minnesota would like a word…
These actually have DOT approved markings on them.
On the tires, or on the wheels?
…and in which century did DOT approve them, and for what application?
I believe you’re thinking of the various wheel designs that are held together only by interlocking flanges. There’s a nice summary here:
https://justacarguy.blogspot.com/2017/05/these-specific-rims-are-what-is-known.html
The RH-5 has the worst reputation but the others can also be… problematic.
These Jeep wheels, on the other hand, are bolted together. The wheels on my KV Mini 1 and Velorex 435 employ similarly bolted designs, although I suppose that’s not necessarily the best pair of examples to be advanced in favor of the suitability of this approach. Still, these aren’t what’s meant by widowmakers.
I didn’t know about the flange wheels. Just any split wheels. The bolted ones that Toyota uses are commonly thrown in the trash by people who have access to better tires in markets where they come standard.
(nevermind)
The tube is not structural. The tube will get pinched and will fail near-immediately.
My father was occasionally a defense lawyer for Firestone in the early 70s. When they demoed inflating a multi-part wheel everybody ducked, even though it was in a safety cage. I’ll happily pass on the experience, although I have done tires on regular steel wheels.