
Repairing your own car is a rewarding and sometimes cathartic activity. Yes, it’s still fun even after the skinned knuckles and the invention of curses that you’ve never used before! What’s not so fun is running into a part that either requires a special tool to remove or the existing tools that exist are not suitable for the task. Or, maybe you want to do a modification for your car, and the parts to do so don’t exist. It’s time to work those folds in your brain and get creative. Have you ever created your own tool or car part?
Most of my creative antics happened back when I was much poorer and had only one Smart Fortwo. Yes, that was a long time ago! I wasn’t even old enough to drink alcohol back then. I worked at McDonald’s and put most of my money into my car. Sadly, the American aftermarket for the Smart Fortwo has usually been on the pricy side, which sucks when your paychecks are just hundreds of dollars. Thankfully, replicating the parts seen in the aftermarket sometimes isn’t too hard.
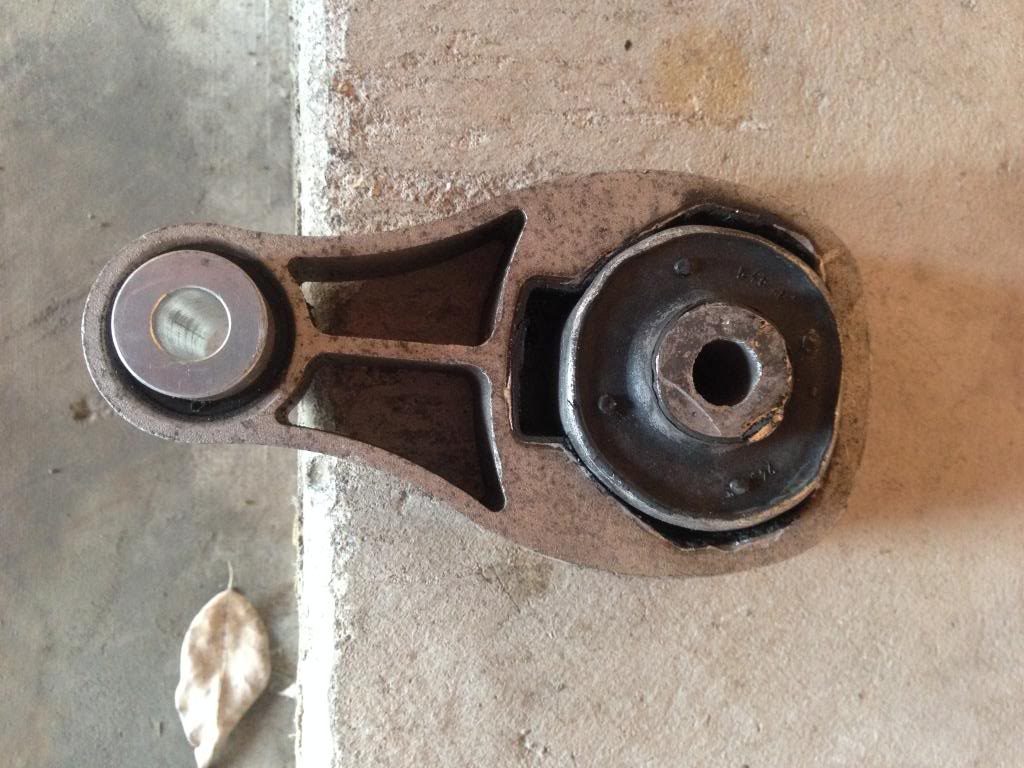
One of my first custom modifications was to my Smart’s lower motor mount. The stock one, pictured below, is soft and rubbery. It’s great for daily driving, but it’s one of the reasons why old Smarts feel so sluggish. The powertrain cradle gently rocks with each gearshift, amplifying the “bucking” feel that some journalists complained about.

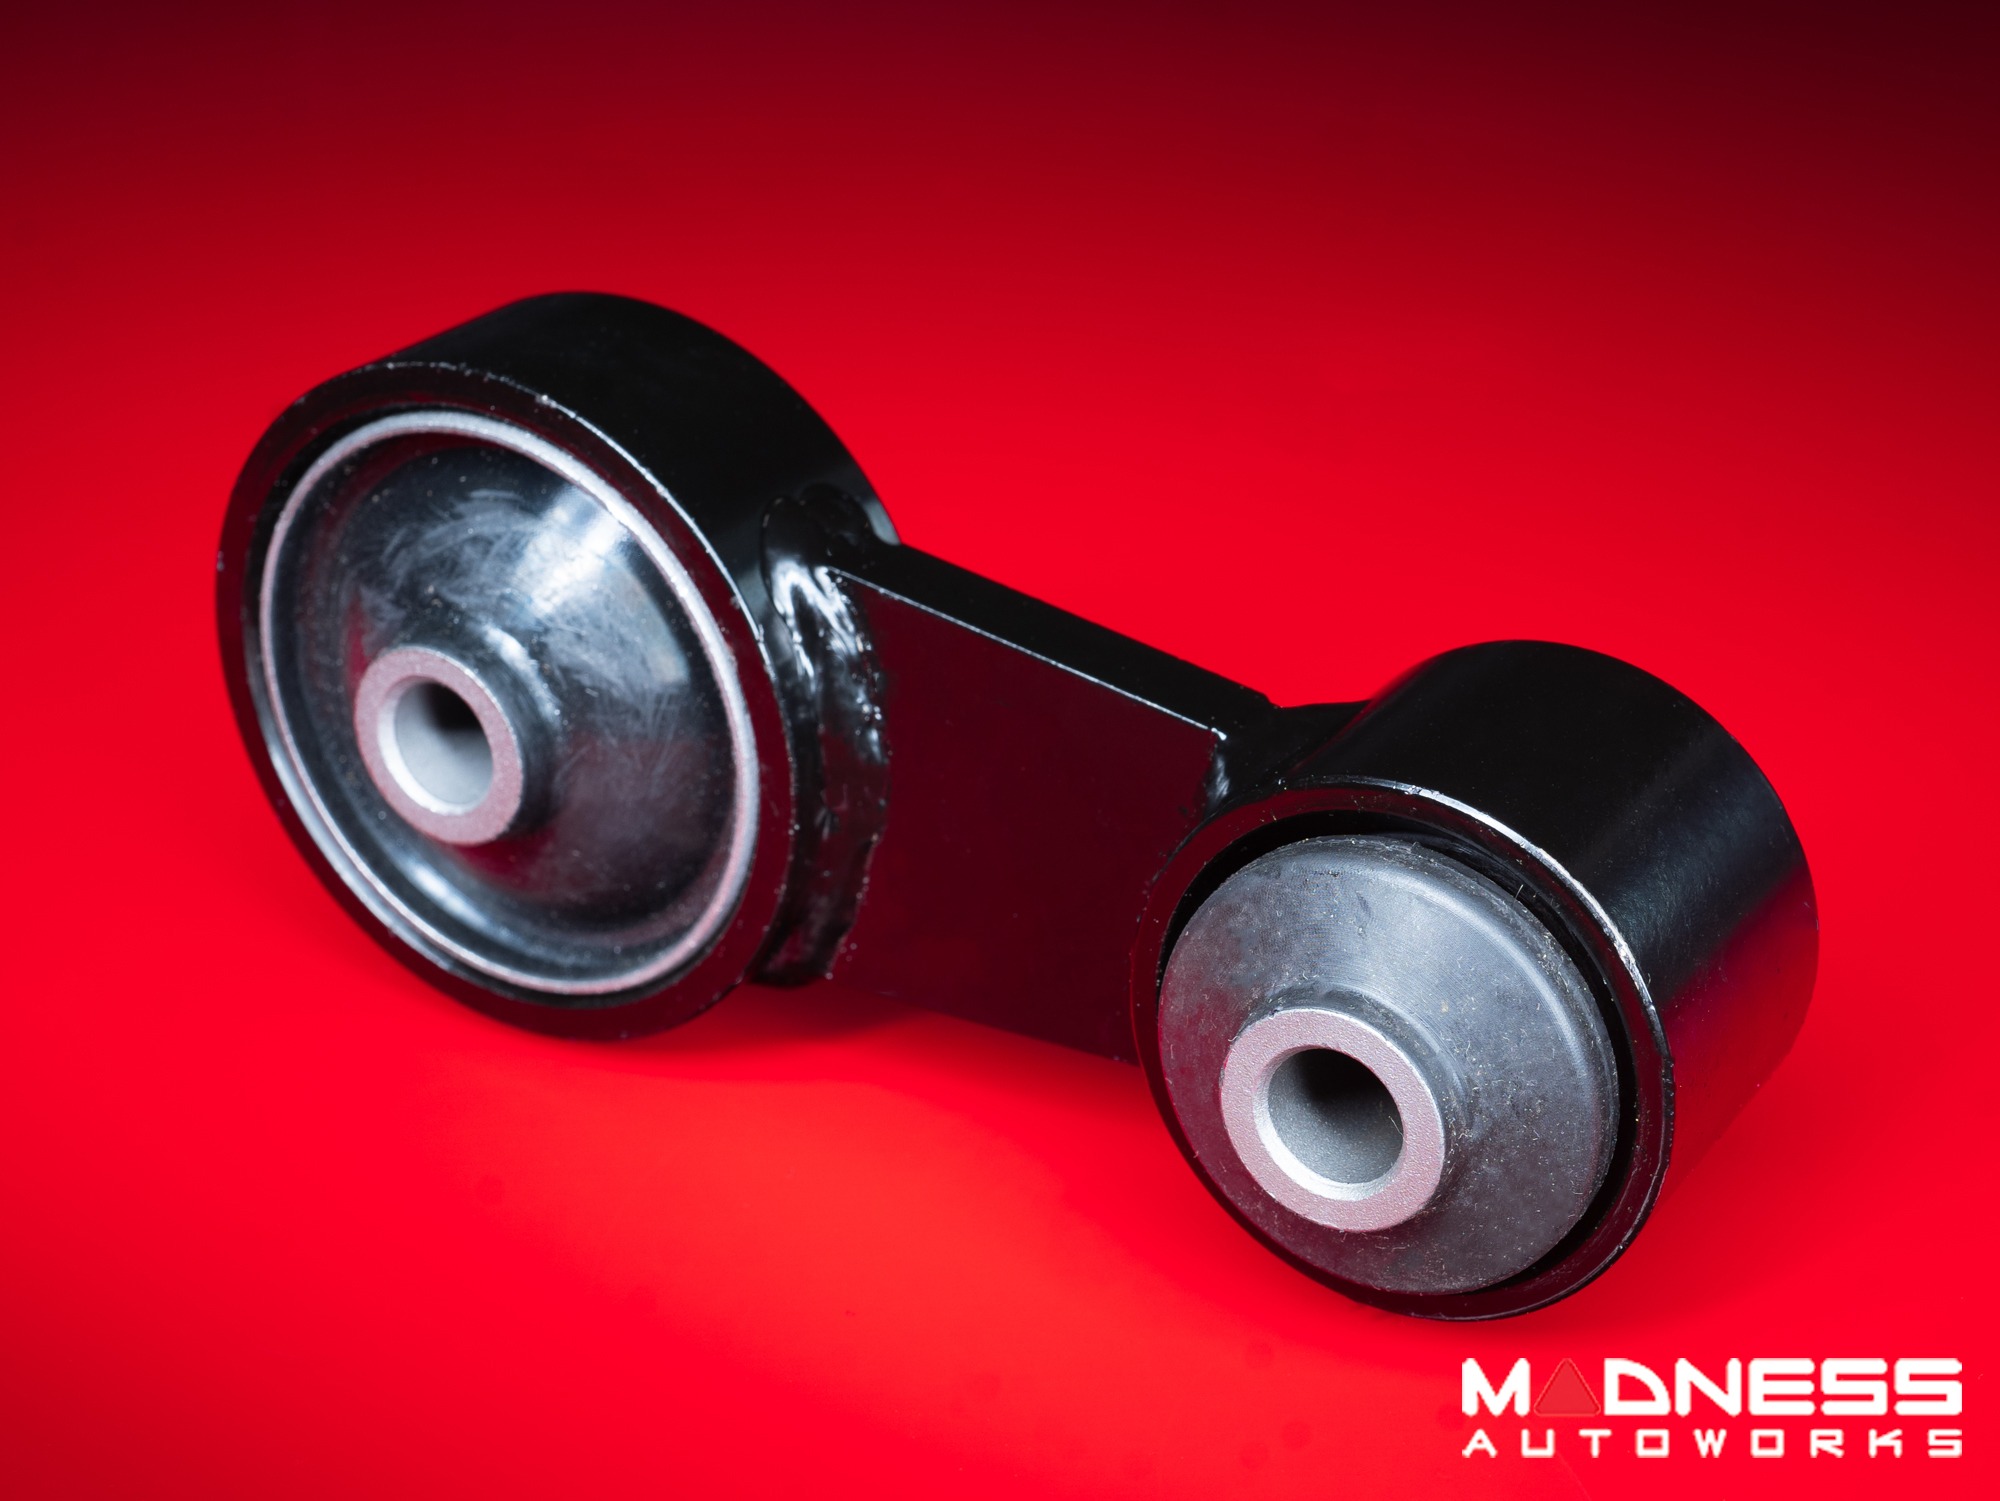
Smart tuners found out that if you replace the soft rubber mount with a hard rubber one, you get more vibrations into the cabin, but the car feels much sharper. A hard rubber mount, pictured below, costs $100 to $130 or so, depending on who you buy it from. That’s not a lot of cash, well, unless you’re living on McDonald’s wages in 2013.
So, I created my own. I used a knife to cut the soft rubber out of the original mount. Then, I bought a hard rubber suspension bushing for a few bucks on eBay.
Once it arrived, I grabbed a cheap sledgehammer from Harbor Freight and bludgeoned the bushing into the mount for the factory engine mount. I then used the motor mount bolt to align the bushing. I spent maybe $30 on the whole project, and my car felt just as sharp as the cars with the fancy $130 mounts. My car is still using the mount today, over 120,000 miles later.
Back in 2020, I bought a 2008 Smart Fortwo for just $1,200 to take on Gambler 500 adventures. There has been a 1-inch lift kit commercially available for the Smart Fortwo since basically forever. But it didn’t sit well with me that the lift kit for Smarts, which largely consists of rubber suspension spacers, is $300 on the low end or over $400 depending on the time of year.
Some Smart owners figured out that you can get most of the effects of the lift kit by buying a set of hockey pucks for about $15, drilling holes into them, and then installing them on top of your rear springs and on top of your front struts. Geometry isn’t as good as the proper lift, but that doesn’t matter if your goal is to beat the car up off-road. Sadly, I couldn’t install my pucks because my struts were too rusted out to be messed with, so I took the car off-road with a stock suspension.
Here’s where I turn things over to you. Have you ever made your own car parts or tools before? Why did you do it?
Top graphic images: Mercedes Streeter


Around 2013 I had a 1971 Austin 1100 that the indicator stall wouldn’t stay selected (it was rounded off) and a printrbot. I modeled a replacement and printed it.
I recently printed some spacers for the center caps for my raptor rims to fit my expedition without needing to cut the end of the stub shaft off
I built a trailer light test box from a vintage cosmetics case. I can’t trust the trailer wiring on my truck and can’t easily get the truck in position to hook up the wiring connector. Found the various bits and piece to use a Makita battery or an external battery to provide power, swithc panel to provide power to individual wires to test each circuit separately> Works great!
In the past I have made side steps and bumpers from tube steel, spring mounts for the chassis, and simple tools for specialized duty because it was easier and quicker then sourcing a tool from catalogs.
Most recently I used aluminum bar stock to copy some fragile plastic glove box arms in my Saab which couldn’t handle the weight of a gun safe mounted inside the glove box door.
(ed.) Forgot that I also made a center roof console, custom glovebox, full center console, and a complete dash overlay plus gauge cluster box for an off-road jeep, too.
Tools? tons, I mean with a grinder and a welder the possibilities are endless.
The biggest “part” was the trunk battery mount for an Optima completely from scratch, you might say, “OK some threated rod and wing nuts?” Oh no, stainless plate and billet spacers..
Most recently I made a heated parts washer and am nearly finished with a small, portable, and very sturdy workbench. Those probably qualify as tools.
As with brackets, stubby wrenches, etc., I like to build things because what I want doesn’t exist and/or would be inconvenient/difficult/expensive to buy.
Also I once made a set of auxiliary/emergency brake lights, but that was a just-to-see-if-I-could type of thing. 🙂
https://www.theautopian.com/how-i-built-my-car-a-sketchy-set-of-brake-lights-using-a-power-tool-battery/
Shop I worked at cut a wrench the exact length needed to disconnect power steering lines off of one specific model of car. All the techs would borrow it, looked pretty worn by the time I started using it.
Saved everyone a lot of time/screaming, or having to move/lower subframes.
I built my own sound system for my Subie. I wanted something as simple as possible and I found the core design in a hot rodding magazine for folks who wanted modern connectivity without marring the classic dash.
It’s just an 1/8″ audio jack that goes to a volume knob via RCA cables, that goes to a 400W amp under the driver’s seat. Then I just have a toggle switch and indicator lamp to control signal power to the amp. No touchscreens, no bulky head unit, no bullshit. I can swap in a bigger amp if I want, or split the channels to control biasing front and rear.
Interesting design. I’ve been looking at building out a vintage appearing radio using a chinese mini amp as the foundation. I want a few basic controls, being volume, treble, bass, mid, and front/rear and left/right biasing control. That set of controls is surprisingly hard to come by outside of full on fancy real head units. But to get the analog vintage appearance I want, I don’t have bluetooth or AUX, which are the inputs I want. So I’ve slowly been piecing together a kit that I think will give me all I want, but I haven’t pulled the trigger yet.
That sounds like a cool design. I’m curious if there’s a compact preamp that can be used for those controls or some kind of MOSFET preamp kit that you could build that would give you controls of the different channels.
I’m sure there is something out there that could be built. Electronics is really really hard for me, for reasons I’ve never understood. I’ve tried to learn it better repeatedly but always end up frustrated and nowhere. So its more of using whatever I can find commercially and trying to combine them in clever ways.
so far, the best I’ve been able to come up with is a Bluetooth/aux board with mono output, to treble/bass/mid preamp with L/R output, to 2channel to 4channel mix unit, then out to amp and speakers.
They make those little amps that plug into a guitar and a pair of headphones that give you control of the different wave channels. You light be able to kerjigger one into your setup.
I will look in to those. Thanks for the suggestion.
Yes. Just yesterday while changing my engine mounts I did not have enough clearance between the subframe and the engine to wedge a new mount in. 27mm socket works nice as an extender for the bottlejack.
When my son was little, he stepped on the lid of my Miata’s ash tray and shattered it. I glued it back together the best I could to measure some dimensions on it and 3D printed a new one. That ashtray lid has been in the car for like 5 years at this point.
I also replaced the clutch pedal stopper with a printed TPU version when the original rubber version crumbled after 28 years. That was more about convenience since my options were waiting days for one to be delivered or print one in about 15 minutes.
Useful: 1st-gen Tundra, bought used, missing the tool to lower the spare tire. Made a crude but effective replacement using the handle from a spare lug wrench, some scrap metal, a welder, and the requisite grinder and paint.
Questionable: I’ve modified a spark plug anti-fouler to make an O2 sensor spacer.
Stupid: There’s a long list, but my favorite was realizing that the threads for a missing diff drain plug were just garden hose thread. I installed a spigot in the place of a drain plug. Why? I had a spigot in the parts box.
I’ve made multiple tools and parts. Much like your story Mercedes, its often because I think what is out there costs too much, but sometimes I just need it now. Lately I’ve built a slidehammer, a fan pulley holder for removing cooling fans, and “wrench extender” for extra leverage on open wrenches. Lots of body parts, brackets, etc. I’ve built a sheet metal brake and a “bead profiler” that I stole the design of straight from Make It Kustom on Youtube. He comes up with some really great DIY tool designs.
Learning basic welding the best thing ever because of all the tool doors it opens.
The ones that stick out the most to me are the time I made a lost-foam casting of the word YEET, and it happened to be just the right height that, with some hose clamps, it made a perfect backstop for my B5 A4’s clutch, which previously had excessive dead travel past the disengagement point. Later, I had a similar but different situation with my 986, where after removing the clutch helper/return spring to improve feel, I had to fashion a rubber bumper for the top-of-travel switch out of a short segment of vacuum hose, which is still working rather well. Eventually, I want to make a custom clutch pedal lever to make it level with the brake and give me an adjustable backstop. I also plan on making a variety of replacement underbody aero panels out of textile/epoxy composites, pending the time and space to do so without making a huge mess.
I have indeed. More times than I can remember. But the best is the armrest latch I had to reengineer for our Pacifica and 3D print.
I also once welded a file to a reciprocating saw blade so that I had a super power file. It worked incredibly well even if it looked beyond janky.
I once attempted to make a ram air intake for my Bronco II by taking a home hvac duct boot and mounting it below the front bumper, cutting a hole in the top of the airbox, and using a flexible dryer duct to attach the two.
It did not work well.
I did similar to my Mazda B2000, but laid a large flat intake over the top of the radiator cross member, ducted to the intake snorkel air cleaner. There was just enough clearance under the closed hood. It actually worked at freeway speed and gave me just enough hp boost to keep up with traffic and a slight bump in mpg.
3D printed a flat plastic clip that helps secure the seat belt in a Lotus Elan (non-load bearing!). The 50+-year old plastic originals snapped instead of bending when the belts were removed for re-webbing.
Half of the exterior bodywork on my race car is handmade. I also recently built a whole new dash panel out a sheet of aluminum.
https://www.youtube.com/watch?v=qKrwCLVHSkk&pp=ygUPdGhlIGhvbWVyIGxlbW5z0gcJCa0JAYcqIYzv
I can’t recall making any tools, but I have modified plenty of them for a single purpose.
Most recently, I needed to fix the temperature controls in my ’91 Elan, which are fully mechanical, specifically type of setup that was common in GM cars in the 80’s. Slight issue, in those GM cars, the mechanism is easily serviceable through the glove box – not so much in this car.
I got an endoscopic camera, which I guided into the dashboard to see what I was doing, and ended up getting some extremely long surgical forceps, which I was able to stick in there and pull the mechanism apart, watching what I was doing on the camera. Soon as I got everything out, I realized these parts aren’t available anywhere – there are no part numbers on them, nor do any aftermarket parts shops carry any of the components that make up the temperature control mechanism.
I ended up experimenting with door lock clips, which are meant to clip on to a similar type of rod used in my temperature controls – found out one meant for a 2000’s Hyundai fits perfectly!! I stuck the camera back in, snaked the rod back in, and managed to get it sitting on top of where it needed to slot in. Stuck the forceps back in, and sort of tapped on the top of the rod until the clip slotted into place. It’s been in there for about a month now, and I’ve been appreciating being able to actually change the temperature!!
I was stuck with either blazing hot air, or nothing, for SO so long. Doesn’t help that there aren’t any sort of diagrams in the service manual to tell you how to do this!! I was in the middle of drawing up my own, hoping I’ll help out another Elan owner somewhere <3
Good luck, we’re all counting on you.
(Not an actual Elan owner)
Will do my best!! The diagrams will be shared wherever I can find that would be relevant
I bent a box wrench 90 degrees so I could get it into the absurdly tight space behind the shock mount on my Ram. I’d never done anything like that before, but a propane torch, vise, and vise grips took care of it no problem.
I still have the wrench, although I’ll probably never use it again because I no longer have the truck.
I have a couple of these types of wrenches in my tool box for the same reason 😀
I’ve made a bunch of parts and tools. Being a mechanical engineer with a SolidWorks license and a 3D printing farm, I’d be remiss if I hadn’t at this point. 😀
I’ve shared a few of them on Printables:
Winch Controller Bracket by Fortner Industries | Download free STL model | Printables.com
Miata Visor Blank with Microphone Holder by Fortner Industries | Download free STL model | Printables.com
I mostly use 3D printers for prototyping test parts for the car before making the real parts from metal. I’ve done fog light brackets for a few of my cars now and a quick plastic 3D print lets me test tolerances and clearances before I commit to much more expensive bent sheet metal / machined aluminum parts.
The CV axle stub would not come out of the transmission on my wife’s 2007 VW Rabbit. I tried pushing, pulling, banging, prying, praying, and crying and none of it worked. There wasn’t enough room to get a CV puller on the stub, and the vise grips that I had threaded onto the end of a slide hammer just kept popping off whenever I pulled on them.
I ended up fabricobbling my own tool out of a jaw-style puller. The jaws were no good, they couldn’t get around the axle stub either so I removed them. In the place of where the bolts would go to hold the jaws on, I slid some wire rope through and crimped the ends together with a wire ferrule to make a couple loops. The tool ended up looking like the love child of a slide hammer and one of those wildlife neck tethers that animal control uses to catch rabid gophers with.
After willing this contraption into existence, I was able to get the wire ropes around the back end of the axle stub and it finally popped out after a swift tug. I doubt I’ll ever need that tool again, but it still lives with the slide hammer just in case.
Lots of tools. My VW tool box has several special tools.
Specific angles wrenches for adjusting valves.
Six point wrenches cut to fit brake lines.
Cut-off and modified allen wrenches to fit in odd locations or to fit into ratchet wrenches.
Replaced shattered vent wing in our ’80 Vanagon Westi from masonite.
The common muffler hanger from a coat hanger.
Manufactured sun visor clips from aluminum stock after the plastic broke.
Bent and welded special wrenches.
Several special bearing removal tools.
Ditto for pressing bearings into place.
Grinding three sides on a round object to fit into drill driver.
Probably several more I can’t think of right now.
I was reading the title of this thread thinking “I’m on my 4th VW, is there any other way?”
The last one was cutting about 3/4 of a cm off an allen key and welding it onto a piece of flat scrap steel to make a tool that would reach a bolt to remove the thermostat. It was that or take off the entire front end of the car.
I’ve made/modified more tools than I can count over my 20 years in the truck & coach industry.
Lots of DIY brackets as well.
But last year I tried pouring my own Poly bushings for the first time and was SUPER pleased with the results.
I had planned to do this for my 2013 Sonic, even found a cheap used but nearly new engine mount and the poly urethane needed, and completely forgot about the whole deal until I found the stuff in my garage a year after I sold the car 🙂
You bet! I have made/modified many tools to get jobs done.
As for car parts, not too long after I bought my Spitfire, I drove it to Rhode Island to visit a friend (I was very adventurous 30 years ago with that thing). In Newport, the radiator overflow bottle fell out and I ran over it. Oops. This happened right in front of the LL Bean store. I went in and bought a Nalgene bottle. Melted a hole in it for the overflow hose, and it is still in the car to this day. Even at LL Bean prices it was half the cost of a real replacement bottle.
Can be seen in all it’s glory here: https://flic.kr/p/23QrVDj
As a bonus – the top isn’t tethered to the bottle in real ones!
That bottle will outlast the rest of the car
Probably. Lot’s tougher than the original for sure, though it was the clamp coming loose that let it fall out of the car, no fault of the bottle.
A couple times:
I needed to find top dead center on my old Land Rover engine so I could tune it properly (the standard sheet metal thingie that you match up to the mark on the crank pulley was way off). I hollowed out an old spark plug so I could send the long probe of a dial caliper down through it and see when I was TDC. Holding the caliper in place without my amazing tool was inconsistent and wobbled around too much.
Man, is it ever hard to smash up the ceramics on an old spark plug! Anyway, now that I have it, I’ll certainly never use it again.
Somehow, I just knew a Land Rover story would pop up…
For my part, a short steel pipe coupling was the perfect size to use as the tool for seating wheel bearings. (A very large socket works, too, but would be a bit big to have on hand typically, even for working on a Land Rover. So a quick trip to the hardware store for a suitable hunk of pipe it was — and a pipe coupling of the female type has a nice thick flange on it; a bit more surface area than a socket.)