
Do you have a friend or coworker with whom you can seemingly solve even the most daunting of problems? I do, and his name is Brandon, who happened to be the very first car-geek I met when I arrived in Detroit for my engineering internship at Chrysler in 2012. He and I have worked together on some truly grueling projects over the past 13 years, and we’ve accomplished the seemingly impossible. Between those wins, and the fact that he’s restored multiple flatfender Jeeps (including a WWII Jeep), it only made sense for me to fly Brandon to LA to get a bit of assistance on my eBay WWII Jeep build — my quest to build an iconic Willys using primarily parts from eBay. And my goodness did we get a lot done.
I’ve accomplished some seriously challenging builds over the years on my own. I managed to get a completely rotted-out and mouse-infested Willys FC-170 running and driving in a matter of weeks. I got a $500 rustbucket Postal Jeep repaired mostly by myself. And I could go on and on. But the truth is: The biggest, most improbable of my wrenching wins have involved Brandon being there by my side. He is a truly incredible mind, not just when it comes to wrenching, but when it comes to problem solving in general. I have met very, very few people as efficient and effective as he, while also just being a joy to work with. He is the ultimate teammate.
I picked him up at LAX a month ago; the plan was to spend a long weekend working on the WWII Jeep. He had to take days off work just for this, because, as I mentioned earlier, he’s the man. As soon as we arrived in my driveway, we got straight to work pulling the engine on my reference Jeep, a clapped-out WWII Jeep that I’d snagged for $1500 and that sits in my driveway for two reasons: So I can have something to look at as I assemble my own WWII Jeep from scratch using primarily parts sourced from eBay, and also so I can pilfer some small/random parts when needed.
Building A Motor
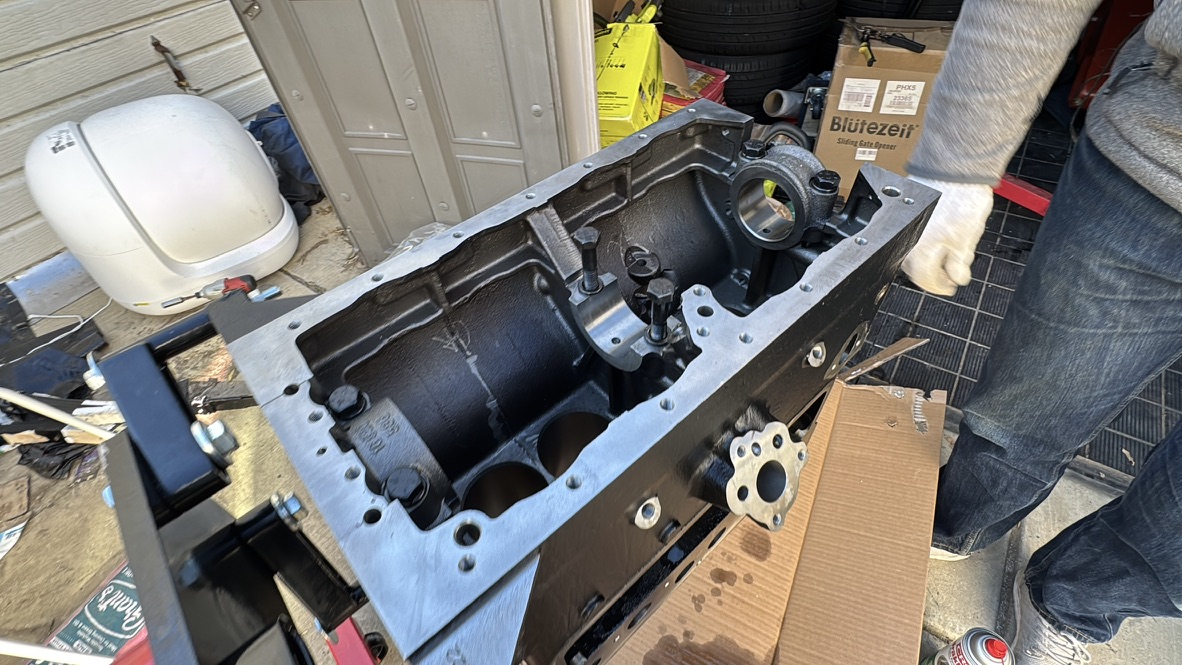
Since Brandon and I wanted to get straight to building the brand new, France-built engine, we decided to yank the reference Jeep’s motor so we could make A look like B. Brandon and I had the reference Jeep motor removed from that WWII Jeep in about 30 minutes.

We then hooked that reference Jeep engine and my shiny new engine block onto their own engine stands, and began assembling my new motor. But not before having a peek at the rustbucket’s engine, whose dipstick was completely rusted, leading me to think that the motor was toast.
Nope! It turns out, the reference Jeep’s engine looks amazing inside. Somehow:


Here’s a look at the new engine block:
Brandon and I found some metal shavings in various places including the main bearing caps:

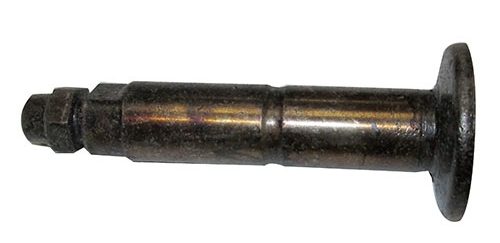
After an initial cleaning with some brake cleaner (part of me worries that not having this hot-tanked might come back to haunt me, but we were careful getting it nice and clean), Brandon and I ground down an oil tube that was too tight to fit the rear main bearing cap:


It now fits snug:

We actually had to drill out some holes in the main bearings themselves (yes, we drilled into the main bearings; yikes!) in order for them to fit the dowels that we had frozen and then hammered into the engine block.


Once we had the main bearings in place, we installed the crankshaft:

Now it was time to check bearing clearance. To do that, we just placed a tiny piece of plasti-gauge (a colorful twizzler-like tool) onto the top of the crankshaft journals:

Then we placed the main bearing caps onto those journals:

Snugging the bearing down squeezed the twizzler-like plasti-gauge, which we lined up with the measuring-tool in which the plasti-gauge is packaged, revealing bearing clearance of about 0.003 inches.

We got the same measurement across all three journals/bearings. This new engine and the bearings that came with it seem to be on the high end of the bearing clearance tolerance. In spec, but barely.
We then took the crank out, shoved in a new rear main seal (a rope seal; we tried a rubber seal, but it just locked up the crankshaft), rubbed some assembly lube on the crankshaft journals, dropped the crankshaft back into place, and snugged down all the main bearing caps. The crankshaft now spins like a dream, gliding with just a light twist of the wrist.
Brandon installed the sole camshaft bearing into the block using my trusty hockey puck that I usually have sitting on the end of my floor jack:


The camshaft, like the crank, glides like a dream. Unfortunately, that gliding will not be activating the valves, since the lifters that I’d purchased for the engine were too large for the block. I had purchased what I was told are new-old stock lifters directly from a company called Kaiser Willys; those lifters are too large (as I confirmed with a micrometer), leading me to think that perhaps they were actually oversized lifters. Most folks, when they rebuild their engine, will have their lifter bore sizes increased, hence the prevalence of oversized lifters and the rarity of original-sized ones.
I’ve got new lifters coming from France, from the same manufacturer who cast the new engine. I have my fingers crossed, and if those don’t fit I’ll have to take my engine to a machine shop to upsize my lifter bores, or I’ll have to use some old lifters. We’ll see.
Speaking of valve actuation, Brandon and I also checked the valve-valve guide tightness, and did a bit of valve lapping for good measure:


Plus we banged in the freeze plugs:

Next, it was time to refresh that transmission.
Tearing Into A Transmission
You might recall that transmission I drove 2000 miles to pick up from an eBay seller in Washington state. Well, it looked fantastic inside:


Still, this Jeep has a brand new engine, so Brandon and I figured we’d give it a brand new transmission, at least guts-wise. The eBay case is original, but the innards were available brand new from the eBay seller I’d met up with in Oregon on the way to buy the transmission/axles/spare motor.

Rebuilding a toploader transmission is an absolute joy, as all the gears just drop in from the top. Brandon has rebuilt Willys transmissions probably 5 gazillion times, so this was child’s-play for him. Sort of.
He set off putting the main shaft together (see above) while I got the dirty job that involved scraping and brushing and spraying 80 year-old grease off an old transmission case:

By the time I was done, I could see that this transmission had been cast in July of 1944:

I don’t think Brandon and I should have rebuilt the transmission on his last night in LA, because we were tired, and this led us to make mistakes. Lots of mistakes.

This is a pretty simple gearbox to rebuild, but we got some synchronizers stuck, we had some needle bearings fall out of position, and we had to make some tools out of old parts. For example, we had to hone this bearing out so we could use it to bang another bearing:
Here you can see the needle bearings in the output shaft. Keeping these in position is critical when rebuilding the transmission:
Here we are, late at night, redoing our work for the third time:

Then, in classic wrenching fashion, the following morning Brandon woke up and completely rebuilt the transmission in 30 minutes. A clear, rested mind goes a long way.

Here is Brandon bolting the rebuilt transmission to the transfer case to check end-play:

I still have to finish the shift rails, but the gears/synchros/bearings are all rebuilt, so we’re getting there.
Inspecting The Axles That I Bought In Washington
I should have inspected the four axles I bought in Washington prior to leaving Washington, as the seller had a huge stash. But for reasons unknown, I did not, and the result is that one of the front axles I brought home is a boat anchor. Or maybe I should say it was a boat anchor — literally:

So anyway, that axle is useless. I only bought one other front axle, so I prayed that it looked better, and…

Thank goodness! This front axle looks and operates perfectly, except for a pinion seal leak.
What about the rears? Well, the first one I picked up had a spider gear that was wobbling all over the cross-pin. You can’t see a wobble, but trust me when I say this diff is toast:

The second rear axle didn’t have that issue, though there is a bit of a whirring noise coming from, I think, the pinion bearing:

Still, overall the diff looks good, and though I will tear into it later, Brando and I recognize the importance of getting the vehicle assembled quickly so we can test the critical systems like the new engine and transmission. So we bolted the axle up to a set of eBay-sourced leaf springs and U-bolts:


I still need to bolt that suspension assembly to the frame, and finish up the motor once those French lifters arrive. Then I need to go through that transfer case, then bolt it all up, rig up an electrical system/fuel system, go through the brakes, and then try to drive the frame around town to identify any major powertrain/drivetrain concerns. Only then does it make sense to start working on the body.


I have a lot of work ahead. But it’s less work than before thanks to my good friend Brandon.
[Ed note: David mentioned the idea of building a brand new WWII Jeep to the team at eBay, and they loved the idea so much they said, “How can we help?” Their financial support and David’s Jeep-obsession are the fuel behind this crazy build. – MH]


Kind of astonishing that a brand-new engine would need some amount of rectifying but I’ve never had occasion to use a crate motor (or even rebuild an old engine though I have two such projects coming up, so fingers crossed) so I do wonder if that’s just typical for any new engine that’s not already turn-key?
Yeah, staying tuned for the rest of the build, it’s pretty fascinating! Not to mention how it’s always nice to see driveway projects where one might not necessarily have a garage and still gets plenty accomplished (yeah, I don’t have a garage, why do you ask? Lol.)
The work required on the new engine floored me, too. Dave knows this, but absent a flush, I’d run the engine for a few minutes then change the oil and filter and cross my fingers.
These types of articles are why I support Autopian.
David didn’t buy a crate engine, he bought an engine block, and all the parts to build the engine from scratch. Hence the work here.
“I find your lack of rust disturbing”
Reminds me of my son’s Facebook post where he thanked me for being the guy who can always figure things out when get into a bind while wrenching.
Made me cry.
Anyone else here old enough to remember when comics and some magazines in the 50’s & 60’s ran ads for old WW2 Jeeps for as little as $200-500? I remember. I really wanted one. My father who had driven a few Jeeps in the South Pacific during WWII thought my idea was the final proof I was an idiot. His mechanic friend agreed and showed me how big of a pile of junk would arrive by freight. As I recall, the engines were cut in half and useless.
Yes, I was an idiot at 16. But I got better!
David, I love the parts cleaning on the lawn, the oil stains all over the driveway and working on the transmission inside the house. Just give your wife and kid a hug from us Autopians for letting the Mad Genius do his thing. I can relate, since my wife burst out laughing when she came in and I was studding fatbike tires with the whole bike in front of the woodstove in the living room. She tolerates my projects, so I don’t complain when she asks for a new bathroom vanity or other house repairs.
I’m sure Mrs. Tracy went into this with her eyes wide open. After all, not many potential husbands have a deep archive of what they get up to in their spare time publicly published on the internet. A Google search for “David Tracy” certainly turns up a whole lot more useful information about what kind of guy he is than a Google search of my name.
Which is to say, I am confident that David married well, and that Mrs. Tracy knows who she married. LOL
Satan help any woman I’m interested in that Googles me.
“I don’t want to be a member of any club that would accept” kinda thing, I suppose.
I watched the video before I read the article. The video was fantastic. I know you have a lot on your plate but this is some great content. It shows the challenges that a lot of real people face tackling their car passion.
I can’t imagine this amount of progress on my project car. Well done!
I have a Brandon too, and his name is Glenn. Unfortunately for me, we now live a continent apart, so I’m rarely able to avail myself of his skills. I’m a bit shocked that David has his own Glenn, and I can’t help but wonder who Brandon might call if/when he’s got an intractable problem.
Soberingly, I am that person that some friends and neighbors call for mechanical/electronic/repair help… so, not all Glenns are created equal.
“How An Old Engineering Buddy Helped Me Get My eBay WWII Jeep Build Off The Ground”
If you truly wanna get your build off the ground, wouldn’t you need a buddy with a forklift?
:-p
/jk
There? What you done there? I seen it.
I never realized that the transmissions for these Jeeps were that small. I guess having the bellhousing, shifters, and transfer case all bolted to it takes up a bit of space?
Honest question. Once built, will you be able to drive it in CA? I suppose you could take the parts Jeep’s VIN, but that’s kinda shady.
I know in Michigan you can get a home built vehicle VIN, and am sure there is a similar process in California. We will probably get an article about that at some point.
Here is one way to do it: https://www.dmv.ca.gov/portal/vehicle-registration/new-registration/register-a-specially-constructed-or-modified-vehicle/
From a quick read of that page, the key problem looks like a ‘new’ vehicle would have to pass a smog test. I’m guessing a standard Jeep engine would have trouble with that.
David might end up having to build a ‘Frankenstein’ Jeep with the parts Jeep, register that, and then replace all the old components with new ones.
Does anyone know where the VIN/Chassis plate is on a MB Jeep? (Or if it has one?)
I wonder if an eBay sponsored catalytic convertor would get it by the smog test.
This reminds me of the time my son and I put together a traxxas slash kit. It was really fun to see all the components come together. And course I somehow screwed up the transmission, so I ordered a complete one and swapped it in overnight without telling him. Yes, it cost me like $80, but at least the little dudes thinks I’m not incompetent. I am, he just doesn’t know it yet.
For those who don’t understand why David is in such a hurry to finish the Jeep, search “eBay stalking scandal 2019”
That Mexican restaurant looks familiar. I think I’ve been there.
The Mexican restaurant that looks like every other Mexican restaurant?
Think I’ve been there too.
So what are you going to do with the boat anchors left over?
I am (sincerely) looking forward to the article with a retest of the overload springs on the Comanche when David takes all the shot parts to the metal recycler!
I’ve purchased new leaf springs! Hopefully they can handle it a bit better, and I don’t have to use those air springs! (they’re a bit stiff).
David needs to assemble a “jeep” with all of the crap parts that are essentially unuseable. And then drive it. Or at least tow it. Or maybe drag it.
Haven’t we seen that build a bunch of times already, usually involving driving the result to Moab after which it never drives again or at least not for long? Seems like the postal jeep, the Golden Eagle, the Forward Control all fit that model, perhaps something else I’m forgetting?
The Jeep of Theseus?
We replace all the old parts of a Jeep with new parts, and then we build the old parts into a Jeep. Which is the original Jeep?
My (facetious) answer to that is: whichever one your local jurisdiction has registered as the original.
It’s trite, but realistically it’s the answer that will have the most impact on using/driving it.
Saw a great interview of the guy John? behind ICON.
He pretty mater of factly admitted on their reimagined Ford Bronco builds, the only part that is original for.legal / registration ease purposes is the firewall and of course the vin
The boat anchors are representative of how far DT has come.
Michigan DT would have called all of these parts mint, installed them into a vehicle that makes a Faraday cage look solid and then driven to Alaska.
There’s nothing quite like a good work weekend with a buddy!
I’m excited to see this project take shape.
“then try to drive the frame around town to identify any major powertrain/drivetrain concerns.”
PLEASE let there be video of DT driving this down the 405 in rush hour!!
On 2nd thought, don’t do that. Maybe just drive it in front of one of those Hollywood tour busses, and have a plant on the bus yell out “Look!! It’s Paul Giamatti!!”
I heard he’s entering the frame into the Nürburgring 24.
Which allows him to take the off-road shortcuts that are otherwise prohibited.
Not cleaning off the crust from the axles and painting them?
assemble->verify->disassemble->paint->profit?
I gotta get this thing down the road, first and foremost. Too many systems to test; to focus on paint at this stage would seem silly.
I will have to paint after Moab (If I can get there!)
With great respect, I disagree. I’ve always regretted not painting when I have the parts disassembled. Painting after everything is up in place is much more difficult.
On the other hand, given the project’s nature and deadline I understand the appeal of just getting everything together to see what does and doesn’t work. Also, it’s not like your LA environment is trying to rust everything the instant it’s exposed, like the upper Midwest.
That’s fair, though it’s worth noting that WWII Jeeps were painted all one color — they just sprayed OD Green EVERYWHERE.
Yeah, and the pictures of the guys painting them are pretty hilarious for their freewheeling process.
Which instantly makes me think of one of my favorite very short scenes from a movie that should totally make the Autopian Film Club required viewing list: “Gung Ho,” 1986.
https://youtu.be/jXDISooGGhE?si=UbTO1z-Co8XJdbUn
Just
Exhaust
Every
Person
Marathon wrench sessions are always awesome, and always exhausting. Great work!
So true.
And next week, I’ll have a special Australian here to really get this project into gear!
Ah, converting it to RHD, as well!
I wonder how he’ll cope with everything being upside down (to him) and driving on the wrong side of the road.
I suppose if he helped with Project Cactus, this should be a walk in the park, or as the Aussies would say: (insert obscure Australian idiom that makes no sense to North Americans here).
Looking forward to it!
I’m sure Laurence isn’t going to LA to copulate with spiders.
You beat me to it!
We should let Margot Robbie explain:
https://youtu.be/wpAS3IHkzPc?t=182
Love that clip 🙂
Seeing that block brought back memories that I have definitely align honed one of these before.
Also, any engine that uses dowels for aligning the main caps is the fucking devil. The slightest bit of damage to the dowel and the bore is no longer round and straight. Nissan VQ engines are the worst with the aluminum block and thin metal dowels.
I agree. I’ll take a tang every time!
Do Jeep people gravitate towards each other for survival’s sake?
You wouldn’t understand
(I kid of course)
I’m positive they did in World War II.
Off-roaders, mud bogging, farmers, ranchers, amateur racers of all stripes and more often than not Id guess Jep people, are the kind of people I Want around in any sort of extreme environments where breakdowns are between common to highly likely.
They know how to GSD* and critically improvisationally problem solve on the fly and make parts / things work together at least long enough to get you somewhere you can get it fixed properly.
*Get “Stuff” Done
Mall crawlers, pavement drivers, gravel soccer parking lot users, and, when it strikes them, the guy who parked on the grass hill leaving a dead strip of mud when a perfectly good parking space was next to them.
New WWII Jeep, some assembly required.