
A quick recap: I bought a derelict 1989 Maserati 430i (aka a Biturbo) from a friend/mechanic because I felt bad for the car. I need to get it running and reliable as soon as possible, as I need to take it on an approximately 5,000-mile “cheap car challenge” road trip up the Saint Lawrence Seaway in nary a few weeks. You can read all about why I’ve made this terrible decision in my buying post and check out my somewhat less thrilling interior repairs post to get caught up before diving into this third installment.
With the Biturbo’s interior work out of the way, I am now free to work on the easy stuff, like getting the engine, transmission, brakes, suspension, and steering sorted. So … just the easy stuff!
OK, in fairness, I really did expect the interior work to take far less time and the engine work to be relatively simple. I mean … the car is basically running Bosch L-Jet with “Bosch” crossed out and “Weber” written over it in Sharpie. Plus, the Biturbo had been driven recently, and by all accounts, driven well. What could possibly go wrong in such a small amount of time? (Hint: everything.) But I knew I had a little less than a month to get it ready.

A list of automotive crimes
Before I launch into working on the Biturbo, I suppose I should enumerate what I know to be wrong. The biggest “oh no” is a ticking coming from the engine, seemingly from cylinder number one. An investigation I did in 2023 turned up no obvious culprits, unfortunately. Compression was good, and the piston looked OK when inspected with a borescope, so my next step there was to pull the valve cover and see what I could see. But since I didn’t own the car at the time, I decided to punt and hope the owner would sell it to someone else. He didn’t, but it feels nice to hope.
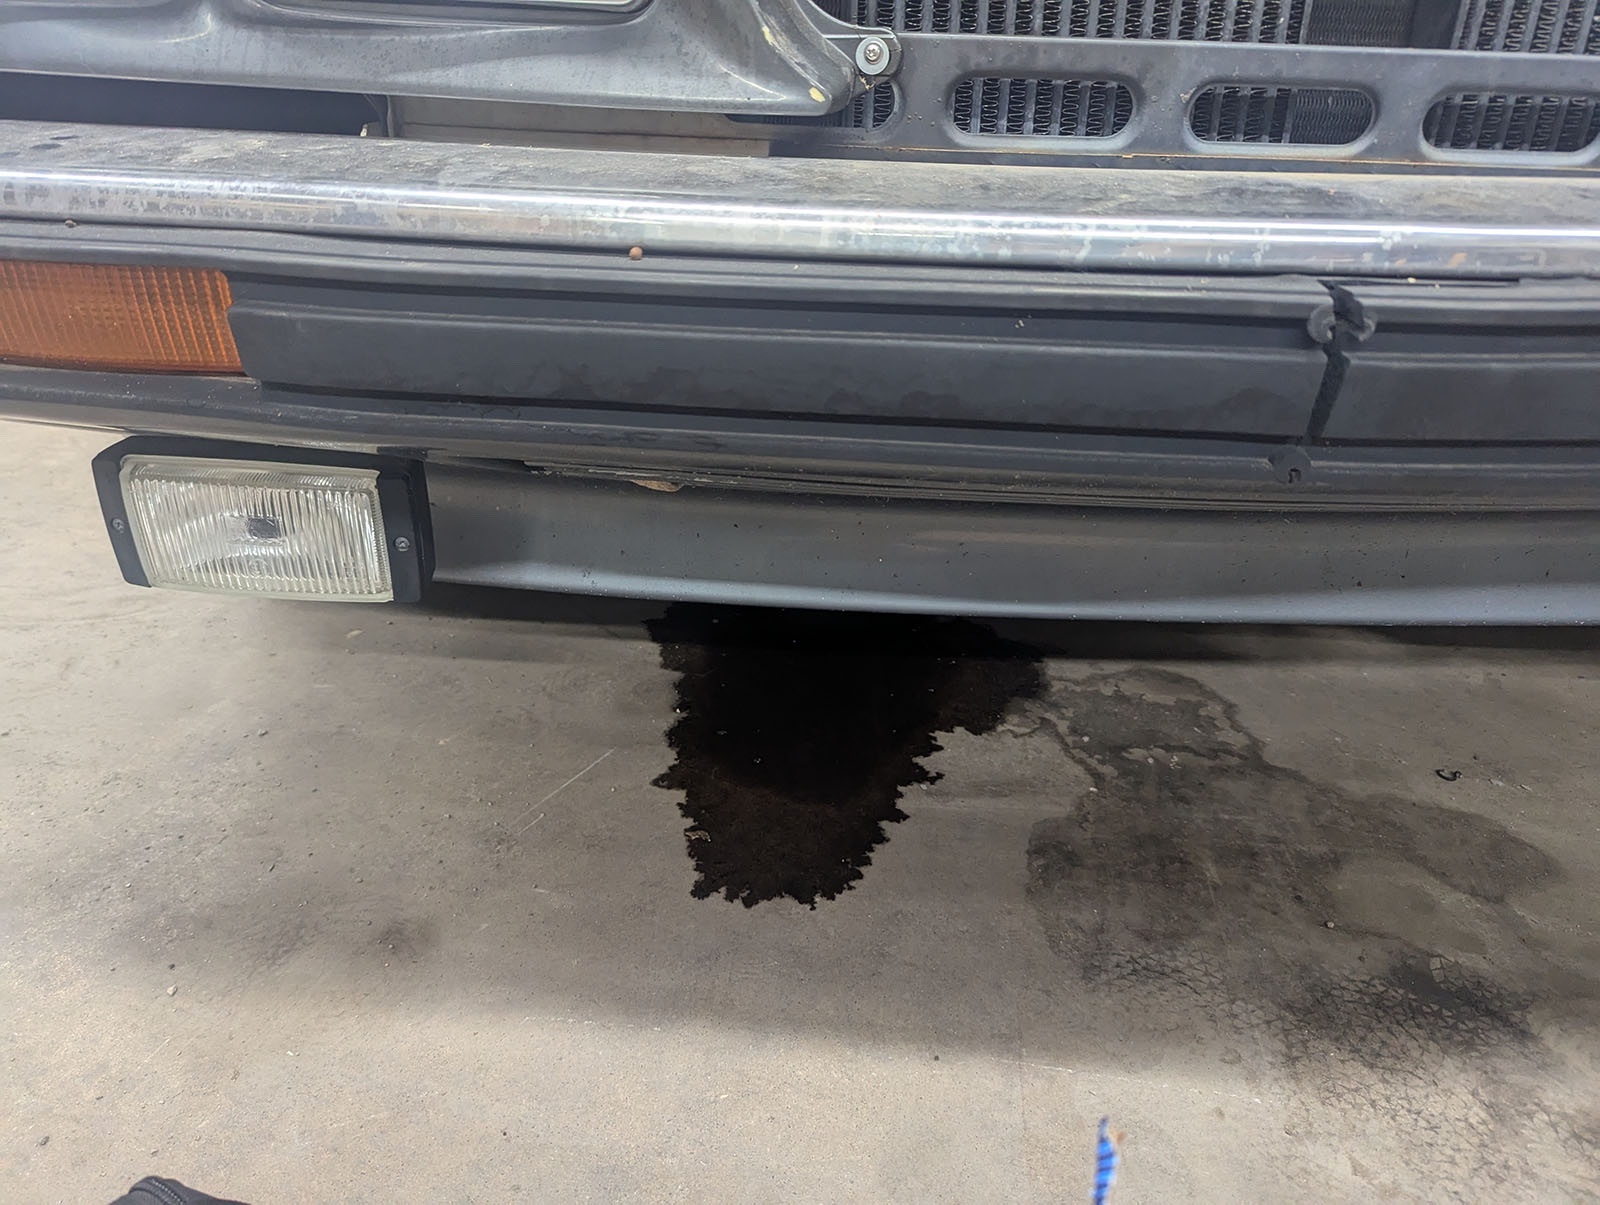
In addition to all that, the car doesn’t really like to start, especially if it dies. It has a loping idle indicative of a vacuum leak, and usually dies if you let the revs fall too quickly. These are all things one generally needs a car to do. There are also several fluid leaks I should at least consider looking into, including a small but annoying brake fluid leak that causes the clutch to need bleeding if the car sits for more than a few weeks. Lastly, the car has some electrical infidelity to address. A lot of accessories don’t work or only work intermittently. These cars are famous for having a fuse box that ages like mayonnaise in the sun, so likely I was going to be on the hook for some electrical work, which I didn’t find daunting, again because of the hubris.
Now, with this many problems, one should make a list, an order of operations, and follow that, right? Yes. Absolutely. Which is why I didn’t do that and just started tearing into things semi-randomly.
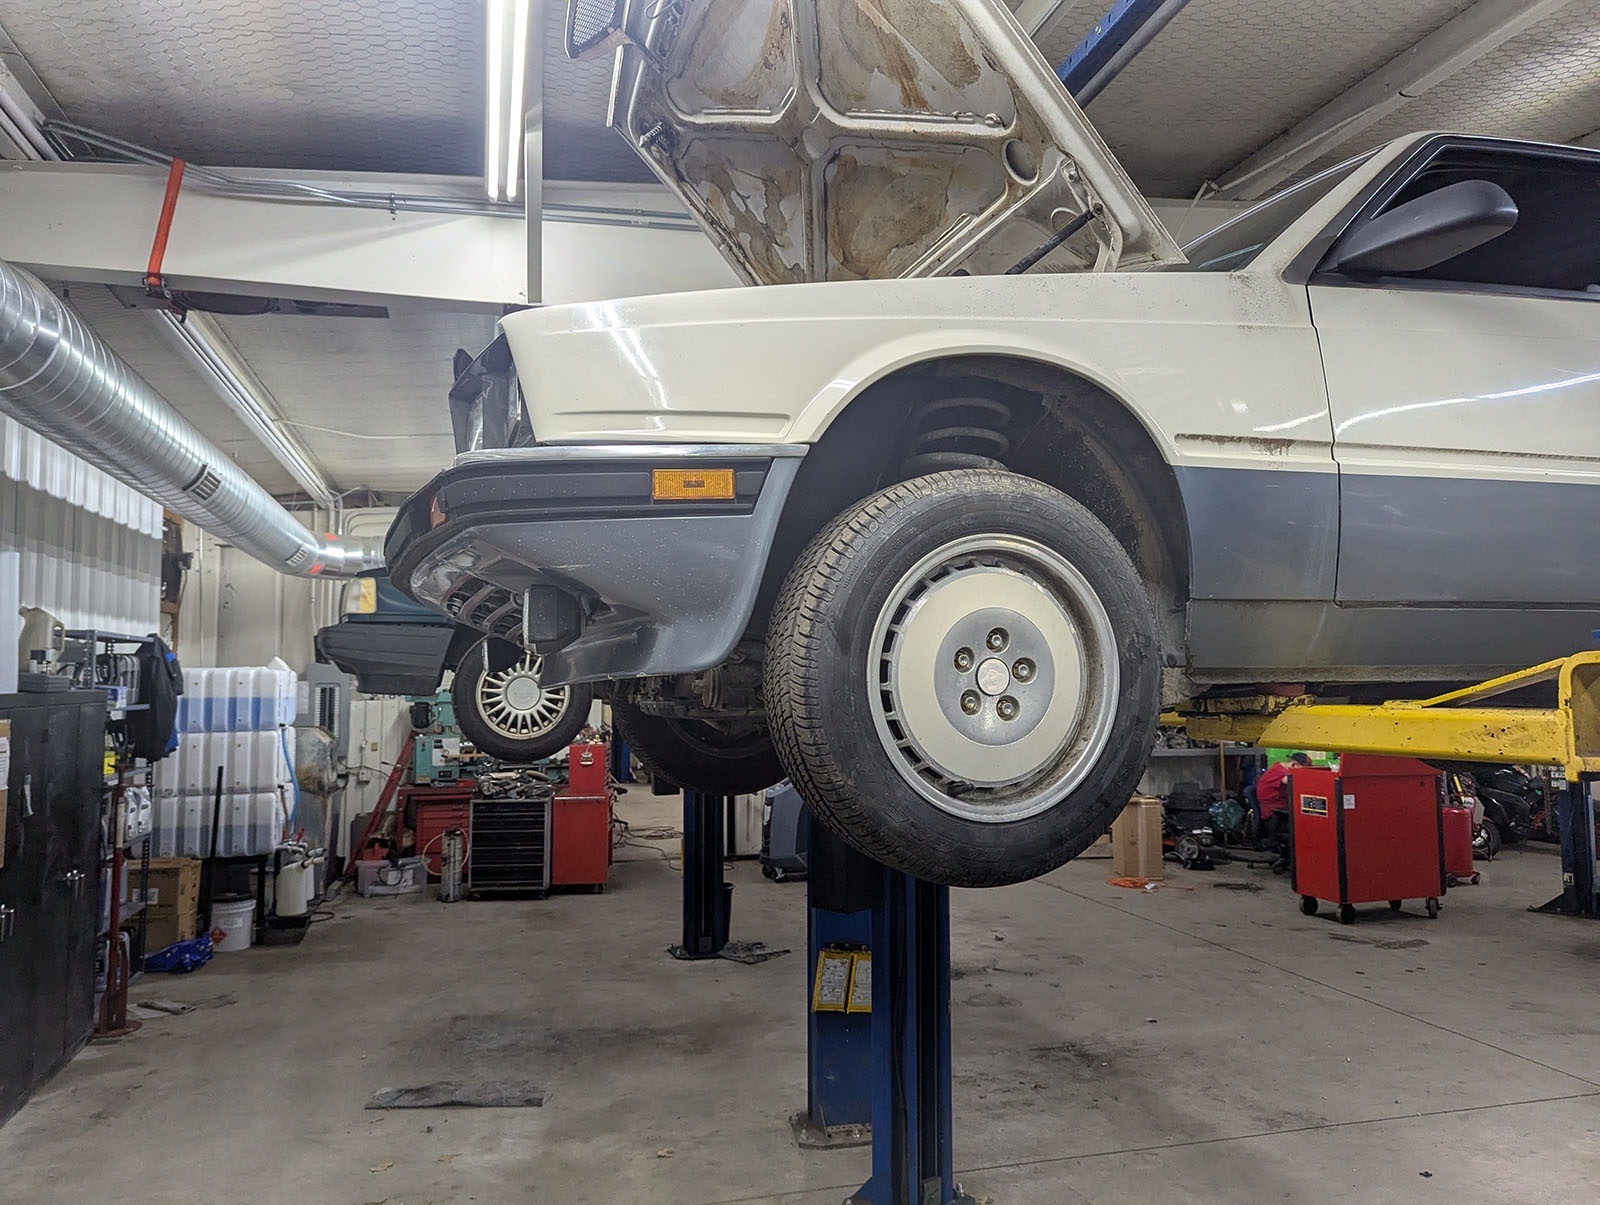
The one bright spot in all of this is that the friend I bought it from is the owner and head mechanic at a shop near my house. Part of the condition of sale was that I would have access to the lifts, tools, and, very occasionally techs, until the road trip. This meant that while things were looking grim, at least I wasn’t having to work in my driveway and could get it up in the air as needed.
Tick tick tick goes the valve
I knew the first thing I needed to do was pull the valve cover on the passenger-side bank to see what all the ticking was about. If this is something serious, I have enough time, but only just, to fix whatever it may be. All the usual rebuild gaskets and parts to be available, if expensive, and I made sure the PO knew he’d be helping me with the rebuild, if it came to that.
With great determination and many tools, I was pleasantly surprised to learn only four screws separated me from peeping the valves. This thing has to have the smallest valve cover I’ve ever seen! Less area to leak, I suppose. I peeled off the cover and was relieved that the gasket came out intact and relatively ductile, as the replacements I’d ordered were for the 24-valve, not the 18-valve, and took a look inside:
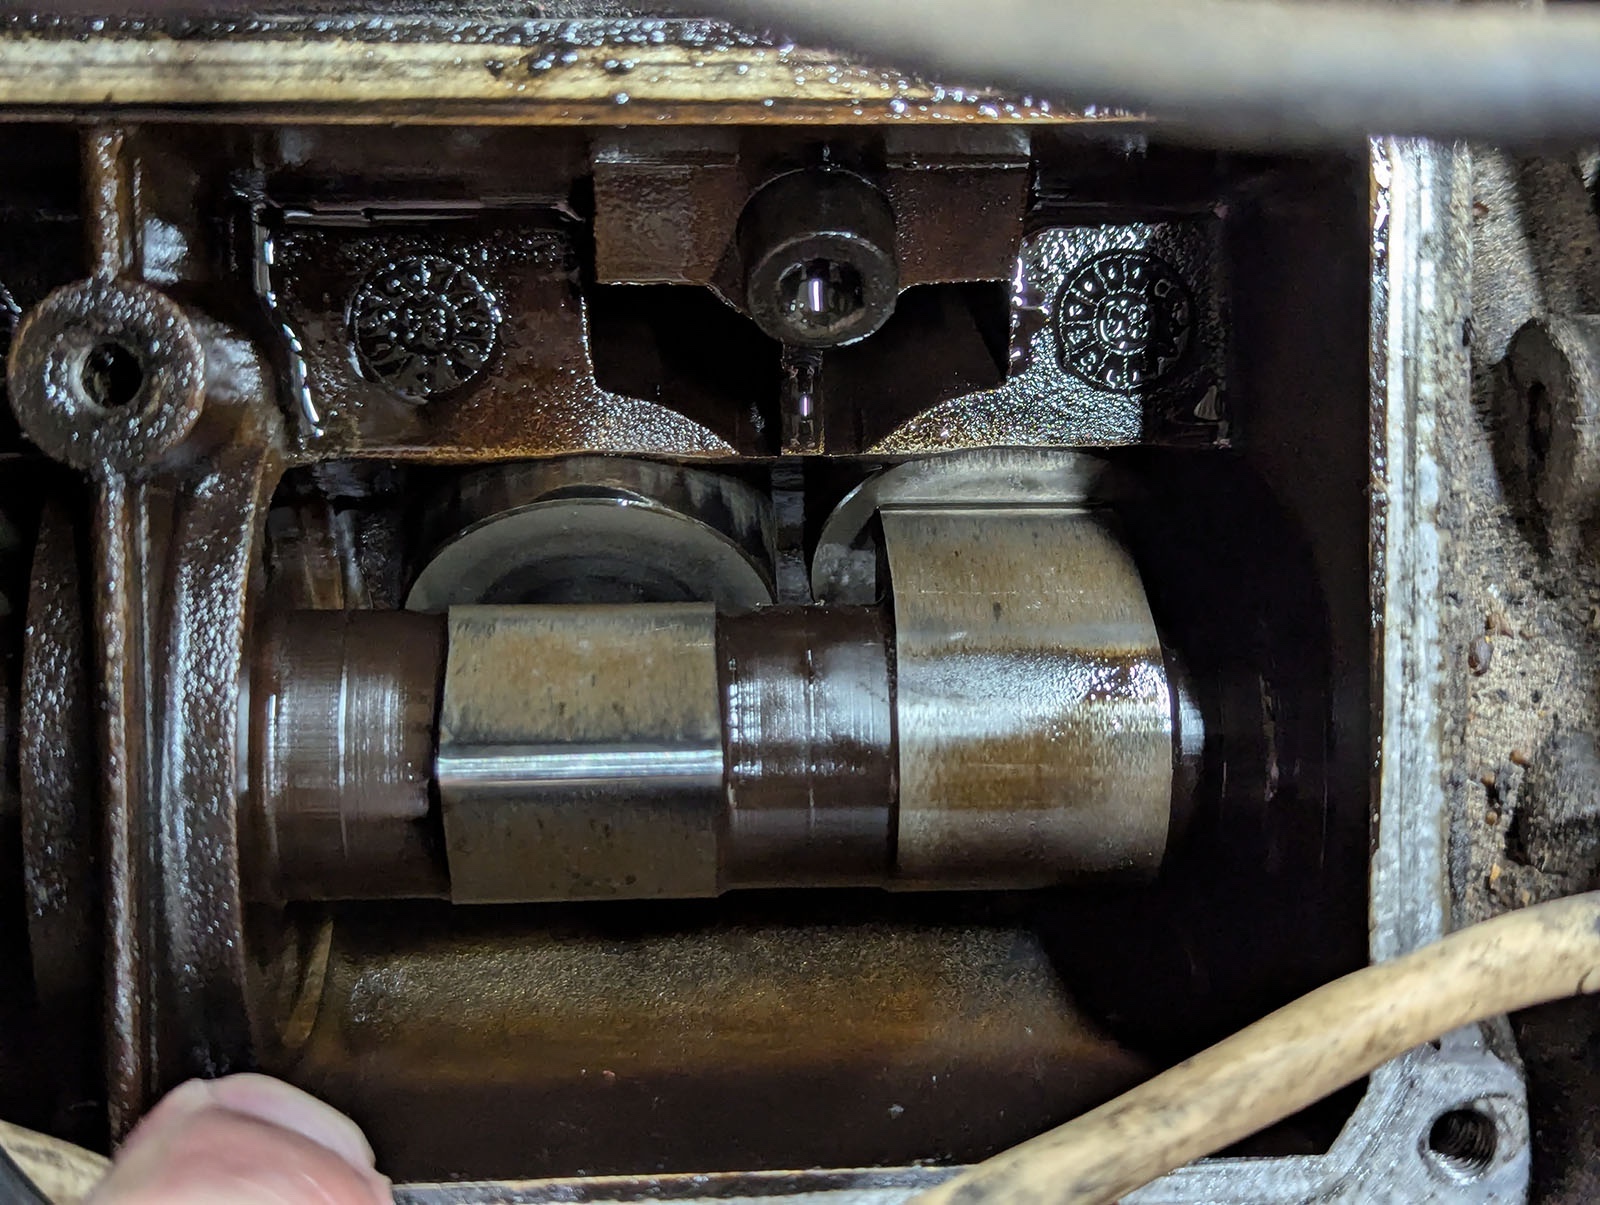
Everything looked … normal. No weird scoring, no obvious loose cups or abnormal play. Just a simple, normal, camshaft. I started the car with the valve cover off (don’t do this) and couldn’t see or hear any obvious source of the noise even then. The Maserati’s 2.8L 18-valve engine is a pretty standard single cam per head with two intake and one exhaust valve per cylinder. The cam lobes press on cups, which press on the valve stems through an intermediate shim to adjust the valve clearances. Now, I could adjust those clearances, but it would involve pulling the timing belt and cams and, frankly, I just didn’t want to.
Dumbfounded, I put the cover back on and contemplated my life. Whatever this was, it was somewhat intermittent, quieting down periodically, and might be something simple. Ultimately, the seats had consumed enough time, I didn’t feel confident in pulling the head gaskets, nor was I comfortable spending the $500+ on new gaskets and accessories to do that, so I shelved the investigation into the ticking for now. I realize this isn’t a satisfying conclusion, but with the schedule looming large, I didn’t feel like the juice was worth the squeeze, so to speak.
Electrical Gremlins
As I lay in bed, thinking about my life choices, I imagined what it was going to feel like sitting on the side of the road, fussing with the fuse box, trying to coax some life back into it. Maybe I’d make it as far as Bartlesville, but ultimately, I knew the fuse box was a time bomb in the passenger footwell. I imagined being stranded in rural Canada, or rural Missouri for that matter, and what I would pay to be able to go back in time to have fixed it when I had the chance. With that horrifying mental image, I decided the answer was “a lot,” pulled out my phone, and placed the order for an upgraded fuse box.

In no way to diminish the accomplishments of the engineering firm behind the “Biturbox” replacement fuse box, I will say there is very little reason this part should cost between $800 and $1,100 USD for what is, essentially, a fancy PCB. It even uses the old fuse box housing, so no plastic molding or advanced production was needed! Still, realizing I’d happily pay $1,100 to eliminate the fuse box as a source of problems, I did it, and a few days later, it arrived. To add insult to injury, they include a flyer for their modernized relays for this car (not included, of course), just to twist the knife that much further. (The Biturbo uses fused relays, which is neat, but with a non-standard pinout and bullet/torpedo fuses, which is less neat.)
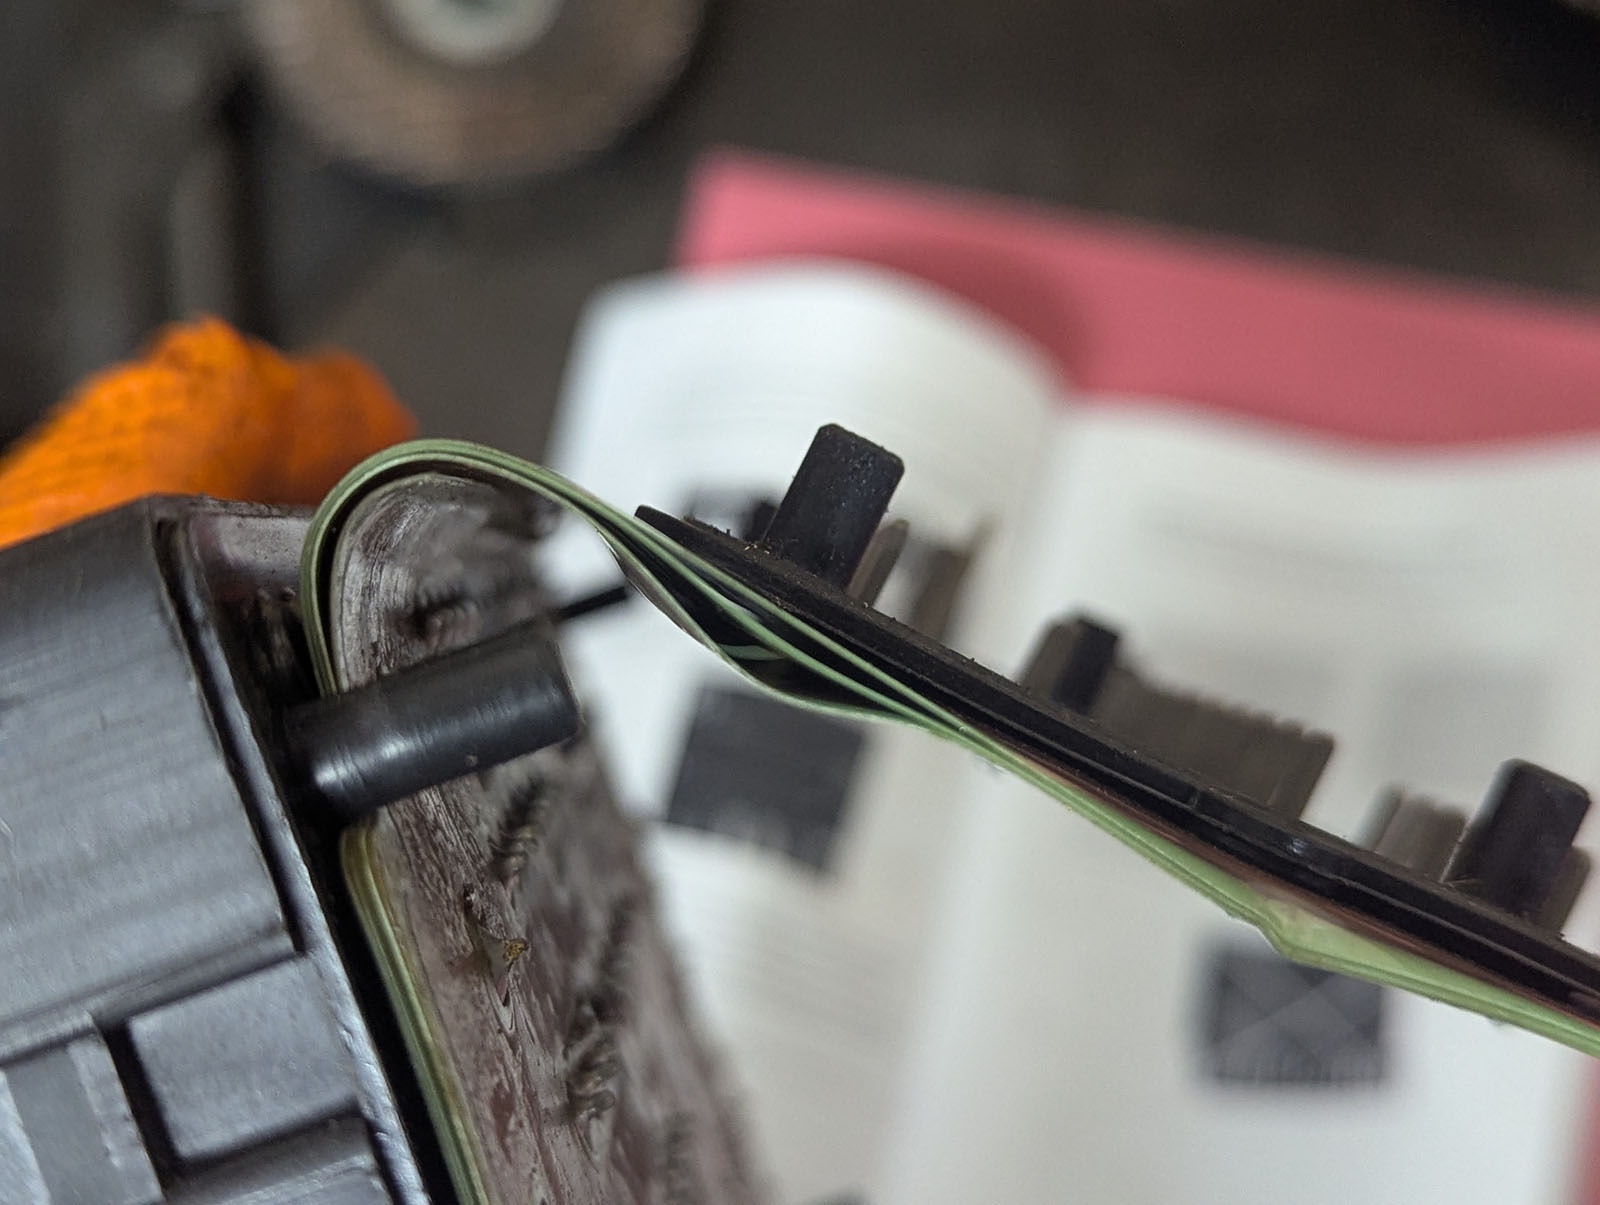
Accessing the fuse box is both more challenging and easier than I expected. The glove box needs to be removed, which is accomplished with a pry bar, but that exposes the fuse box, both ECUs, and a bunch of wiring both standard and otherwise. This makes replacement … well, not easy, but straightforward, though seems like a pain to go through if you just blew a fuse randomly.
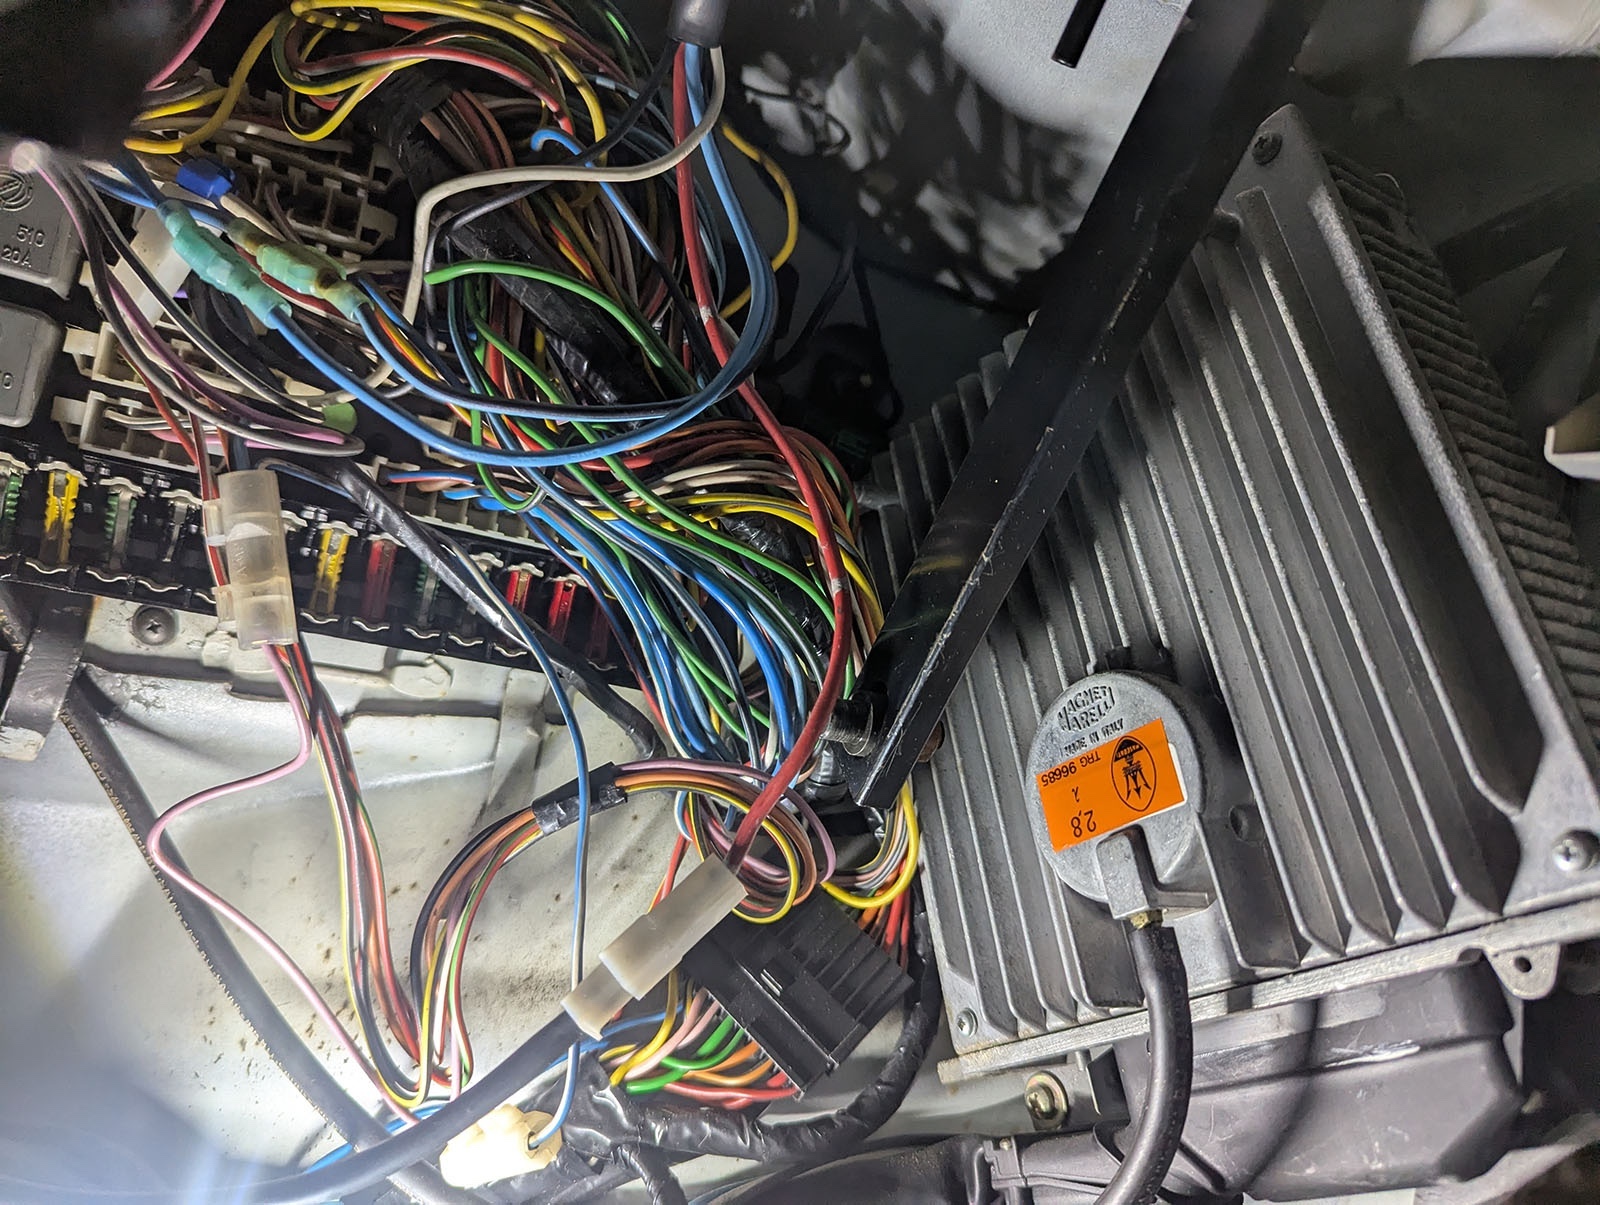
Curiously, the rest of my work needed to be done in the engine bay. I’ll admit I don’t often work on fuse boxes, and this is the first one I’ve had to outright replace, but I was pretty surprised to see the fuse box mounts to the firewall and has connectors on both sides. After removing a few vacuum lines to gain access, I managed to remove the heat shield, connectors, and bolts holding in the old fuse box. A little bit of wiggling and I finally had it in hand and … it looked like a fuse box. Reading the instructions on the Biturbox, I realized I needed to swap the case from the old box to the new one, so I took the old one apart and was astonished by what I saw.
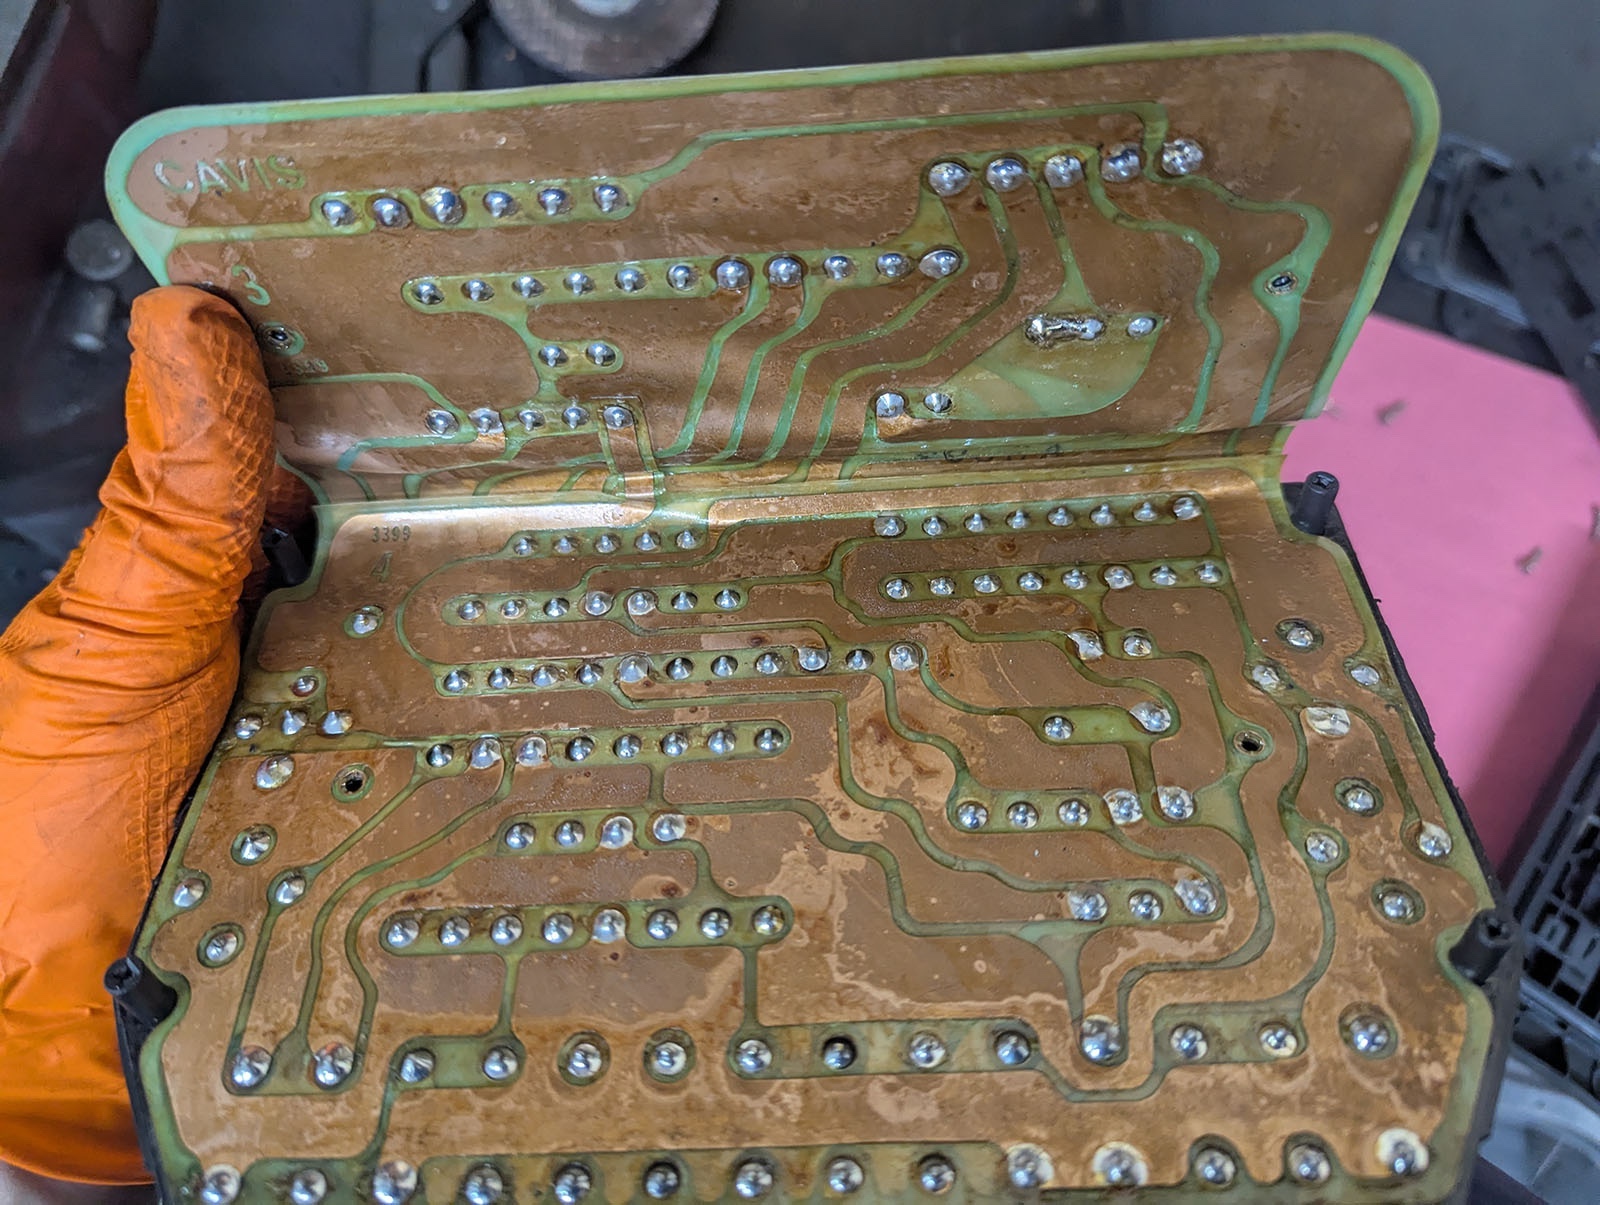
Flexible PCBs are a fantastic technology that has many applications, but before today, I wouldn’t have fathomed anyone would use one in a high power application like a fuse box, let alone essentially solder three of them together, fold them over, and cram them into a box. Multilayer PCBs certainly existed in the 80s and would have been a far better choice. Figuratively, anything would have been a better choice. Looking over the PCB, I could see multiple faults, including solder joints that had cracked or pulled through one or more layers, somewhat justifying my expenditure on the new box.
Installing the new box was fussy, but not complicated. I took the opportunity to remove the ignition ECU and clean the central grounding point on that side of the car for good measure. Without too much time spent, I had the new fuse box in and was able to start the car again.
Bad news: the car still runs like crap.
Good news: the factory air horns work now!
Even though I have material evidence the fuse box was bad, I was really hoping this was “the fix” to my engine problems. On to the next thing!
And then it broke more
After a lot of dead ends, false flags, and red herrings, I got the car running acceptably enough that I was willing to take it out to get registered with the state.
Or so I thought.
I arrived at the shop at 3:00 PM, having knocked off work a little early, with the intent to take the car to the tag agency for a “VIN inspection,” a requirement for any vehicle to be titled in Oklahoma from “out of state,” with this vehicle’s tribal title counting as an out-of-state title. With confidence, I pressed the starter button, the start position of the ignition switch having burnt out over a decade ago, and … the car wouldn’t start. From the sound of the crank, the car wasn’t even trying, with no sounds of any ignition on any cylinders.
Terrific.
As a side note, you can absolutely tell when this car is and is not “trying” to start. When everything is working normally, the crank is almost loping, with a tough spot somewhere in the crank that I’m ignoring. When it isn’t trying to start, it sounds almost like a car cranking with no compression, just a fast, consistent crank. I know why now, but at the time, I was trying not to think about it because there could be a whole bunch of expensive, complicated reasons for this.
As we all know, you need three things to make a car go: fuel, air, and spark.
The mechanic/previous owner was becoming more invested in this project as, I suspect, he was starting to be concerned at how long this was taking and also probably wanted his lift bay back at some point. He pulled a coil wire, I cranked and … nothing. No spark from either of the car’s two coils.
OK.
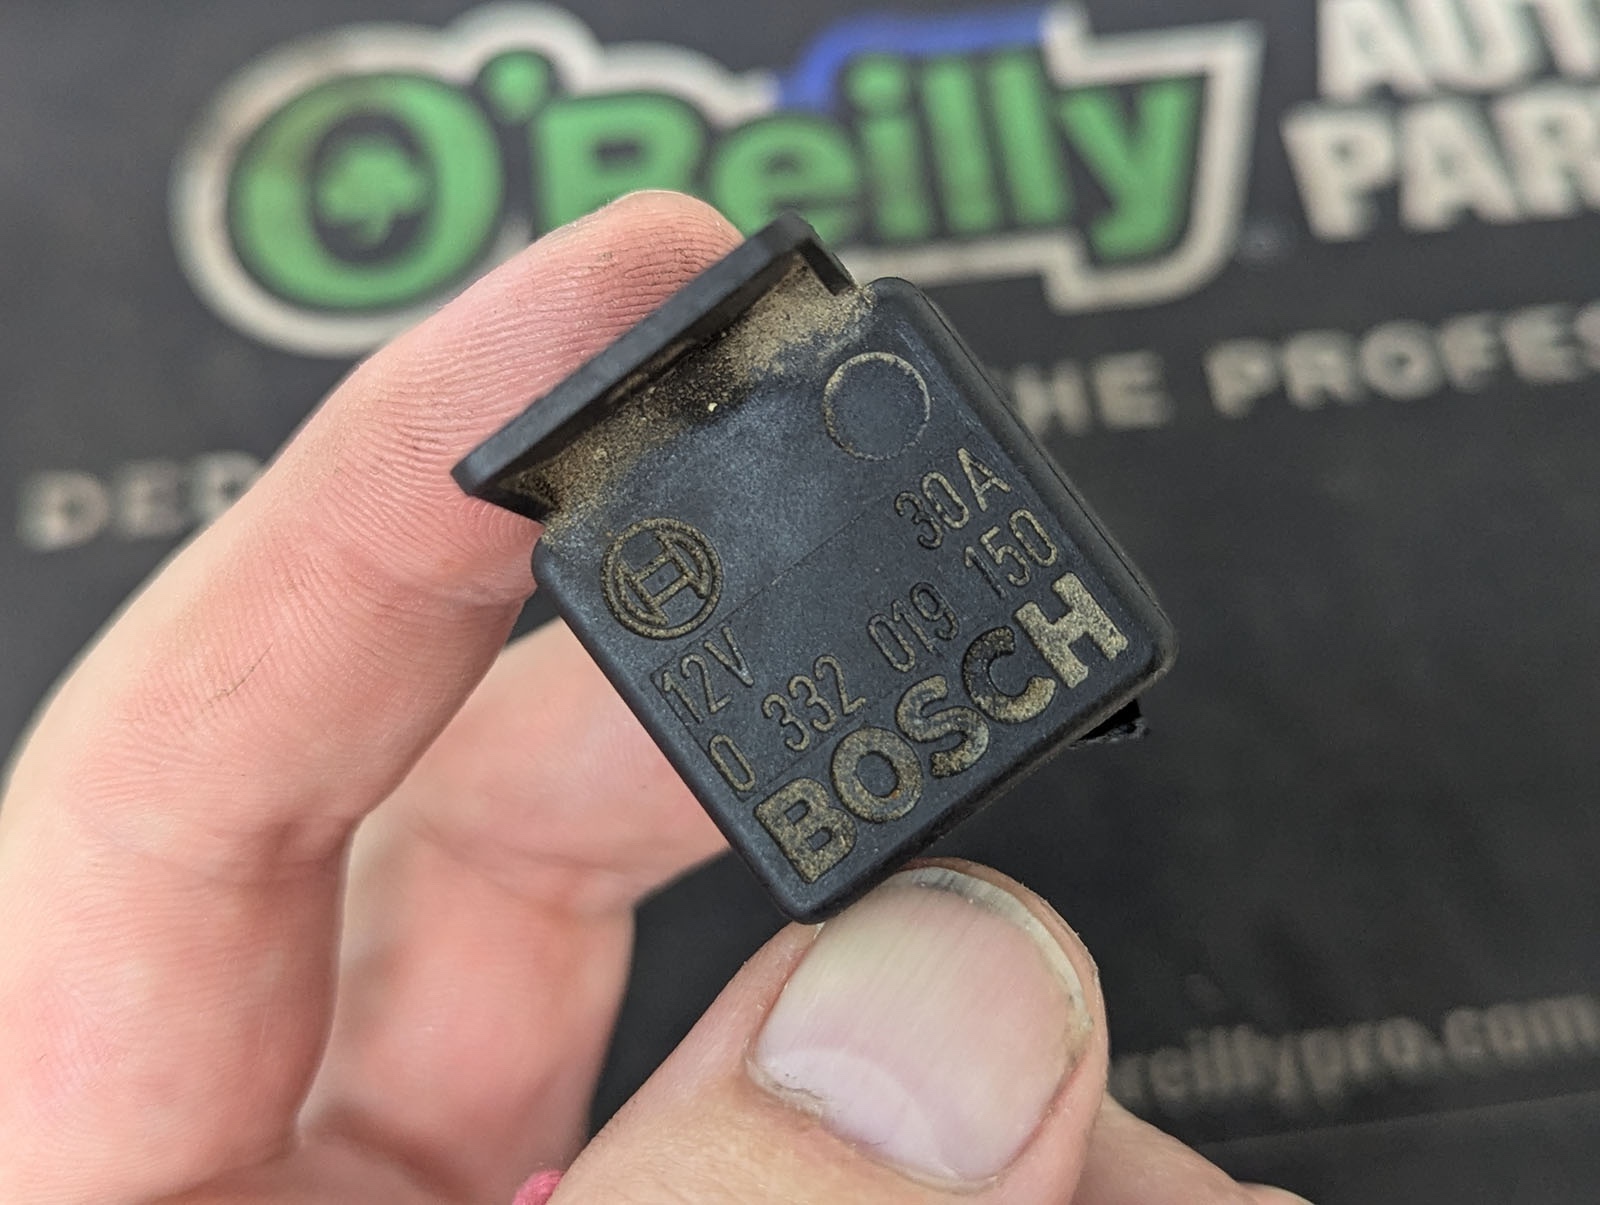
Thankfully, the Biturbo factory service manual (FSM) has a simplified wiring diagram for the injection system, and while there are a lot of sensors and systems involved, the first point of failure was likely the relay, which gave the coils power. We probed it with a multimeter and confirmed the ECU was giving the relay coil power, but the relay wasn’t engaging.
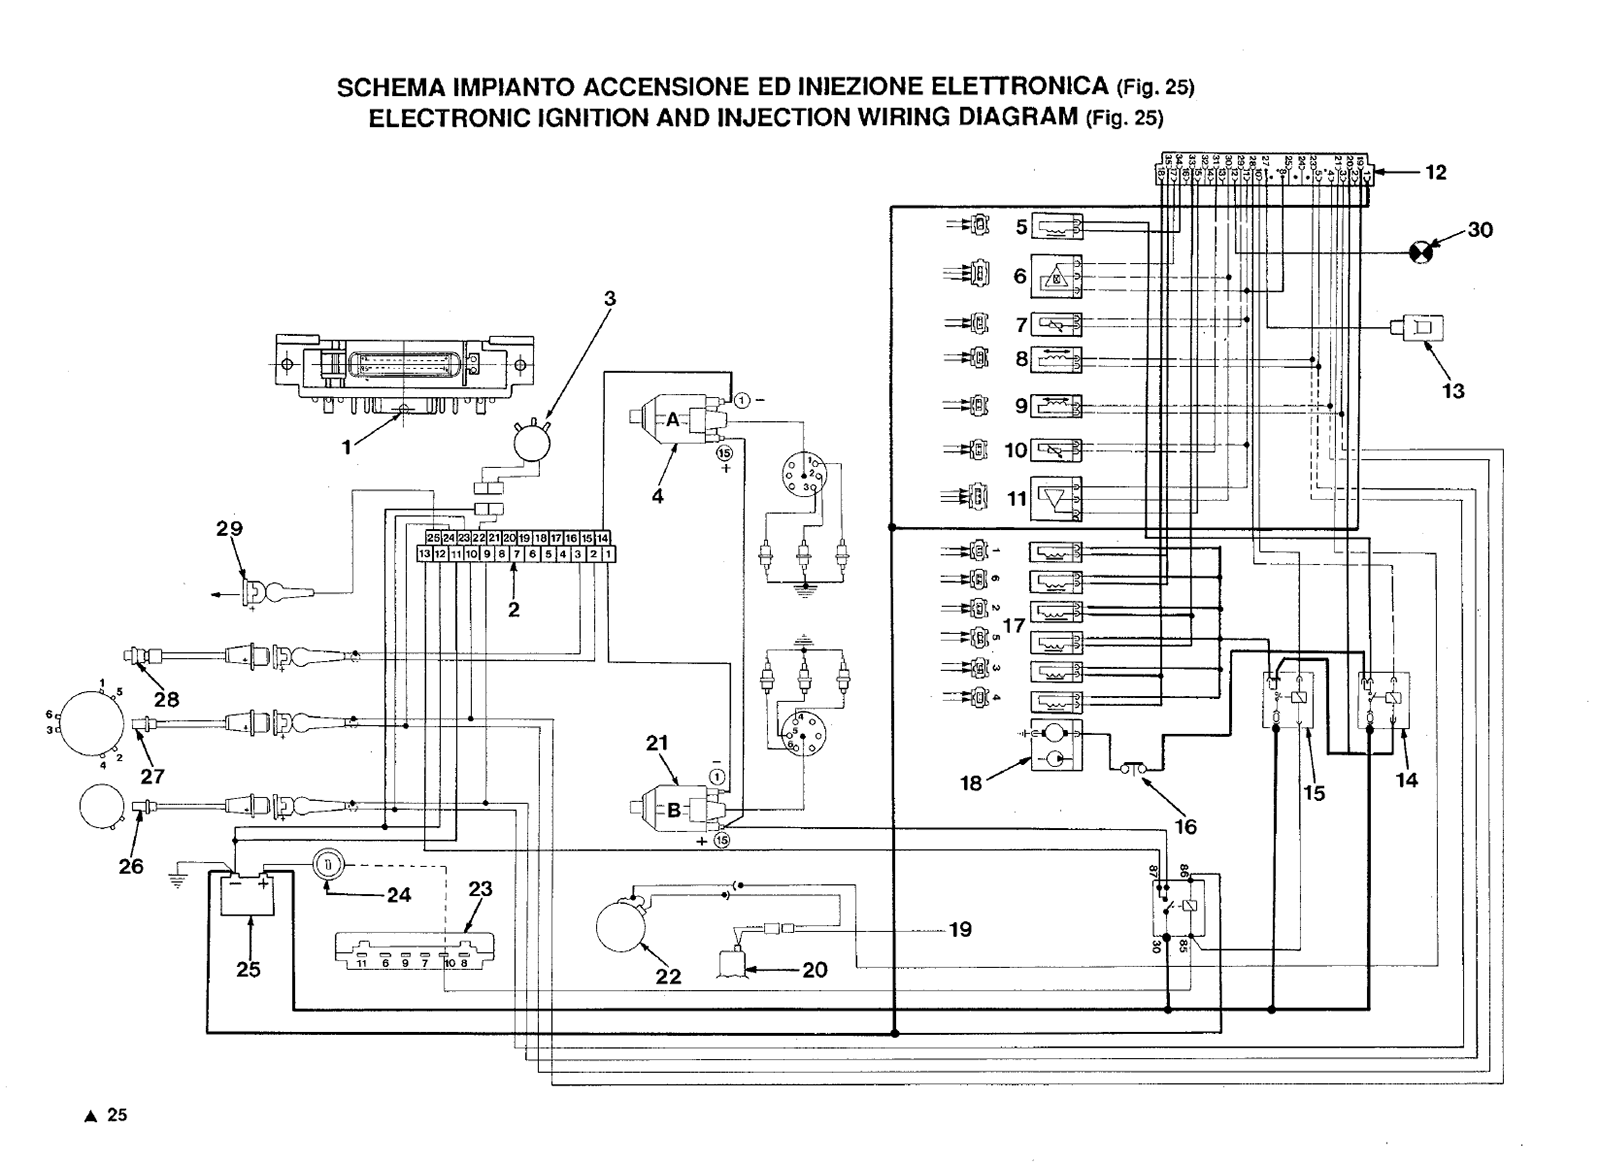
Of all the random failures, a fairly standard electromechanical relay had failed. I say “fairly” standard, but unlike most automotive relays you’d pick up at an autoparts store, which have one normally closed (NC) and one normally open (NO) contacts, this one had two NO contacts, making it slightly harder to source. Still, two days later, the new relay was in, and the car would start on its own again. Fantastic!
We did manage to bodge the old one, but apparently the ignition computer didn’t like that, refusing to start the car unless the bodged relay was removed and re-inserted. Turns out one of the two contacts goes to the ECU as a feedback mechanism for whatever reason, and it won’t re-engage fuel unless it sees that signal go away. This wouldn’t be a problem if the car were running well or easy to move, but it was neither. For someone who has been driving stick for 20+ years, I was a little surprised at how often I was killing it in 1st and reverse, even on relatively flat ground. A trip to the lift revealed the problem was not me; the car had two very major problems.
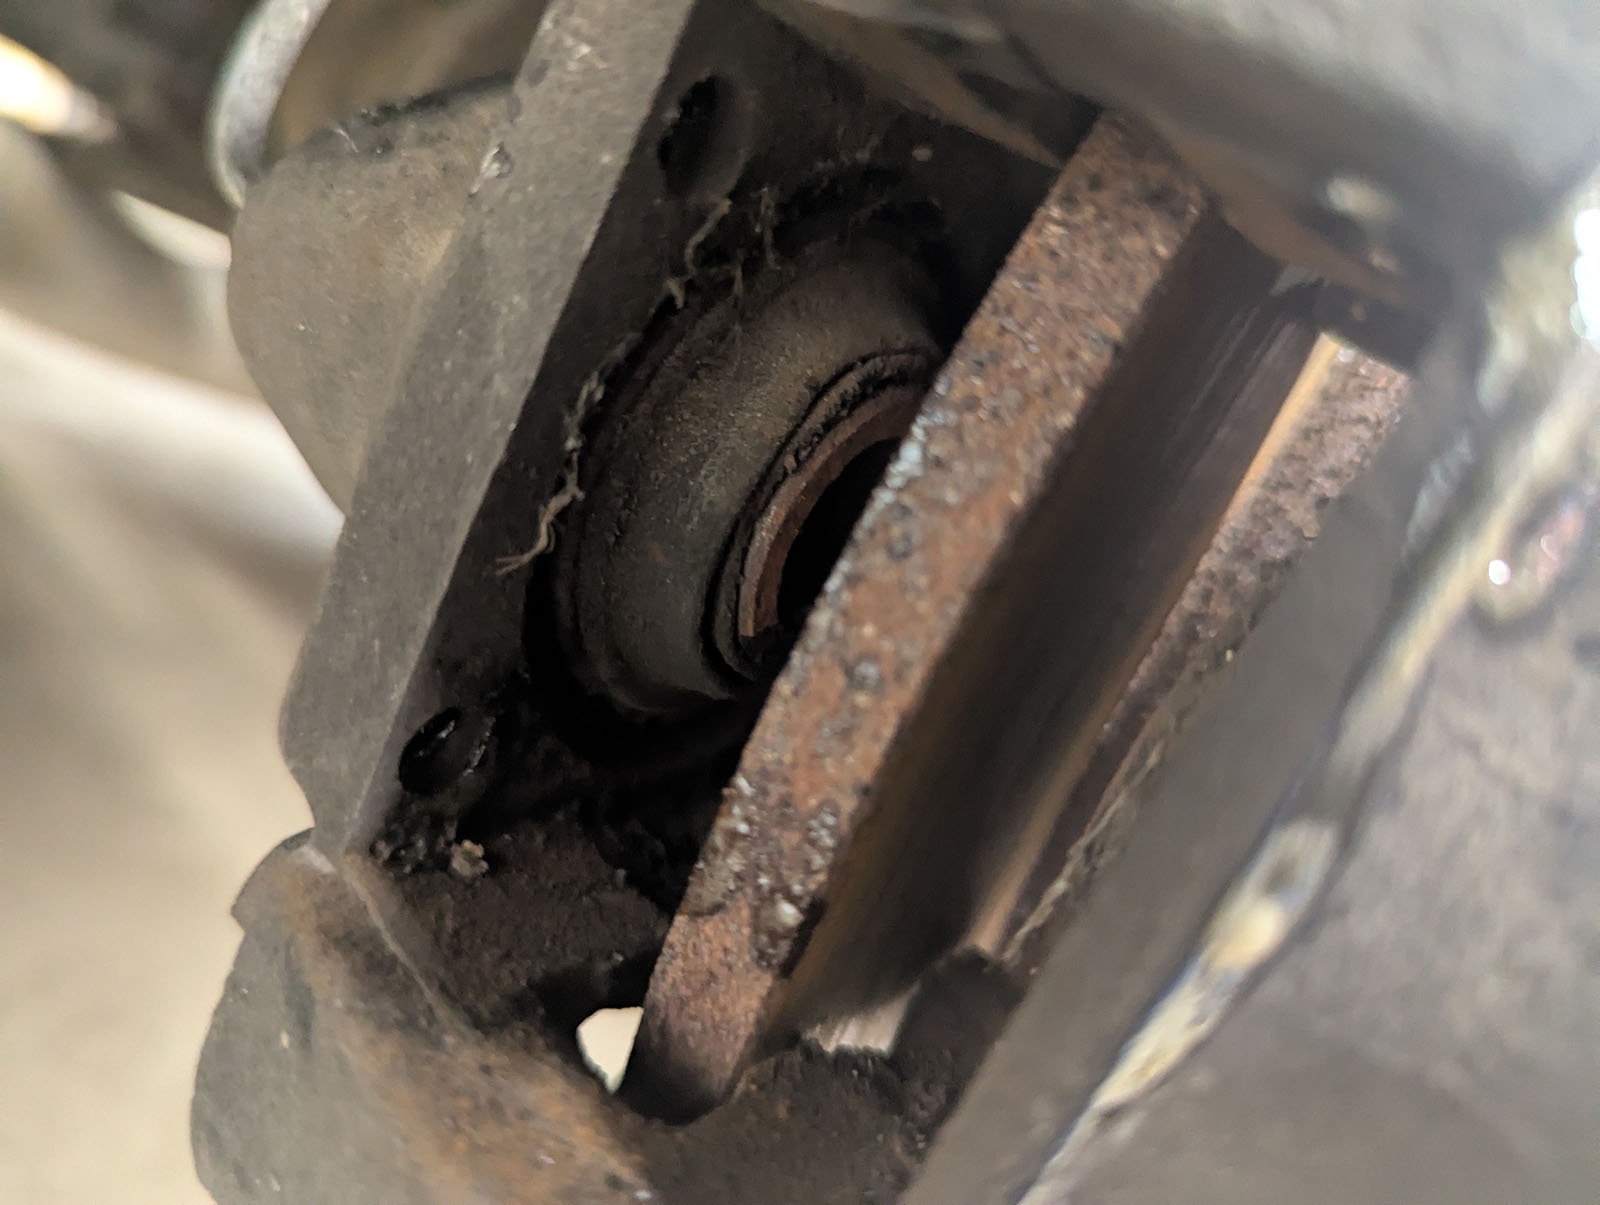
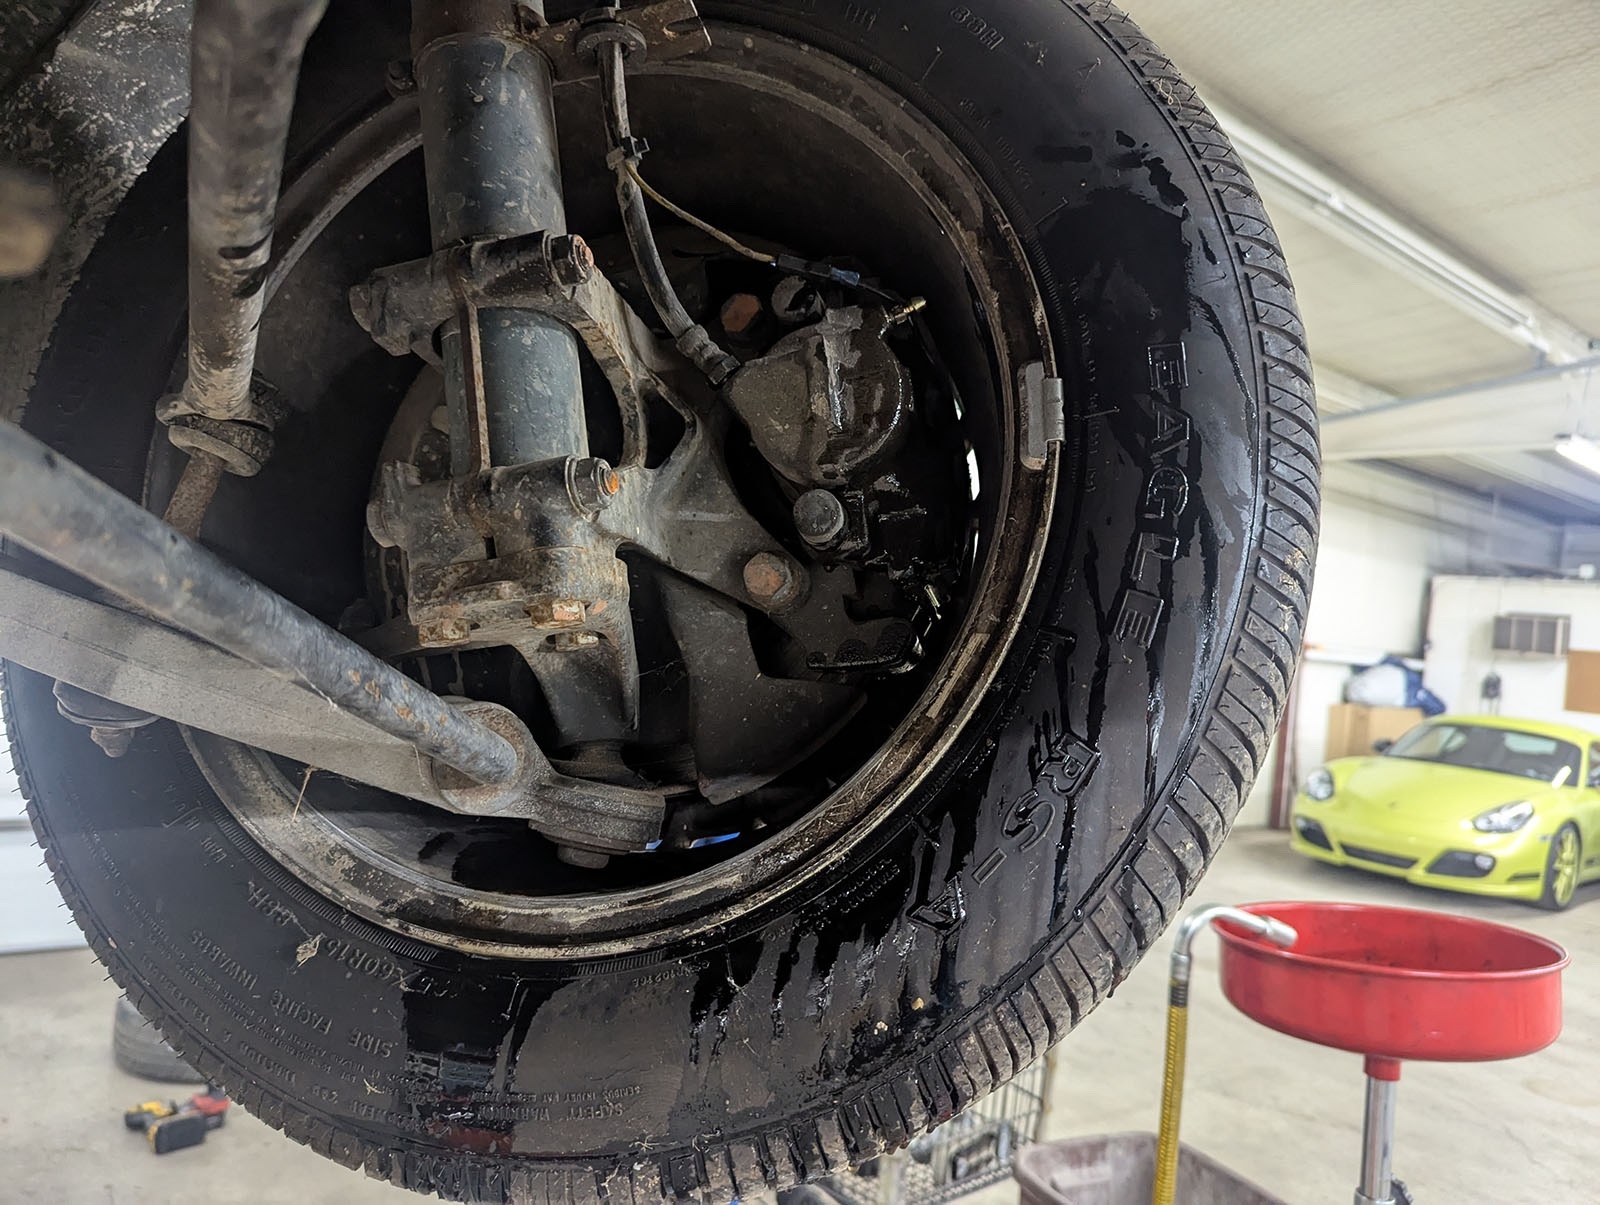
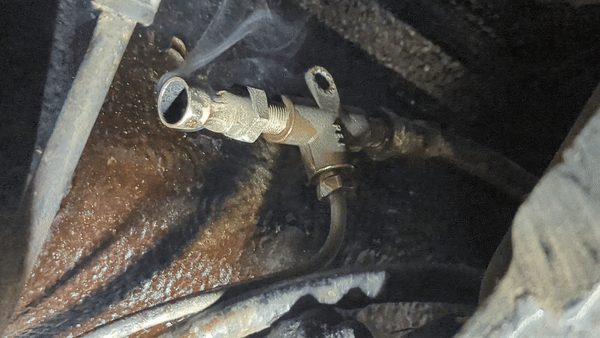
One: The oil pressure switch was less than finger-tight, spewing oil, and mostly impossible to access. Seriously … removing the engine from the car wouldn’t make this switch easier to access. It was essentially embedded in the block and completely occluded by the AC compressor. I couldn’t even take a picture that would do justice to how impossible it is to access this thing.
Two: The rear brakes were partially locked up, which explains the difficulty moving the car.
Sure, no problem!
The oil pressure switch was solved with some wobble extensions, a crows foot, and a lot of swearing.
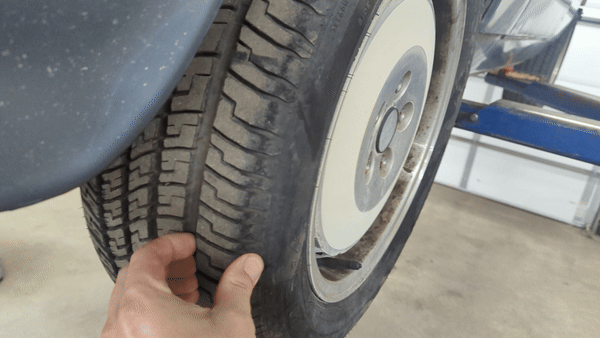
The brakes … well I figured brakes are important and I might as well do calipers, pads, rotors, and flex hoses all around. The Maserati has a lot of parts from other random cars, and I see no reason why Maserati would do something so silly as to engineer their own rear brakes.
Right. RIGHT!?
Yeah while the front brake calipers are, allegedly, off a BMW 528i, the rears were not in my parts exchange spreadsheet nor available from the Maserati specialty shops I’d been leaning on for this project.

Not ideal.
However, the possibility exists that the brakes were not the problem and, in fact, the flex hoses were failing. Flex hoses of this vintage are well known for looking acceptable on the outside but failing internally such that no fluid can pass or, even worse, essentially act as one-way valves allowing the high-pressure fluid from braking through but not allowing the relatively lower pressure return fluid back. Sadly, cracking the bleeder didn’t relieve the brake pressure, meaning there was likely a problem in the calipers. That didn’t mean the flex hoses were good, just … not the sole source of the problem.
The rear brakes are, allegedly, rebuildable with the kit from a Saab 9000, so I got some rebuild kits, brake pads, and flex hoses on order. Unfortunately, this means the car was going to be immobile for at least a couple of days while we rebuilt the rear calipers and replaced the hoses. I was not looking forward to this, as I’ve never rebuilt calipers before, and if we were not successful, removing the rear brakes entirely would be my only recourse. Deleting the rear brakes wouldn’t be the worst thing, as rear brakes only do between 20% and 30% of the overall braking on most vehicles, but I’d still rather have working brakes on all four wheels, regardless of utilization.
Luckily, a random update posted on Opposite-Lock ended up saving my bacon. While I was complaining about the problem and laying out my options, a commentor posted a link to someone selling used calipers on eBay. The price and shipping were high, plus the delivery time was long, but as a Plan C, it was nice to have options. Wait, they ship from Tulsa, Oklahoma? I know that place! I live there! I did a little bit of internet sleuthing and found the shop selling them and gave them a call. The next day, I showed up and managed to score both rear calipers, including surprisingly nice pads, and a rear taillight for a very reasonable price. The shop itself felt maybe like if you took your car there for service, it wouldn’t be leaving in one piece, but I needed parts, so here we are.
The new calipers proved to be in mint condition, so I installed them, rather than rebuild the old ones, and with a fair amount of trouble and a minor explosion, got the new rear flex hoses installed. The fronts were in good condition, and I didn’t have the parts on hand, so I left them as. Not content to give me the win, the Maserati pulled another trick out of its hat, and the front driver’s side brake caliper wouldn’t bleed for some reason. After loosening the flex hose to confirm fluid could make it that far (it could), I contemplated my options. I could try sourcing new front calipers, as they were off a BMW and fairly available, or I could try doing a reverse bleed, but for that I’d need to disconnect the hoses, rather than risk pushing contaminants into the system… or I could jam a screwdriver into the bleed screw hole.
Guess which one I did?
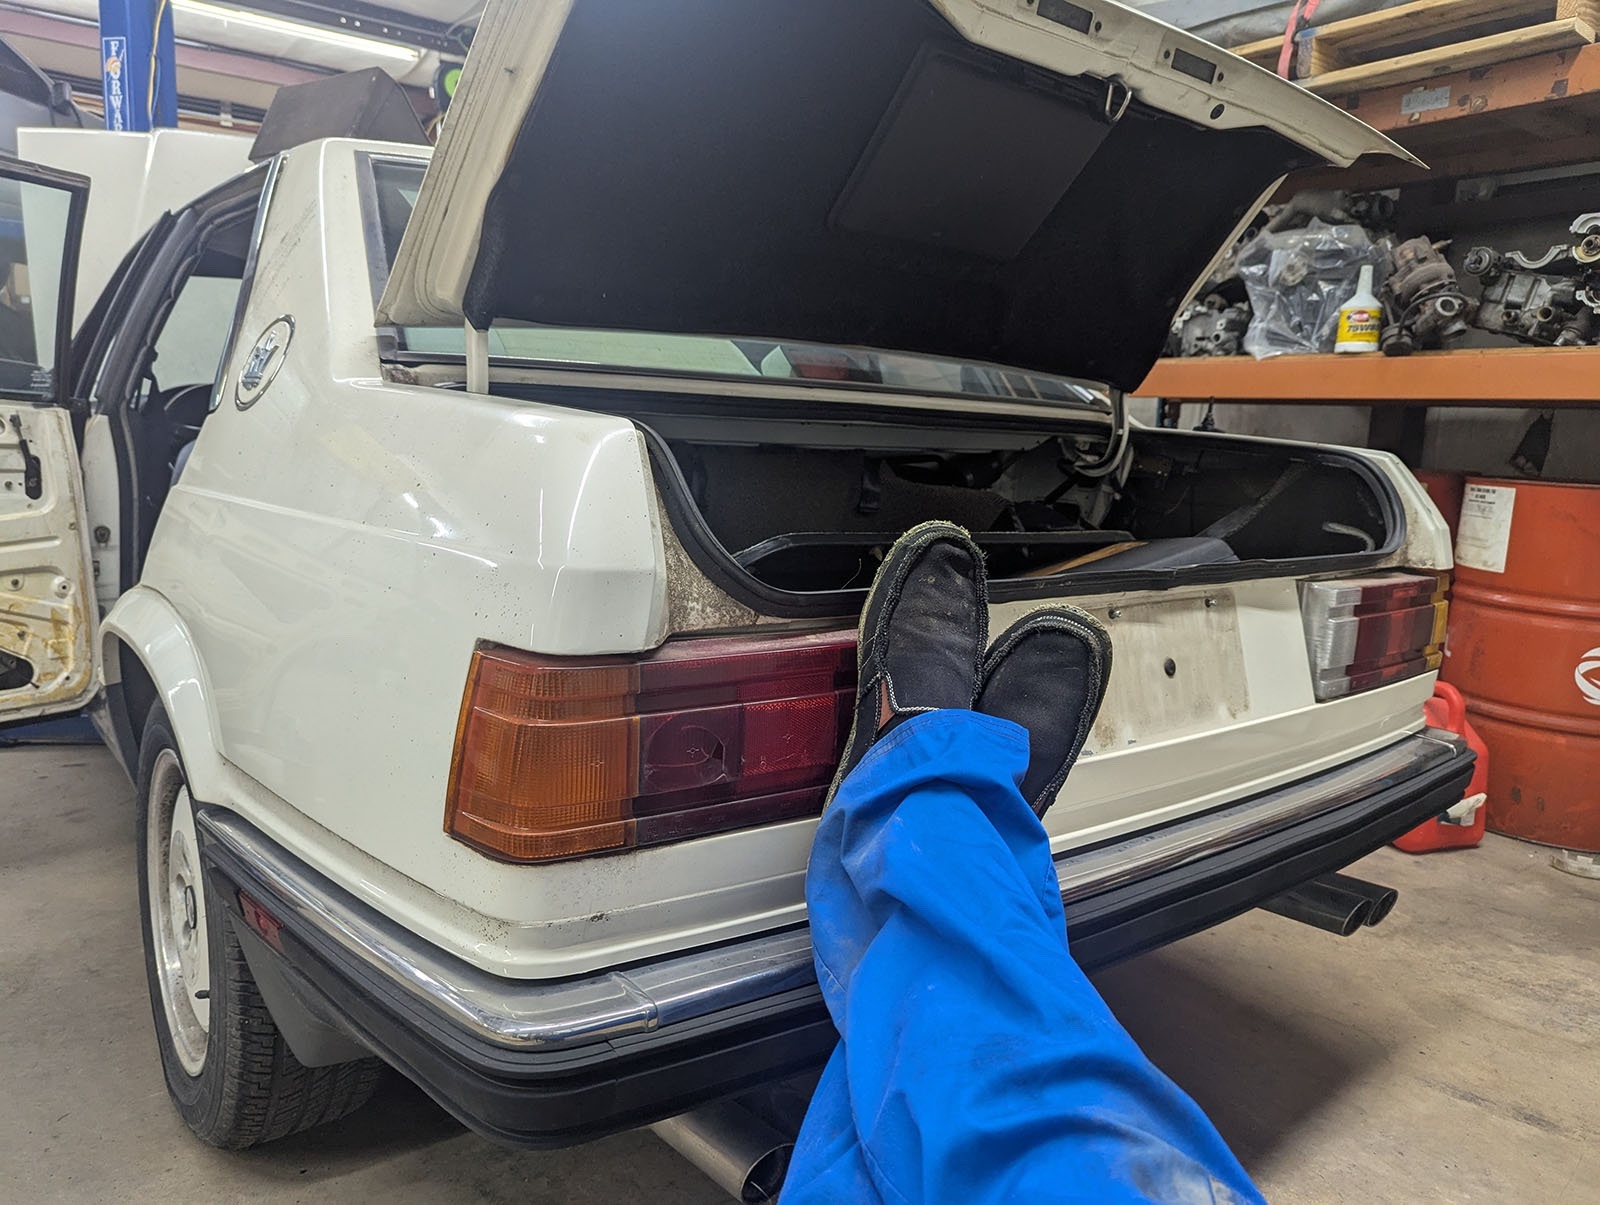
That done, I bled the clutch as it uses the brake fluid reservoir and could probably use a bleed anyway, and finally managed to finish a job on this car.
A (timing) light at the end of the tunnel
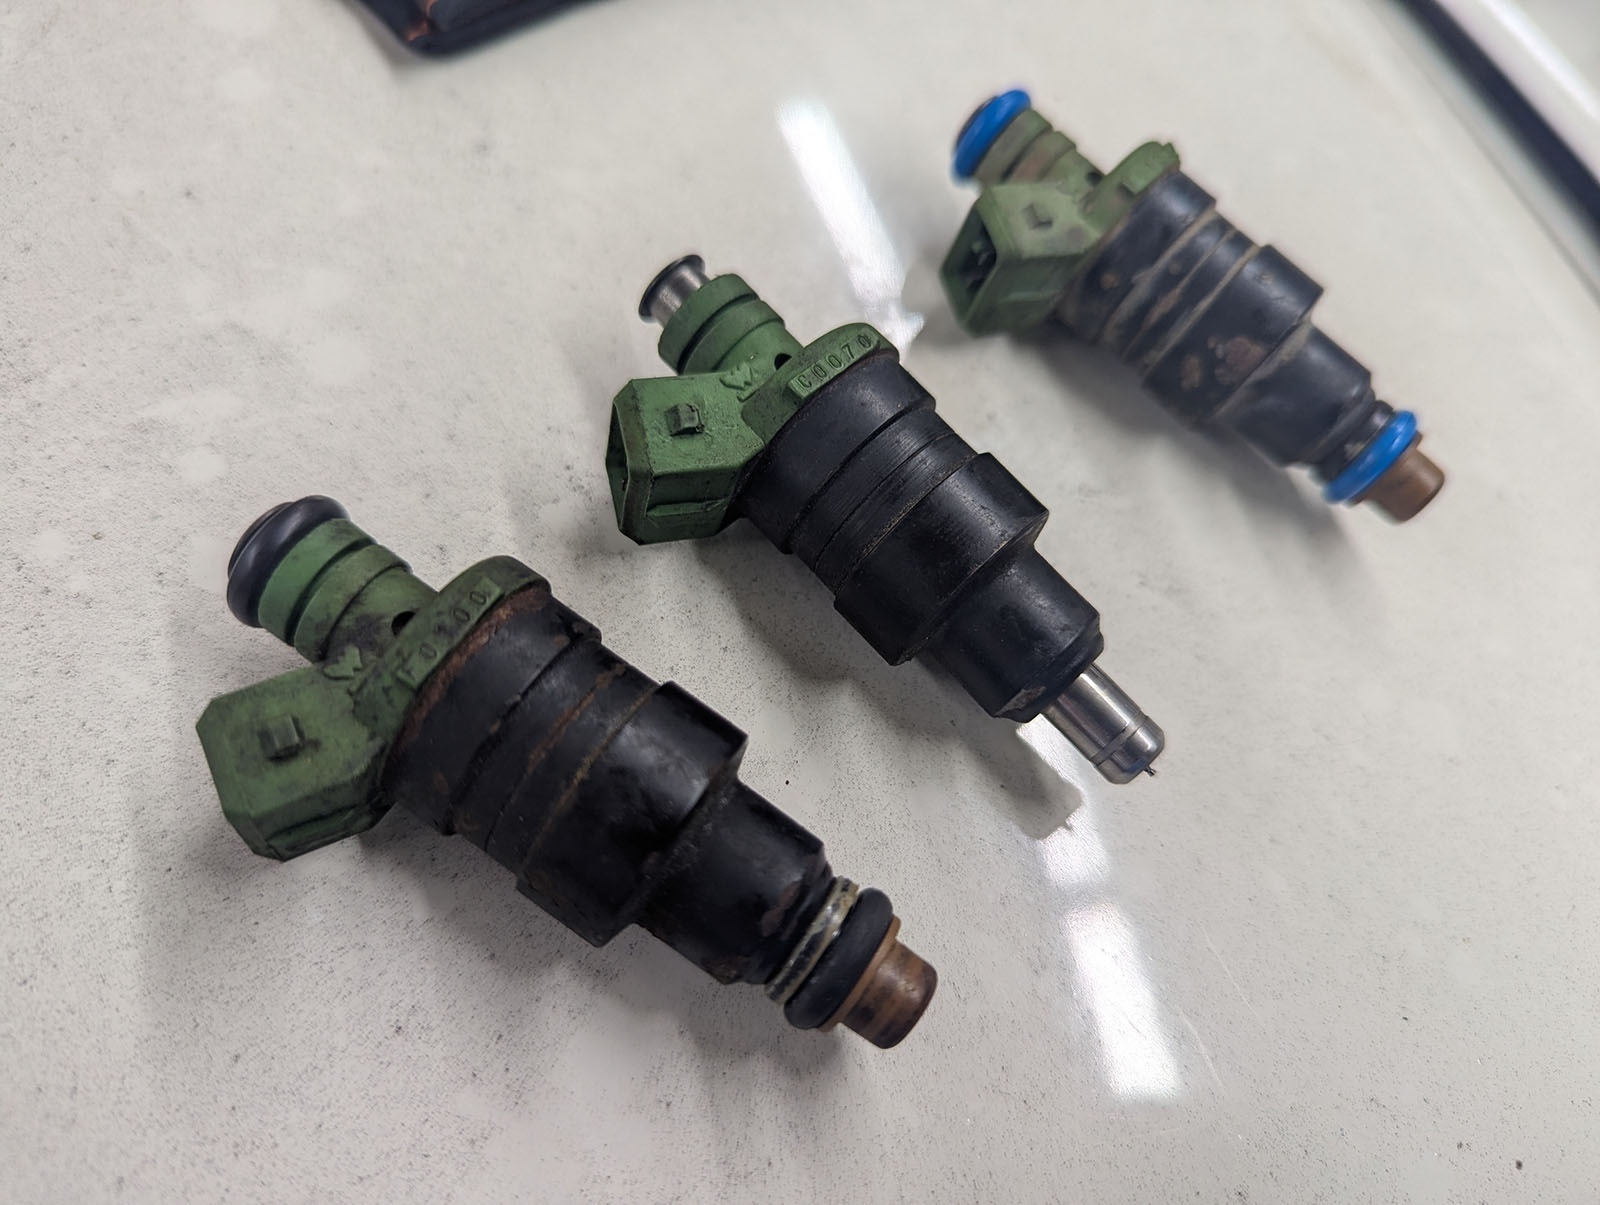
After having an existential crisis over a cracked intake gasket, I confirmed the intake didn’t have any leaks via smoke test, the injectors were working well enough, and moved on to investigating timing.
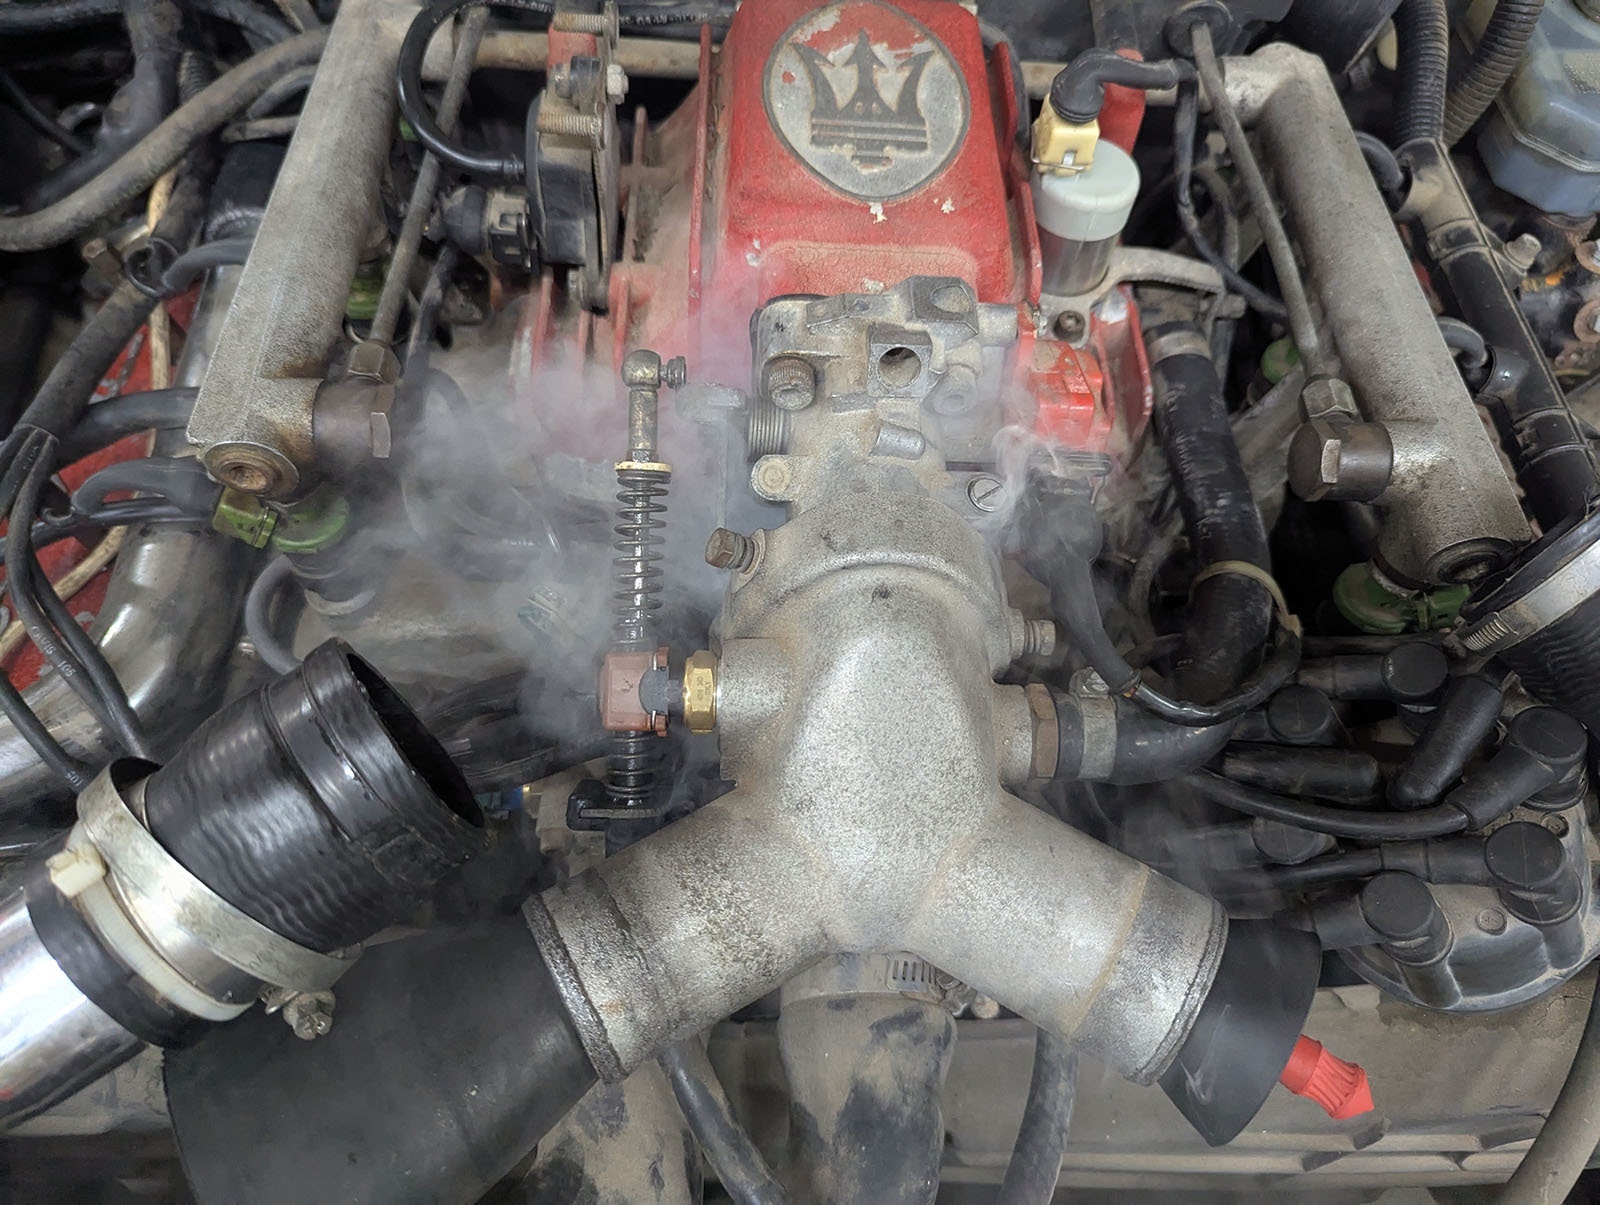
I connected a timing light to the number-one spark plug wire and discovered this car appears to lack any timing marks. The FSM indicates timing is set by the ignition computer, and it isn’t for my peasant hands to adjust. Still, looking at the magnets on the crank with the light, I noticed they hold solid under revs, but will seemingly randomly pull way back. The mechanic suggested this could indicate a bad crank sensor, and with so few days remaining, I ordered a new crank and cam position sensor.
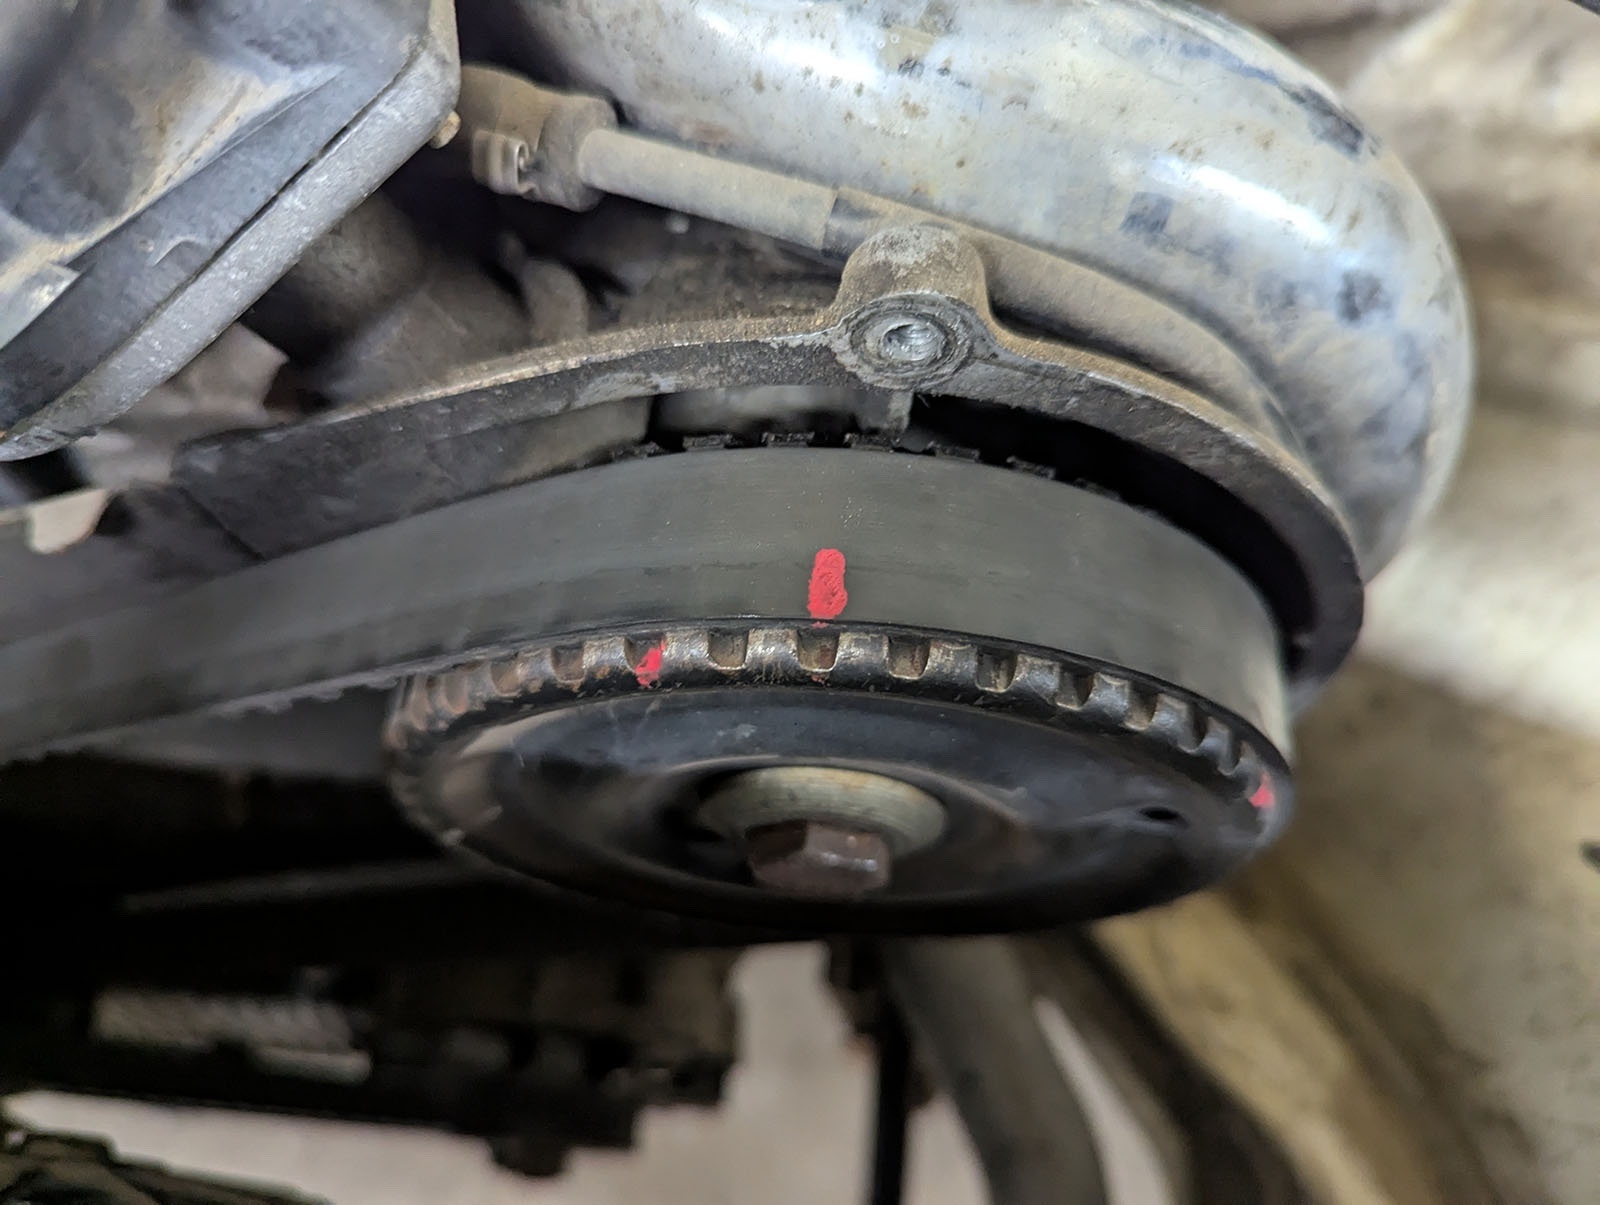
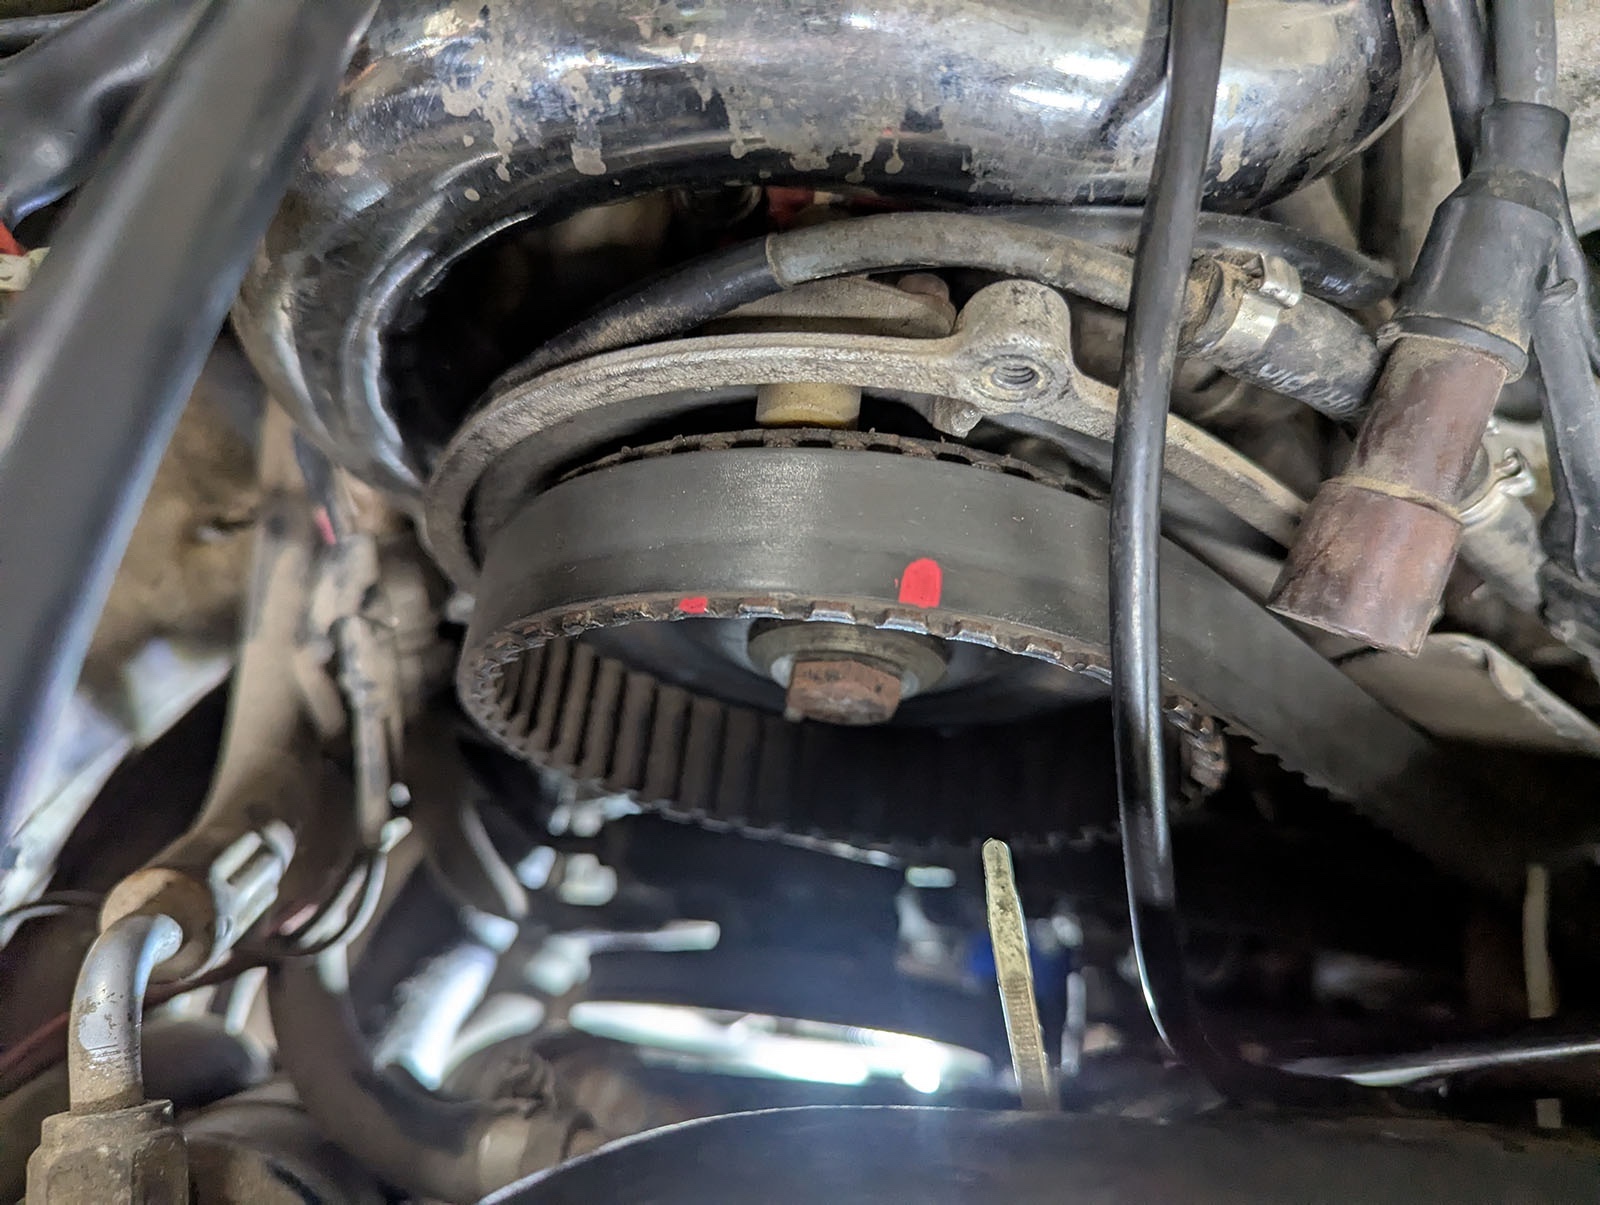
While those came in, I decided to pull the timing cover and see what I could see. I hadn’t really wanted to do this, as it is one big piece of plastic and I was concerned with how much of the cooling system I was going to have to pull to remove it, but luckily with just removing a few intake hoses, I managed to squeeze the cover out, only losing some of the skin on my hands in the process. Once off, I was able to see the timing marks on the cams and crank and they didn’t look quite right. After some fussing, we got the engine to top dead center (TDC), and the timing marks on the two cam pulleys didn’t line up in a way I expected.
Surely not?
As previously mentioned, this car has two overhead cams, one per bank, driven by a timing belt off the crankshaft. The tensioner is a spring-loaded, pre-tensioning style system (there is probably a word for this, but I don’t know what it is) where the tension is set once and then locked in. The two cams need to be in sync with each other and the crankshaft to make sure the valves open and close when expected and, somewhat more importantly, the valves and pistons don’t consummate their forbidden love. Generally, valve timing is set when the belt is replaced, and it shouldn’t ever change. Belts can slip, but usually this causes catastrophic engine damage in an interference engine, which this is, as the valves and pistons can occupy the same space at the same time and the results are not pretty. Some engines can be a few teeth off and not suffer damage while others can be a total disaster if off by just a tooth. I had no idea which category the 2.8L V6 in the Biturbo fell into.
As such, I was skeptical my valve timing had slipped, but not enough to grenade the engine. I re-checked the FSM several times, re-verified TDC, and even went so far as to borrow the Alfa Romeo Owner’s Club’s TDC gauge (it was too short, sadly) to double-check my work, and I couldn’t help but conclude the valve timing was off. The mechanic came over to inspect and eagerly concluded the same. We marked the position of the belt as-is, in case we were wrong, and set about adjusting the cam timing. We ended up adjusting the driver’s bank three teeth and the passenger by two.
Not being completely insane, we turned the engine over by hand for four full revolutions, waiting for the valves and pistons to make their forbidden love known, but they never did. We reconnected everything and bumped the starter once, twice, three times. No terrible sounds.
So we started the car. After what could best be described as a “minor freak out,” it seemed the ECUs caught up with what was happening, the idle settled out, and the car started running beautifully. The idle was very high, but I cranked down the idle screw to bring it back down to earth. We fixed it?
As an aside, I’m not sure how we got away without valve damage here either. Apparently, a lot of Volvos of this era can withstand three teeth out of time, but not four. And while I agree this makes a good case for the cause of the ticking noise, that noise existed in 2023 when I first tried to resurrect this car, and we don’t think it had skipped time yet. Either way, compression was good then, so I don’t think there was valve damage. As for why the timing slipped … we have a few speculations, such as a mud dobber nest on the belt or debris in the intake, but really, there is no way of knowing for sure. The belt and tensioner were both in good shape, and there was no clear indication of what happened.
Now what?
At this point, I had eight days before I had to drive this car 900 miles from my home in Tulsa to the starting point for the trip in Toledo, Ohio. Ironically, this was the exact number of days before the trip I figured out my 2023 cheap car challenge Isuzu Piazza’s ignition timing issue. Apparently, eight is my lucky number?
Myself, the mechanic, and one of the other shop guys who had become invested in this project as it wore on, piled into the Biturbo and took it for a drive around the block. The car was indeed transformed. No longer was there any fear of stalling starting off, the idle was perfect, it was hitting peak boost and holding, and pulled like an 80s wonder. The front suspension, which had been warning me it was unhappy, chose this moment to completely fail, so the tires rubbed any time we took a turn or hit a bump but let’s not let this distract us from the engine was fixed!
We were all a little giddy at this point, but the suspension situation was certainly a new, fun problem we only had a few days to deal with, so we set to work. After a little investigation, we determined the front struts were likely having some issue or another, as the springs looked to be in good condition. I once again consulted the parts interchange spreadsheet from the Biturbo Owners Group and determined the front struts off of a, you guessed it, BMW 528i were supposed to work with “some modification,” but when they arrived, we couldn’t figure out how to make them work. Instead, we installed some spring spacers from Amazon and called it “good enough.” Feel free to comment about how we’d missed something obvious, especially as I have no evidence to the contrary, but short of taking an angle grinder to the struts, we couldn’t figure out how to refurbish them. We also installed new tie rods, as those had disintegrated at some point during this process.
Not ideal, but this close to the trip, we were firmly in “make it work” territory.
I took it to the tire shop and confirmed everything was adequate, had a new set of tires put on, then took it to the exhaust shop to weld in some generic replacement mufflers. Lastly, I hit up the alignment shop and. .. I guess we were in “sending it” territory?
The final job, which I fully admit was time that could have been better spent elsewhere, was to fix the air conditioning system. We pulled vacuum on the system and it held for two days, so we went ahead and charged it. With what? Don’t worry about it. After the system stopped taking refrigerant, we fired the car up, and the AC still didn’t work. Begrudgingly, I spent the weekend investigating the system and determined the pressure switch had failed (or we’d really messed up this process) and that someone had done some “special” wiring to the system in the past. After restoring it to factory wiring and bypassing the pressure switch (don’t do this), the system roared to life in a cloud of dust and started pumping out ice-cold air.
Nice.
Also, in case it needs to be said, don’t do what I just did. Bypassing safety features is a great way to get yourself hurt or worse, not to mention a great way to destroy hard-to-obtain car parts.
Time to hit the road
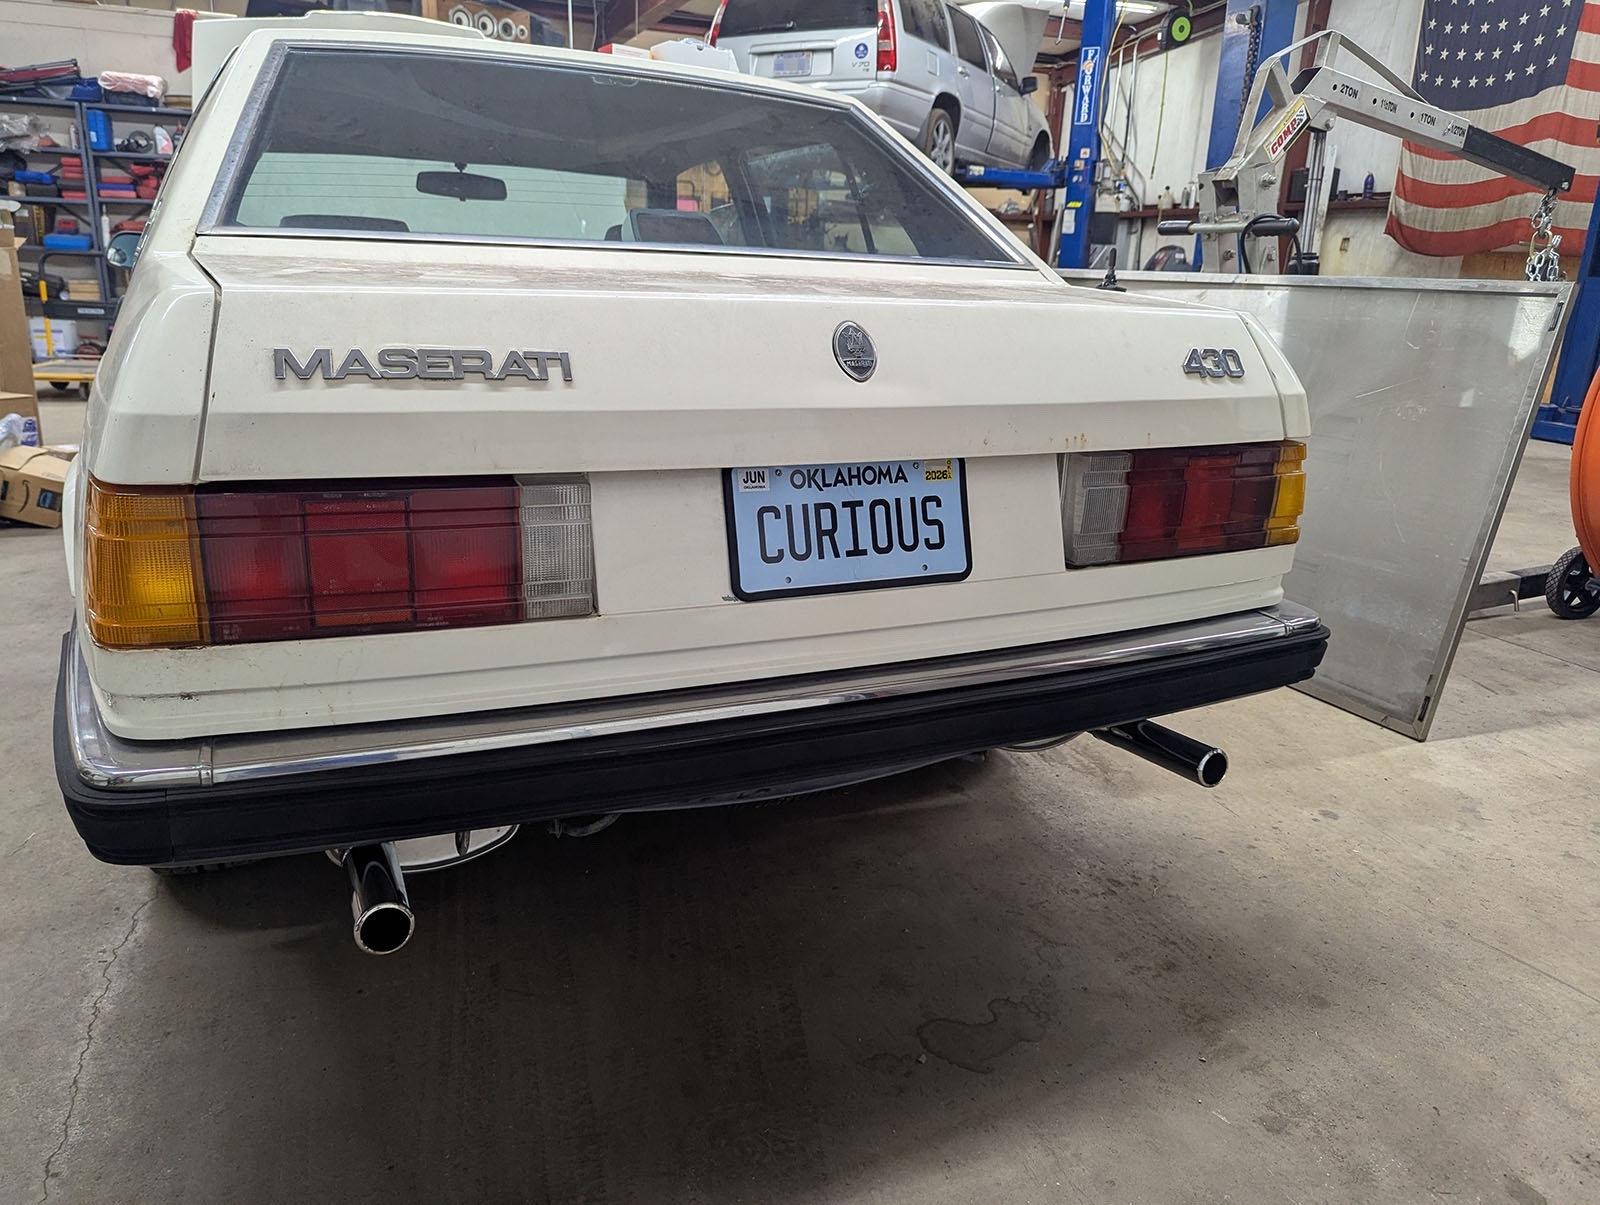
One final surprise, against all odds a good one this time, came when the custom plate I’d ordered months ago finally arrived
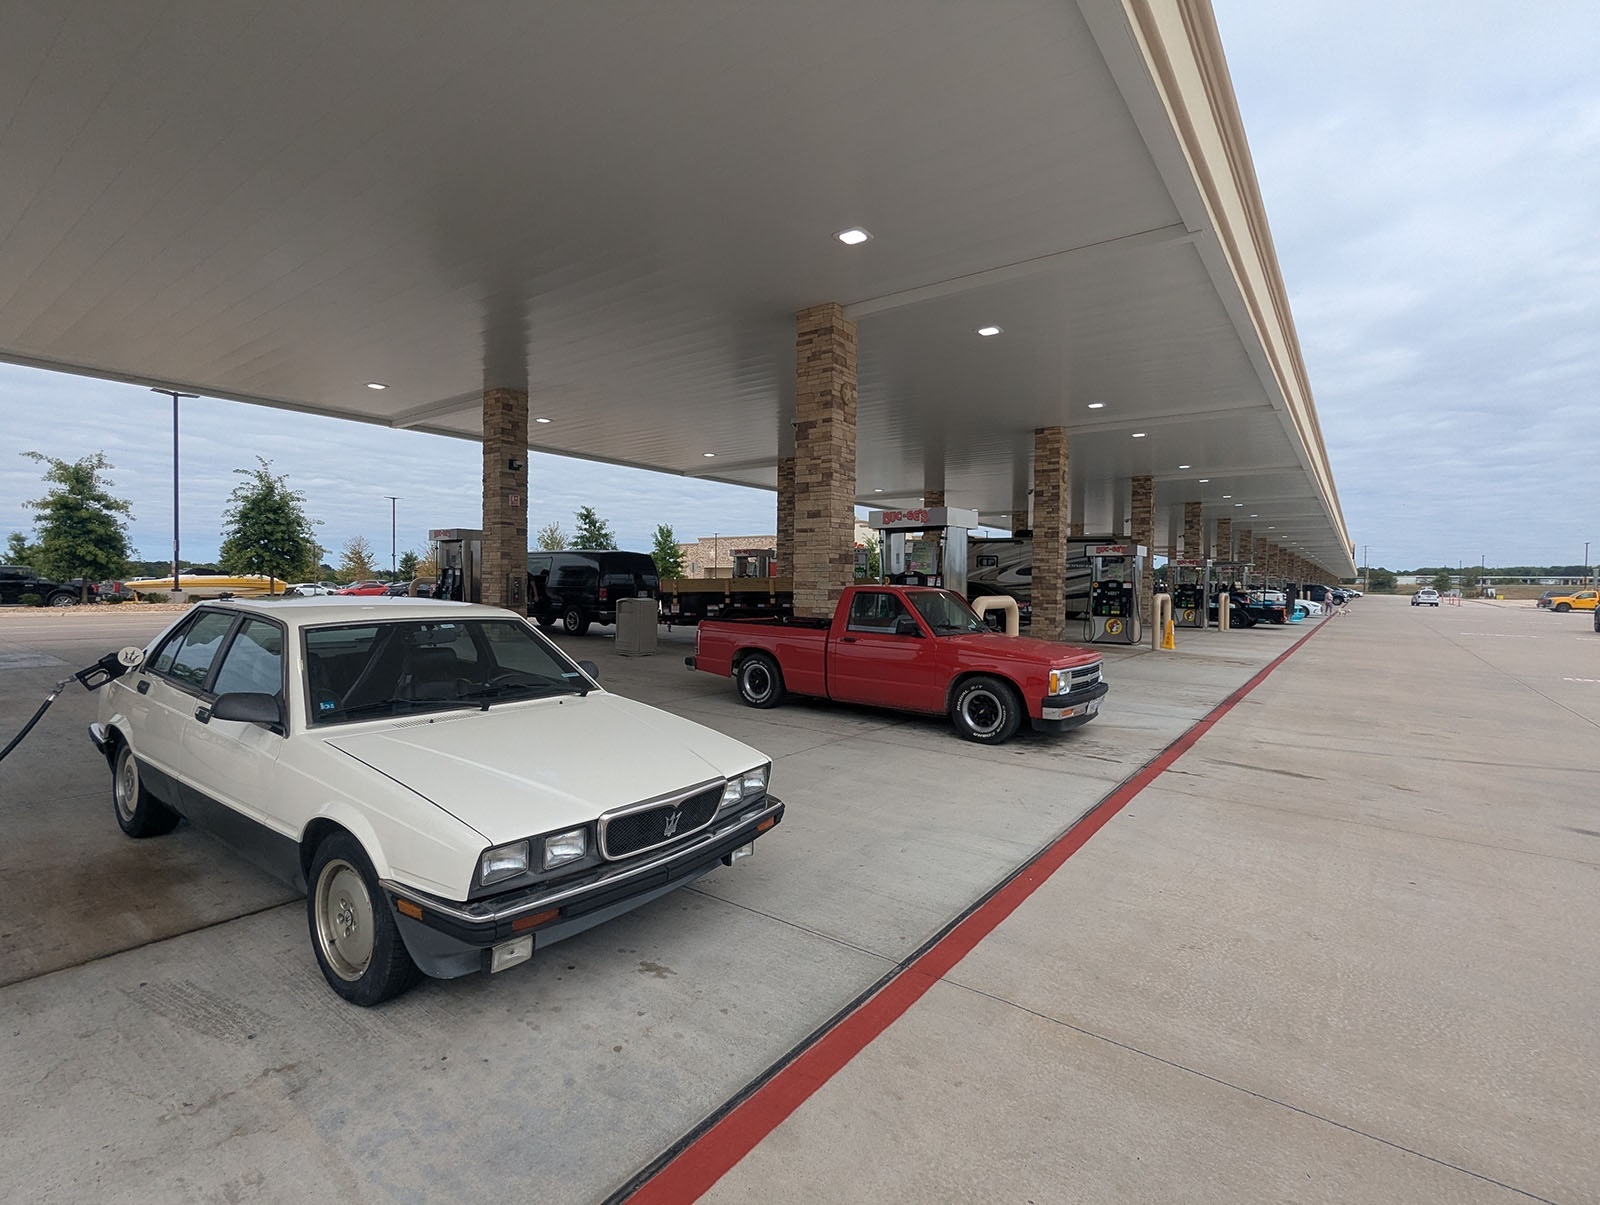
And with that, I’d run out of time. The car was running well enough to justify taking it on the trip, and I had two days to make a 900-mile drive to the start line and then continue for another 2,000+ miles through rural Canada, and then another 2,000 miles home. Was the car ready? I had no idea, but I was hedging my bets and filled the trunk with tools and spare parts. Did I need two spare fuel pumps? No, but I brought them anyway. Crank position sensors, belts, plug wires, gaskets, all the other assorted spares I’d ordered but not installed … all of them went into the trunk. I gave the car a bath in the rain, washing away years of accumulated mold and grime, and set off north to Ohio.
Did the trip go smoothly? No. Of course not. But that is a story for the next installment. For now, I’ll take comfort knowing the Biturbo is once again a running, driving car, which I feel reasonably confidant came make it to the end of my driveway without dying, so I guess that has to be good enough.
All photos by author unless noted


Thank you for this reminder to not buy the Biturbo for sale down the street from my house.
I actually LOL’ed at the license plate…”Bi-Curious?” Or at least that’s what first came to mind.
It amazes me how no matter the car, there will always be at least a small subset of
masochistsenthusiasts who sign up for the challenge of conquering said car’s “quirks and features!”Great content, BTW…can’t wait to read about what happens on the tour!
“likely I was going to be on the hook for some electrical work, which I didn’t find daunting, again because of the hubris.”
If it wasn’t for hubris, NOBODY would buy a used Maserati.
So this Maserati doesn’t do 185 yet?
Are you “bit”ter at this “Bit”urbo yet?
Are you following along in the footsteps of Lucas where you add your own replacement smoke to this car? Ha ha
Great article, great work and great for you hanging in there and not giving up
I had one of these once it wasn’t a very bad car, it was a hoot to drive, and it was a reliable the same same way in 1960s British roadster is reliable. The worst part was the 30,000 mile timing belt mine was about to go, you could hear it ticking, so I parked the car for a later repair, and it sat so long and it rusted and I donated it to a charity
Slow clap for that license plate. Good one!
I’d also like “185” but suspect that’s already on a Bora or Merak somewhere.
I am currently in process of installing the 2.5l version of this engine in my W201 190e. Because why not.
I can hear the crying and gnashing of teeth coming from all of the way from Stuttgart.
Pete, please change this to Evan’s byline!
The Maserati Biturbo will often leak critical fluids in order to show dominance to other cars on the lot.
Marking its territory!