
My timeline for completing my eBay WWII Jeep project means I have no choice but to get the entire drivetrain and braking system done now; this means I’m wrenching through the night tonight in an all-out offensive attack on rusty bolts, greasy bearings, and stubborn press fits. To ensure that I complete this ambitious list of tasks, I’m risking embarrassment by telling all of you everything I plan to get done before the night is done, and to make it fun: I’m going to give a prize to whoever guesses what time tonight I complete all this work.
We’re trying something new today: a LIVE wrenching-blog. This is partly to make it more fun for you, dear reader, and also to really help motivate me beyond my normal level of motivation. I have a ton of work to do, and if I have to check in hourly to give an update, I’m a lot less likely to dilly-dally. I’ve got to get stuff done.
Speaking of things I have to get done, my goal is to get the drivetrain and the brakes done today. This way, all I have to do is get the engine running and, theoretically, I can try to drive this thing. Here’s the list of tasks I plan to complete before I go to sleep — it’s an ambitious one, and I give myself a 50% chance of pulling it off before midnight
- Rebuild all drum brakes
- Remove and replace all 8 outer wheel bearings
- Remove and replace all 4 inner axle seals
- Remove and replace rear pinion seal
- Install all new brake lines
- Install all new brake hoses
- Remove and replace all kingpin bearings (check drag with pull-scale and shim appropriately)
- Remove and replace all kingpin seals as well as any wheel bearing seals
- Install rear driveshaft [UPDATE: okay, the front one.]
With this done, I should be able to stop, I should be able to steer (ish; I still have more to rebuild before I’m done, but I can use old parts in the interim), and I should be able to go if my engine runs and my transmission/transfer case rebuild turns out to have been done properly.
I know this live-blog skips a bit ahead of our latest wrenching update — which mentioned how Laurence and I had ended up in a bit of a bind when I cracked a piston. This was just after we’d rebuild the transfer case and bolted it to the rebuilt transmission. As you’ll see in these live blogs, things are a bit farther along, and I’ll come back and discuss where things stand in a future update. But I wanted to do this live-blog and issue a challenge:
Whoever can guess, within 10 minutes, when I complete the above list of tasks, will receive a prize. I don’t know exactly what the prize is, but maybe I’ll ask you about what cars you like, and maybe I’ll choose a price to best suit your tastes.
[Editor’s Note: Actually, we do know the prize! Whoever guesses the closest gets 50% off a membership or an upgrade if they’re an existing member, and what the hey, I’ll do a drawing of a car, just for you! How’s that sound? – JT]
I’ll be doing this mostly alone, with a tiny bit of help from our Video Manager, Griffin Riley (I’m going to have him pack all my bearings). I don’t plan to take any breaks aside from meals, which I’ll eat on the premises. I have all the parts I need, but there’s a chance I’ll realize halfway through that I’m missing something. I’ll do my best to wrangle something together.
View this post on Instagram
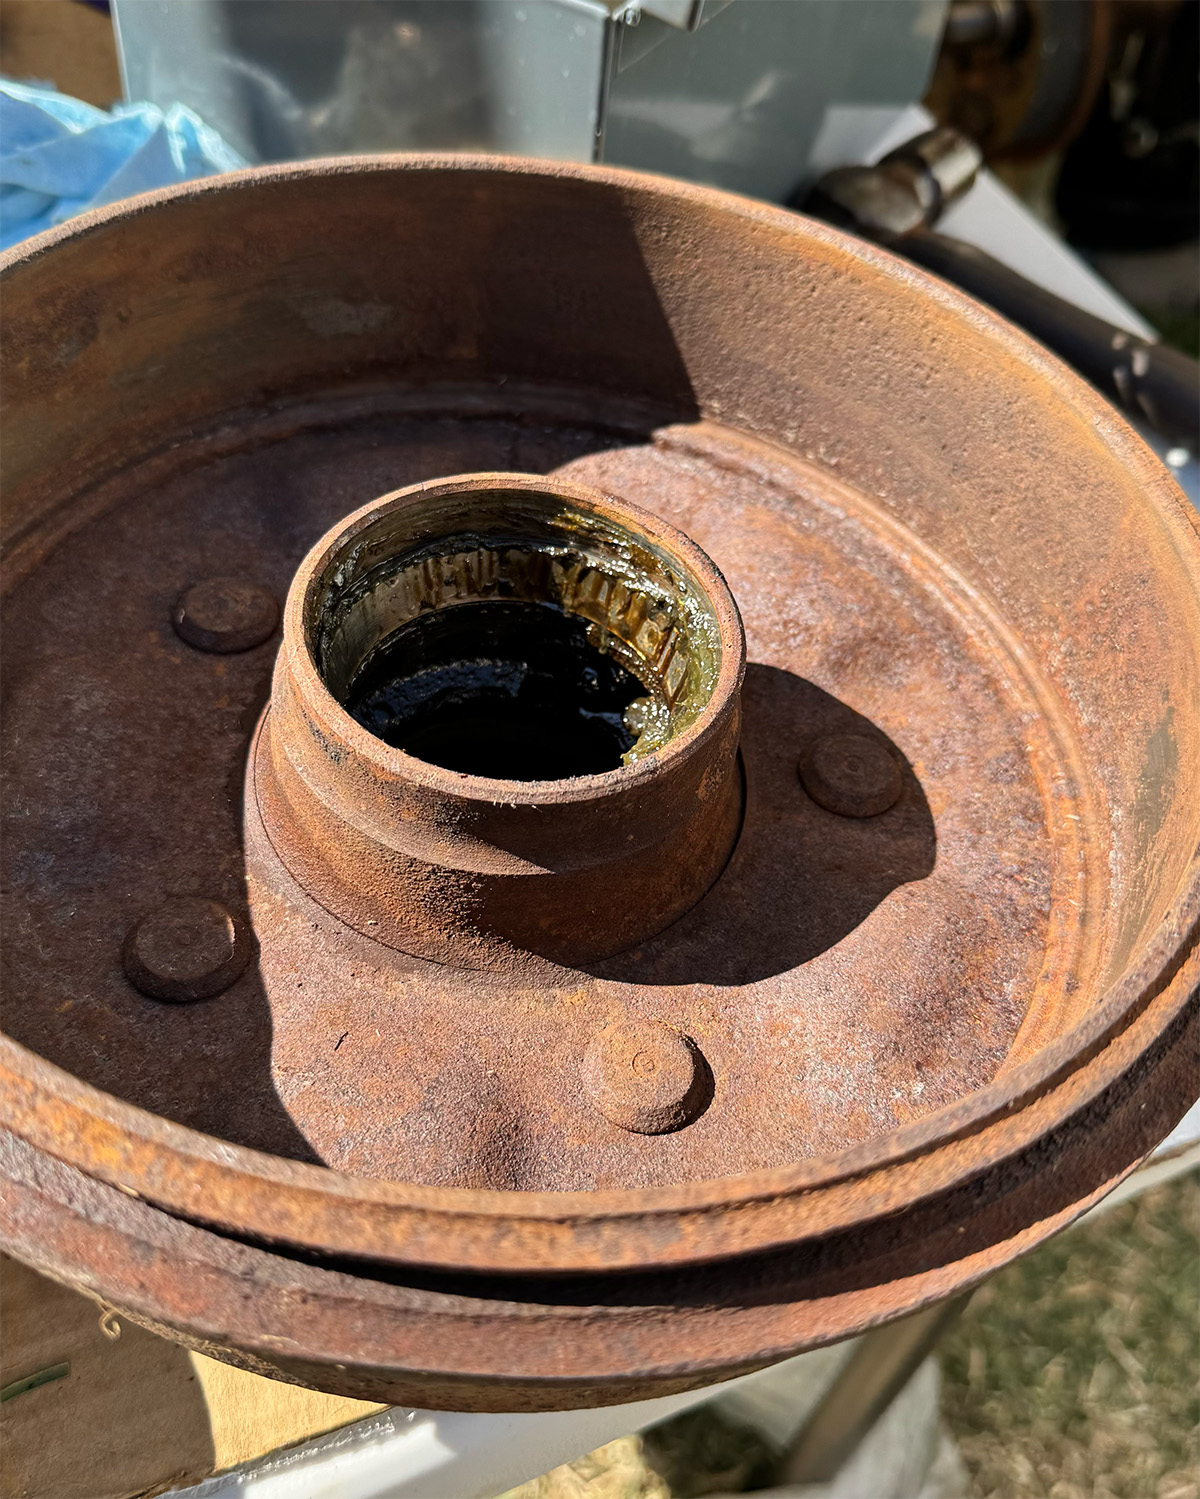
Otherwise, I’m just tearing apart some old axles and rebuilding their outer bits, along with their seals. Plus I’m installing brake lines and hoses and a rear driveshaft. Sounds doable, right? [wipes brow]. I’ll take any encouragement in the comments!

UPDATE 1
Doing rear pinion seal.
UPDATE 2:
David has informed me he installed the front driveshaft, not the rear. That still counts. And he’s wisely getting a shop to put the U-joints on the rear driveshaft! – JT
UPDATE 3:
Brakes!

UPDATE 4:
I’m really, really tired. I’m gonna spend 20 minutes (from 6:25 to 6:45) charging my phone and eating. Then I’m going to replace the rear axle inner seals. The old ones popped out easily with a pry bar. The new ones will hopefully not give me too much trouble, as I purchased a special installation tool like this one.
Once the inner seals are in, I’ll pop the carrier back on, install the diff cover, and then do the rear brakes. The rear axle will then be done. Then I’ll move on to the front brakes and kingpins.
Brake lines will come after that. They’re actually not going to be particularly challenging, since they’re pre-bent and there really isn’t that much line to deal with. But fatigue is setting in early, so we’ll see what I can get done tonight before I pass out.
The goal remains to grind it out, but safety first.
UPDATE 5:

Here’s me adding RTV to those pinion yoke splines after installing a new seal. Those splines are a classic spot for oil to try to wick up and out onto the floor. Not on my watch!
UPDATE 6:

Looking good.
Update 7:


Here’s me banging a U-joint into a driveshaft only to realize:

It’s actually my front driveshaft. The rear on the WWII Jeep is shorter, which is quite uncommon.

Anyway, this just means I’m installing the front driveshaft today, and not the rear. That’s OK (my rear driveshaft is bent and needs a professional repair; I’m on it).
Update 8:


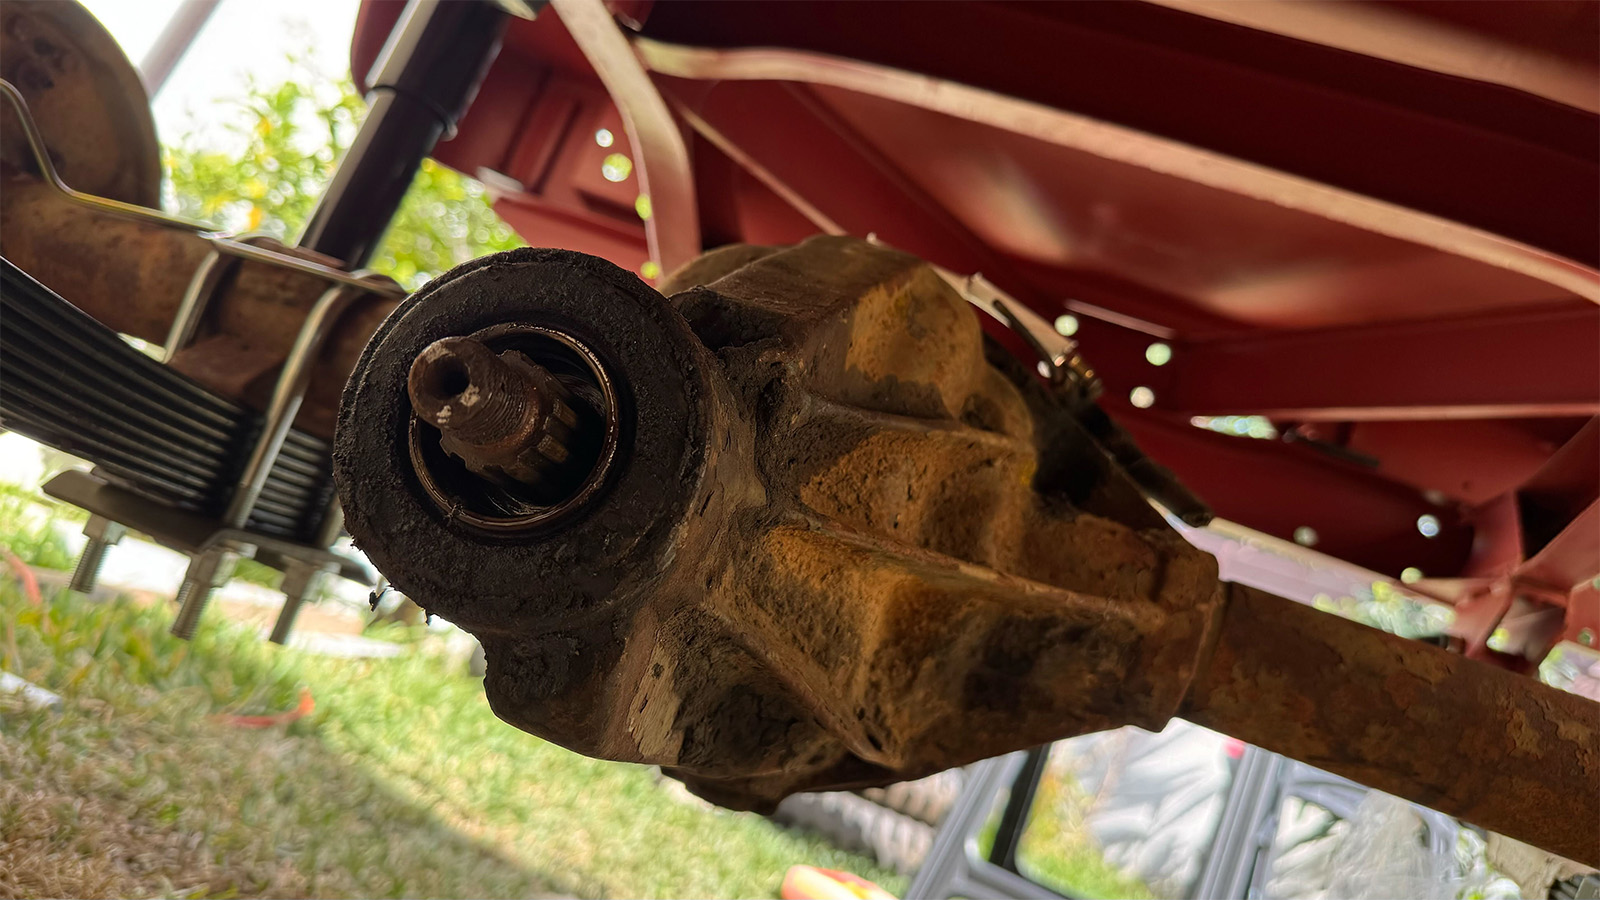
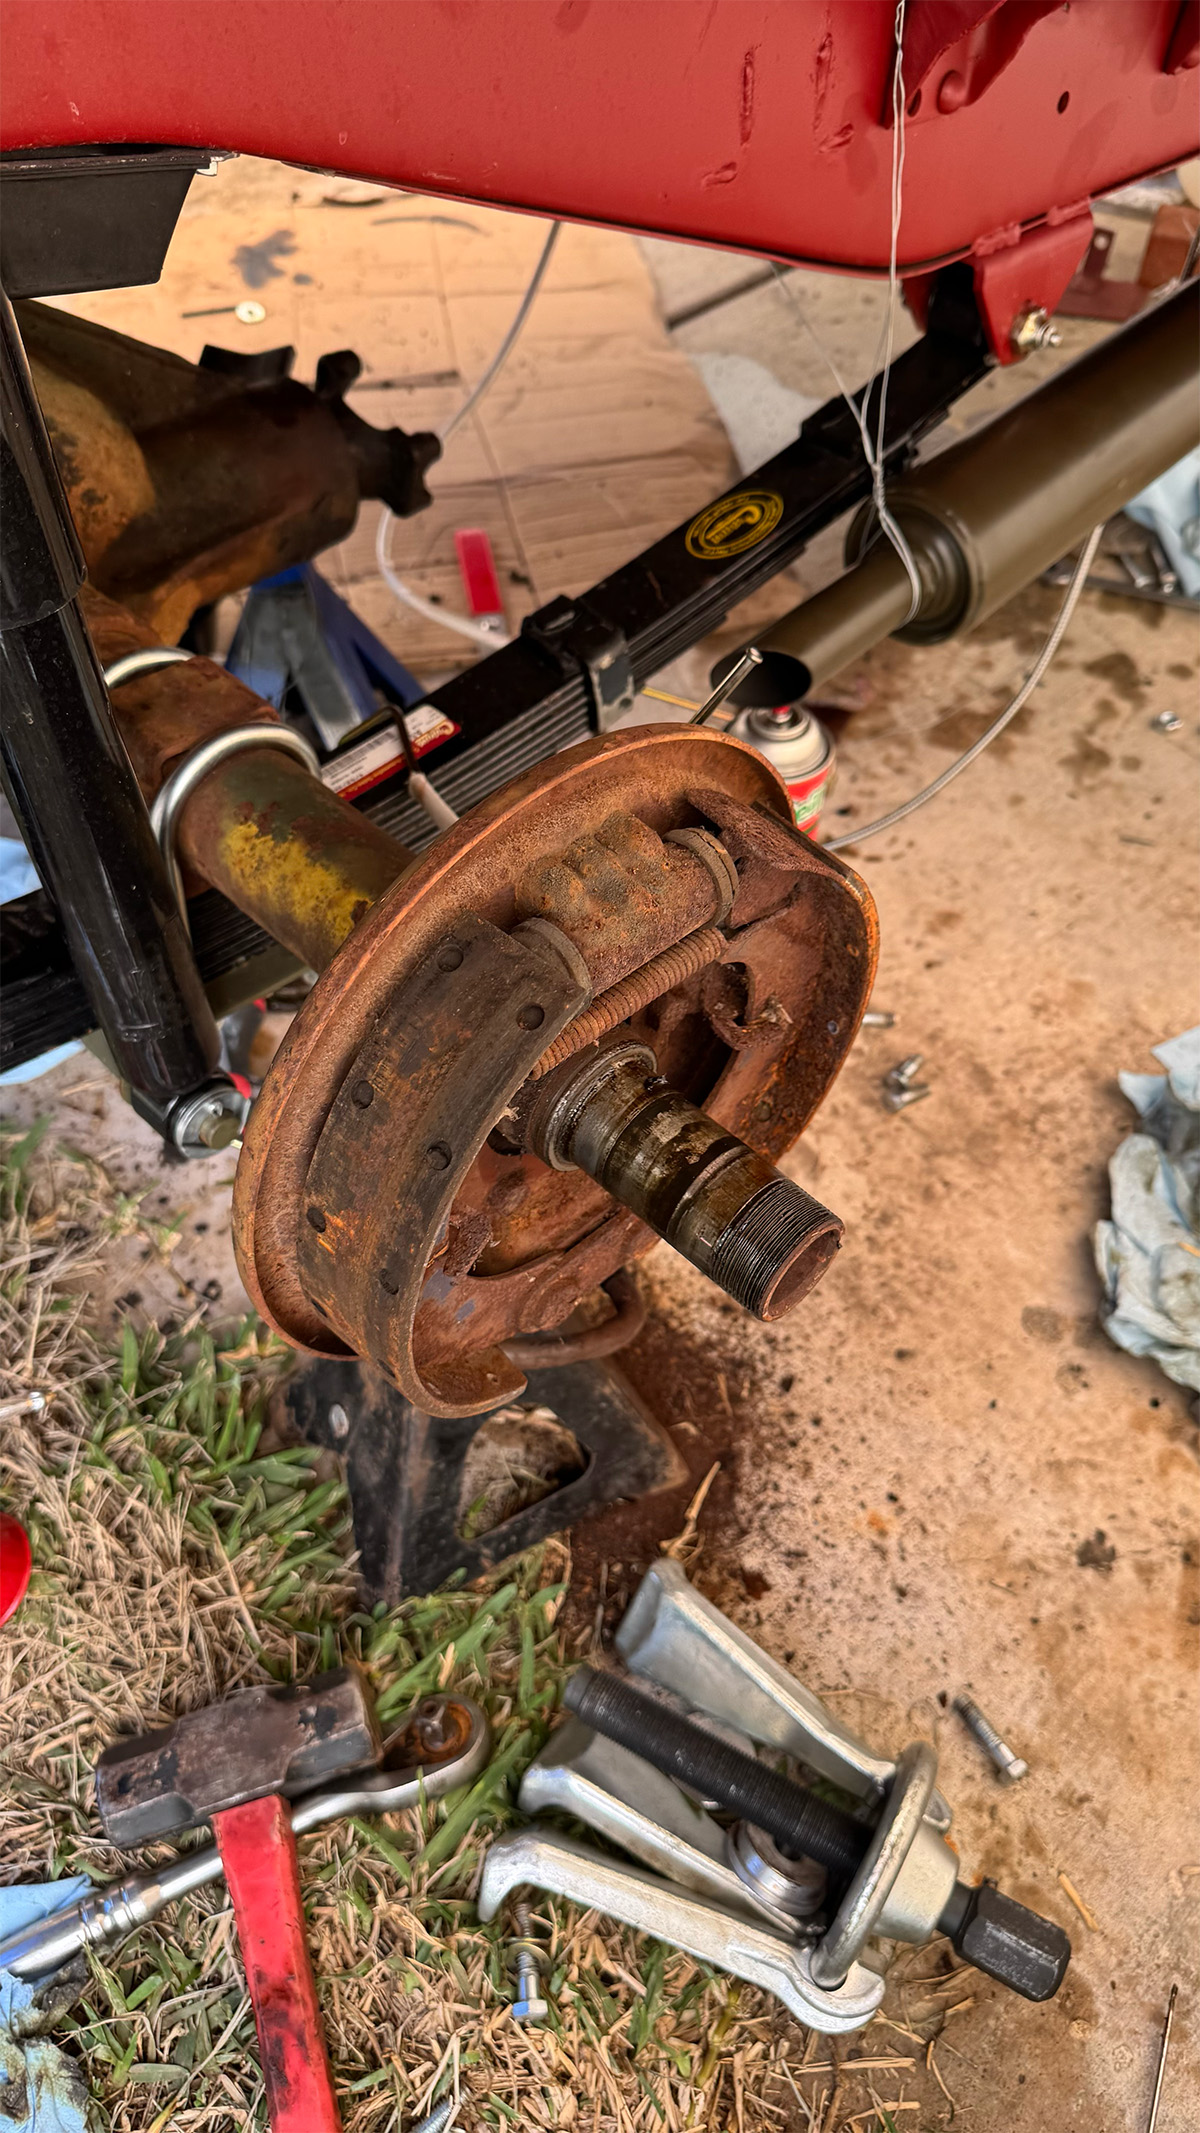
I started tearing down the front knuckle. Everything looks good. The thing has these super weird “Tracta” CV Joints. They’re basically these two big, strange cast iron shapes that connect the inner and outer axle shaft and provide constant-velocity action. For some reason it seems the U.S. Government specified constant velocity joints over U-joints on the WWII Jeep.


Update 9:


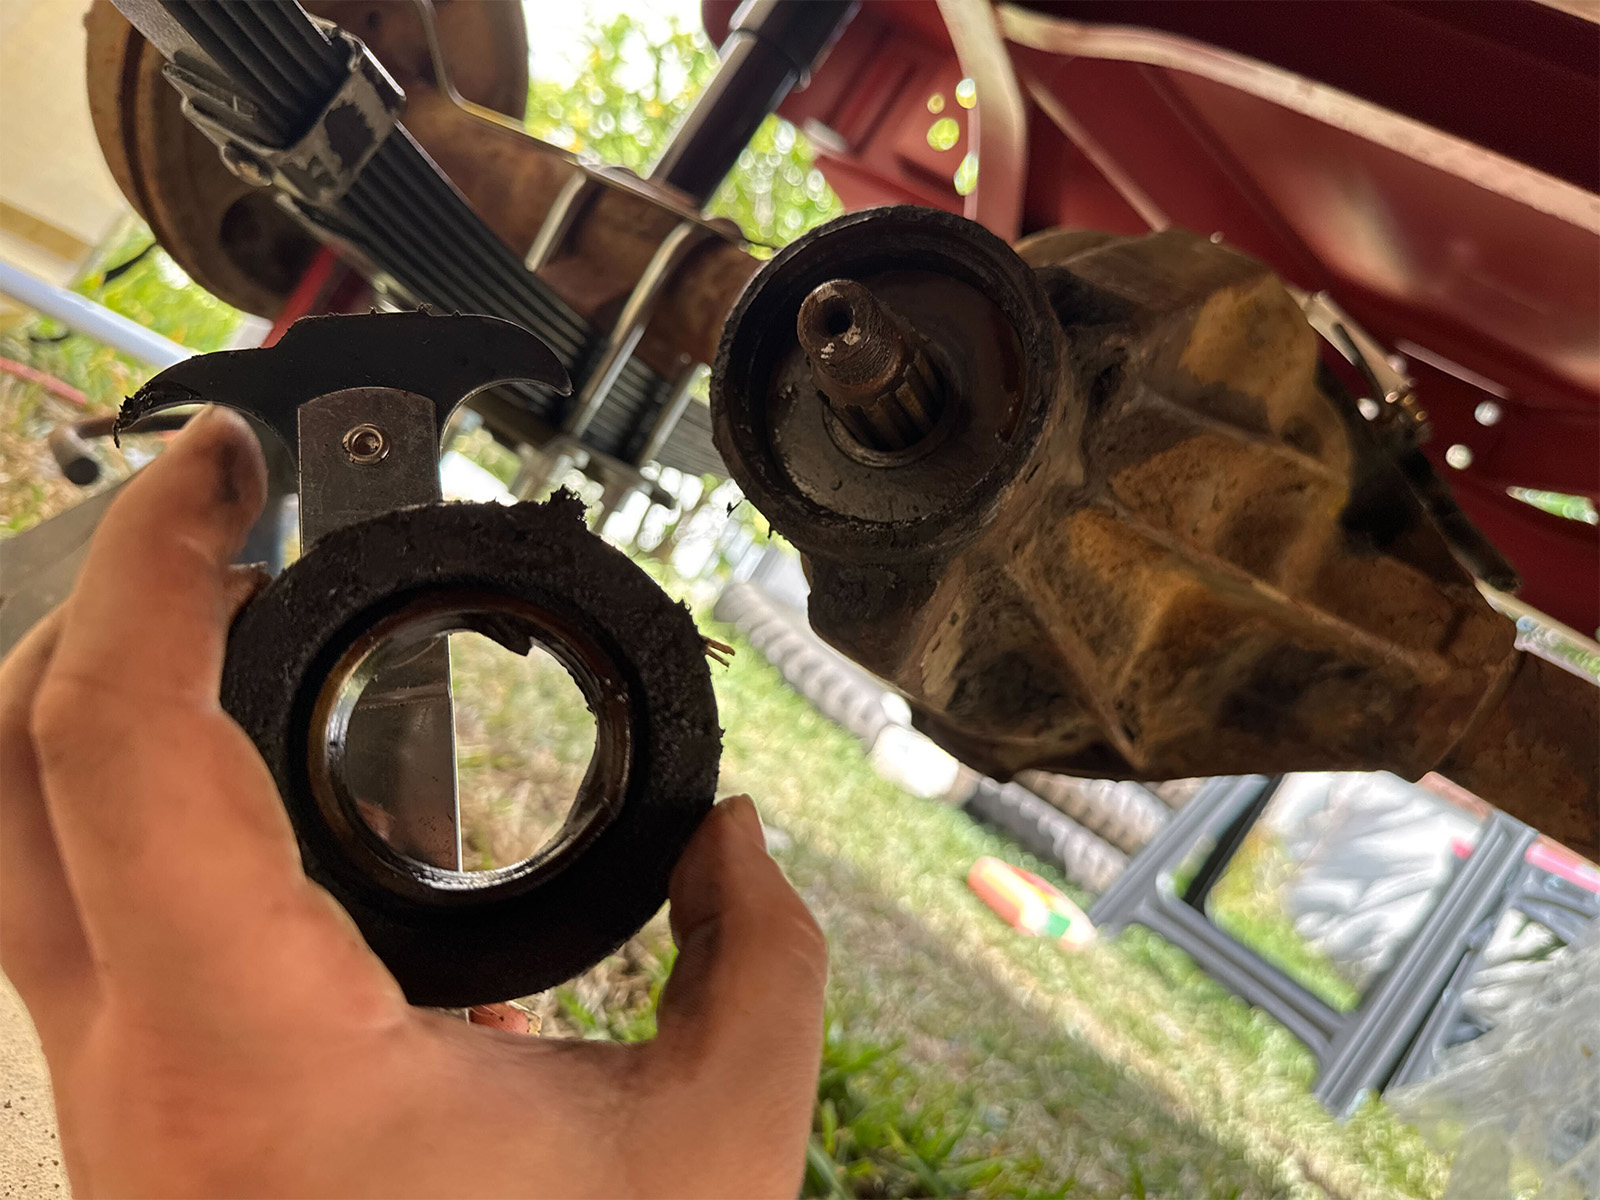
I took my rear differential carrier out, and for the first time I used this special inner bearing seal tool. With this project, time is of the essence, so I’m trying to work smarter. Normally I’d bang these seals in from the outside using a humongous extension and a bearing seal driver set, but I’m so glad I bought that tool you see above. Check this out!:

I did avoid a major mistake that the previous owner made. If you look really closely, you’ll see an upside down seven on the left side of the differential housing, and you’ll also see a faint upside down seven stamped into the left bearing cap.
These bearing caps are line-bored, meaning you can’t mix up left and right caps, and you don’t want them upside down. The number (and there’s a sideways seven on the right side not shown) are there to help you get this right. As I took a photo before I took this apart, I noticed the last person in this diff had switched the caps up!

Update 10:

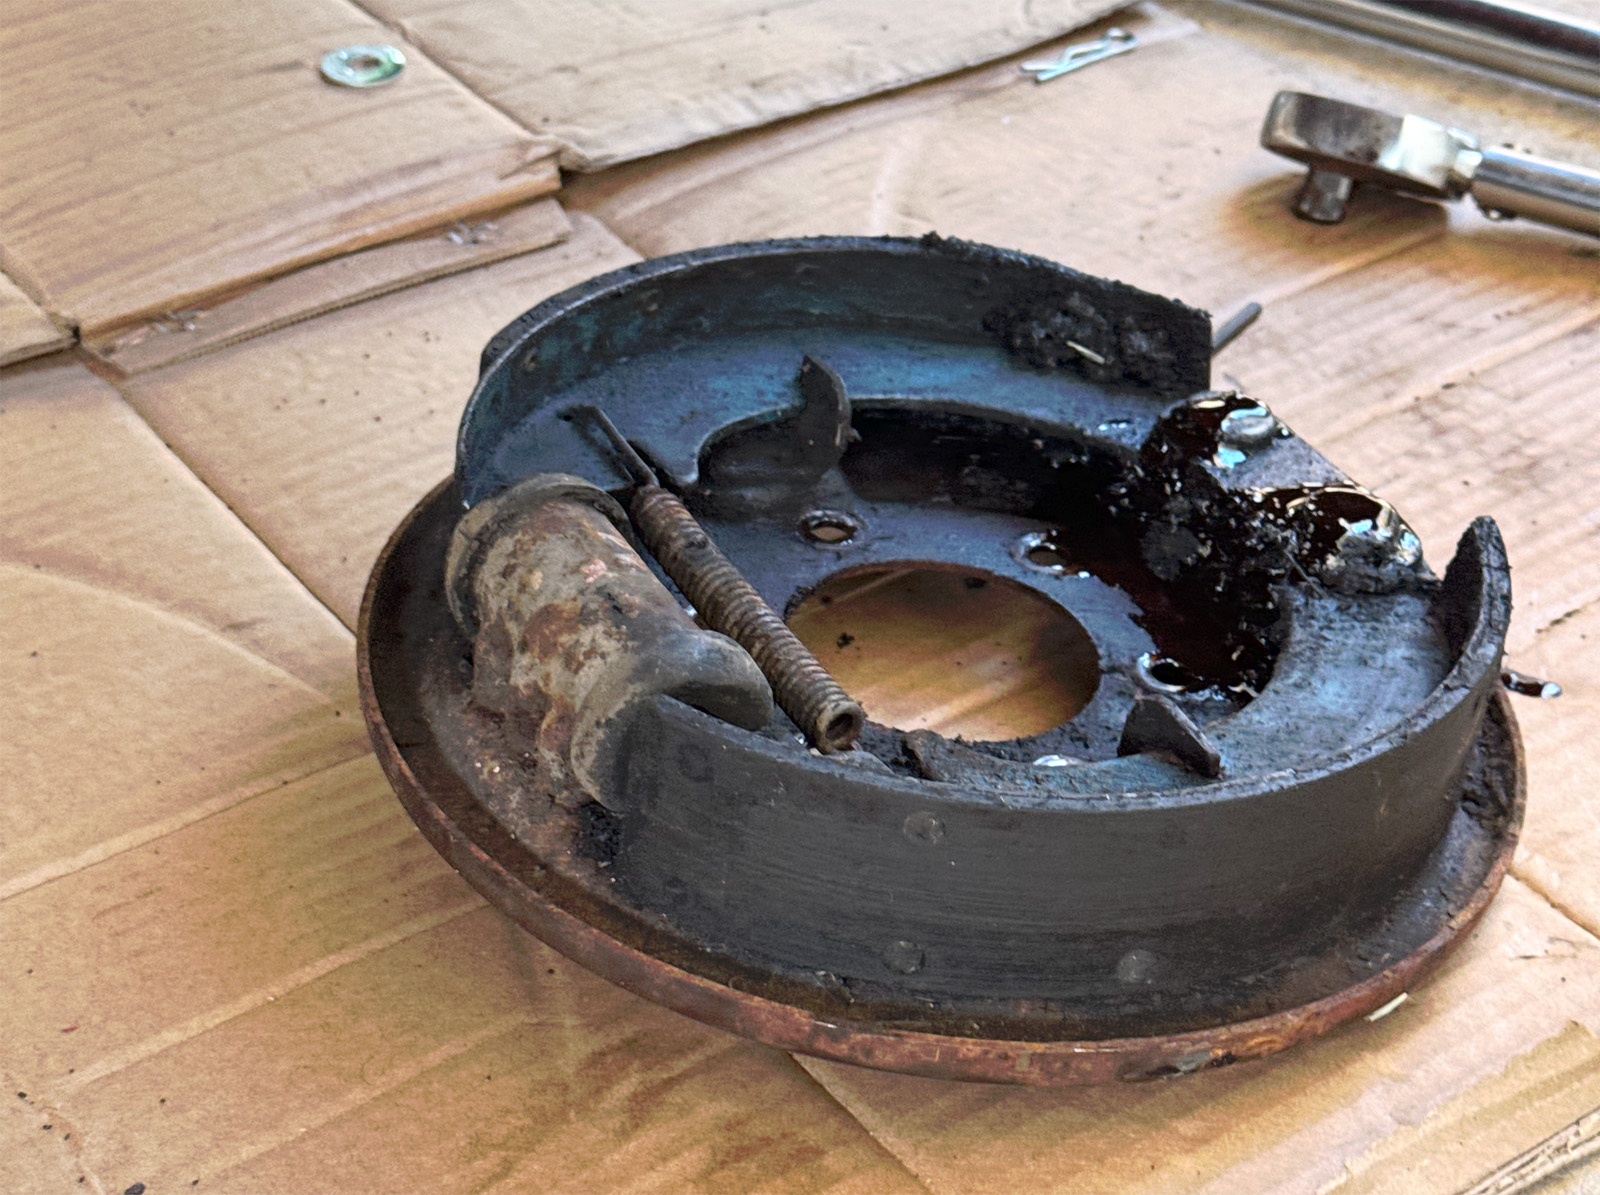
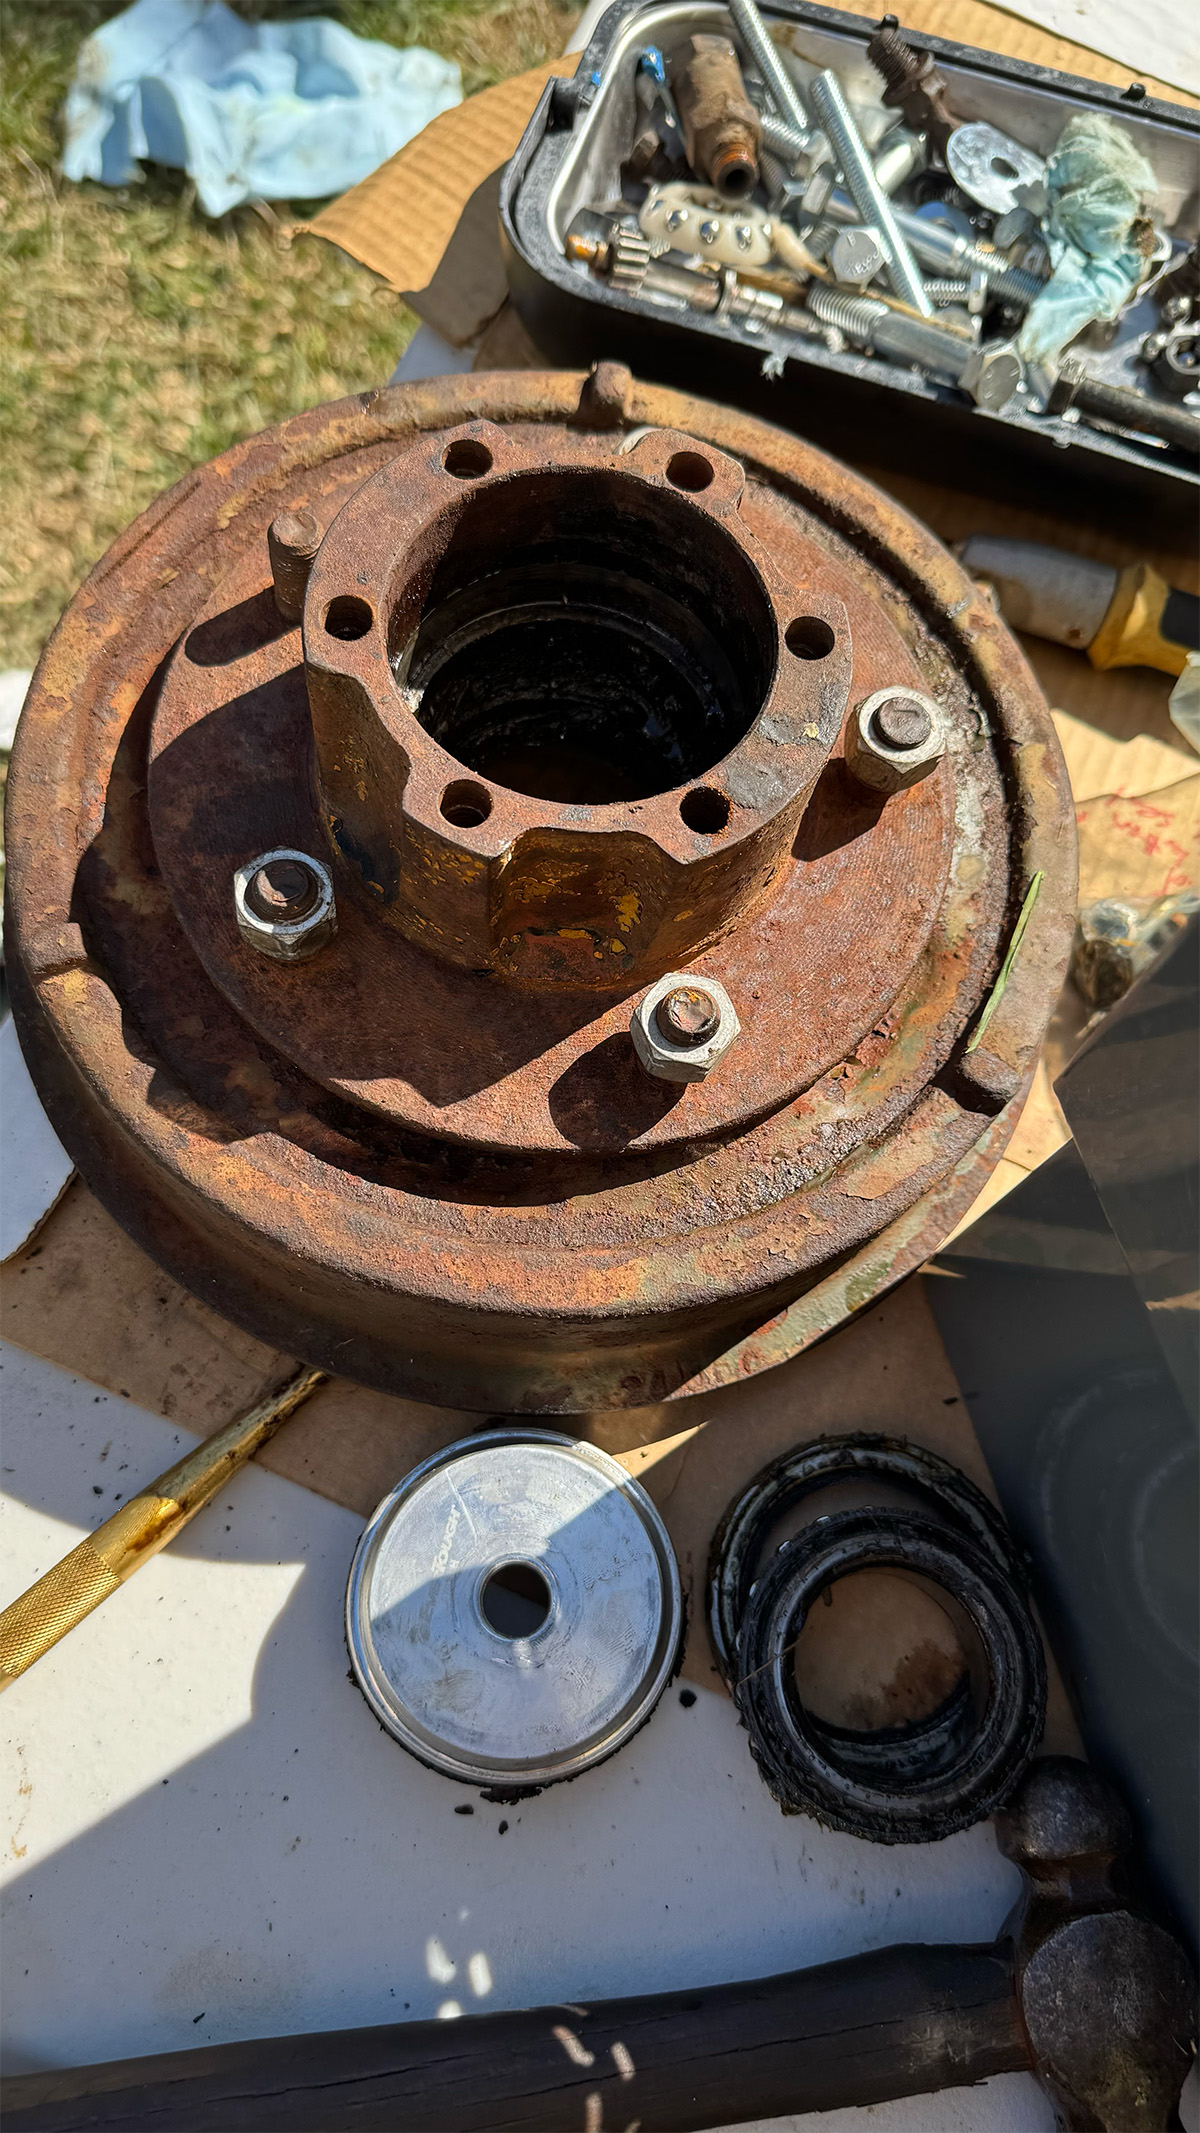
With new inner seals in, I popped the carrier back into place and sealed up that rear differential. Then I started working on the brakes. They’re incredibly basic!
This was about 2AM. To get to the other side of the car to finish its brakes and put the whole rear axle behind me, I had to use a puller to get the drum off, and this would require some strategic hammering, which at 2AM was not going to fly.
I also had to hammer out some bearing races for my wheel bearings. With little left in the tank, I turned in for the night, with much of my task-list still incomplete, but with confidence I’ll get it done the next day.
Update 11:
Let’s take advantage of having all these parts exposed to learn about CV and universal joints! And somehow, this Jeep has the weirdest one! There’s no ball bearings!
View this post on Instagram
UPDATE 12:
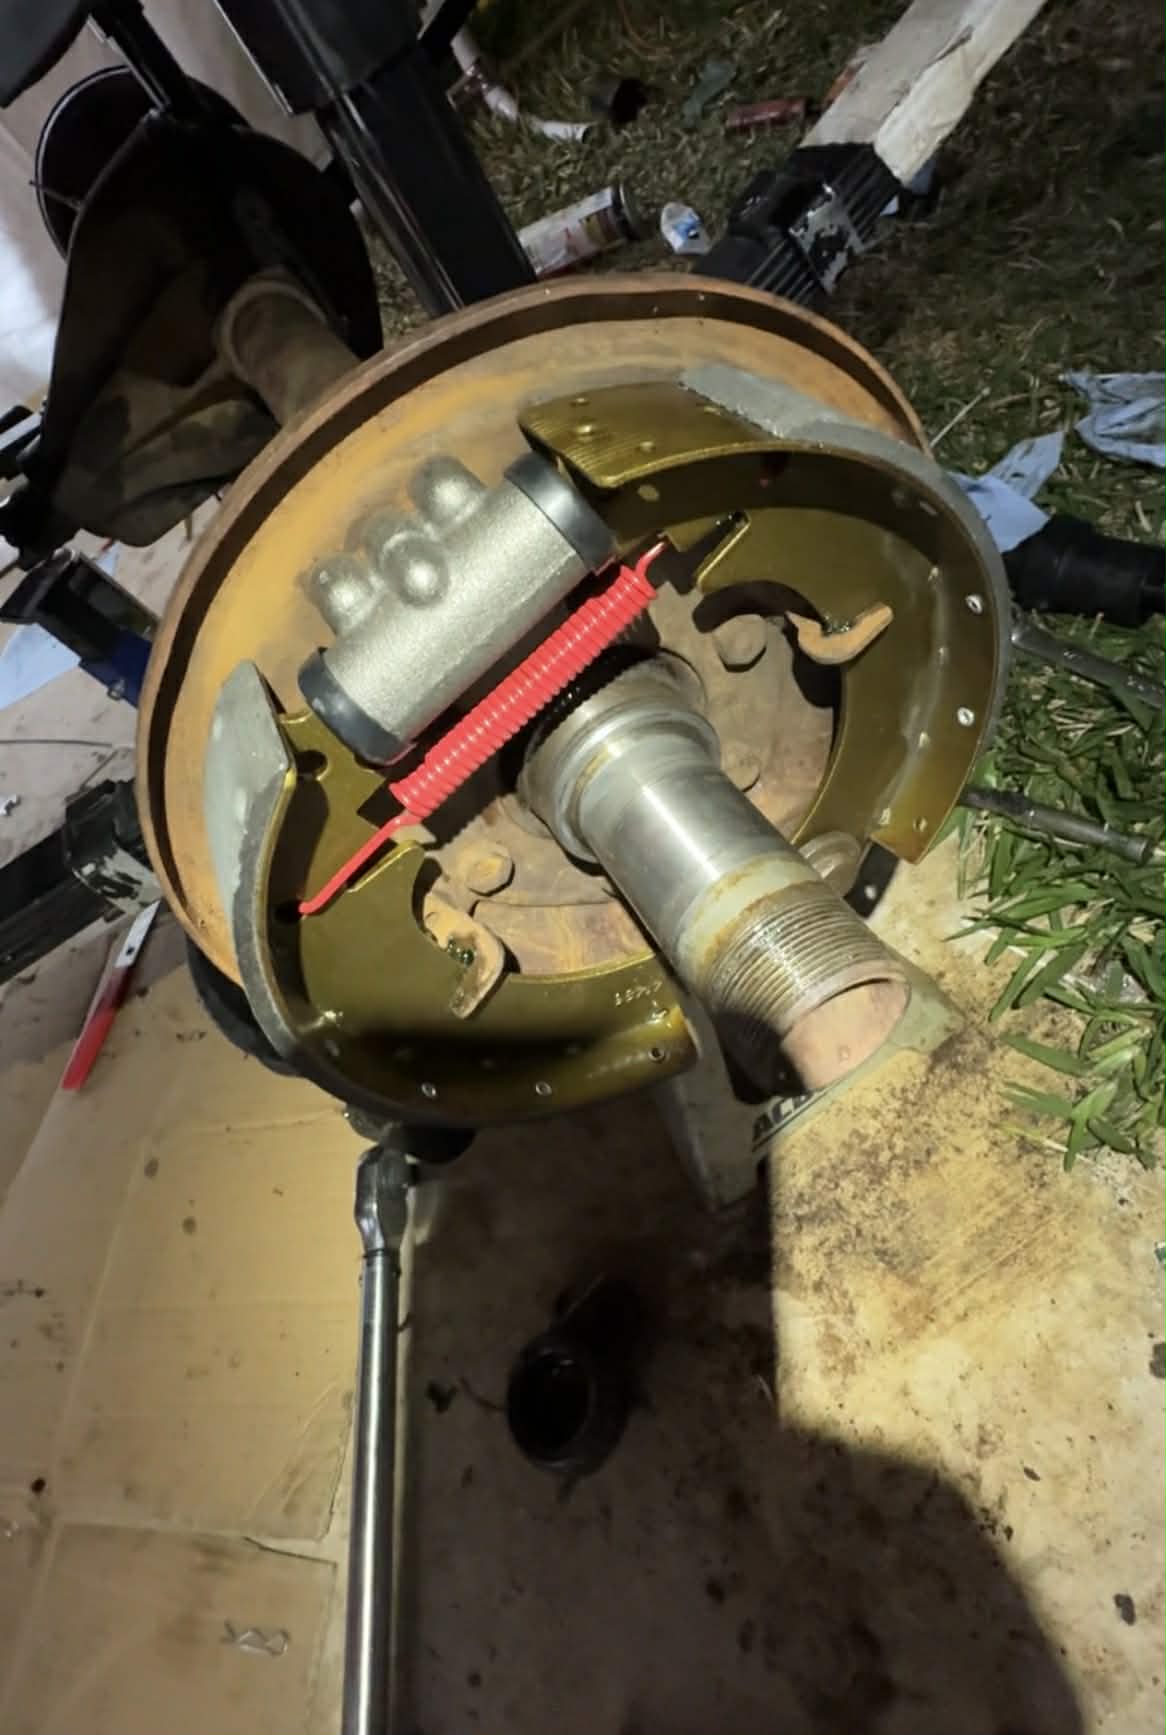
I’m rebuilding the other rear brake and I’m replacing all the wheel bearings that are in the drums.
As you can see one of these drums is not in particularly amazing shape, but I’m gonna run it cause it’s will be at least safe if not, you know, the best performing drum of all time.
UPDATE 13:
I’m basically going to finish up the rear brakes/wheel bearings, and install the axle shafts (which were missing from this axle, and which I will remove from a spare axle). Then I’ll fill up the diff with 85W-140, install the hard lines on the back, and be done with the rear. Then it’s time for the front kingpins and inner axle seals, etc.
I’m tired. My baby would not go to sleep last night. He sleeps with my wife and me in bed; as tricky as that can be for my sleep (and especially my wife’s), I really do love him being right there beside me.
It’s hard when I get inside and he wants me to hold him. My hands and face and hair are covered in grease, so I have to decline, and he just cries. Alas; duty calls!
UPDATE 14:
View this post on Instagram
UPDATE 15:
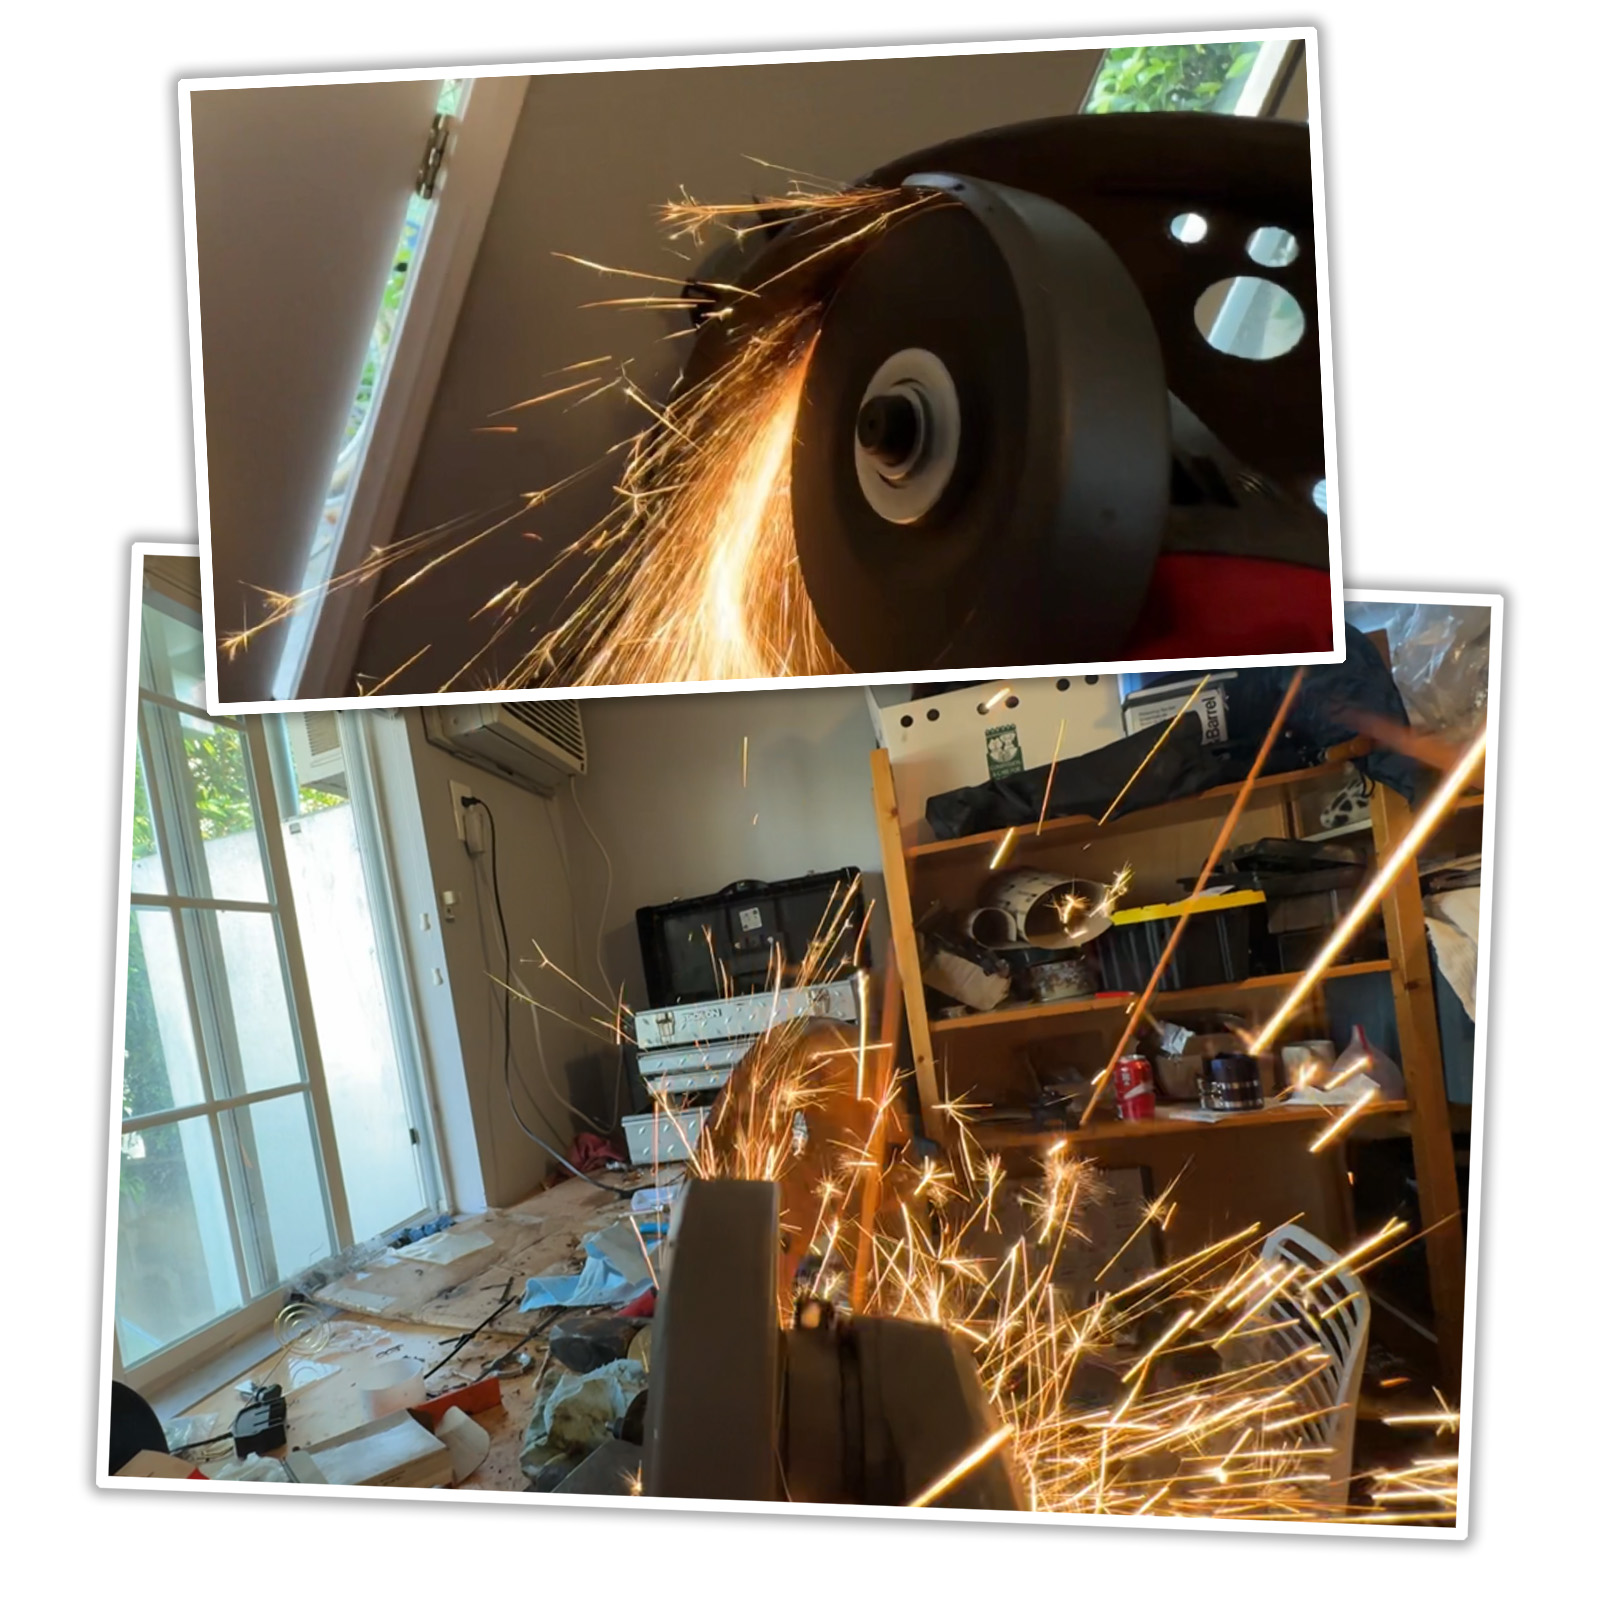
Cutting out rusty bolts that refuse to move!
The bolts are the adjuster bolts in the drum brake backing plate. I’ll get ’em out.
Top graphic image: David Tracy


2:38am Thursday
06:47.
2:15am Thursday
5:02 a.m. Pacific
2:15 AM
1:30 AM
That’s a lot of work! I’m going to say 5:55am given cat naps and snacks along the way.
5:15 AM Pacific.
You can do it David, just like old times, more pressure means getting more done
03:49 am
4:40 am, good time to make a coffee and catch a 20 minute nap before taking over baby duty.
He’ll be missing a part and won’t complete until Thursday afternoon 3:18PM Pacific time.
12:30 PM Friday (sorry)
9 AM Thursday morning, Pacific time
I love how DT is wrenching in Pacific time, the updates are being posted in either Central or Eastern time, and almost no one is including time zones in their comments.
That’ll make picking a winner fun.
I would assume unless someone specifies some other time zone, they mean the time zone David is in, which is Pacific.
425am PST.
You got this DT!
11:42 pm before Murphy has his way with that last brake line fitting, then 11:42 am after a trip to the parts store can happen.
3:36 AM PST
This is an all-nighter kind of list, with a lot of time-sucking fiddly bits per line item. I predict he finishes just shy of 4:15 AM, when the pre-dawn light suddenly makes his guilt about keeping Griffin out there sharing his suffering too acute, at which point “good enough” will be declared. 😉
Going with 2:47am.
I’m going to guess that the cops show up at 11:55pm and inform DT that due to noise complaints, stopping time is now.
2:42 AM
I was feeling confident in your list until these items
Install all new brake lines
Install all new brake hoses
I give these items a 12% chance of going to plan.
Press “F” to pay respects…
Brake lines are a misery, even pre-bent, but he’s got a big leg up on most projects in that the body isn’t on yet (right? …right?) so that simplifies the installation on the frame rails a LOT. So maybe…
Sacrifice working fluids for time efficiency; gravity bleed those brakes one corner at a time (i.e. *allegedly* open one bleeder at a time and *allegedly* let it drip on the *alleged* floor for 5-to-10 minutes apiece as you do other stuff, taking care to keep the master cylinder topped up.)
*need to cover my boy, as he’s in California, *allegedly*
Brunch time, with cantalope
6:47 a.m. Pacific Time, which includes 2:13 (hours/mins) of “aw, dang, I broke [insert names of broken assemblies/parts here]”.
3:18 a.m., the LA engine.