
Yesterday, I used what was likely one of the last warm days of the year to tackle all of the issues that stacked up in my wife’s 2012 Scion iQ. The little bugger was getting abysmal fuel economy, sometimes stalled out, and, on basically every other day, its gas pedal also had a knack for breaking, preventing the vehicle from moving anywhere. We fixed all of the issues, making the car drive better than it did when we picked it up. But getting to the finish line was ridiculous because Toyota gave this tiny car the dumbest possible route to get to the spark plugs.
Now, for various silly reasons having to deal with how a site like the Autopian works, “My” works better in a headline than “My Wife’s.” However, she chose the car herself and then bought it with her own money. The car is in our shared fleet, yes, but it’s mainly her ride. She also maintains her own car as a point of pride. However, I know more about wrenching than she does, so when it came to this project, I coached her on how to do everything. I spun very few wrenches this time around!
I’ve written about this car quite a lot by now, so if you want its full story, click here to start bringing you up to speed. Otherwise, I’ll keep it short. Sheryl picked up this 2012 Scion iQ in December 2023 with 67,000 miles. Her idea was to get something that was as cute as a Smart, but as reliable as a Toyota. Thus far, the car has largely lived up to that promise. We’re just about to hit the two-year mark with this car, and it’s going to cross 60,000 miles in her care. That’s 30,000 miles a year for those of you counting. Thankfully, she is driving fewer miles than she used to. Her previous cars sometimes got as many as 40,000 miles a year.

What Broke The First Time
The only modifications that Sheryl has done to this car are an Android Auto and Apple CarPlay stereo, a center console, wheels from a Scion iA, and an aftermarket cruise control. The stereo and the center console were great, but the cruise control was not.
The cruise control worked flawlessly until nearly a year after our local Toyota dealer installed it. Then, out of nowhere, the accelerator pedal — which is drive by wire — stopped working intermittently. The symptoms would be that Sheryl or I would mash the gas pedal, but absolutely nothing happened. The car would sit completely still. Alternatively, the engine would rev to redline, but the car would move only 10 mph. Finally, one more failure mode was just that the car went into limp mode.

The accelerator pedal failure was accompanied by a P2122 error code, plus the activation of the Maintenance Required light plus the Traction Control Off light.
Diagnosis at our local Toyota dealer revealed that the aftermarket cruise control unit had failed. You’d think that this shouldn’t matter for the gas pedal, but the twist is that the cruise control ties into the pedal’s wiring to do its job. It was the dealer’s diagnosis that the faulty cruise sent bad signals to the digital pedal, ultimately killing it.

So, the dealer replaced the cruise and the pedal. We were extremely disappointed when, 10 months later, or around October, the brand-new pedal began dying just like the last one. This time, thankfully, the failure mode did not include revving to the moon. But the car would just stop responding to throttle input at completely random times, even at highway speed.
Wrenching Day
This time, we decided to uninstall the cruise control entirely. Clearly, either this car shouldn’t have cruise control, or the quality control for these aftermarket cruise units is abysmal. Either way, it has to go. The car was perfectly reliable until this bad modification.

By this time, the car had gathered 123,000 miles, and some other issues had also reared their ugly heads. For one, there have been times when the car got a frankly pathetic 23 mpg. Also, the car had a knack for gently misfiring. On top of this, there have been many times when the engine would just stumble and shut off while idling at a red light. Also, you could hit the gas at a green light, and the engine would rev a little, stall out, and shut down.
My diagnosis pointed towards the spark plugs, which, based on the records I had access to, were original to the car. At 123,000 miles, it was time for them to go. I also decided to replace the ignition coils, too, and you’ll see why in a moment.

Yesterday, Sheryl and I finally got the time to tackle this project. Between October and today, she put 3,000 more miles on the car. Wowie, that’s a lot of driving.
Now, replacing a gas pedal and some spark plugs normally wouldn’t be much of a “project.” The gas pedal is held on with two bolts and can be removed and replaced in an honest 5 minutes. Also, when was the last time you took longer than maybe 30 minutes to remove and replace some spark plugs?

Unfortunately, Toyota engaged in some funky engineering in order to build the world’s smallest four-seat car. Unlike a Smart Fortwo, the Scion iQ – which was sold elsewhere as a Toyota iQ – doesn’t stuff its engine in the back where you would normally find the car’s trunk. That couldn’t happen here because that would mean that there would be an engine where the rear seats are. So, Toyota put the engine up front. However, because the iQ was designed to be almost as small as a Smart, Toyota had to reengineer much of the engine bay to get everything to fit into such a compact space. Here’s what I wrote in the past:
Toyota used some clever engineering to make a car about 10 feet long and 5.5 feet wide fit four people. The automaker says a lot of the tricks went into the vehicle. To maximize interior volume, Toyota punched the wheels out to as far near the edges as they could be. To facilitate this up front, the differential was moved forward of the engine, placing the centerline of the wheels slightly ahead of the engine.

Another space-saving development happened with the steering gear. In other Toyota small cars, tie rods connect to the ends of a conventional rack and pinion. In the iQ, the rods connect to the center of the steering gear. Toyota says this allows the steering rack to sit back near the firewall, reducing front overhang and saving space in the engine bay.
The engineering didn’t stop there. The iQ uses a flat fuel tank that resides under the floor, roughly in front of the rear seat and under the driver seat. Other space-saving measures included the aforementioned air-conditioner pack, which was reduced in size by 20 percent, that weird dash, which is slimmer on the passenger side for more legroom, and seats slimmed down to barely thicker than what you’d see on a bus so that rear passengers could have a place to put their knees. The glovebox was also deleted for even more room.
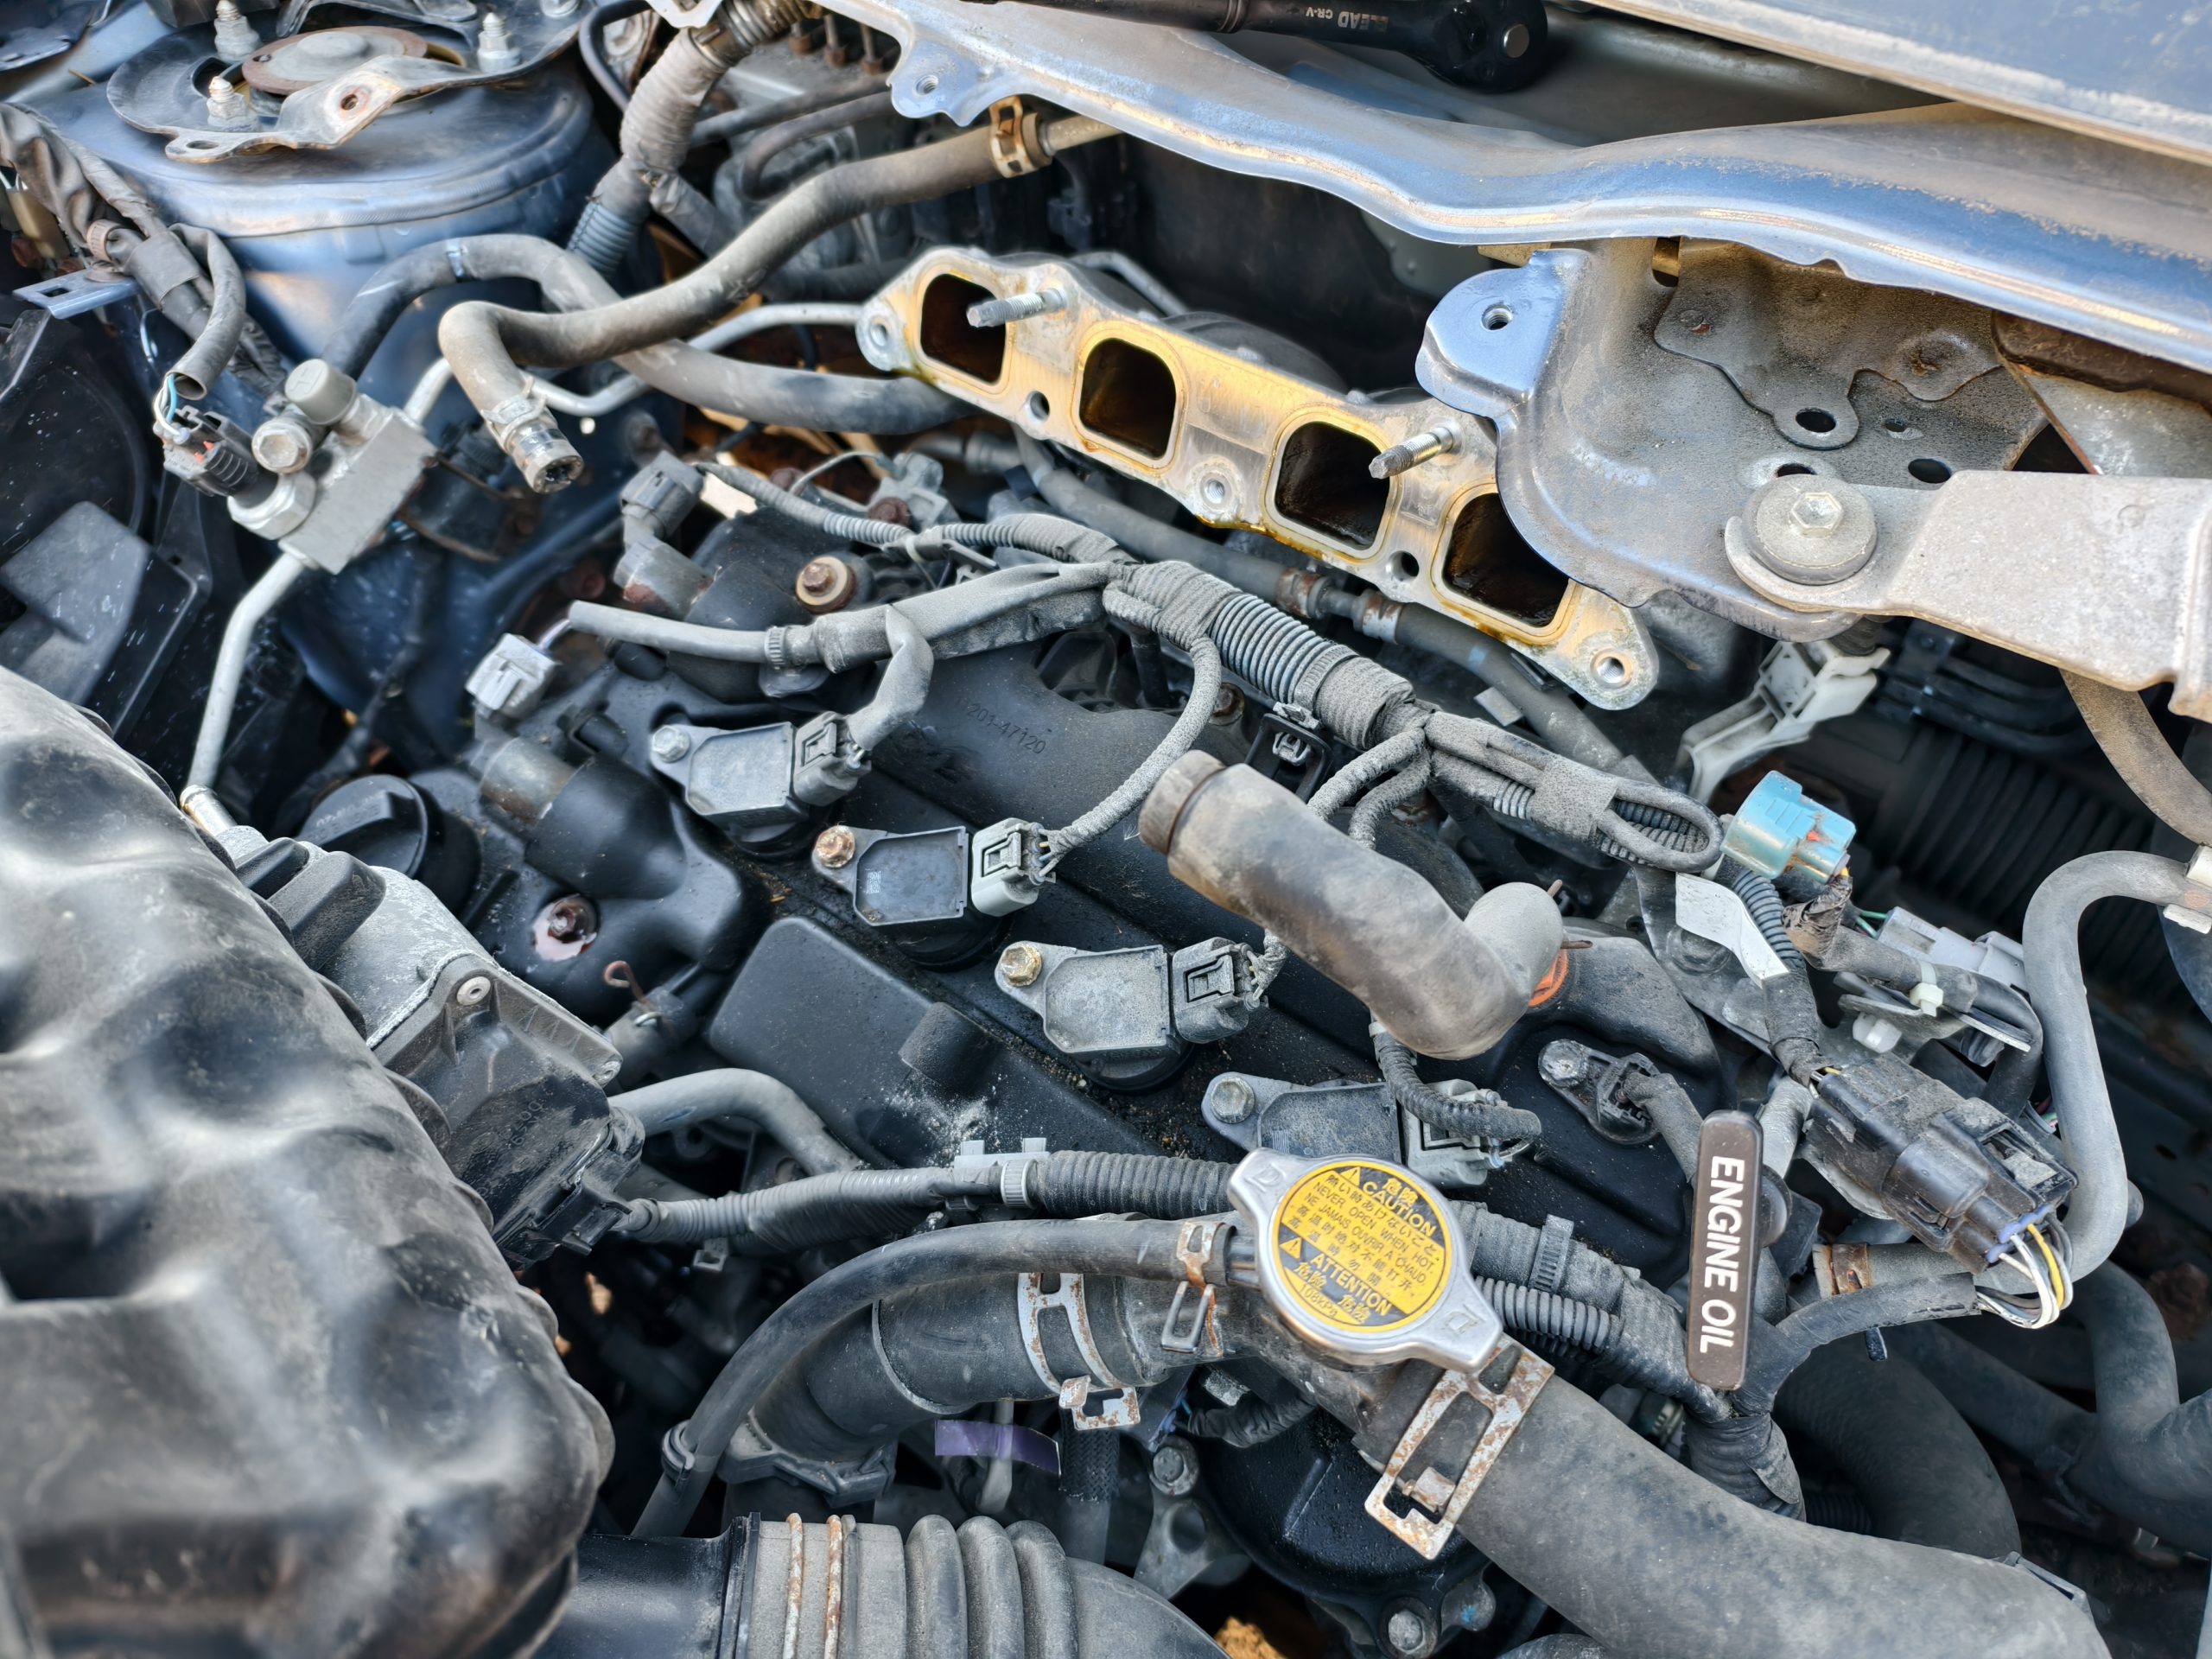
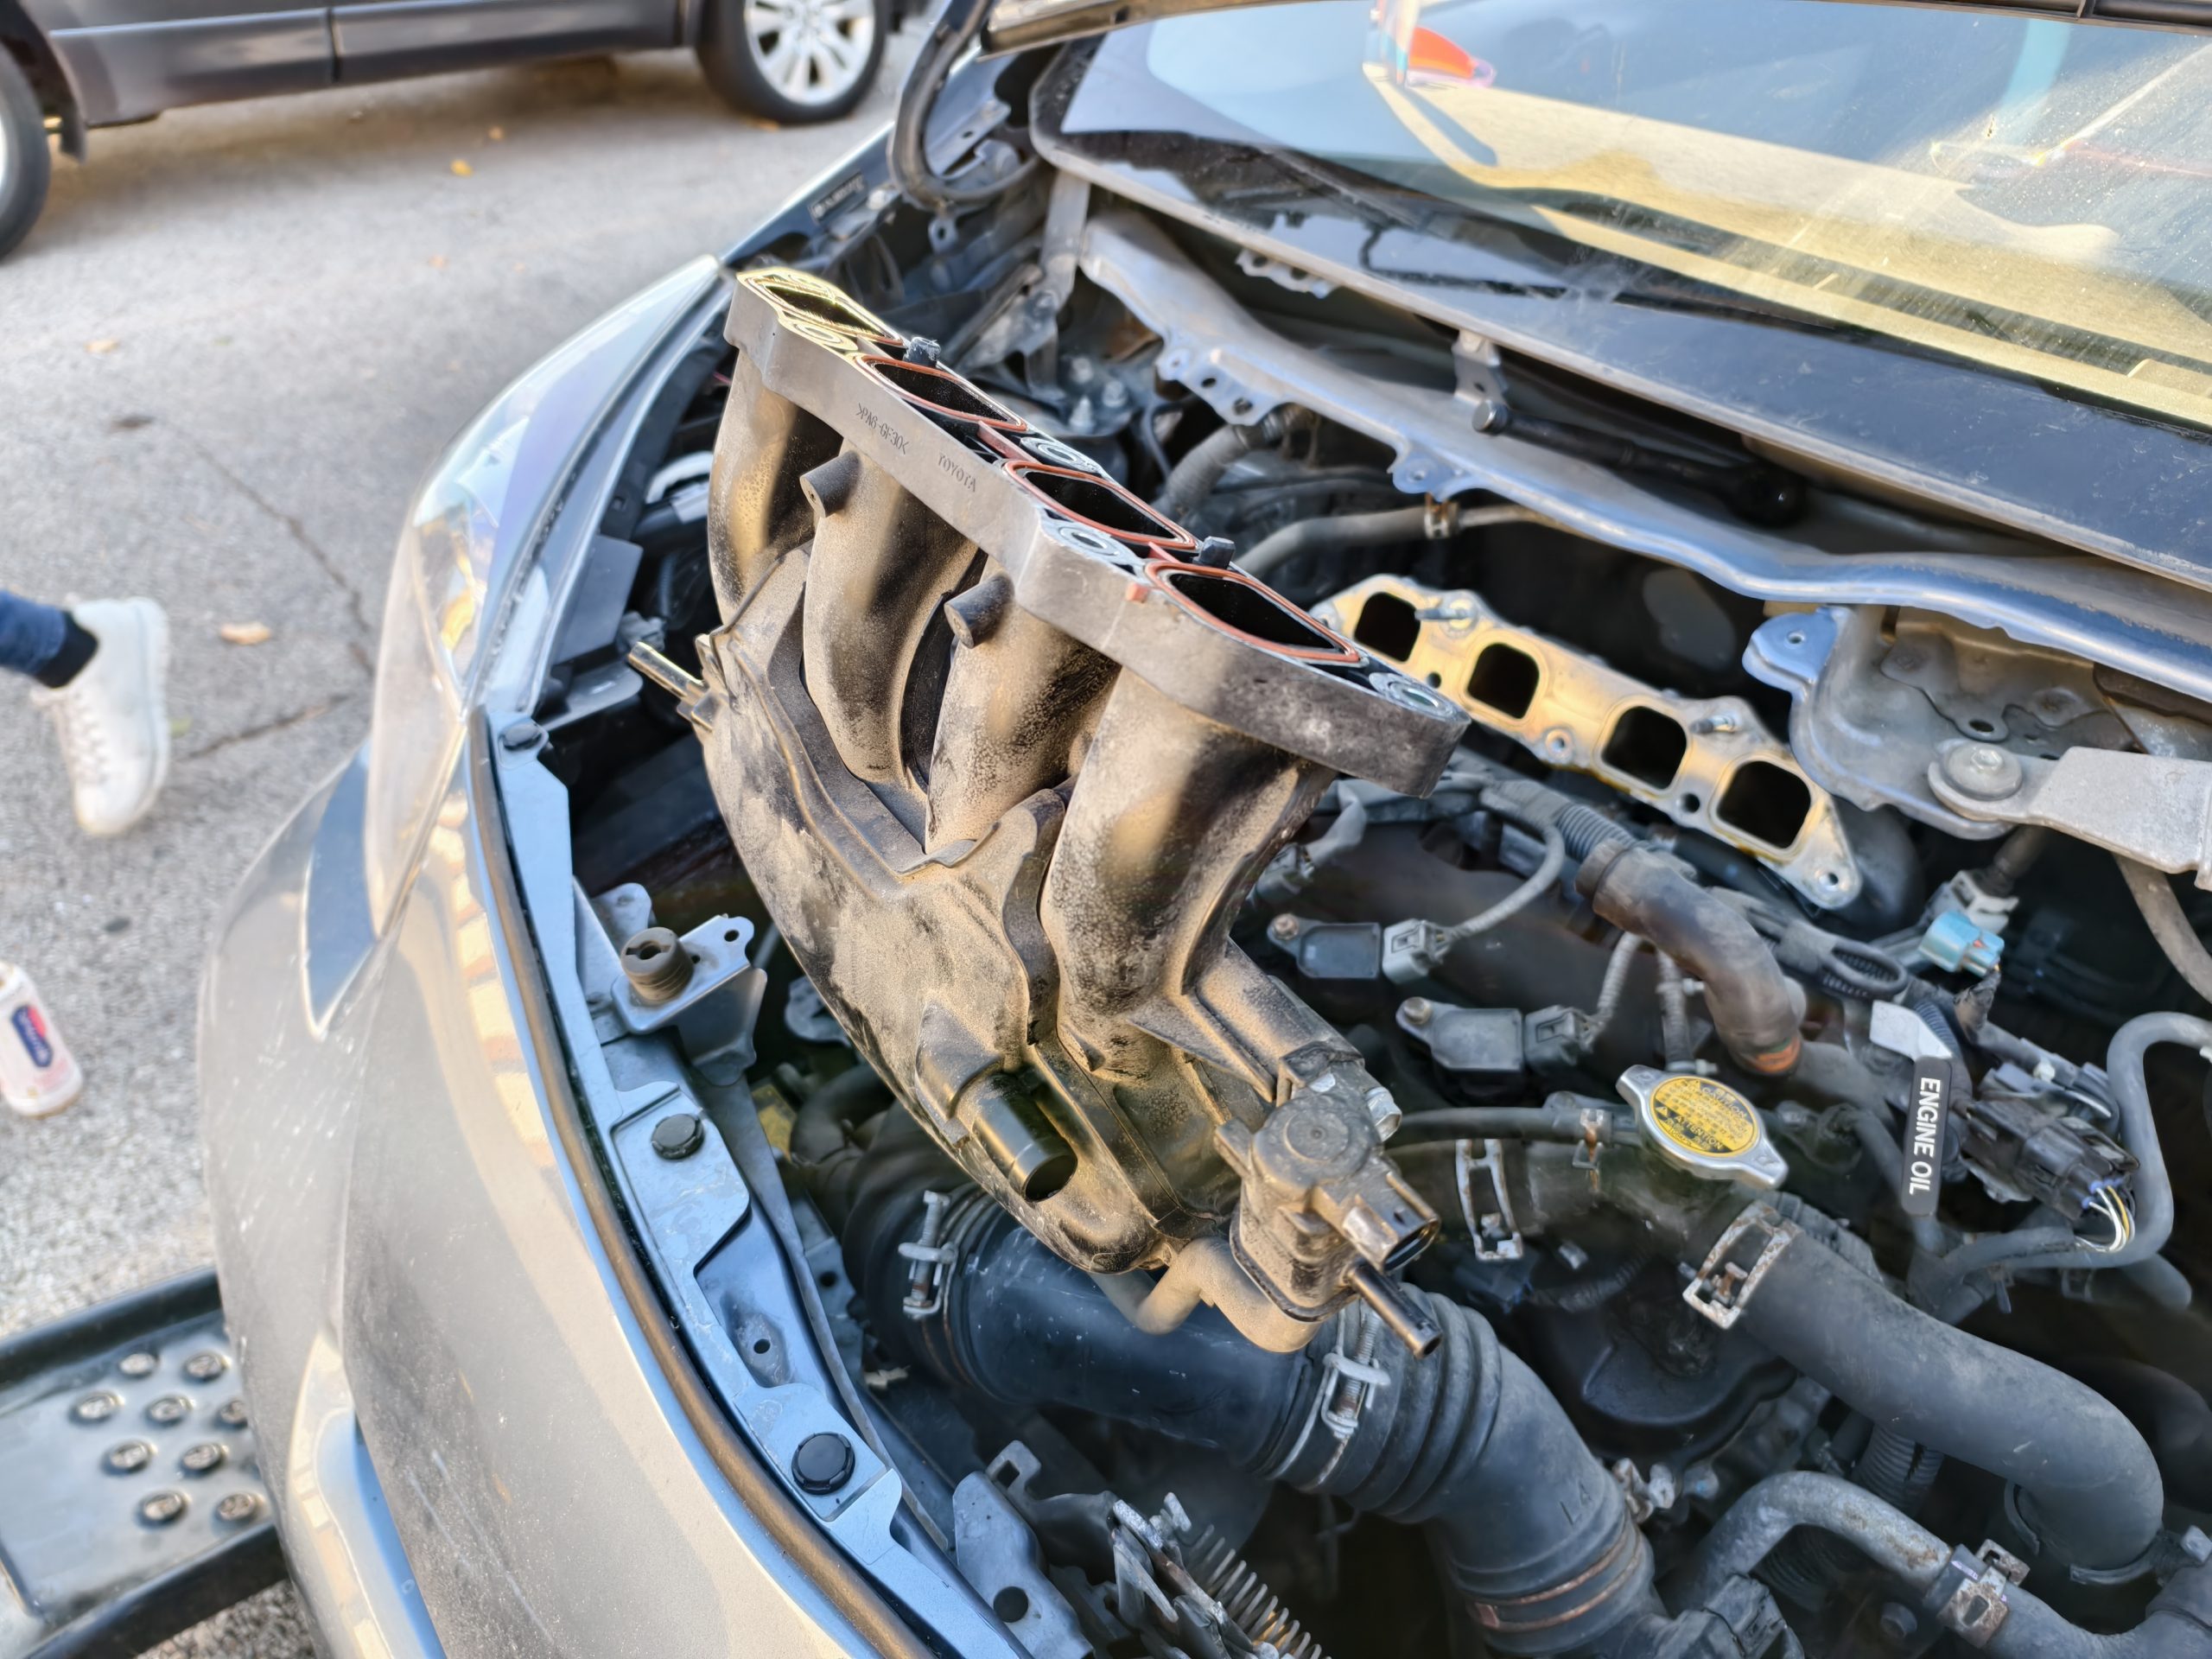
Unfortunately, this clever engineering means that not only do you not have much space to work on the iQ’s engine, but many of its components are stacked on top of each other. If you pop the hood on a typical car, the only thing blocking you from the spark plugs and coil packs might be an insulating engine cover. In an iQ? You have to take off the throttle body, airbox, and intake runners. This is non-negotiable, too, as the intake sits directly on top of the ignition coils.
Two Paths, Both Silly
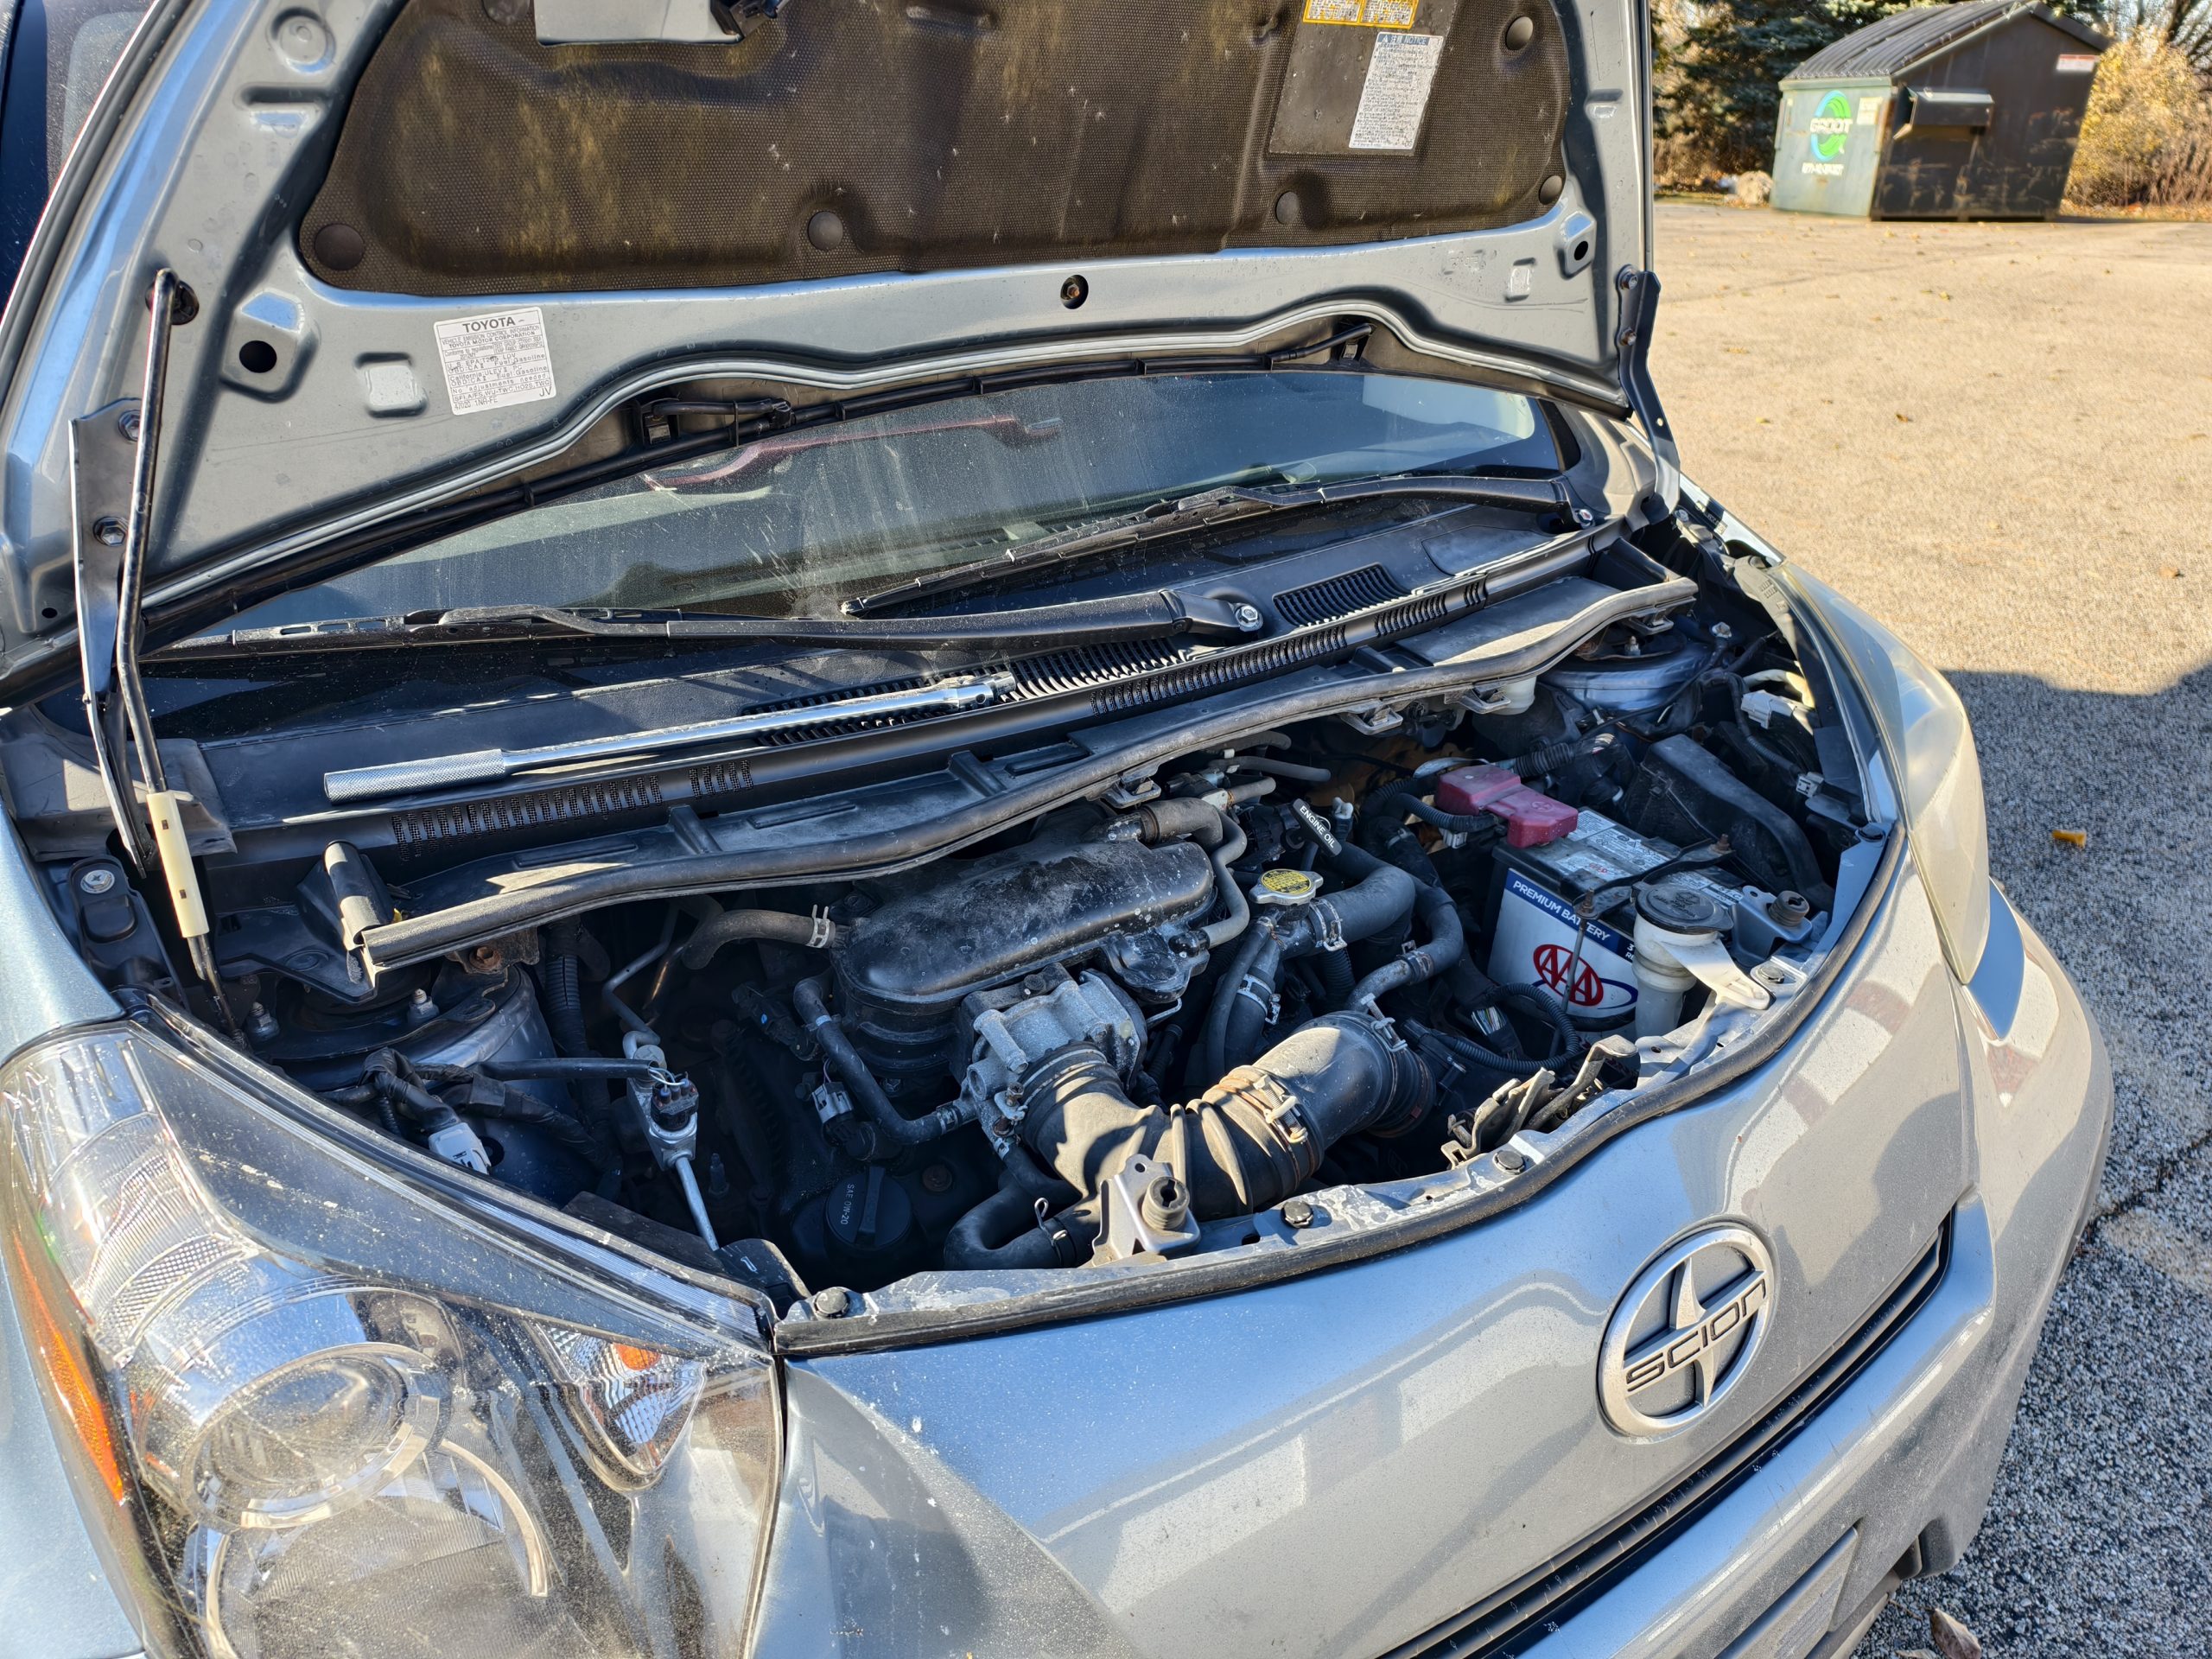
There are two methods for removing the intake from the engine. Since the engine bay is packed so tightly, you can’t just remove the intake. No, that would be too easy. The intake’s bolts are set about 10 inches or so under the header panel that your windshield wipers are attached to. Oh, and one of the bolts is between two of the intake runners, and you have about an inch or so of total space to fit a tool into it.
The “easy” method would be to attach a universal joint to the end of a 12-inch extension and then work on the intake’s bolts from a distance. Unfortunately for me, my universal joint was too thick to reach the bolt between the runners, so that method was out. Here’s a great video on the whole process:
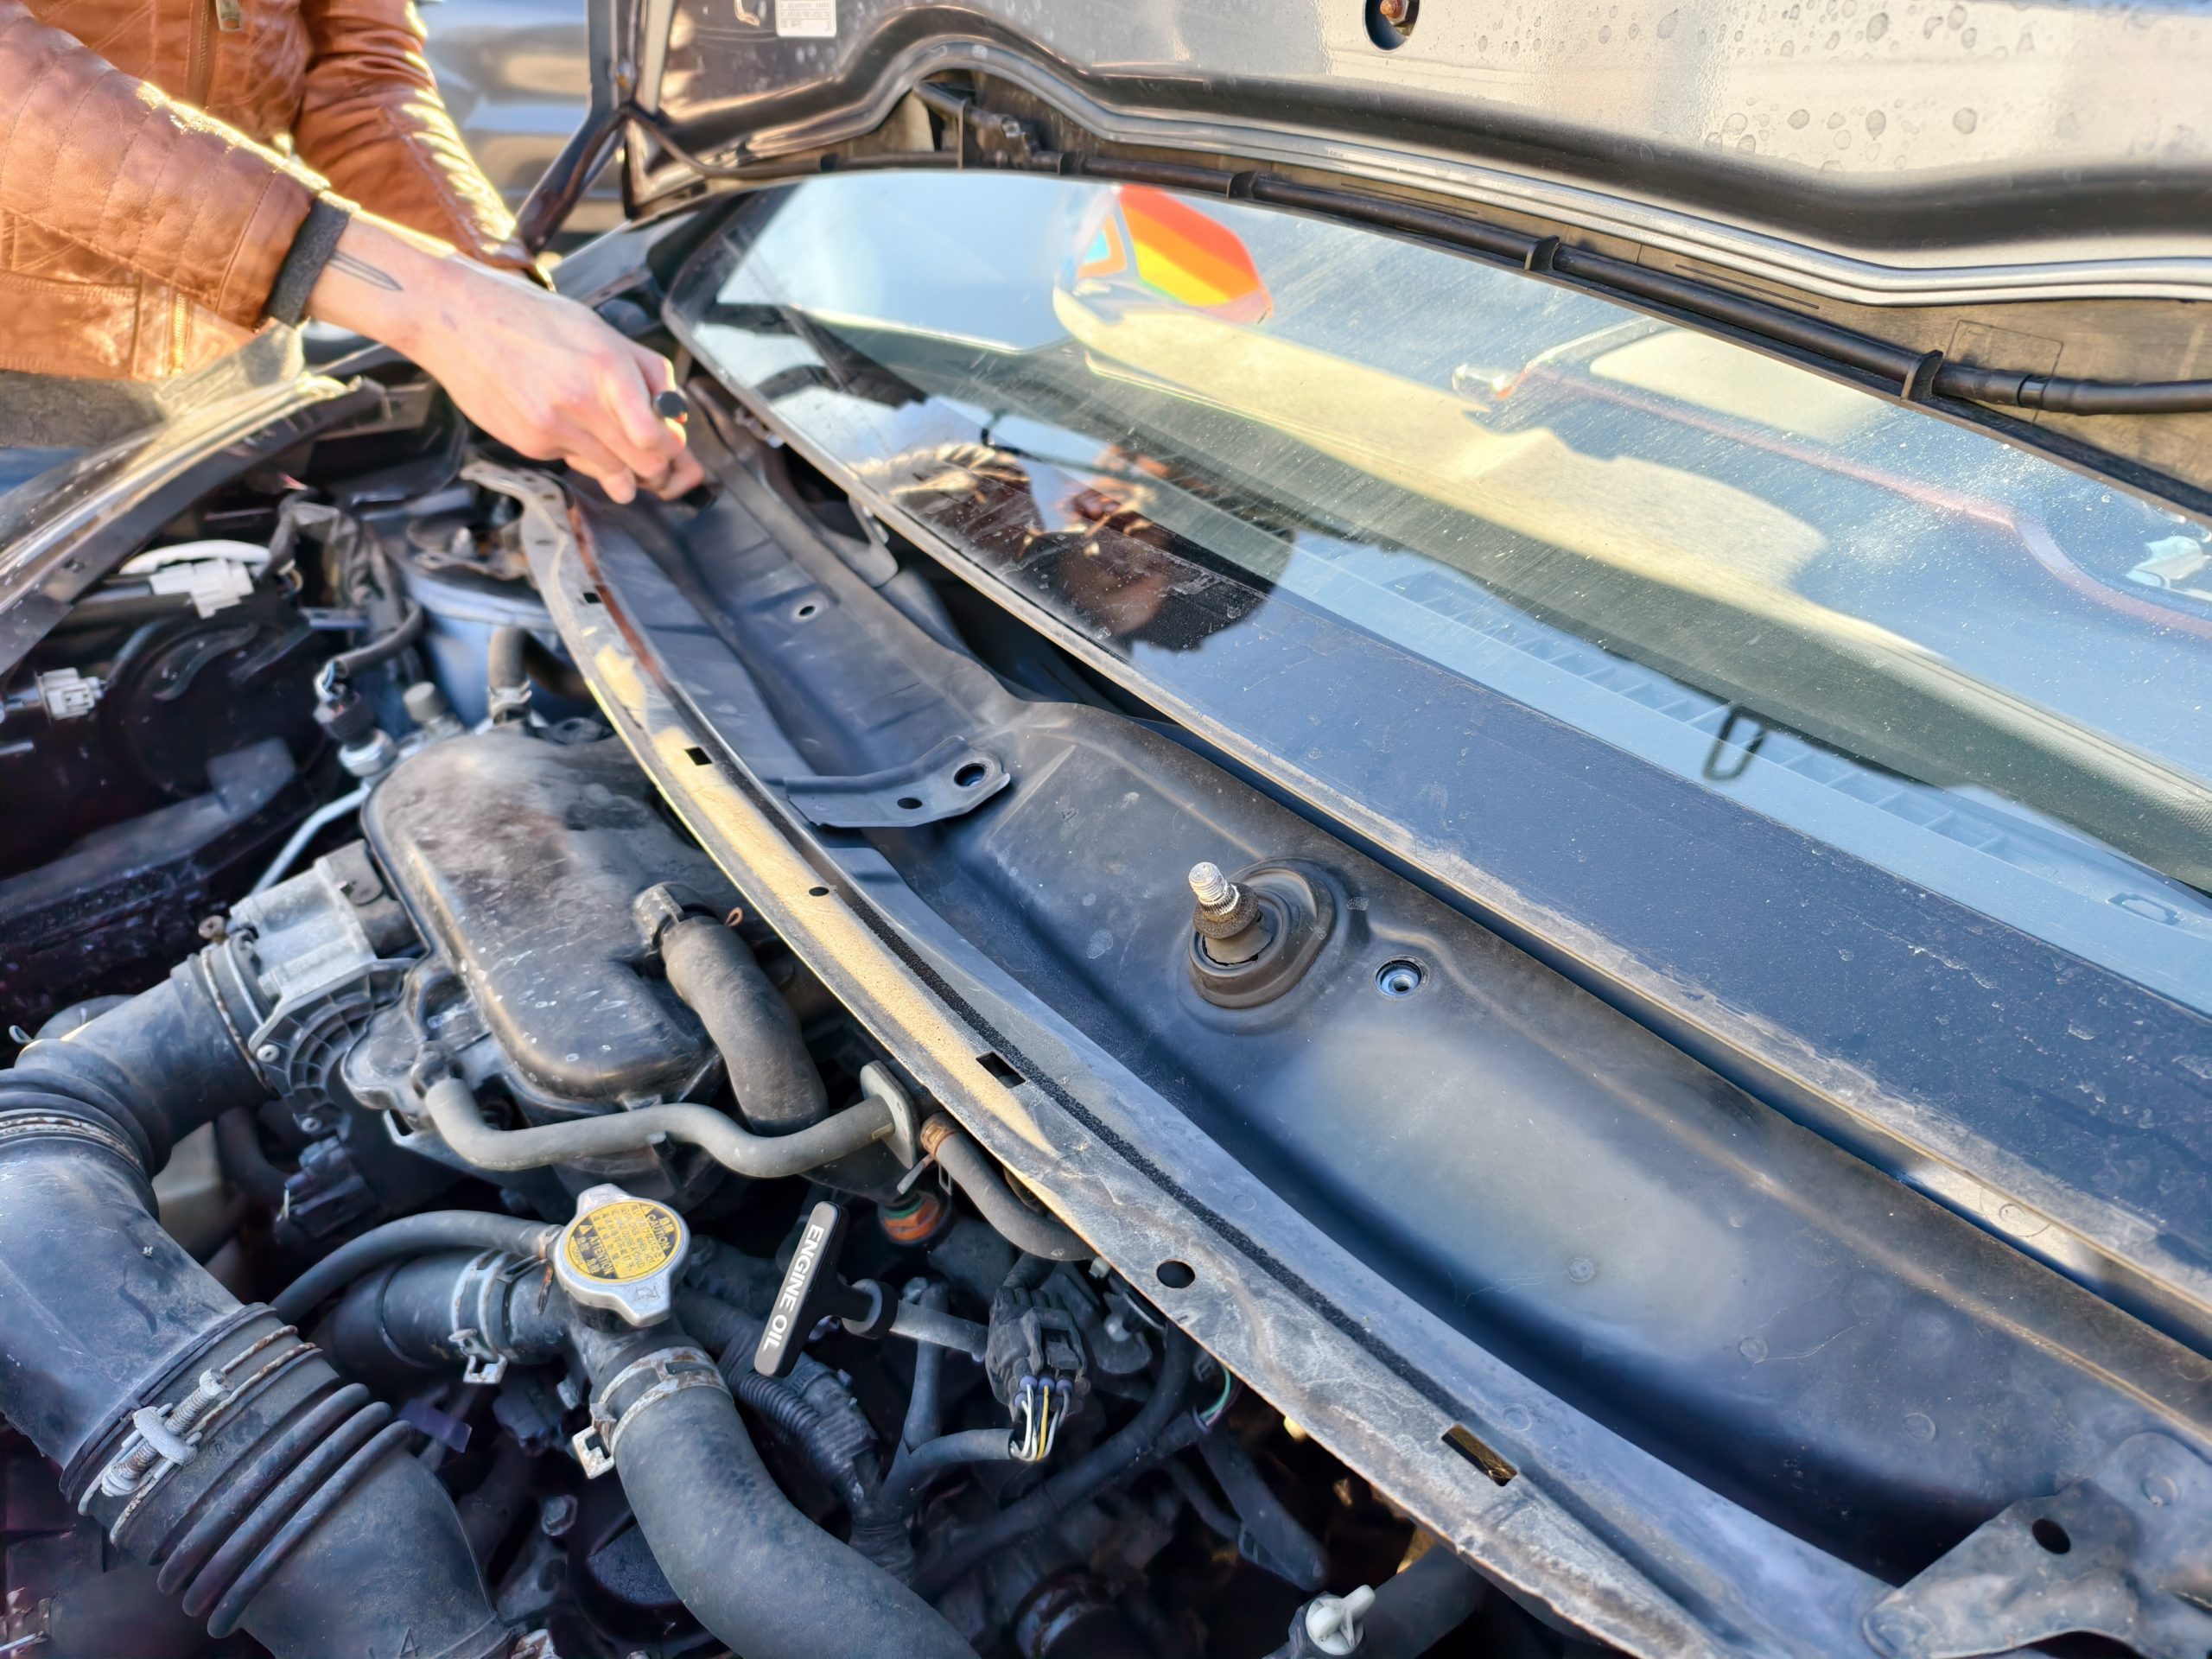
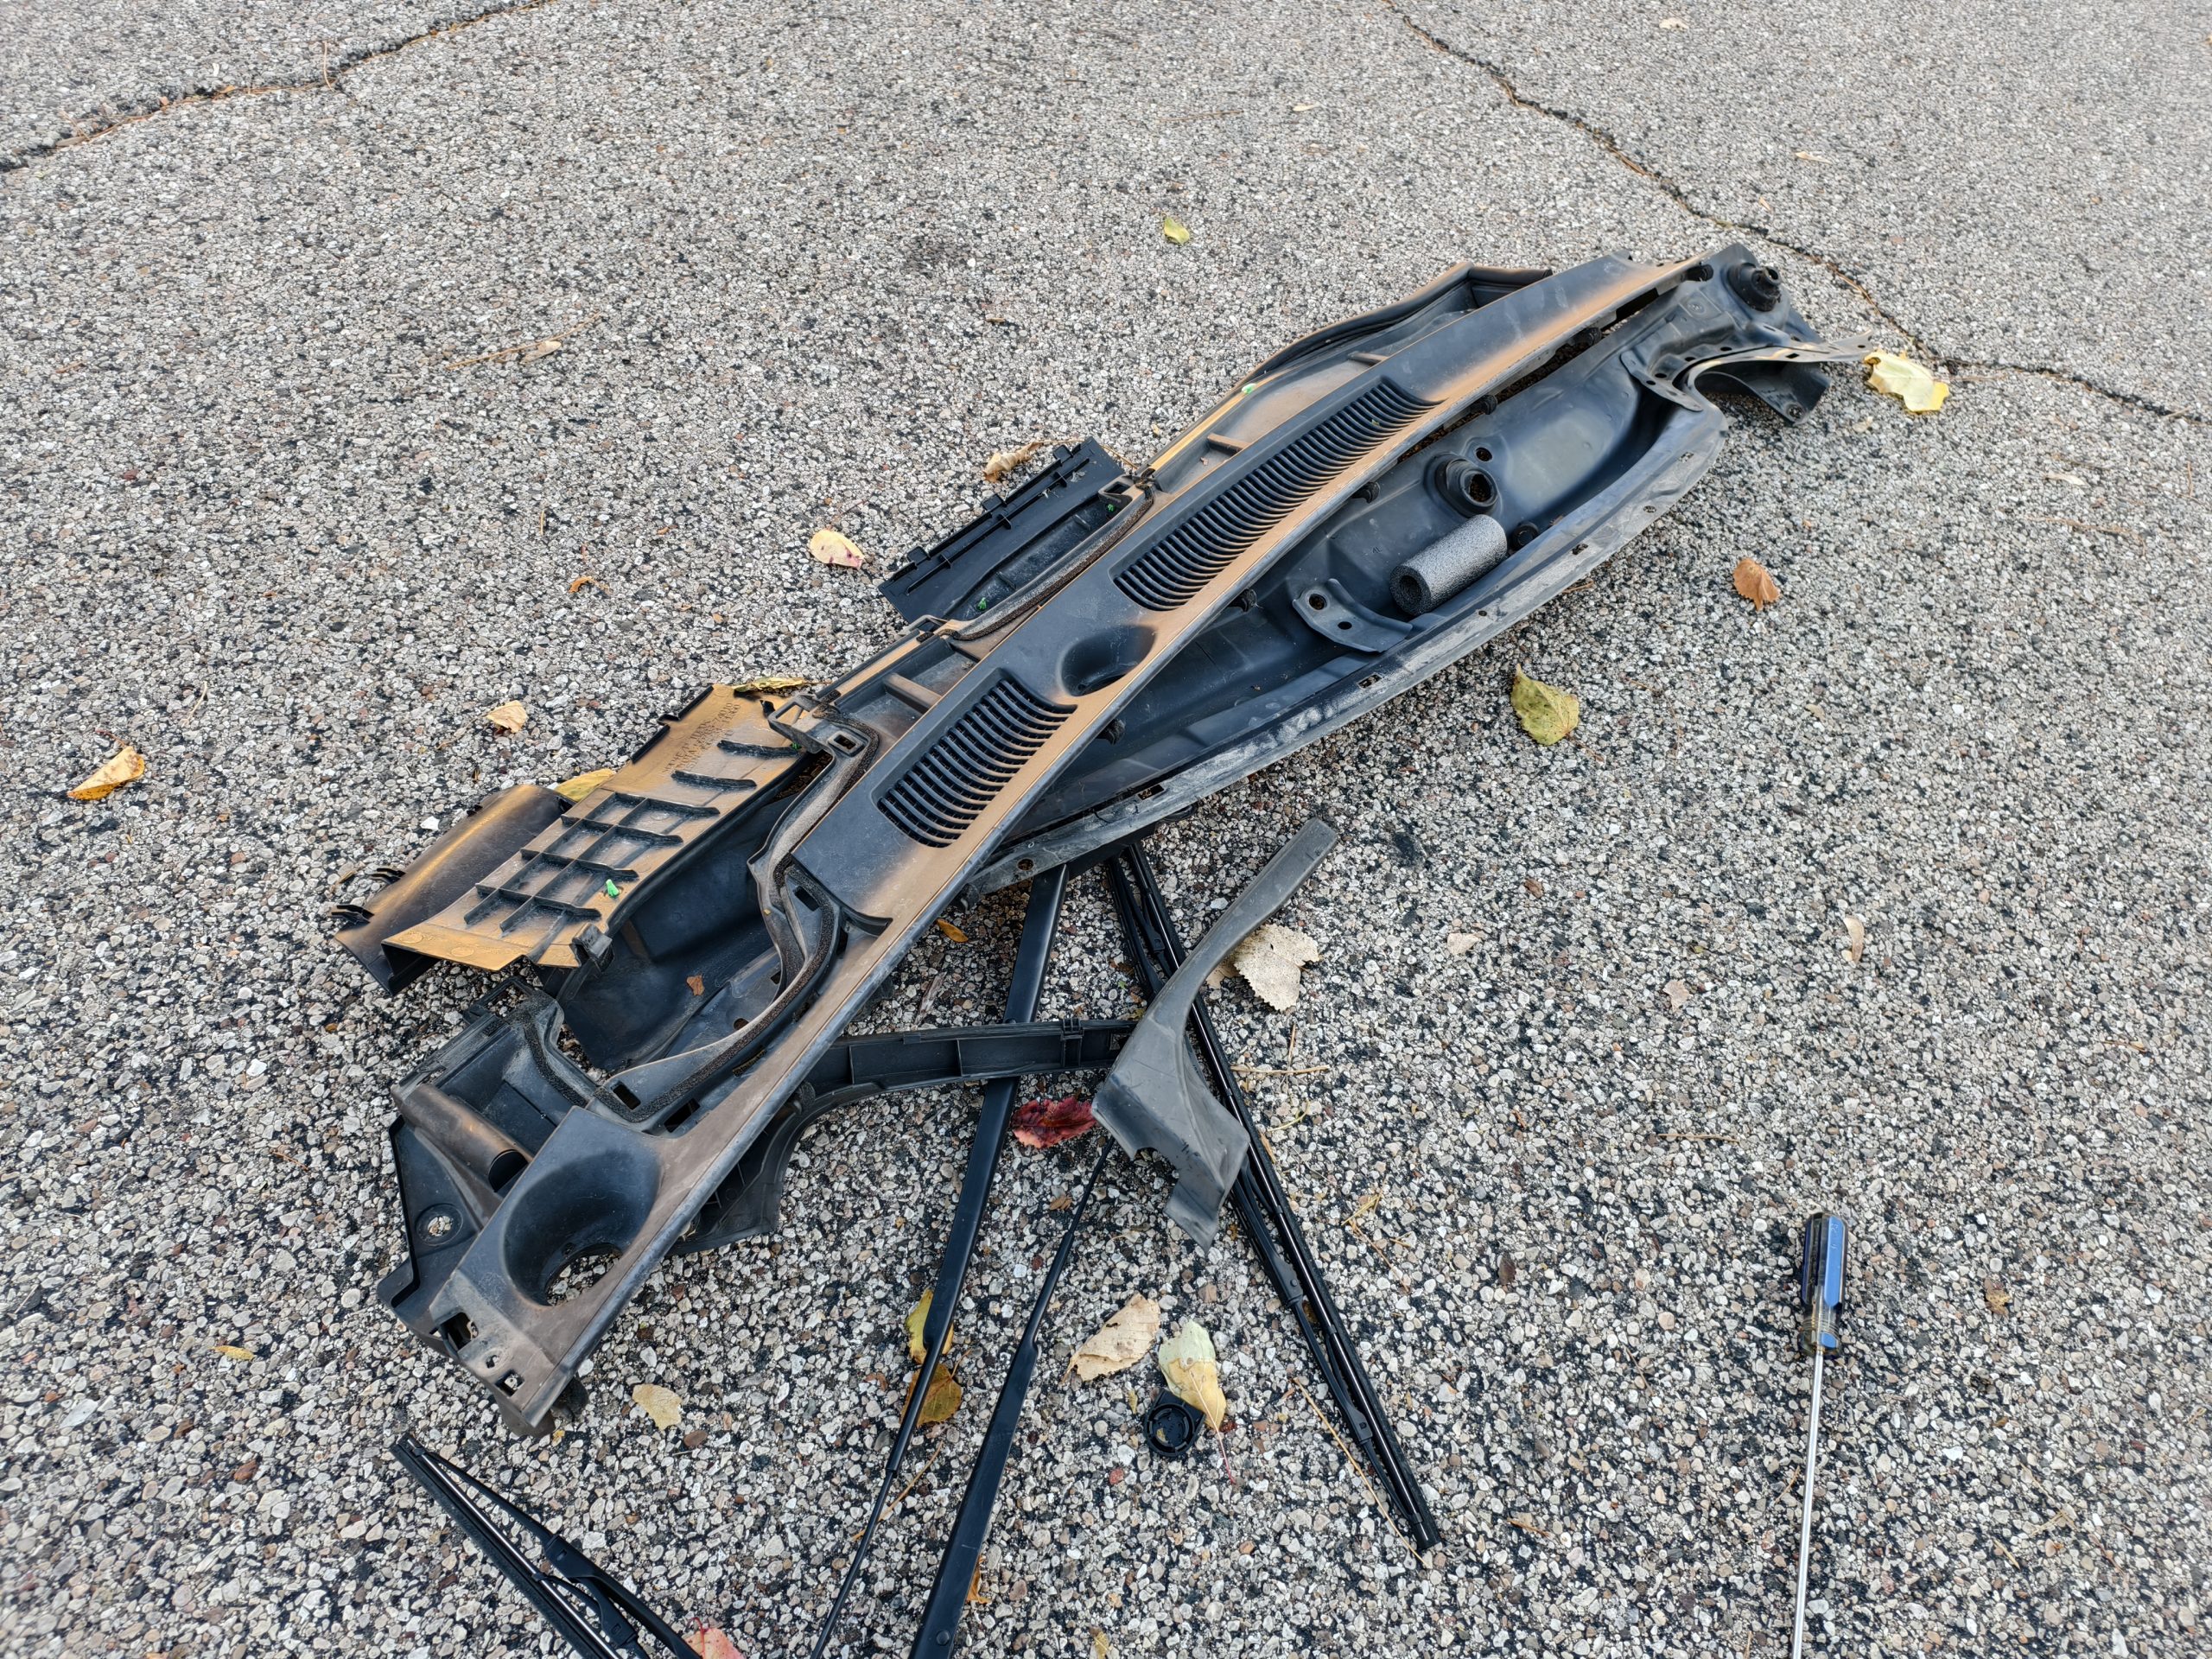
The long way around involves removing the windshield wipers, removing the plastic panel under the wipers, removing the metal header panel, and then finally starting on the intake. So, we did that. Or, specifically, I coached Sheryl on how to do it herself.
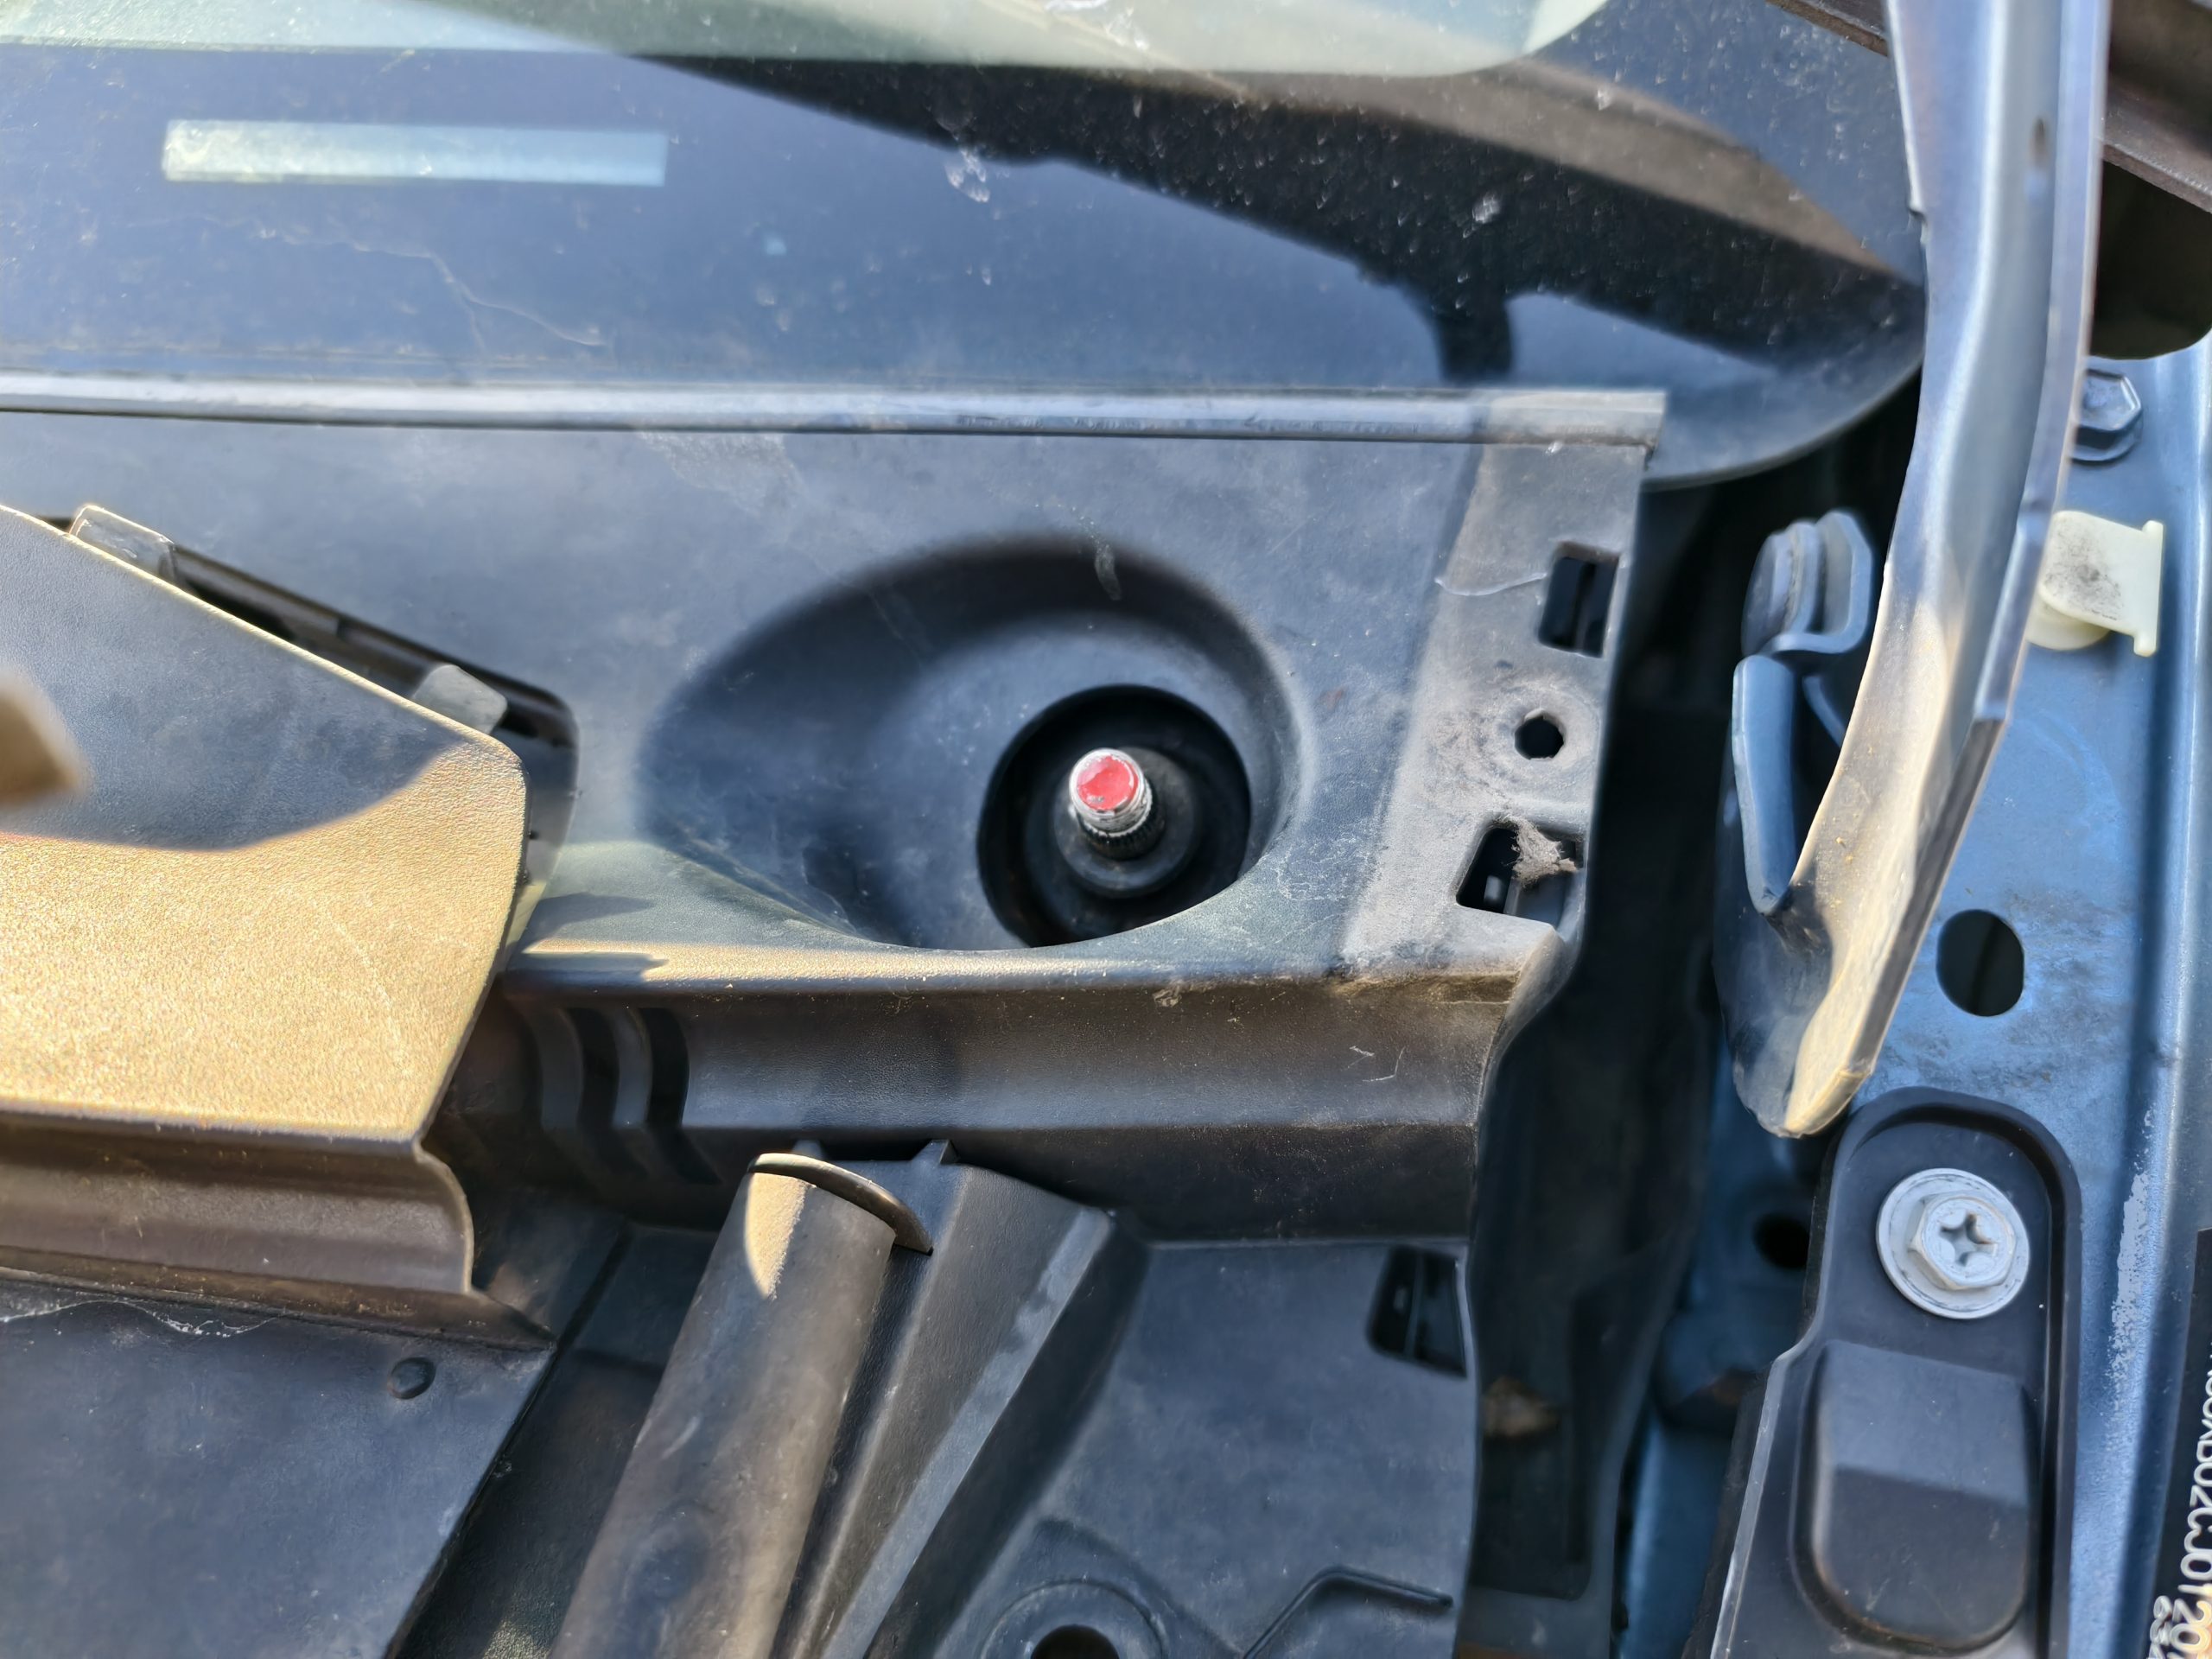
Removing the wipers was easy enough. They’re held in with two 14mm nuts. Sheryl removed those with ease, and then immediately lost my 14mm deep socket. We never saw it again.
The plastic panel under the wipers was also easy to remove. It’s held in with plastic rivets, and after 13 years outside, they disintegrated the second we touched them.
Next came the metal panel, and this one was also easy to remove, as it consisted of a handful of easily accessible 10mm bolts.

Now, with the cowling deleted, the engine bay actually became surprisingly roomy. I was able to see just about everything in the engine bay, except for my missing socket.
The intake is held on with two nuts and three bolts in the rear. These will be easy to get off with just a regular socket and an extension. That pesky center bolt had too little room to fit a socket, so we used a regular ol’ wrench to bust that one out. You’ll find a bracket at the front of the intake, which has two more easily accessible bolts.
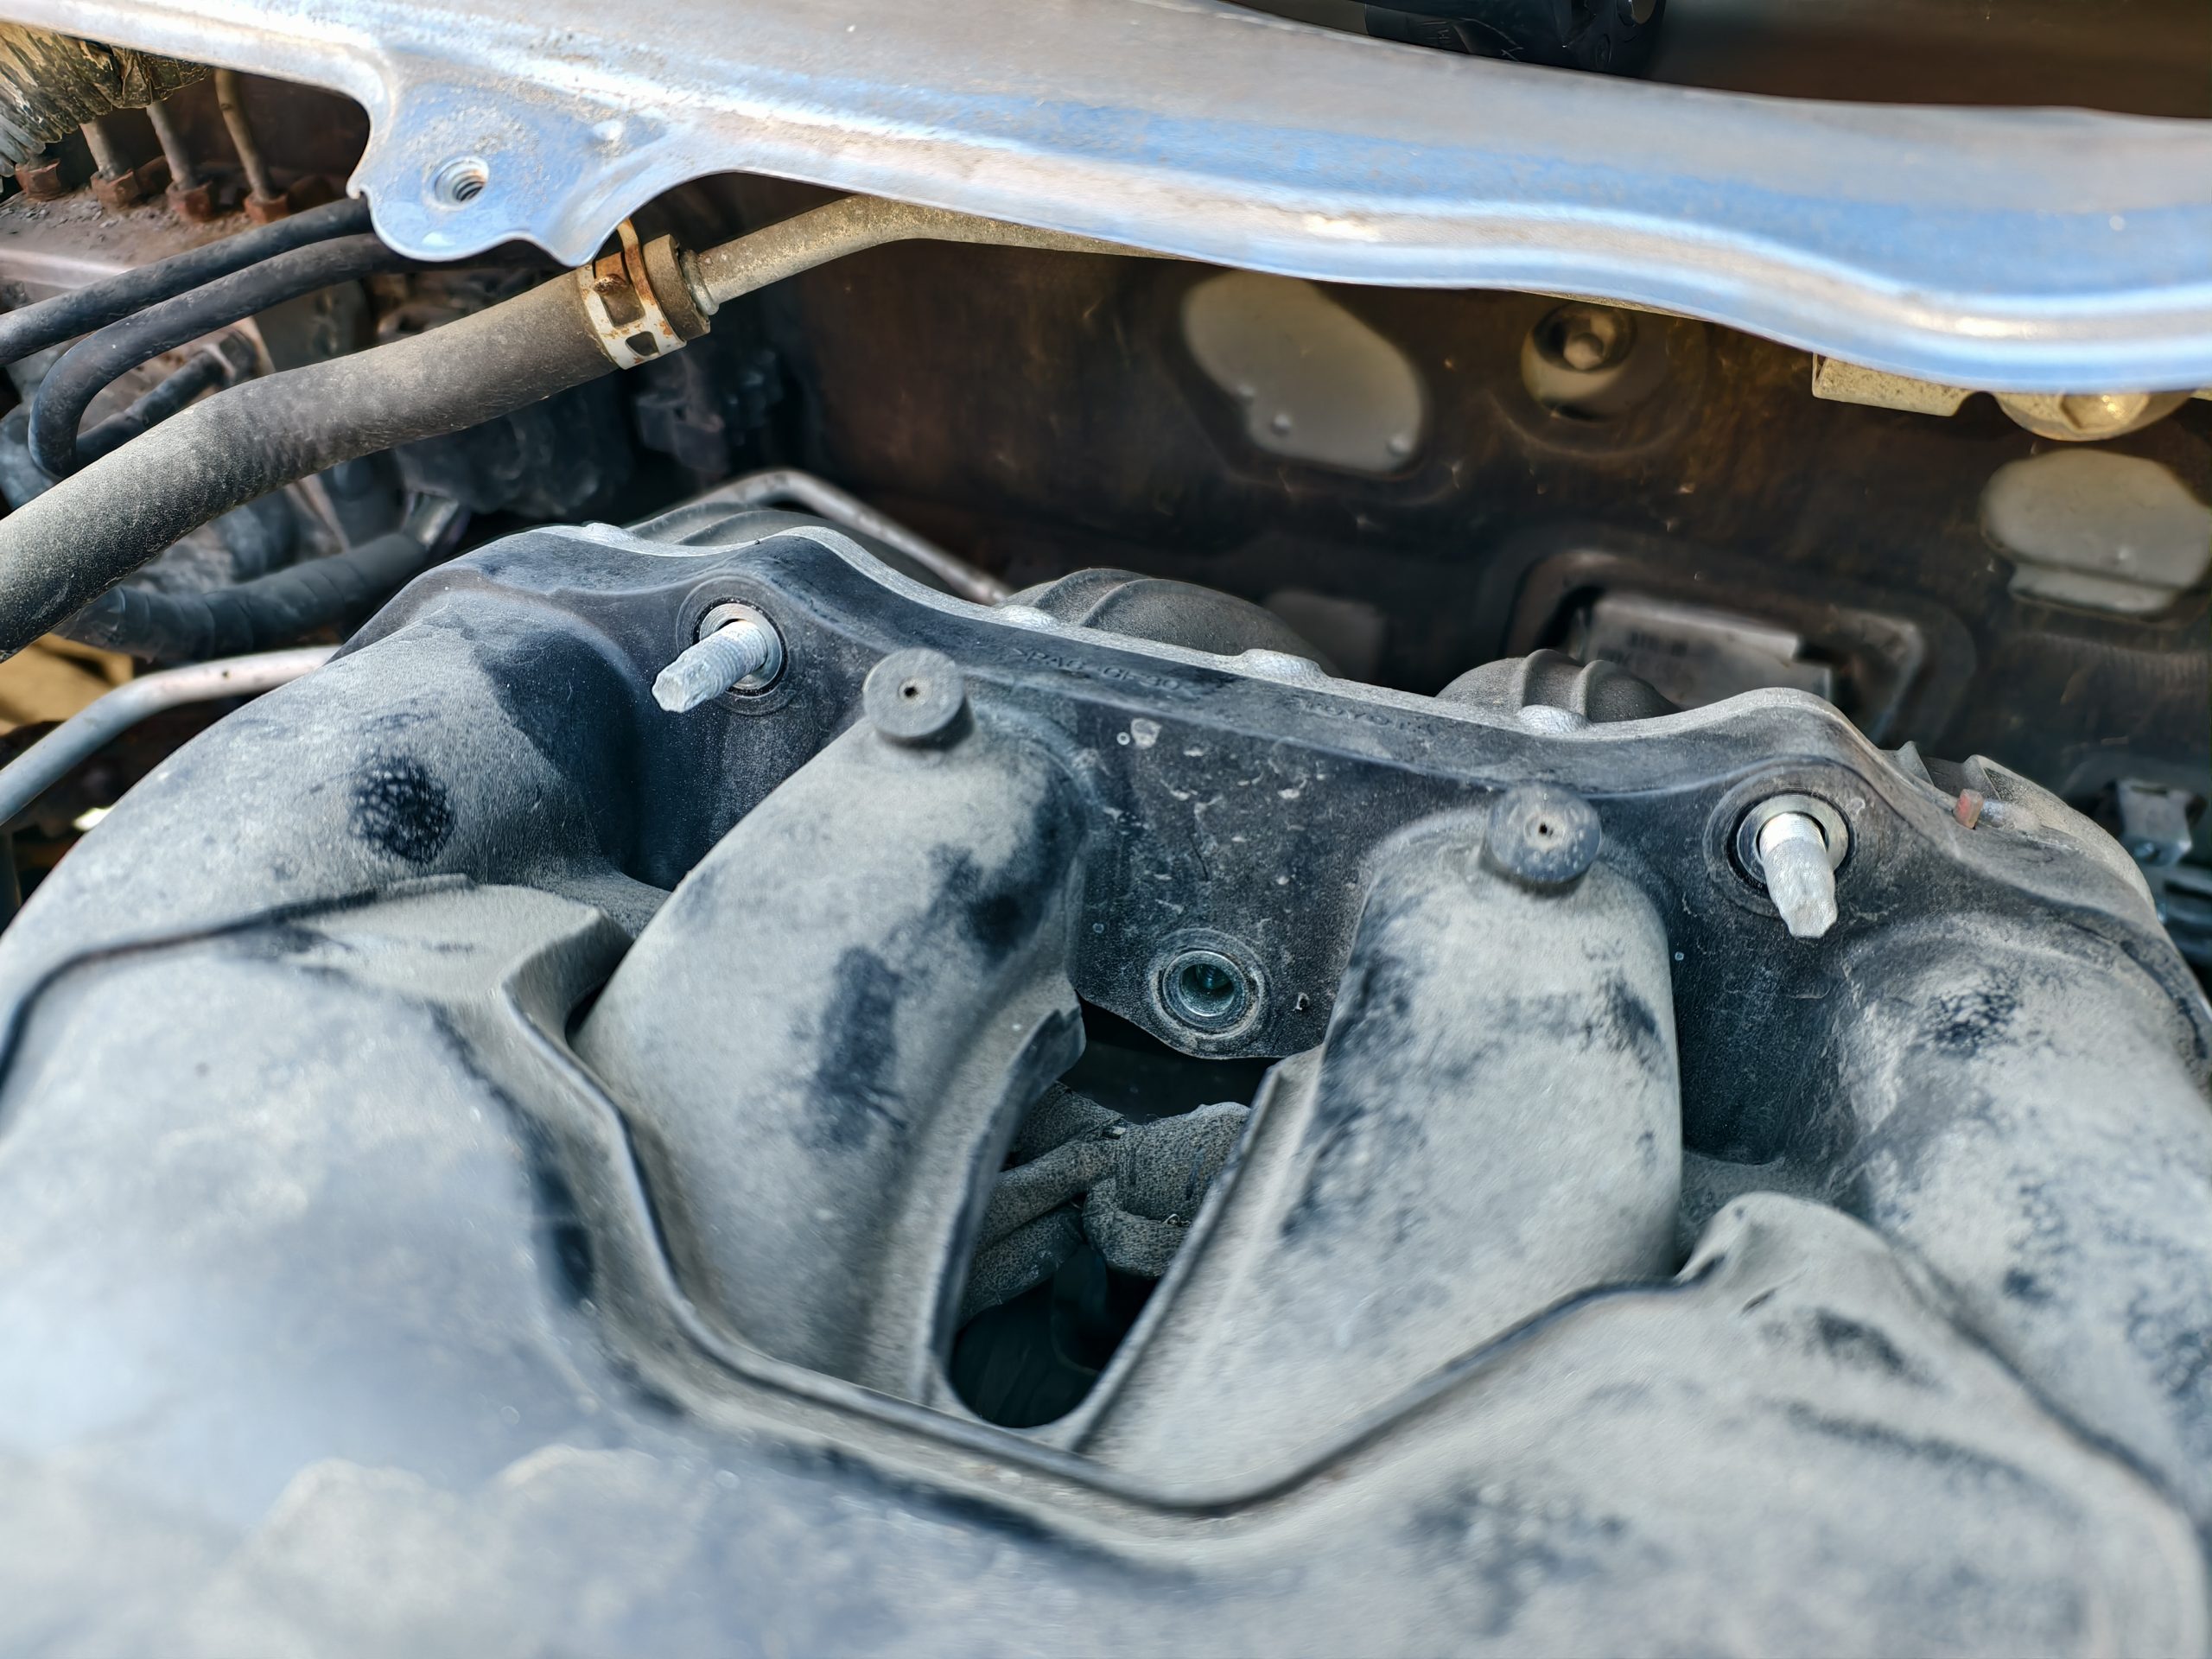
Once all of those bolts and nuts are zipped off, you’ll want to remove all short hoses and electrical connections to the intake. So, you’ll need pliers to work with the clips.
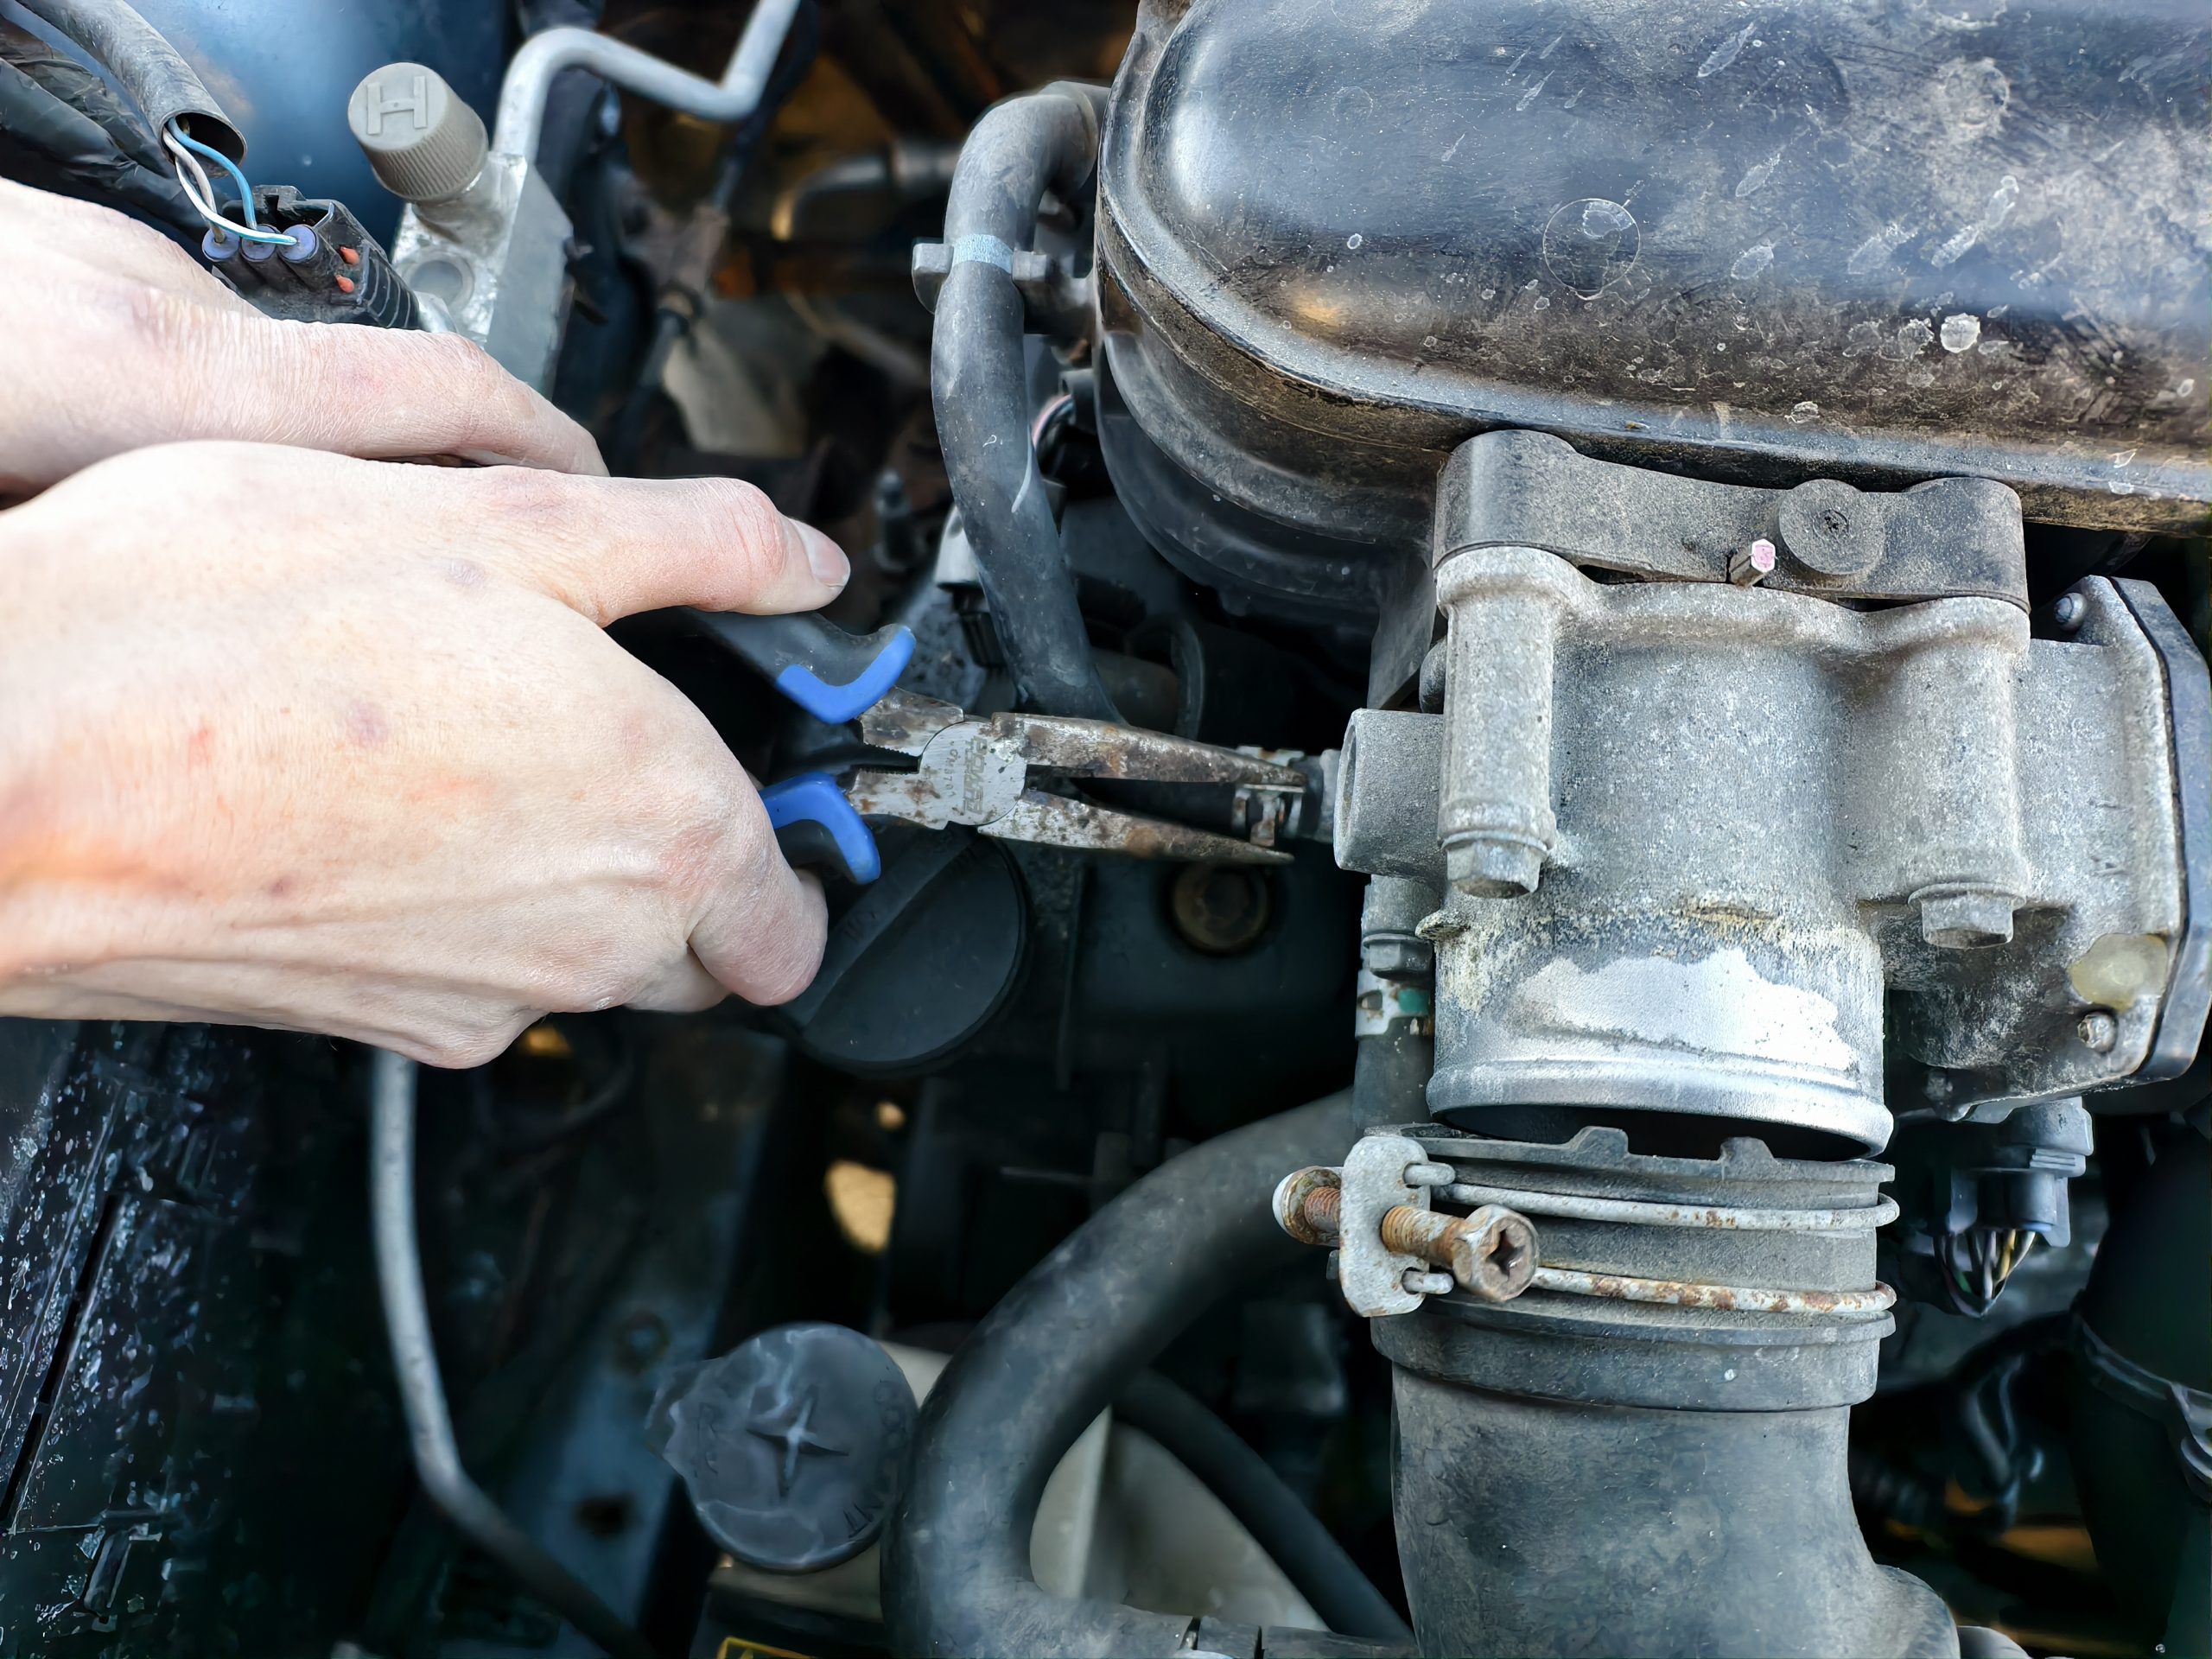
Once you get through all of that, you can finally move the intake away and reach your ignition coils. Take this moment to clean your intake and your throttle body while you’re in there.
It took us about an hour to reach this point. Most of it was because we were working on a car that had spent its entire life in the Rust Belt. Some bolts didn’t want to move, and the hoses weren’t very pliable, either. Also, it was our first time doing this. I bet that you could get this time down to about 30 minutes.

Anyway, removing the ignition coils and spark plugs was super easy, barely an inconvenience. The coils looked okay, and tested okay, too.
Yep, That’s Your Problem
And the plugs? Oh yeah, they were well-worn. Take a look:
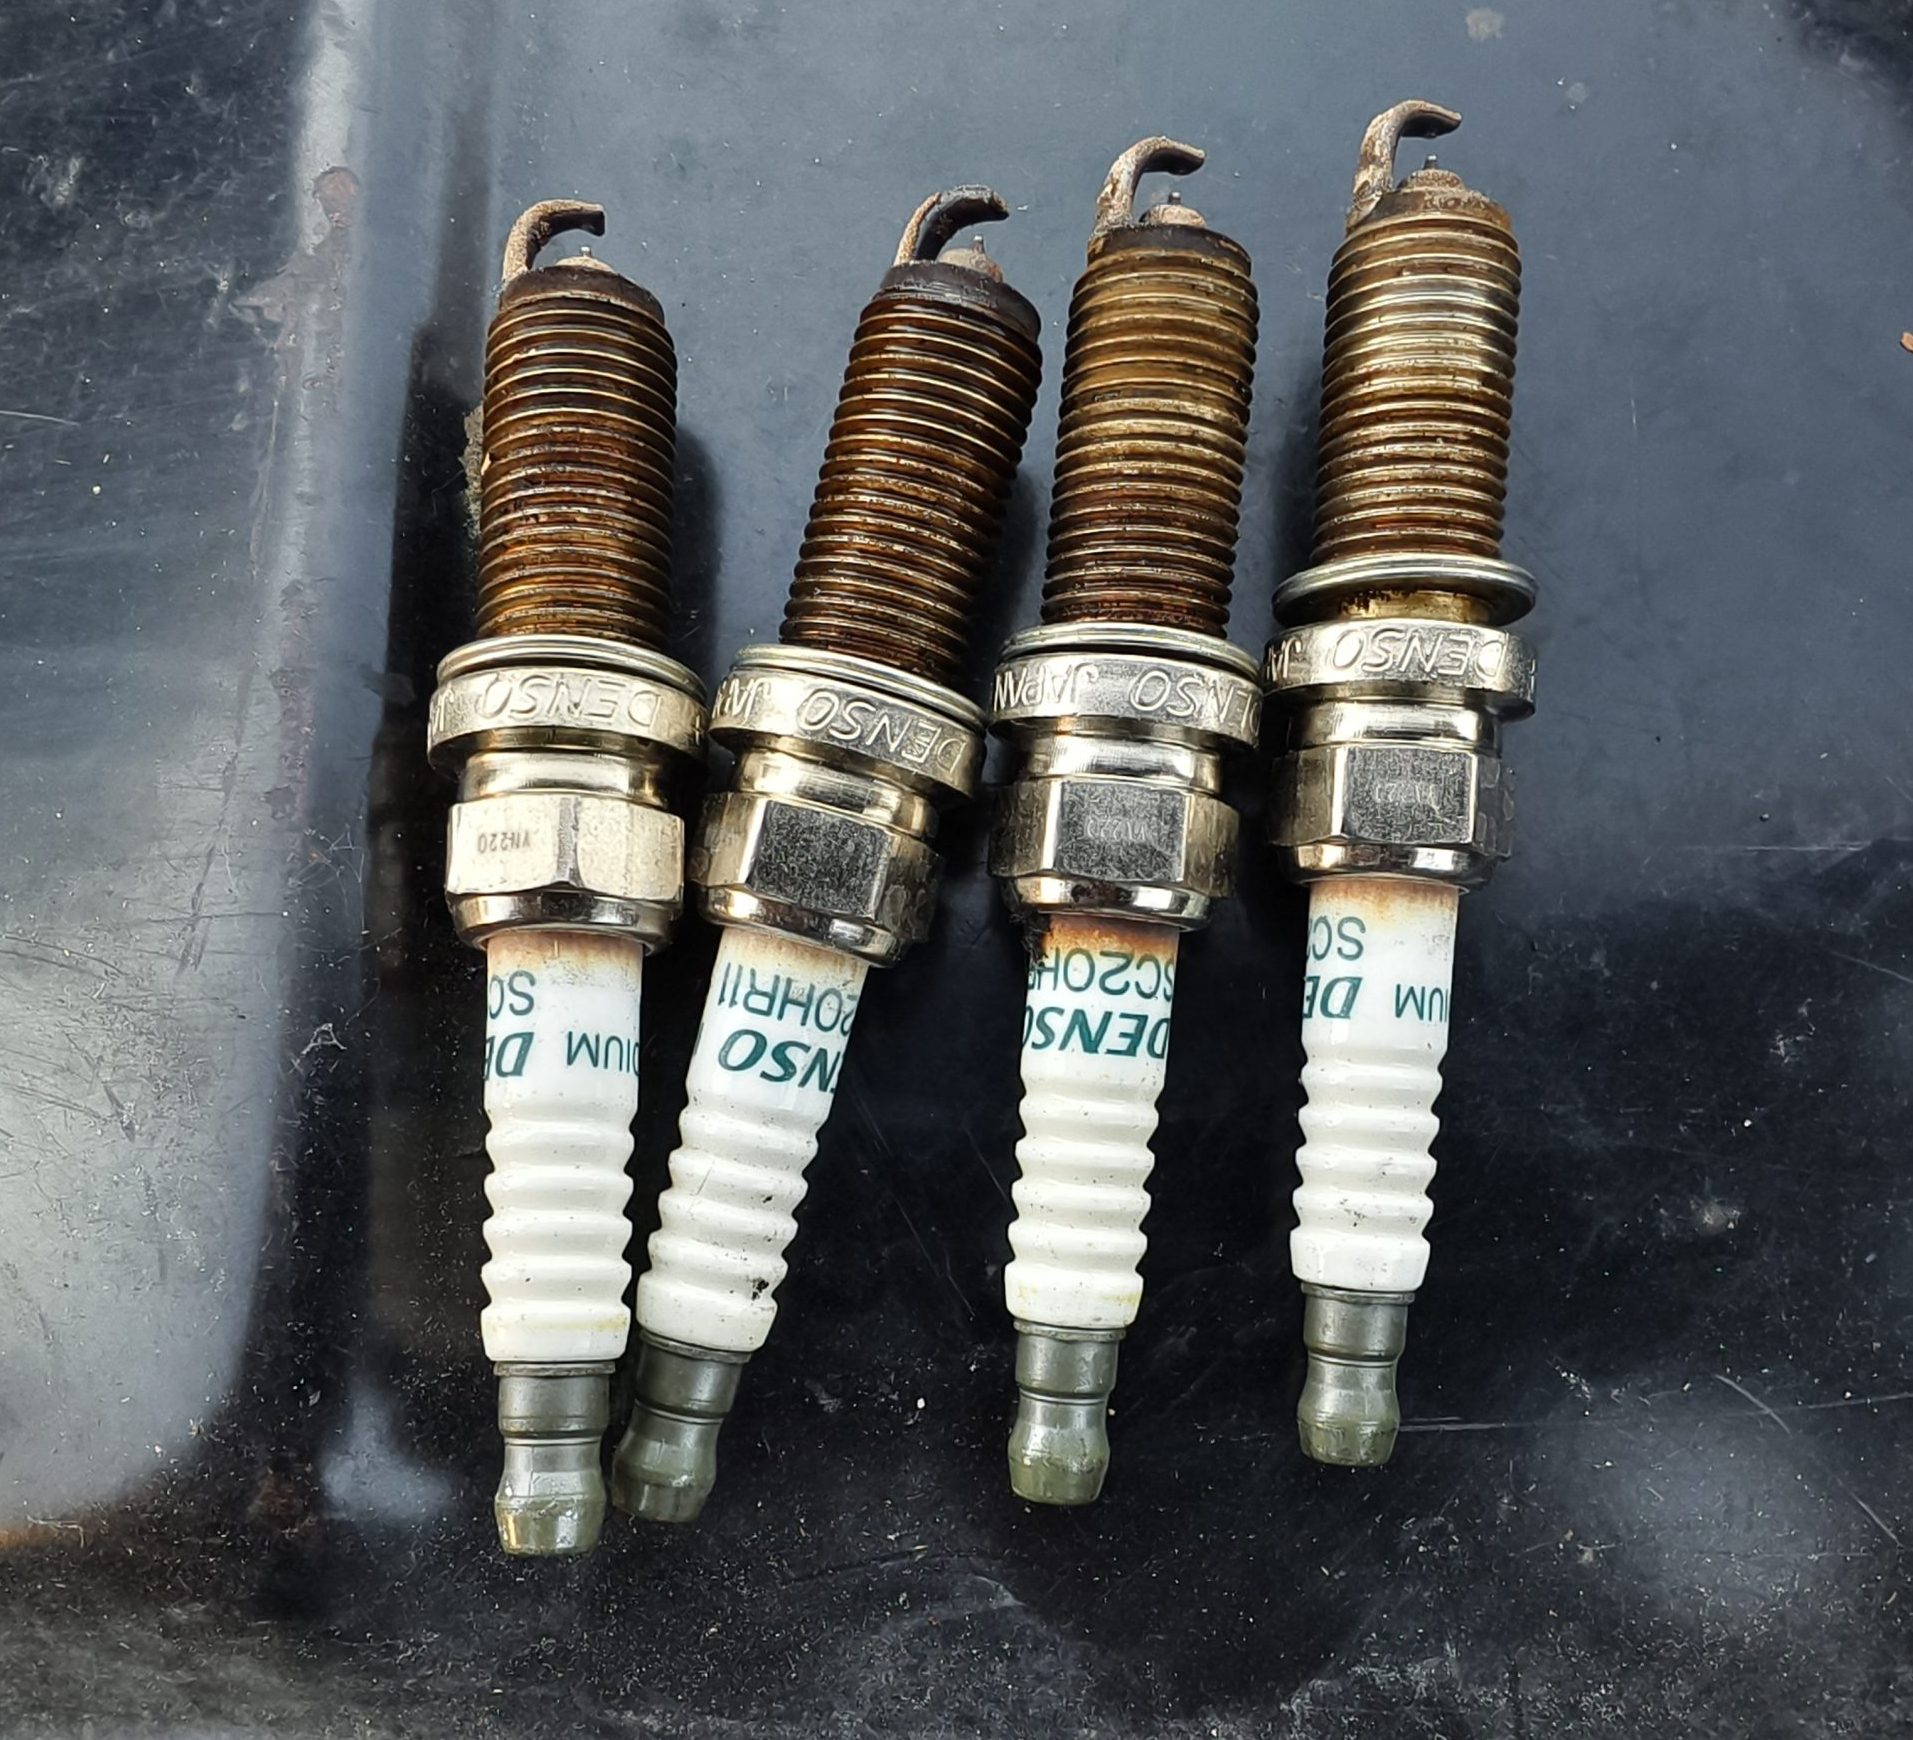
Enhance!

We replaced the plugs and the coils. Why? It was not fun getting to this point. We had to take off so many parts that our neighbors thought we were scrapping the little car.
Normally, I would say that you should replace coils when they break. Don’t fix what isn’t broken. However, most cars don’t make you work to get to their coils. Given how hard my wife is on her car, I have no idea how much life the coils have left. So, we replaced the coils just for peace of mind.
The old ones are sitting on a shelf as spares, and I hope we never have to use them. Don’t worry, the new plugs and coils that went in are OEM Denso ones. I really don’t want to have to do this project again anytime soon.
Buttoning the car back up was the reverse of removal, and I think that might have taken around 45 minutes. That was only because Sheryl somehow managed to lose one of the header panel bolts, and we spent a considerable amount of time looking for it and my missing socket.
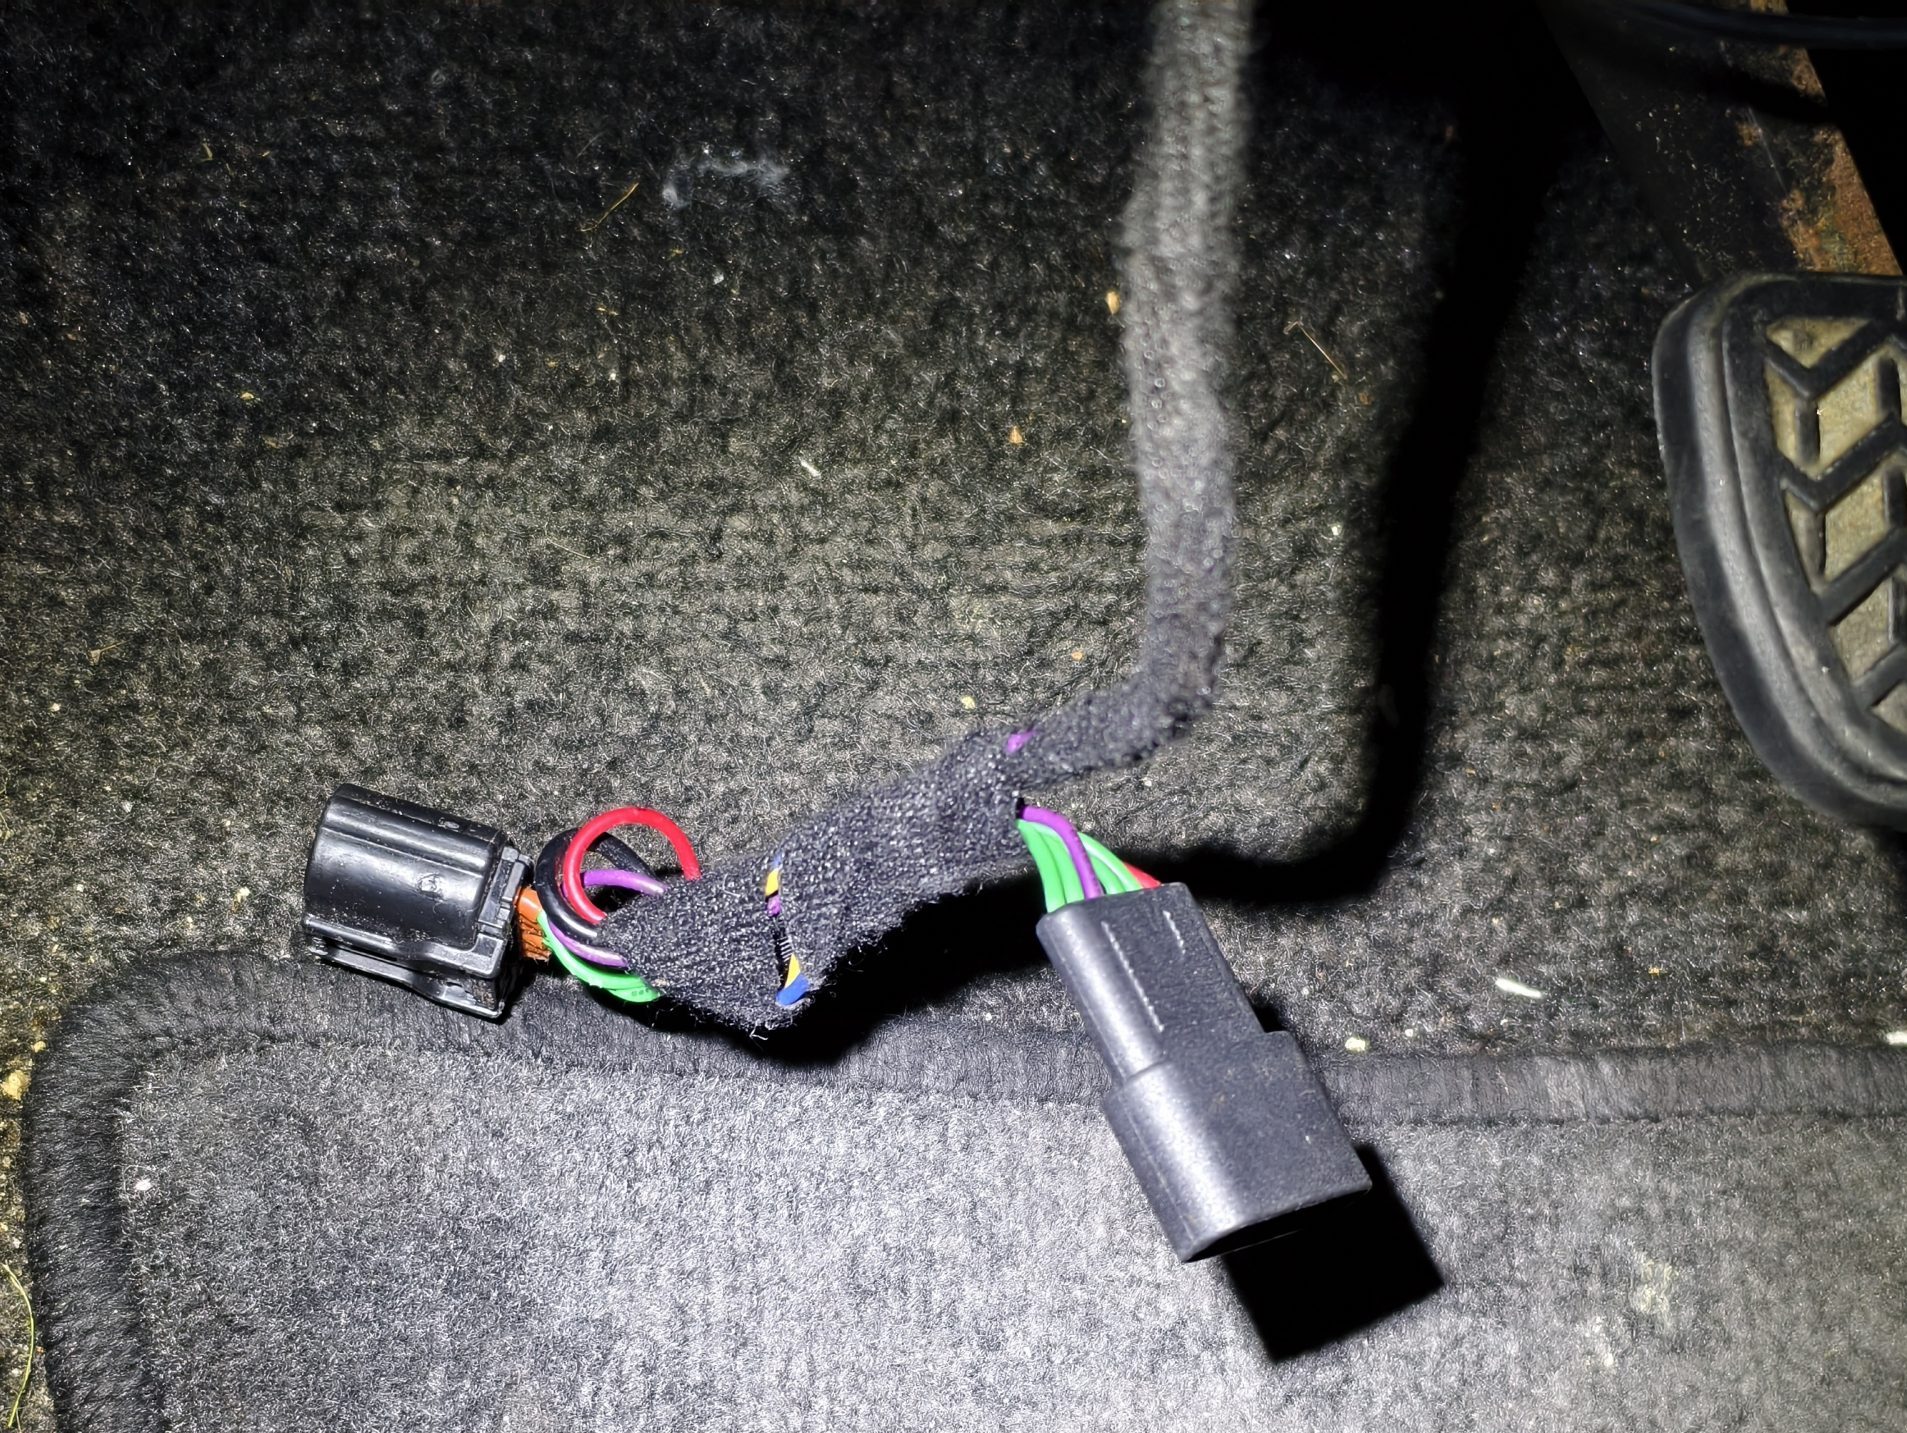
We wrapped up the day’s work by replacing the gas pedal, which took all of five minutes. I also studied the wiring diagram for the cruise control and, sure enough, I was right that a part of the unit is plug-and-play with the gas pedal. When I disconnected that part, it disabled the entire cruise control. The new pedal is in and is working great.
What was pretty cool is that it feels like the car is driving better than when we picked it up. It’s now scoring above 40 mpg at 60 mph, and is just as zippy as it should be. I’m not too surprised about this. I mean, the car had 67,000 miles on it when we picked it up, and the maintenance history wasn’t entirely clear on how the previous owner treated the car. Or, maybe it’s a placebo effect because the car’s been driving like crap for so long.
Better Than It Used To Be
Either way, the misfires are gone, the engine is no longer stalling, and the fuel economy is better than it was two years ago. So, I’m calling this one a solid victory. Also, I got to teach my wife how to do a project on her own car, and that always feels awesome. She got to feel the pride and gratification from fixing something, and got to save money doing it, too!

In total, we spent about $539. That’s $300 on the ignition coils, $207 for the gas pedal, and $32 on the spark plugs. That’s a lot of dough, but the dealer wanted $350 alone just to replace the gas pedal again and another $800 to do the spark plugs, so we saved big in doing it ourselves.
If you’ve ever been shocked by a dealership’s or mechanic’s quote, look into fixing your car yourself. You never know what you’re capable of doing. Just don’t be surprised if you own a modern car and find out that you have to go through a labyrinth to do a task that should be easy.
Top graphic images: Mercedes Streeter


“If you’ve ever been shocked by a dealership’s or mechanic’s quote, look into fixing your car yourself.”
That’s nice idea only if the manufacturers would not package the parts as one component as to force you to sell your first-born son just for one teeny-weeny part.
My brother was trying to fix the electric window winders in his wife’s 1993 Toyota Corolla. He was quoted $170 for the entire winder instead of one part (gear wheel). Stung by the ridiculous price, he improvised the repair by cutting and filing the plastic sheet into the new one (that was before the 3D printers), saving him $170.
Why he didn’t peruse the part-out junkyard, I don’t know…
I would tear the car down to its tires to find that socket, that shit drives me nuts.
So the 14mm socket got lost, but the 10mm is fine? Well that’s refreshingly different! 😀
I love reading articles like this; I wish I had this kind of confidence to tackle car repairs! Beyond headlights, air filters, and bits of interior work, I’m pretty sure I would just make things worse.