
Yesterday, I used what was likely one of the last warm days of the year to tackle all of the issues that stacked up in my wife’s 2012 Scion iQ. The little bugger was getting abysmal fuel economy, sometimes stalled out, and, on basically every other day, its gas pedal also had a knack for breaking, preventing the vehicle from moving anywhere. We fixed all of the issues, making the car drive better than it did when we picked it up. But getting to the finish line was ridiculous because Toyota gave this tiny car the dumbest possible route to get to the spark plugs.
Now, for various silly reasons having to deal with how a site like the Autopian works, “My” works better in a headline than “My Wife’s.” However, she chose the car herself and then bought it with her own money. The car is in our shared fleet, yes, but it’s mainly her ride. She also maintains her own car as a point of pride. However, I know more about wrenching than she does, so when it came to this project, I coached her on how to do everything. I spun very few wrenches this time around!
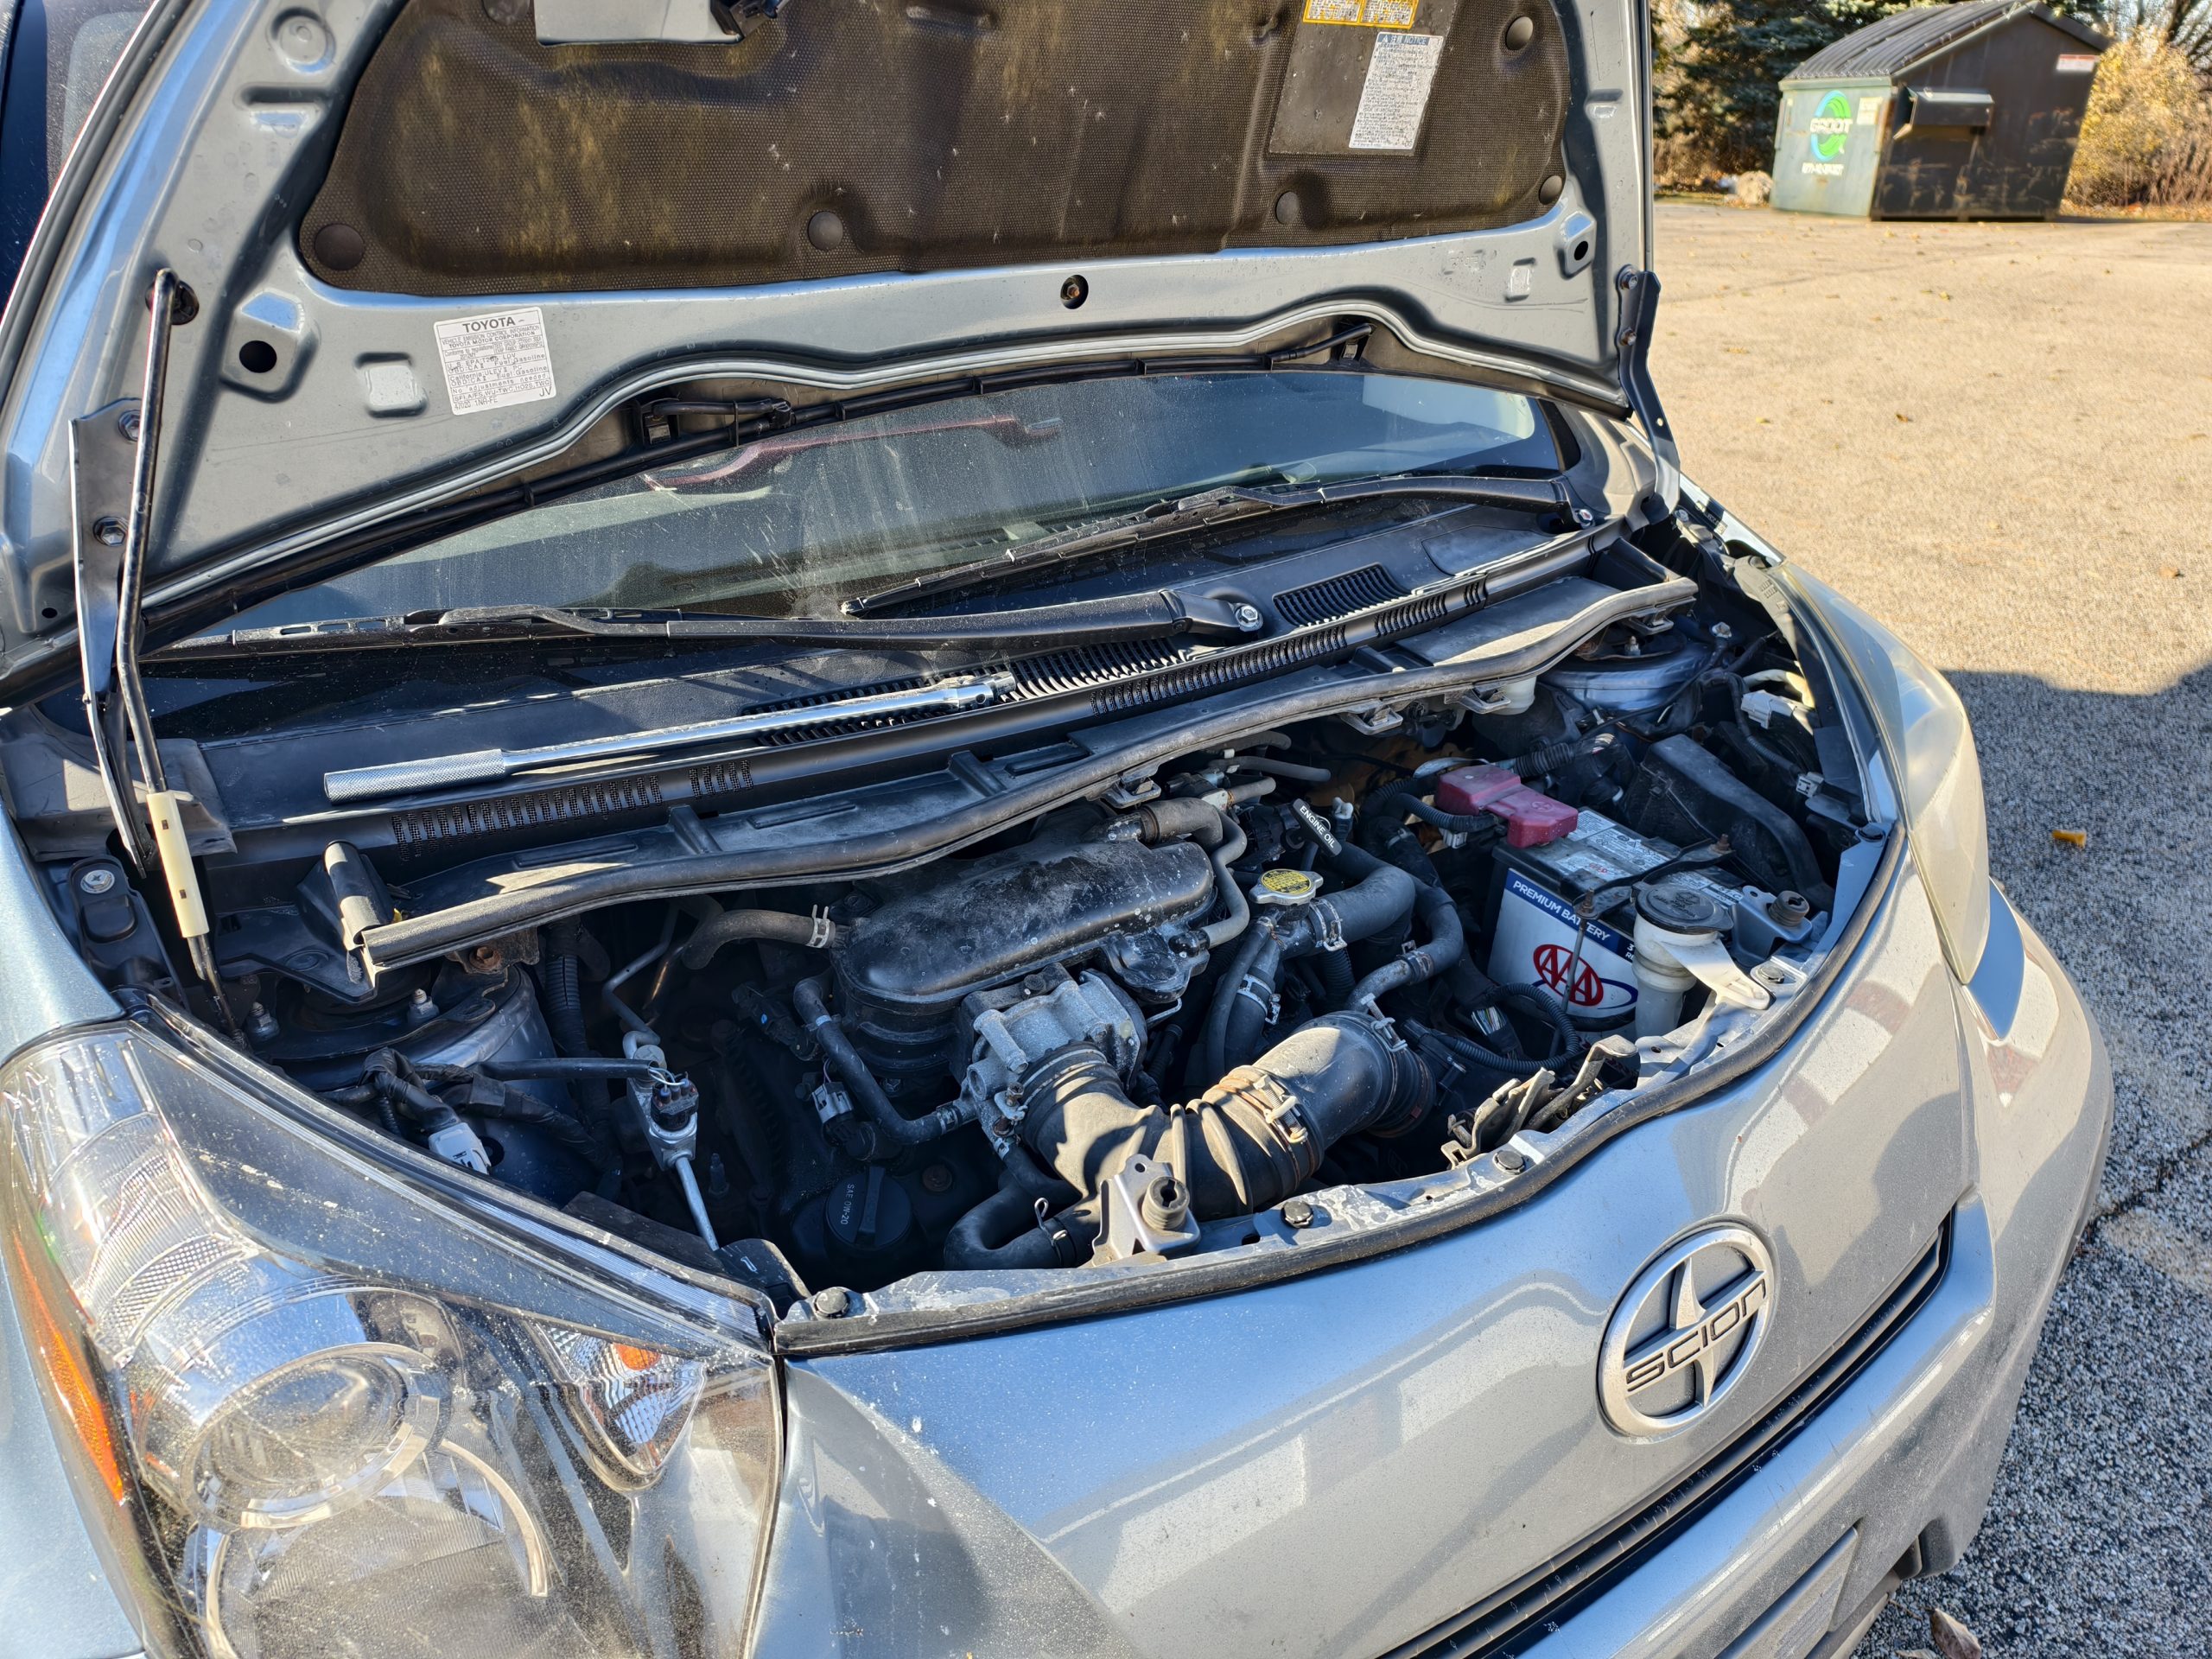
I’ve written about this car quite a lot by now, so if you want its full story, click here to start bringing you up to speed. Otherwise, I’ll keep it short. Sheryl picked up this 2012 Scion iQ in December 2023 with 67,000 miles. Her idea was to get something that was as cute as a Smart, but as reliable as a Toyota. Thus far, the car has largely lived up to that promise. We’re just about to hit the two-year mark with this car, and it’s going to cross 60,000 miles in her care. That’s 30,000 miles a year for those of you counting. Thankfully, she is driving fewer miles than she used to. Her previous cars sometimes got as many as 40,000 miles a year.

What Broke The First Time
The only modifications that Sheryl has done to this car are an Android Auto and Apple CarPlay stereo, a center console, wheels from a Scion iA, and an aftermarket cruise control. The stereo and the center console were great, but the cruise control was not.
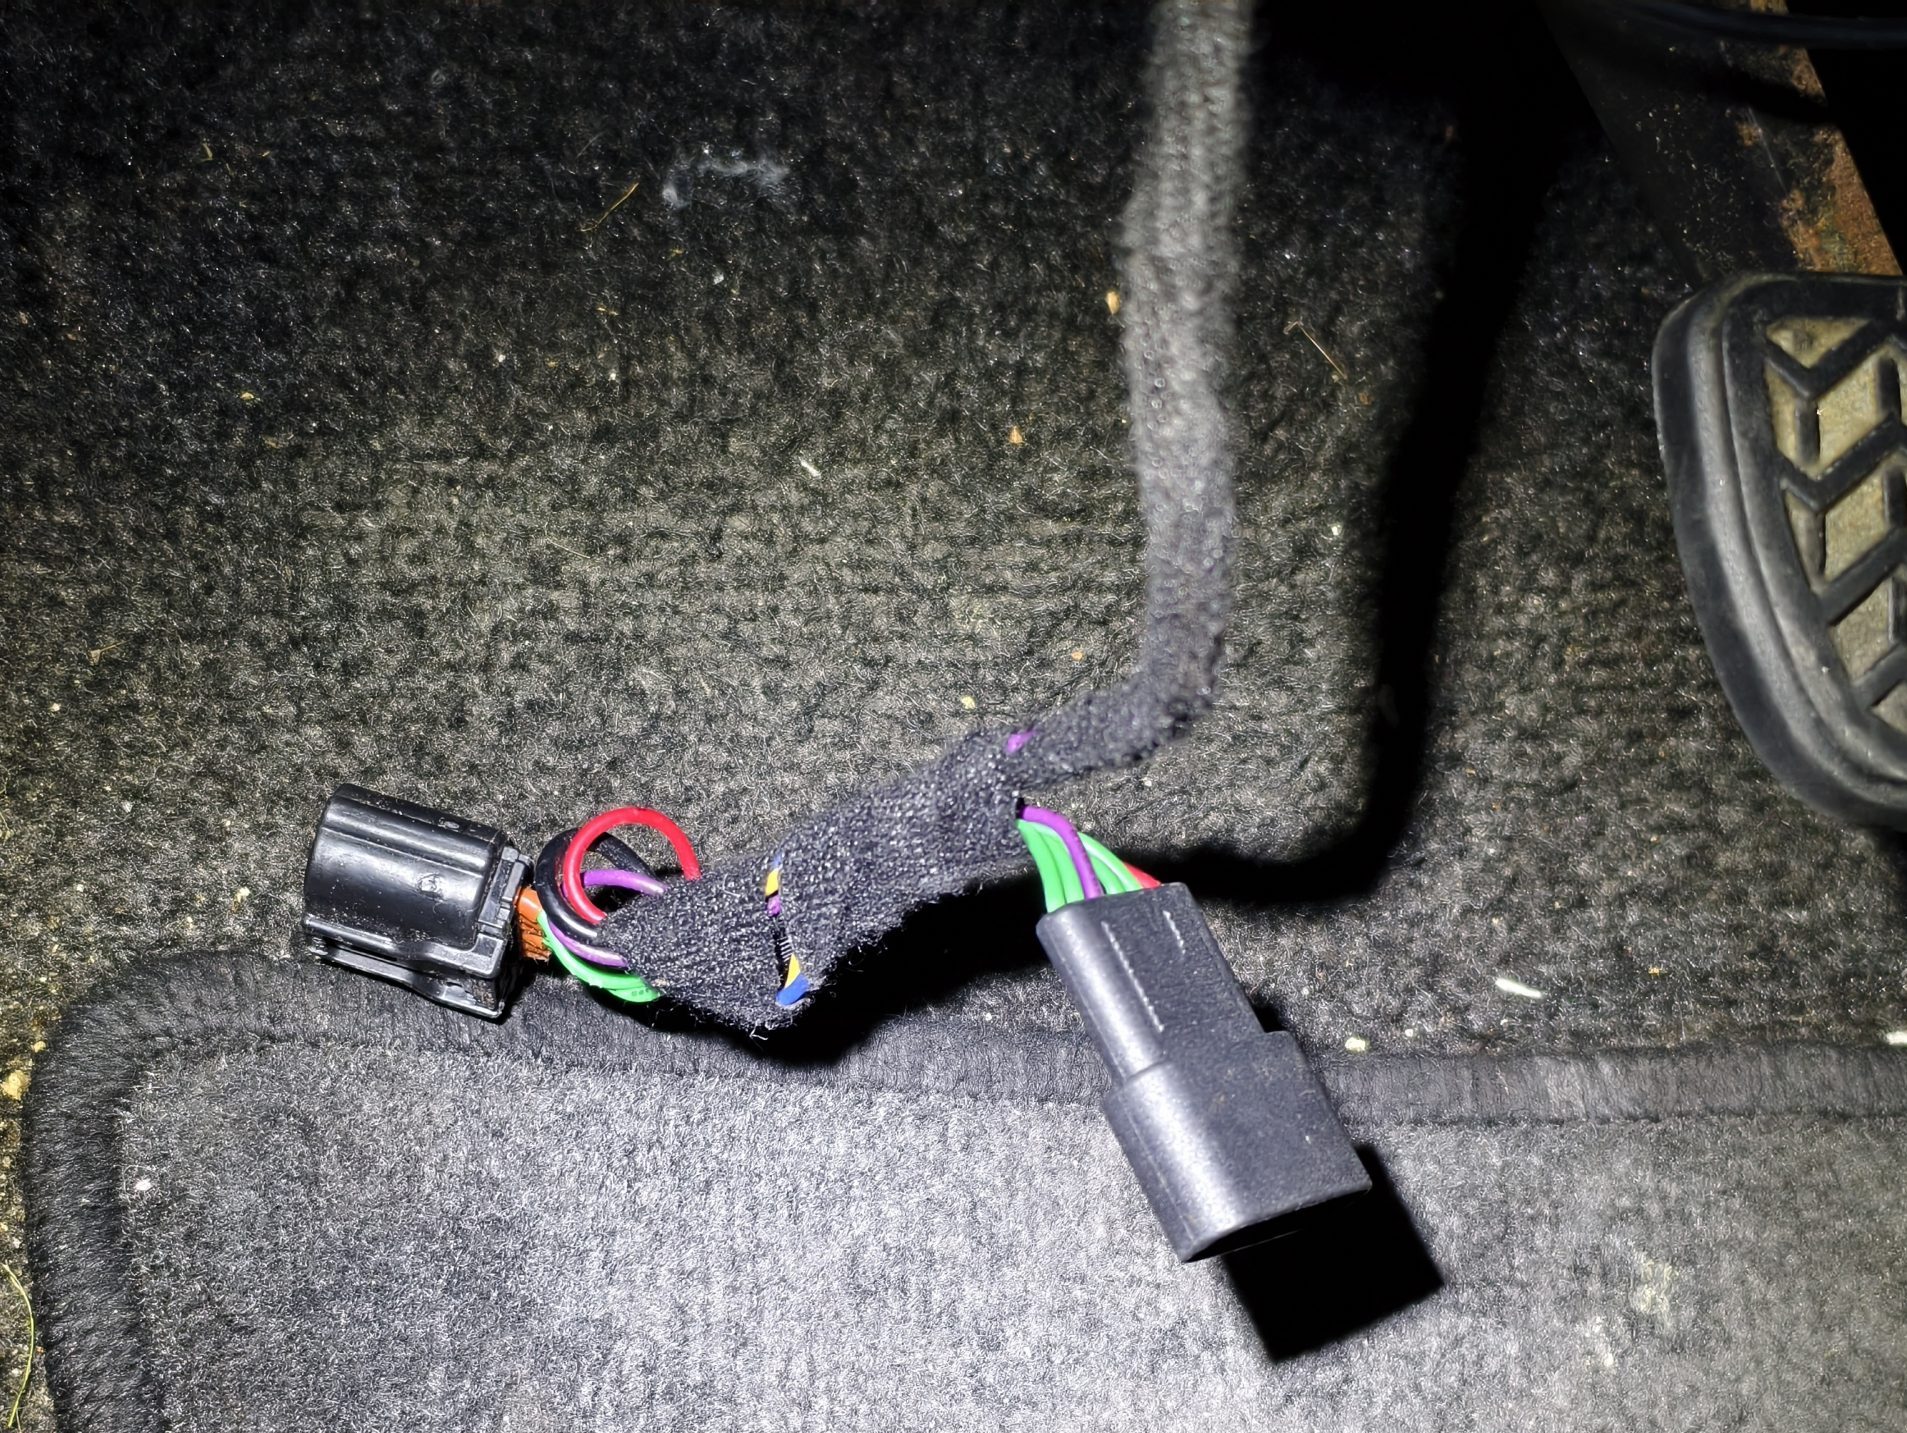
The cruise control worked flawlessly until nearly a year after our local Toyota dealer installed it. Then, out of nowhere, the accelerator pedal — which is drive by wire — stopped working intermittently. The symptoms would be that Sheryl or I would mash the gas pedal, but absolutely nothing happened. The car would sit completely still. Alternatively, the engine would rev to redline, but the car would move only 10 mph. Finally, one more failure mode was just that the car went into limp mode.

The accelerator pedal failure was accompanied by a P2122 error code, plus the activation of the Maintenance Required light plus the Traction Control Off light.
Diagnosis at our local Toyota dealer revealed that the aftermarket cruise control unit had failed. You’d think that this shouldn’t matter for the gas pedal, but the twist is that the cruise control ties into the pedal’s wiring to do its job. It was the dealer’s diagnosis that the faulty cruise sent bad signals to the digital pedal, ultimately killing it.

So, the dealer replaced the cruise and the pedal. We were extremely disappointed when, 10 months later, or around October, the brand-new pedal began dying just like the last one. This time, thankfully, the failure mode did not include revving to the moon. But the car would just stop responding to throttle input at completely random times, even at highway speed.
Wrenching Day
This time, we decided to uninstall the cruise control entirely. Clearly, either this car shouldn’t have cruise control, or the quality control for these aftermarket cruise units is abysmal. Either way, it has to go. The car was perfectly reliable until this bad modification.

By this time, the car had gathered 123,000 miles, and some other issues had also reared their ugly heads. For one, there have been times when the car got a frankly pathetic 23 mpg. Also, the car had a knack for gently misfiring. On top of this, there have been many times when the engine would just stumble and shut off while idling at a red light. Also, you could hit the gas at a green light, and the engine would rev a little, stall out, and shut down.
My diagnosis pointed towards the spark plugs, which, based on the records I had access to, were original to the car. At 123,000 miles, it was time for them to go. I also decided to replace the ignition coils, too, and you’ll see why in a moment.

Yesterday, Sheryl and I finally got the time to tackle this project. Between October and today, she put 3,000 more miles on the car. Wowie, that’s a lot of driving.
Now, replacing a gas pedal and some spark plugs normally wouldn’t be much of a “project.” The gas pedal is held on with two bolts and can be removed and replaced in an honest 5 minutes. Also, when was the last time you took longer than maybe 30 minutes to remove and replace some spark plugs?

Unfortunately, Toyota engaged in some funky engineering in order to build the world’s smallest four-seat car. Unlike a Smart Fortwo, the Scion iQ – which was sold elsewhere as a Toyota iQ – doesn’t stuff its engine in the back where you would normally find the car’s trunk. That couldn’t happen here because that would mean that there would be an engine where the rear seats are. So, Toyota put the engine up front. However, because the iQ was designed to be almost as small as a Smart, Toyota had to reengineer much of the engine bay to get everything to fit into such a compact space. Here’s what I wrote in the past:
Toyota used some clever engineering to make a car about 10 feet long and 5.5 feet wide fit four people. The automaker says a lot of the tricks went into the vehicle. To maximize interior volume, Toyota punched the wheels out to as far near the edges as they could be. To facilitate this up front, the differential was moved forward of the engine, placing the centerline of the wheels slightly ahead of the engine.

Another space-saving development happened with the steering gear. In other Toyota small cars, tie rods connect to the ends of a conventional rack and pinion. In the iQ, the rods connect to the center of the steering gear. Toyota says this allows the steering rack to sit back near the firewall, reducing front overhang and saving space in the engine bay.
The engineering didn’t stop there. The iQ uses a flat fuel tank that resides under the floor, roughly in front of the rear seat and under the driver seat. Other space-saving measures included the aforementioned air-conditioner pack, which was reduced in size by 20 percent, that weird dash, which is slimmer on the passenger side for more legroom, and seats slimmed down to barely thicker than what you’d see on a bus so that rear passengers could have a place to put their knees. The glovebox was also deleted for even more room.
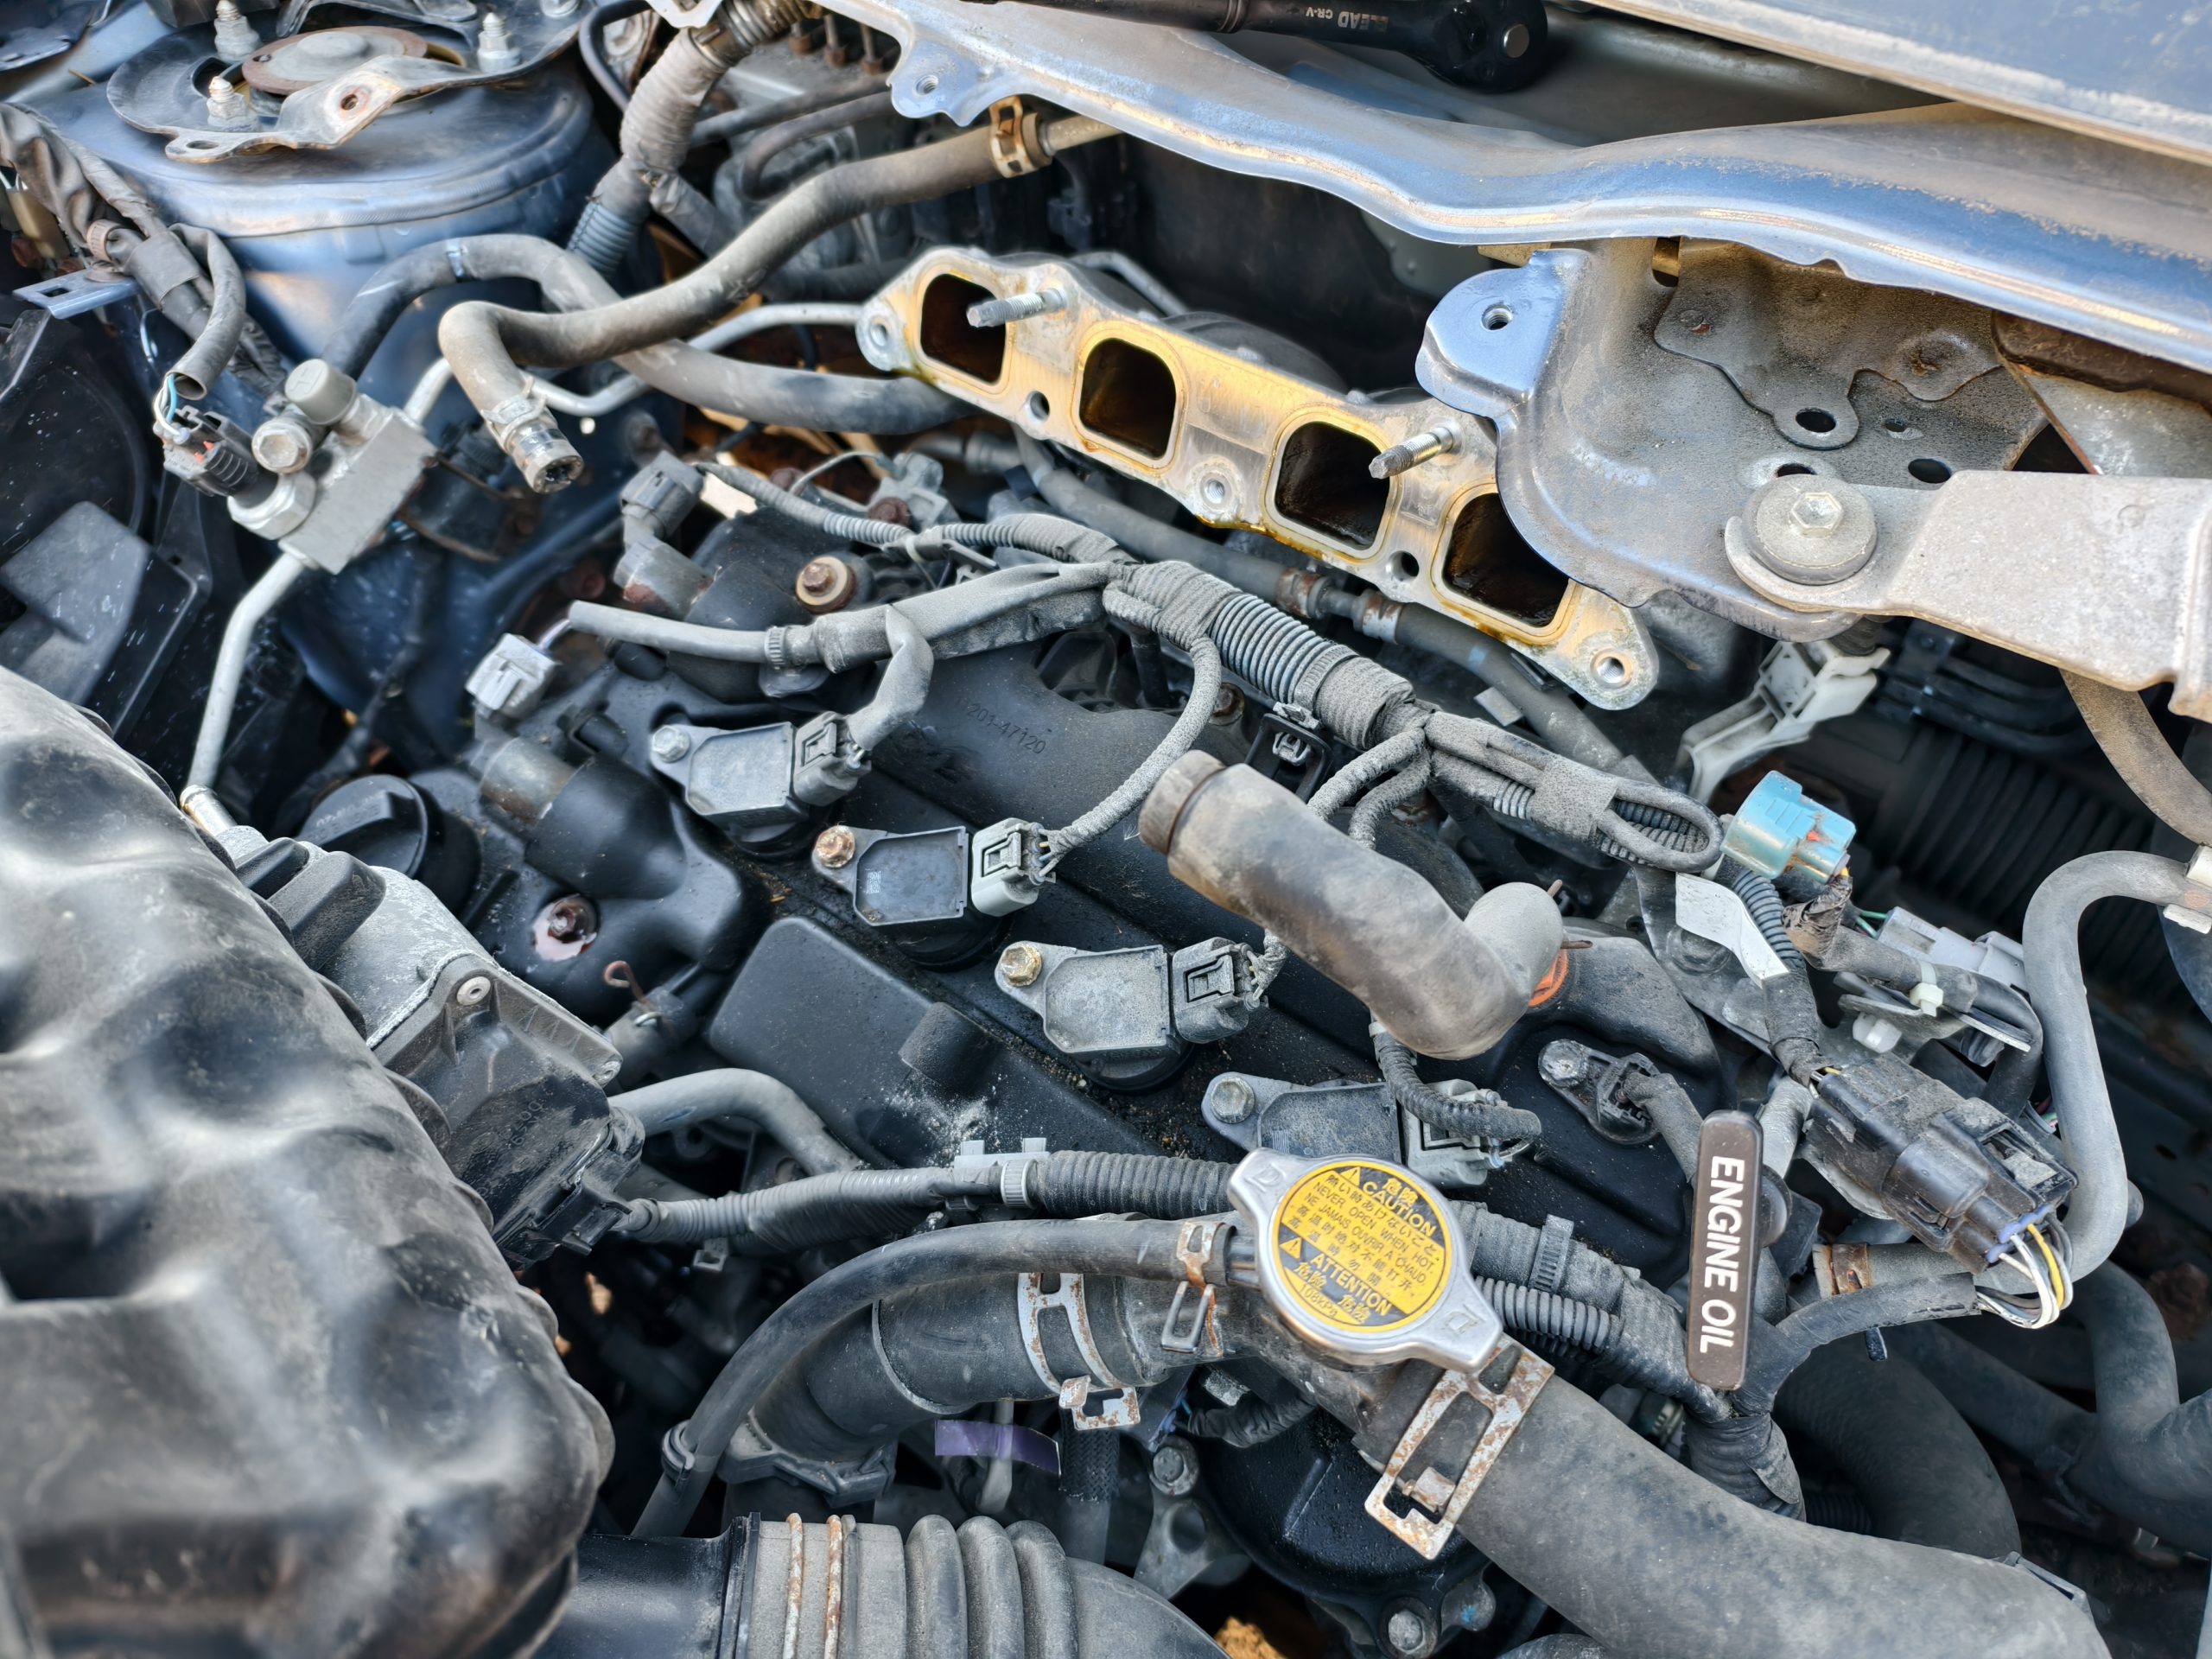
Unfortunately, this clever engineering means that not only do you not have much space to work on the iQ’s engine, but many of its components are stacked on top of each other. If you pop the hood on a typical car, the only thing blocking you from the spark plugs and coil packs might be an insulating engine cover. In an iQ? You have to take off the throttle body, airbox, and intake runners. This is non-negotiable, too, as the intake sits directly on top of the ignition coils.
Two Paths, Both Silly
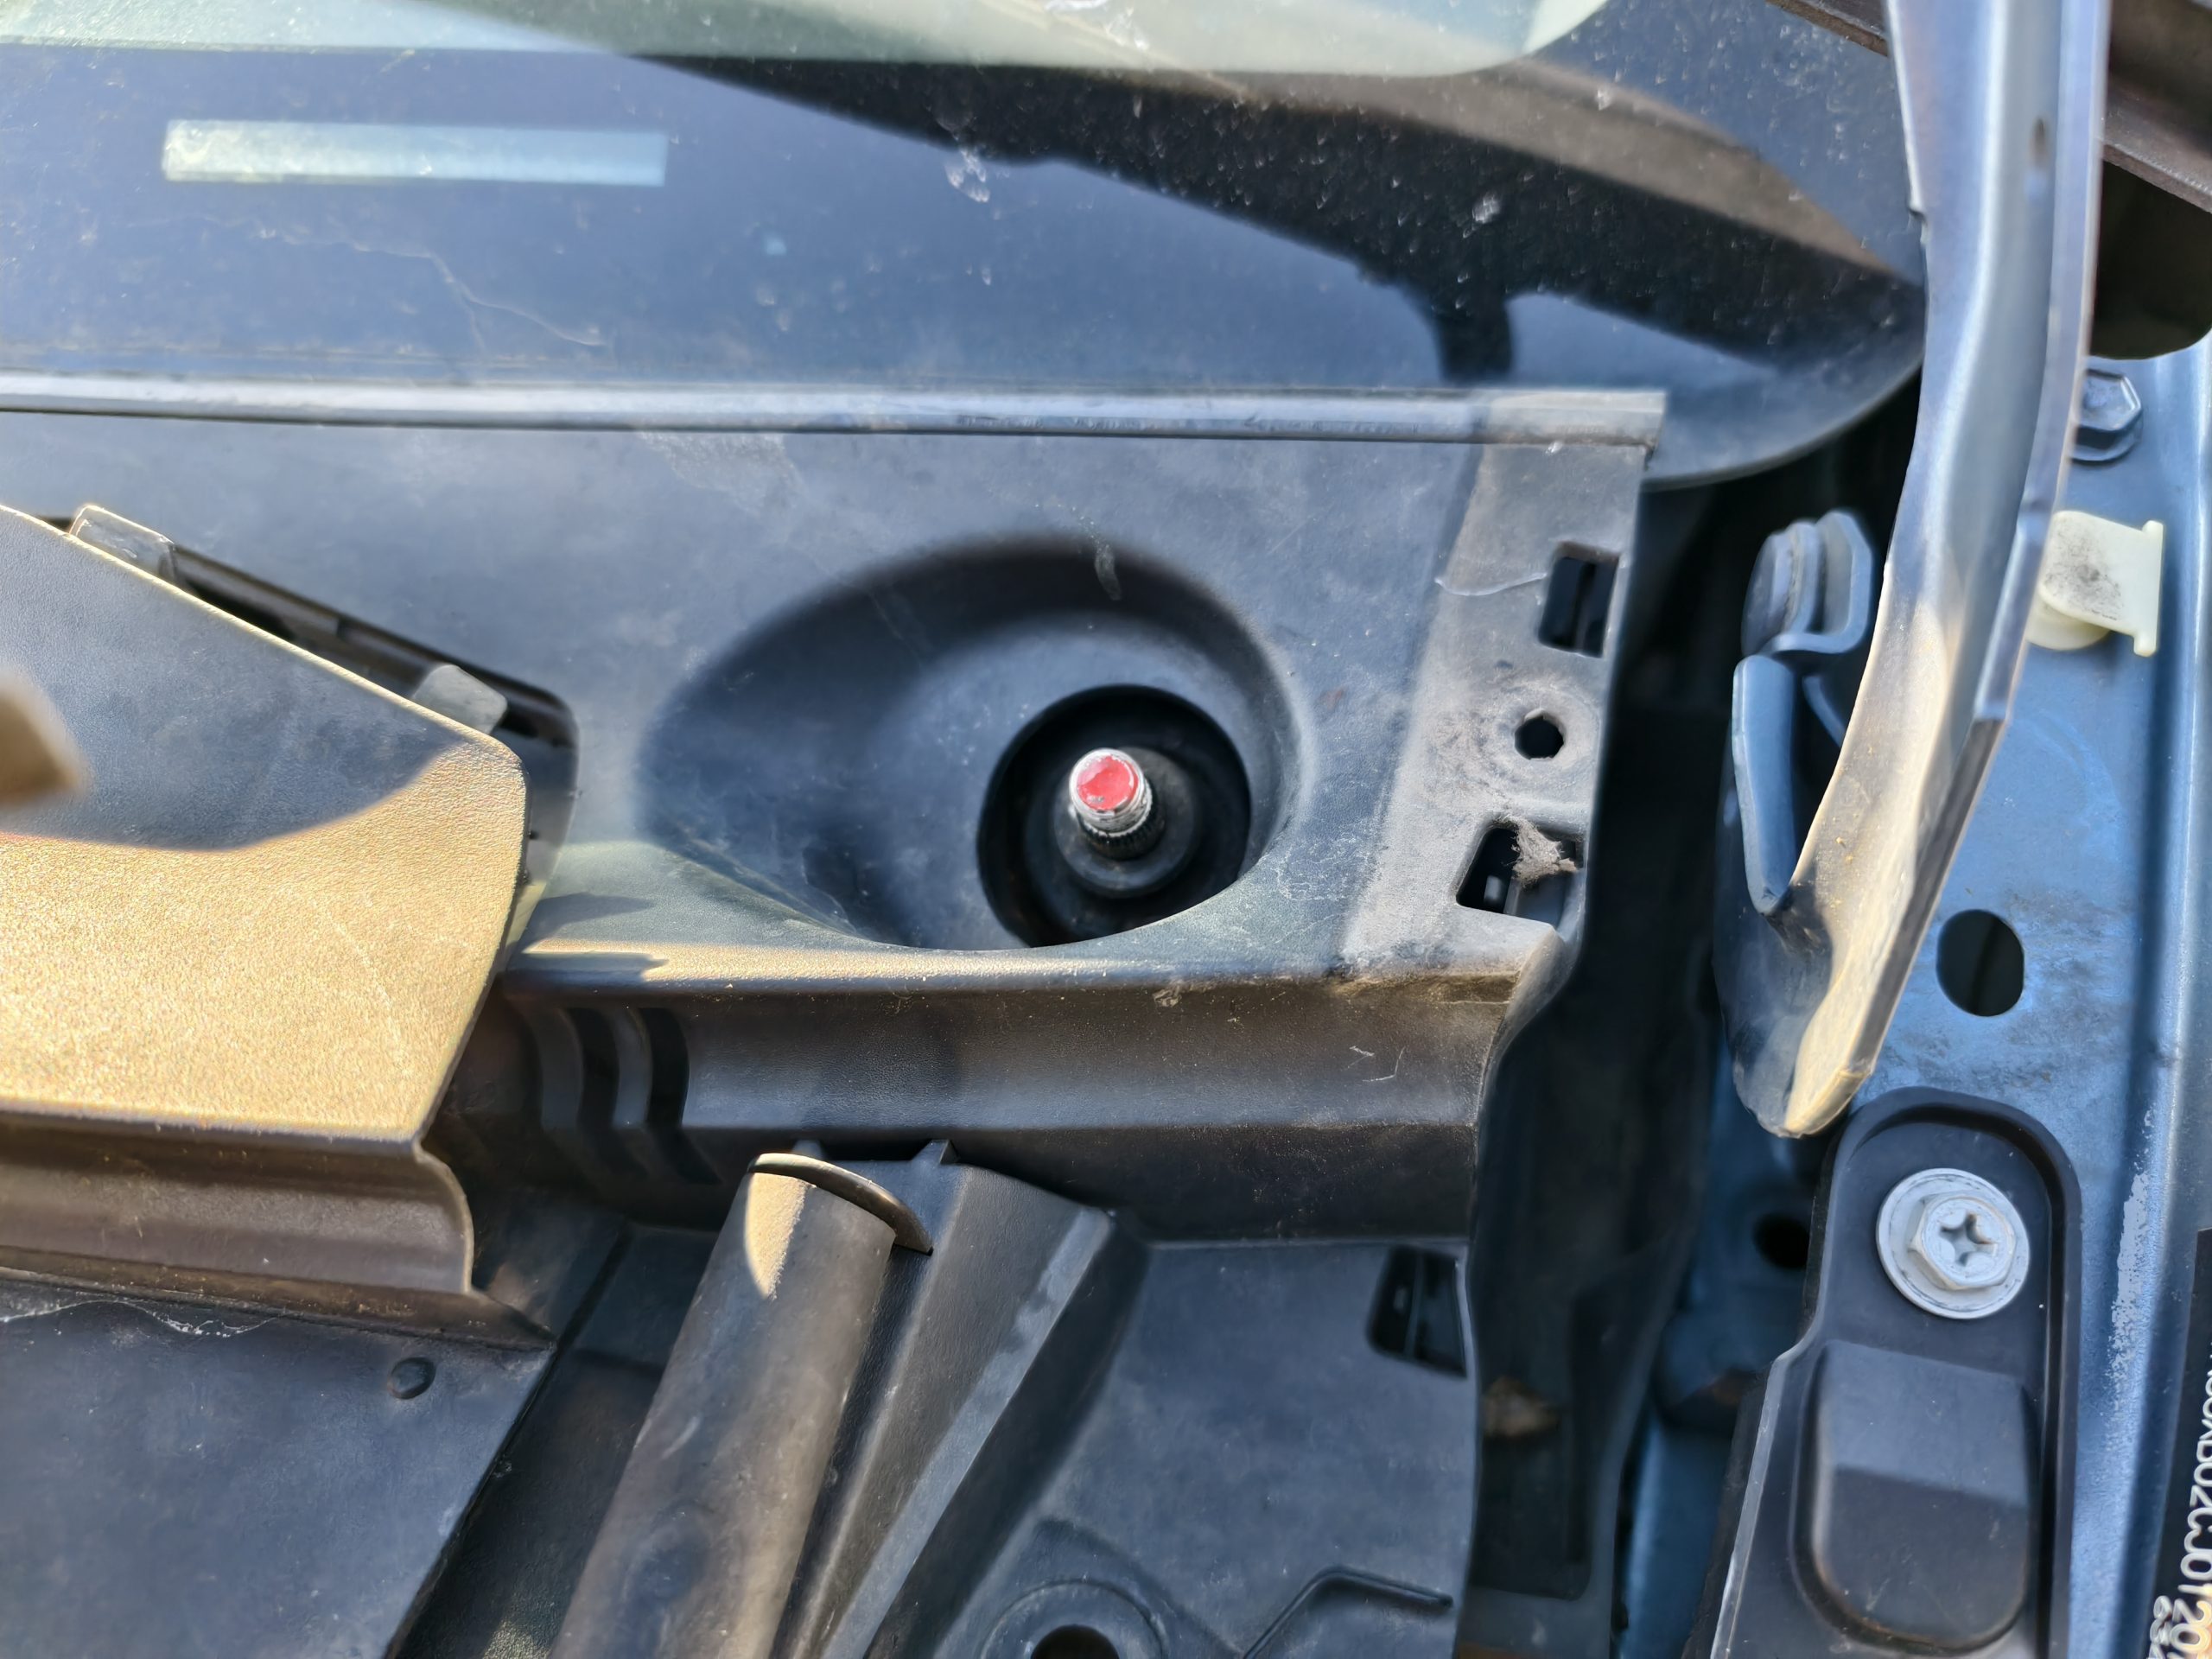
There are two methods for removing the intake from the engine. Since the engine bay is packed so tightly, you can’t just remove the intake. No, that would be too easy. The intake’s bolts are set about 10 inches or so under the header panel that your windshield wipers are attached to. Oh, and one of the bolts is between two of the intake runners, and you have about an inch or so of total space to fit a tool into it.
The “easy” method would be to attach a universal joint to the end of a 12-inch extension and then work on the intake’s bolts from a distance. Unfortunately for me, my universal joint was too thick to reach the bolt between the runners, so that method was out. Here’s a great video on the whole process:
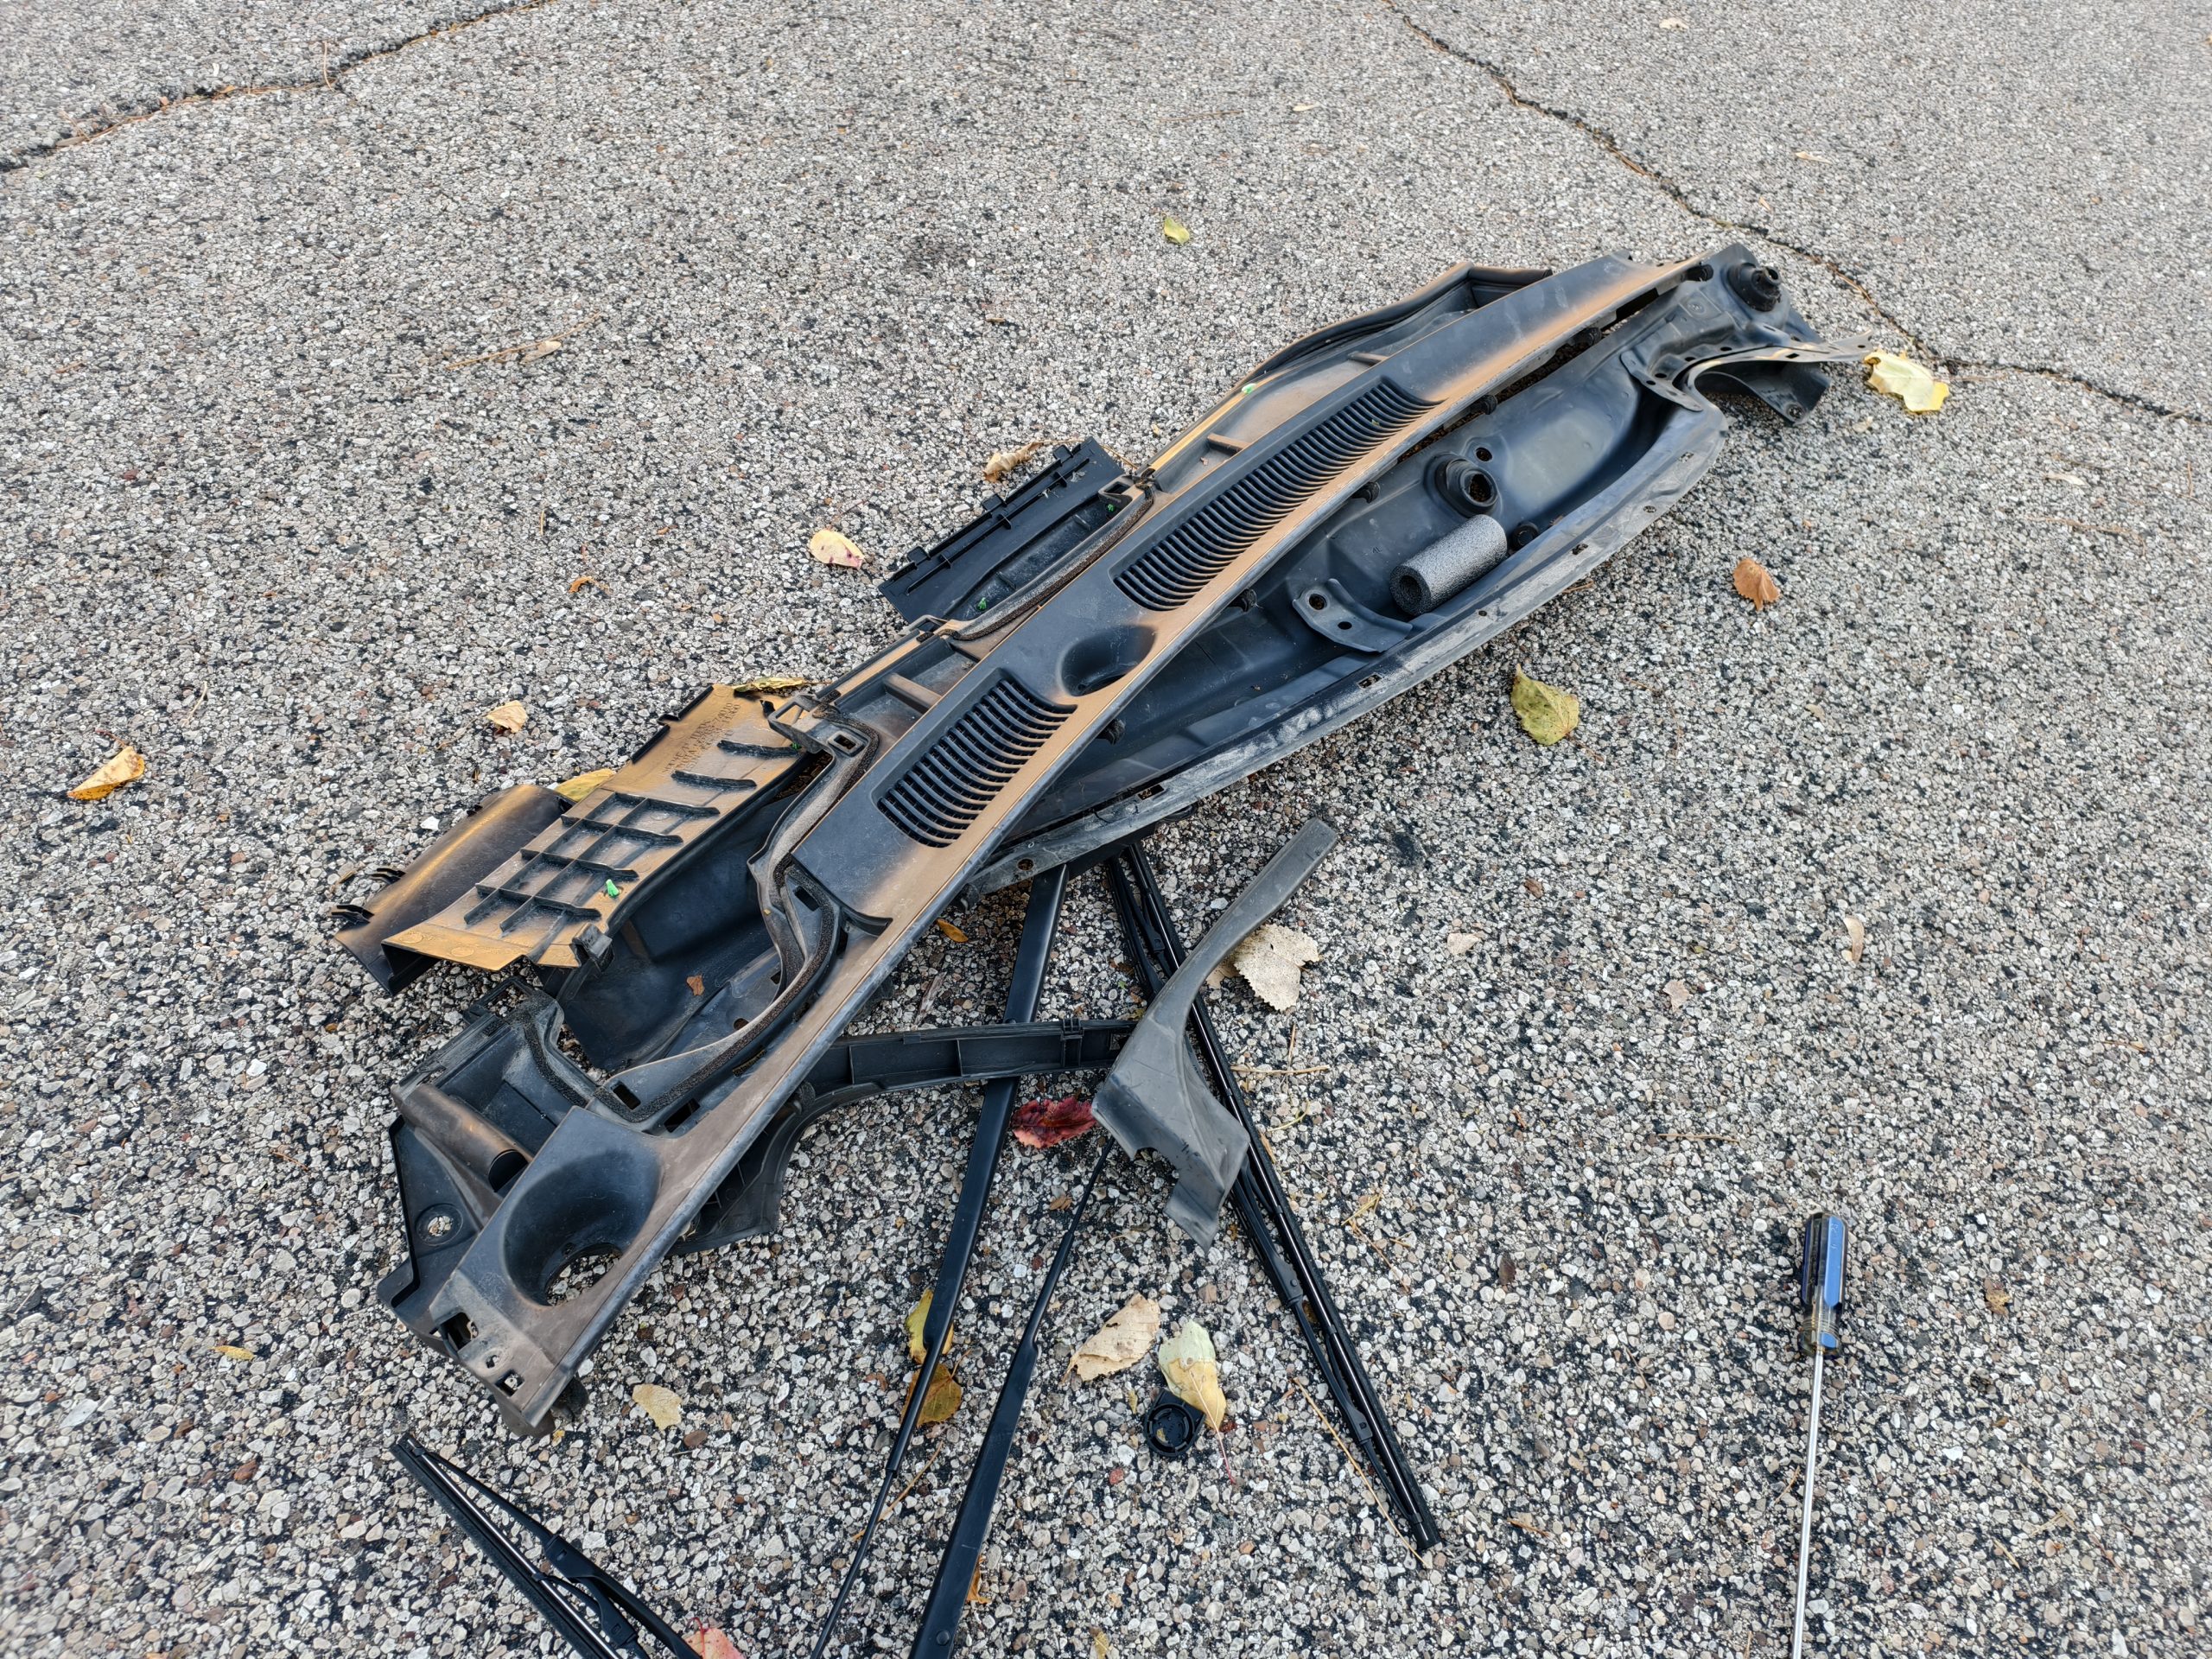
The long way around involves removing the windshield wipers, removing the plastic panel under the wipers, removing the metal header panel, and then finally starting on the intake. So, we did that. Or, specifically, I coached Sheryl on how to do it herself.
Removing the wipers was easy enough. They’re held in with two 14mm nuts. Sheryl removed those with ease, and then immediately lost my 14mm deep socket. We never saw it again.
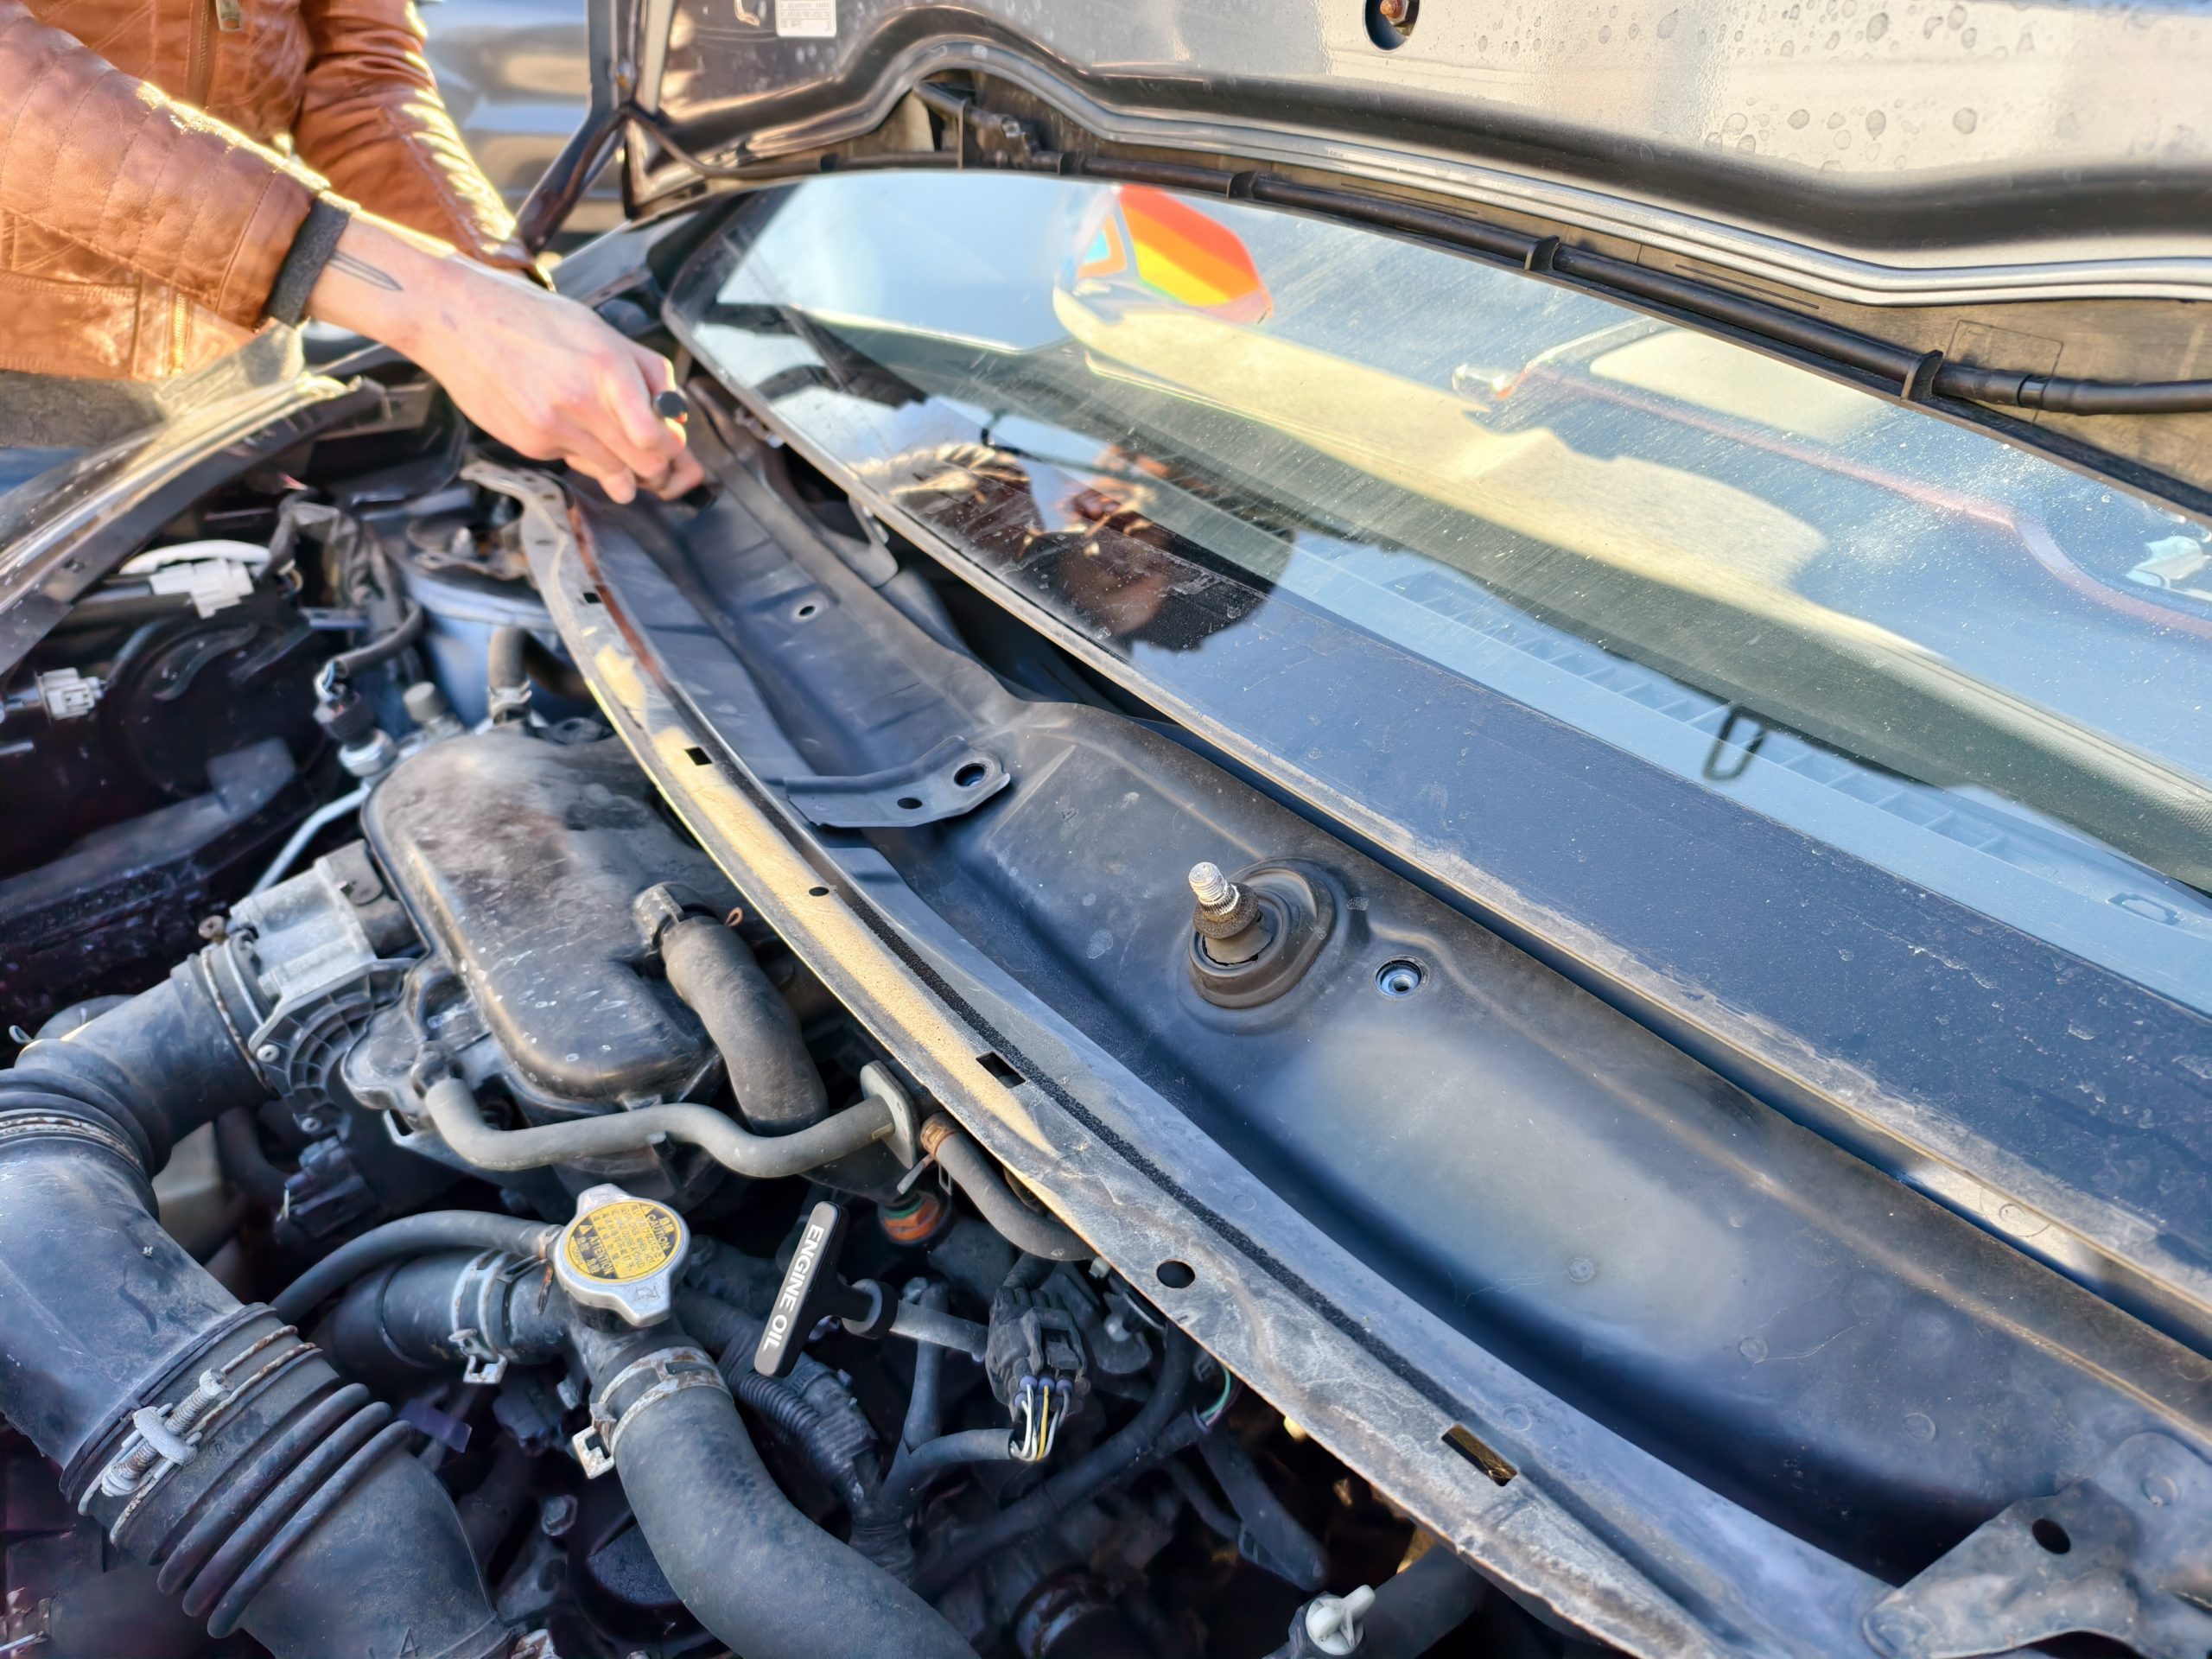
The plastic panel under the wipers was also easy to remove. It’s held in with plastic rivets, and after 13 years outside, they disintegrated the second we touched them.
Next came the metal panel, and this one was also easy to remove, as it consisted of a handful of easily accessible 10mm bolts.

Now, with the cowling deleted, the engine bay actually became surprisingly roomy. I was able to see just about everything in the engine bay, except for my missing socket.
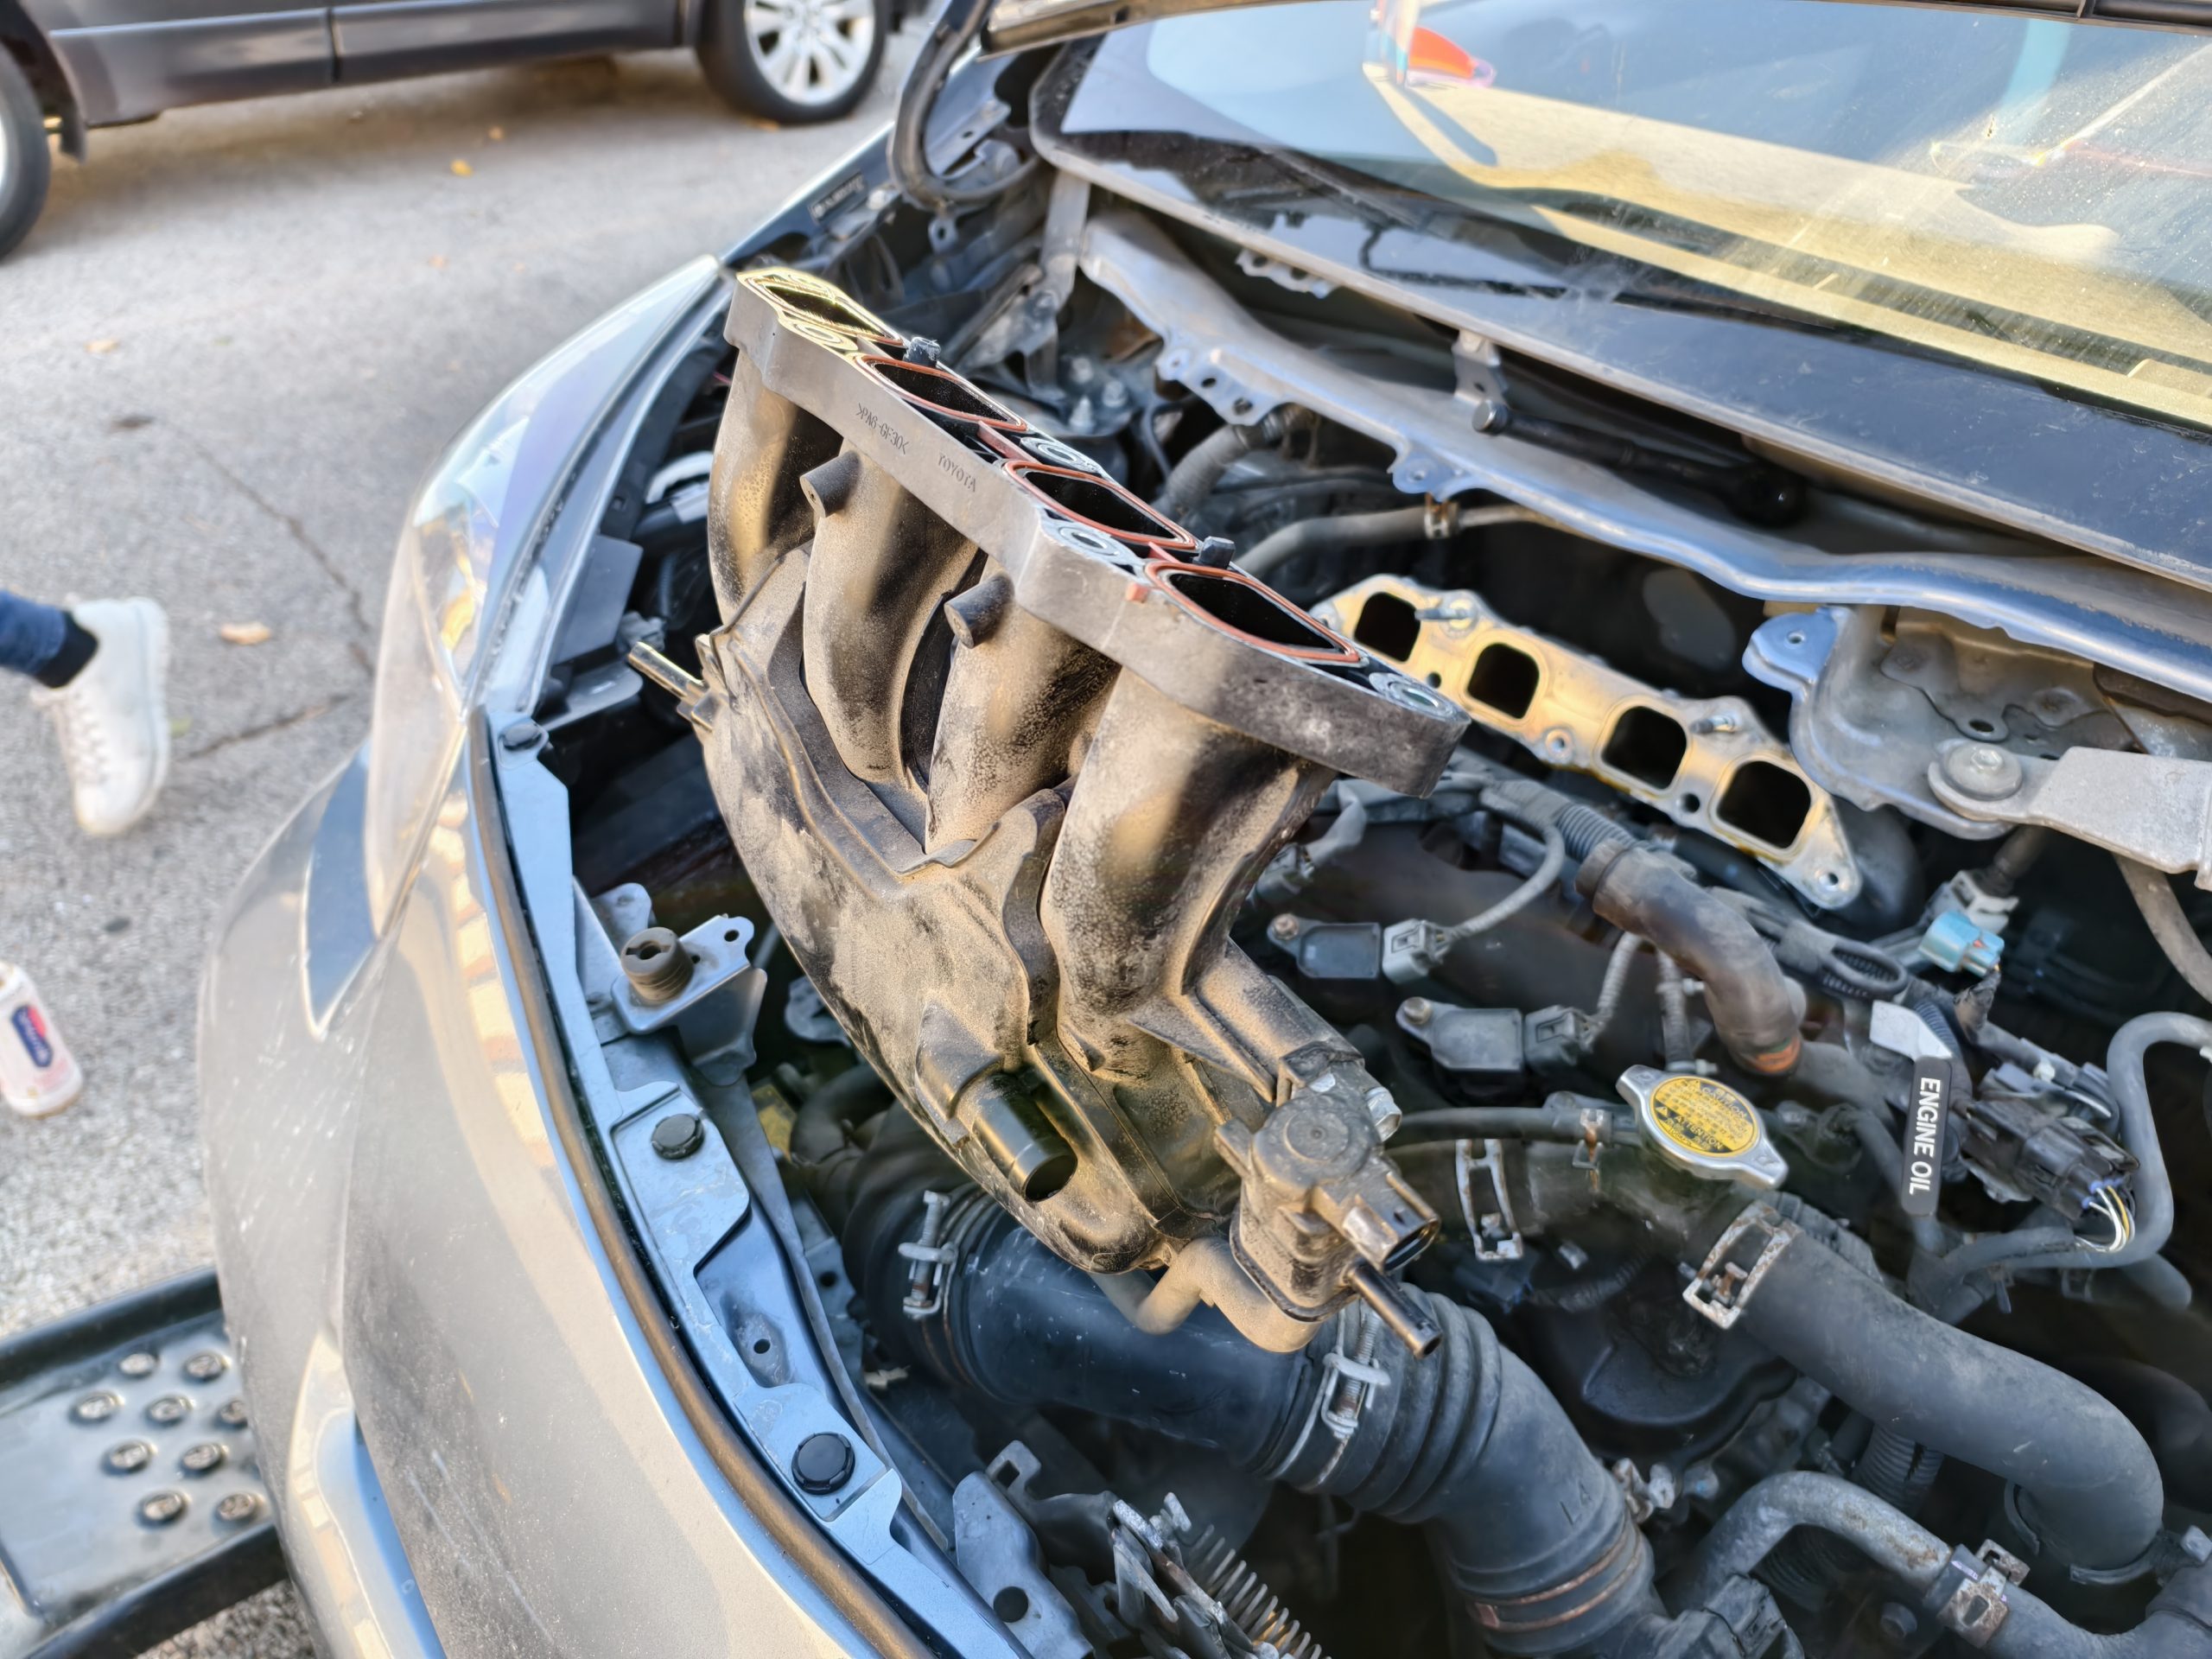
The intake is held on with two nuts and three bolts in the rear. These will be easy to get off with just a regular socket and an extension. That pesky center bolt had too little room to fit a socket, so we used a regular ol’ wrench to bust that one out. You’ll find a bracket at the front of the intake, which has two more easily accessible bolts.
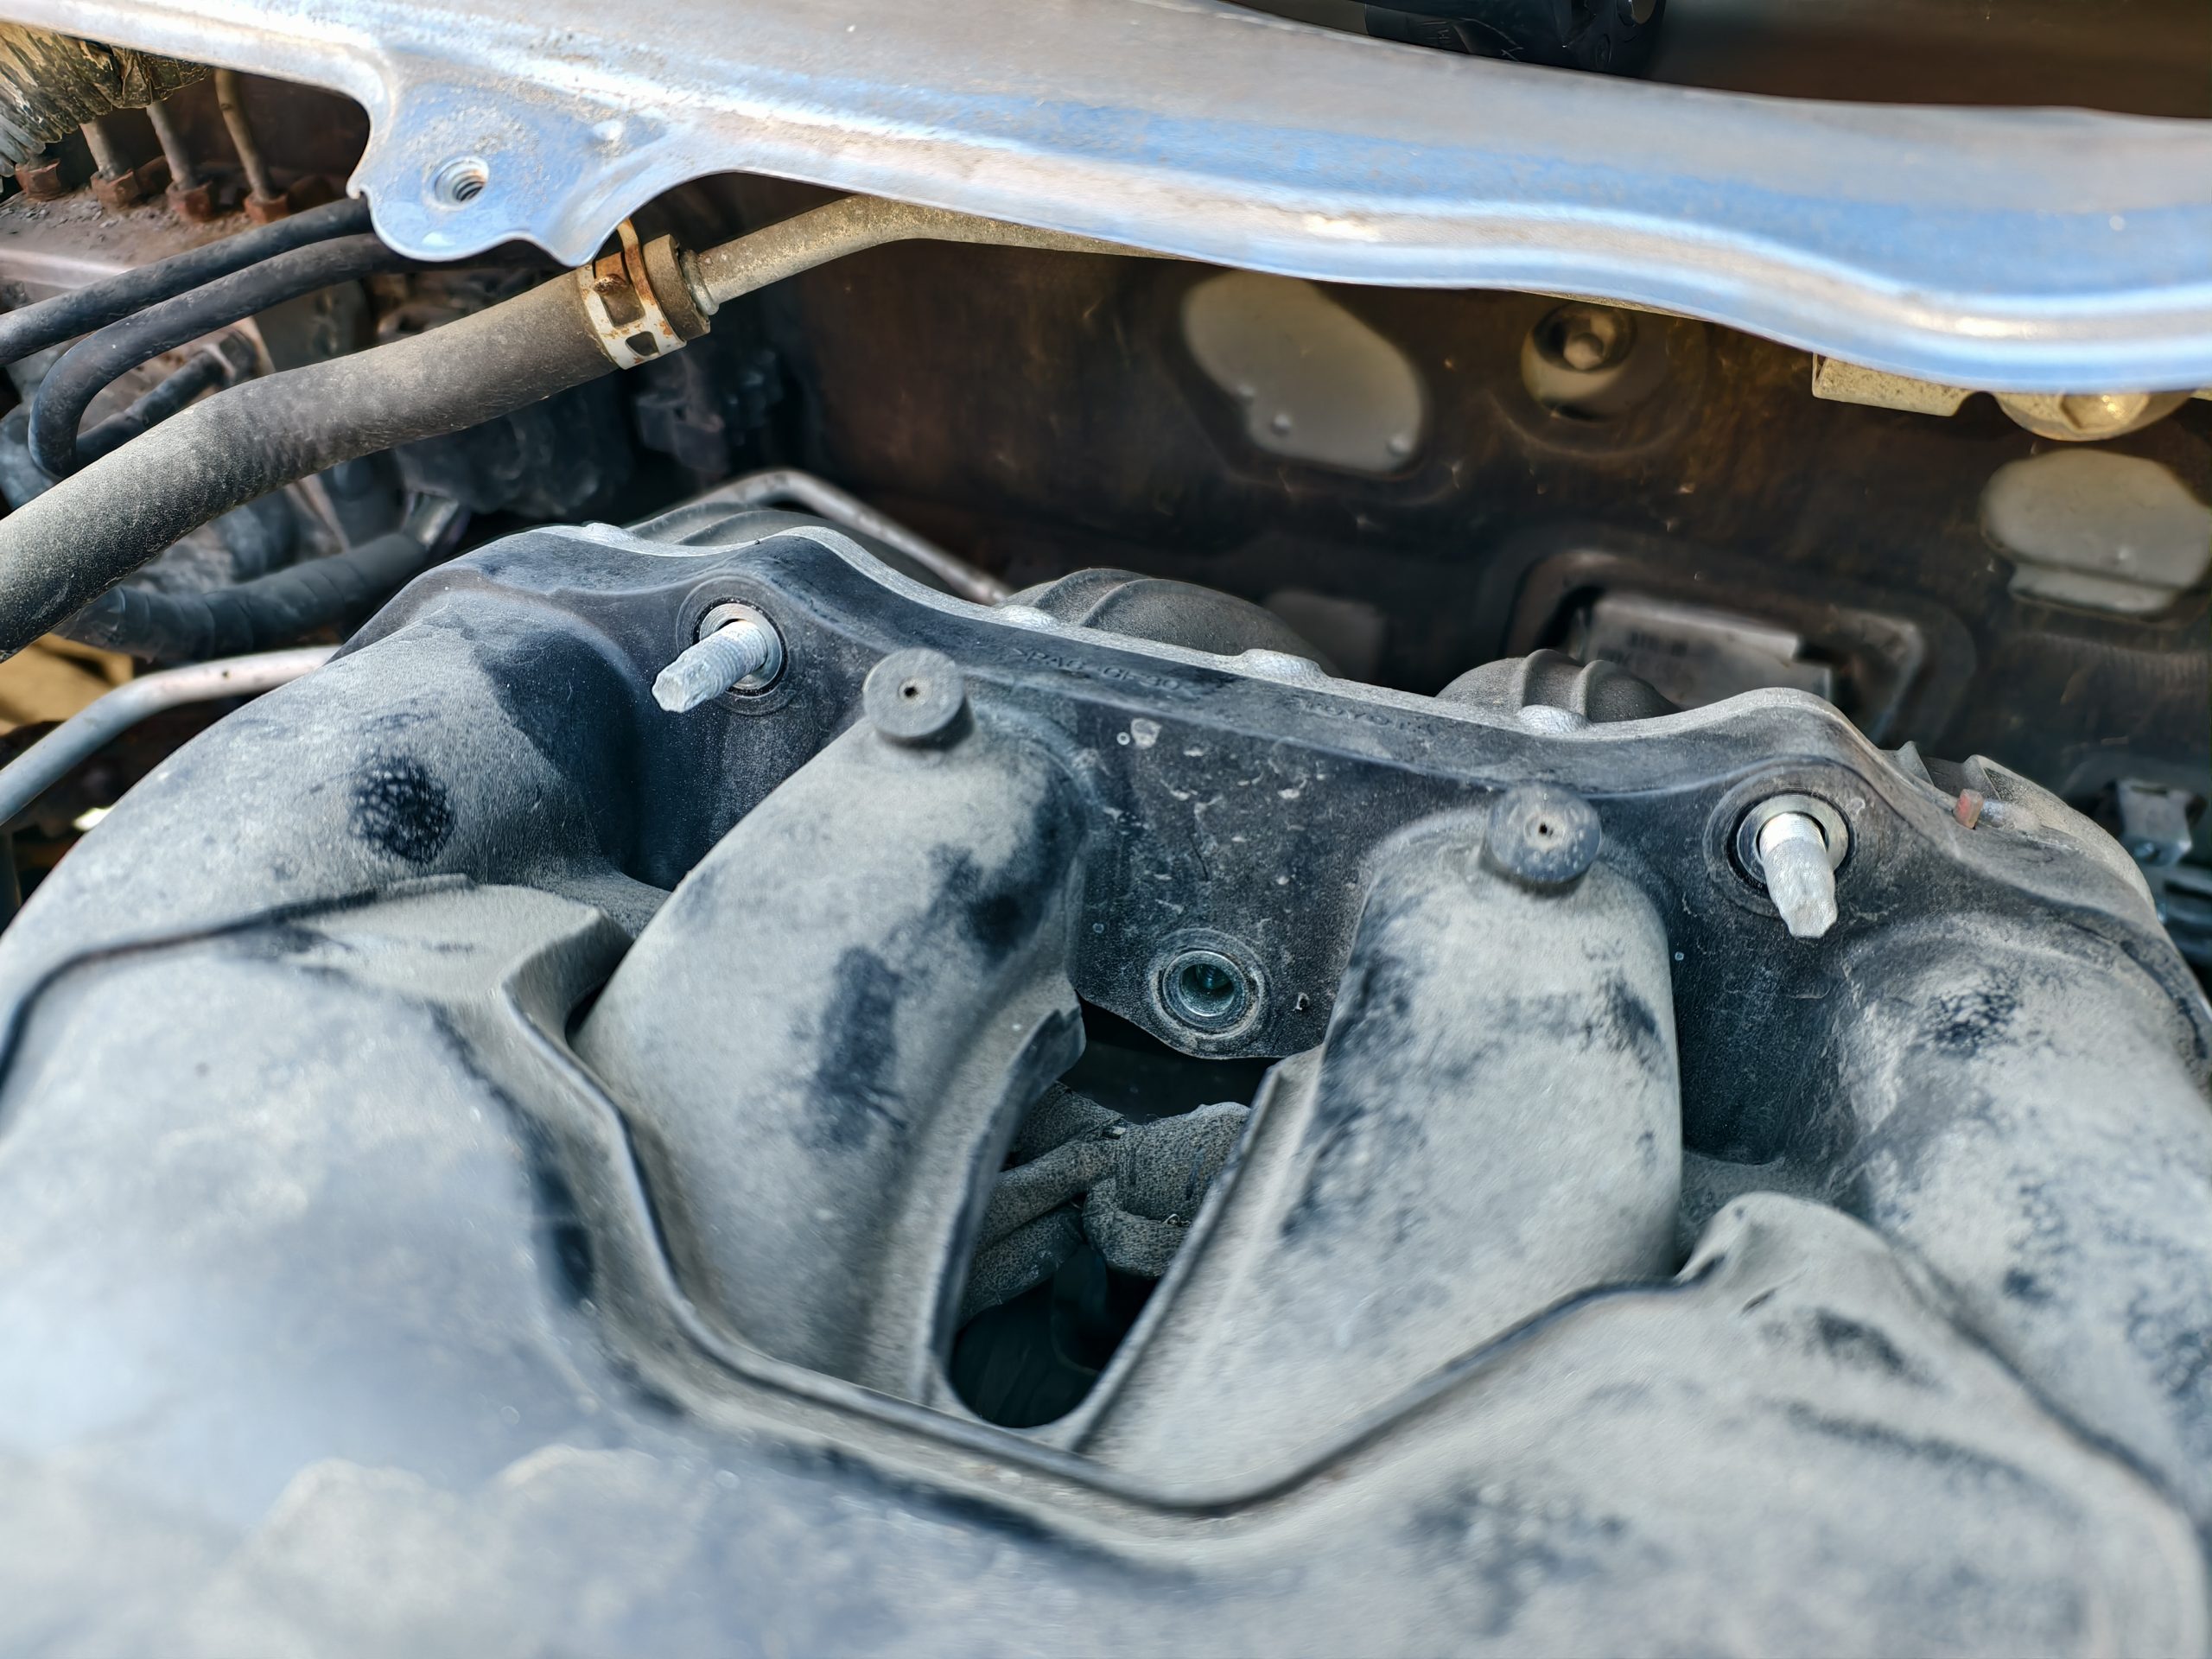
Once all of those bolts and nuts are zipped off, you’ll want to remove all short hoses and electrical connections to the intake. So, you’ll need pliers to work with the clips.
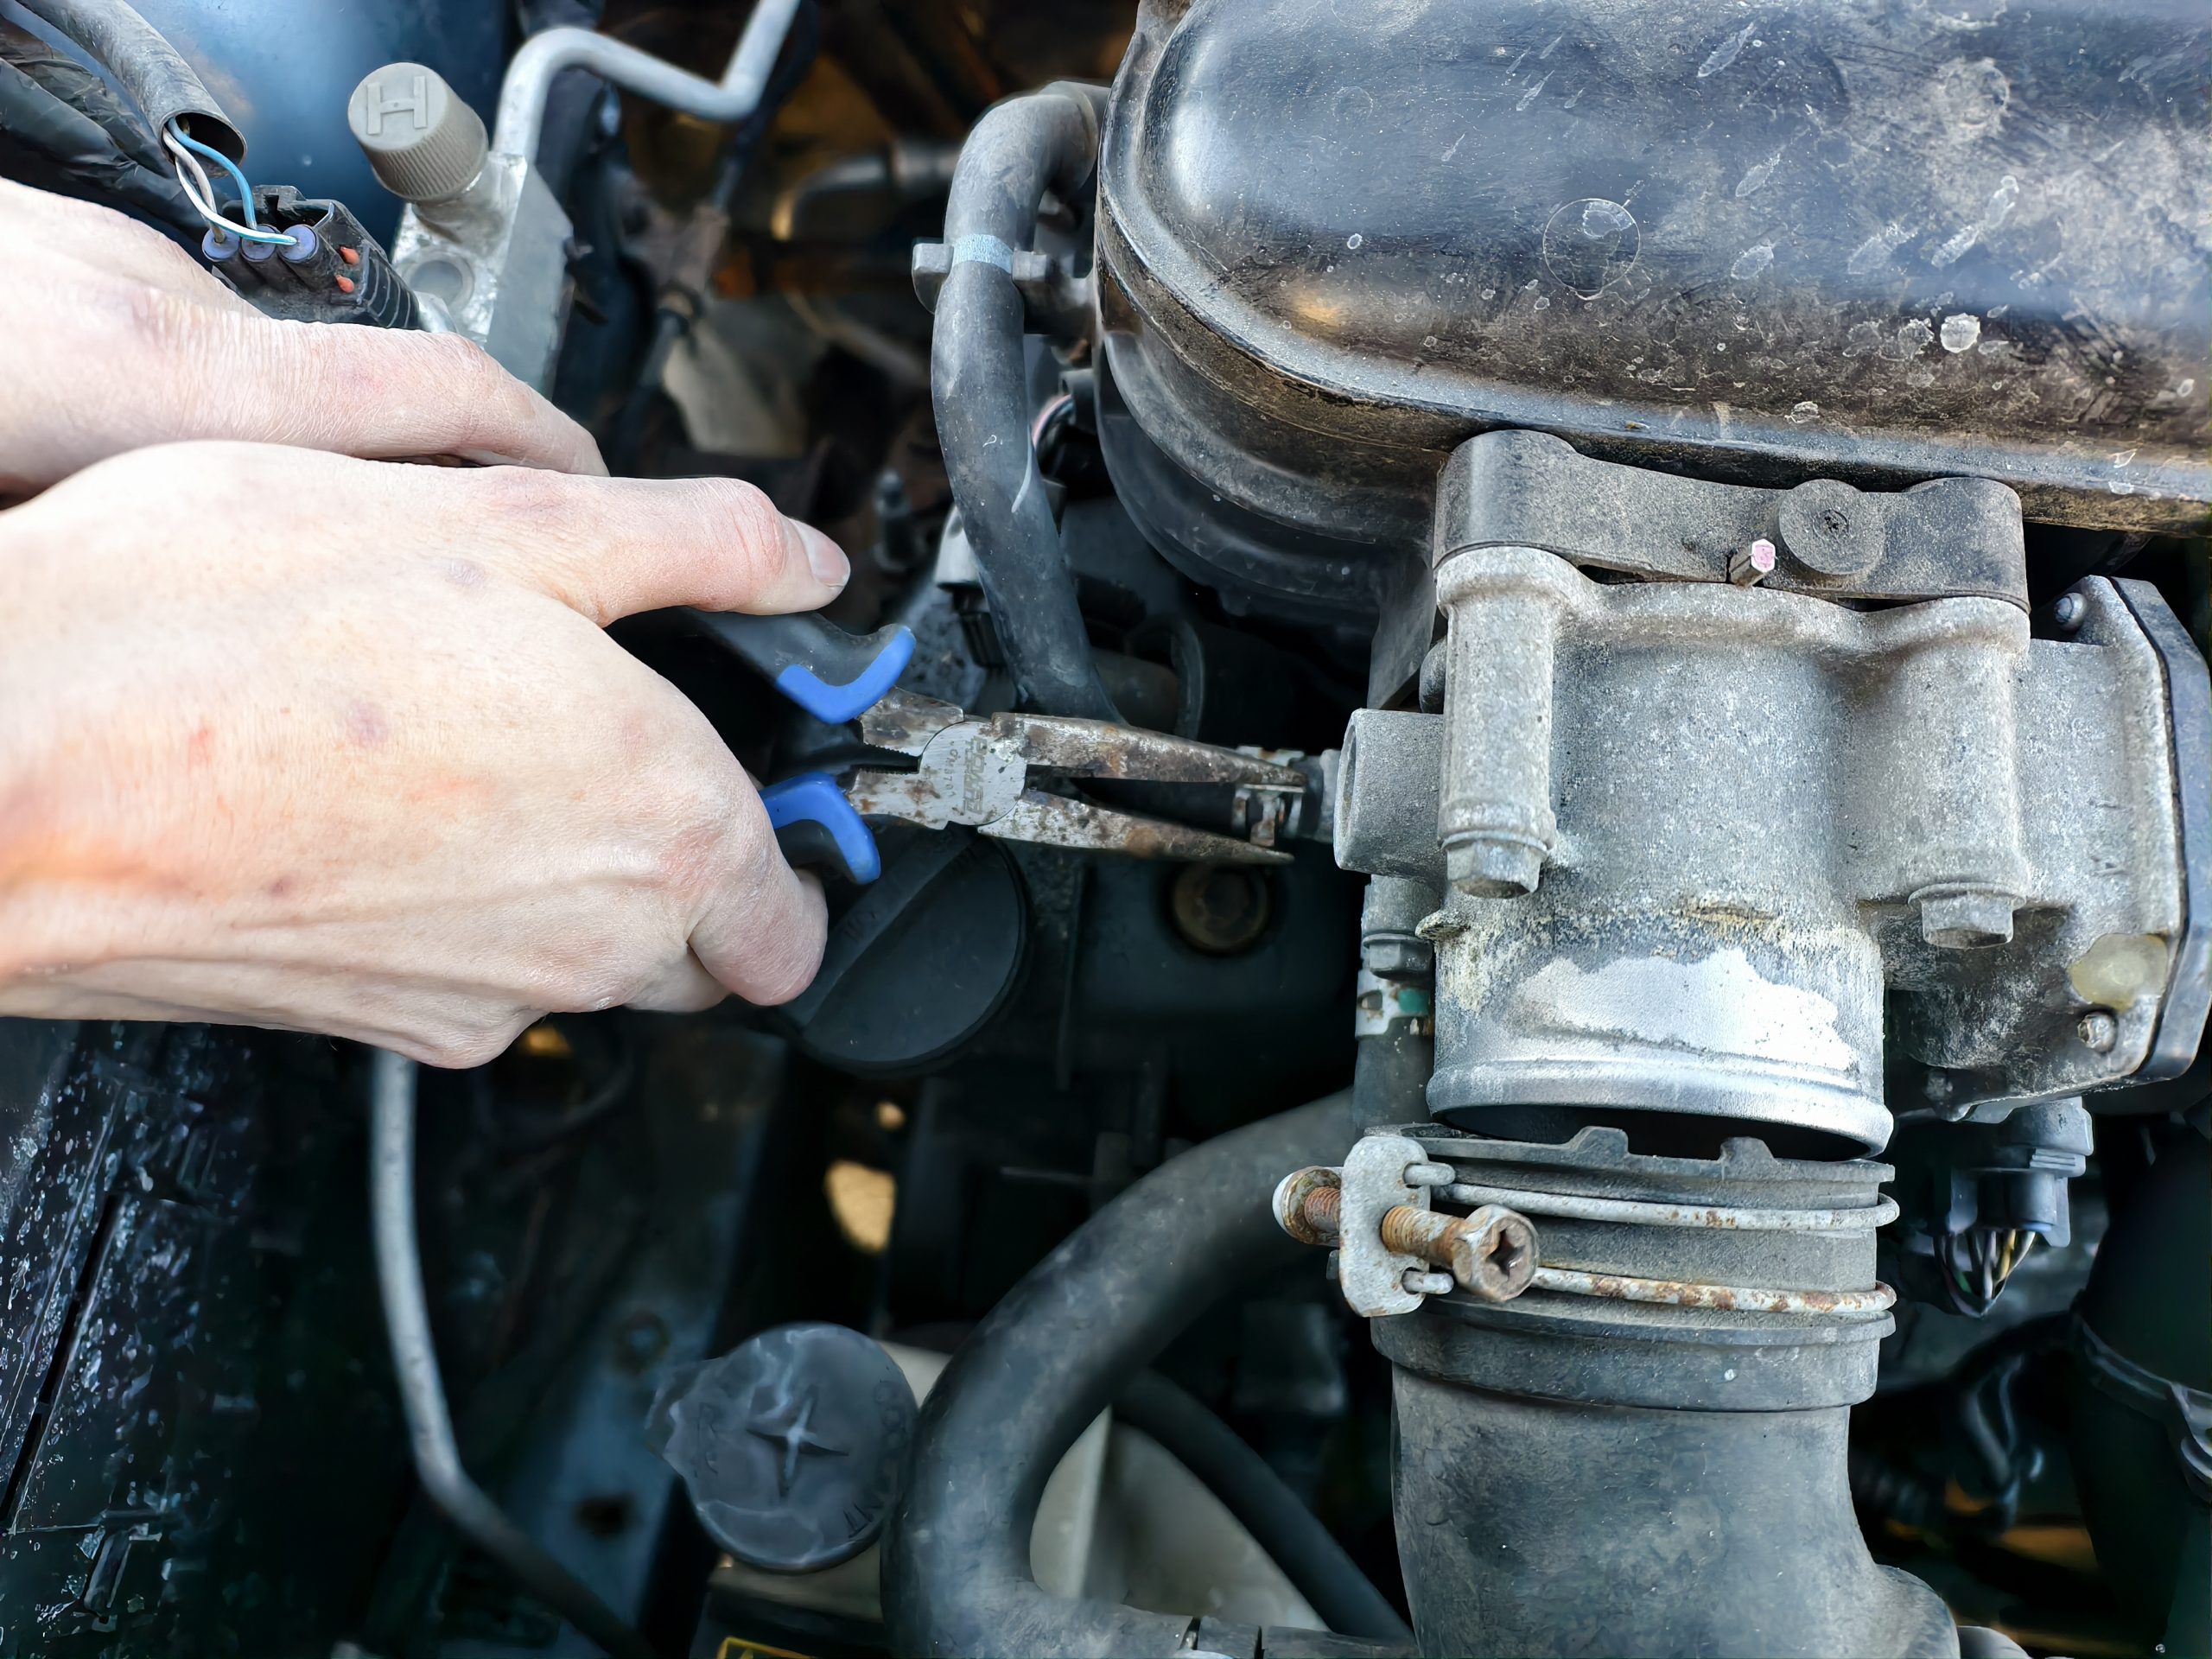
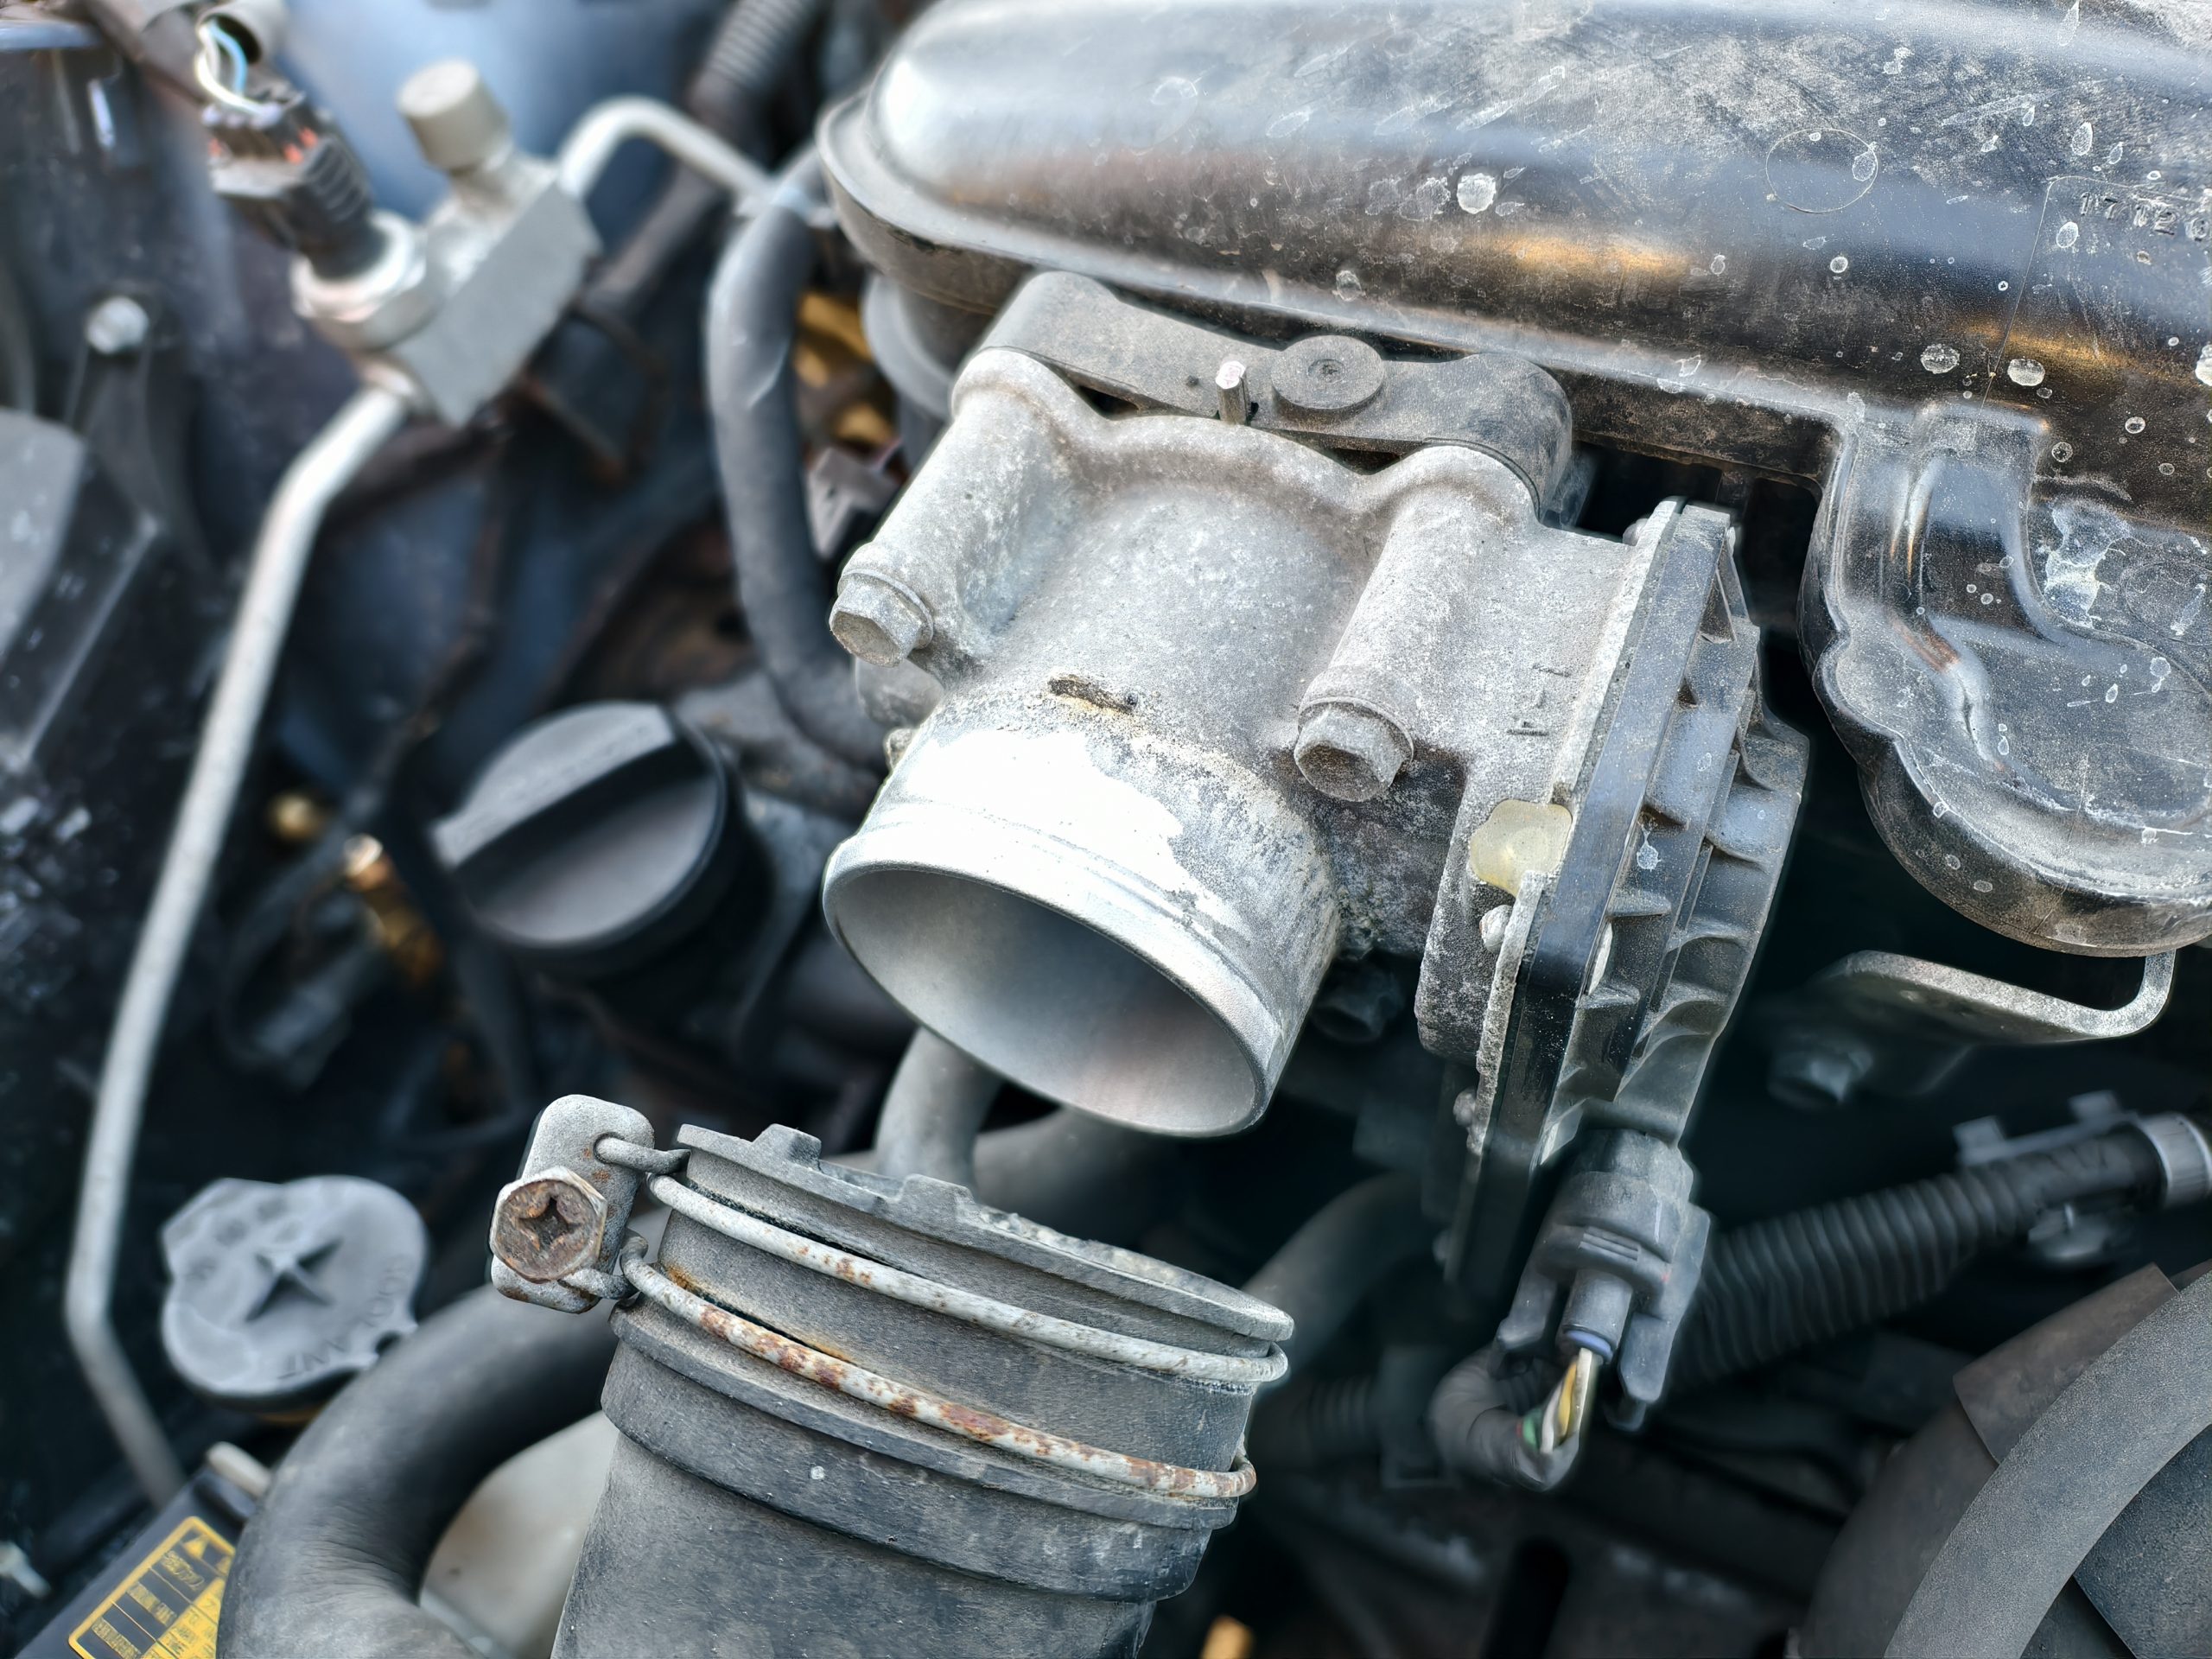
Once you get through all of that, you can finally move the intake away and reach your ignition coils. Take this moment to clean your intake and your throttle body while you’re in there.
It took us about an hour to reach this point. Most of it was because we were working on a car that had spent its entire life in the Rust Belt. Some bolts didn’t want to move, and the hoses weren’t very pliable, either. Also, it was our first time doing this. I bet that you could get this time down to about 30 minutes.
Anyway, removing the ignition coils and spark plugs was super easy, barely an inconvenience. The coils looked okay, and tested okay, too.
Yep, That’s Your Problem
And the plugs? Oh yeah, they were well-worn. Take a look:
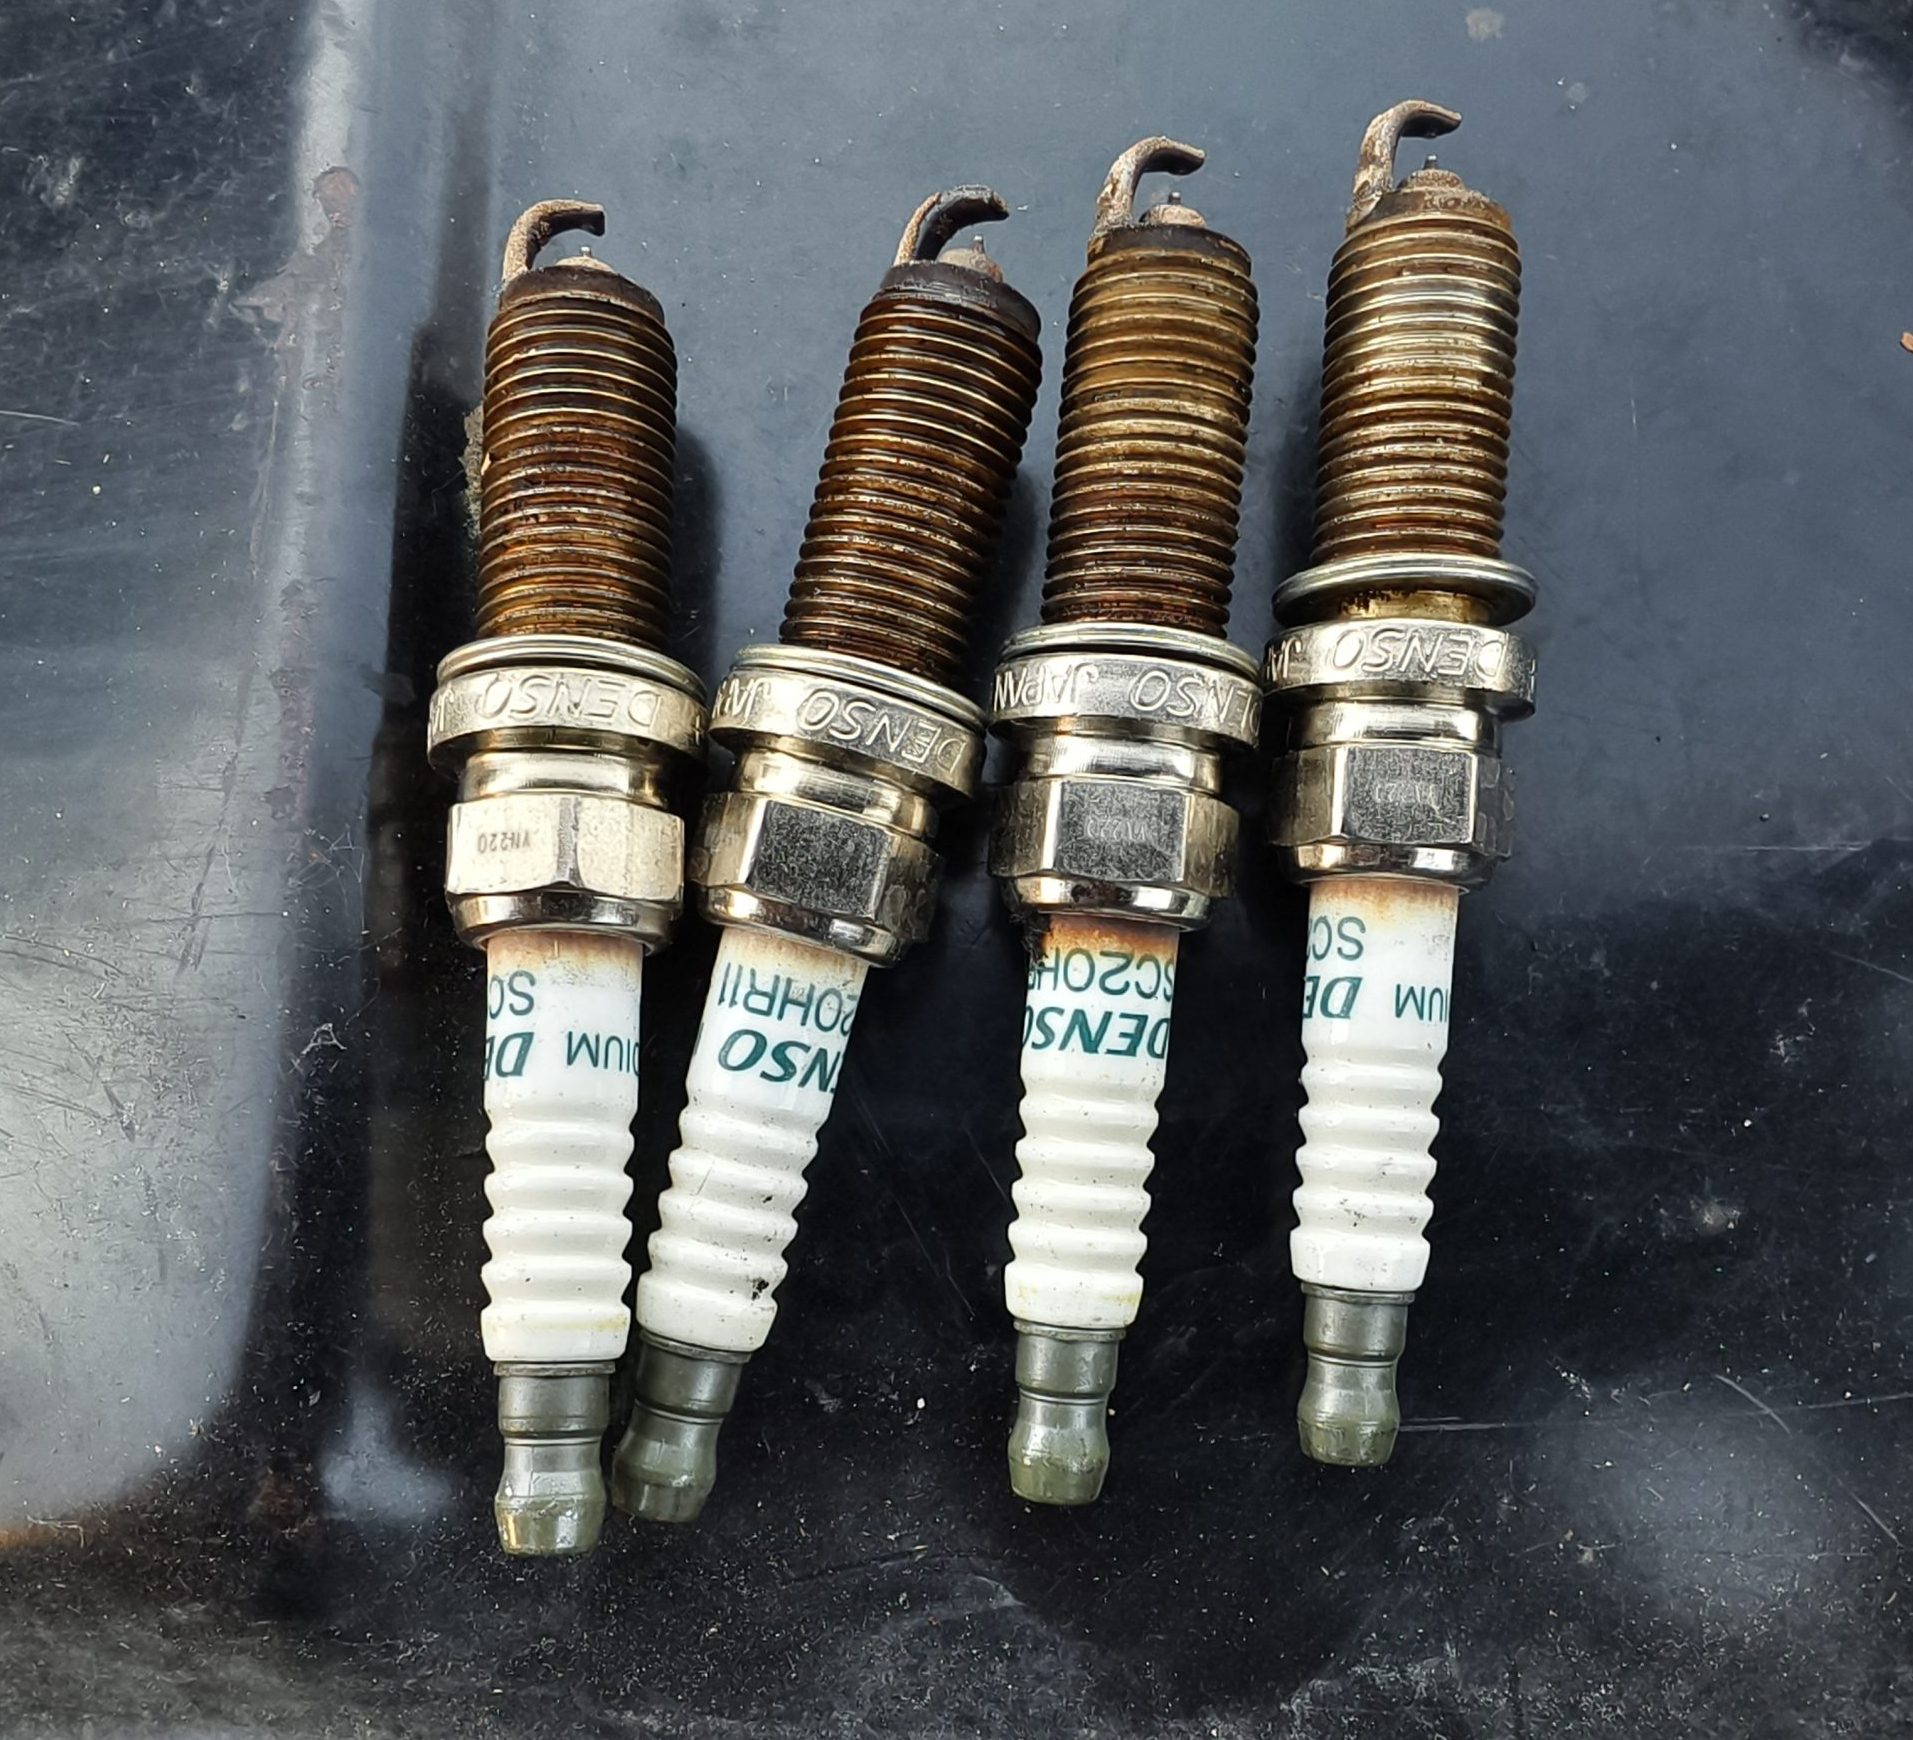
Enhance!

We replaced the plugs and the coils. Why? It was not fun getting to this point. We had to take off so many parts that our neighbors thought we were scrapping the little car.
Normally, I would say that you should replace coils when they break. Don’t fix what isn’t broken. However, most cars don’t make you work to get to their coils. Given how hard my wife is on her car, I have no idea how much life the coils have left. So, we replaced the coils just for peace of mind.
The old ones are sitting on a shelf as spares, and I hope we never have to use them. Don’t worry, the new plugs and coils that went in are OEM Denso ones. I really don’t want to have to do this project again anytime soon.
Buttoning the car back up was the reverse of removal, and I think that might have taken around 45 minutes. That was only because Sheryl somehow managed to lose one of the header panel bolts, and we spent a considerable amount of time looking for it and my missing socket.
We wrapped up the day’s work by replacing the gas pedal, which took all of five minutes. I also studied the wiring diagram for the cruise control and, sure enough, I was right that a part of the unit is plug-and-play with the gas pedal. When I disconnected that part, it disabled the entire cruise control. The new pedal is in and is working great.
What was pretty cool is that it feels like the car is driving better than when we picked it up. It’s now scoring above 40 mpg at 60 mph, and is just as zippy as it should be. I’m not too surprised about this. I mean, the car had 67,000 miles on it when we picked it up, and the maintenance history wasn’t entirely clear on how the previous owner treated the car. Or, maybe it’s a placebo effect because the car’s been driving like crap for so long.
Better Than It Used To Be
Either way, the misfires are gone, the engine is no longer stalling, and the fuel economy is better than it was two years ago. So, I’m calling this one a solid victory. Also, I got to teach my wife how to do a project on her own car, and that always feels awesome. She got to feel the pride and gratification from fixing something, and got to save money doing it, too!

In total, we spent about $539. That’s $300 on the ignition coils, $207 for the gas pedal, and $32 on the spark plugs. That’s a lot of dough, but the dealer wanted $350 alone just to replace the gas pedal again and another $800 to do the spark plugs, so we saved big in doing it ourselves.
If you’ve ever been shocked by a dealership’s or mechanic’s quote, look into fixing your car yourself. You never know what you’re capable of doing. Just don’t be surprised if you own a modern car and find out that you have to go through a labyrinth to do a task that should be easy.
Top graphic images: Mercedes Streeter


Wait, an old, weirdly packaged car designed to be as compact as possible, makes regular maintenance a skosh hard than a larger car? No who would have ever thought that? There are a few Subarus and the Toyota Previa that have their hands raised. Not to mention, every rear-engined, sub-1000cc mini-van from Japan.
I drive a Subaru as a daily, and people love to tell me why they are hard to work on because of the spark plug location. I see stories like this all the time, where you have to remove intake manifold and other stuff. There are plenty of similar examples with transverse mounted V6 vehicles, too.
Meanwhile, in my FB25 Subaru, I just need some socket extensions and about 45 minutes to do the plugs, and nothing else has to come off. Literally every other main service item (alternator, water pump, belt & tensioners, A/C compressor, etc.), is up high easy to access.
I wonder how hard spark plugs will be one day in my ’23 WRX with the FA24.
As a palate cleanser change the plugs on a BMW Airhead. They are just out there in the breeze, and the plugs on my R100S will foul in heavy traffic.
I’m studiously avoiding changing the plugs in the Buick LeSabre because the rear bank is against the firewall.
Subaru Forester XT plugs enter the chat….
Dismantle battery, airbox etc etc and jack the engine up off the engine mount a side at a time.
Eh, as far as many cars go that isn’t too bad. There certainly are easier cars out there But as others have mentioned there are cars out there where you need to disconnect engine mounts, remove the tires and go through a splash flap, do them from underneath the car, do them by feel only, ect.
The other thing to factor into the total time is that you were mentoring your wife through this so I’m sure there was time spent discussing the next step.
I do think doing the valve cover gasket would have been a good idea “while you were in there” considering the oil seen in the one plug well.
“…remove the tires and go through a splash flap…”
That’s how my Chevy truck was. I had it jacked up one day working on something (probably brakes) and noticed how easy it would be to get to them through the gap between the inner fender and frame. The little rubber flap was removed in seconds.
That’s what I ended up doing once I got the parts, and it was stupid easy. I found that the driver’s rear plug was the original, presumably the PO probably changed them from above and didn’t even bother with that one.
Given the choice, I’d rather do that than remove the intake manifold.
Looks like the valve cover gasket has a small seep. Both the dealer and our indy shrugged and told us not to worry about it until the seep either becomes bad or the car starts consuming oil. It’s doing neither, but I’ll keep monitoring it.
My Fit works the exact same way. To get the coils and plugs it’s wipers off, plastic header off, metal windshield cowl out, airbox off, intake manifold plenum off. THEN you can reach under the windshield to the rear side of the engine to do the plugs and coils. I did a valve adjustemtn at the same time so it was even easier to reach the coils.
Did this at the end of August… was a lot of fun, even if it took me the better part of 8 hours. Was my first time!
That being said I thought my engine bay was crowded… This IQ’s looks to be half as long!
Frankly, if you don’t need to get under the car to change spark plugs, I call that a win.
I owned a PT cruiser that you had to take the intake off to access the spark plugs. What a pain. Judging by your picture it had the same cramp conditions under hood as your Toyota.
Bonus respect points for, “super easy, barely an inconvenience.” New coil packs are tight!
4.3L Blazers and S10s (plus other variants) required spark plug removal through a wheel well.
Same with 1g Explorer. I assume the ranger is the same.
The Toyota dealership here charges $90 to change a headlight bulb on a Prius.
Once you know which parts you have to remove, and that you have to attach the wiring to the bulb before you install it because it’s about 20mm too short, it’s only a 20 minute job at most.
The dealer quoted for my ’06 Prius a headlight replacement for $650. $90 would be a bargain in comparison, but still too much.
This was just to replace the $20 H11 bulb, not the entire headlight.
Depends which year Prius. We physically couldn’t do it and gladly paid the $90 to not be that annoyed again. But different people have different tolerance for annoying removals. (I also have some nerve damage that didn’t help)
Having a borescope helped.
See a bit of this on the daughter’s gen 2 Prius. Plug access is somewhat obstructed but not insurmountable.
Do the rear plugs on a V6 GM A-body or W-body for a exercise in swearing sometime.
$800 for just spark plugs? Damn, costs more than doing a porsche macan s.
Reminds me of working on the transverse V6 that was in the ’09 Fusion my partner had when I met him. Whole intake, throttle body, fuel injectors all had to come out to access the rear plugs and coils. And of course, it was always the rear coils that gave me trouble. I’m genuinely convinced that car hated me. The first time I drove it the check engine light came on, and it was all downhill from there.
He now drives a 2018 Mazda3…90k miles and not one single problem in that time.
Surprisingly sh*tty engineering from Toyota on both the spark plug access and the screwball cruise control.
Well, the cruise is NOT theirs…
In fairness to Toyota, the crappy cruise control was Rostra’s fault. 🙂
Ahh! I missed that detail!
Given the size of the engine bay, that’s surprisingly easy. Mercedes didn’t even have to enlist a small child to reach some of the bolts, as you would on a classic Mini.
When I finally replaced my Prius’ plugs at around the 240k mark, I discovered that 1) they were original and 2) the engine had been running on about 1.5 cylinders for a while. These weren’t gaps you’d measure in hundredths, but tenths. Just one tenth, but still. And yes, the fuel economy was down. When you’re used to upper 40s, lower 30s is pretty terrible.
Had to remove some stuff to get to the plugs and coils. Once the stuff is out of the way the job is no sweat, easy out, easy in. But getting the stuff out of the way is an extra half-hour of fiddling and shoving.
And then I replaced the PCV. What they don’t tell you about the PCV on the GenII Prius is that you should replace it every 50,000 miles or so, and that it’s about an hour of work to get to where you can even touch it. Again, removal and replacement: no sweat at all. But all of the prerequisite work, it’s a chore. It shouldn’t be, but it is.
A friend of mine had a PCV fault on a 1.4L Turbo Cruze. Sigh, I had to replace the entire valve cover and intake manifold (about $250 bucks aftermarket) and 3-4 hours of my labor. There has to be a better way.
Thanks for the tip, daughter now has a gen2 Prius. Probably due for plugs again, anything else I can access at the same service is fair game. Car has about 270k.
Be aware that you’re getting to the mileage where the car may throw the big brake failure warning: ABSVSS((!)) or whatever the specifics are. I understand that it’s doable by a competent shadetree mechanic but when it happens it’s because the ABS actuator has thrown a cog – I don’t remember precisely what the issue is. It’s a big job for a guy at home but one hell of a lot cheaper to do than to hire it done – send it to a dealer and you’re looking at a couple thousand bucks, easy. Just getting to the actuator means moving the inverter – the big shiny box on the driver’s side of the engine bay when you’re looking in. Another big job of excavating before you can get to the actual project.
Did you break out your endoscope to search for it? #1 use for mine is finding dropped nuts/bolts/screws/etc.
I have a kit of mirrors, magnets, claws… When a car decides to consume a socket an otherworldly law is laid down. Your only hope is duplication. Ask appology of the offended diety and buy another. Re 10mm sockets, just buy in bulk as they are the early sacrifices.
I’ll be dipped! I didn’t think of that.
Funny, it was your “cool tools” article (on the gelatinous, outdoor-meal site) that convinced me to buy one.
I guess if Sheryl has already taken it for a test drive, the chance of finding it is slim. Although, I have, on occasion, found loose items stuck in some nice little crevice after putting many miles after losing it.
I once lost a socket putting the heads on a small block Chevy.
A couple of years later it came out with the used oil when I did an oil change. I still can not imagine what path it took to get there unless the guy that rebuilt the short block lost one in there
For a comparison attempt to change the plugs in a VW type3 Squareback. Then again the Porsche VW 914 would like to enter the conversation.
Subaru Forester. You have to have tentacles.
Foresters are so easy compared to an SVX. I think I spent about 4 hours and $50 on various extensions and swivels on just the rear drivers side plug.
Svx was a bit easier as the Forester loves wrapping the engine in random shit.
Forgot what I used on the posvx but it was kinda easy once you get the trick down.
Never having had an SVX, I’m going to have to take your word for it.
Great story!
I was given my first car for free, with the caveat that it didn’t run. I was told that if I could get it running, I could have it. I ended up replacing the plugs, points, plug wires and distributor cap. It was a slant-6 so I probably swapped out all those parts in less than the time it took your wife to remove the intake on that Scion. This was pre-Internet days, though, so I had to ride my bike down to the local library to research what needed to be done, and then ride over to the auto parts store to get all of the parts needed beforehand.
But my second car made up for it. It was a 1977 Chevy Monza Spyder with a 305, and I ended up having to remove the driver’s side motor mount bolt, place a block of wood under the oil pan, and jack up one side of the engine an inch or two in order to replace the #3 spark plug.
That was fun.
Old Chevy Monza V8 required an engine out to change the plugs. Try that at home…
Too funny!
See my post written while you were writing yours. Not a full engine out required.
Been there done this too.
No need to pull engine out.
Not sure how that false idea began.
Every time I went to a shop around here (Detroit area), they had signs up saying it (warning it was much more than a normal tune-up). I did not have the V8 so I didn’t experience it.
Just the rear two, almost, not really.
1975 Monza Cp with the 4.3 ltr, not engine out, but definitely had to loosen up the rear motor mounts a bit.
This is the way.
A lot of vehicles in 90s and later have engines that were originally designed for front-rear mounting but were flipped sideways and stuck on a transaxle for front wheel drive. The re-oriented engines had many parts, including spark plugs, that were damn near impossible to get to without major disassembly and sacrificial blood offerings.
That said, did you remember to check/gap the new plugs? Just because they’re maybe gapped at the factory doesn’t mean that they are, or that they’re the correct spec. Good excuse to buy a feeler gauge.
What about an inch-pound torque wrench? Get new plugs in tight, but not TOO tight? Good time to invest in yet another tool if you don’t have a decent in-lb torque wrench.
Dielectric grease? Anti-seize compound? These are also in the spark plug change out trick bag.
Good luck and always better to wrench it yourself if you have the tools.
I did check the gap and use grease and anti-seize. Admittedly, I do need a good torque wrench, though…
Just helped a neighbor with plugs in an older CRV. Specked for 13 lb/ft aka 156 in/lbs. used a cheap ish torque wrench I had from Amazon. Worked fine. Those aluminum heads won’t take too much torque and 13 lb/ft isn’t much at all. Seems all too easy to over-tighten them and strip something.
This is what I picked up…
https://www.amazon.com/dp/B07BVR92TC?ref=ppx_pop_dt_b_product_details&th=1
Wow, That IS a pretty tight space in which to work.
When my father passed away, my mom gave me a very large torque wrench he had for his Kenworth. It was very rusty. and today I would only use it as a breaker bar.
Maybe it would have been better/easier to source the skinniest universal joint extension you could find?
My Accord V6 just passed 70K miles. I’ll have to look under the hood to see what awaits whoever has to change the plugs at 100K.
Probably old news to a lot of you, but I’m starting wrenching on a Seadoo. Thankfully a few decades of wrenching on 90’s or later vehicles has prepared me for how wedged in things can get. Remove the seat and seat locking bridge to do anything besides add gas, oil or check the coolant.
Stuff like this is why I like EV’s. There’s not much going on mechanically. But beware Reddy Kilowatt!
I just got my first EV and promptly named him Sparky. I needed an appropriate hat too.
https://www.ebbets.com/products/reddy-kilowatt-1940-authentic-wool-ballcap-red?_pos=2&_psq=Kilo&_ss=e&_v=1.0
Wow that’s quite an ordeal. I’ve worked on a couple 4-cylinder Toyota engines (Scion tC and Corolla) and thought how great it was that the plugs and coil packs were just right there front and center when you open the hood. Not so on the iQ.
On my Scion the bolts for the beauty cover and the coil packs are even the same size (10mm as I recall). Just a nice little detail…
You’ve clearly never tried to replace the back plugs on a v6 minivan. Those are horrendous and usually involved removing the intake manifold, or in the case of the mid 90s Dodge/Chrysler minivans you had to reach up from underneath and do them blind from below. The only one I had to do I got two out without too much difficulty, and the third we decided could just stay because after 5 hours it hadn’t budged.
Yeah, I was gonna say that this iQ combines the worst aspects of spark plug access on older Chrysler minivans (remove wiper tub) and PT Cruiser (remove intake plenum).
It’s stories like this that have been shifting my opinions of small cars and the latest technology.
I used to love small cars and tended to look upon large cars with contempt for wasting space. I also used to absolutely love any and all tech. But I’m coming around as I get older. An extra inch if engine bay clearance isn’t going to mean anything in the great big scheme of things in terms of space efficiency, yet that inch could mean the difference between an easy job or needing to fabricate a custom tool and go through curse words in 5 languages as you have no room to maneuver in the engine bay. Similar deal with all the latest engine tech that in recent times seems to have negligible benefits but can cause lots of repair headaches when out if warranty.
Give me a low revving, torquey American pushrod V8 and to hell with all this new fangled overhead cam nonsense and CVTs and hybridization and the like. Now get off my lawn.
There are a number of reasons anything below compact size is undesirable even to people who like small vehicles, and more extreme packaging compromises is one of them.
Also with you on lower rpm and torque. They don’t have to be pushrods or V8s, but I don’t like engines that make all their power up high and I don’t even find them enjoyable to drive.
Our automotive media has fooled a whole generation into thinking a 10k redline is the holy grail. Holy grail for what? For early repairs? Usually higher cost? No thanks. A slow turning, usually larger displacement engine will typically last forever. High RPMs with fancy, unproven tech is usually what breaks. I’m not trying to race anywhere (usually). For every day tasks and cruising around a OHV engine is a better experience than some high strung, boosted engine.
And to be clear, I don’t always think this. Everyone should have a multi-car garage, and an older classic should be in that garage.
All I can see is increased oil consumption, worse mileage, shorter lifespan, greater expense to repair, getting blown off by the most basic stuff in traffic, feeling even slower than it is, sounding like an obnoxious boyracer trying to accelerate to merge at a decent speed, and droning on the highway because the thing has to be geared lower than a bicycle.
It’s all about that low end torque. Others can go sound fast while going 30 mph and just drone on and on when on the highway, I rather hear a lumpy OHV V8 that is barely audible on the highway.
I only have a one car garage. I doubt that the ’17 Accord V6 that finds shelter in there counts as an older classic, but it is certainly under-stressed the way I drive it.
If you like small cars but also appreciate maintenance accessibility, try a Triumph Spitfire. Clamshell hood plus 1600 cc carbureted engine result in one of the most accessible engines you can find in a 4-wheeled vehicle. My dad showed me how to do a valve job while sitting comfortably on the front tire. Drop a socket? 99.99% chance it lands on the floor.
Our neighbor’s husband had one of those growing up. Always thought they were cool.
Just find a picture of a Saab 900 engine bay. My heart dings. Excepting the position of the trans.
Sings. But dings is ok I guess