
“David, you need to call eBay and give them a heads up. You’re supposed to leave soon!” my wife told me every night as I walked into the house, demoralized, covered in grease, mumbling about how doomed my WWII Jeep project is. “There’s no point,” I responded. “There is no backup plan; this Jeep is never going to be ready in time, and yet it has to be because failure is literally not an option.”
I had only two weeks before I was supposed to go on a 900 mile road trip from LA to Utah, where I was to tackle some of the toughest off-road trails in America.
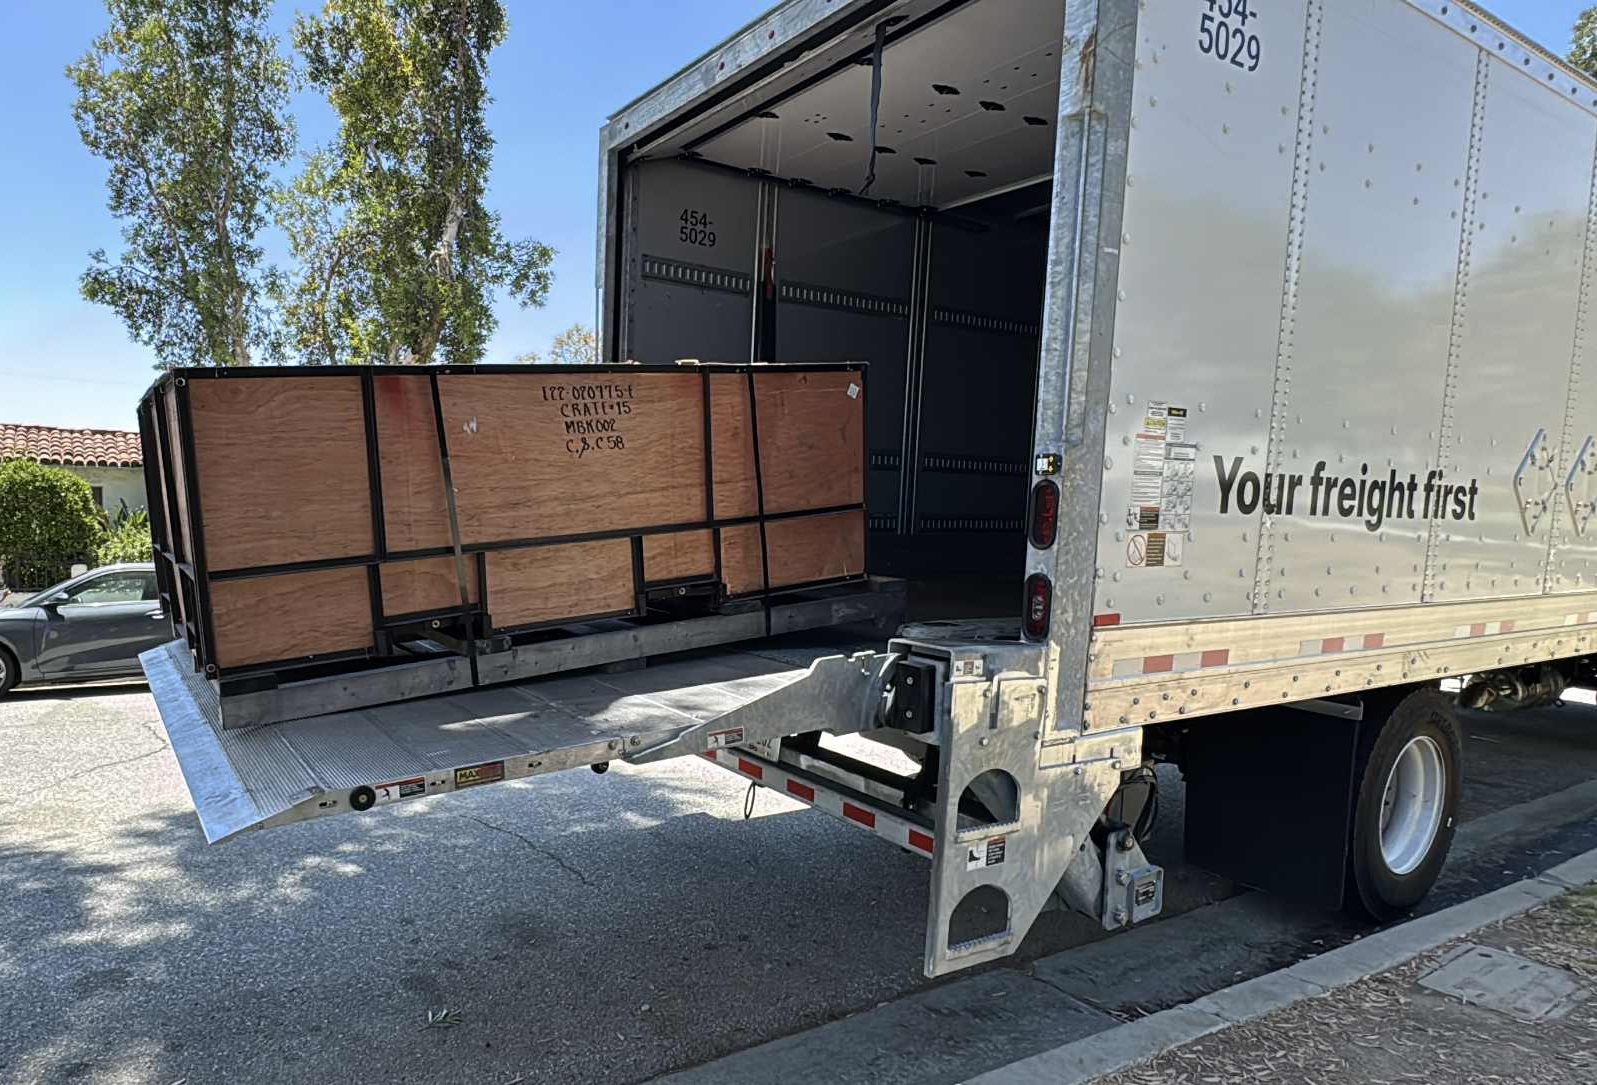
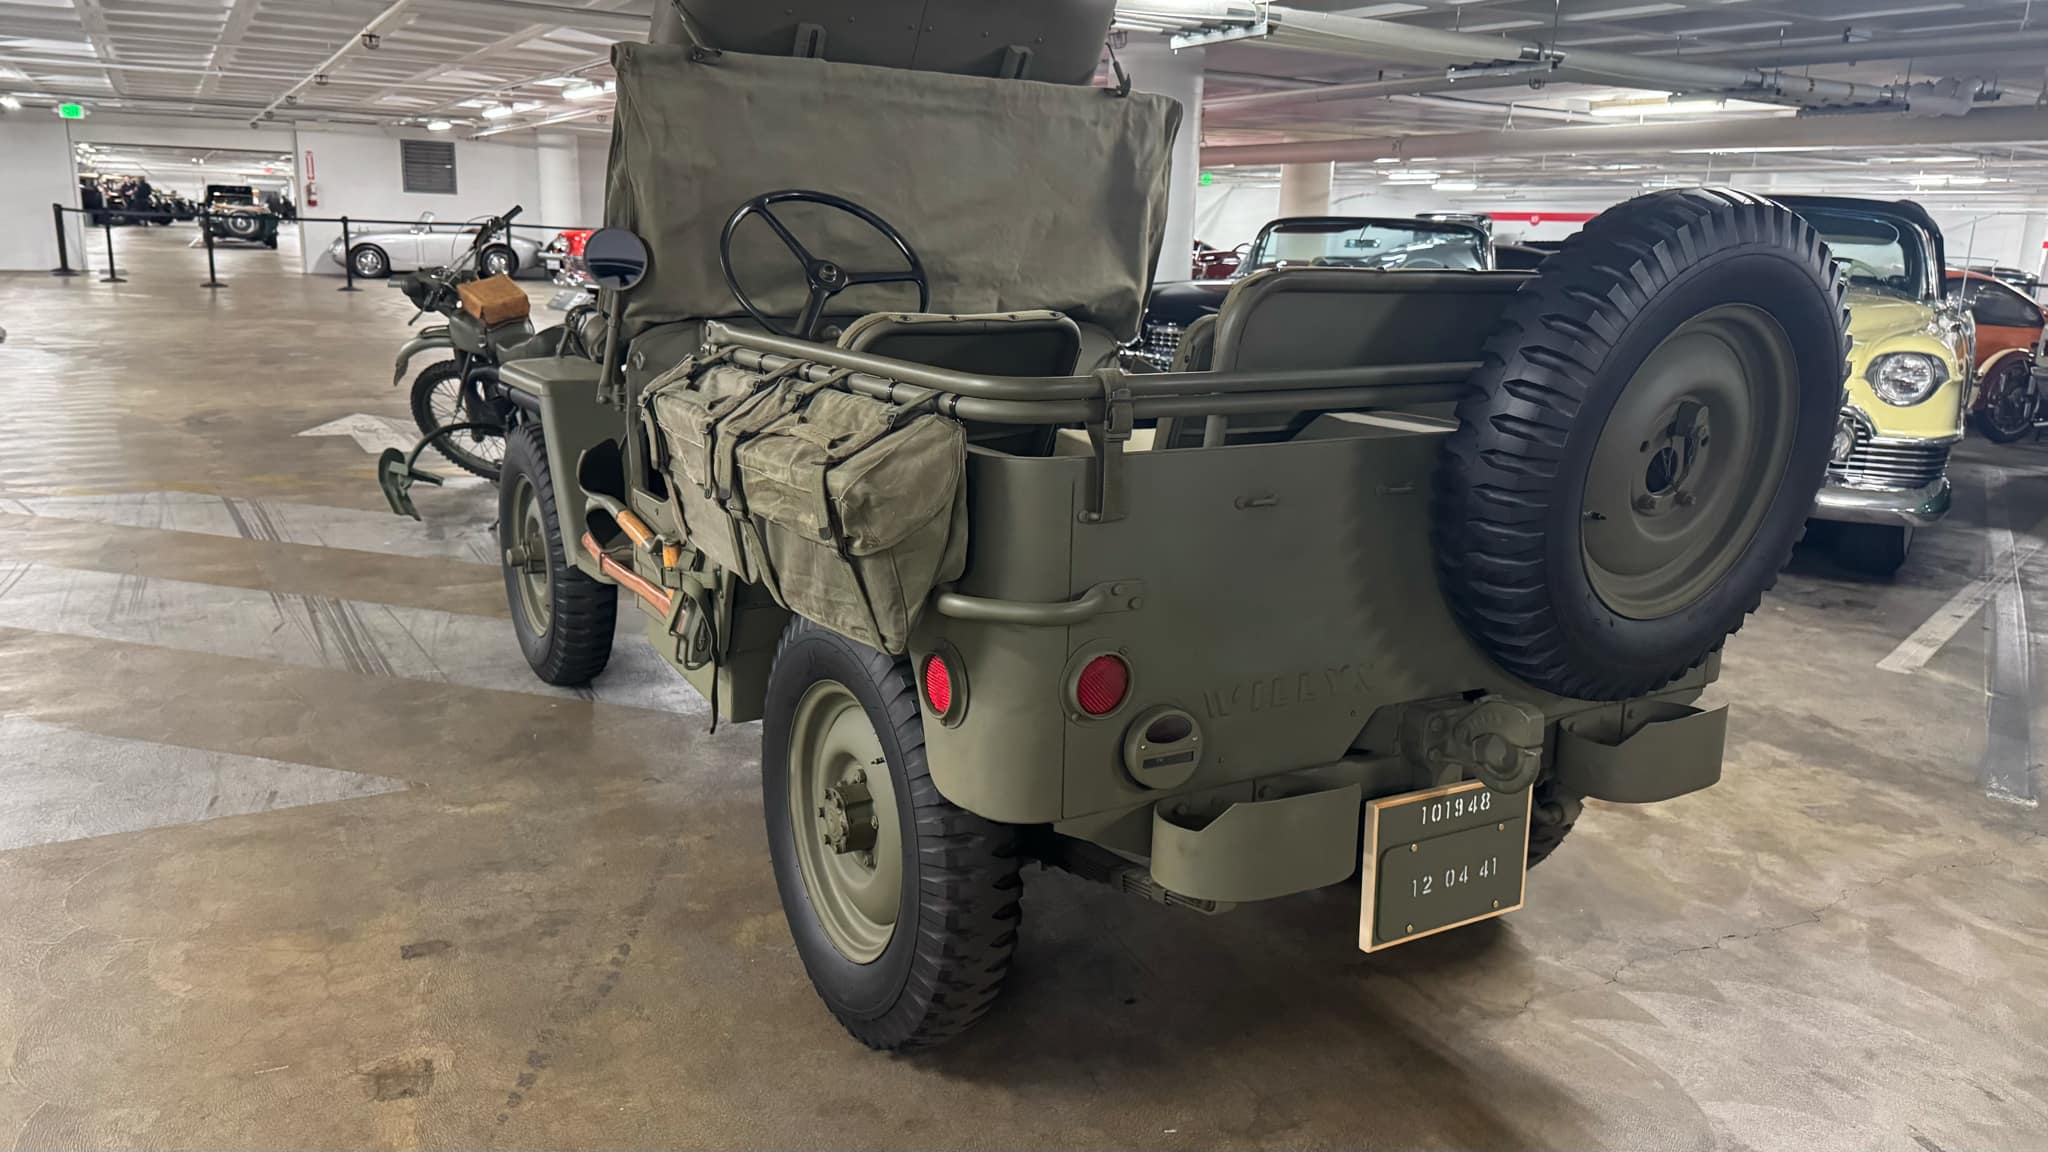
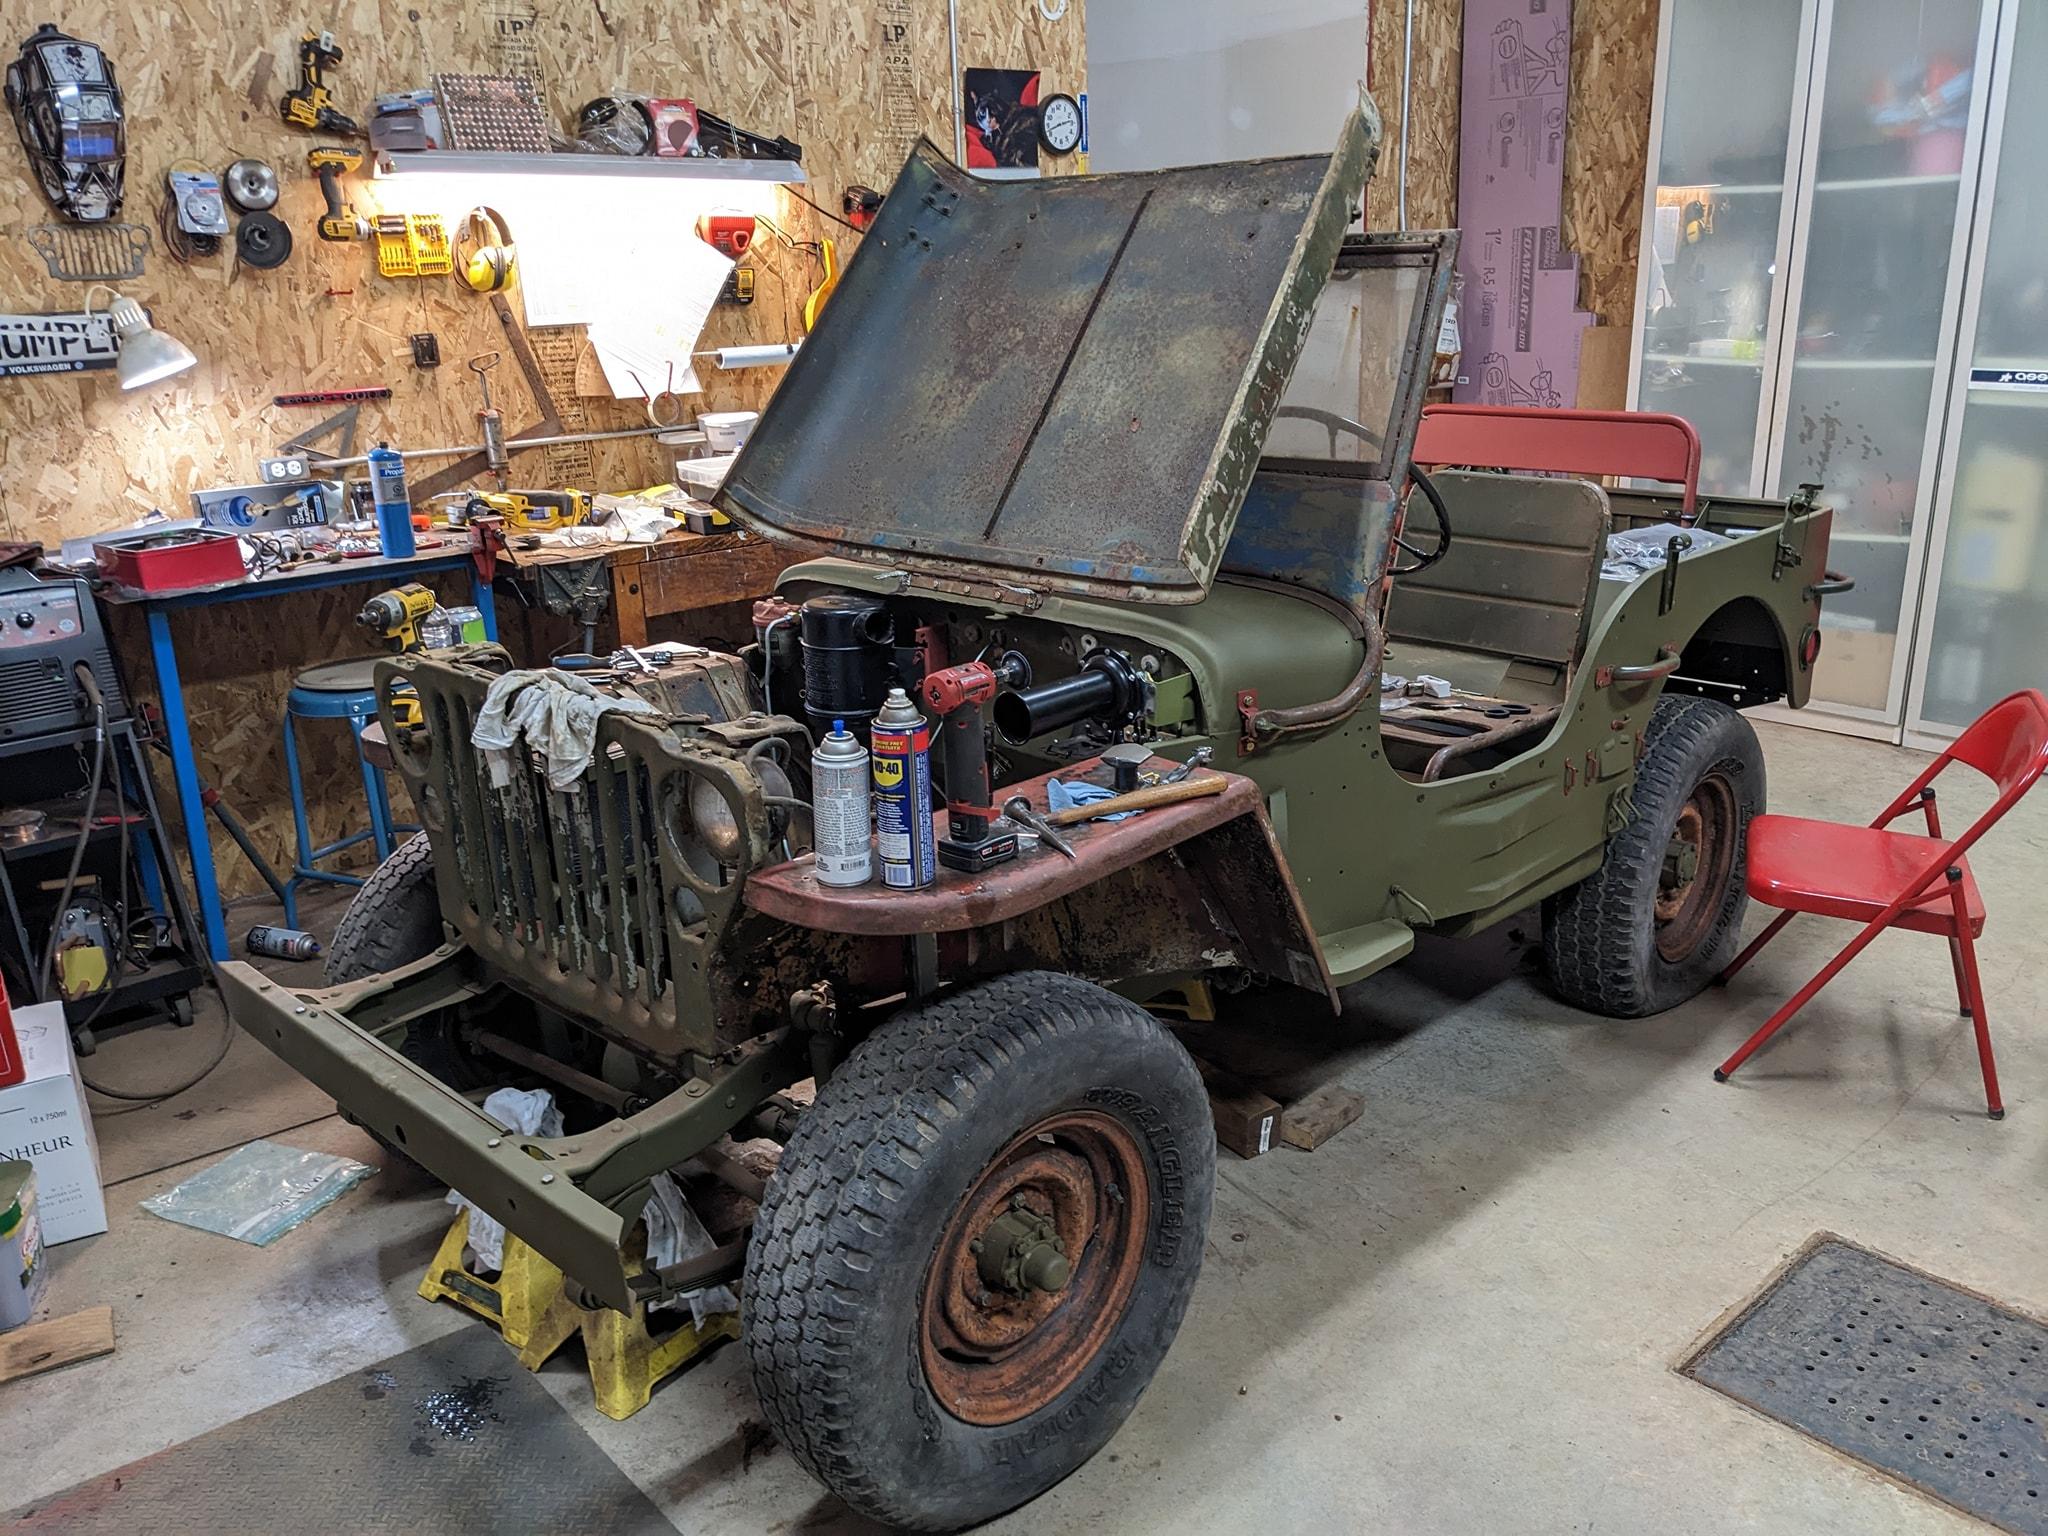
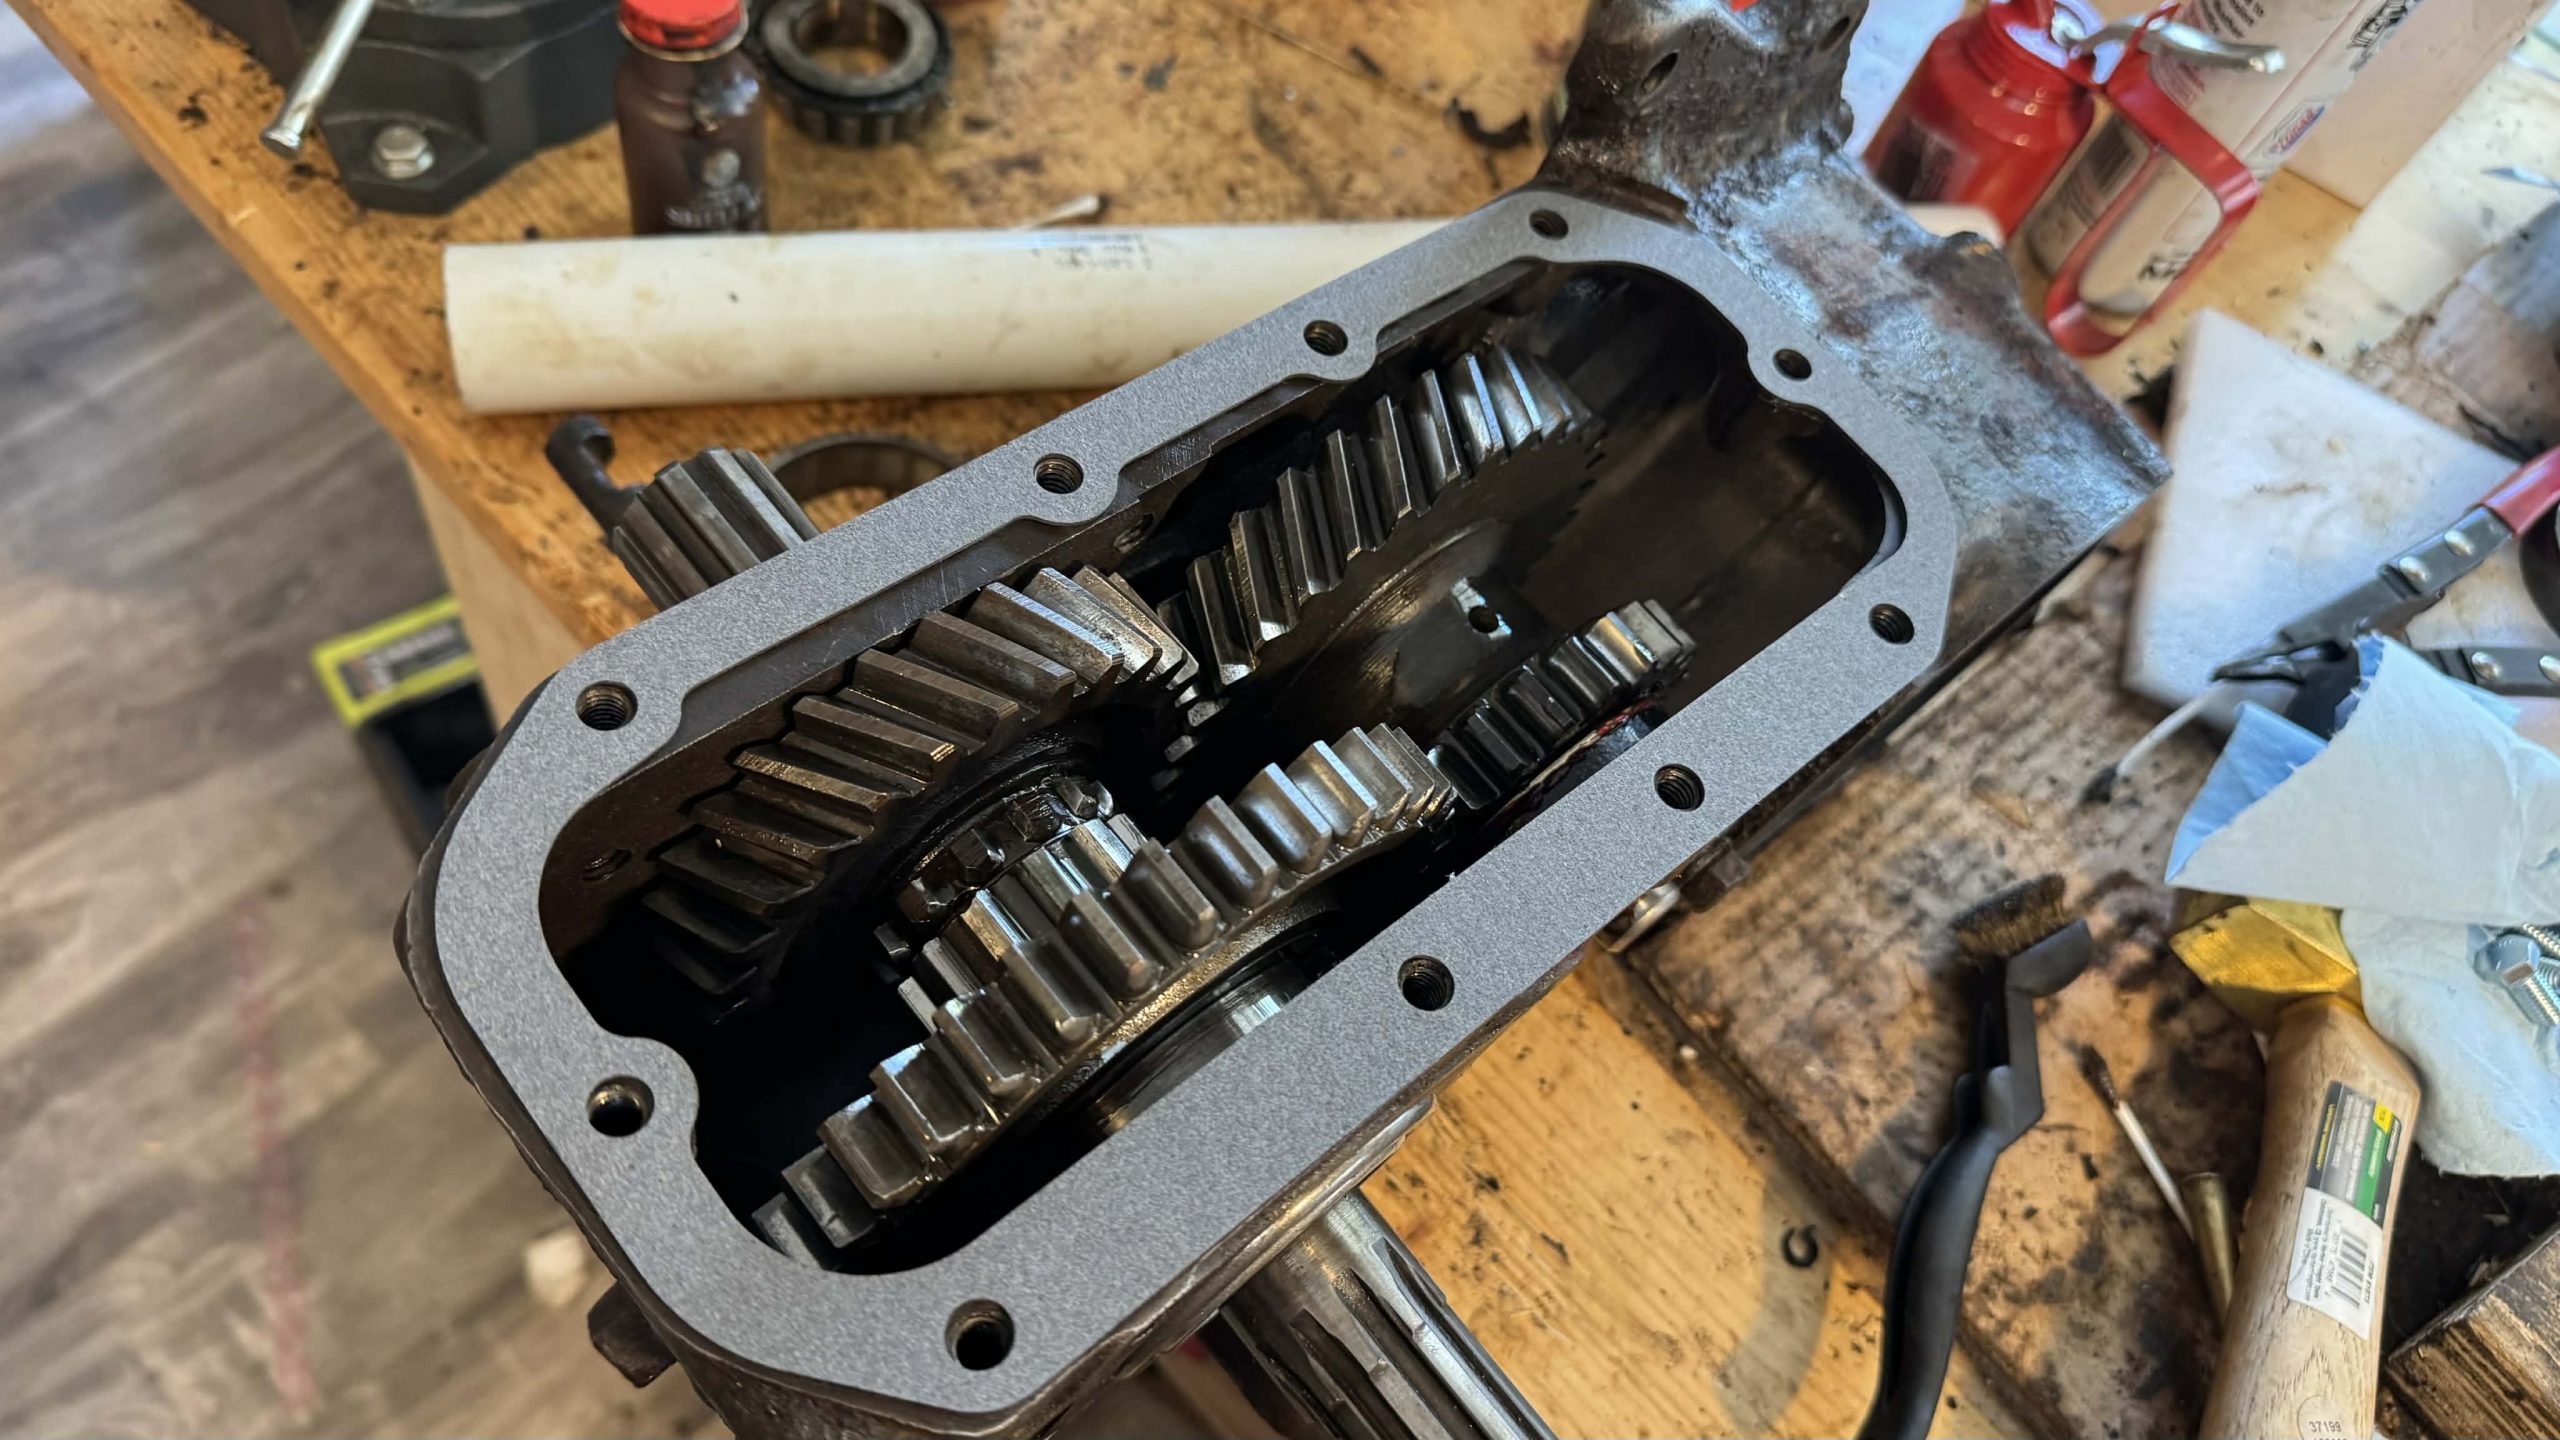
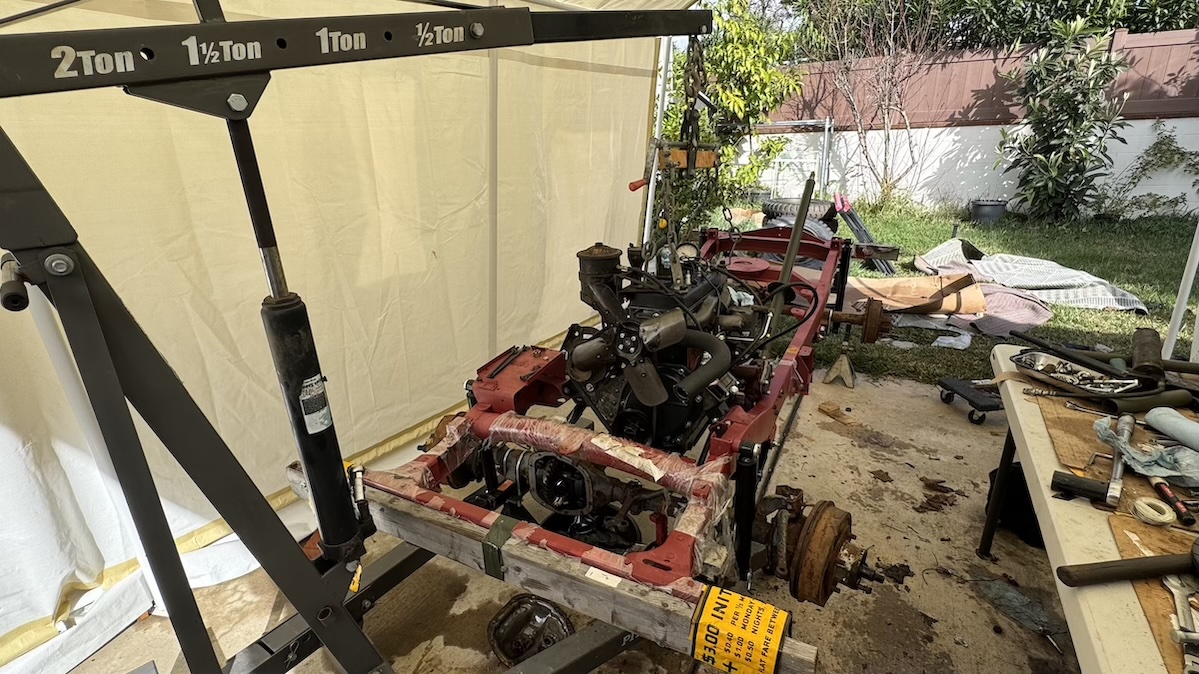
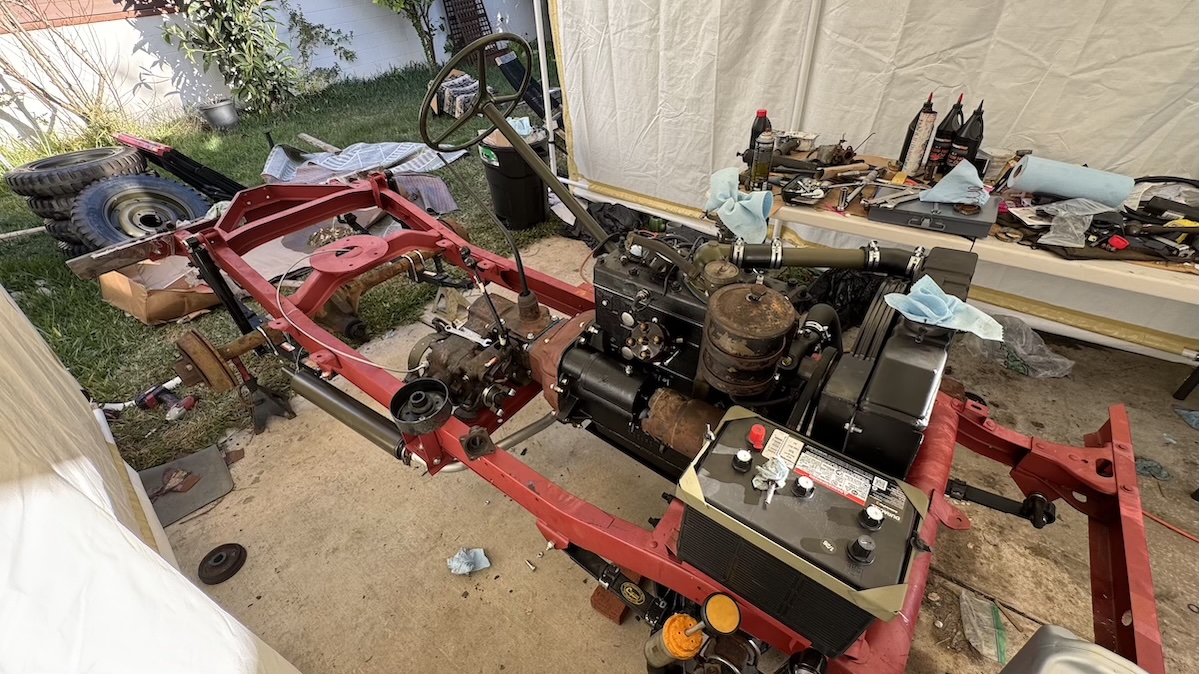
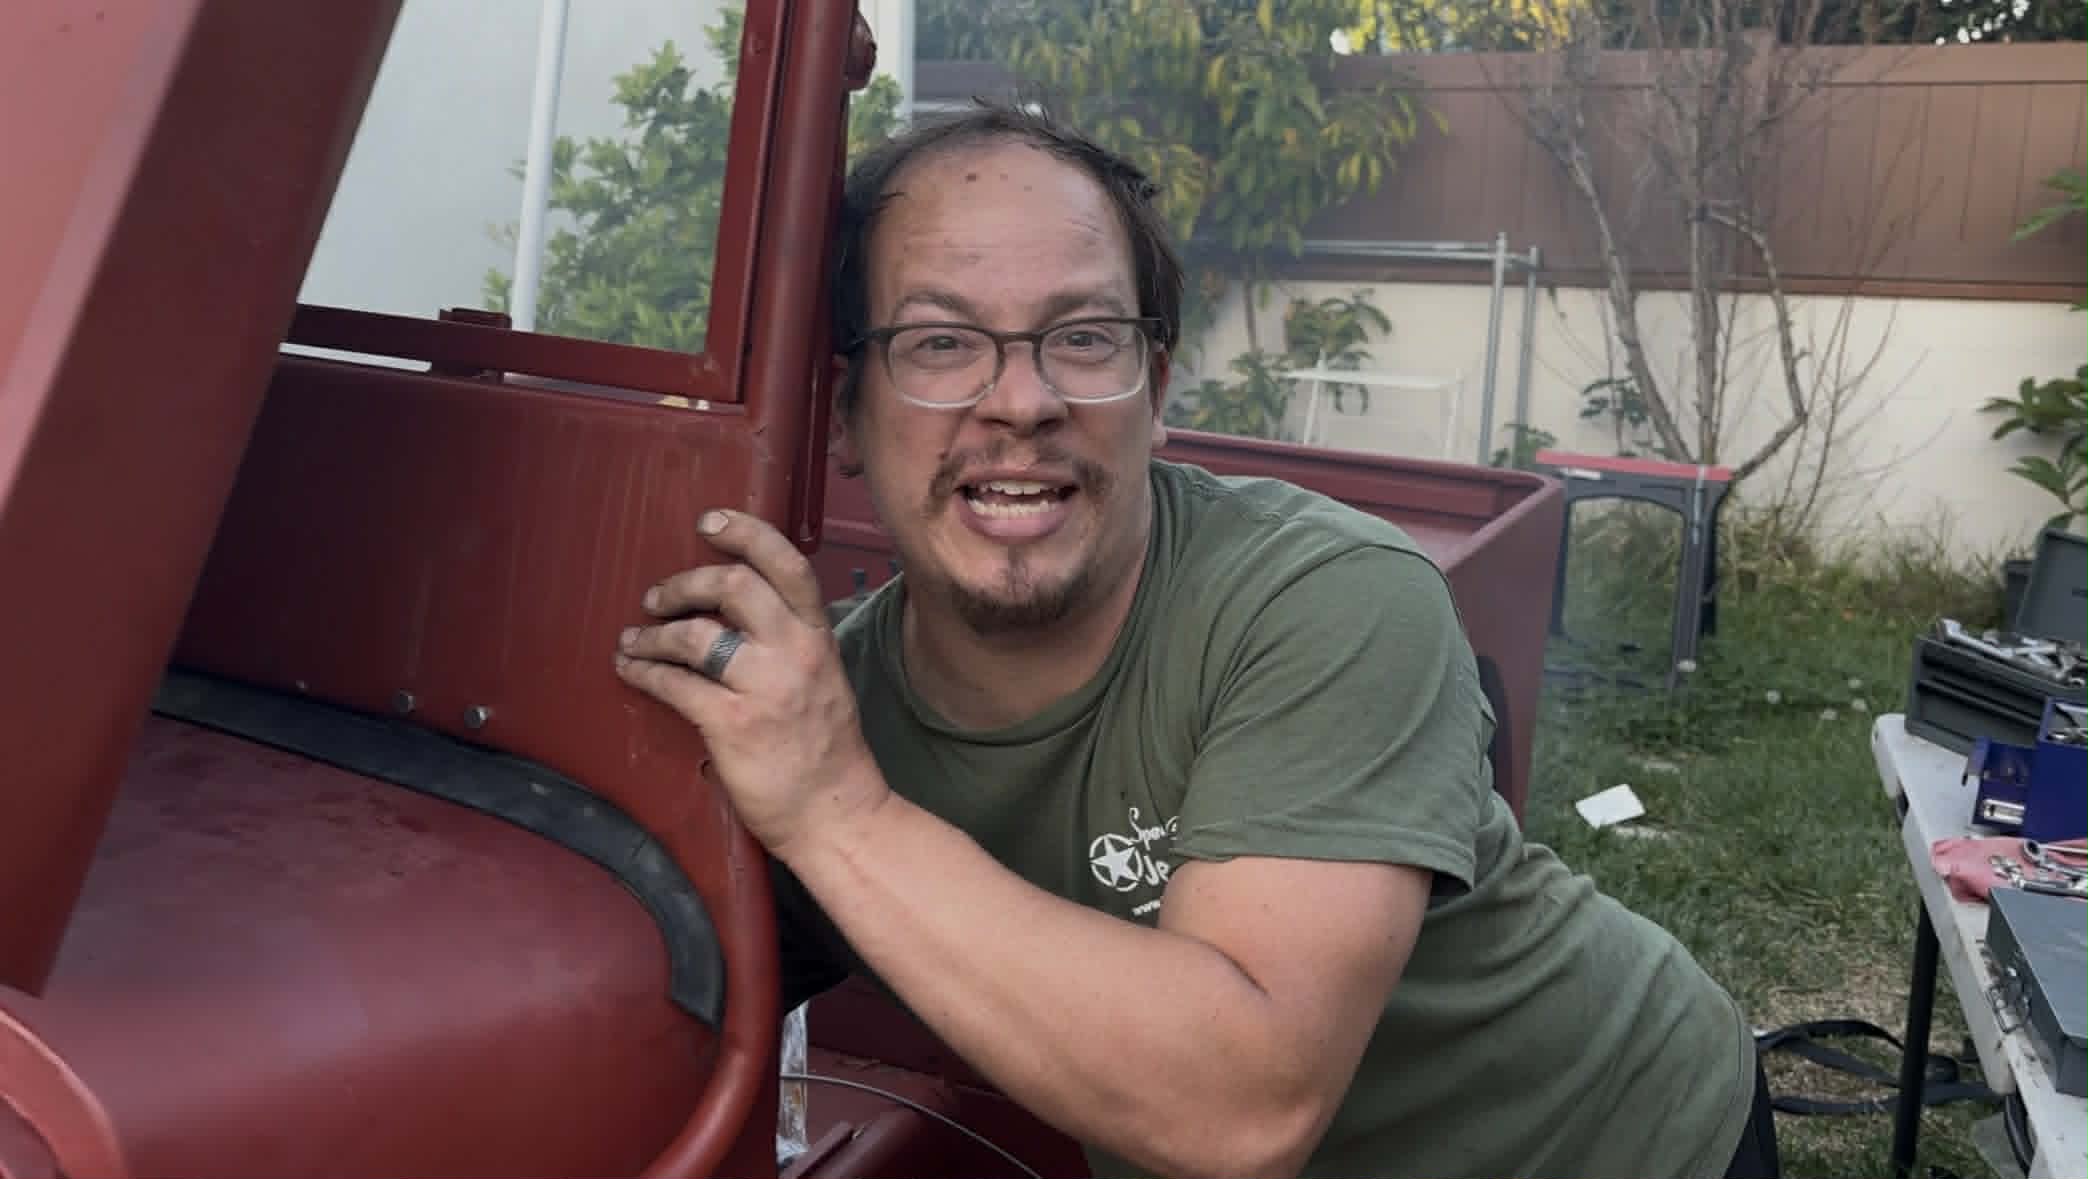
And my eBay WWII Jeep project looked like this:

Watch our feature-length video about this incredible project here on YouTube:
How I Got Myself Into This Predicament
It was November of 2025, and I was in Las Vegas attending my first-ever Formula One race. eBay Motors had kindly invited me, and I accepted because I’d enjoyed meeting the eBay team at a recent media event, I was curious about F1, and The Autopian was looking for another brand partner.
The media industry is incredibly challenging, with publications no longer able to support themselves with ads alone. For us here at The Autopian, this has led us to a three-pillar revenue model:
- Membership
- Ads
- Partnerships with brands we love
All three pillars are critical to the health of our company, and the last one is really challenging. Building a partnership means delivering excellent content for a brand that you legitimately love and that loves you back to the point where they choose you over (or alongside) the thousands of influencers and YouTubers and other publications out there. The brand partner has to believe that you can deliver excellence, and though The Autopian creates great content every day, we had only had one long-term brand partner in our first four years.
Ebay Motors, to me, seemed like a perfect match for our community. Our readers are constantly buying parts online, and I use eBay basically 24/7 to find rare components for my fleet of old vehicles. My purchase history reads like an automotive Bill of Materials; here’s a tiny snapshot:

But how could I get the attention of such a large and beloved brand, and how could I make sure that I delivered a top-tier product for them? I didn’t have a plan going into the F1 event, mostly because I didn’t want to force anything. It’s very important that partnerships we have here at The Autopian feel organic, and I want our readers to love every single bit of content we produce, whether it’s news, a review, a deep-dive, an investigation or a paid partnership.
I don’t know exactly how it came up, but as I was talking to a car enthusiast on eBay’s team, I mentioned that I bought all sorts of Jeep parts off eBay because there’s just so much selection. In fact, I said, there’s so much on eBay that you can literally buy an entire Jeep body! I showed eBay’s rep what I was talking about:

“I bet one could build an entire WWII Jeep using parts from eBay,” I continued. “Actually… I’d love to do it,” I half-joked. Ebay’s rep seemed to find the brand new Jeep body interesting, though we quickly returned to paying attention to the F1 race. I drove back home to LA the next day, and a few months elapsed without me giving that red Jeep body tub you see above any more thought.
Then, out of the blue, I received an email. It was eBay Motors asking if I’d like to talk about the Jeep project I had semi-jokingly mentioned at the race. “Wait, what?” I thought. “This is great! A potential partnership with eBay would be huge!”
Fast forward a month or two, and after we’d proposed a few different partnership scenarios (including one involving flying a Jeep to Normandy), eBay agreed to sponsor a build with the following goals:
- I would assemble a brand new Willys MB from scratch in my driveway using primarily parts purchased off eBay
- I would drive the WWII Jeep 900 miles to Moab, Utah
- I would off-road the Jeep on some of the world’s greatest trails
We would deliver world-class articles and videos describing this extraordinary endeavor and highlighting how great eBay is for sourcing car parts, while Ebay would cover build costs and compensate us for the content. If we played this right, this partnership could cover the annual salary of an Autopian staff member; this was a big deal, especially given that, if I was going to have any chance of pulling this off, I’d have to devote basically all my time to it.
I was over the moon for days! We had penned an amazing deal with eBay and all I had to do was…
… wait. I had to do what?!
I Had Pitched Something Borderline Impossible
When I initially introduced the project in August, many readers and I had similar thoughts on how difficult it would be for me to execute. Back when I lived in Michigan as a staff writer for Jalopnik, I used to buy rusted-out $500 junkers, resurrect them on a budget, and take them on epic road trips. Building a brand new WWII Jeep with fresh, rust-free parts should be relatively easy, right?
Within about a week of starting on the job I realized that, given the short timeline and my obligations as a father and media company co-founder, what I had proposed to eBay was borderline impossible.
Rebuilding an existing 1940s WWII Jeep that needs bodywork or engine work or drivetrain work — or all of the above — is extremely challenging, but in those cases, one at least has something to go off of. All the tiny random brackets and fasteners and specialty washers are there. One has a blueprint to copy, replacing old bits with new ones.
Committing to a brand new WWII Jeep meant I had to bring an entire vehicle into existence from nothing. It wasn’t just that I had to determine every single tiny part that made up a WWII Jeep, I had to figure out how all those parts went together; with no starting point, I had to reference videos and photos, which meant I had to pore over hundreds of online forums and pages of WWII Jeep literature.
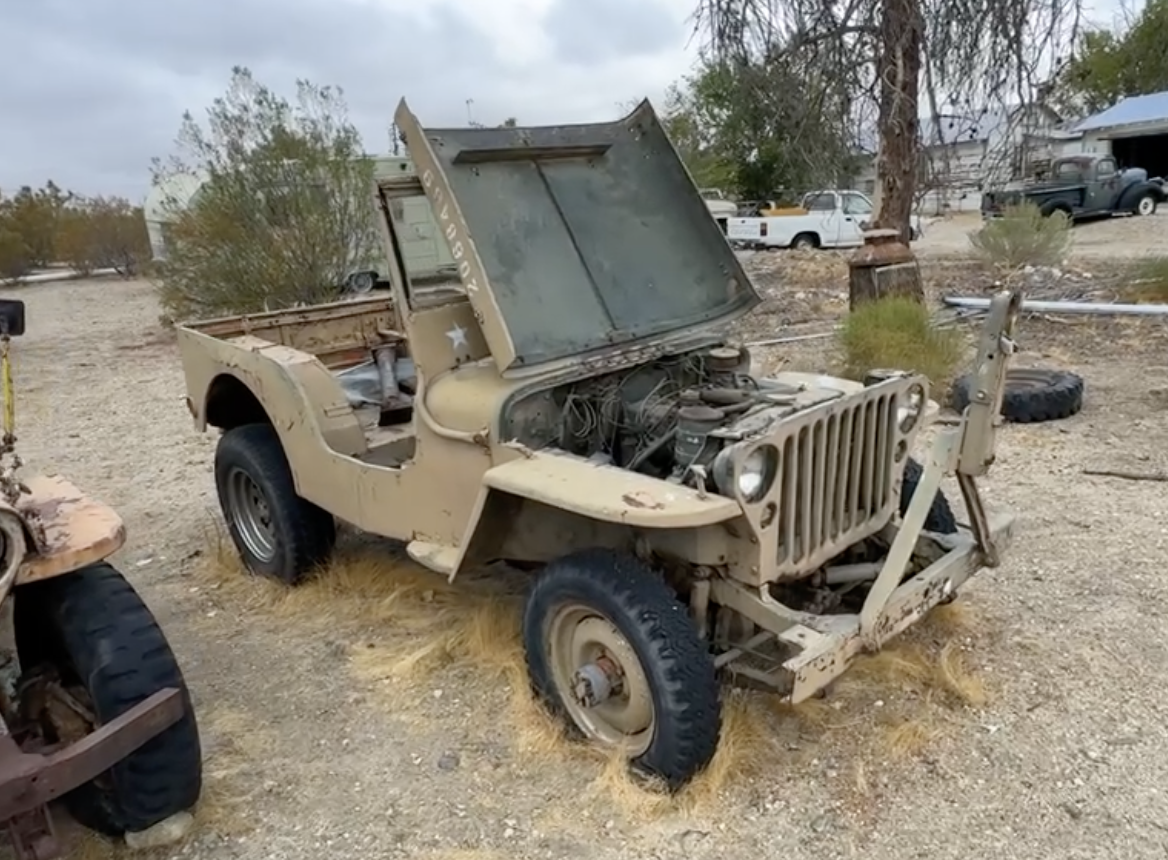
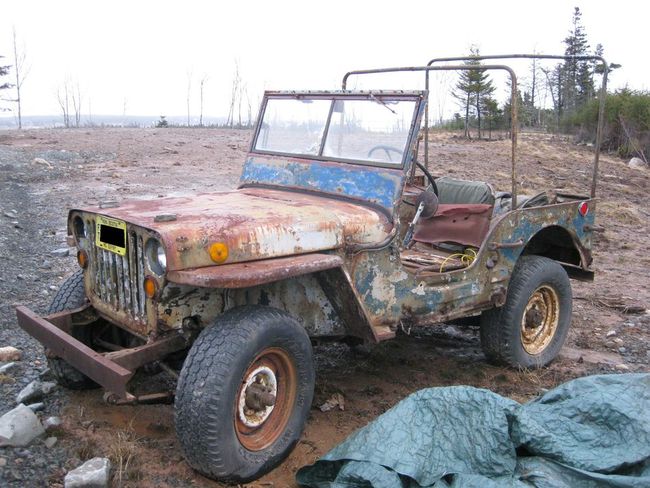
I ended up getting lucky and finding a reference Jeep nearby; this would help me figure out how certain parts were meant to go together and act as a source for random bits should I be unable to source each of the 1000+ parts that make up a WWII Jeep (in the end, I would only borrow three from the reference Jeep, though with better planning I could have used none). The vehicle was a completely rotten junker that I bought from the desert for $1500 with no title and no paperwork.
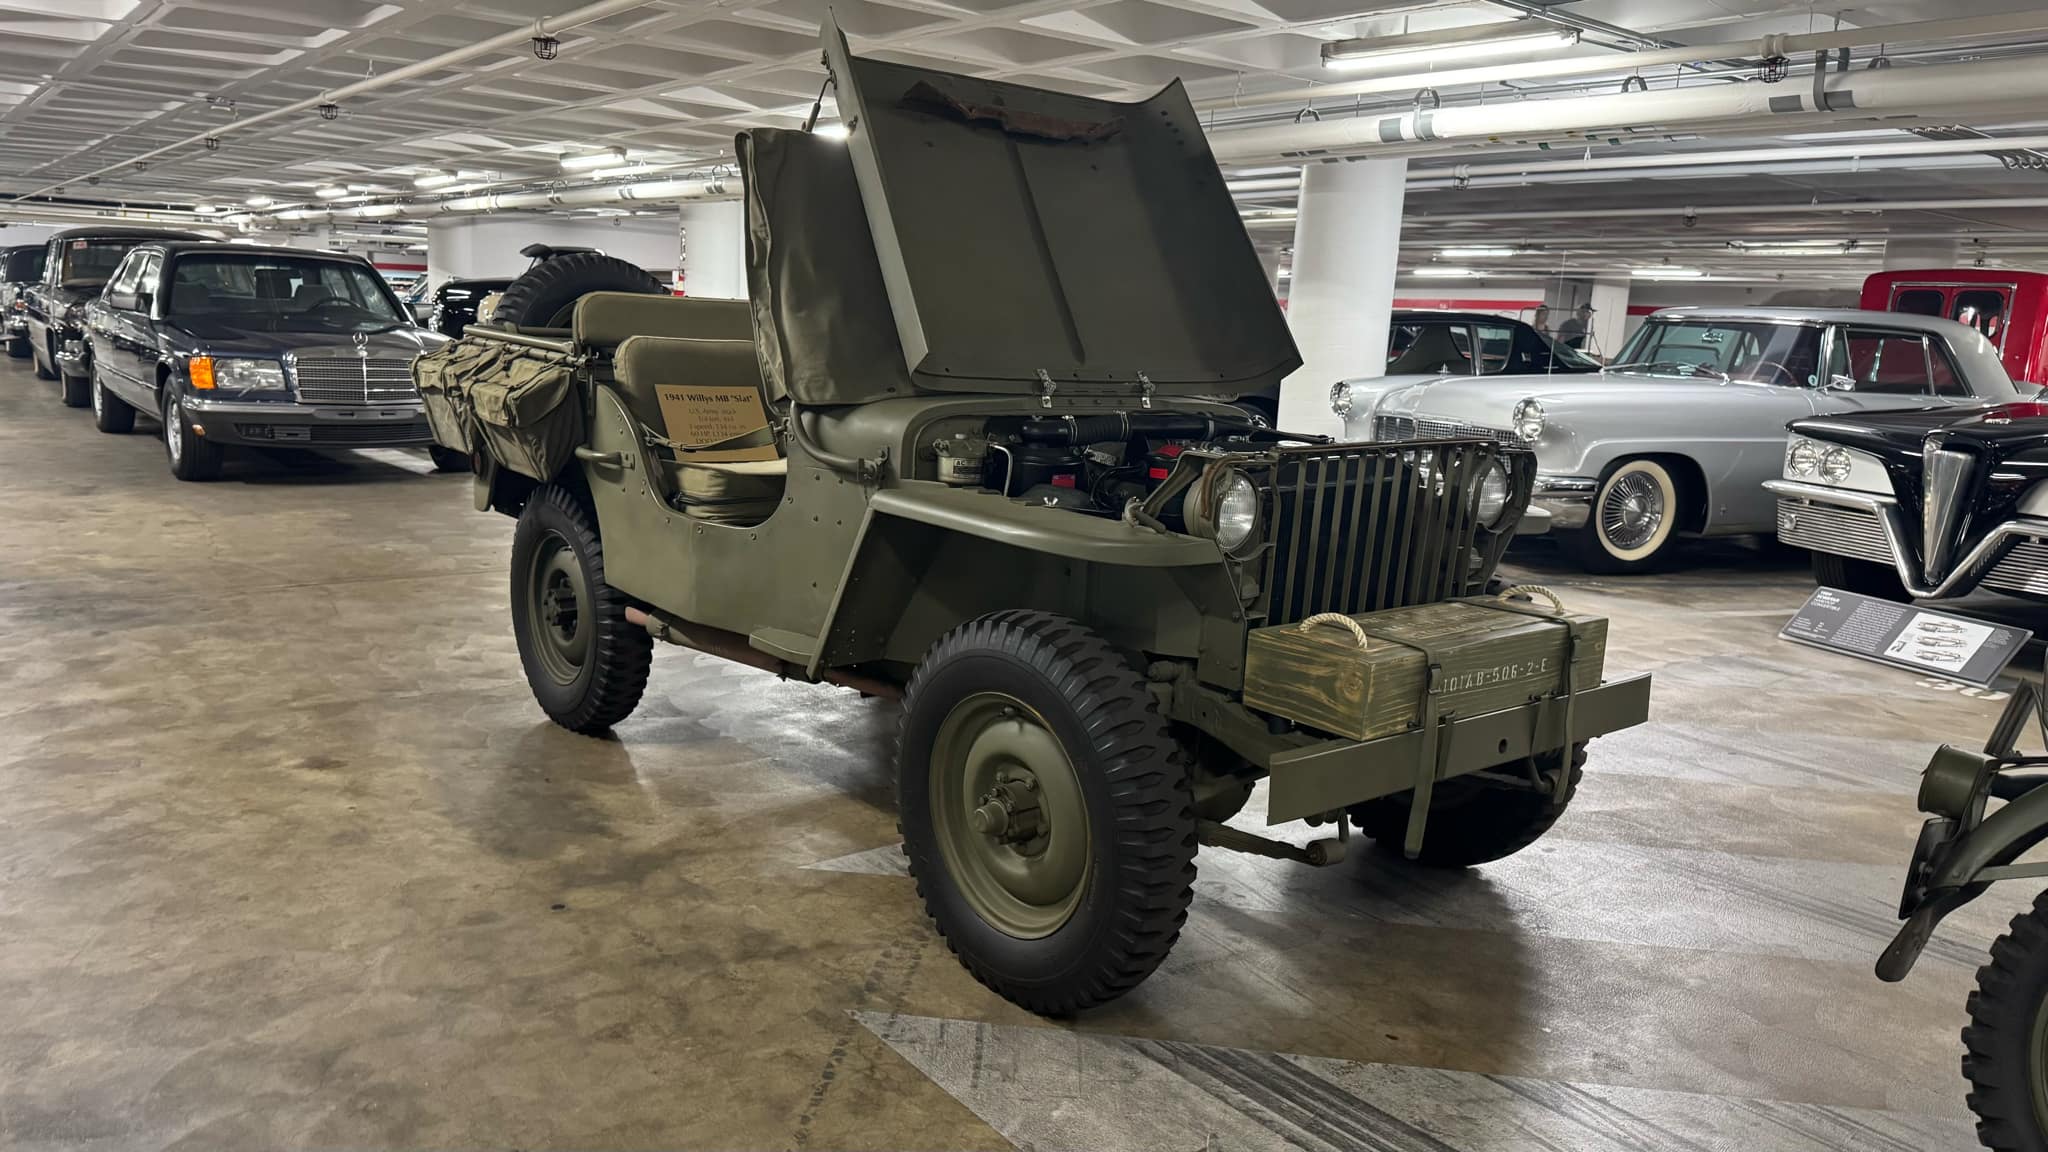
Because most of the Jeep had been jerry-rigged such that it was far from factory-original, it wouldn’t be the ideal reference Jeep, but there was a fully-restored WWII Jeep at the Petersen Automotive Museum, so I snapped a few photos of that to help out.
One of the main benefits of the crusty reference Jeep was that I could yank the engine out and use it as a guide as I built up the new engine.
Yes, you read that right. The new engine.
Early in the project, I asked myself this question: Given that I promised to build a brand new WWII Jeep, how much of it needs to be brand new in order to avoid it feeling like an old Jeep that has been restored? Ultimately, I decided that the vast majority of parts (75% or more) had to be brand new, and three components in particular absolutely had to be factory-fresh: the body, the frame, and the engine. As for how many parts I wanted to source through eBay: at least 90%.
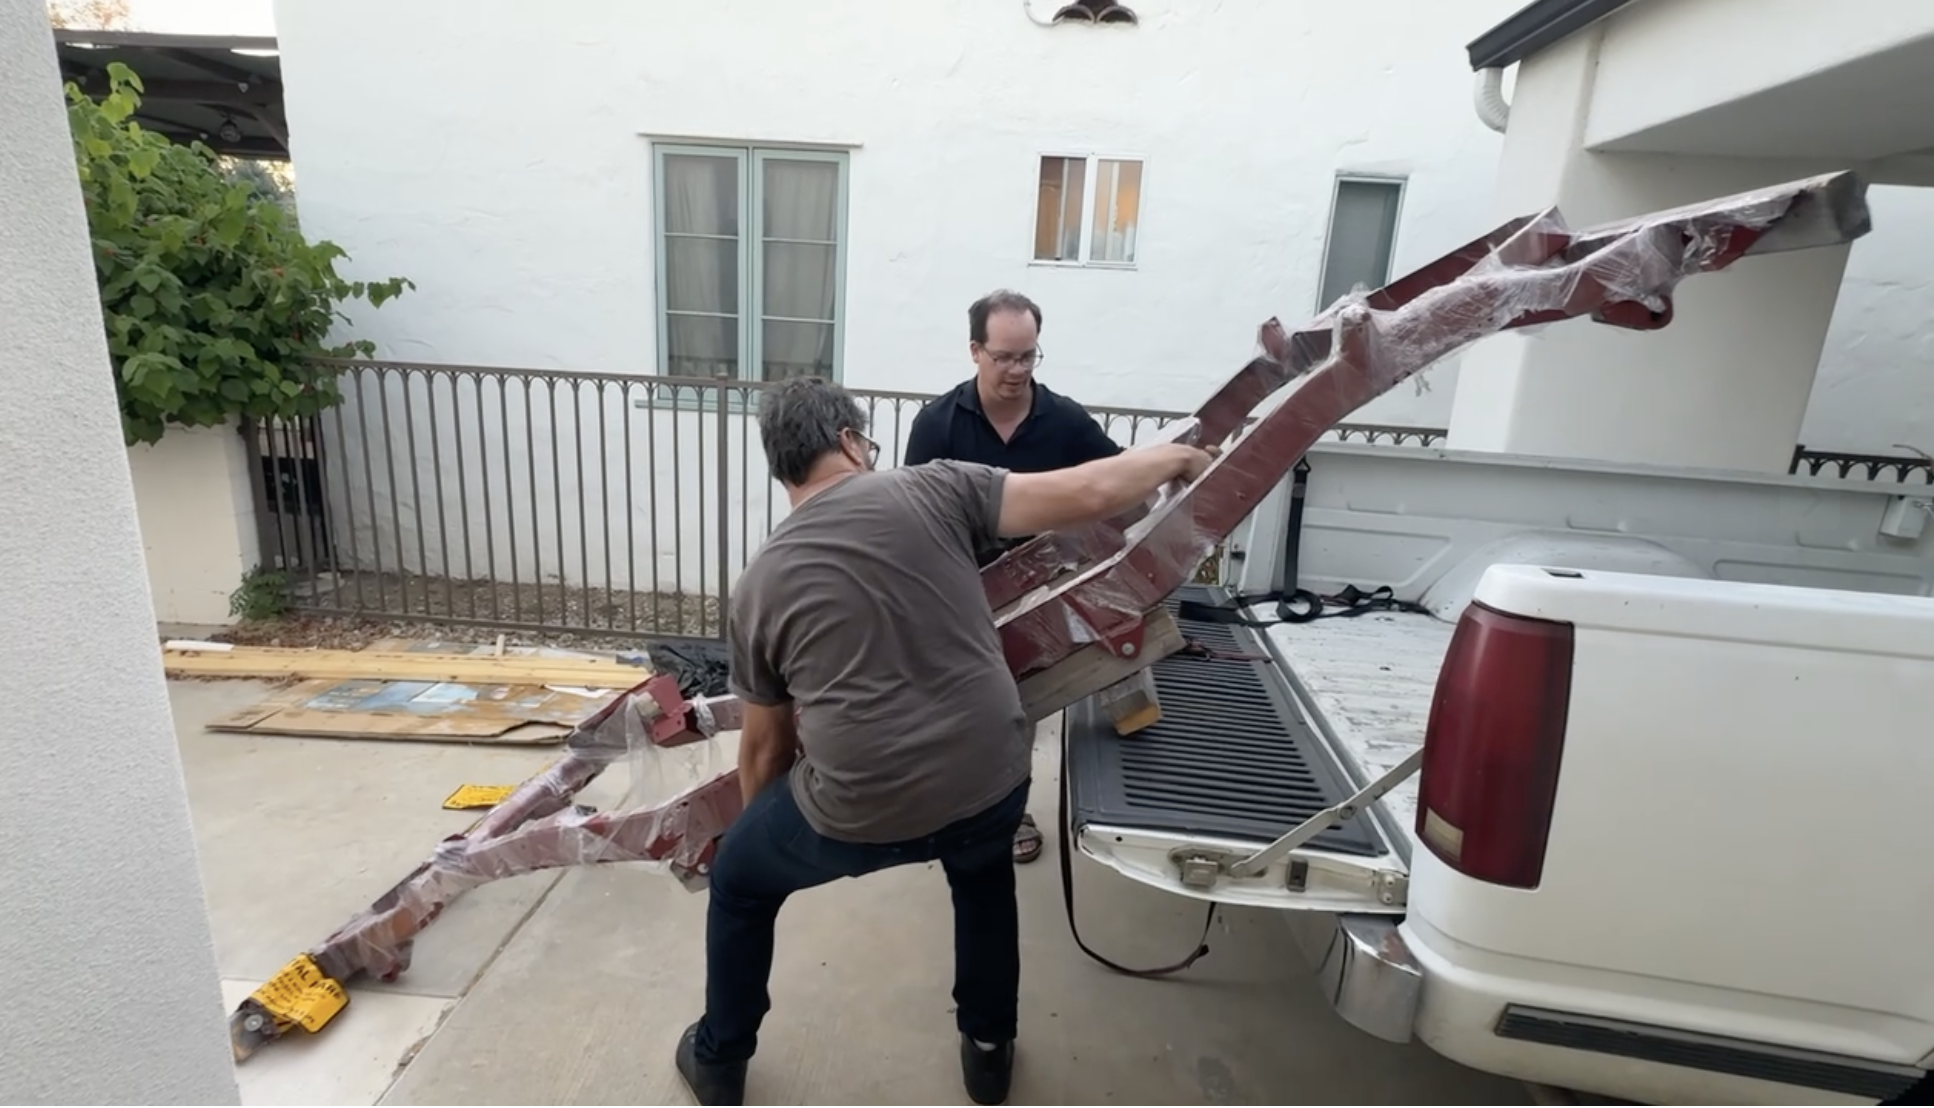
The body that I’d purchased from eBay was originally manufactured by the Manila, Philippines-based company called MD Juan; it had shown up in a gigantic wooden box that had to be lowered down from a big truck, and then wheeled into my driveway. The frame, also built by MD Juan, was shipped to a local warehouse. I was able to put that into the back of my 1989 Chevy K1500 and unload it in my driveway with the help of my friend Carlos (see above).

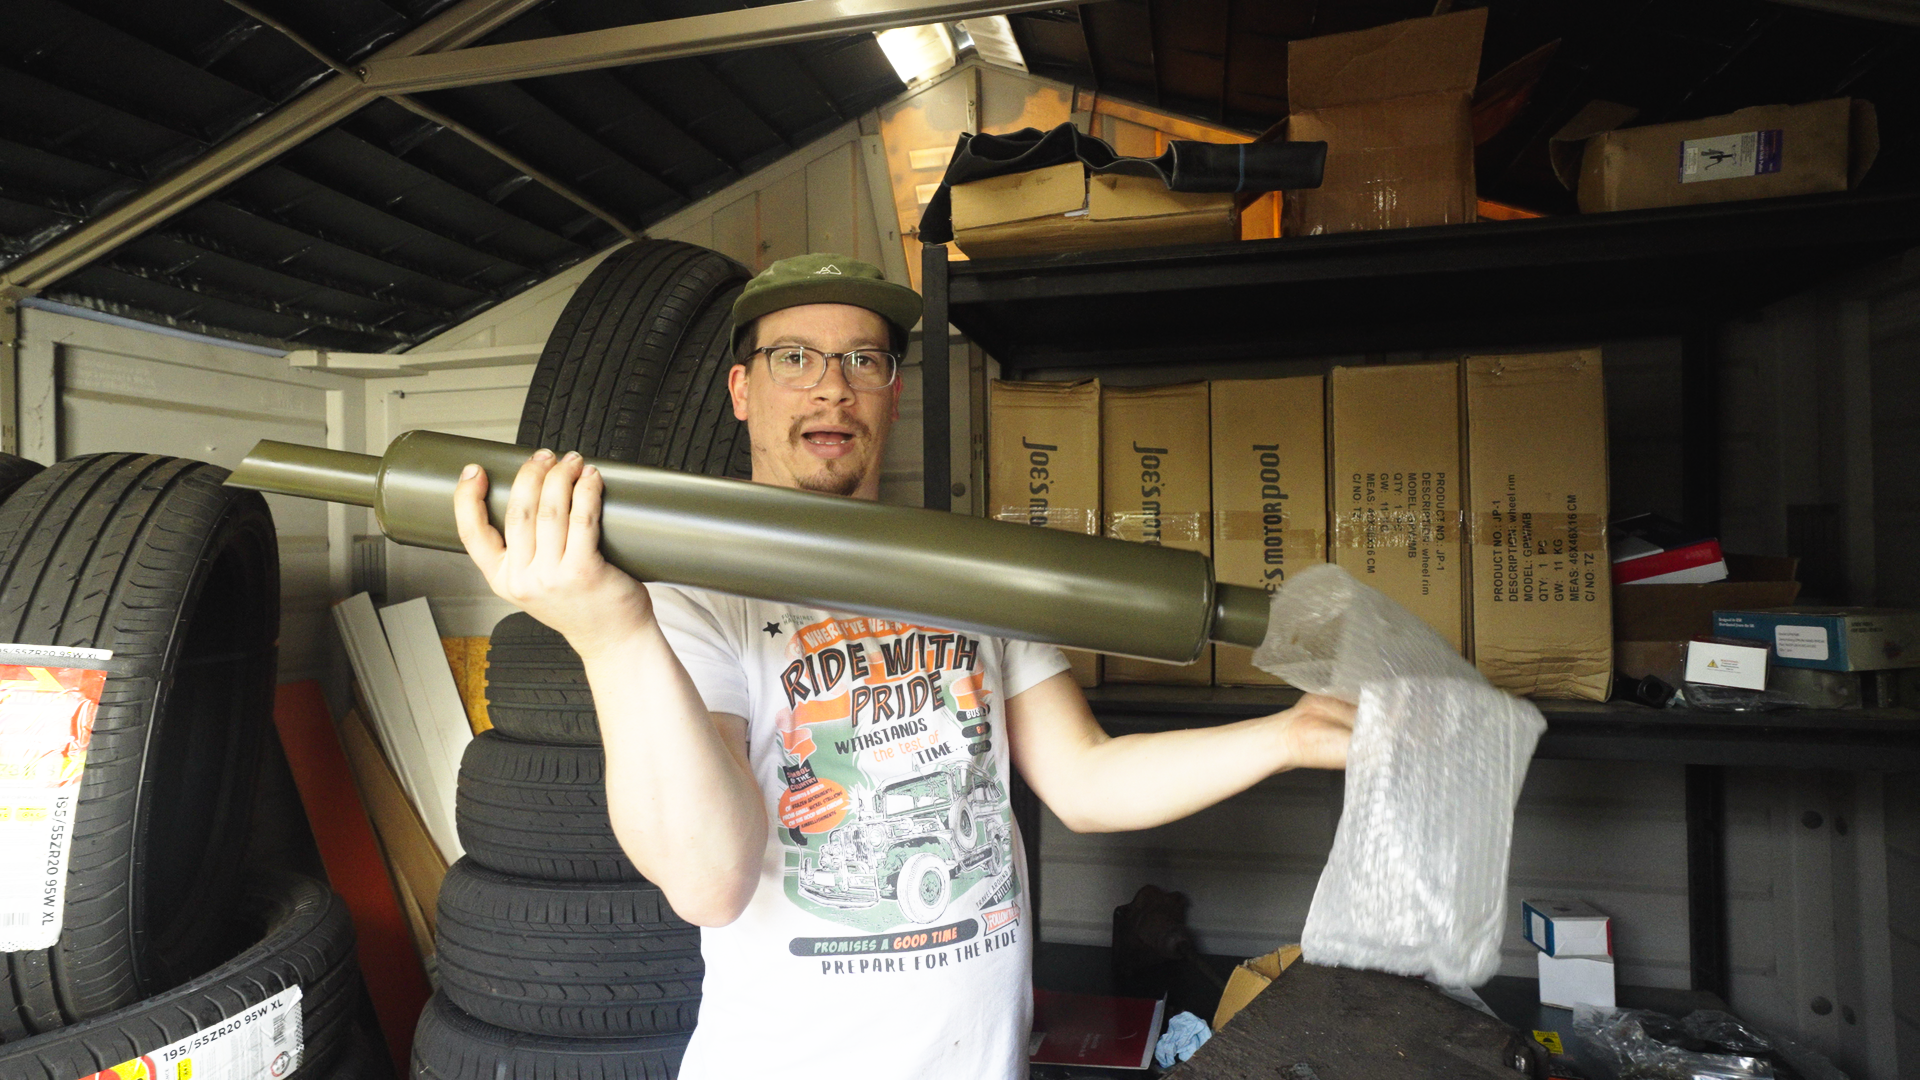
Unlike the body and frame, my engine didn’t originate in the Philippines, but rather another nation with a huge WWII Jeep culture: France. Specifically, the motor was cast by a company called “Willys Owner Product.” I chatted with eBay seller Kaiser Willys, who said they had one available and were happy to list it on their popular eBay store. Within a few weeks, a sizable wooden crate showed up at my workplace, and inside was the most beautiful engine block I had ever seen; it was a shiny new Go-Devil motor, and I was likely going to be the first American in 80 years to install one on a brand new frame.
Two Major Preparations That Would Ultimately Save Me
Unlike many sponsored builds you might have seen before, this one wasn’t going to involve a huge crew of experts, a well-stocked garage with a hydraulic lift, or a big film crew. No, this would be just me in my driveway trying to build the greatest 4×4 of all time in a ridiculously short amount of time, while also not completely dropping the ball running a media company, raising an infant, and being a good husband. I was a dad with tools and a prayer, and since I understood this was a longshot, I prepped my workplace and made a few strategic calls to give me a bigger chance at success.
Prepping My Workspace (Which Was Just My Driveway)
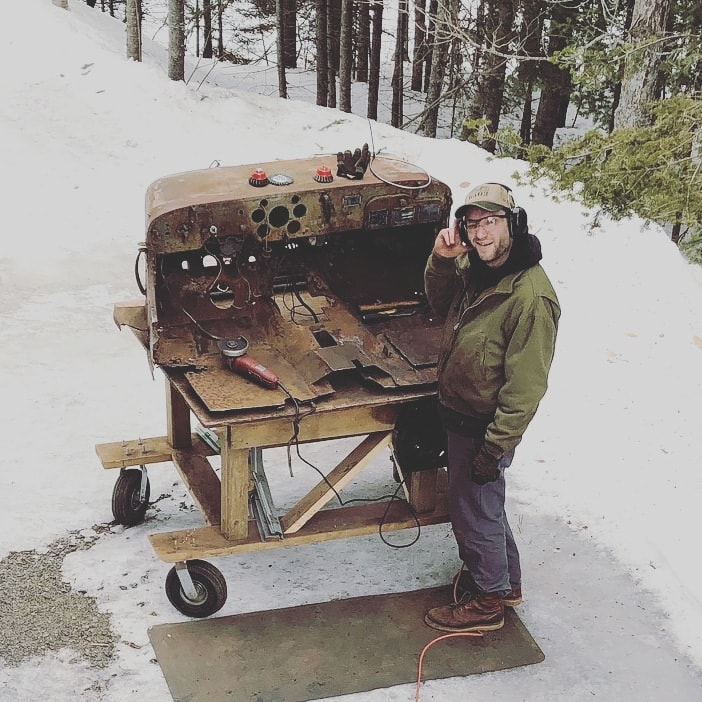
View this post on Instagram
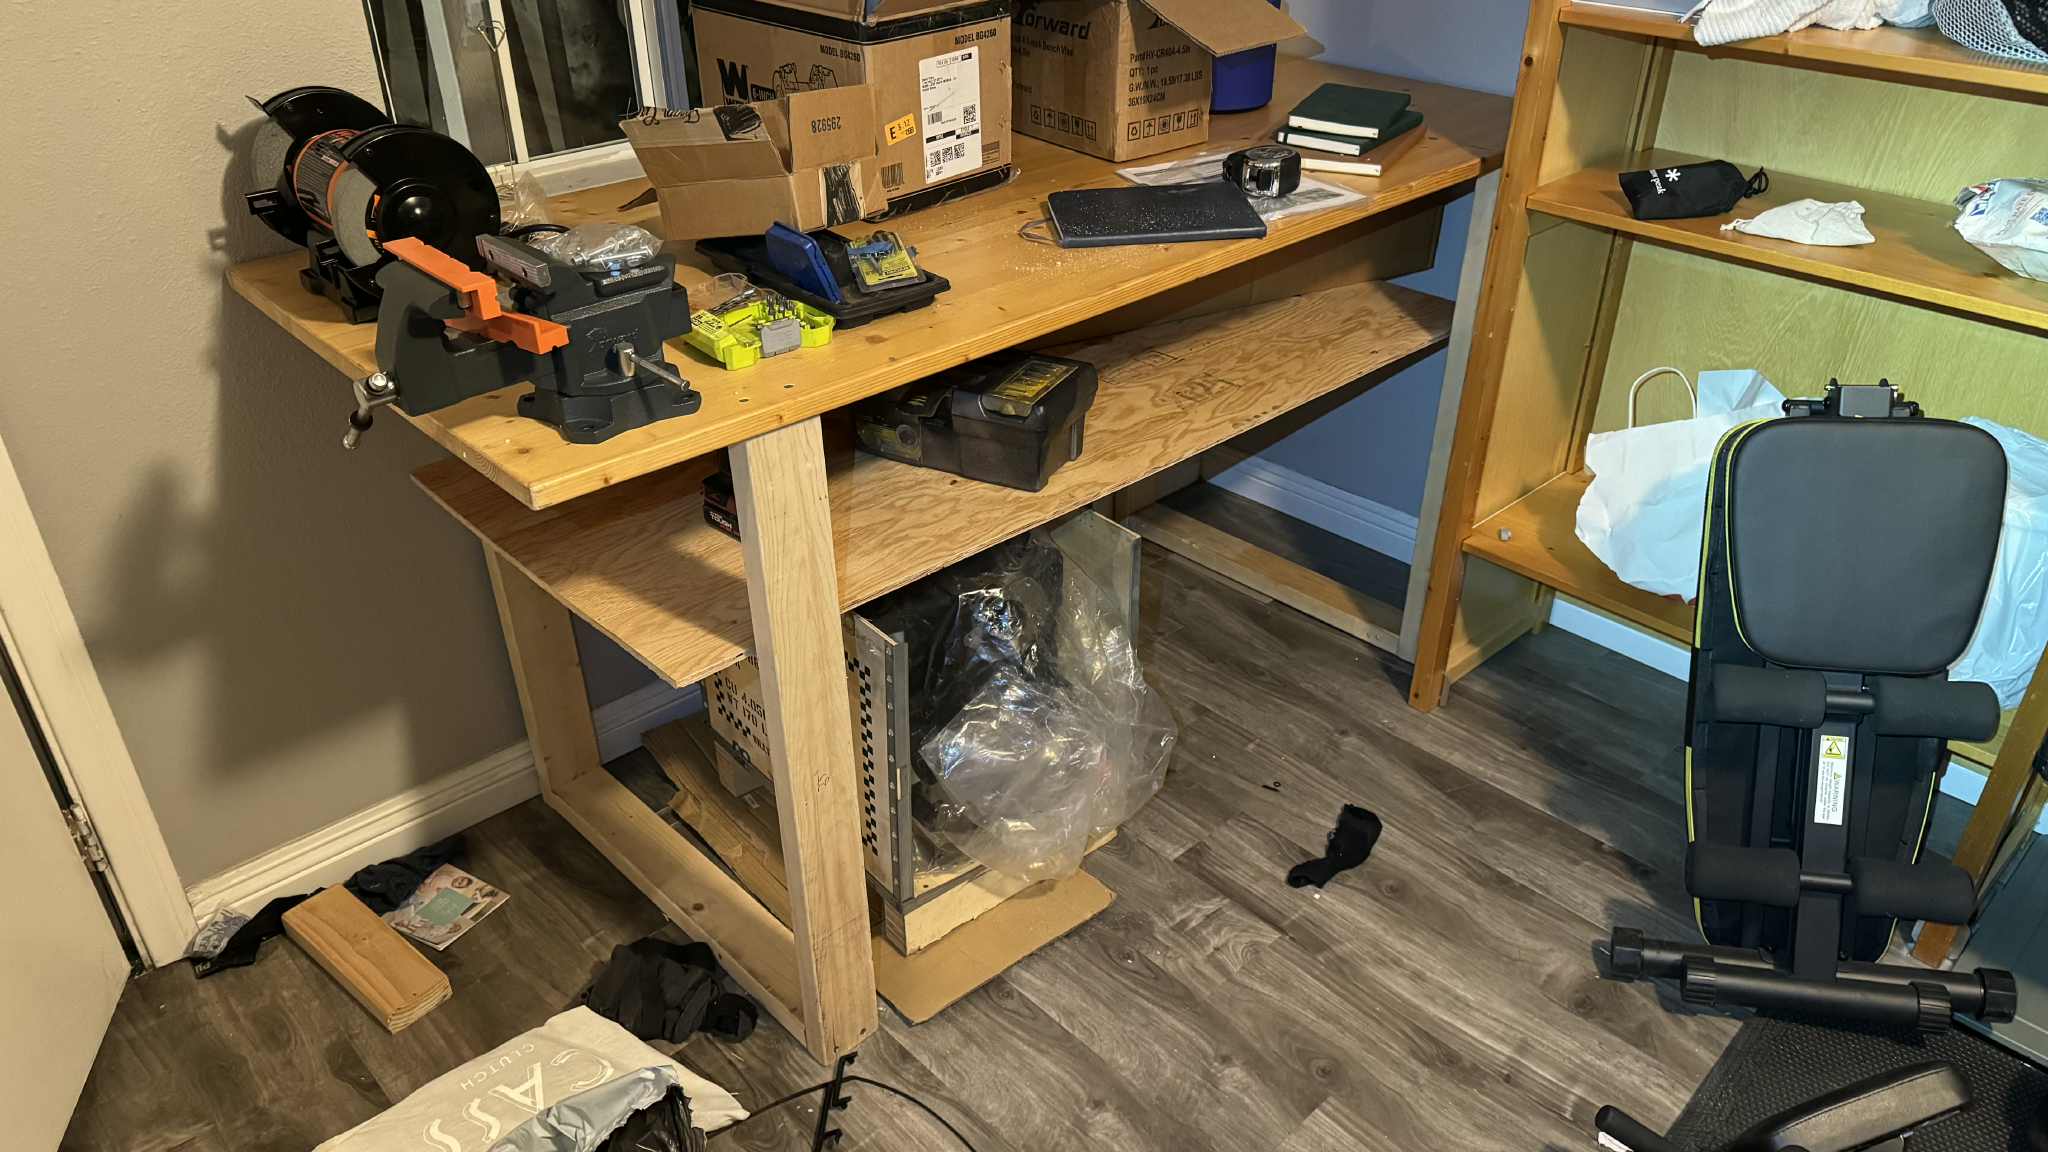
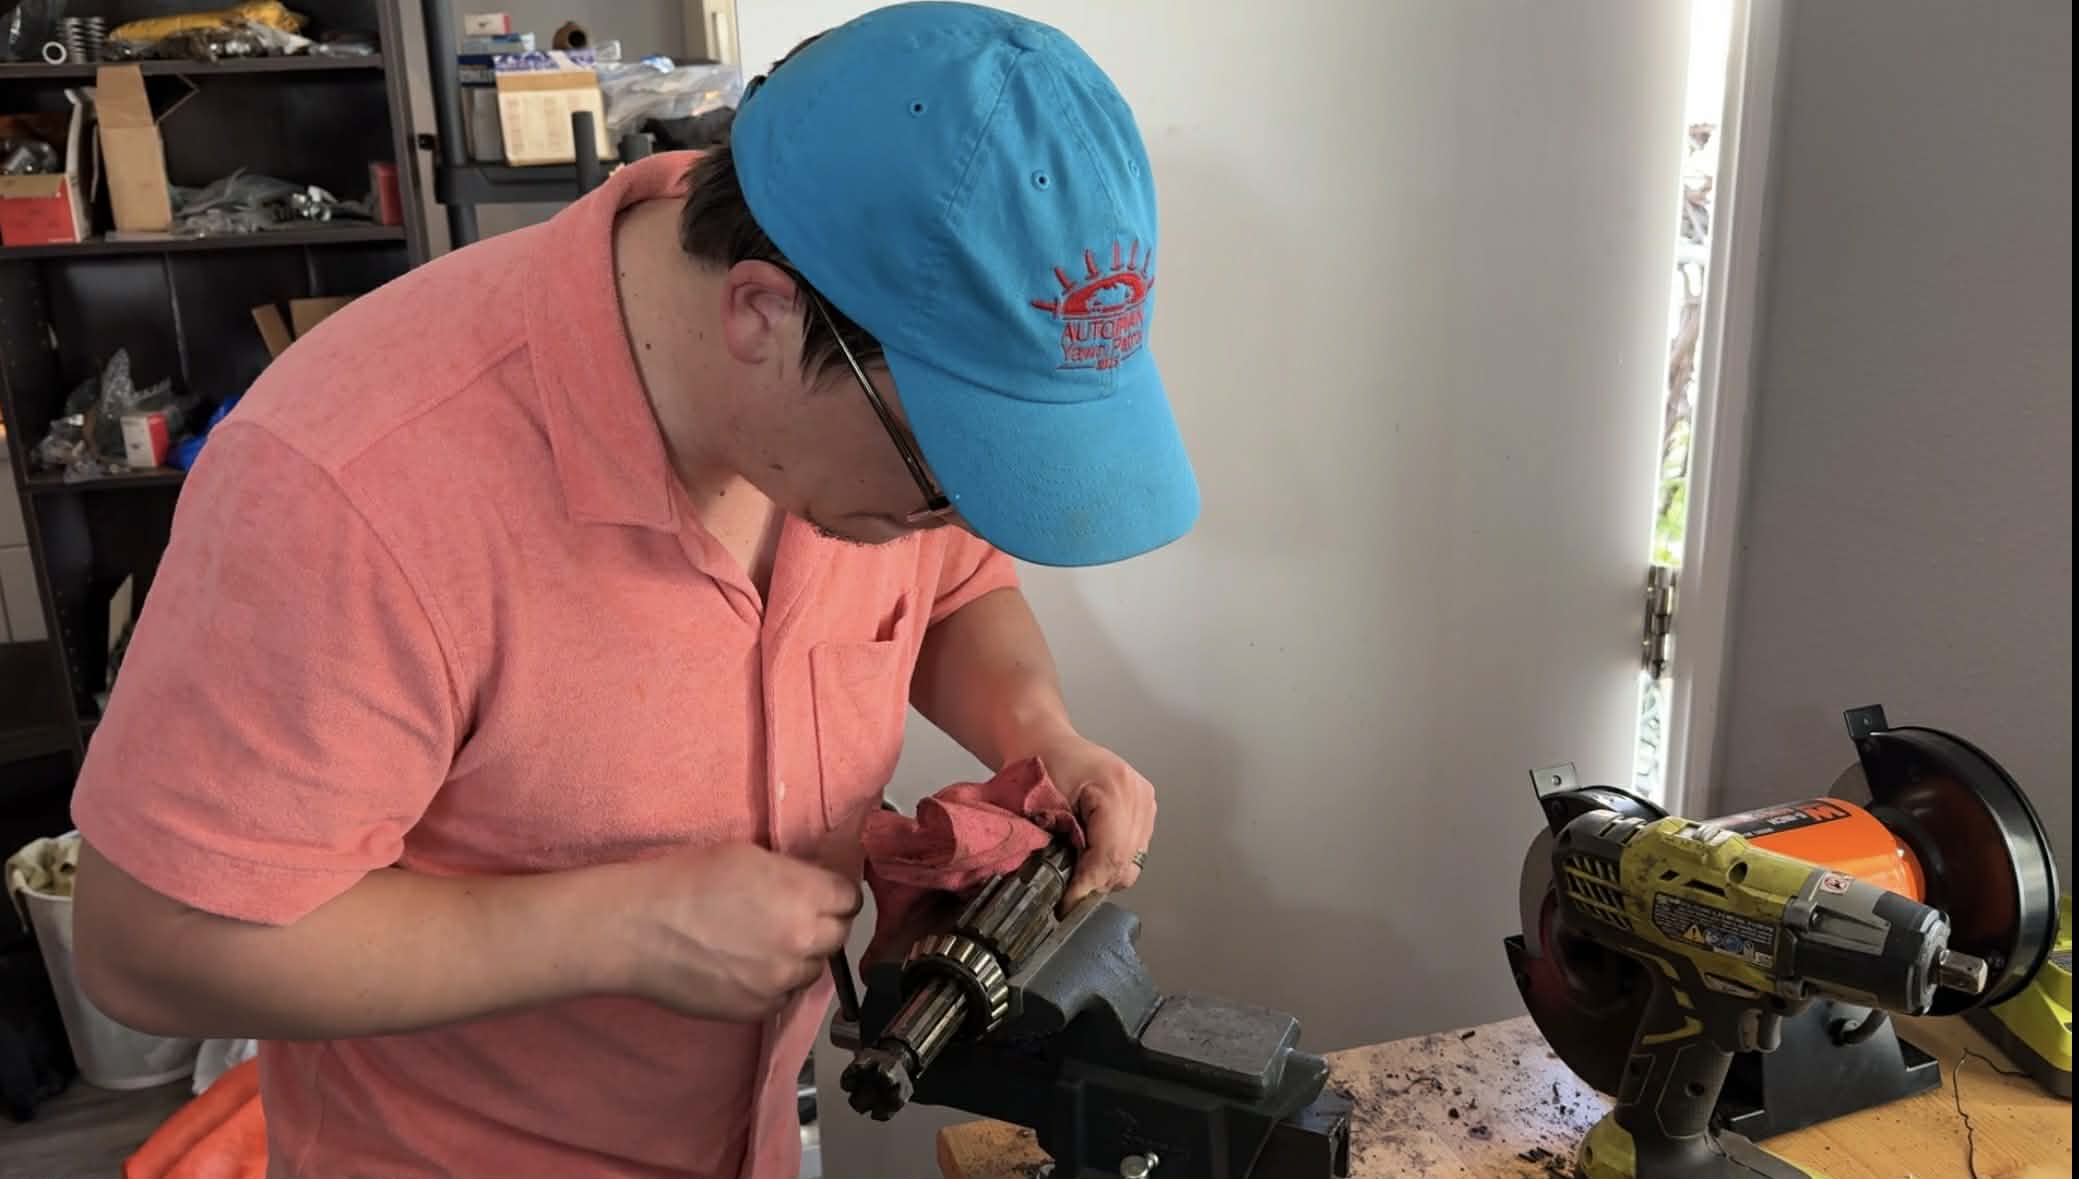
There were three critical things I did to prepare my workplace — which was just my driveway here on the east side of LA and, to a lesser extent, my small garage — to become, essentially, an automobile factory. First, I built a workbench, which I was lacking because my family had just moved into this 100 year-old suburban LA house. On that workbench I bolted a vise and a bench-grinder — two tools that I would end up using pretty much constantly throughout the build:
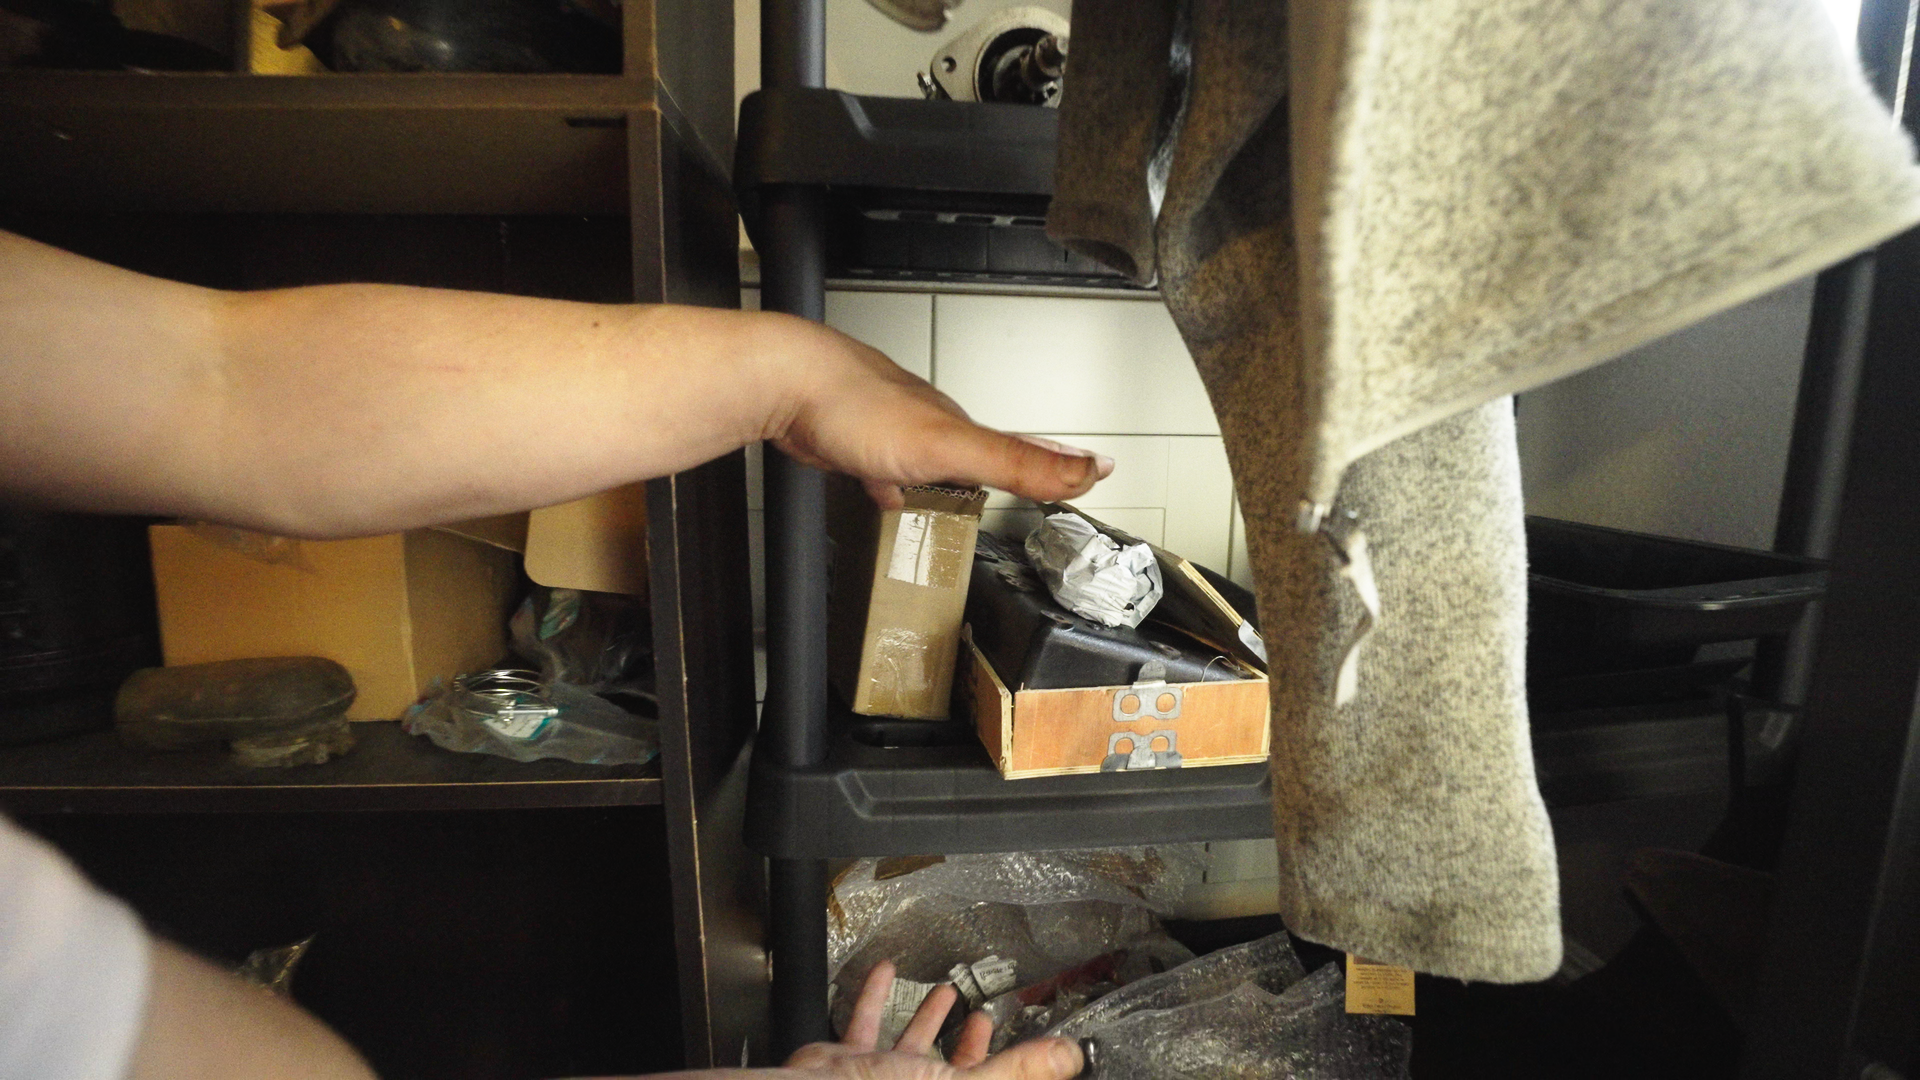
Second, I bought three shelves on which to store the hundreds of parts I was about to have arriving at my doorstep pretty much nonstop for the following six months.
Third, I purchased four huge boxes of assorted (fine thread and coarse thread SAE) fasteners. I understood that, even if I had all the parts needed to build a WWII Jeep, running to the store to pick up fasteners to actually install those parts was going to take ages. I wanted to be ready with any fastener I could possibly need, especially since — because I was building the Jeep from scratch — I had zero to start with.

That vise and grinder-equipped workbench, those storage shelves, and those cases of fasteners were absolutely critical upfront purchases that would help me save time throughout the build.
The Smartest Preparation Was Calling Three Wizkids
Even though this was my project, the reality is that very few people accomplish great things entirely on their own. So I made three calls.
View this post on Instagram
The first was to my longtime friend Brandon Girmus. He restored a 1946 Willys CJ-2A when he was 16 years old, combined that love for the Jeep brand with academic brilliance to score an engineering job at Chrysler, and excelled at Chrysler to the point where he became the company’s youngest director.
To me, though, he’s just the same old Brandino I met on the first day I arrived in Auburn Hills for my 2012 summer internship; the same Brando I used to go on road trips with to Toledo just to eat pizza in the shadows of the hallowed Willys-Overland factory; the same Brandon who over the years has helped me wrench on countless Jeep projects in a cold garage.
Brandon is a true world-expert on WWII Jeeps. He has restored one on his own over a single winter; he has read every bit of WWII Jeep literature known to humankind and can tell you insanely obscure facts about the vehicle; and he has even written fiction about what it might have been like in the Willys-Overland factory during the war.
The second person I called was a man named Étienne Boisseau, a Canadian Autopian reader who has been following my work since 2017, when I resurrected Project Slow Devil (a rotten 1948 Willys CJ-2A farm Jeep). In addition to being a reader, he’s also one of the world’s foremost experts on WWII Jeep restoration, and has been doing a complete nut-and-bolt job on his 1944 Ford GPW since 2012. Here are some photos of his work:


With Brandon I had a World War II Jeep history expert and someone who had restored a WWII Jeep and a CJ-2A and with Etienne I had someone who was actively doing a ridiculously in-depth restoration. So now that I had some Jeep expertise, I needed some muscle. This is where Laurence comes in.
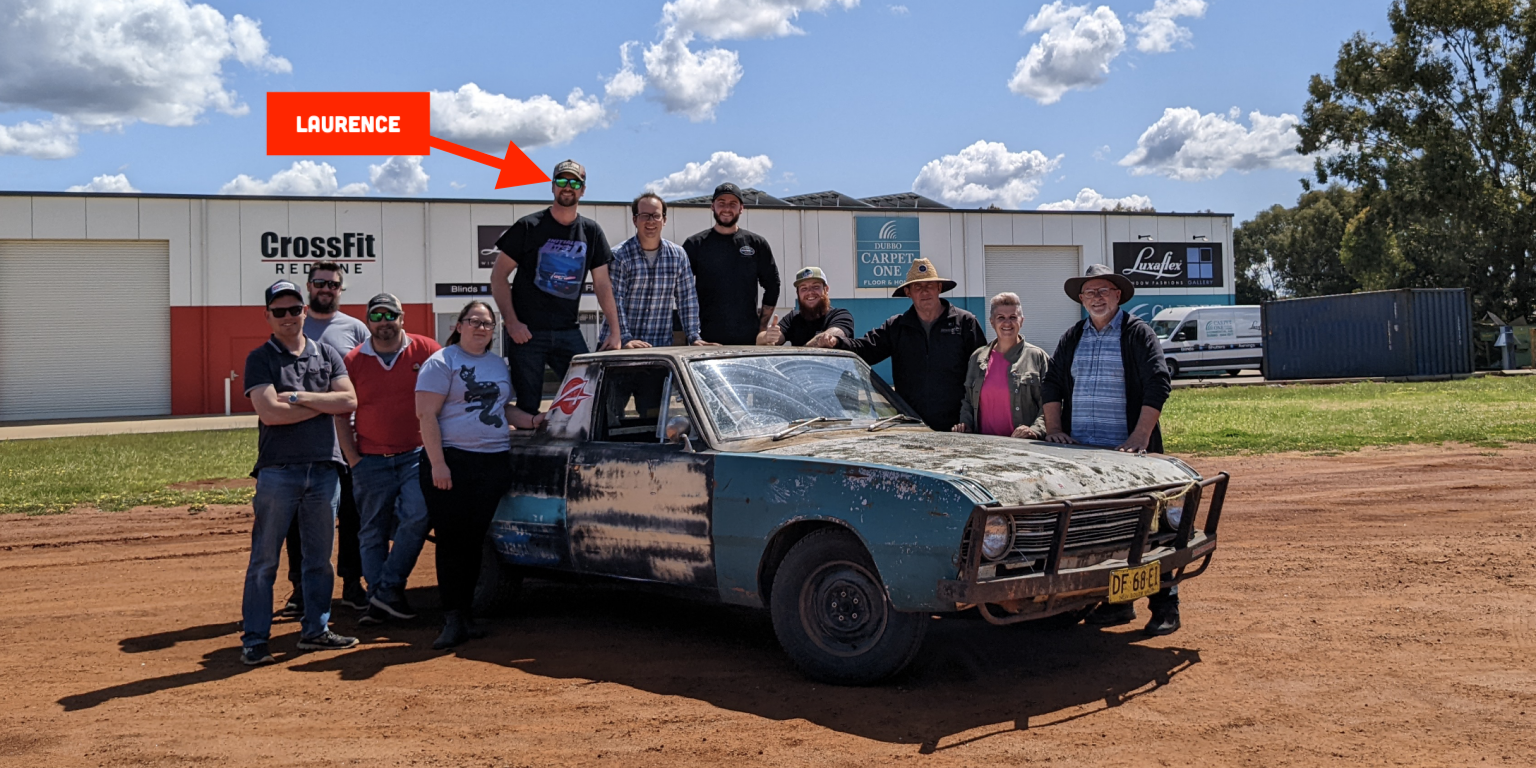
In the early days of The Autopian, I bought a 1970 Chrysler Valiant ute sight-unseen in Australia for $500. Autopian reader Laurence purchased the vehicle on my behalf and allowed me to stay with him for a month as the two of us worked day-and-night to bring the rustiest ute in Australia back to life.
What we pulled off was truly unbelievable, thanks largely to the fact that we are both wrenching machines who work brilliantly together. When I told him about this project that was arguably even more challenging than that rusty ute, Laurence stepped up and agreed to make the long flight.
Driving 1000 Miles To Pick Up Parts, Receiving Hundreds Of Shipments
With my workplace somewhat ready to take on the complete assembly of an automobile, and the team of Wrenching-Avengers assembled, it was time for me to begin purchasing parts in volume. I started with the big stuff; I already had the body, frame, and engine longblock, but I still needed the transmission, transfer case, axles, and so much more.
Since the transmission case, transfer case housing, and axles aren’t parts that can be purchased brand new, I had to find a used set. Sure, I could have yanked the ones from the reference Jeep, but I hadn’t purchased the reference Jeep from eBay. After a few weeks checking, eventually the motherlode showed up on eBay Motors; it was exactly the parts I needed:

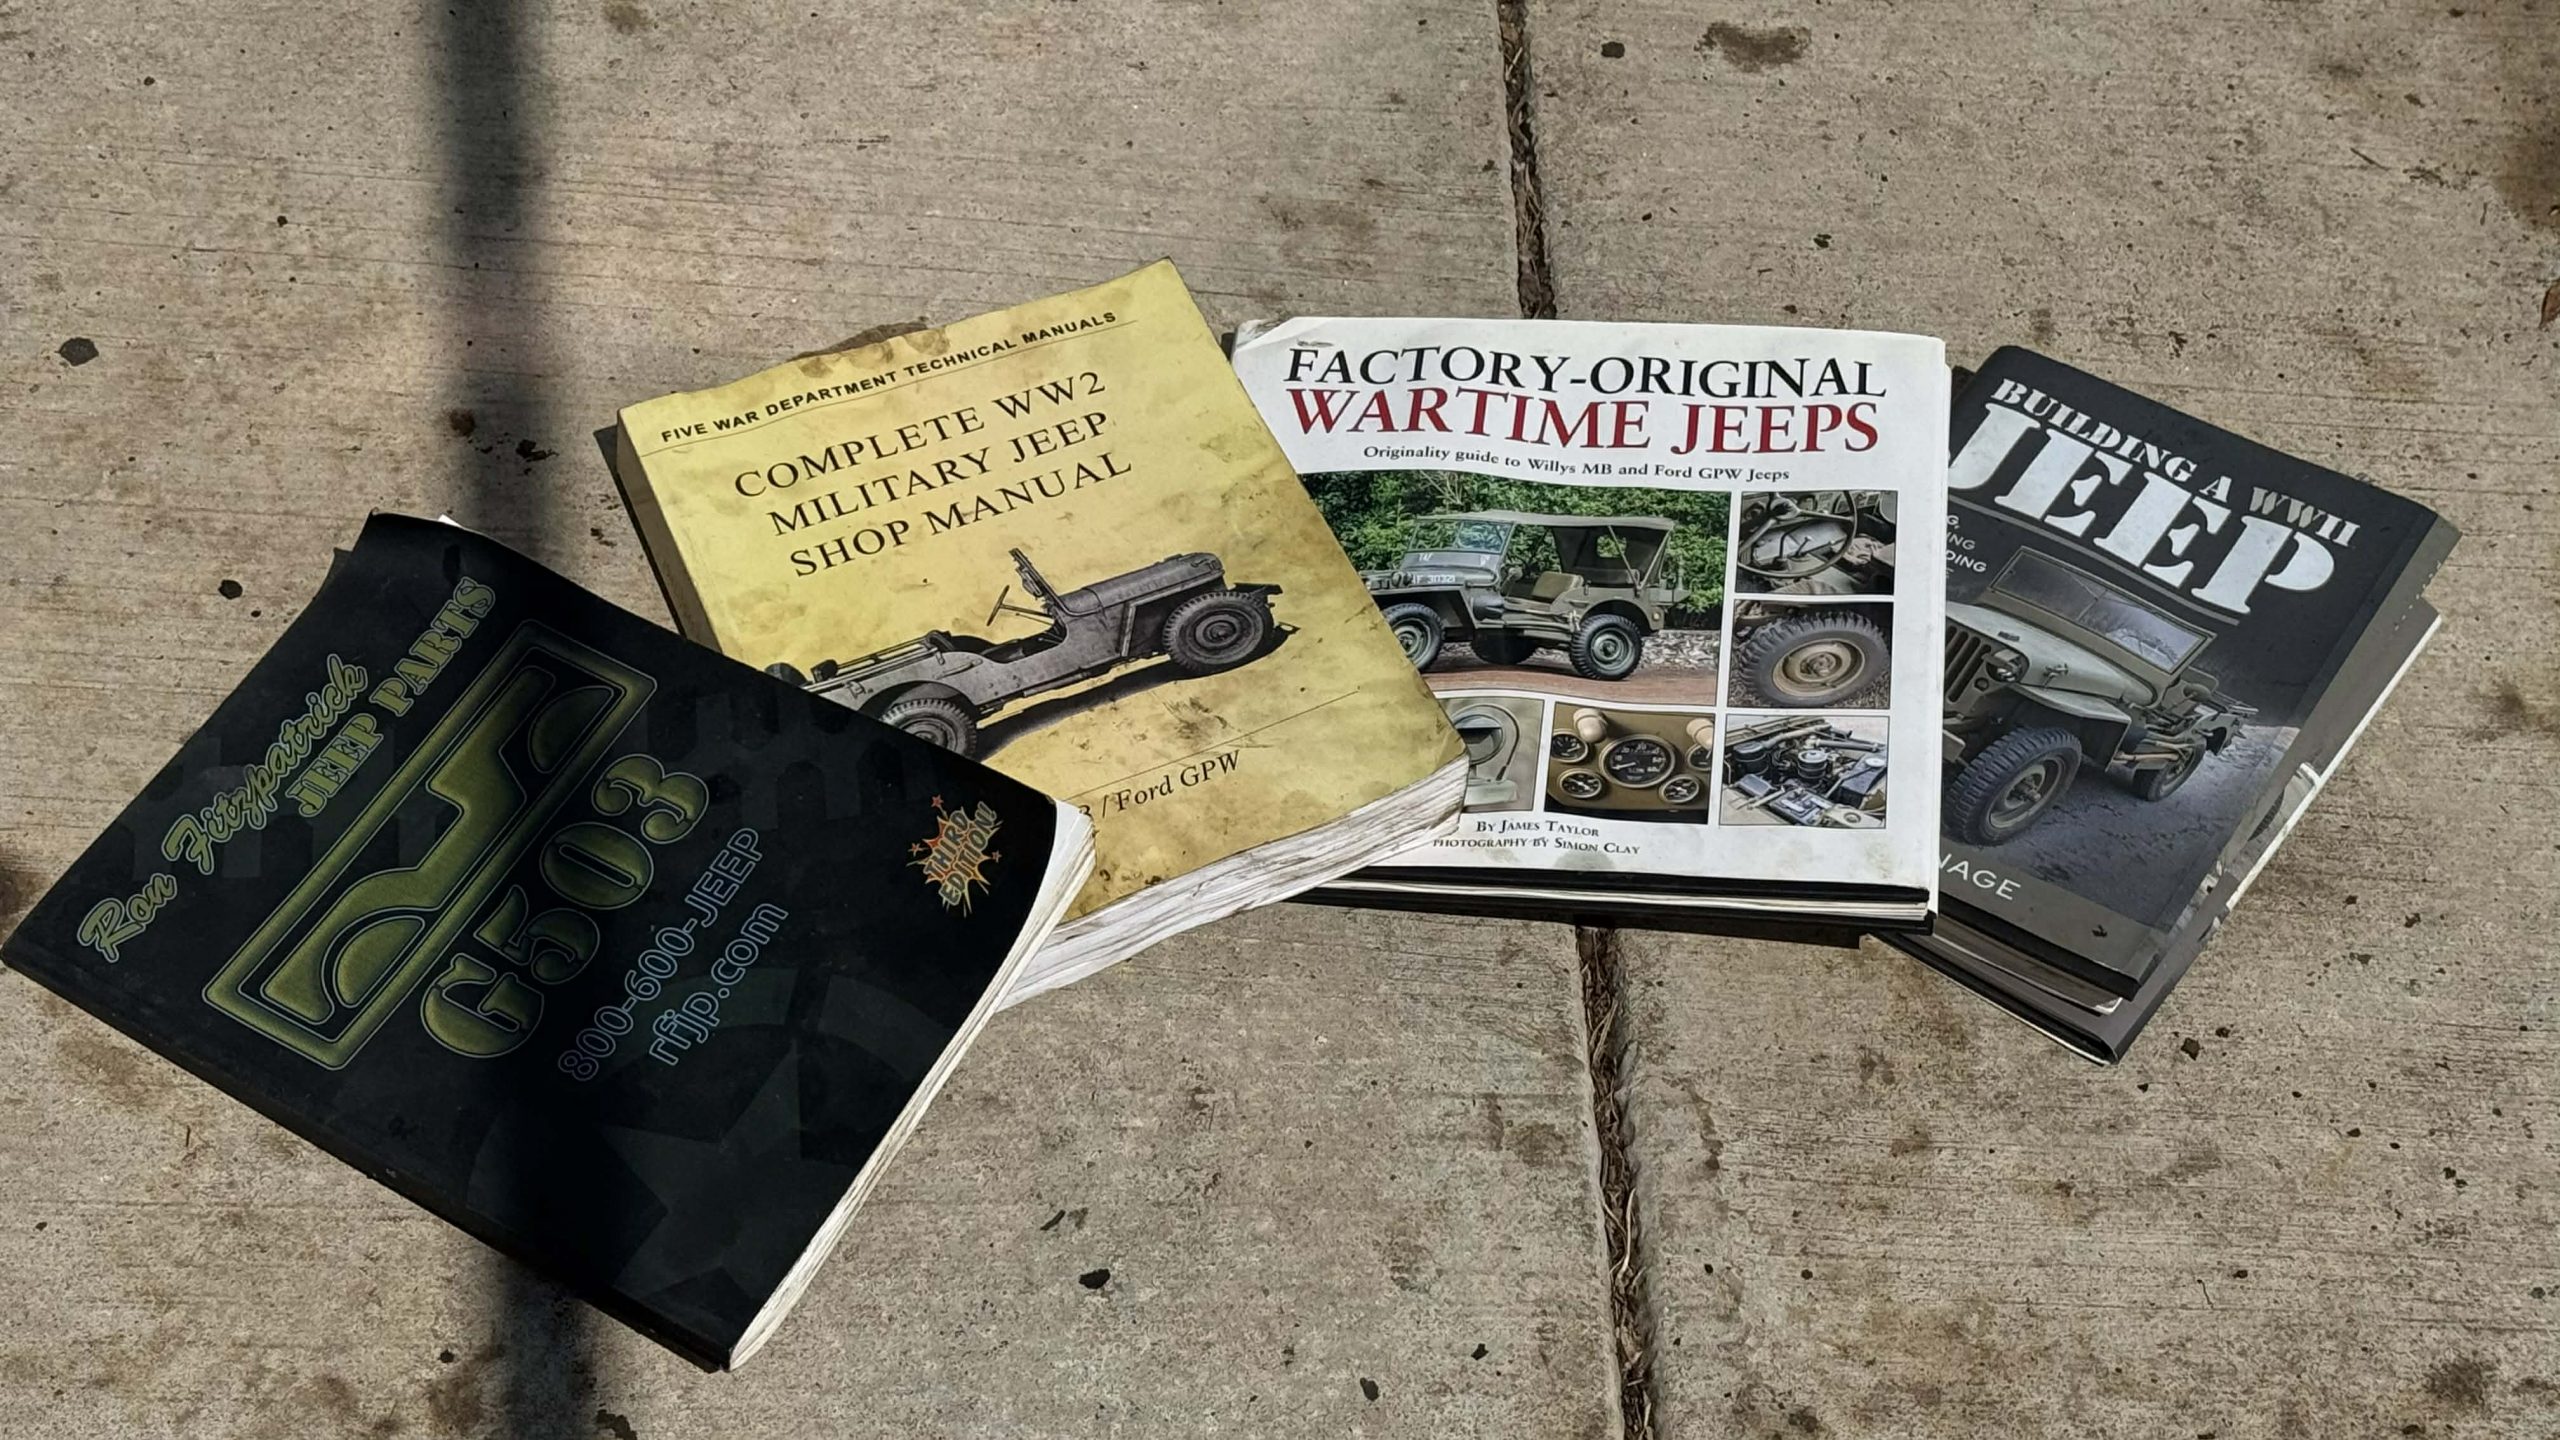
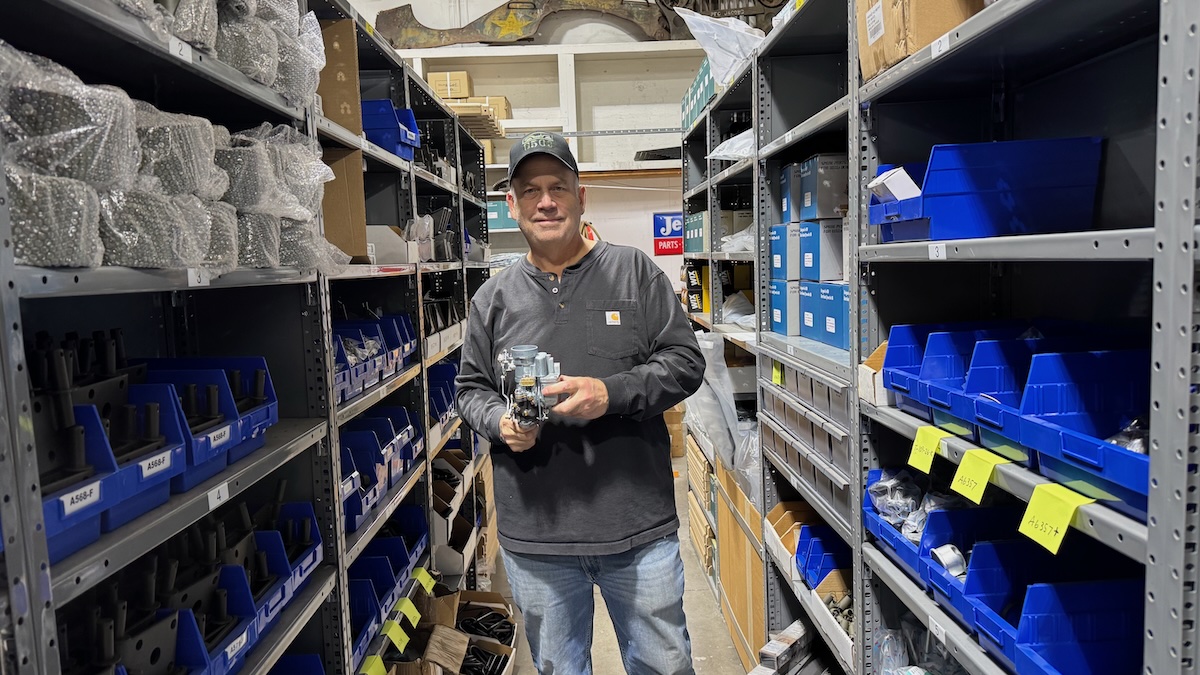
I clicked “Buy It Now” and began planning my trip to the seller, who was 1000 miles away in Longview, Washington. Luckily, the world’s most prolific WWII Jeep parts seller, Ron Fitzpatrick, was located along the route, so I stopped by and purchased a humongous pile of parts from him, mostly through his popular eBay store.
After an Autopian reader near Longview took me in for a night, he helped me load up the four axles, transmission, transfer case, and a spare engine I had purchased just in case.

My Jeep Comanche, with its 7-foot 3-inch bed completely loaded with axles, gearboxes, an engine, a new set of wheels, a seat frame, transmission and transfer case internals, an exhaust system, a starter, and all sorts of other stuff I’d picked up from Ron Fitzpatrick, handled the 1,000 mile trek back to SoCal without any drama, its 4.0-liter crushing miles as if it was trying to honor its mighty war-hero forefather.
Between September and December, I did tons of research to figure out all the components I’d need to assemble a WWII Jeep from scratch, with Etienne and Brandon helping from afar. Then I ordered the vast majority of those parts from eBay Motors, from sellers all around the world — India, the UK, Oregon, Texas, Indiana, Pennsylvania, and on and on. My mailman delivered several boxes to my front door each day, many of them rather heavy.

My wife, in the first year of our marriage, in the throes of raising an infant, and living in a house we hadn’t yet fully moved into, was incredibly patient given the chaos this build had quickly thrusting upon our home. And it was only going to get worse.

By the time my good friend Brandon arrived in December, we had loads of boxes to open and endless wrenching ahead. I now had less than 4 months to build an entire Jeep from scratch.
Wrenching With Brandon

The build began in earnest when I flew Brandon in from Michigan in early December. He had helped me rebuild a T90 three-speed transmission years ago, so I figured it might make sense for him to help me rebuild the T84 I had purchased from Washington. In addition, I figured we could get started on building the new motor, and then if we had time to tackle the suspension, we’d do that.
I wanted to try to get a running, driving chassis as quickly as possible so I could do plenty of validation testing on all the brand new parts I was joining together for the first time, and on the 80 year-old parts I had purchased from Washington.

We removed the manual transmission from the bed of my Comanche, gutted it, and cleaned up the case. Then we began assembling the all new gears and bearings and thrust washers I had picked up from Ron Fitzpatrick.


Rebuilding that transmission wasn’t as easy as we’d anticipated, with the biggest issue being that a synchronizer kept sticking. “I think if we installed this in the Jeep, you might be stuck in gear,” Brandon feared, as the shift collar refused to budge at 2AM after a long night of toiling.

After having to remove all the transmission guts multiple times, on the morning of Brandon’s flight back to Detroit we finally got the transmission together and shifting smoothly. We measured the output shaft end-play by bolting the transmission to the transfer case housing and using a dial-indicator, then we installed the appropriate number of shims and set the transmission aside. Other than some missing shift rails I was still waiting on, the transmission was complete.

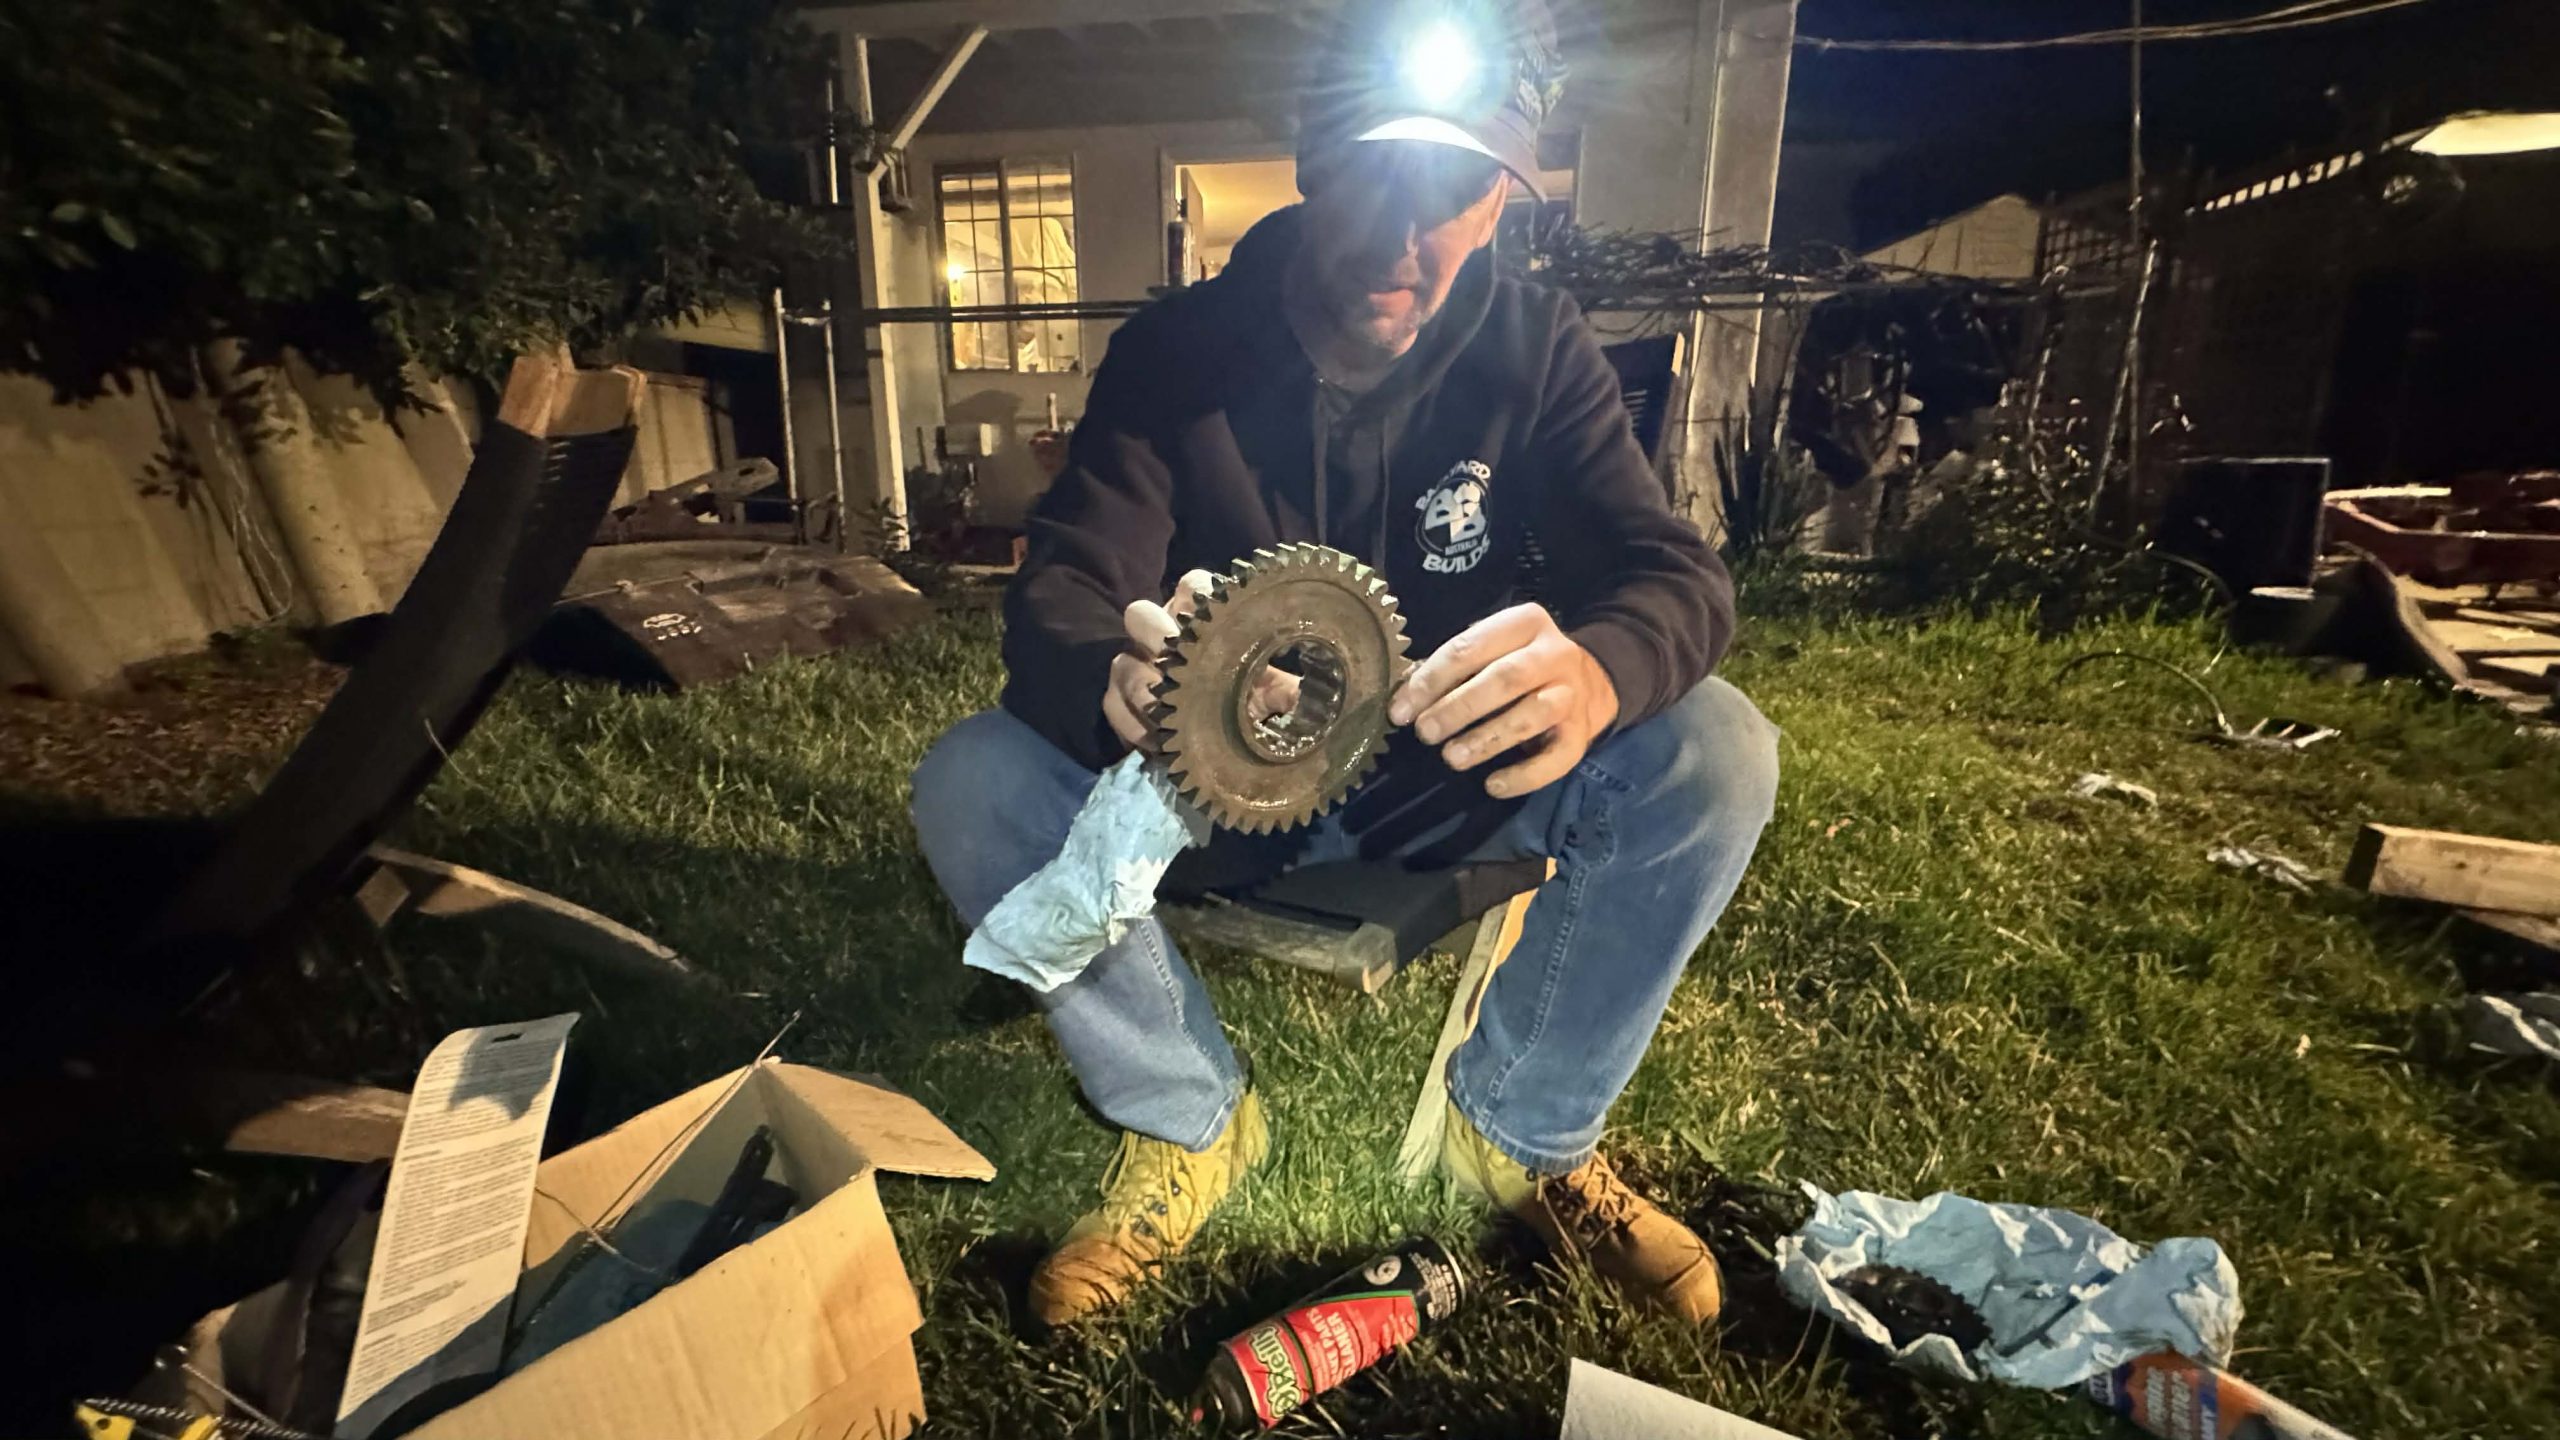
That weekend in December, Brandon and I also worked on the fresh new Go-Devil engine, starting by yanking the reference motor out of my rusty Jeep.

The innards of that reference engine were remarkably nice, and gave us a great template to go by:

After we cleaned my new engine block thoroughly with some brake parts cleaner and tube brushes, we modified the main bearings, which needed to be drilled out in order to sit around the dowels in the brand new engine block:

With that done, I installed the heart of the engine: the brand new crankshaft:

We measured the bearing clearance, and it was just in spec:

Brandon and I used a hockey puck to press in a new camshaft bearing:

And we hammered all the freeze plugs into the block:

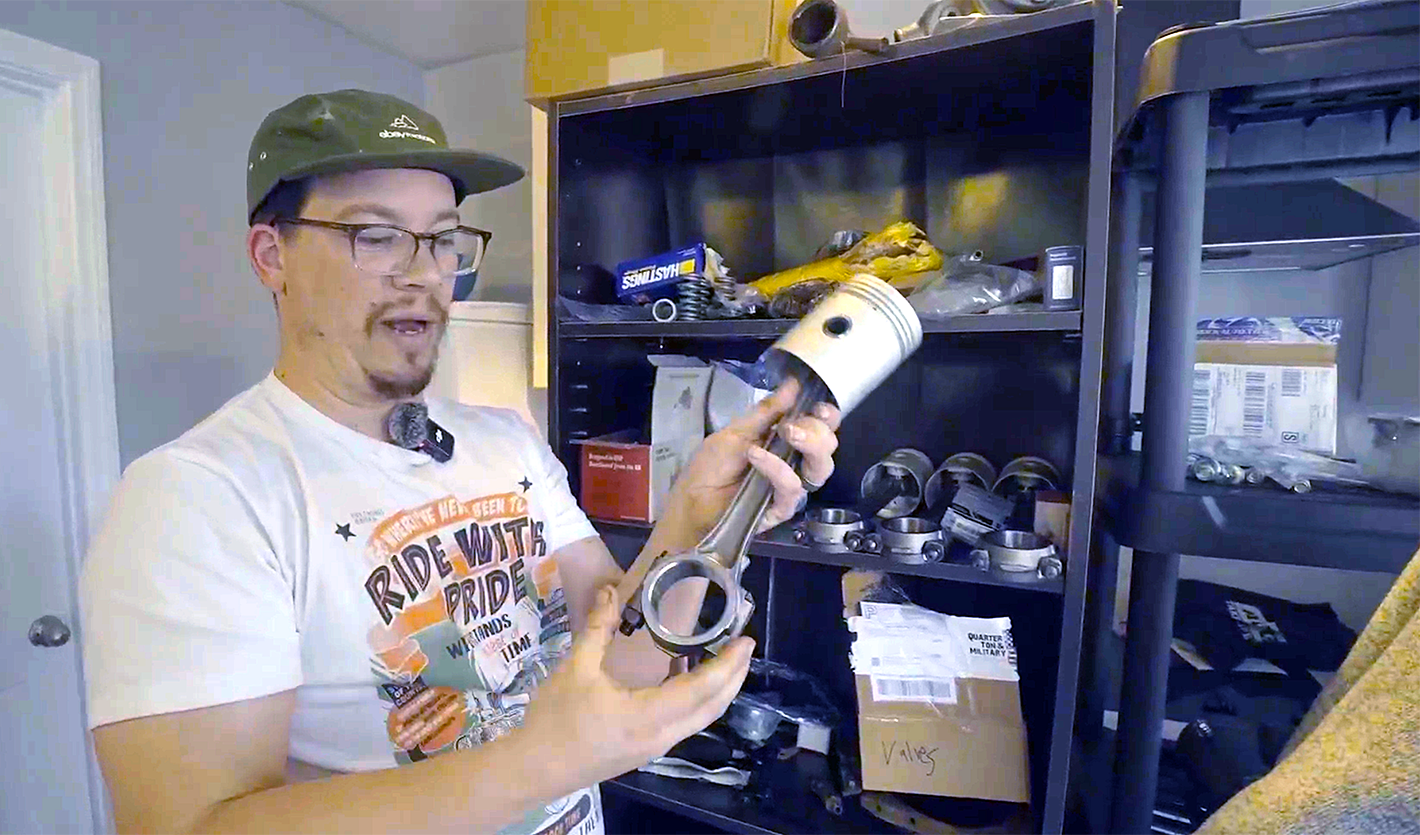
After finding that I was missing valve lifters (which would be required before installing the camshaft), we moved on to the pistons. One by one, we wedged a flathead into a slot on each connecting rod; this opened up the hole at the end of the rod, allowing us to slide in the wrist pin to attach each piston. We then tightened the bolt at the end of the conrod, and Brandon showed me in the old WWII Jeep instruction manual which direction each connecting rod had to face in order for the oil squirter hole to be in the right spot, marking each piston with an arrow so I didn’t screw this up.

Then we moved on to the suspension.
I had purchased four axles from the seller in Washington, who had about two dozen of them sitting in his garage. Instead of looking inside the differentials and picking the best of the lot, I had foolishly just grabbed four random axles.

One front axle was completely rusted out, and one rear axle had a spider gear that was wobbling all over the place:

This meant, if either of the other two axles was bad, I was in a real bind.
I caught a huge break when I opened the second front axle and it looked perfect:

The other rear axle looked decent inside, but the bearing caps had been put in backwards, and the pinion did make a light grinding noise when I spun it. As I didn’t have an alternative, I decided I would just run it.

Before heading back to Michigan, Brandon helped me attach my eBay-sourced leaf springs to the axles via some shiny new U-Bolts:


Though I had only 3.5 months left before I was supposed to drive 900 miles to Utah, this weekend with Brandon had been critical, as it truly got the wrenching ball rolling. Perhaps more importantly, Brandon left me with an extremely detailed Bill of Materials spreadsheet, which outlined every single part I’d still need to purchase to assemble a WWII Jeep from scratch. Here’s a small snapshot:


How Brandon knew all this off the top of his head was beyond me, but this document ended up being absolutely critical as the number of parts on my shelves continued to multiply and my Easter deadline meant there was simply no time to waste.
Just Two Months Left, And The Jeep Wasn’t Even Close
Between the holidays, my work as the editorial leader of the site, and my family obligations, the period from December to February wasn’t my most productive. I did manage to finish up the transmission rebuild by installing the shift rails:

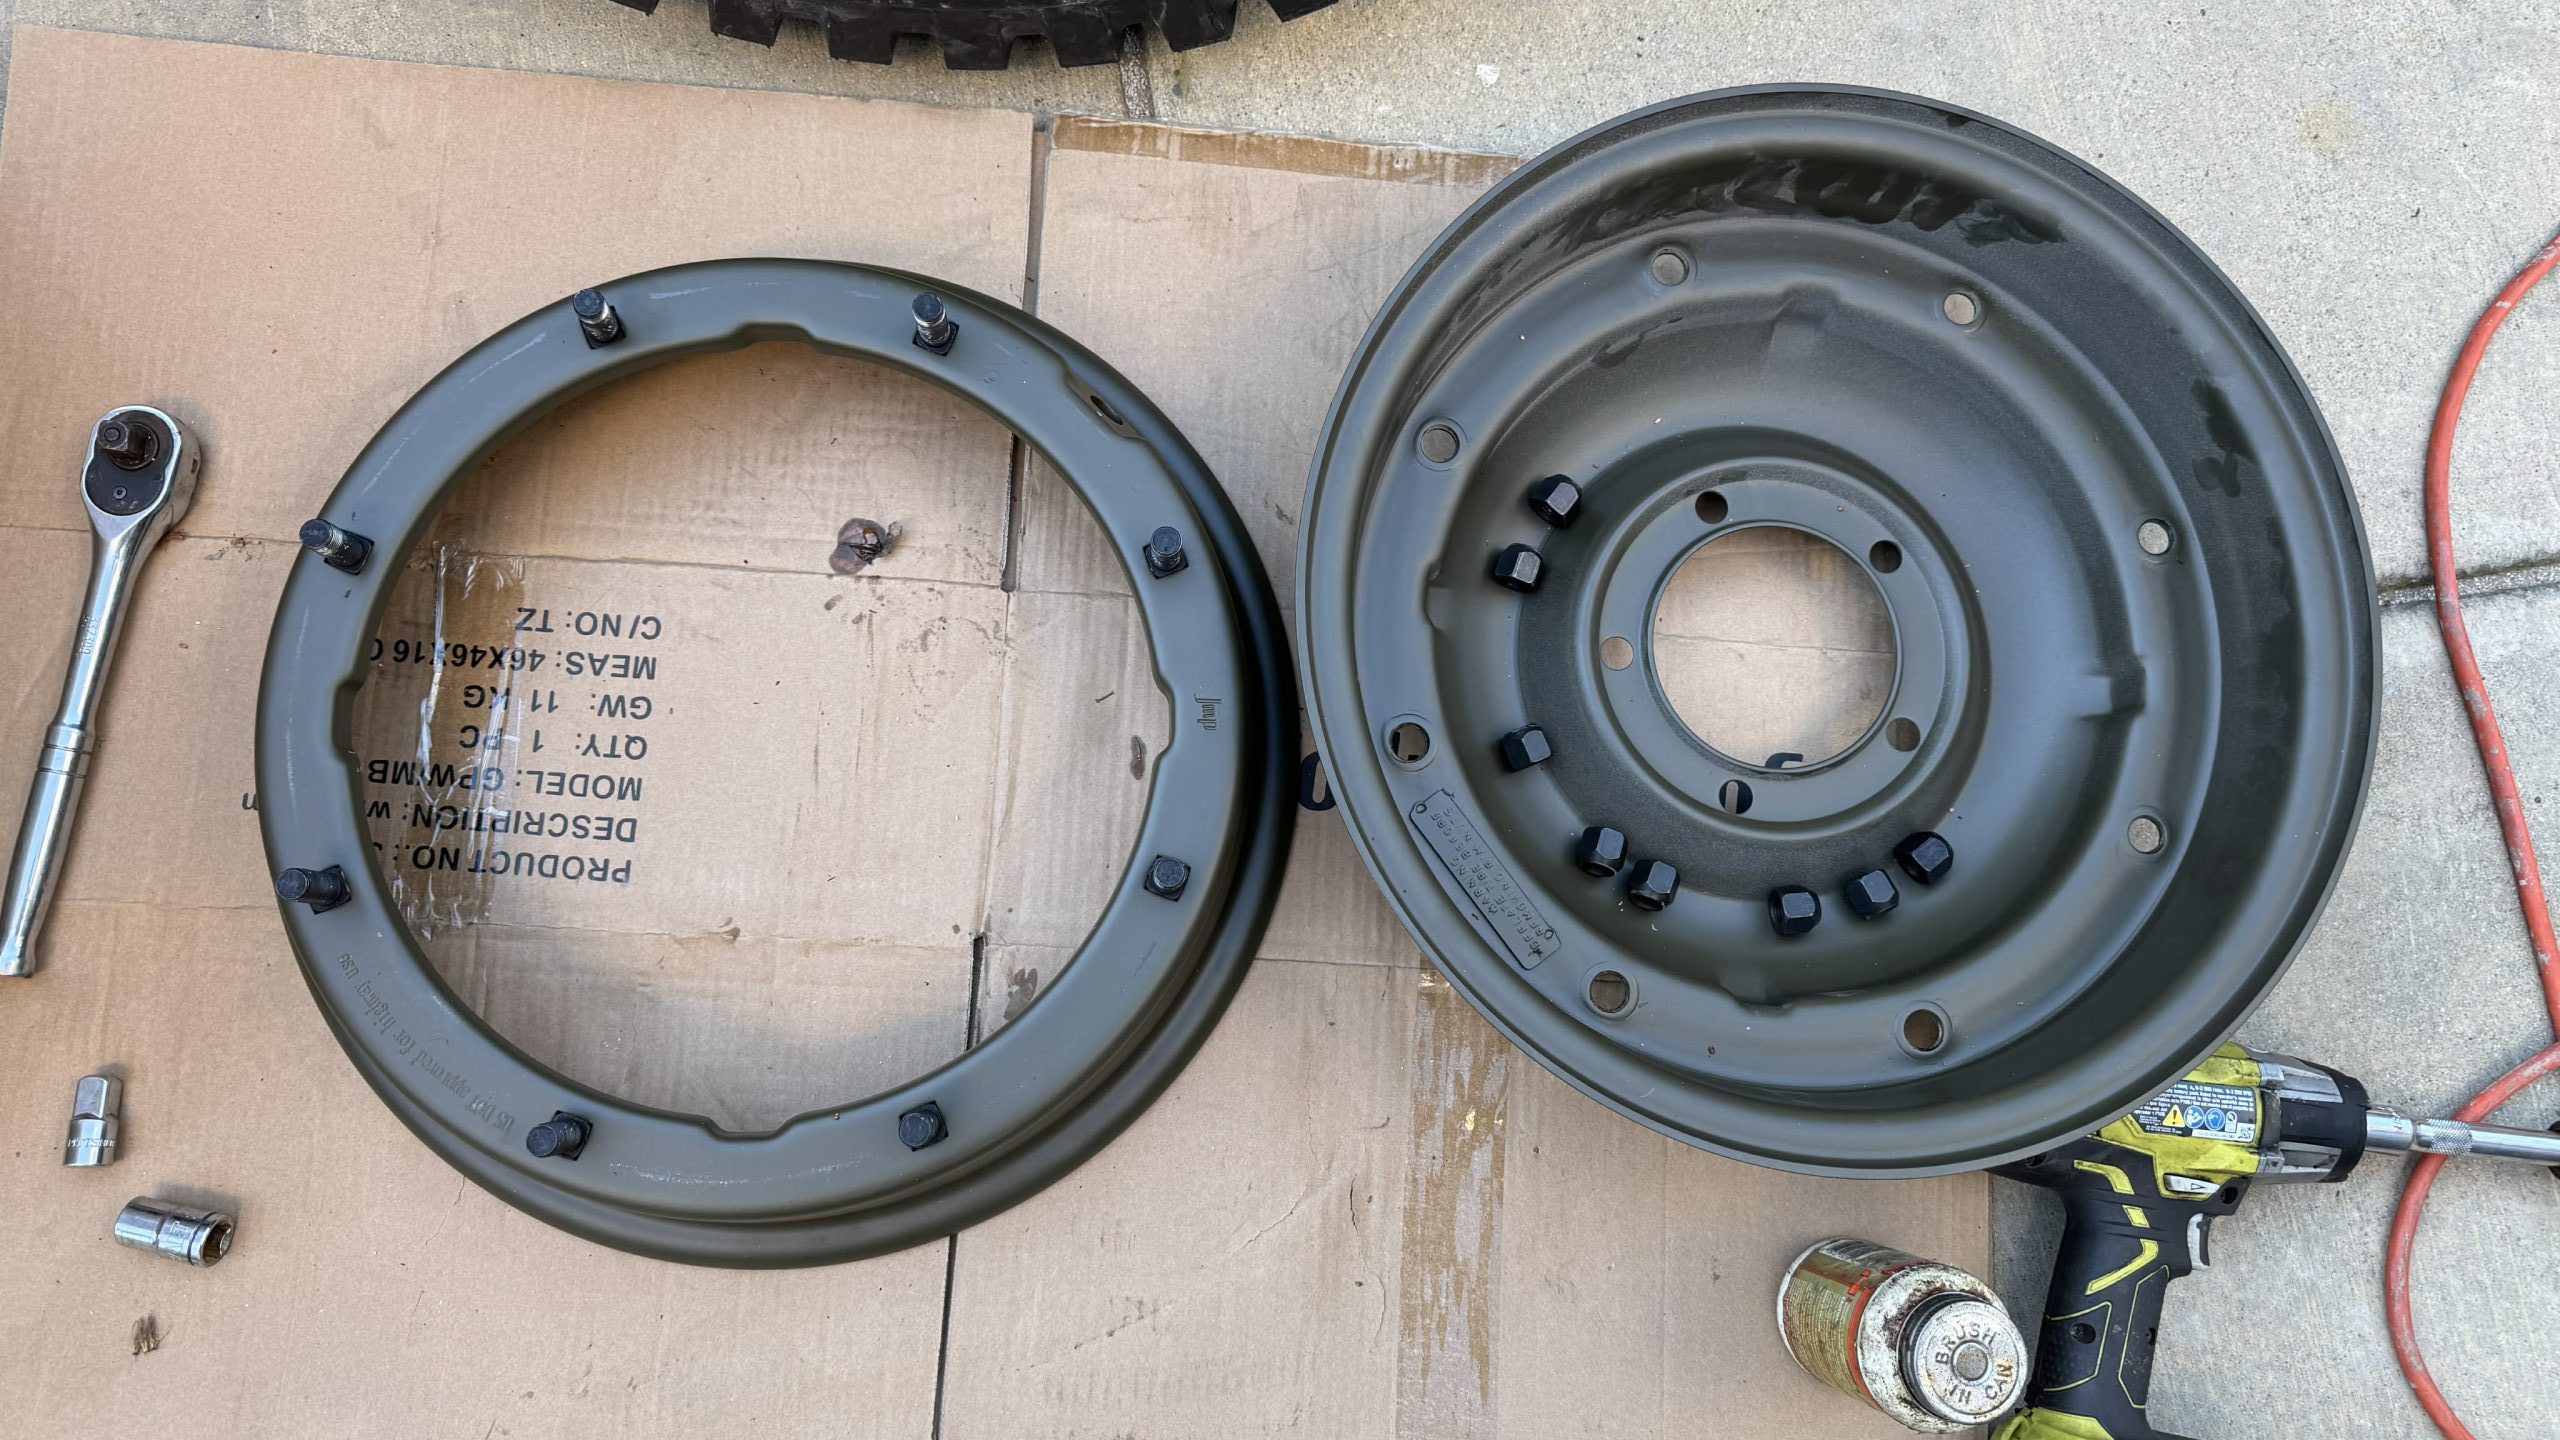
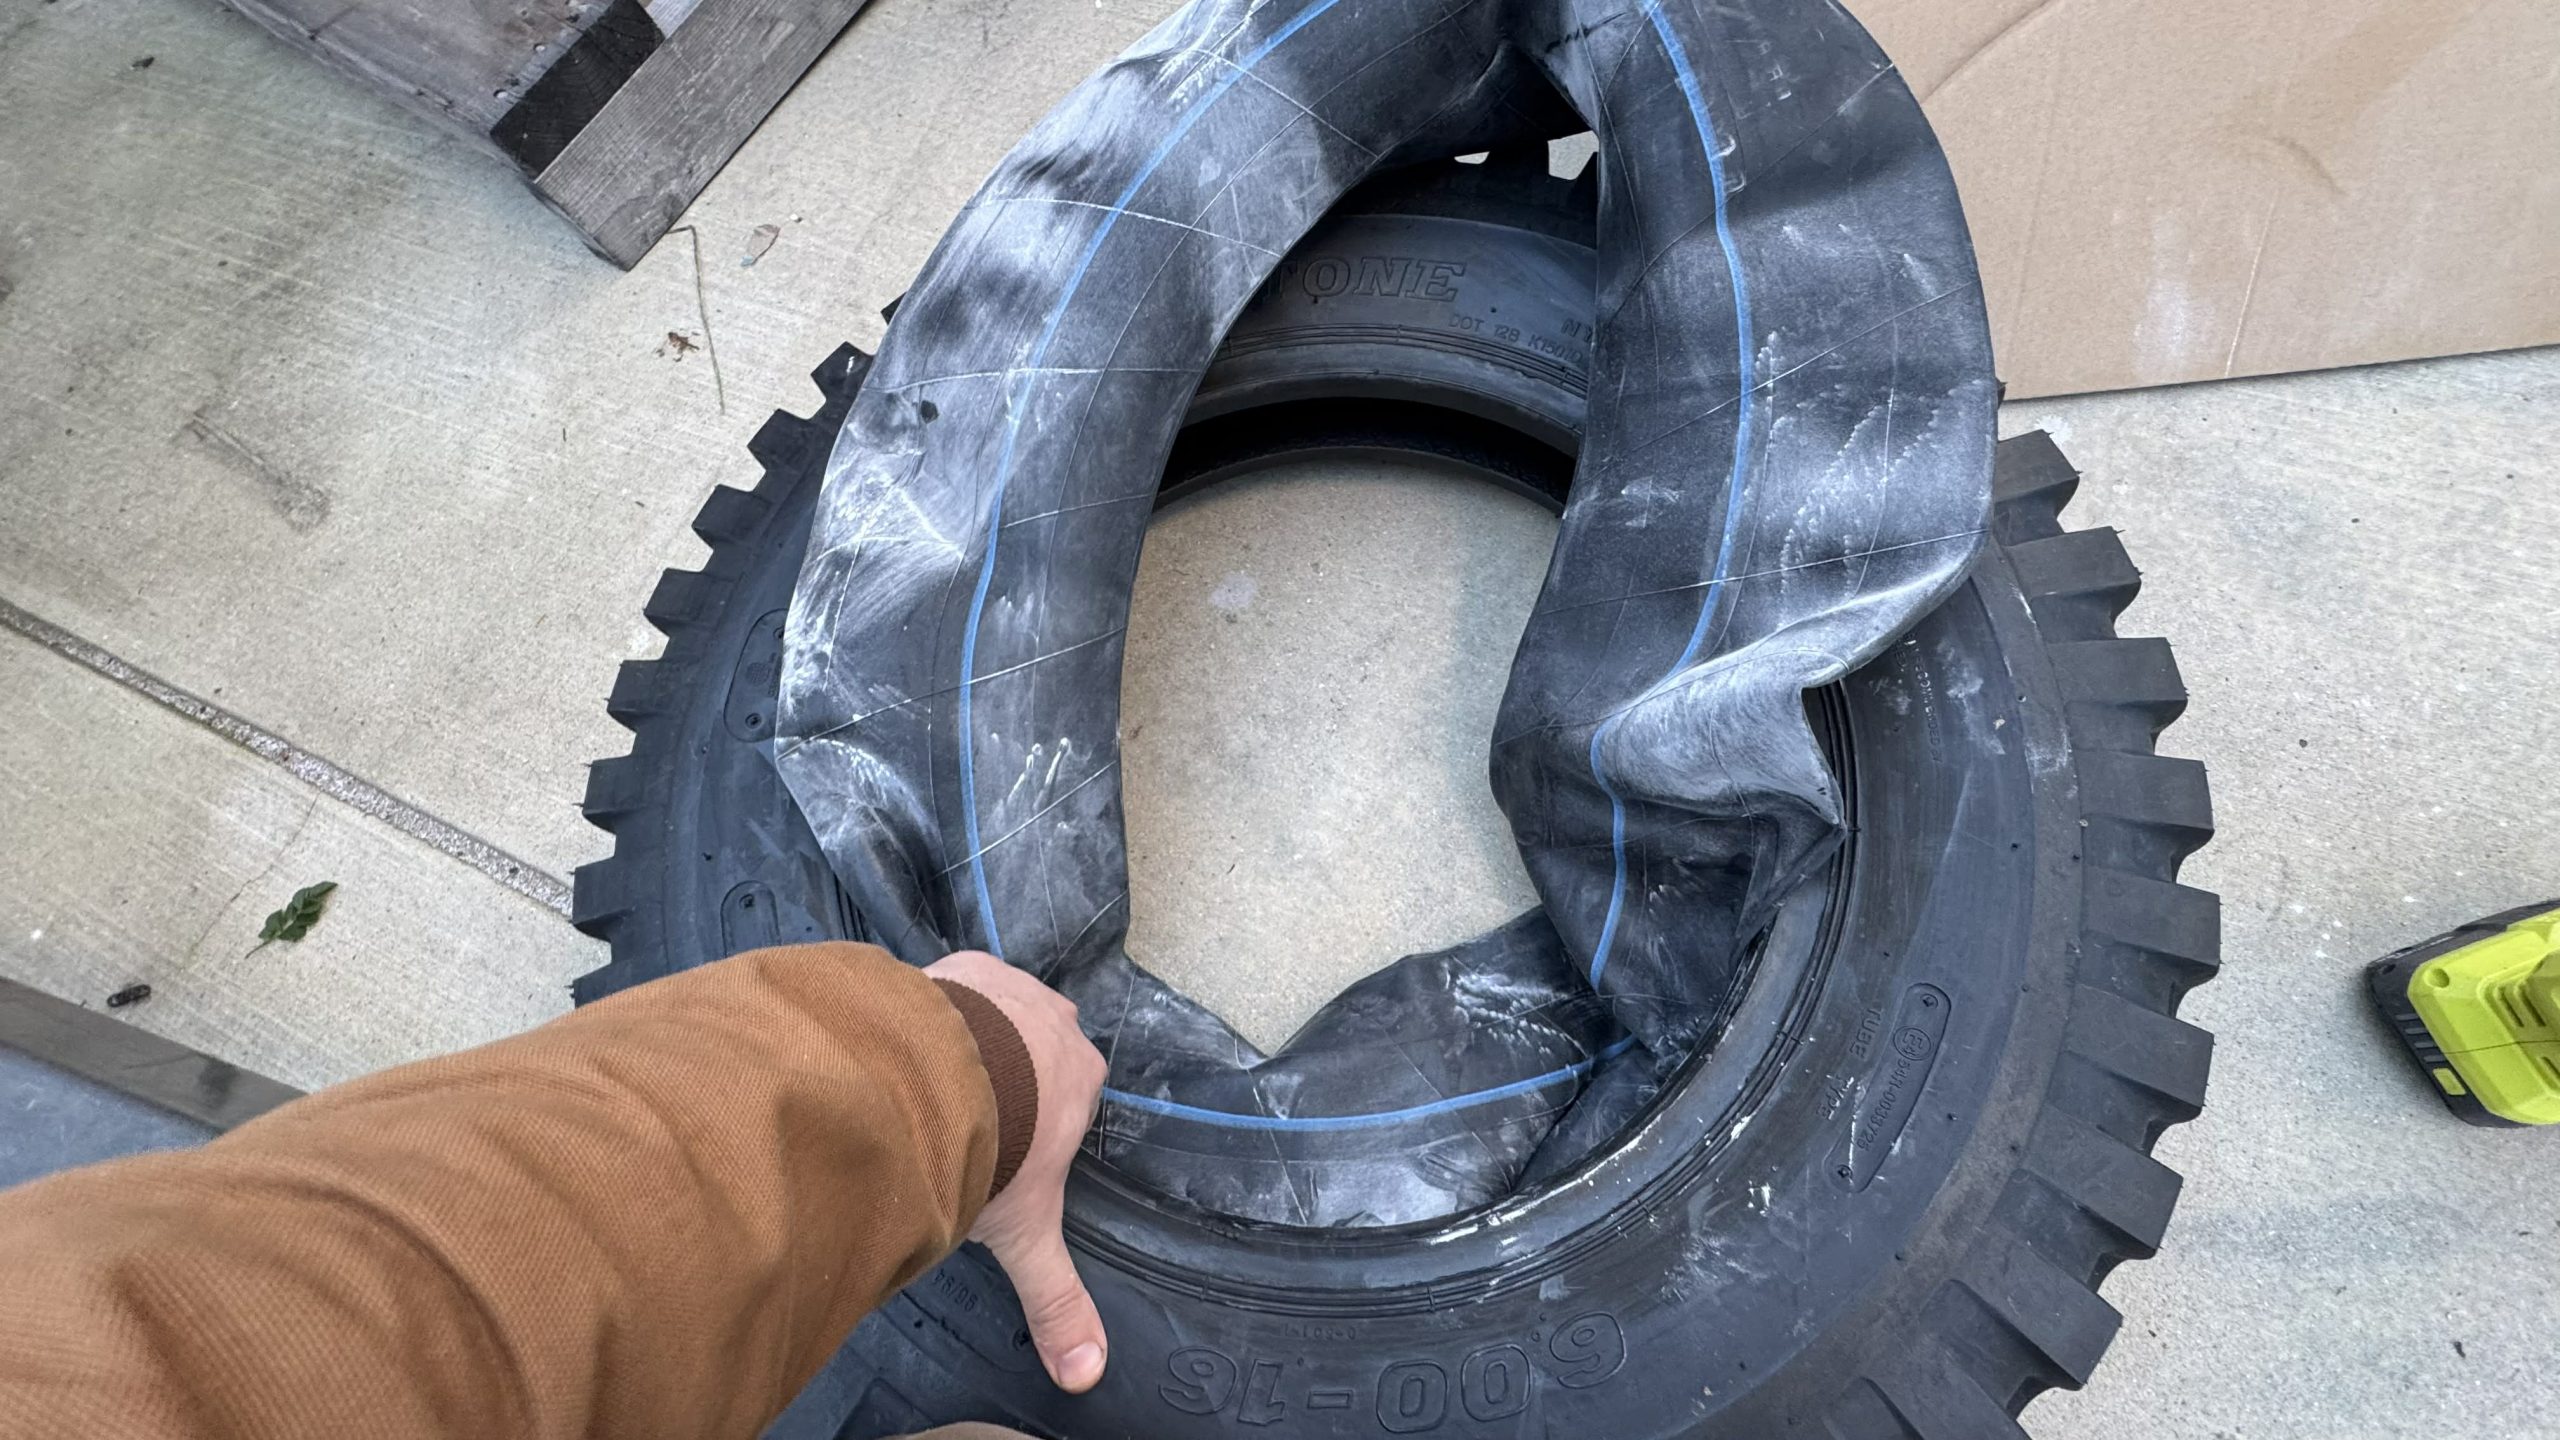
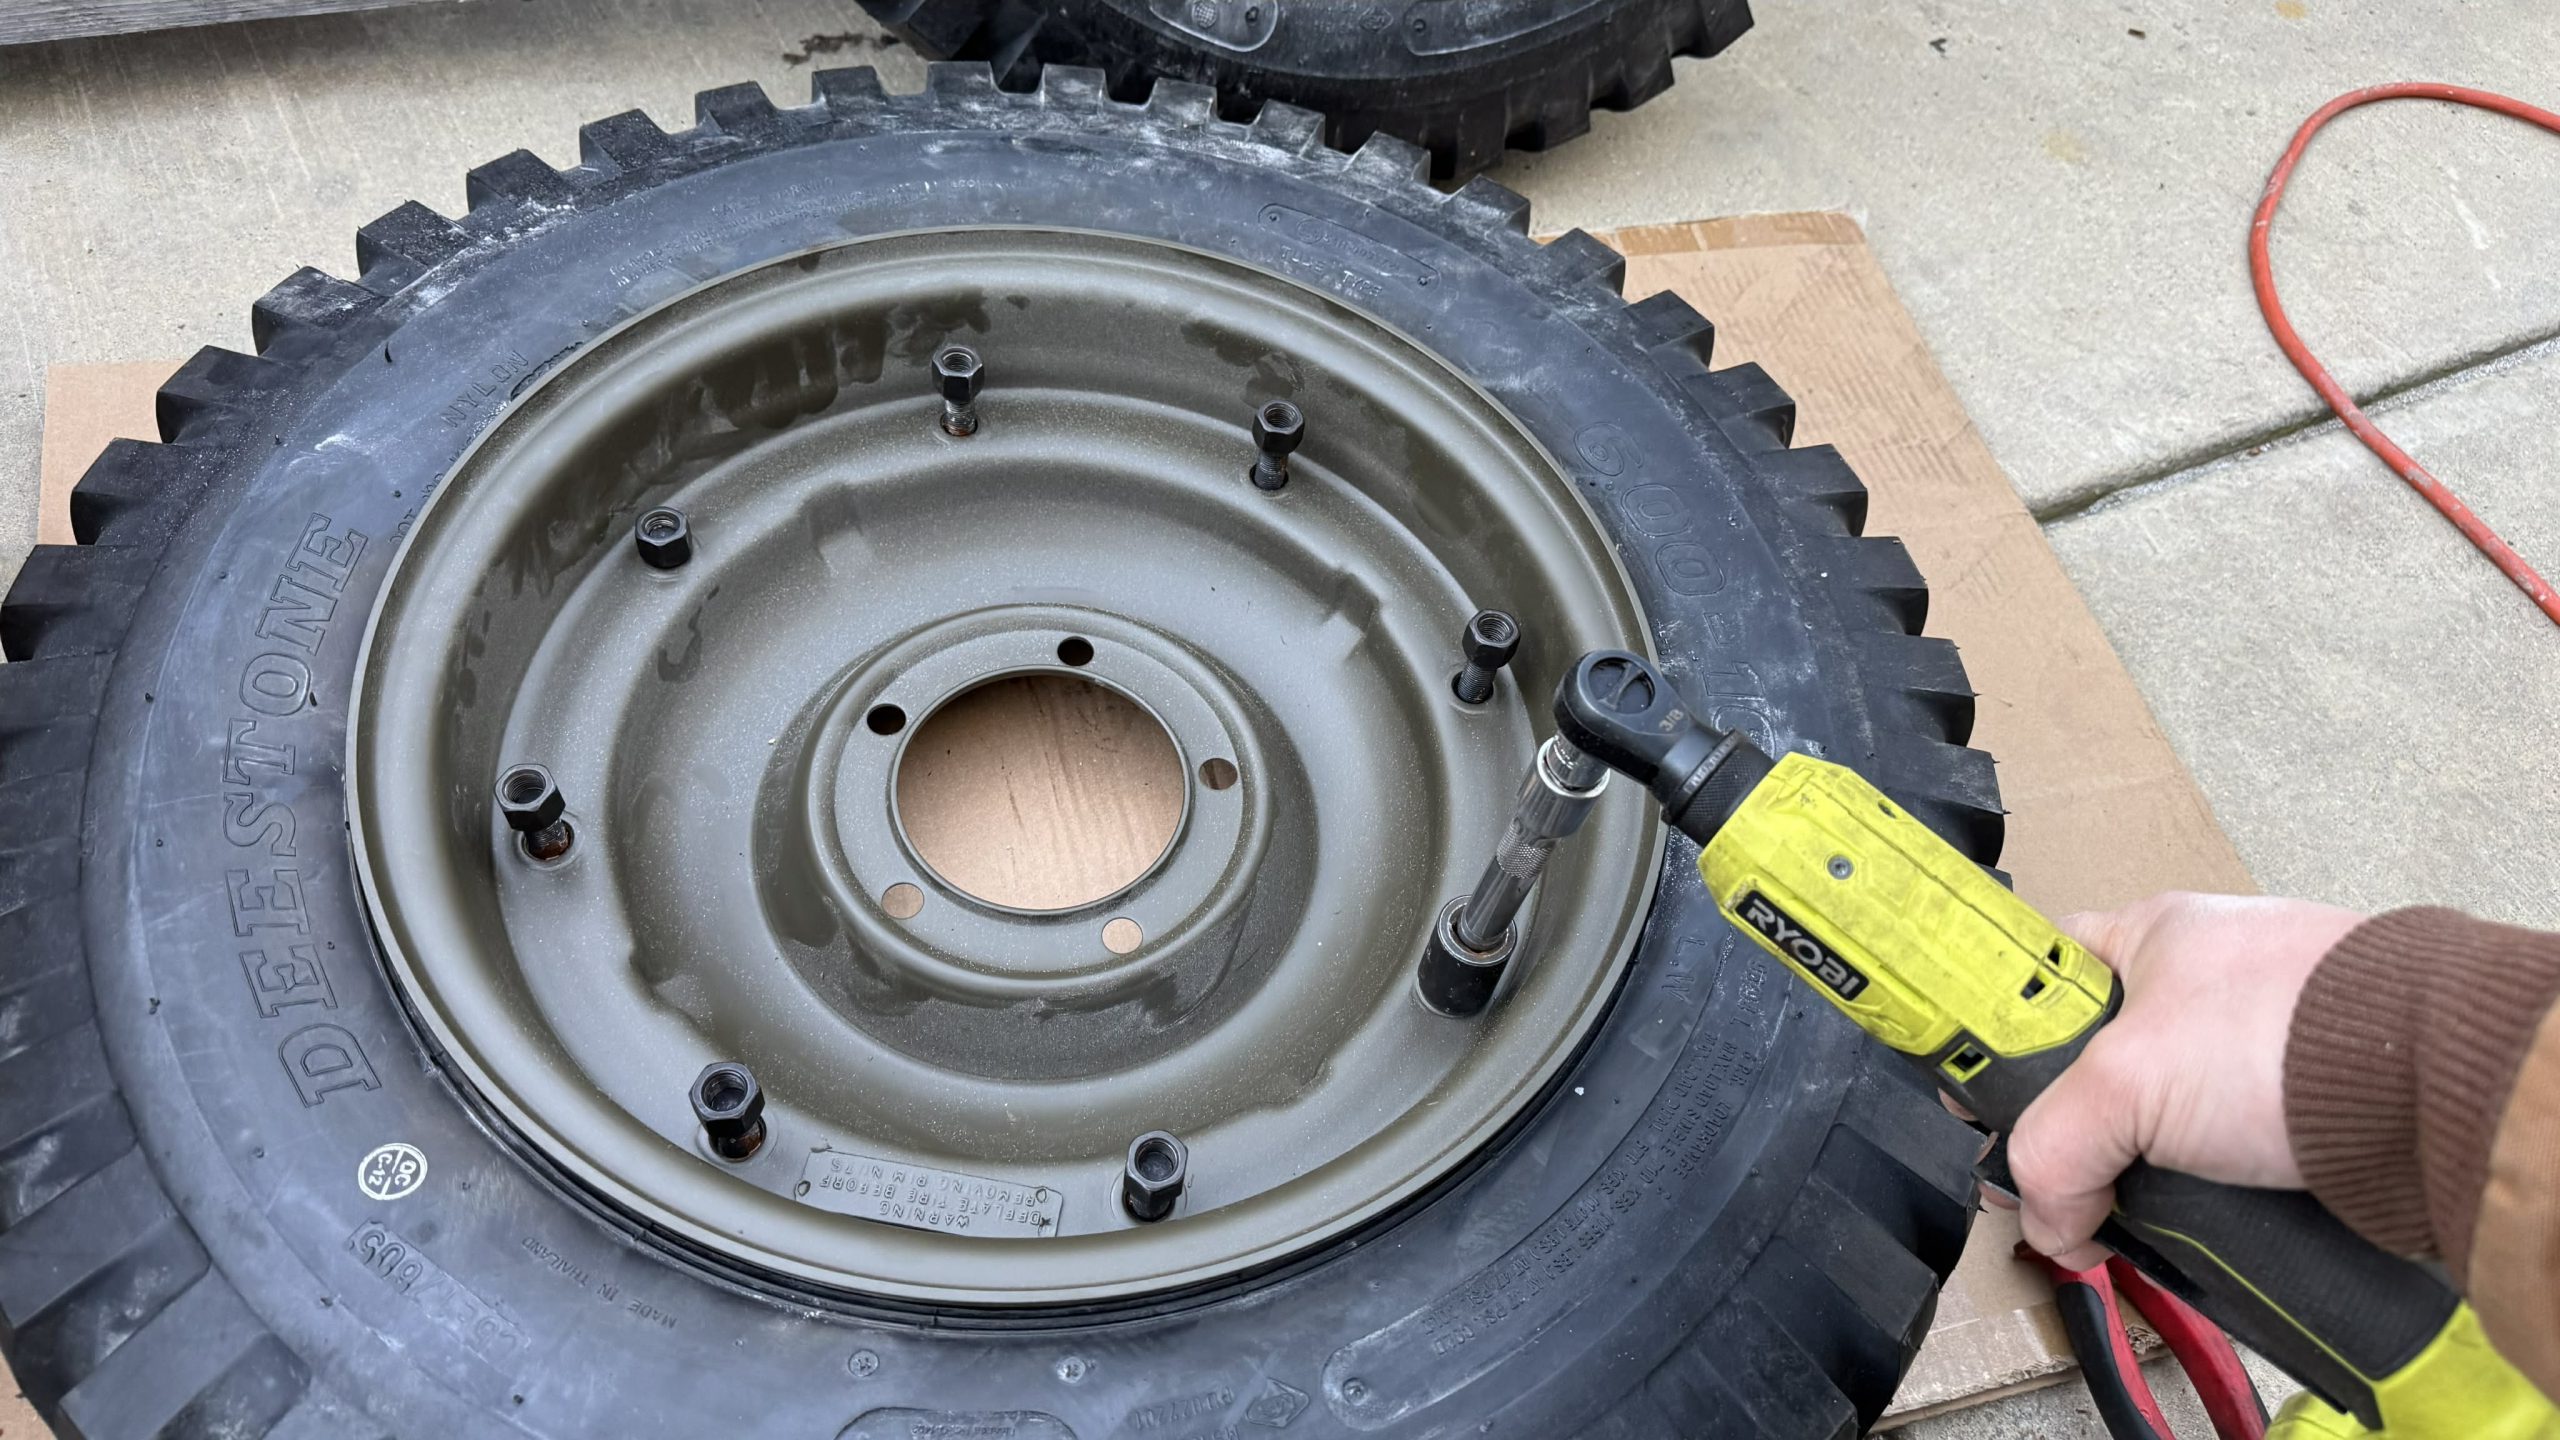
I also installed the tires and inner tubes onto the two-piece “combat wheels”:
Plus I drove this old engine flywheel to a clutch shop to be machined flat:

I also started working on the transfer case:

This proved rather difficult, as the whole thing was extremely crusty. I had to break out the torch numerous times:


But ultimately I was able to get the thing disassembled:


During this time, I purchased a set of standard-size lifters from the only place that seemed to have them — the manufacturer of my French engine.

When the lifters arrived from France, there was a major issue. The machining operation that had created the threads for each lifter adjuster-screw had left tons of metal debris.

Between the eight lifters (one for each valve), there was a monumental amount of debris that I had to extract using pliers, a magnet, and a Q-tip:

Had I not noticed this on installation, I would have found myself unable to adjust the lifters properly, and I’d have had to tear the motor down after building it. Worse, if some of this debris had gotten into my oil, it could have wiped my bearings clean, killing this brand new, roughly $10,000 engine.

Luckily, I was able to get all the lifters cleaned out, and they slipped right into the new engine block’s lifter bores.

In late January, just two months prior to departure, I finally rolled my two leaf spring-equipped axles under my frame and hooked up the suspension with all new eBay-sourced shackles and shocks.
The fact that I had so little time left, and all I had was a halfway-built engine, a rebuilt transmission, a torn down transfer case, and a bare frame sitting on some leaf sprung axles was a problem, and in my heart of hearts I believed this just wasn’t enough time to do what I needed to do. Luckily, this is when reinforcements arrived.
Wrenching With Laurence: A 20-Day Adrenaline Shot To The Project’s Heart

I knew that, to turn my assemblage of parts I had into an actual, functional machine, I would need to become more efficient, and luckily Laurence had agreed to fly in from Australia for 20 days.
After taking the first-time-US-visitor to the Grand National Roadster Show some other local attractions (like Roscoe’s Chicken and Waffles, the Petersen Automotive Museum, the Long Beach Swap Meet, and the USS Iowa), Laurence and I “hit the spanners,” as he likes to say, and it became apparent that the magic that had existed when he and I had wrenched on that old Chrysler Valiant ute in Australia a few years prior was very much still alive. When Laurence and I work together, we don’t just become twice as efficient — it’s more like a 4x multiplier. This was exactly what this project needed.
We started by cleaning up the transfer case gears and replacing all the bearings and thrust washers.
I was very pleased with the shape of the innards of that crusty transfer case I’d bought from Washington:
Here’s Laurence and me setting the output shaft end-play with a dial indicator. This is precision stuff!:


Once we’d finished following along with the transfer case rebuild YouTube video, we broke open the old WWII military instruction manual and put together the parking brake, which is a band that clamps a drum on the transfer case output shaft:

Now that we had a rebuilt transmission and transfer case, it was time to finish up that Go-Devil motor so we could hook it all up to that frame and try to get the Jeep running.
At the top of the engine, we made some careful measurements to ensure that our piston rings fit; then we installed those rings onto some pistons and slowly lowered them into the bores.
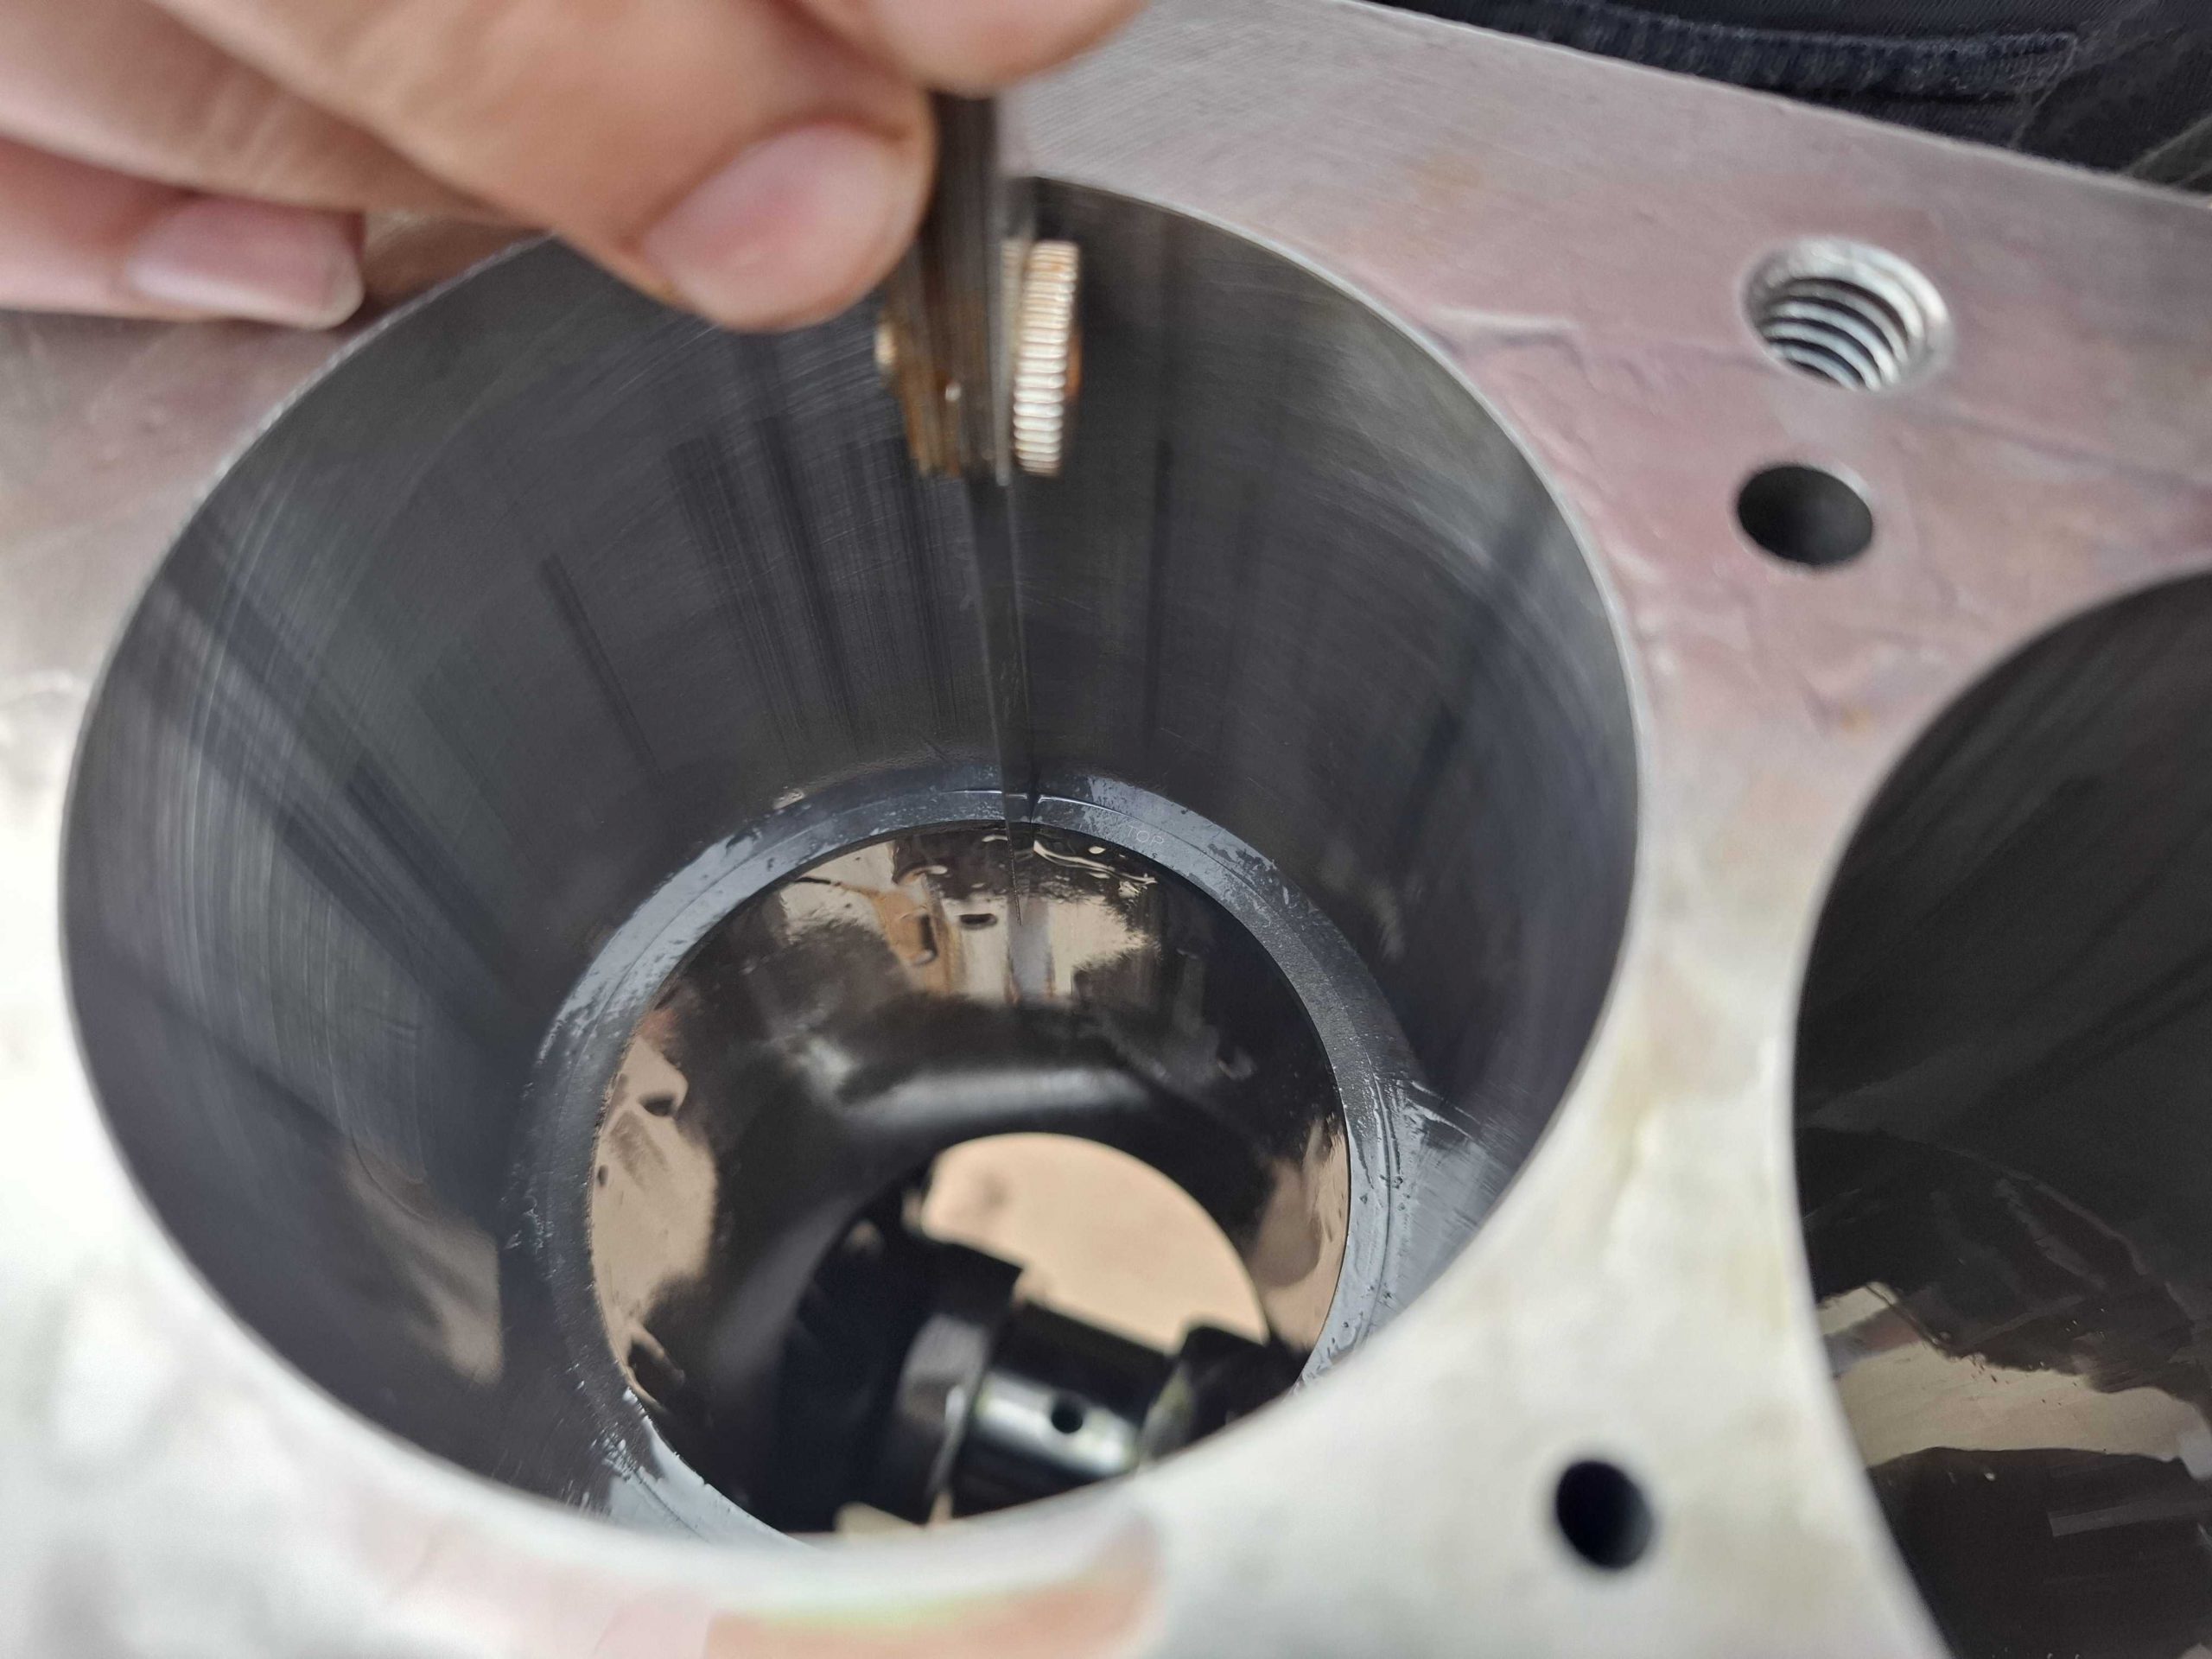
Here I am dropping piston number three into its hole:

Things went smoothly until, while installing piston four, I realized I had accidentally cracked the aluminum while trying to remove its connecting rod bearing cap:
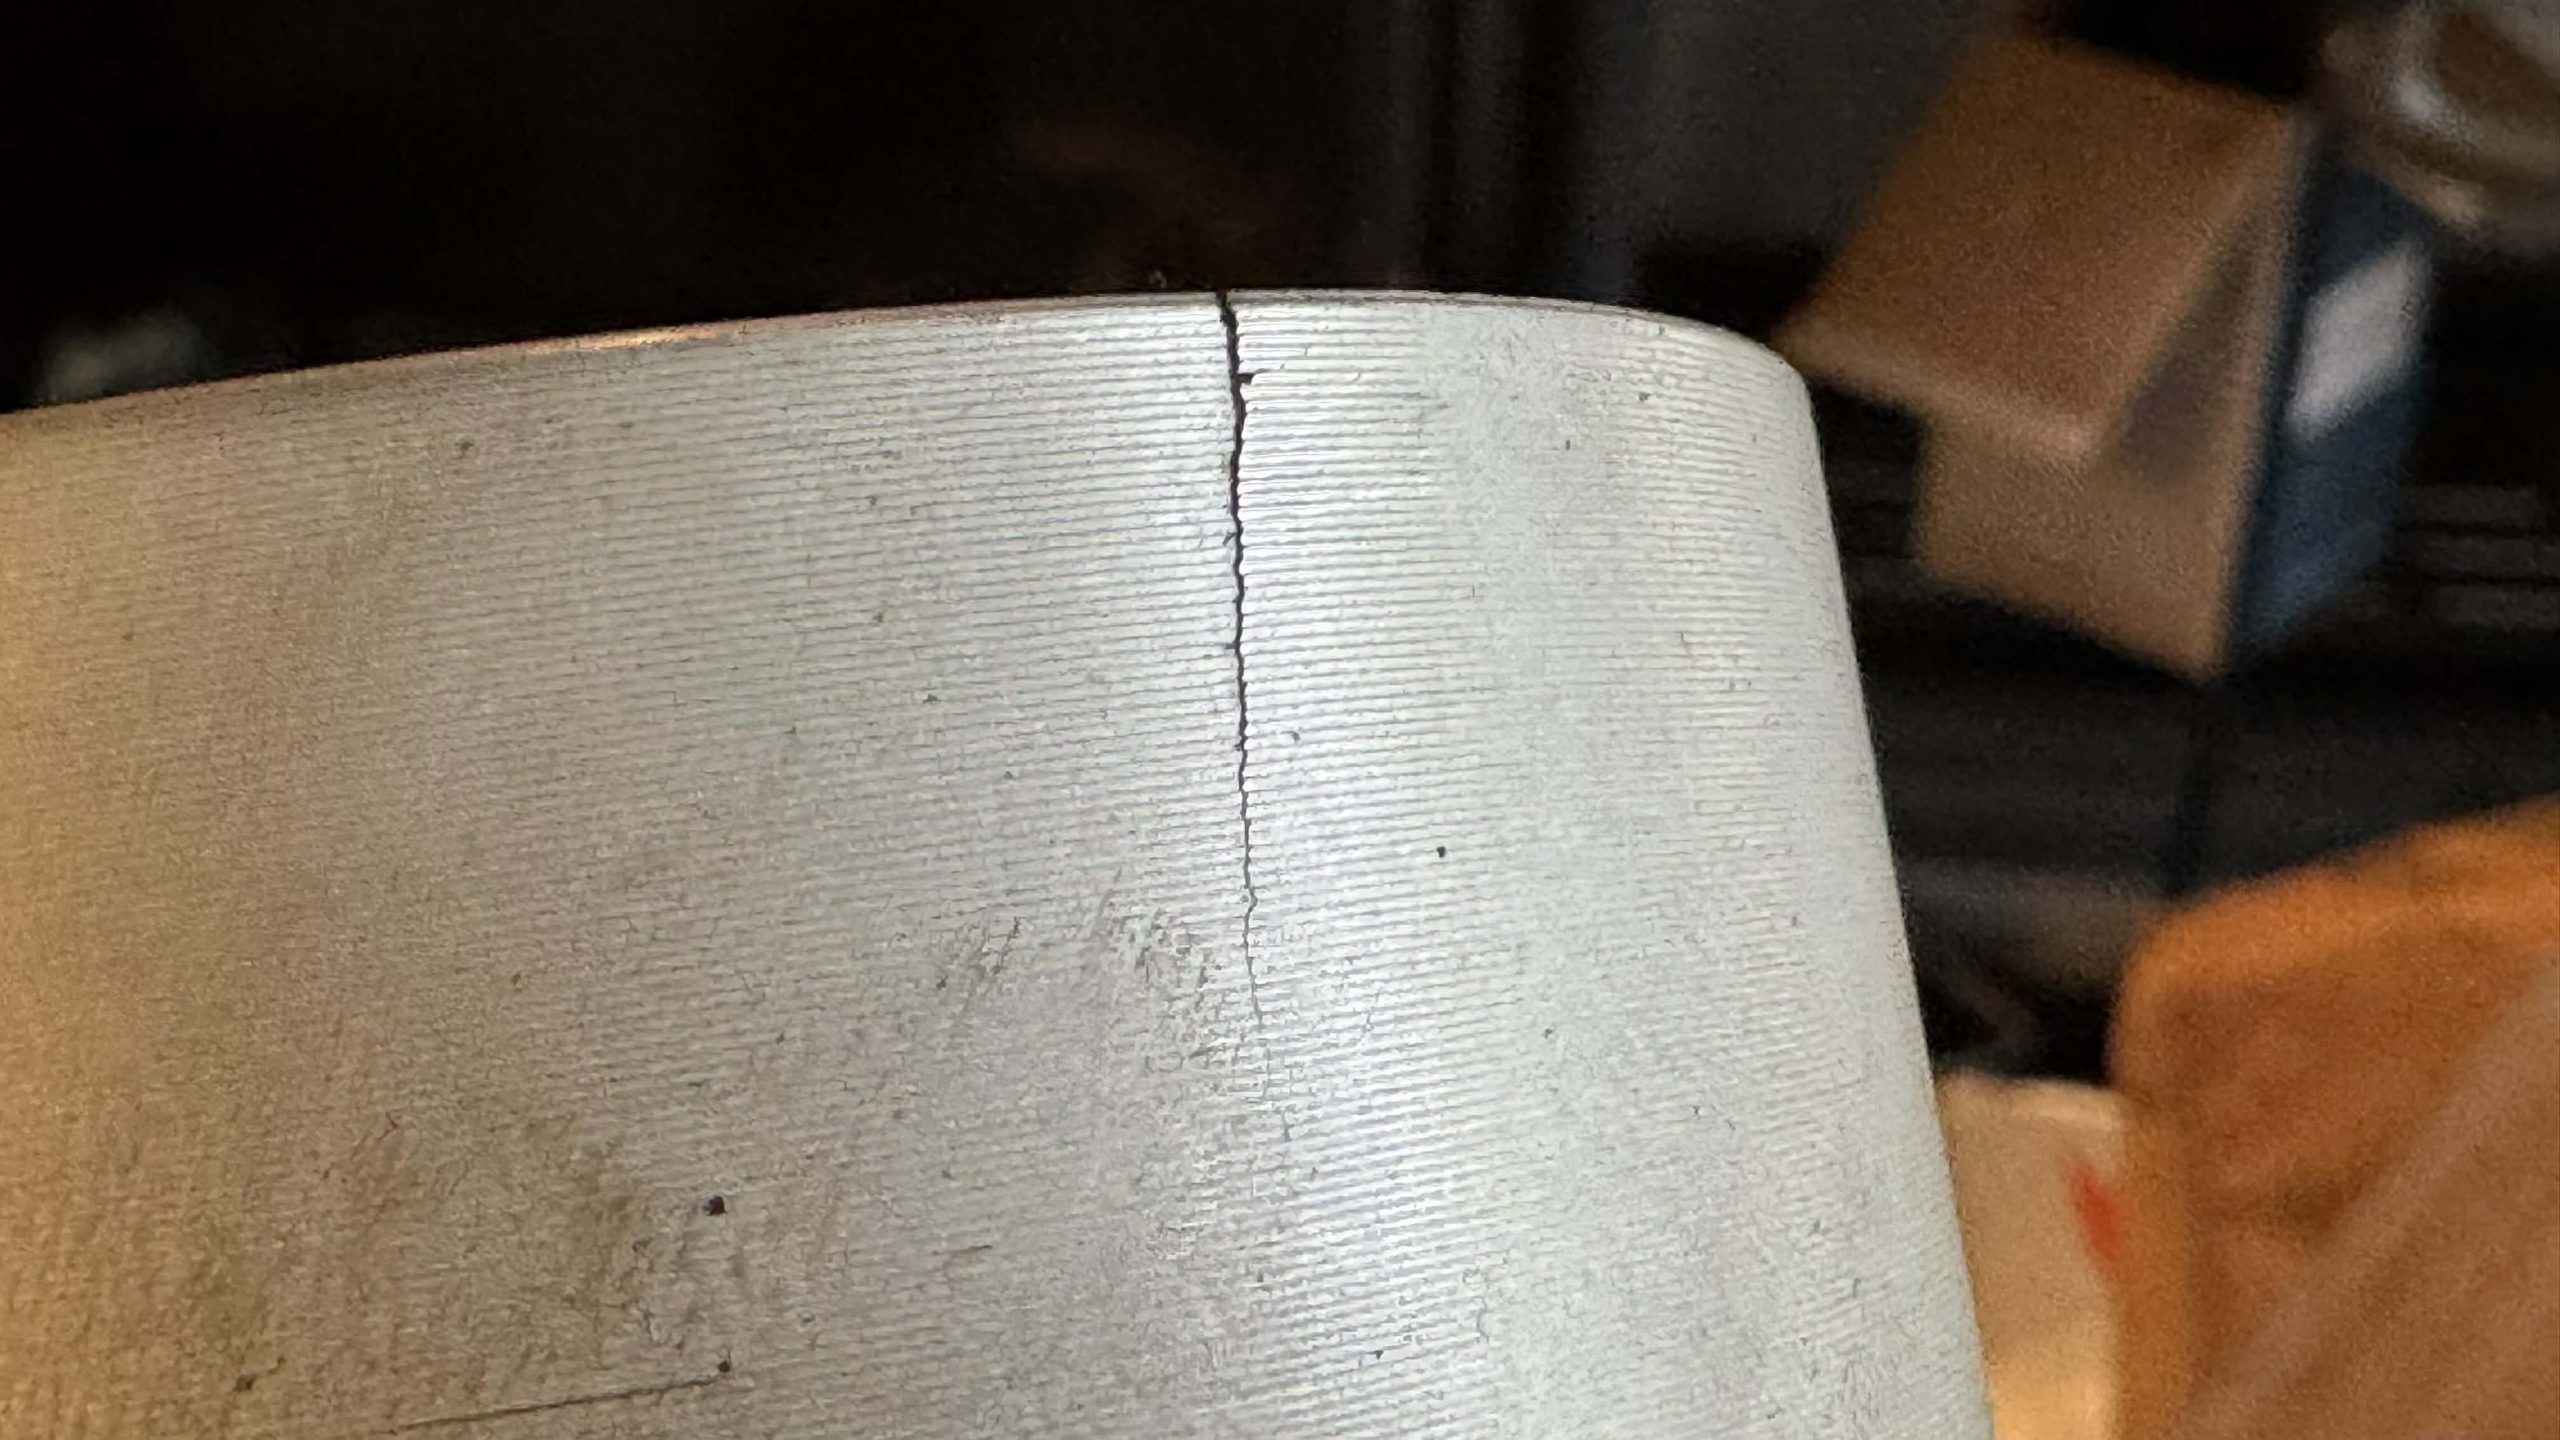
This forced us to remove the first three piston/rod assemblies, and install all new pistons that I conveniently (and accidentally) had sitting around. We later discovered a piston ring defect on piston four, leading us to run around in search of a new set of rings — a search that ultimately brought us to an amazing old-school engine shop in LA.
Once we had all the pistons in with good rings, we read through old U.S. military literature, and I carefully stacked the washers/shims on the front of the crankshaft, using a dial indicator to make sure the crankshaft endplay was in spec. Again, precision stuff!:

Then we hooked up the oil pickup tube, installed an oil pan gasket, put in the timing chain, and buttoned up the engine’s bottom end and timing chain cover using gobs of RTV silicone.


We lost a few hours when I realized I’d purchased a timing chain cover without an oil feed, forcing Laurence to painstakingly replace the thoroughly-glued-on-cover with the right one; eventually we dropped in our new intake and exhaust valves and put a lid on this motor:


Then came the brand new intake and exhaust manifolds, the water pump and fan, the oil pump, the distributor, the thermostat housing, and after I adjusted the valves and installed the side-cover, we had a shiny, brand-spanking new WWII Jeep engine:


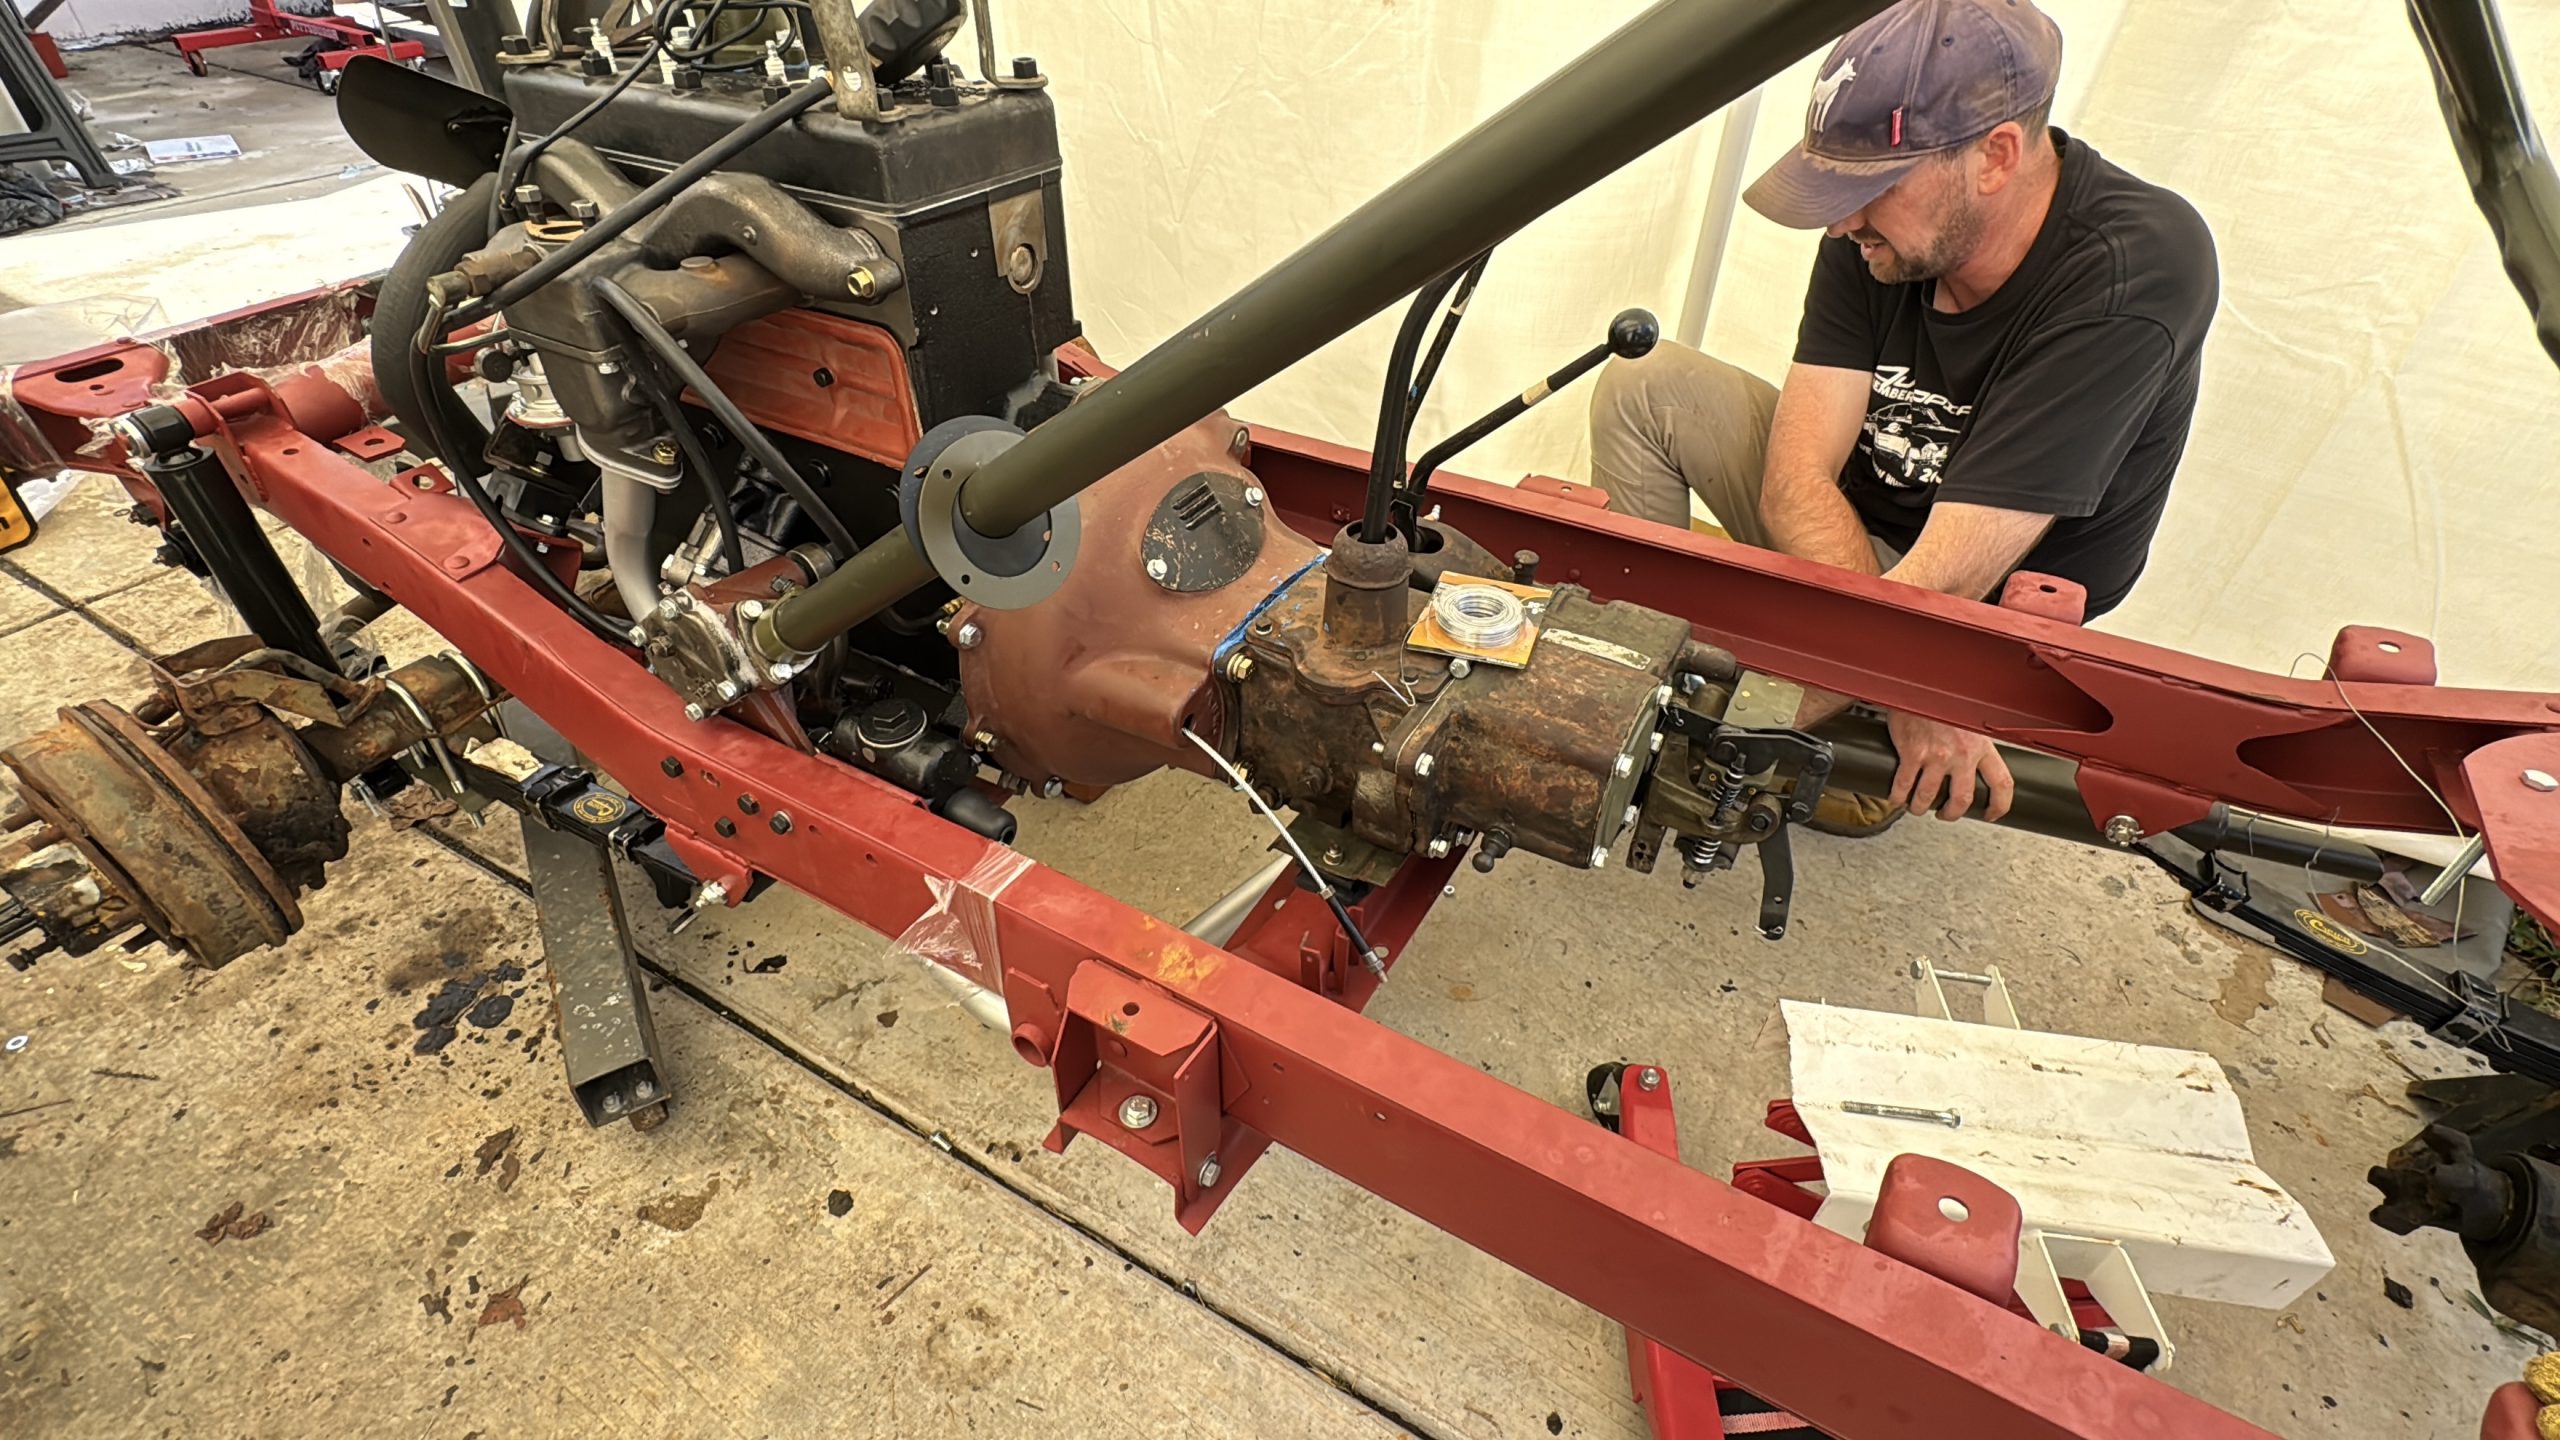
Laurence and I bolted up the flywheel, clutch, and generator, and lowered the engine onto the frame:

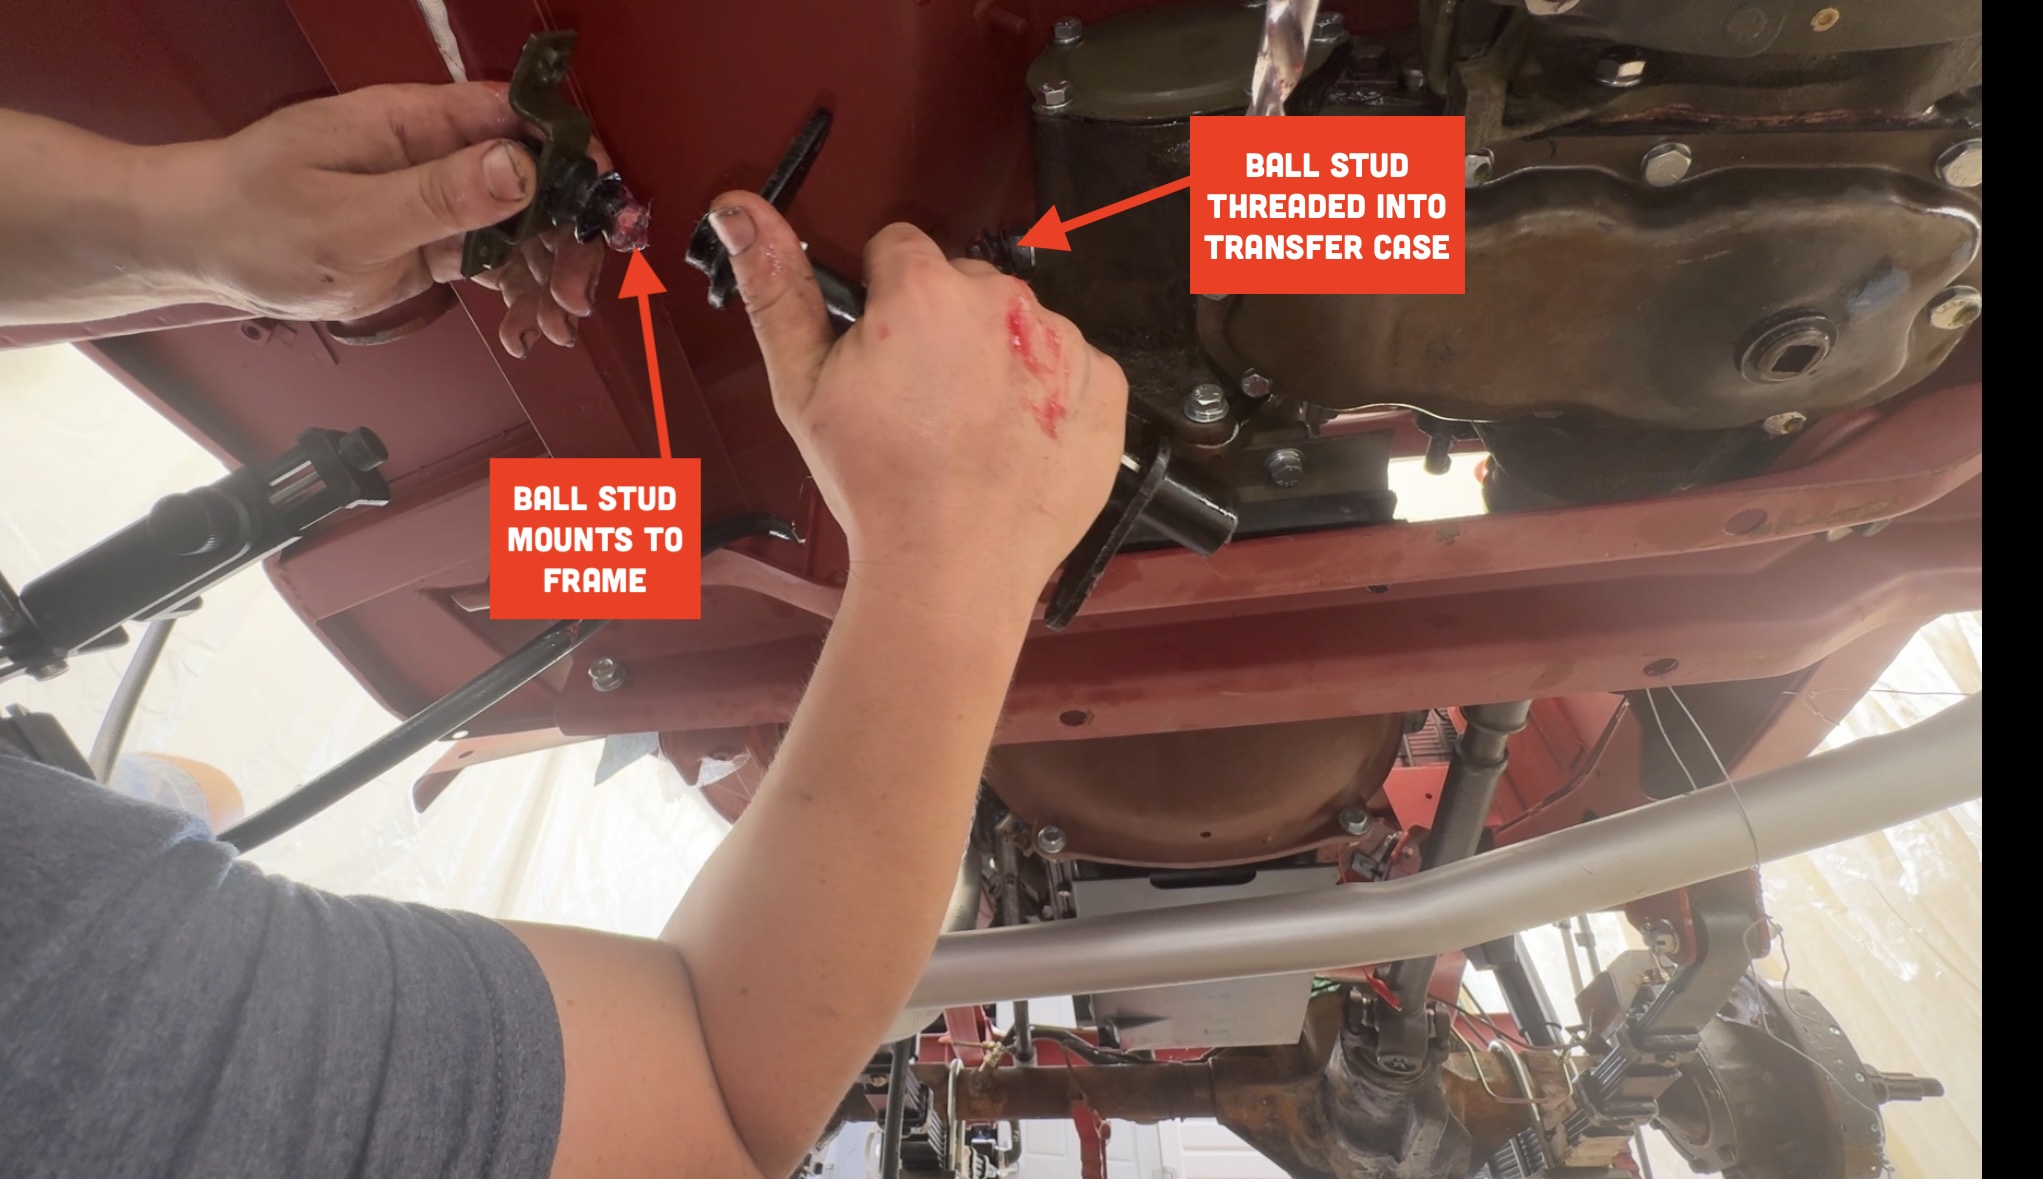
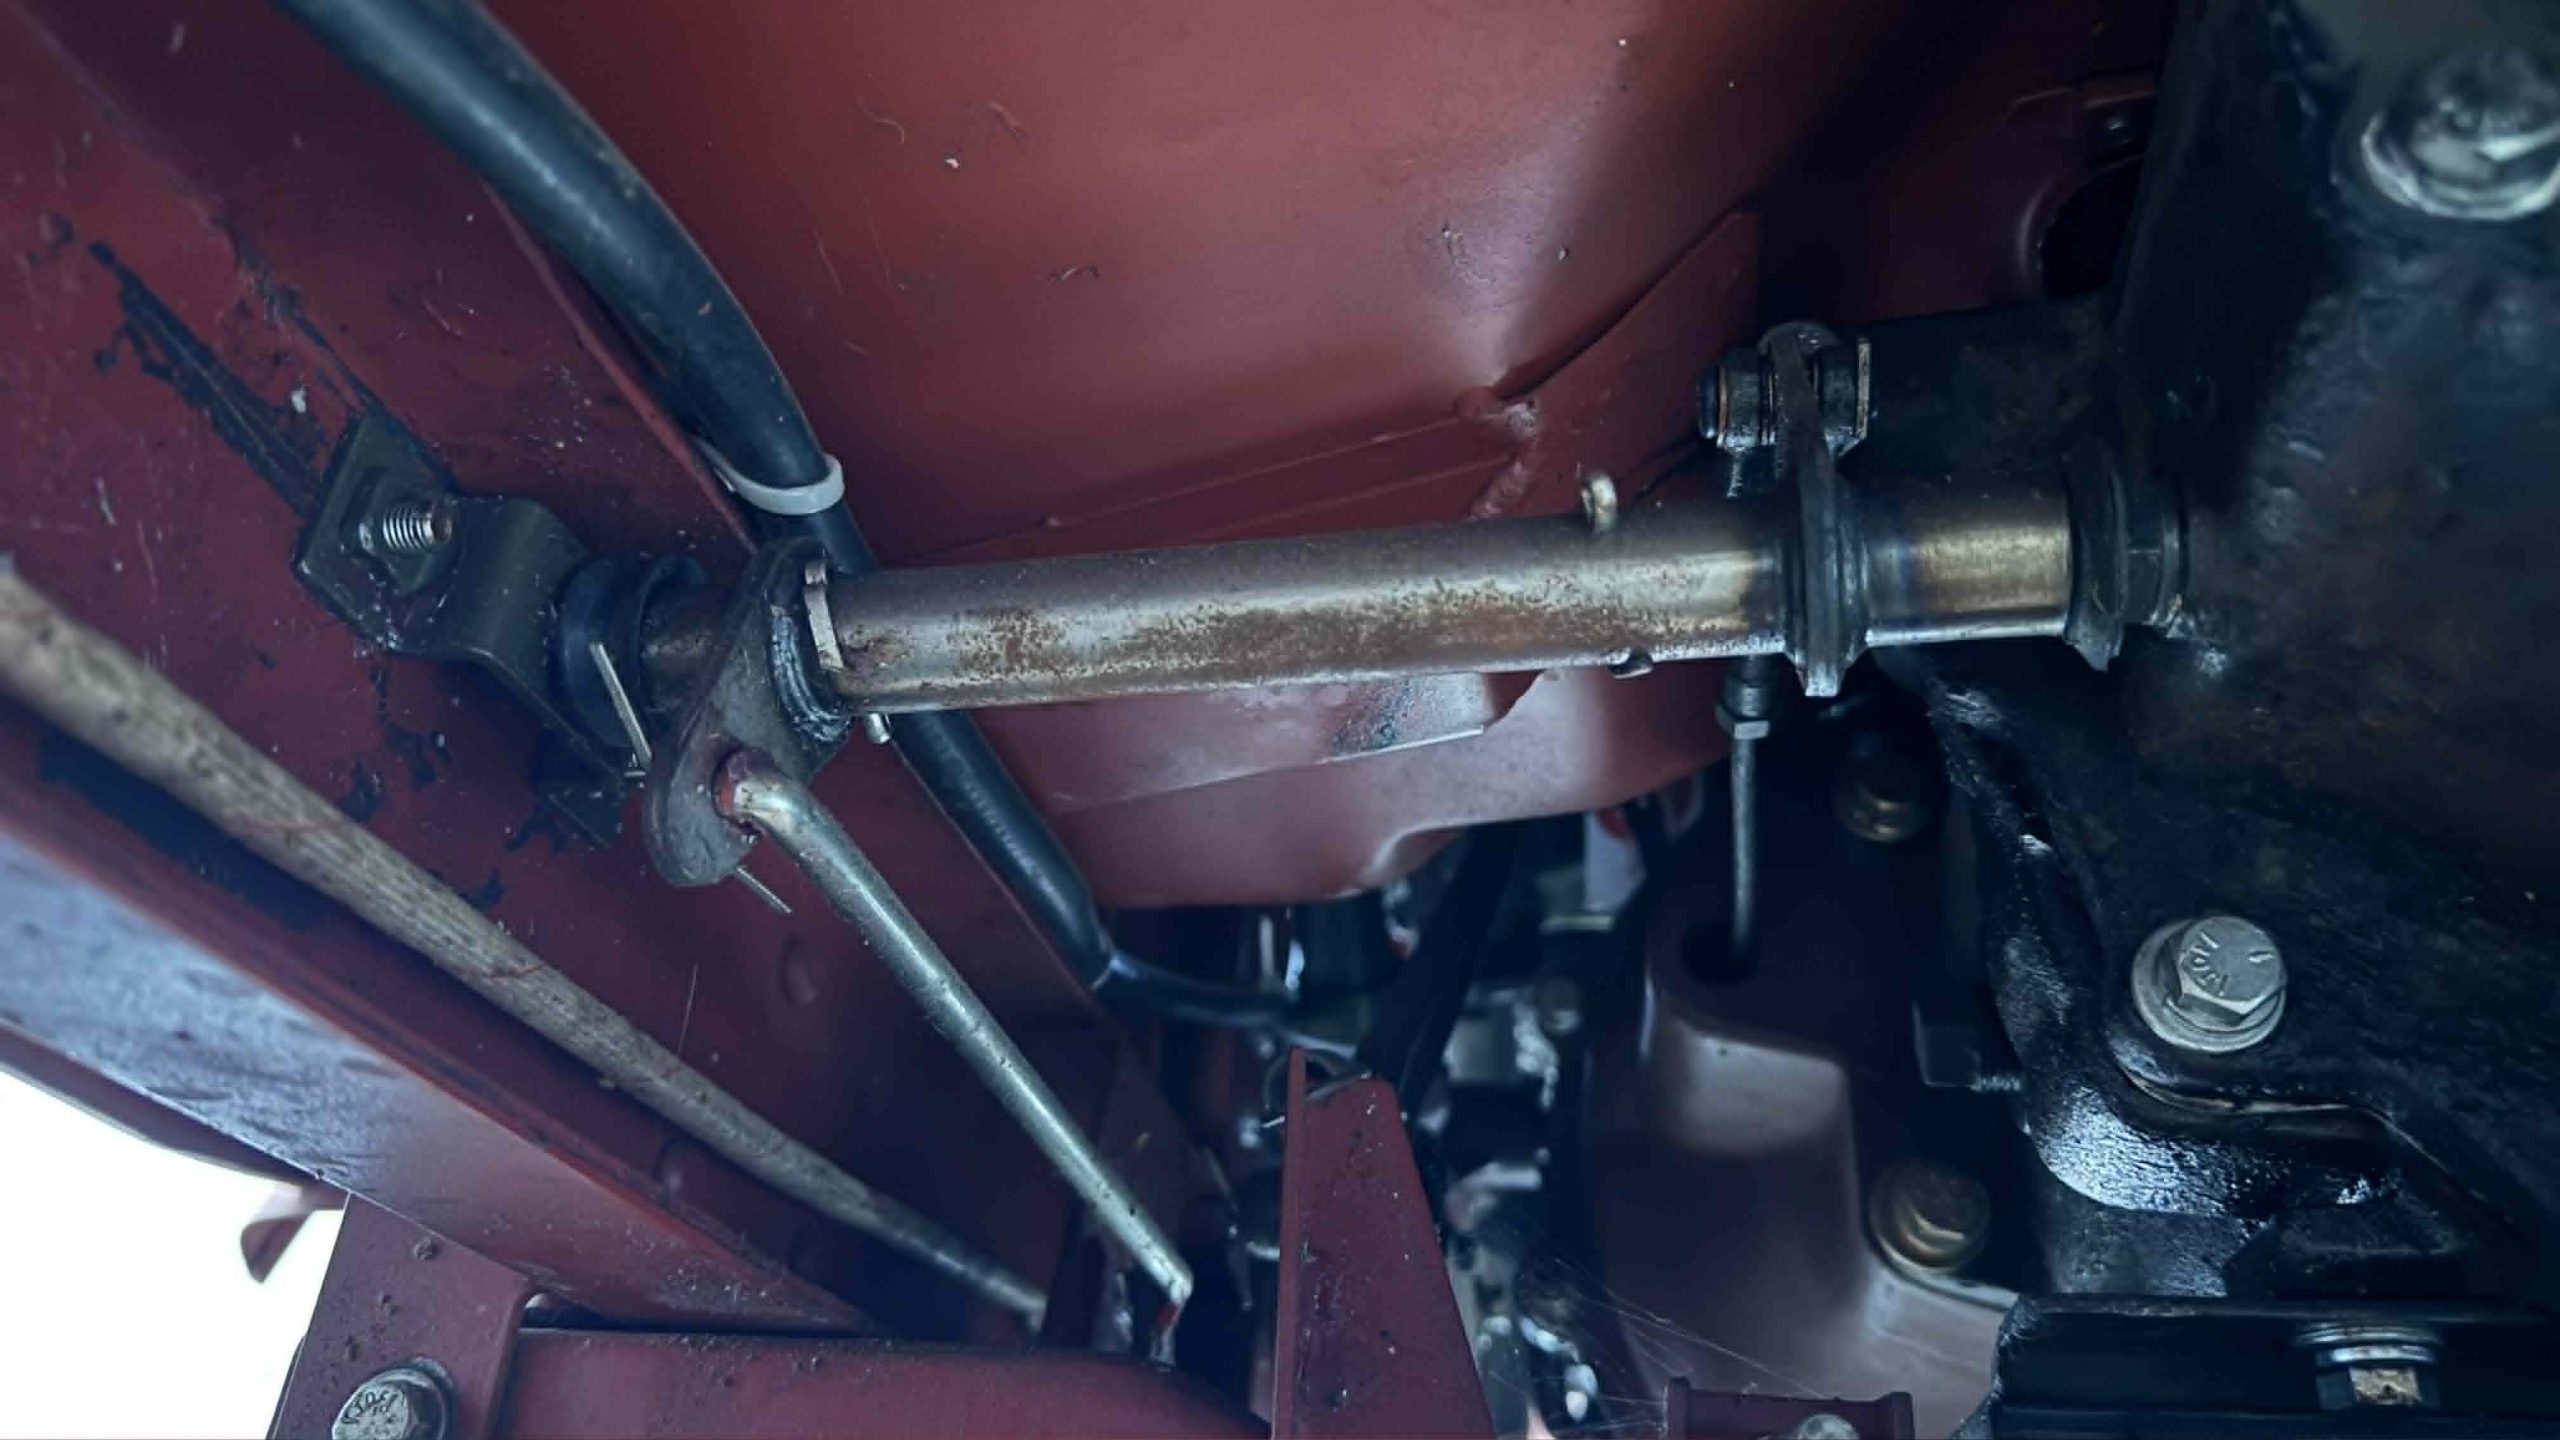
As you can see in the image above, there’s a steering column already mounted up. That’s because Laurence and I had been concerned that the engine might get in the way and make installation challenging, so during a break in engine work, we completely assembled a new steering system made up entirely of parts purchased off eBay.
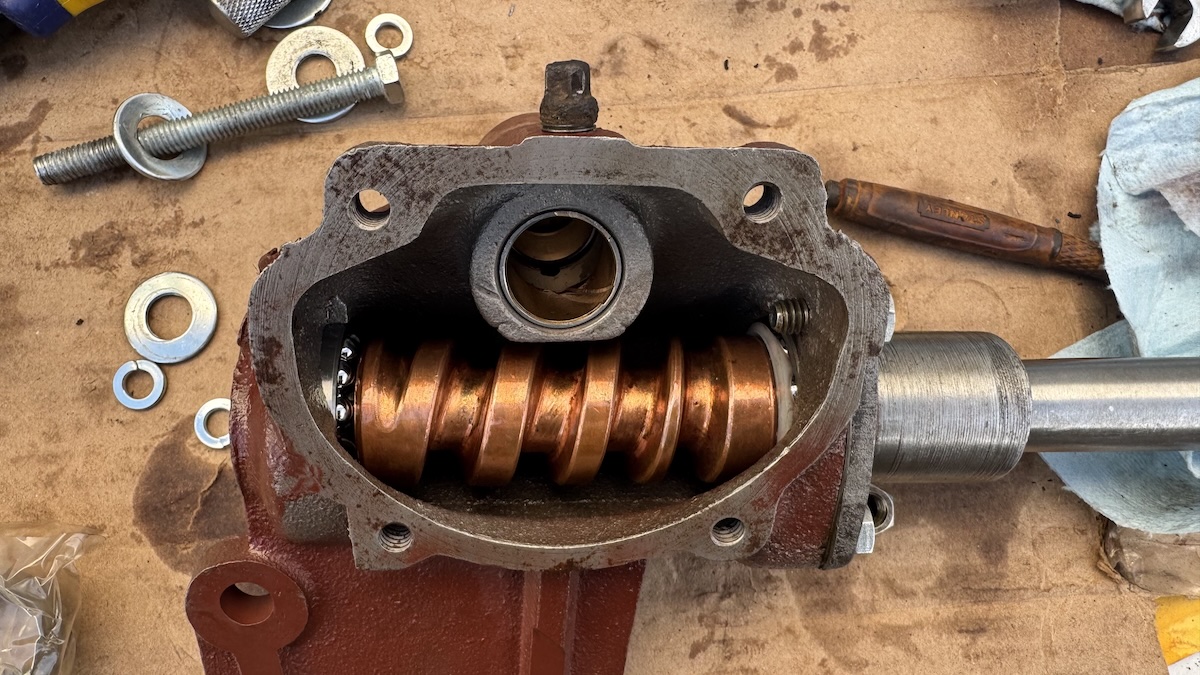

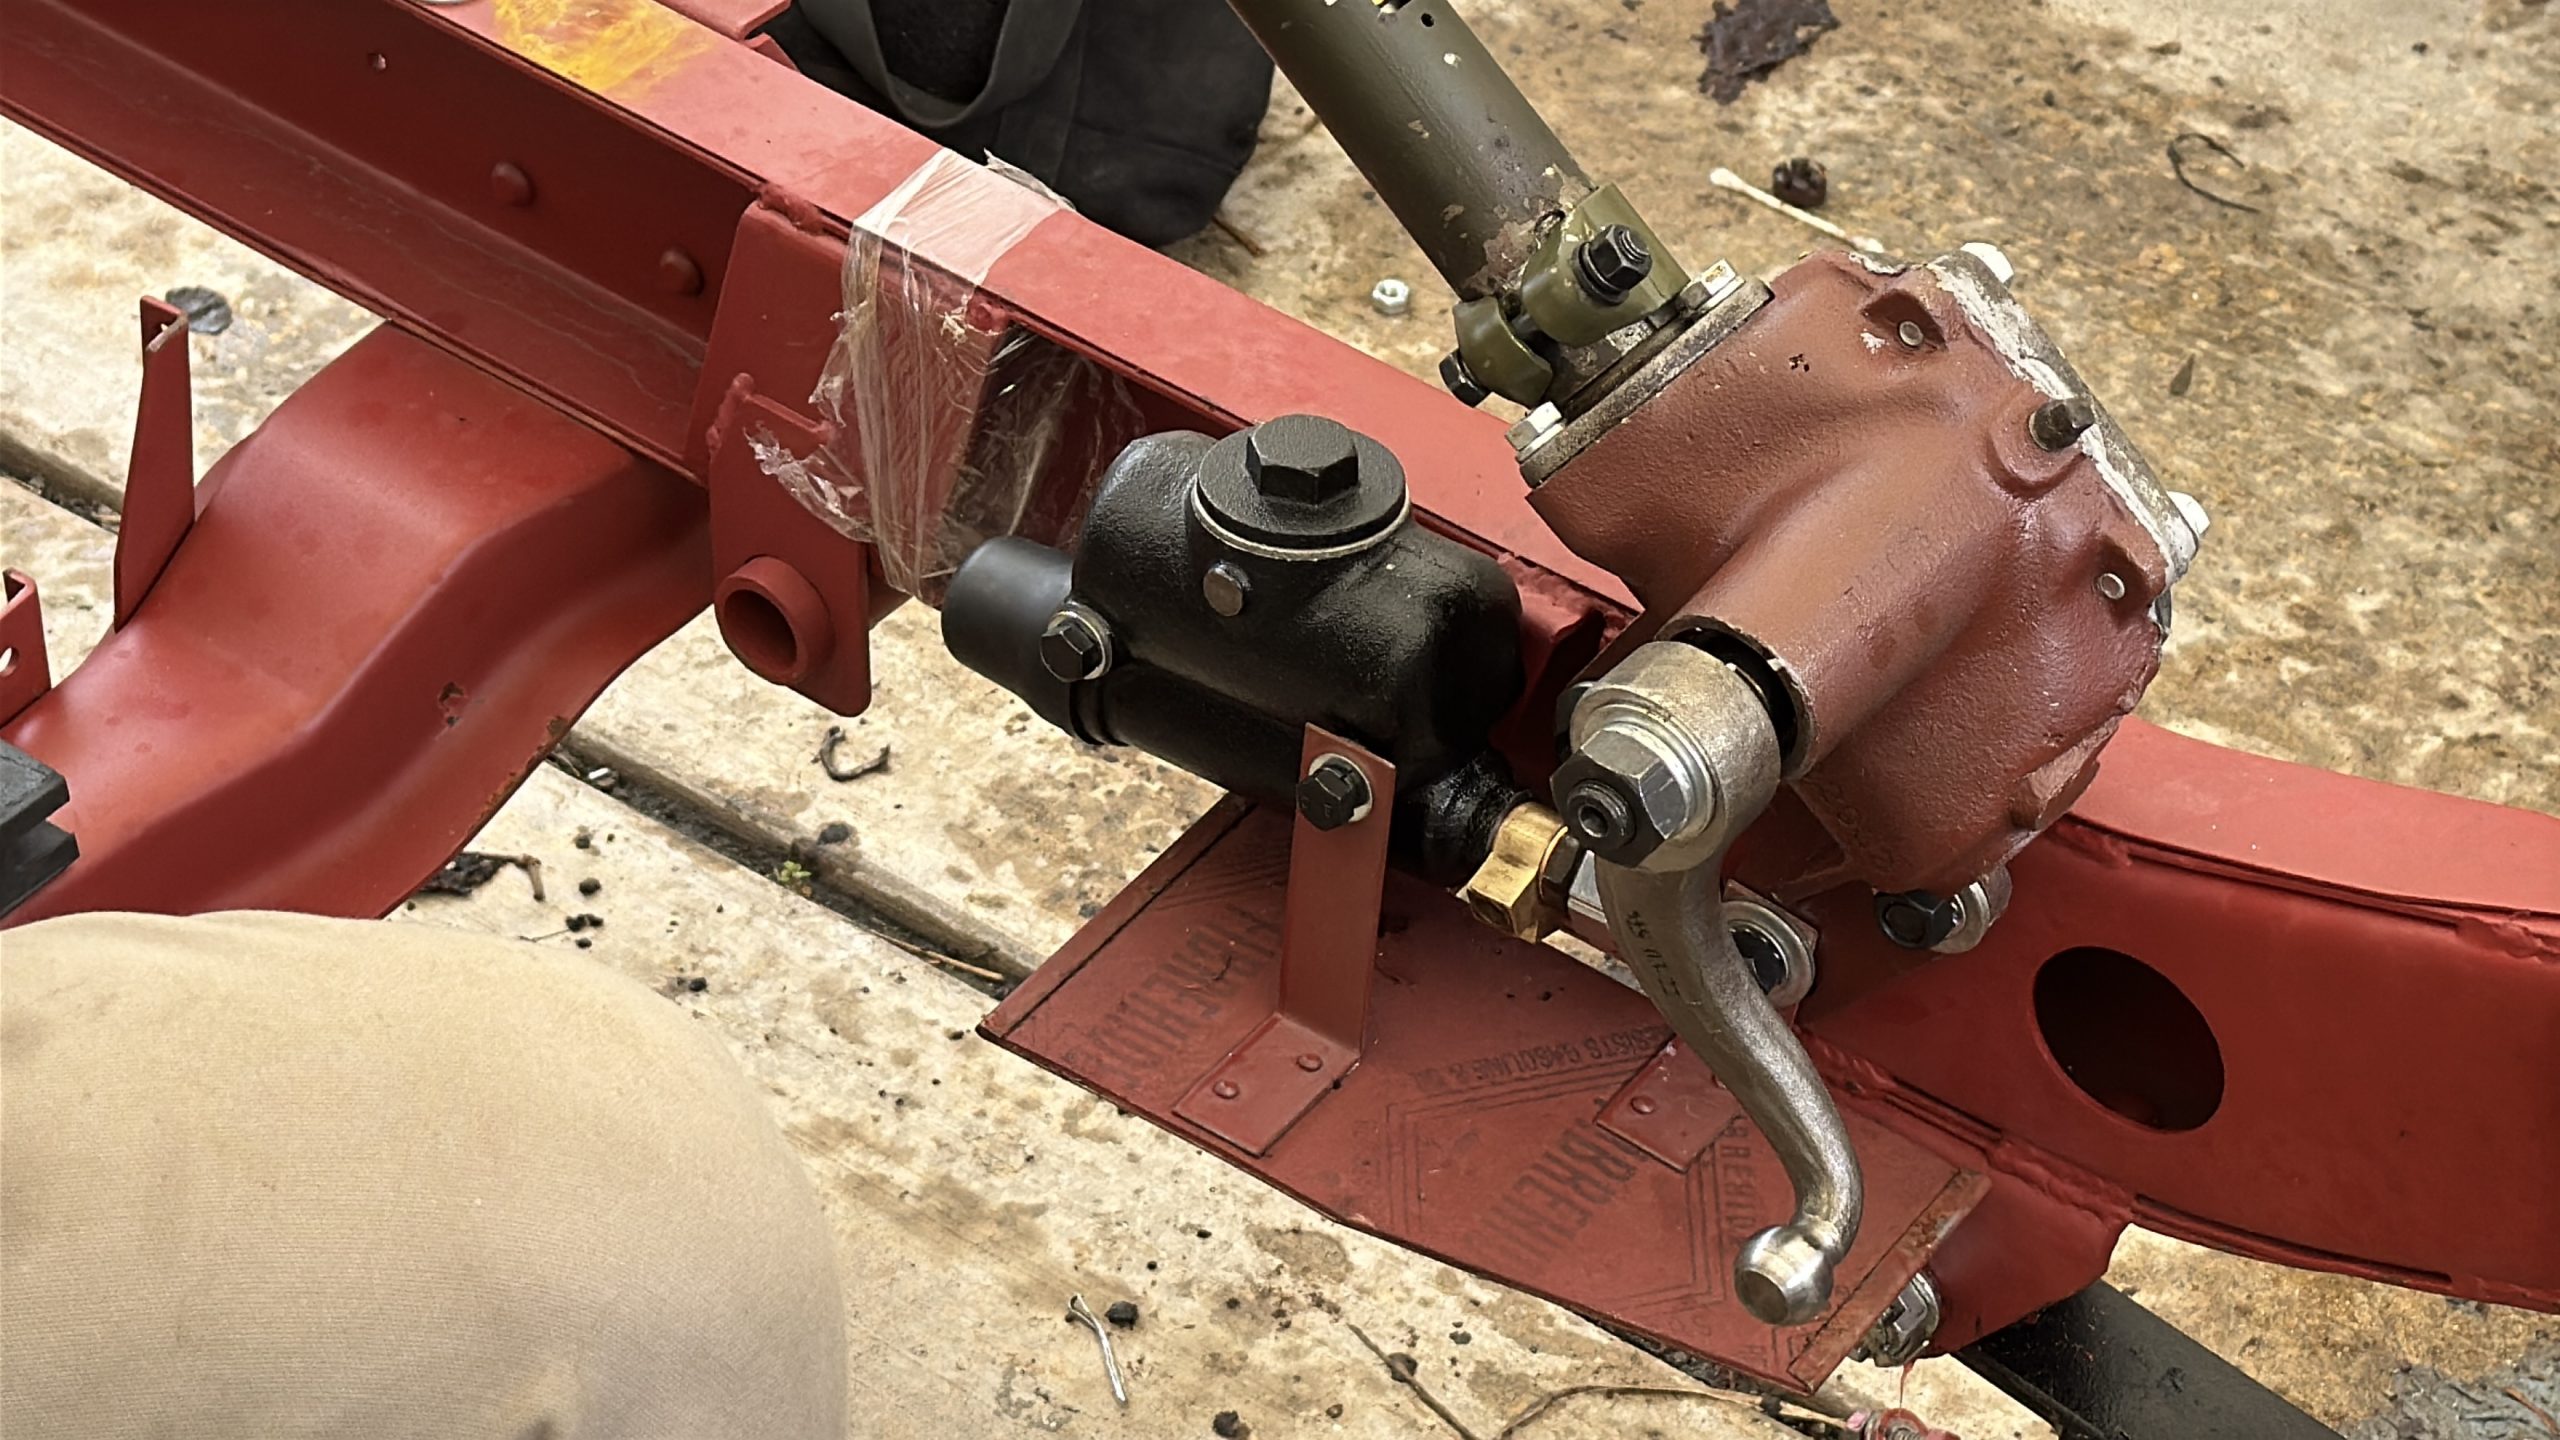
Neither Laurence nor I had ever rebuilt a steering box like this, but with YouTube tutorials and old War Department literature, we figured it out in the same way that we had seemingly figured out how to put that engine together.
After we hooked the transmission to the transfer case, we dragged the heavy cast iron lump onto the frame crossmember and bolted it to the back of the engine. Then we set up a crude ignition system, tightened up the exhaust system to the engine’s exhaust manifold, put on a brand new carburetor I had purchased from eBay, attached the radiator, installed the starter motor, and ran a fuel hose into a jerry can.
For about an hour, we toiled to see if we could get that freshly-built motor running. At first, it wasn’t turning over fast enough, as all the internals (seals, bearings, rings) were tight, but eventually it cranked with vigor, and popped off a few times. Only when we realized that I had mixed up two of the spark plug wires did the engine actually fire:
The motor idled for a little while, but unfortunately would not rev up without dying.
Still, I didn’t hear any loud knocking or ticking, so hopefully I could dial the motor in later. For now, with Laurence set to leave the next day, I wanted his help plopping the body onto the frame, as I was worried there might be major fitment issues that would require cutting and welding — something that I would have to know about right now if there was any hope in getting to Moab on time.

Laurence and I didn’t have a ton of time to get things perfect, but we lined things up reasonably well, and I was hopeful that, with a bit of hammering, drilling, and prying, I could get this body bolted securely onto that frame.

It was a great 20 days with Laurence. We now had a somewhat-running engine, a rebuilt transmission and transfer case, a suspension, and a body that had at least been test-fitted.
But it was February 20th, I had just over a month until I had to drive the Jeep across the country, and I still had a towering mountain of work ahead.
One Month Until Moab, And The Jeep Isn’t Even Close
This takes me back to the intro paragraph. “David, you need to call eBay and give them a heads up. You’re supposed to leave soon!” my wife told me pretty much every day during this phase of the project. I had a month to go, and, though I had something that looked like a Jeep (see above), it was all a big lie. The body wasn’t even going to stay on the frame; I had to take it right back off to drill holes.
But the body wasn’t my biggest concern. My driveline, steering, and brakes were nowhere near complete. So I put everything in my life aside, and I completely locked in. The Jeep became my priority — over sleep, over nourishment, over family time, over editor-in-chief duties. This project was too important to The Autopian; we had a deliverable, not just for our brand partner but for our readers, and for the future of the company, failure simply was not an option. The pressure was immeasurable, but in a way, hugely motivating.

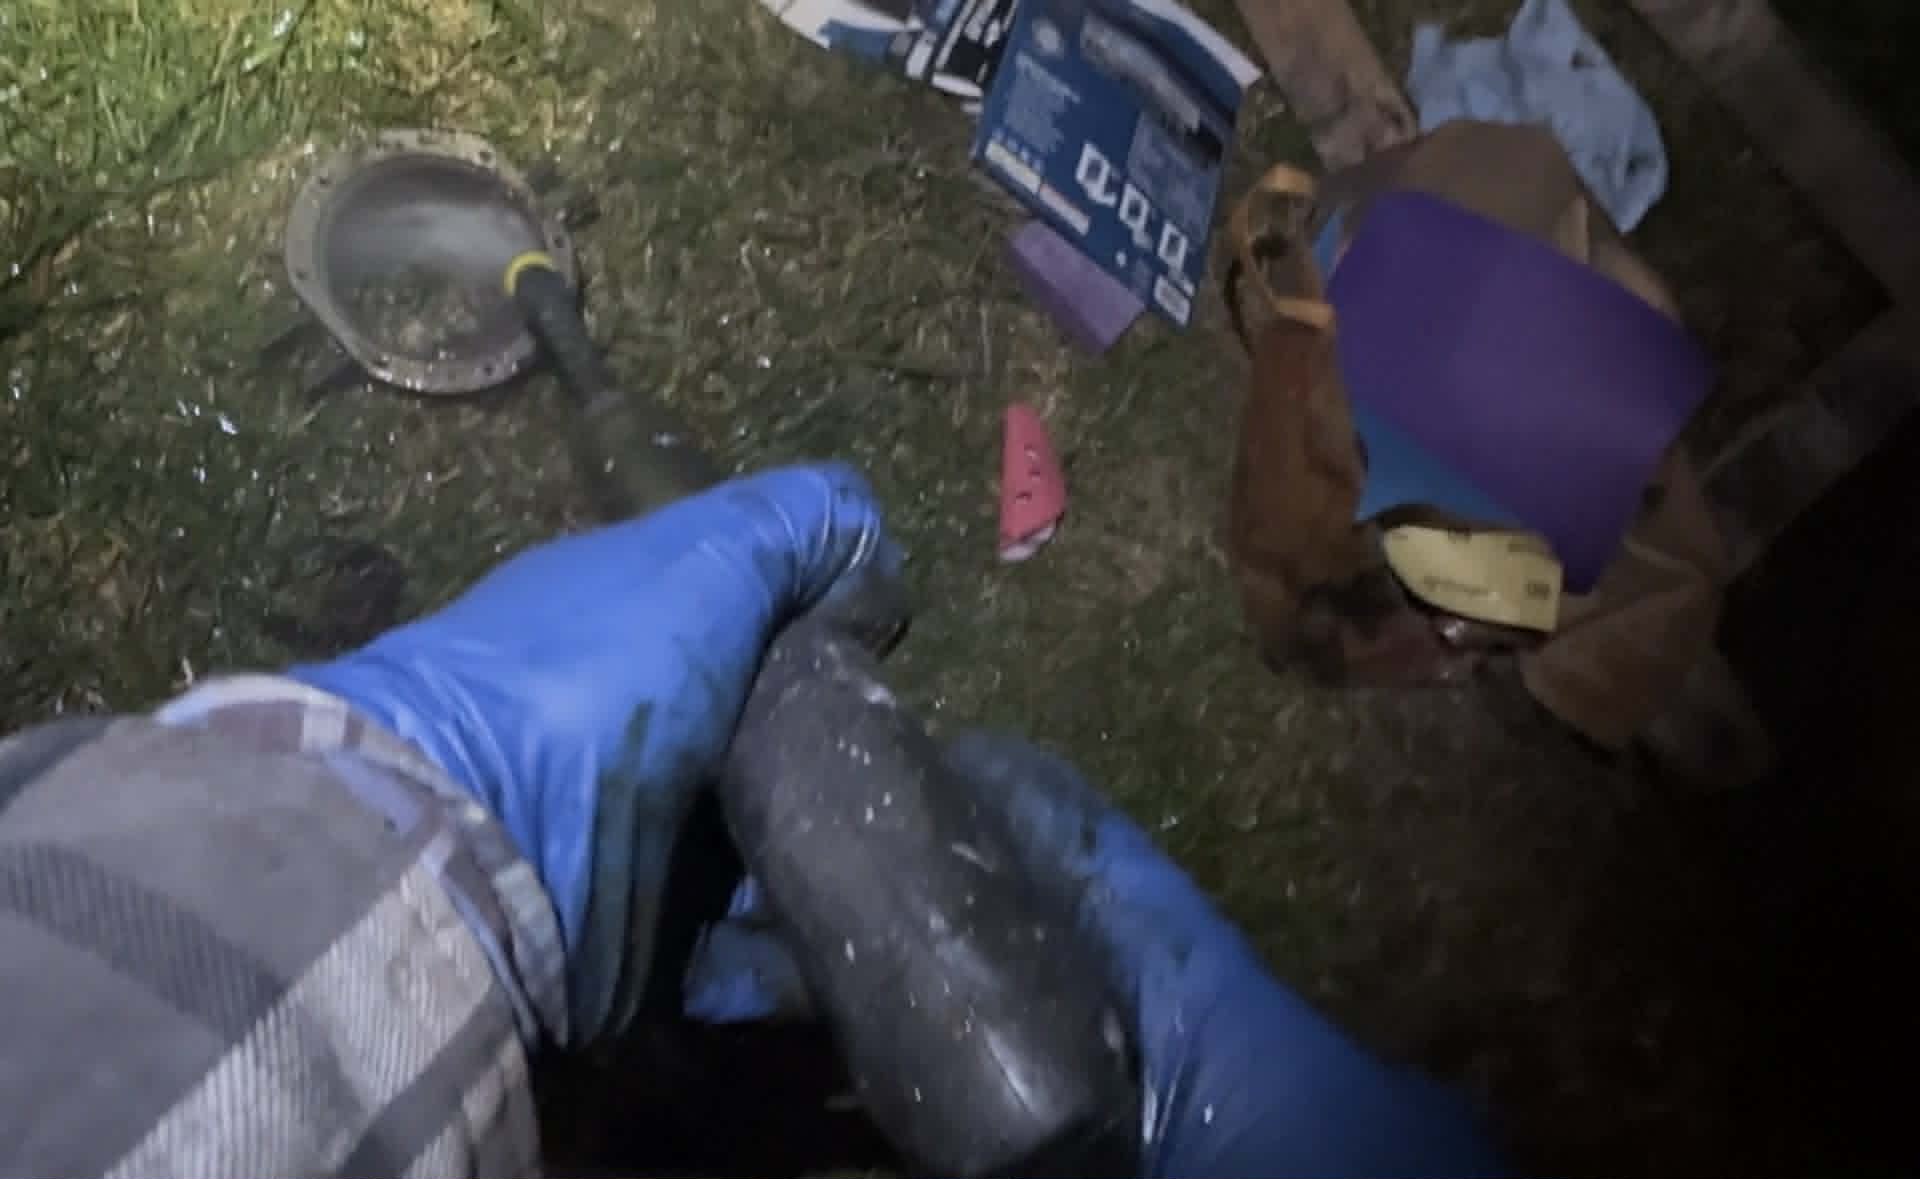
After Laurence flew back to upsidedown-land, I started by yanking all four brake drums and then scraping, power washing, degreasing, and scrubbing the backing plates:


Then I installed the hardware and brake shoes, and bolted the backing plates back to the axle housings:

I packed my wheel bearings:

And I installed those tapered bearings into the drums after having pounded in the races. Then I installed the wheel bearing seals:
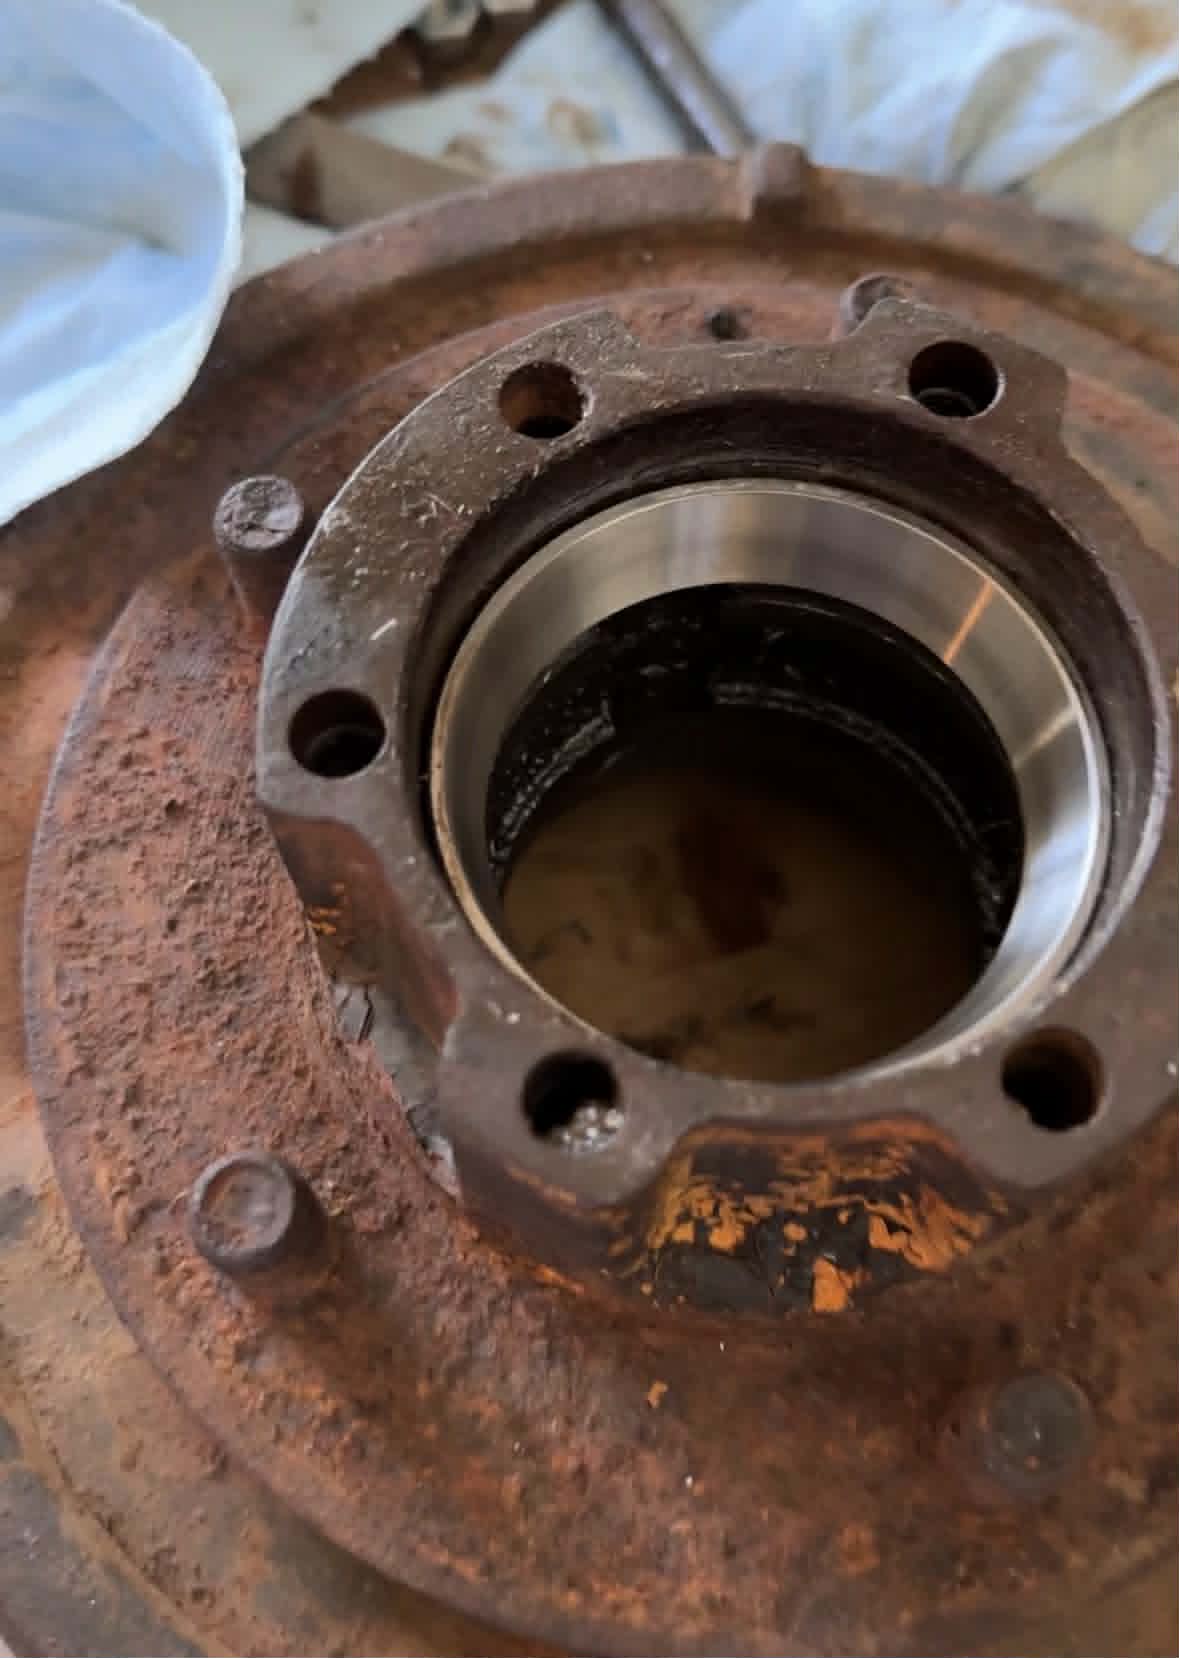


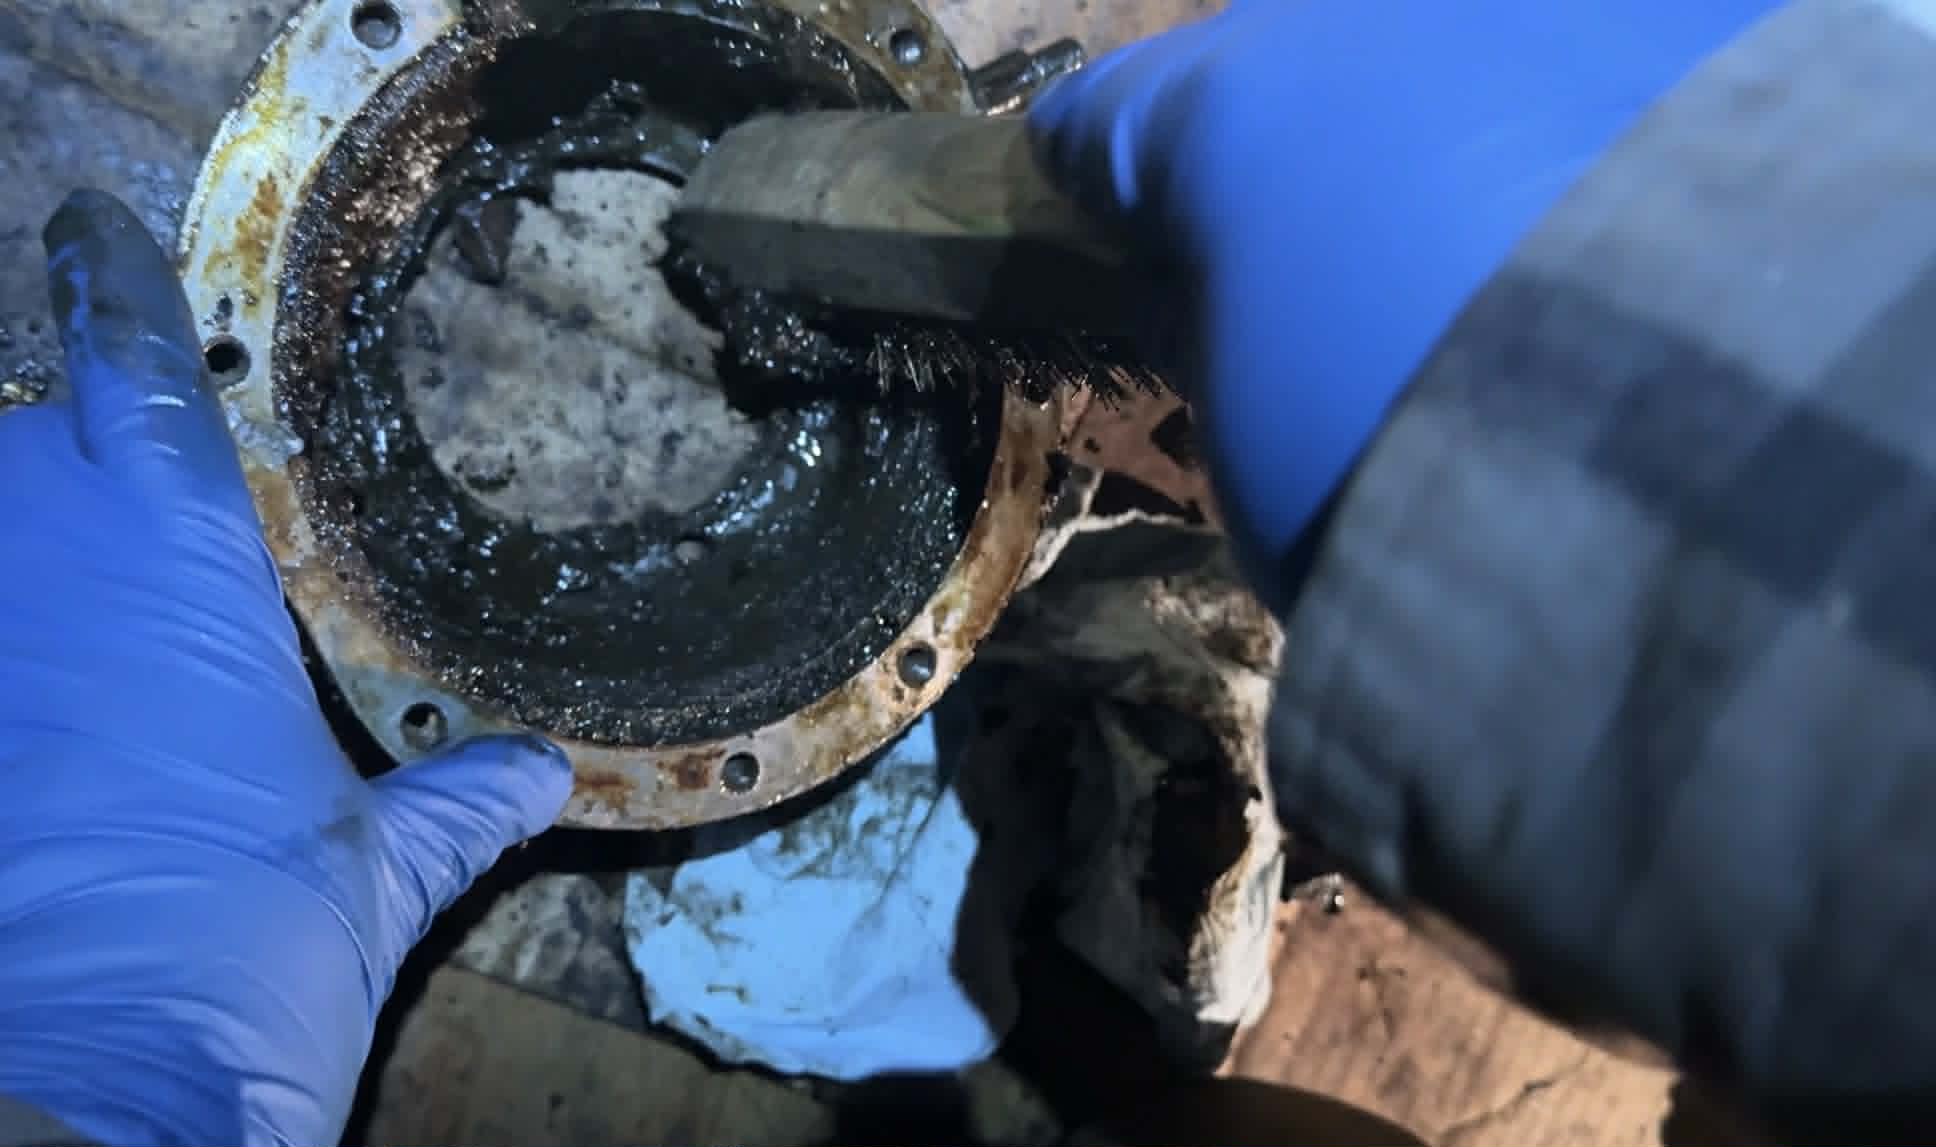
That completed the rear brakes, but up front I had a ton more work to do. Removing the brake backing plate revealed the open knuckle, which had an axle shaft inside whose CV joint was bathed in goop:

Removing the knuckle revealed a total mess:
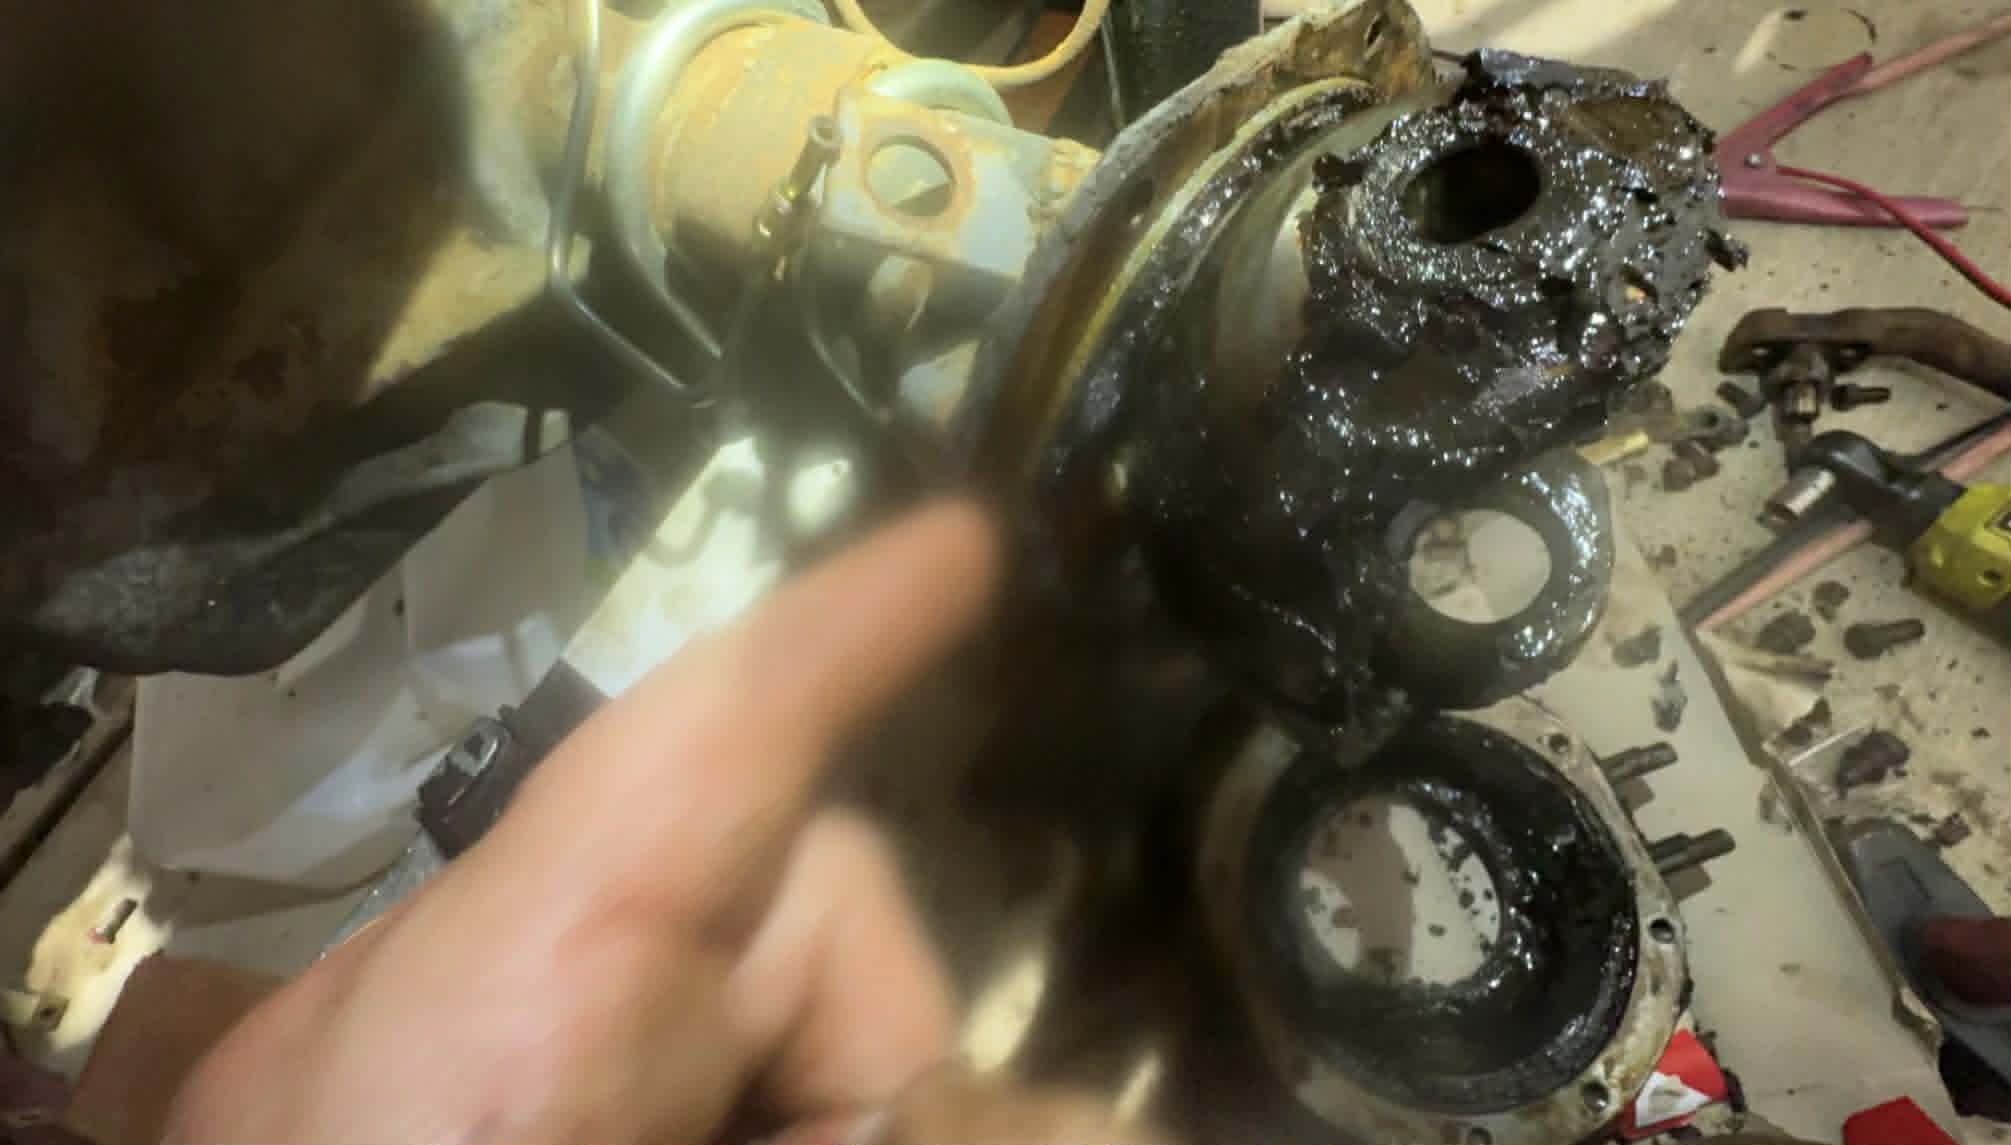
I scrubbed and power-washed all the grease out of the knuckle and also off of the axle tube itself:
I banged out the steering kingpin bearing races:

And I hammered in new ones:

Then I pressed in new races, packed my kingpin bearings, and installed the knuckles:

This was an iterative process that involved strategically installing shims between the bearing caps and the knuckle — shims like this:

Different shim stacks changed the steering resistance of the knuckle, with more shims yielding a looser steering and fewer shims yielding tighter steering.

There’s a certain spec for how many pounds one should have to impart on the steering arm before the knuckle rotates about its kingpins, since steering that is too light or too stiff won’t last long; I used the pull-scale you see above to get my system into spec, and then I locked it all down with a torque wrench:

I then shoved in the axle shafts:

Then came the spindle:

Then the backing plate:

I then shoved the brake drum on and bolted up the wheels:


I replaced all the tie rod ends, including the two that attached to the bellcrank, whose bearings Laurence and I had replaced:

That bellcrank is hooked to the draglink that goes to the steering box’s pitman arm; I had to rebuild it, too, as it has bearings inside as well:

I also had to install about 20 feet worth of brake lines and hoses:
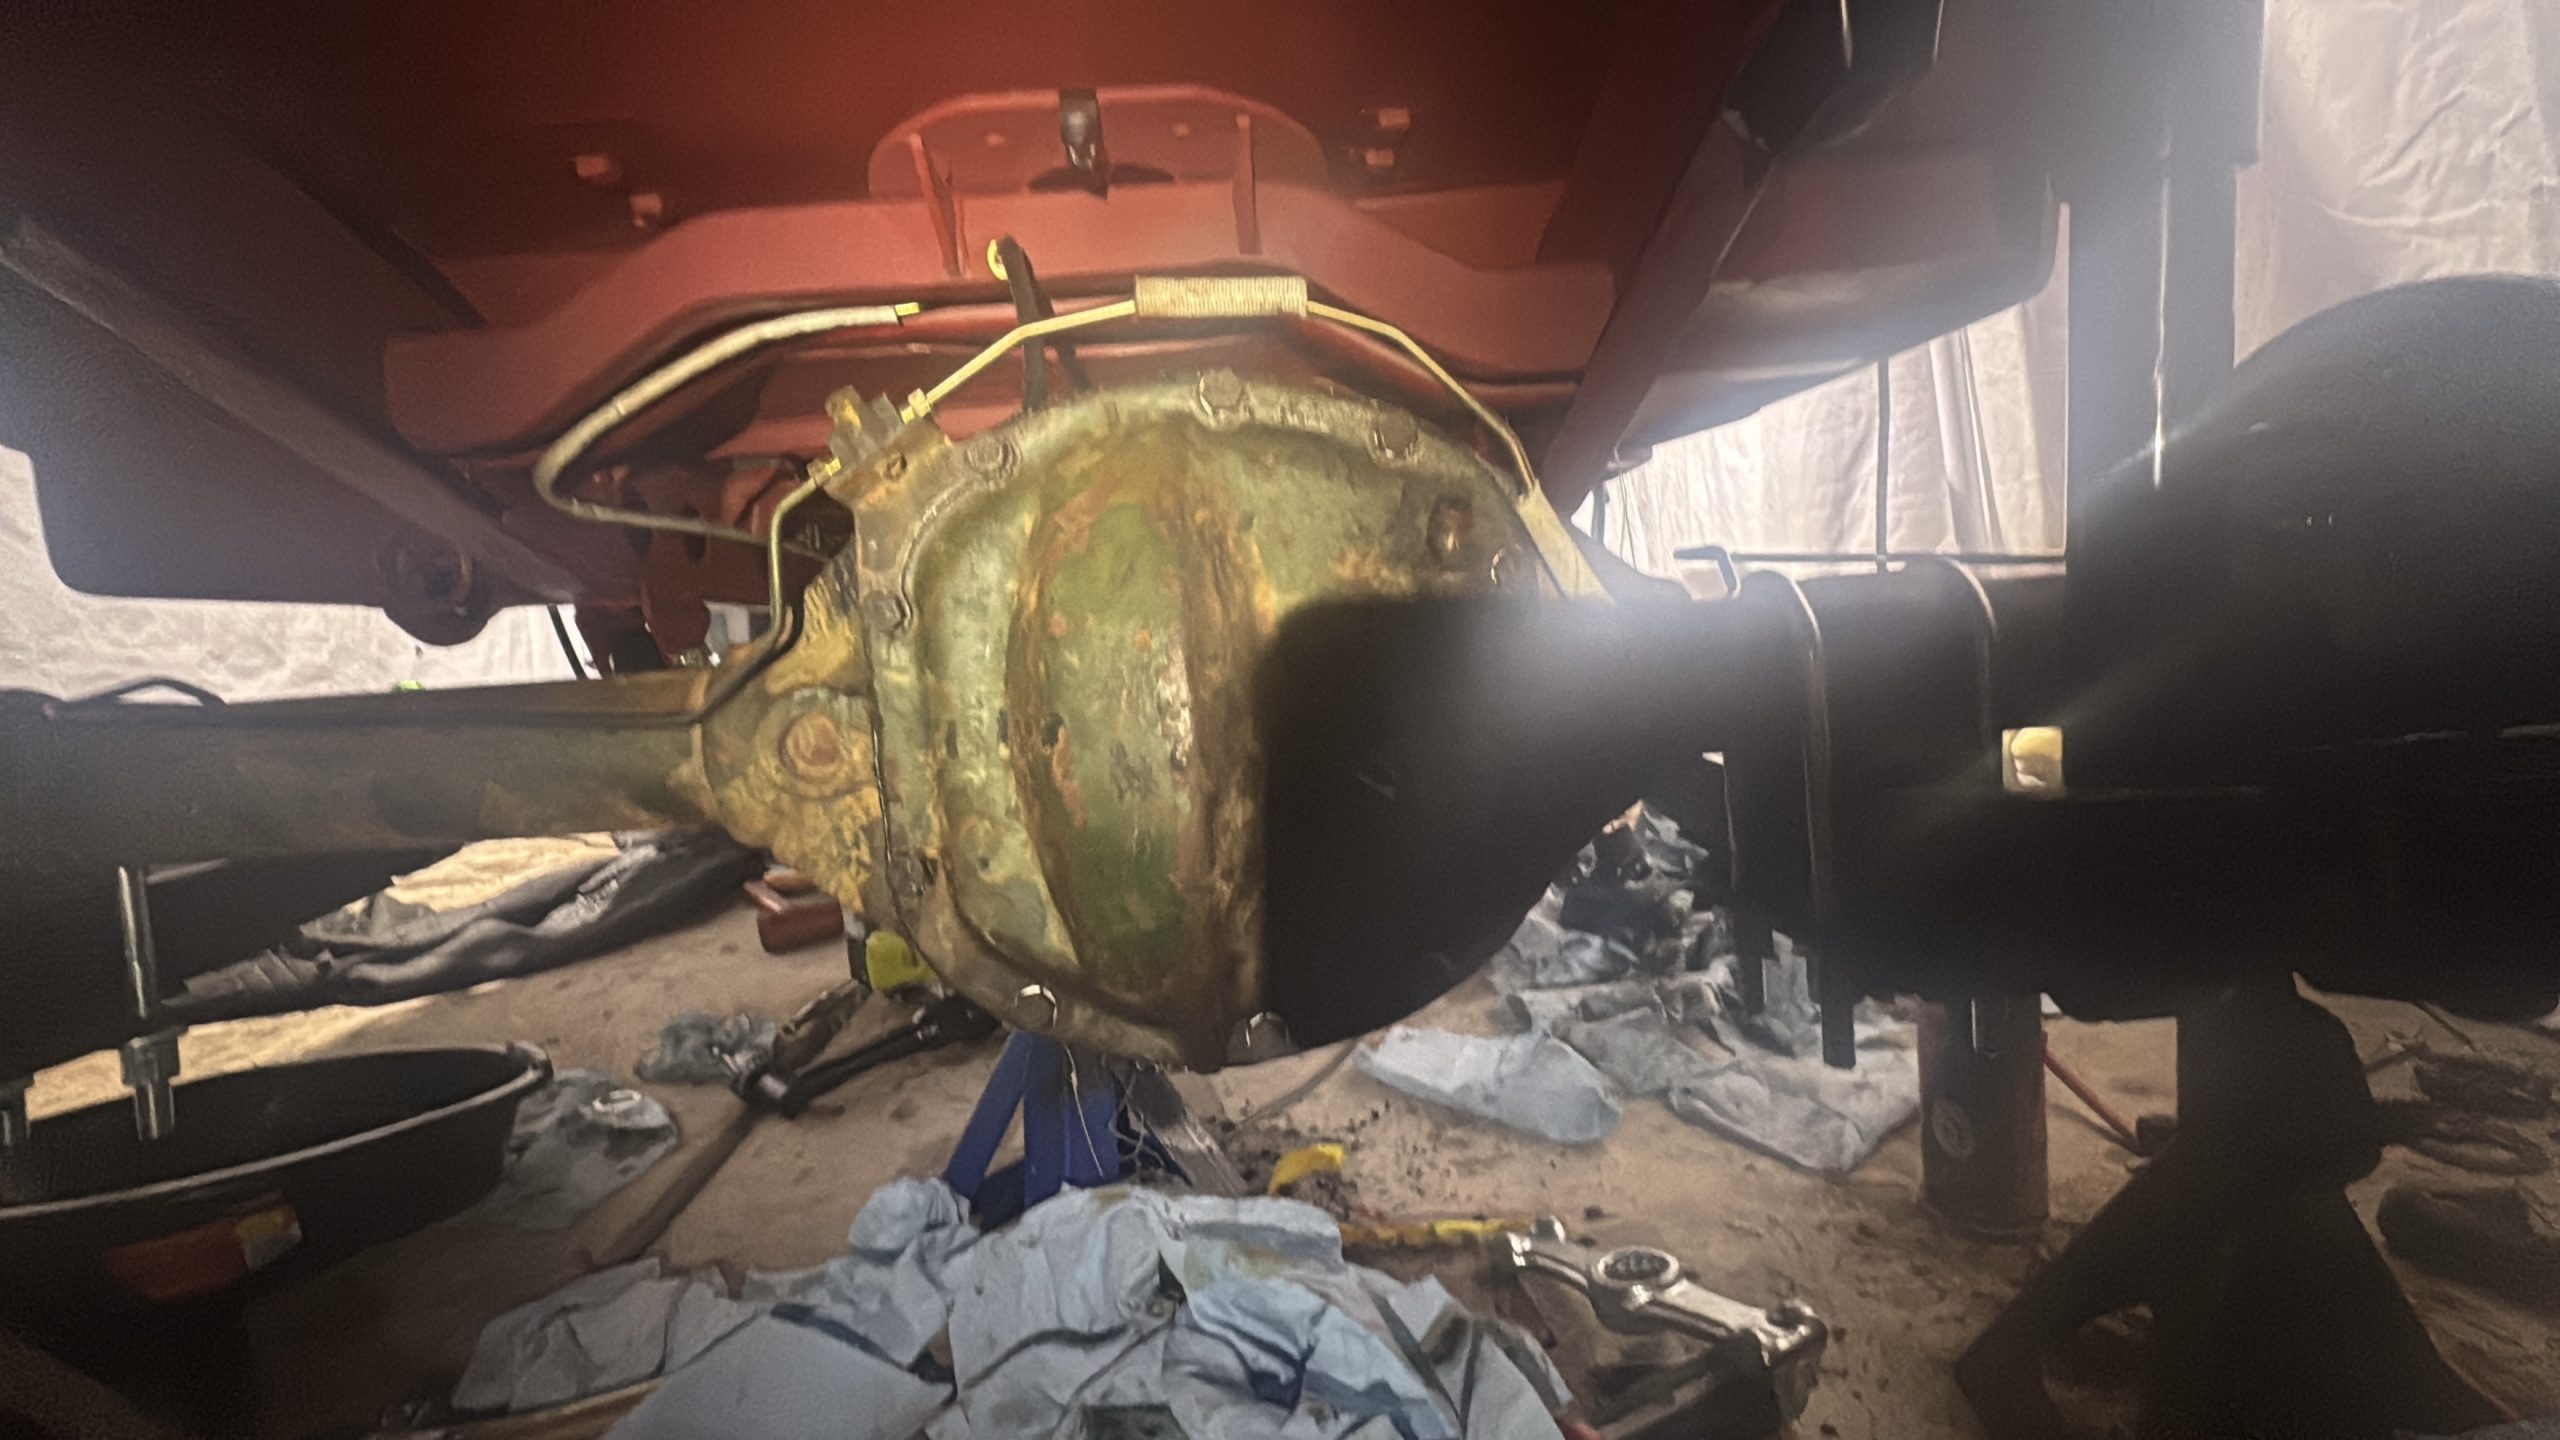
I then bled the brakes, and removed both differential carriers to replace the axle seals:

I also replaced the pinion seals:

One of the differential carriers had its ring gear bolts hand-loose, so I had to remove them all and tighten them with threadlock:

I bolted in new driveshafts with new u-joints, and I installed the clutch cable and the rod that connects that to the clutch pedal:
The way I’m listing this all off makes it sound like it happened quickly, but if I actually described how things really went this article would be 20,000 words, so just know that when I say “I did this, then I did that,” it was in many cases days of grinding, sanding, hammering, prying, or torching just to get one subsystem to play nice.

It was brutal. It felt endless. And in some ways, it felt futile.
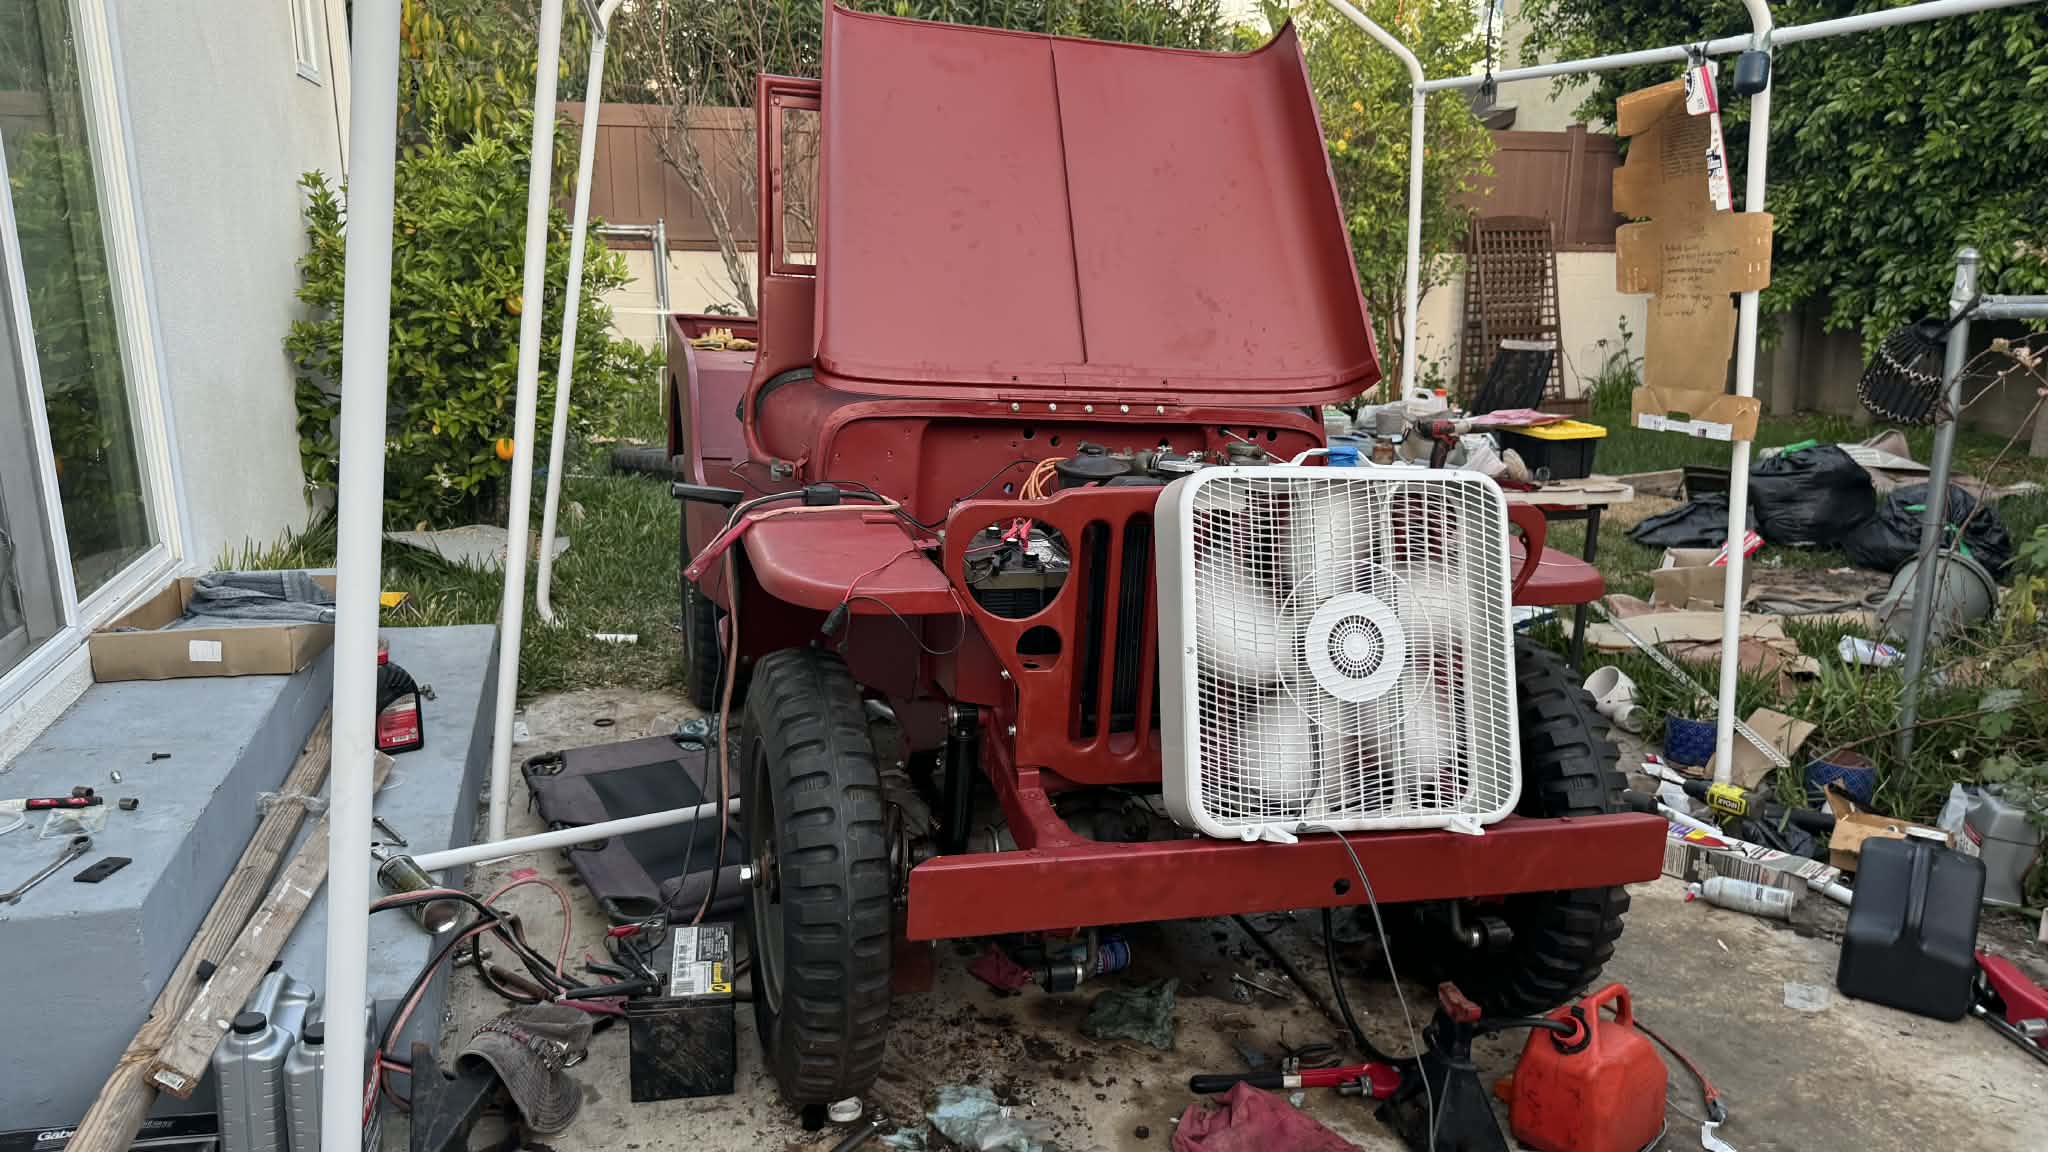
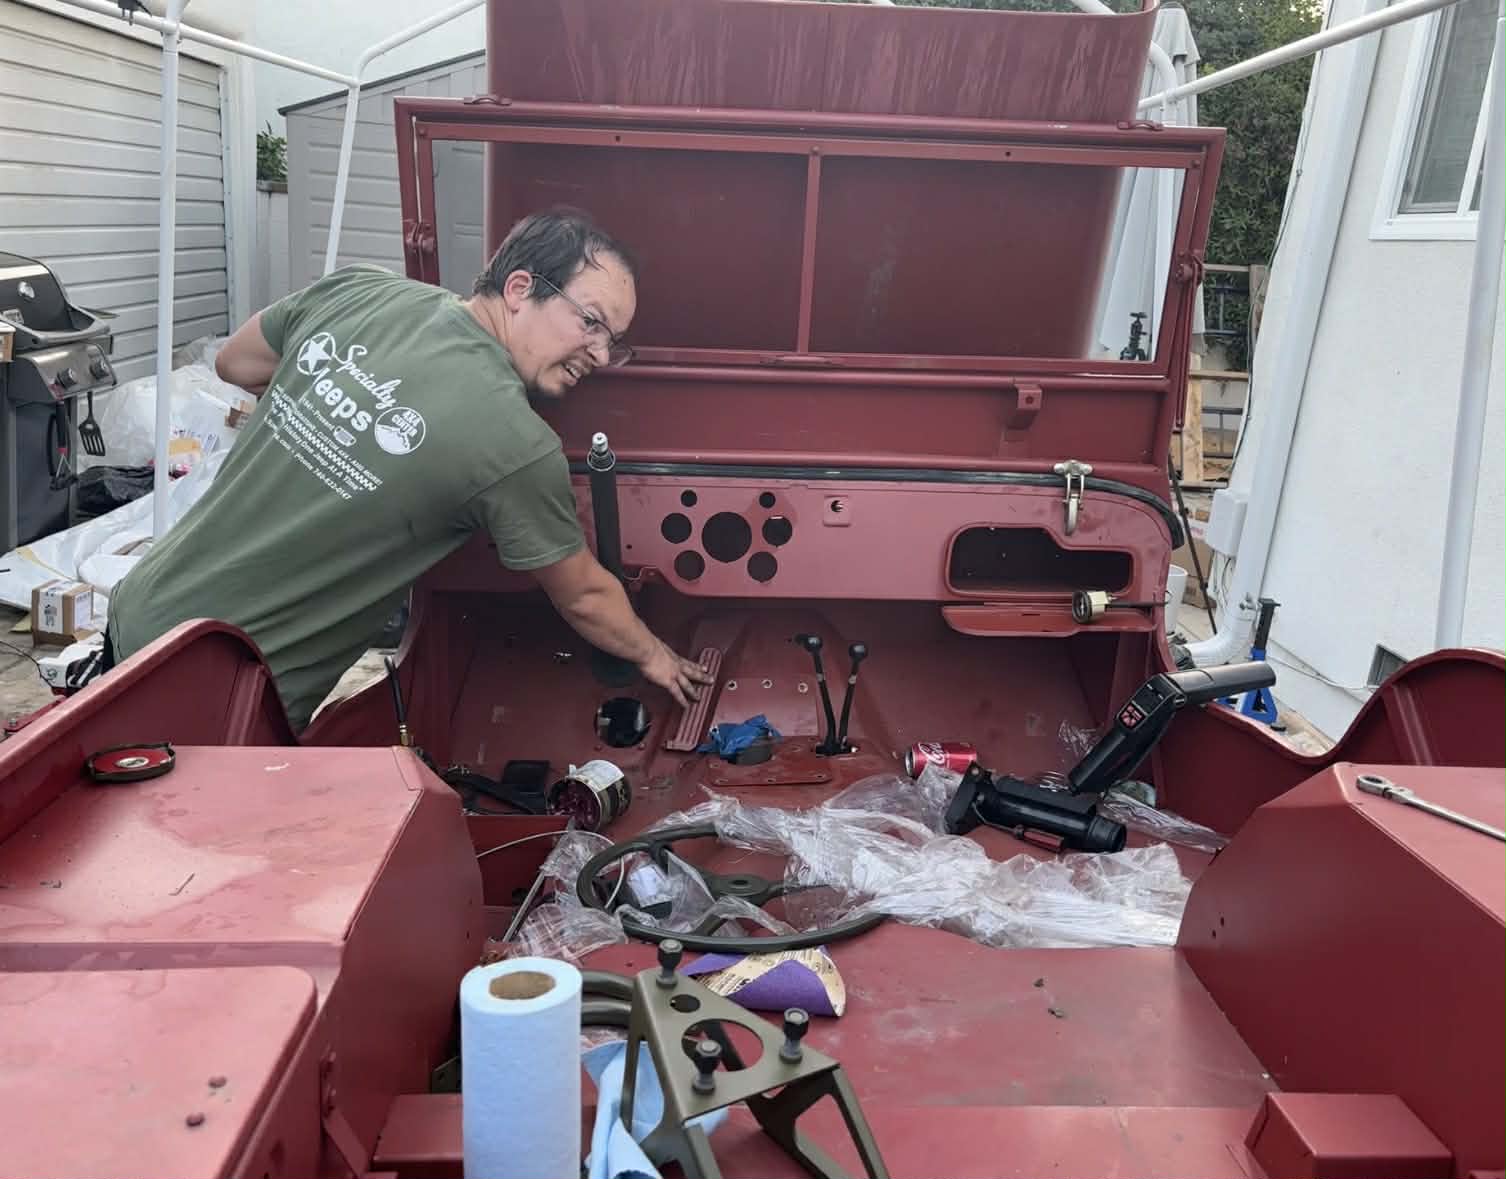
Two Weeks Until The Road Trip And The Jeep Looks Like This
Imagine the panic I felt upon looking at this on May 10, just two weeks before I was supposed to drive to Moab.
Just thinking about the situation made me sweat. Multiple people, seeing how far I was from completing the Jeep, told me: “Just tow the thing; nobody will mind!” But I had made a commitment to eBay and to my readers. The initial pitch for this project included me building the Jeep, road tripping it to Moab, and then off-roading it on some of America’s toughest trails. Trailering to Utah just wouldn’t be the same. And I’m a man of my word.
That panic motivated me to ignore the intense exhaustion I felt from all the work I had just done on the axles, all by myself, covered in grease, in a hot driveway, day and night. I still had so much more to do to get the body onto the frame.


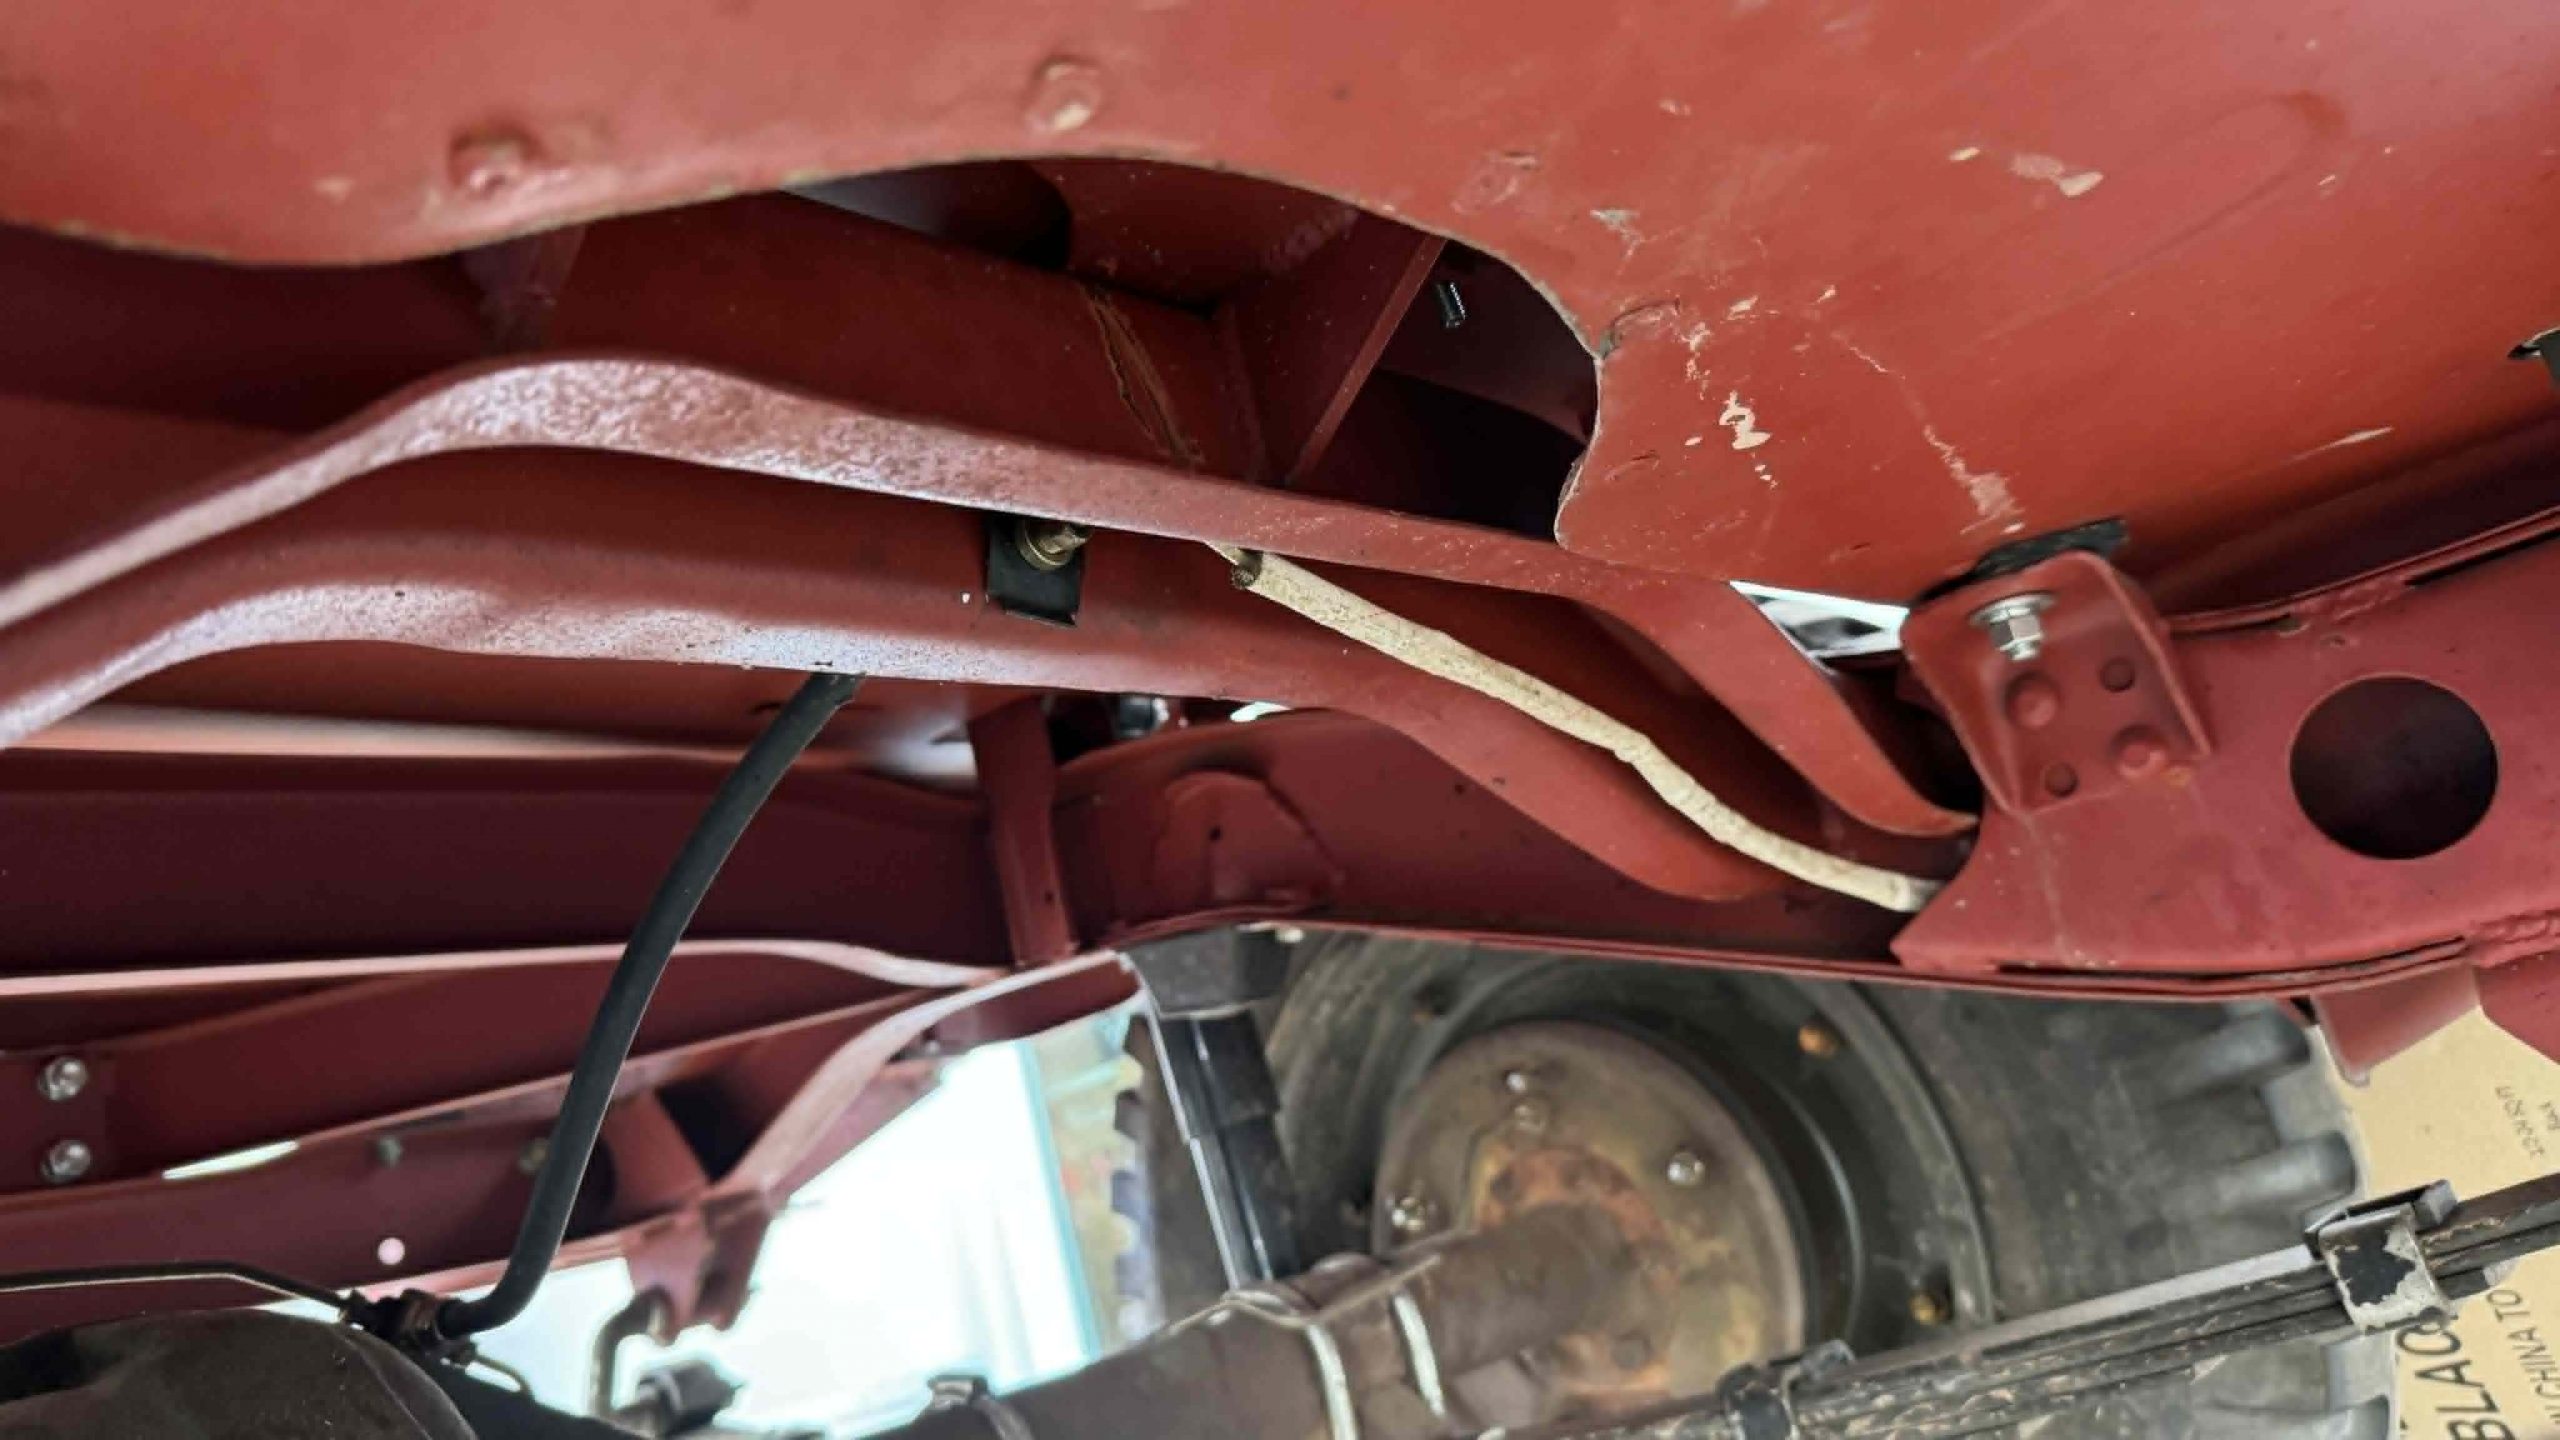
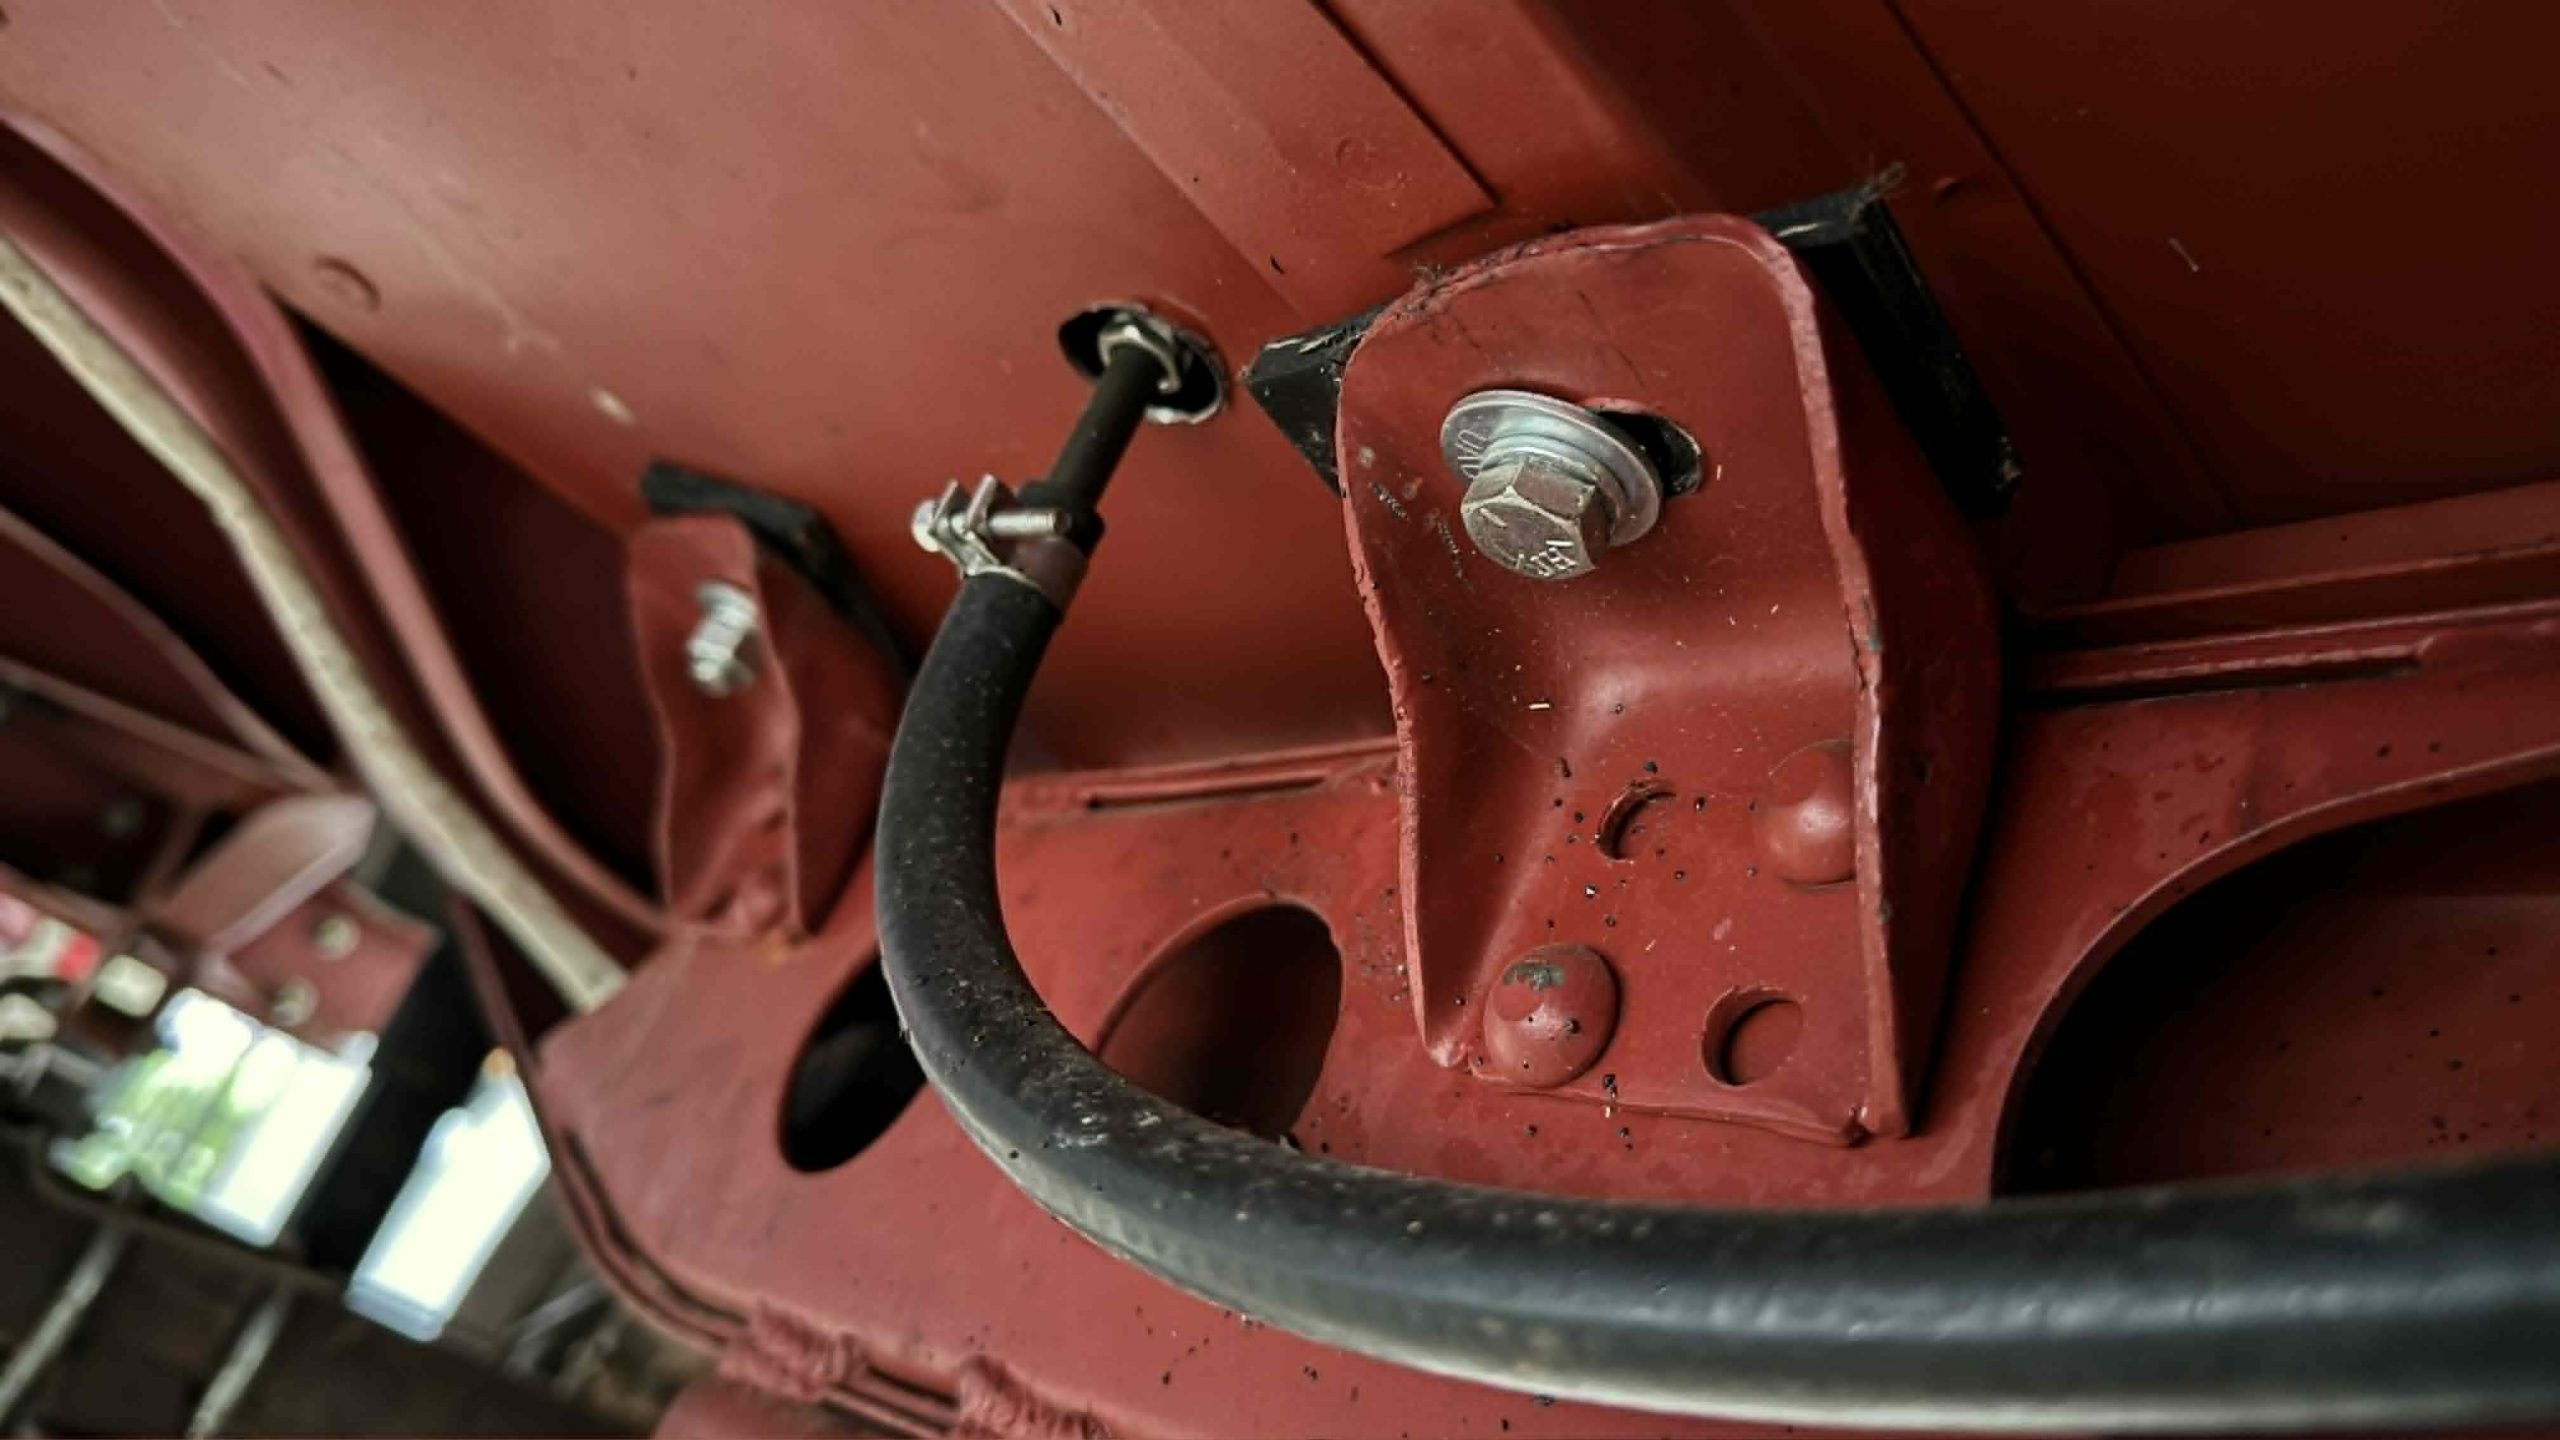
The reality is that, despite the same Philippines-based company having manufactured both the new body and new frame, things weren’t really fitting perfectly. For example, in order to get the body pushed far enough forward for the rear section of the tub not to overhang the rear bumper, the firewall hit the back of the engine.

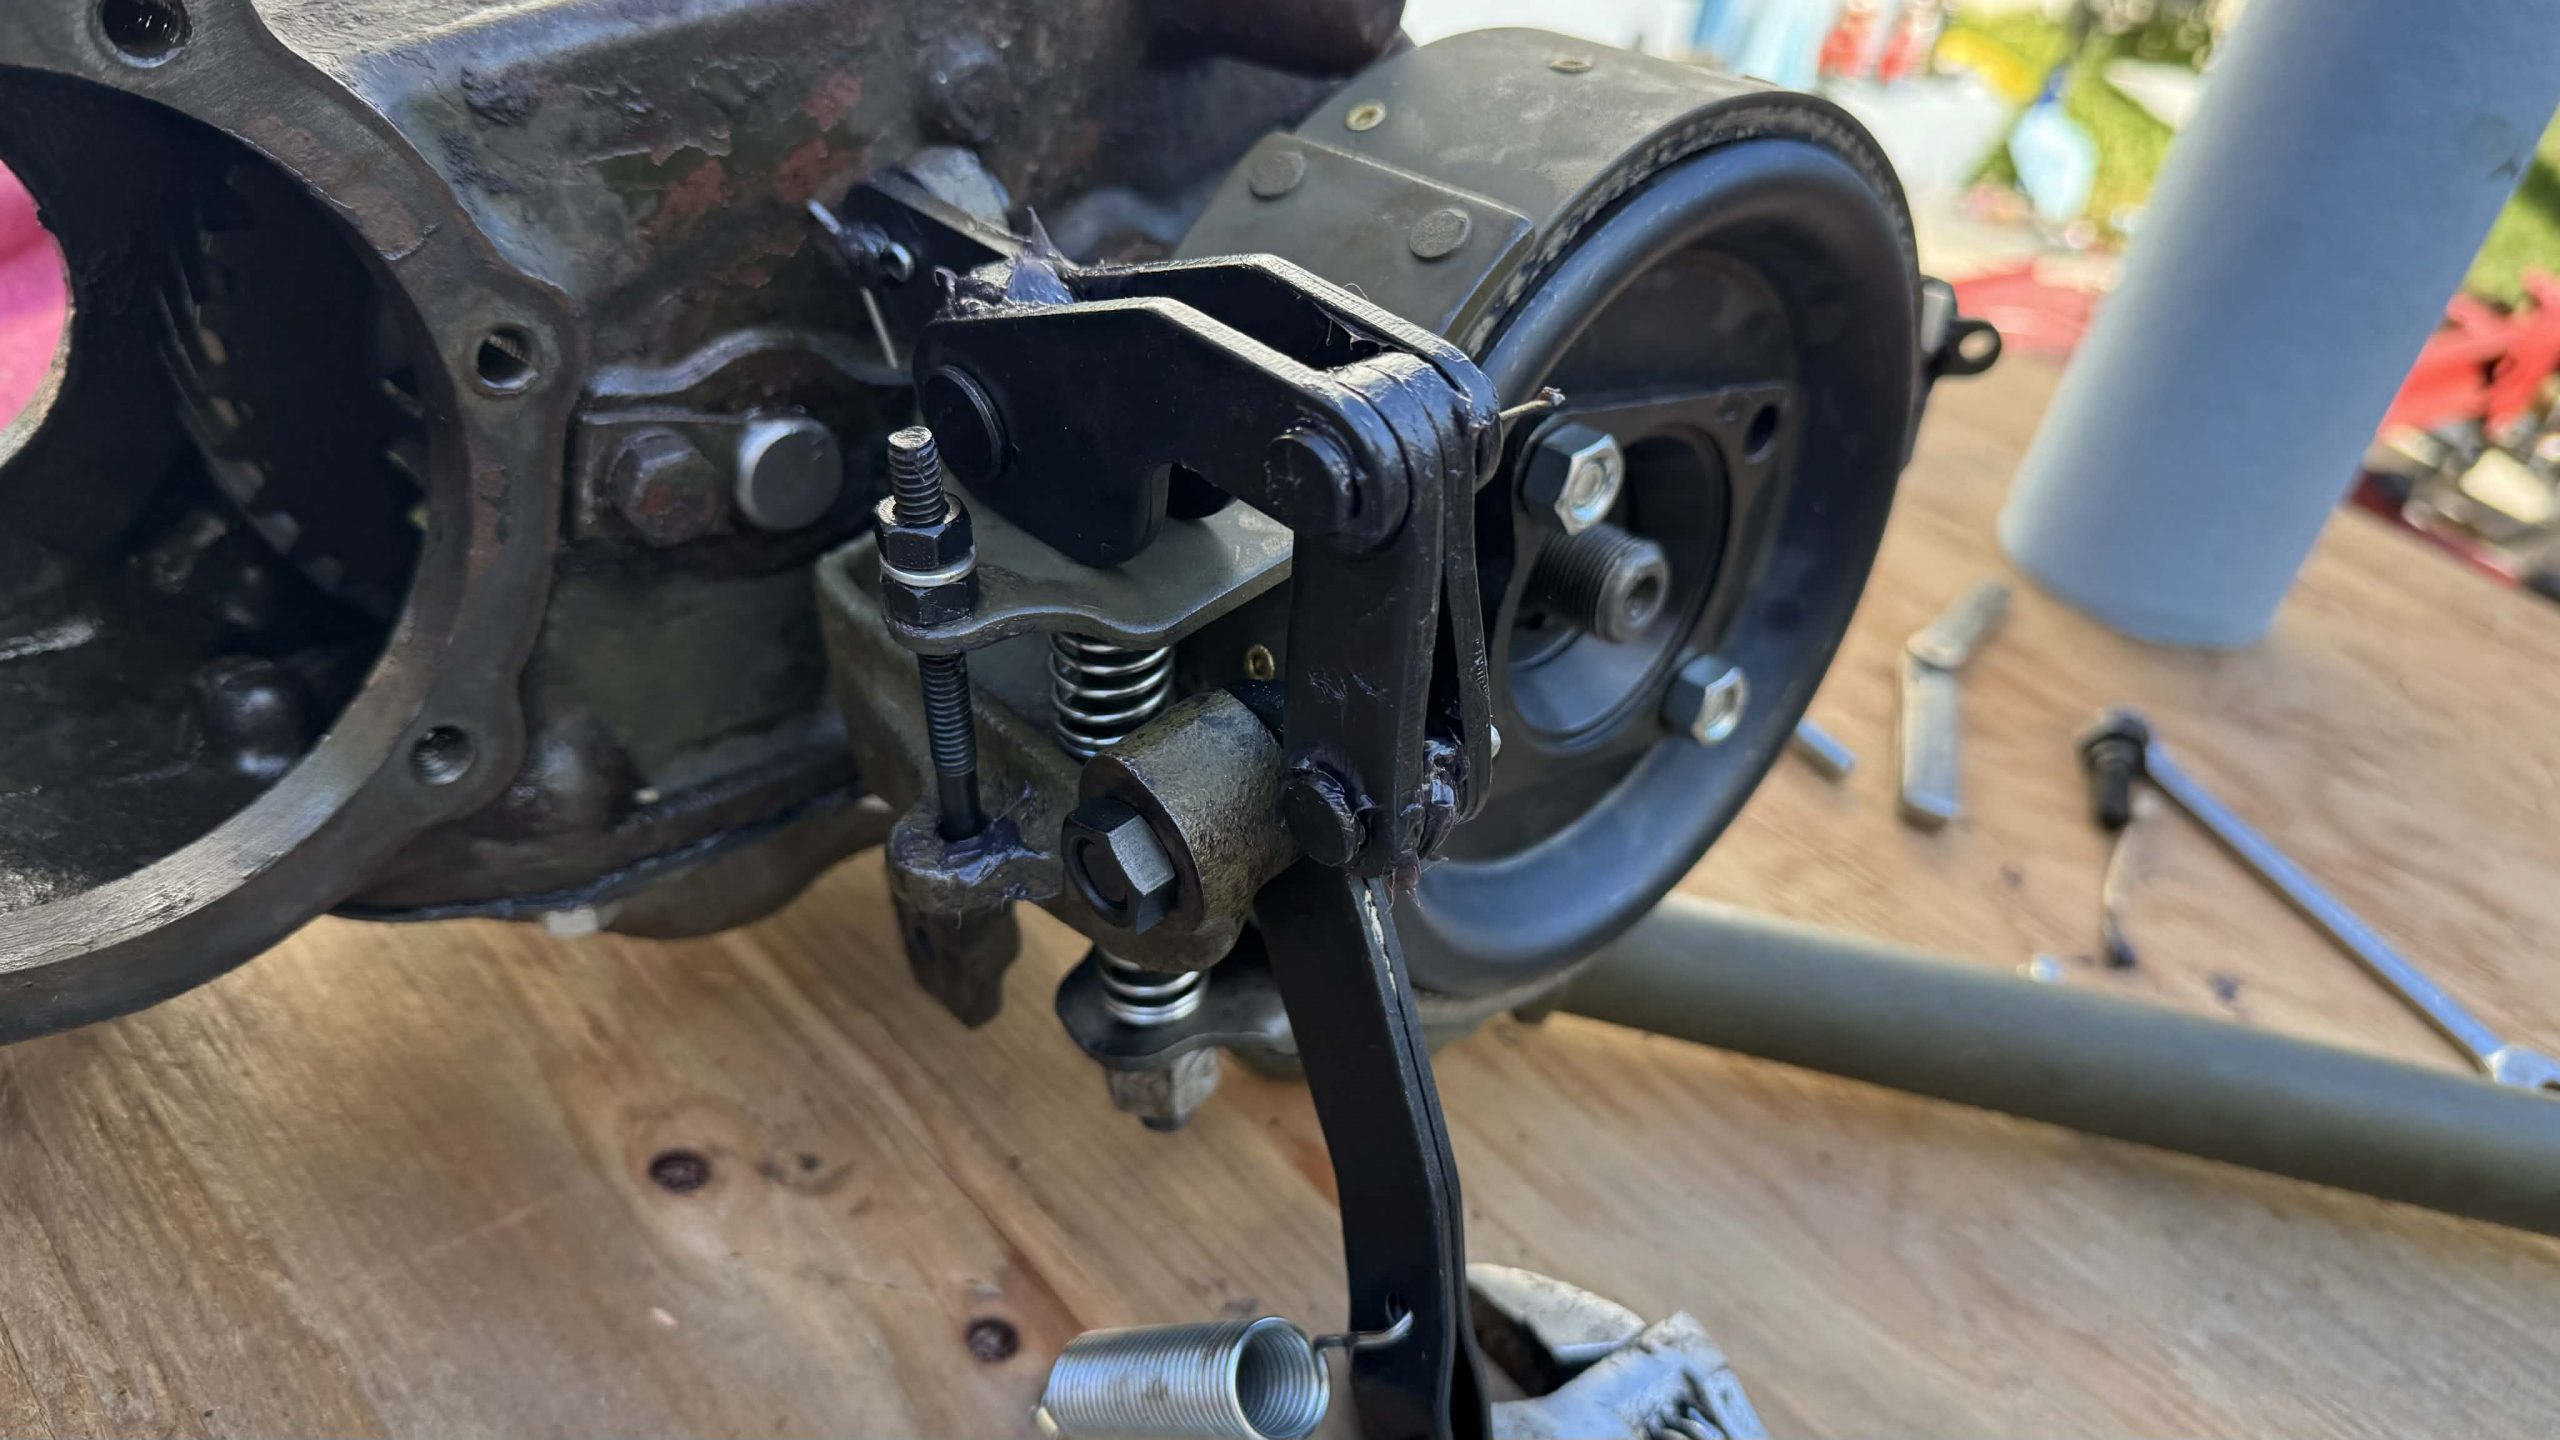
Unfortunately, the WWII Jeep’s accelerator pedal linkage is on the back of the engine, meaning the tub was actually opening the throttle — a huge safety issue. So I had to adjust the throttle linkage a bit and pull the body tub backwards so that it overhangs the rear bumper just a little. This meant some of the frame/body holes no longer aligned, and worse, I was having issues getting the pedal holes to line up.

My friend Carlos, Autopian Video Manager Griffin, and at one point my neighbor helped me position the body in exactly the right spot that minimized the issues with the pedals, while also preventing any problems with the accelerator pedal linkage — those were the priorities over aesthetic considerations like overhangs and lining things up exactly with the bolt holes in the frame.
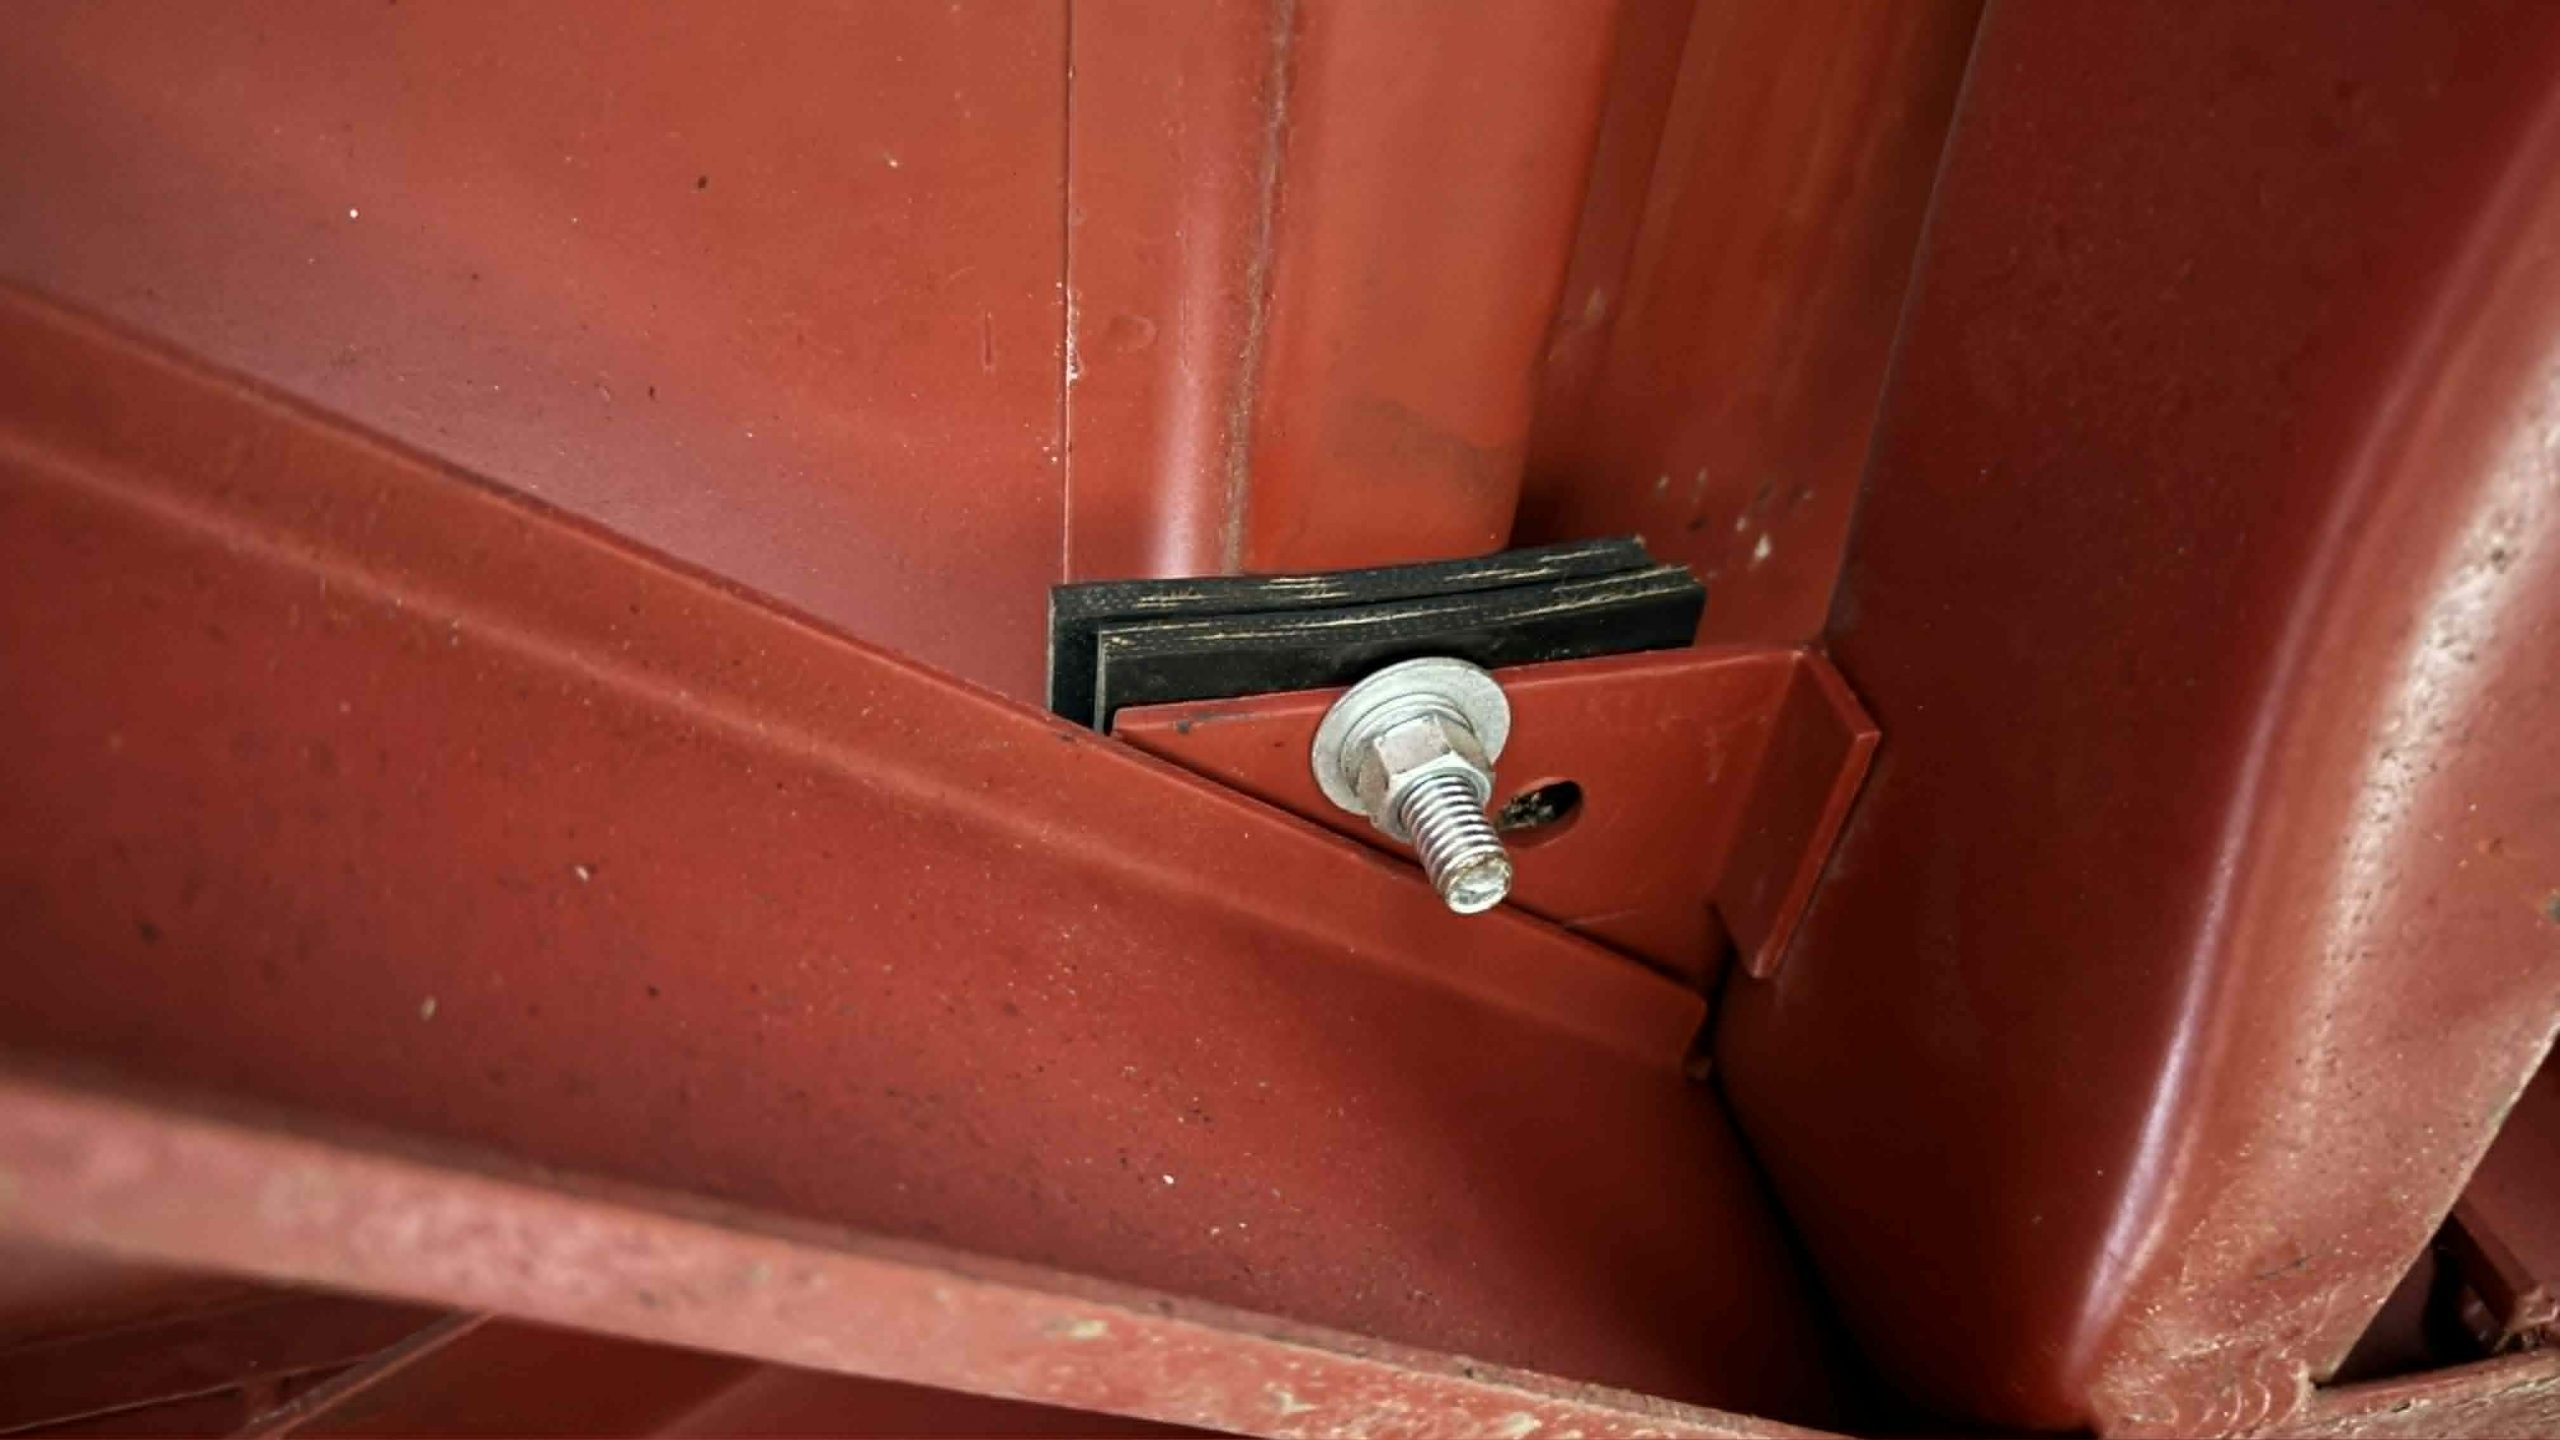
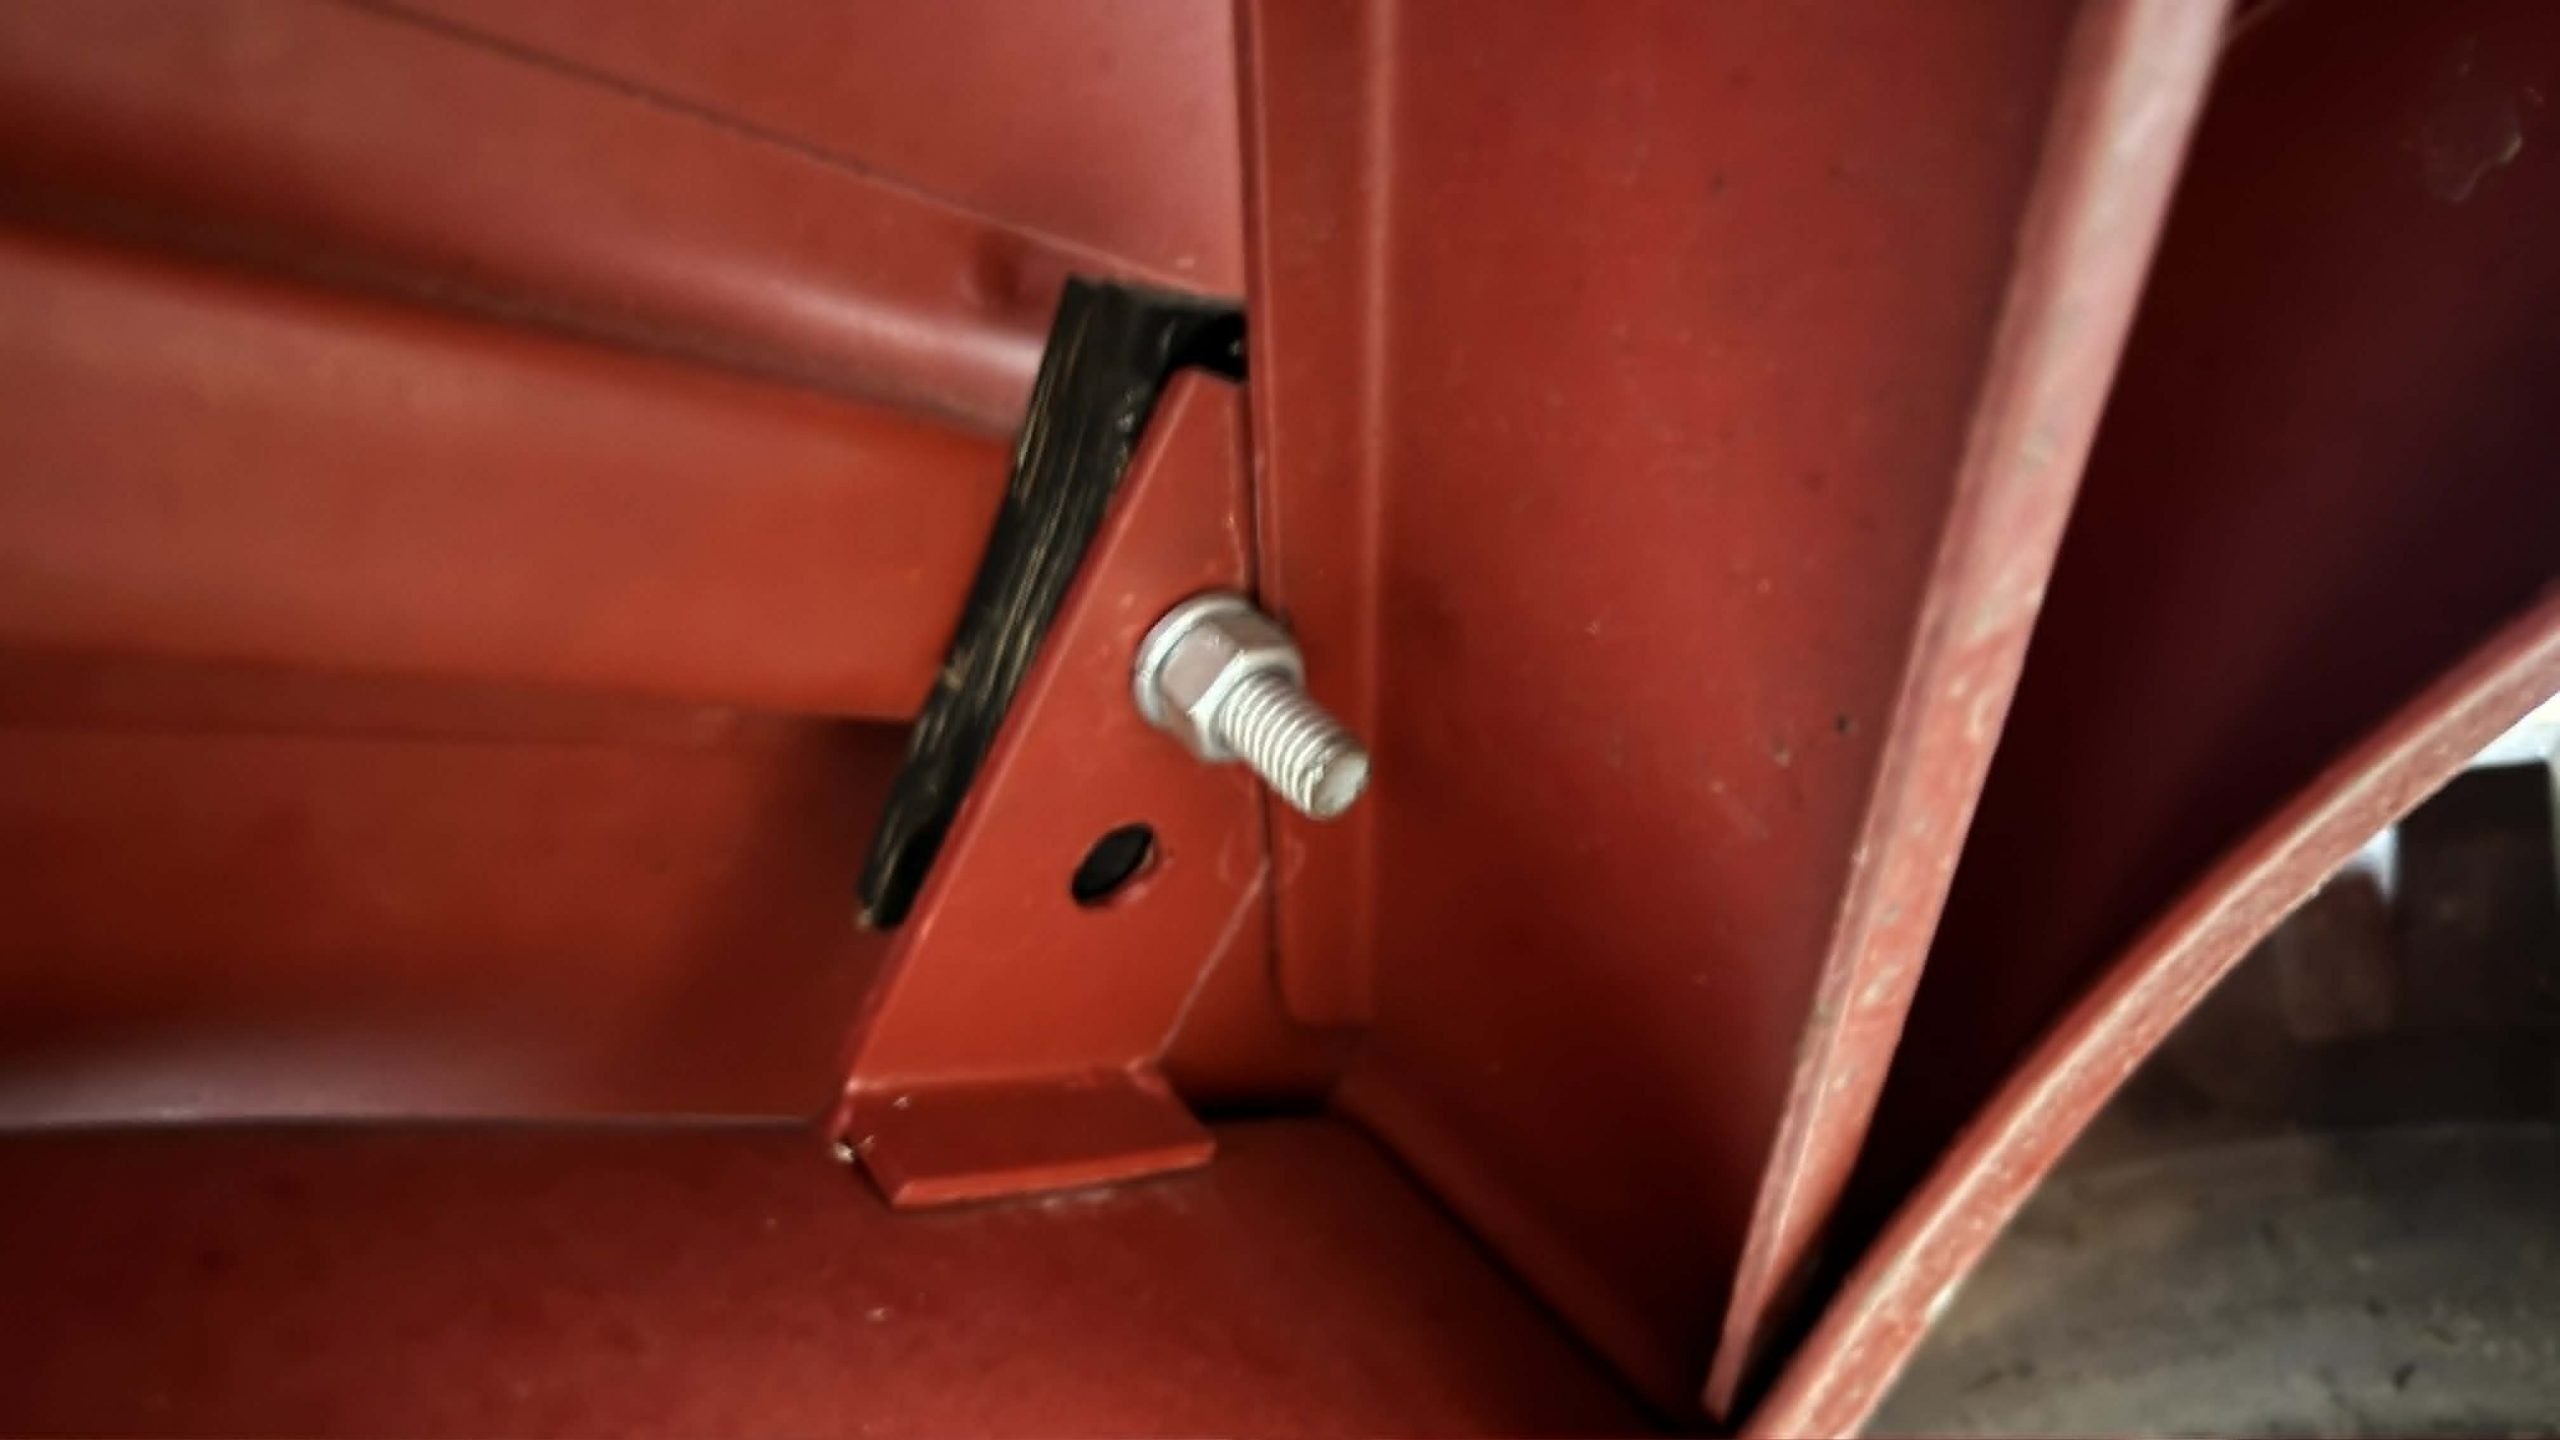
We then removed the body from the frame, and I drilled a bunch of holes into both.

I then installed the body, and it looked good! It wasn’t perfect, as you can tell by the inconsistent grille-to-hood gap:


It was very difficult to get two nonparallel bolts through two parallel holes in the fender:


But I did a lot of bending, prying, pulling and hammering to get the body together:
I had to drill extra holes in the frame next to the holes intended for the body mounts (you can see that I had to drill a hole for the fuel tank line as well):

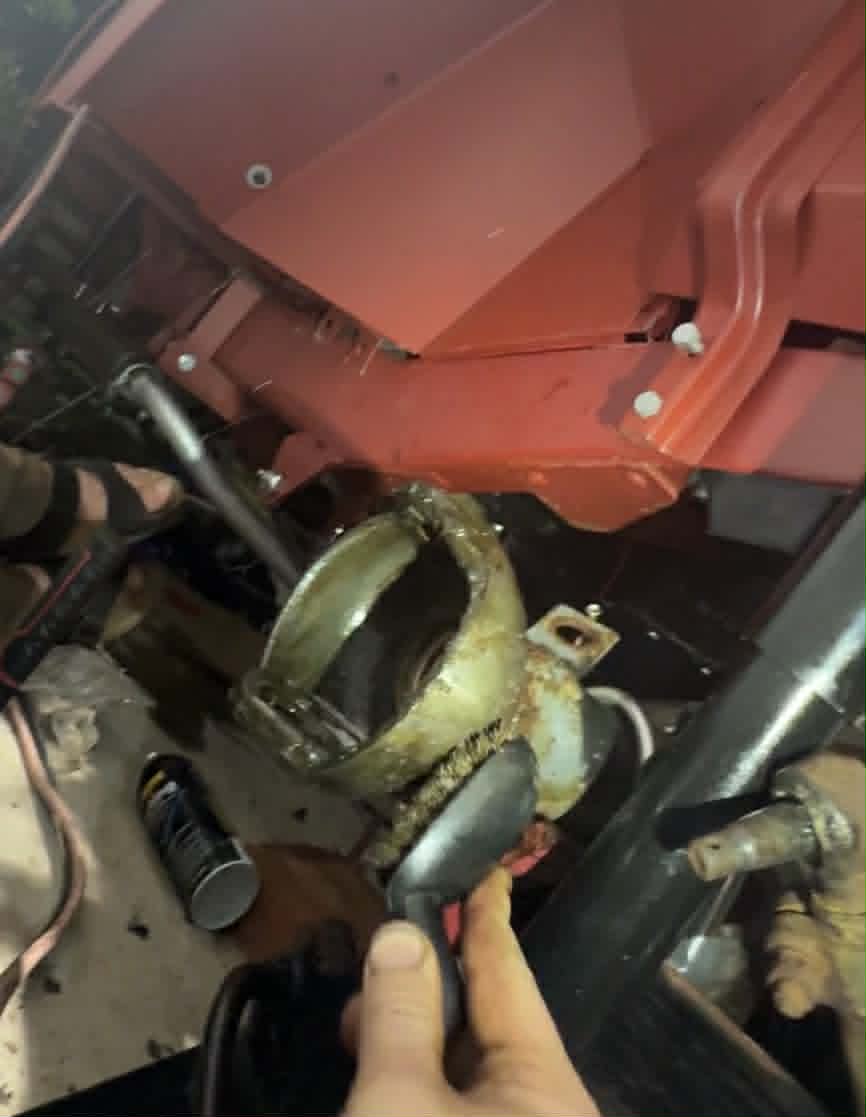
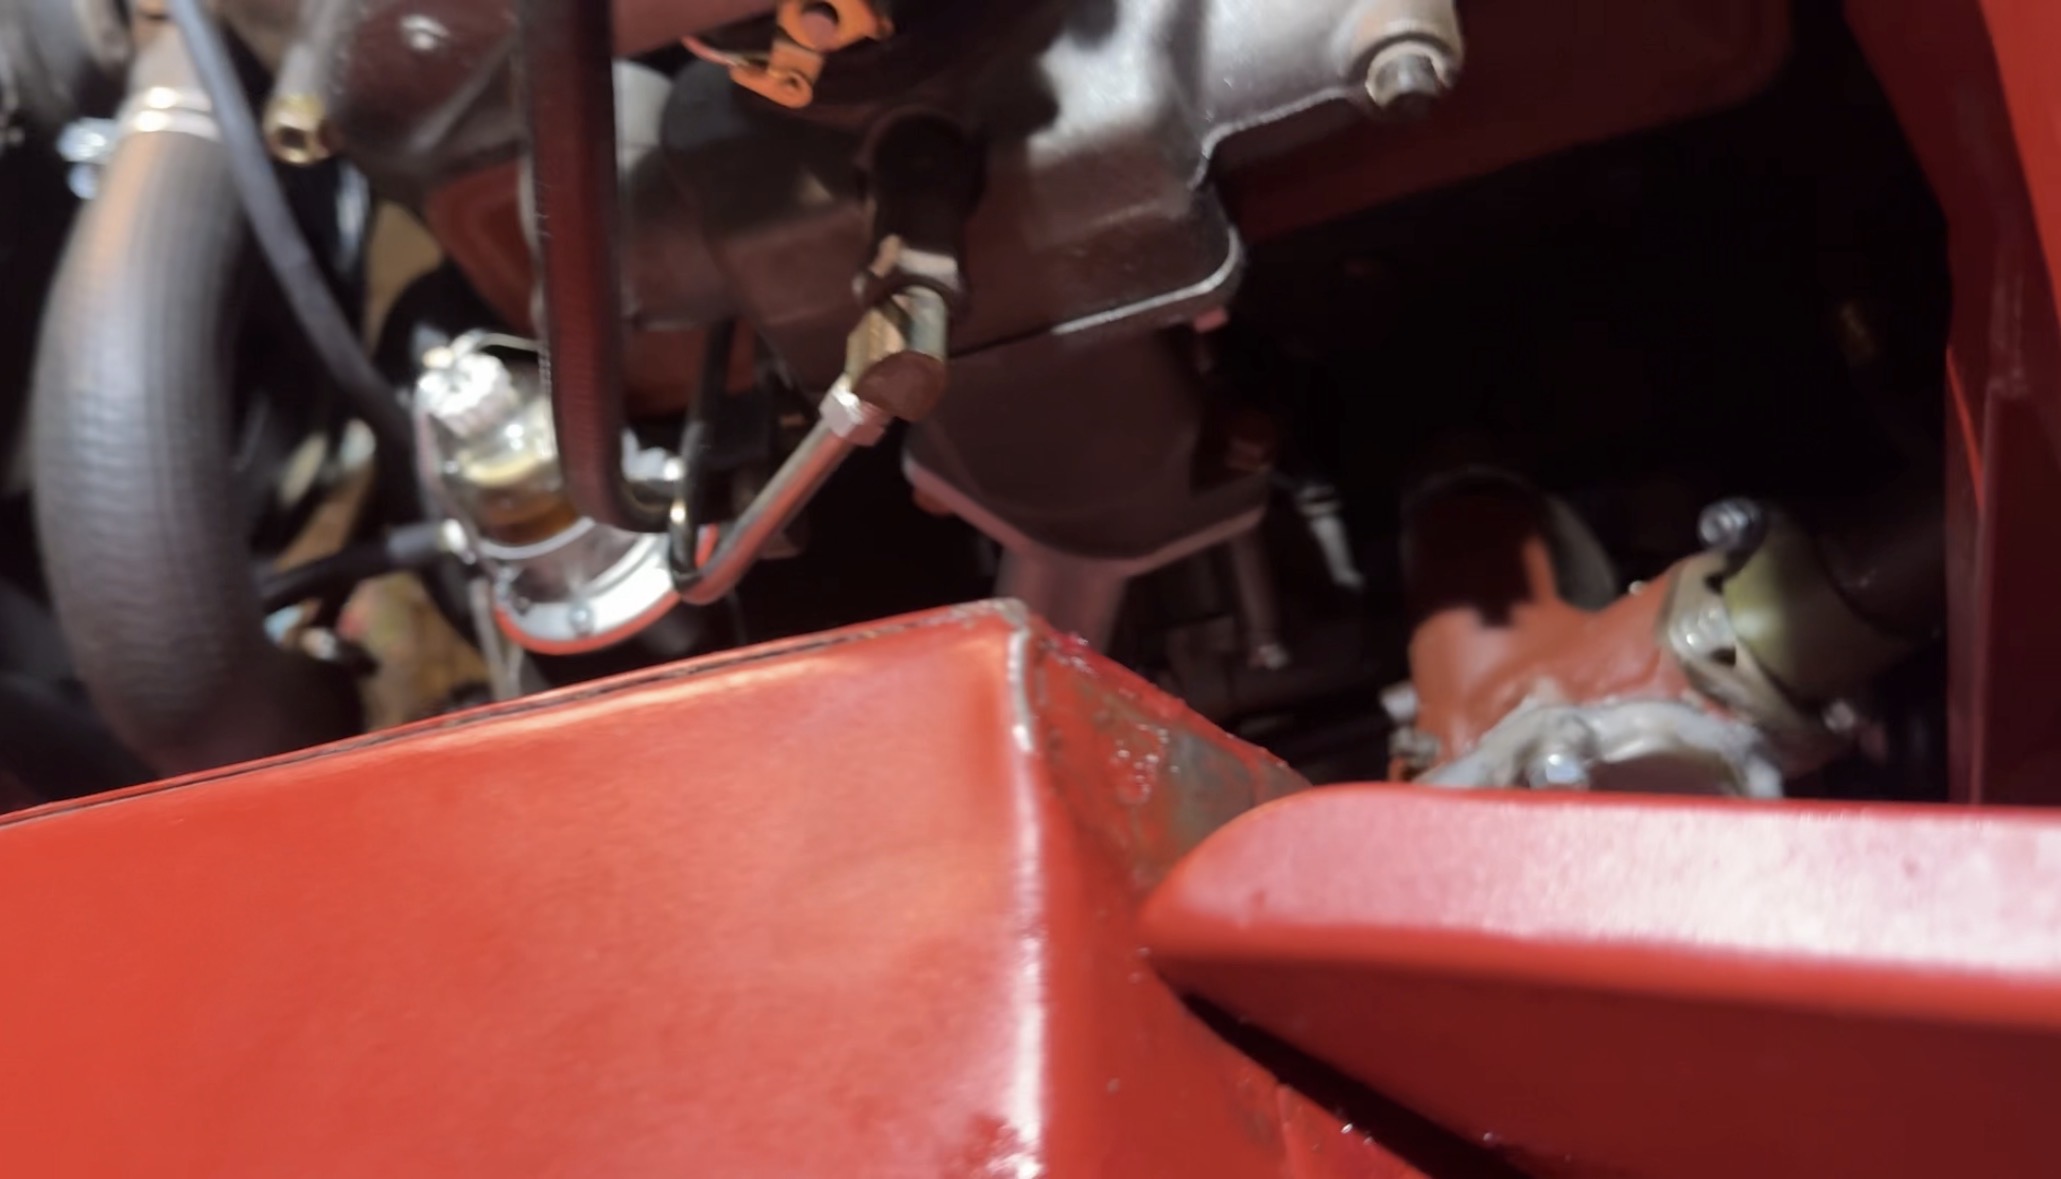
The most challenging part was getting the brake pedal in the right location, and not rubbing up against the steering column.

I actually had to purchase an original WWII Jeep pedal from eBay since my aftermarket one wasn’t bent quite the right way, then I had to go to an old-school shop and have the pedal bushed so it wouldn’t wobble and hit the steering column:

The brake pedal was now perfect, but the body wasn’t. Still, it was finally mounted in place, and it actually looked decent if you didn’t look too closely; I’m sure the line workers in Toledo back in the 1940s were saying the same thing about original WWII Jeeps.
I hooked a fan up to the front grille, fired the engine up, and conducted an engine break-in procedure to “bed in” the lifters to the camshaft. This required me to hold the throttle down and keep the engine revs above 2,000 for 20 minutes. It was insanely loud, largely because every tool I’d left on the floorboards was vibrating, and I may have actually done the break-in before bolting the body to the frame, so the actual tub was vibrating:
But the motor held up for those 20 minutes, made decent oil pressure, and didn’t overheat, so I changed the oil and prepared for the first drive just a week before my planned departure.
My First Test Drive Was A Failure

The first drive wasn’t good. Immediately upon firing up the engine, it ran terribly, and when I let off the clutch, the engine wanted to stumble. It seemed to hate being under any amount of load, requiring me to feather the clutch to get moving at all.
As I sat on a box of litter, with a jerry can bungie-corded to my grille, I carefully managed to limp the Jeep out of my driveway, but it required far too much of both the gas and clutch.

I eventually managed to drive fast enough to shift up, to the right, and into second gear, but something about the shifter didn’t like crossing over from one side of the H-pattern to the other. Even worse was that, when I tried accelerating from a stop sign about a quarter my from my house, the engine died, and there wasn’t enough juice in my battery to fire the sputtering motor back up.

I later walked home, grabbed a battery and some jumper cables, and took them to my Jeep, firing it back up and limping it back home.

It wasn’t all bad, in that it seemed that the driveline and suspension were working OK, but 1/4 mile wasn’t exactly a validation test, and the engine and transmission worried me.
A Last Minute Hail Mary Attempt

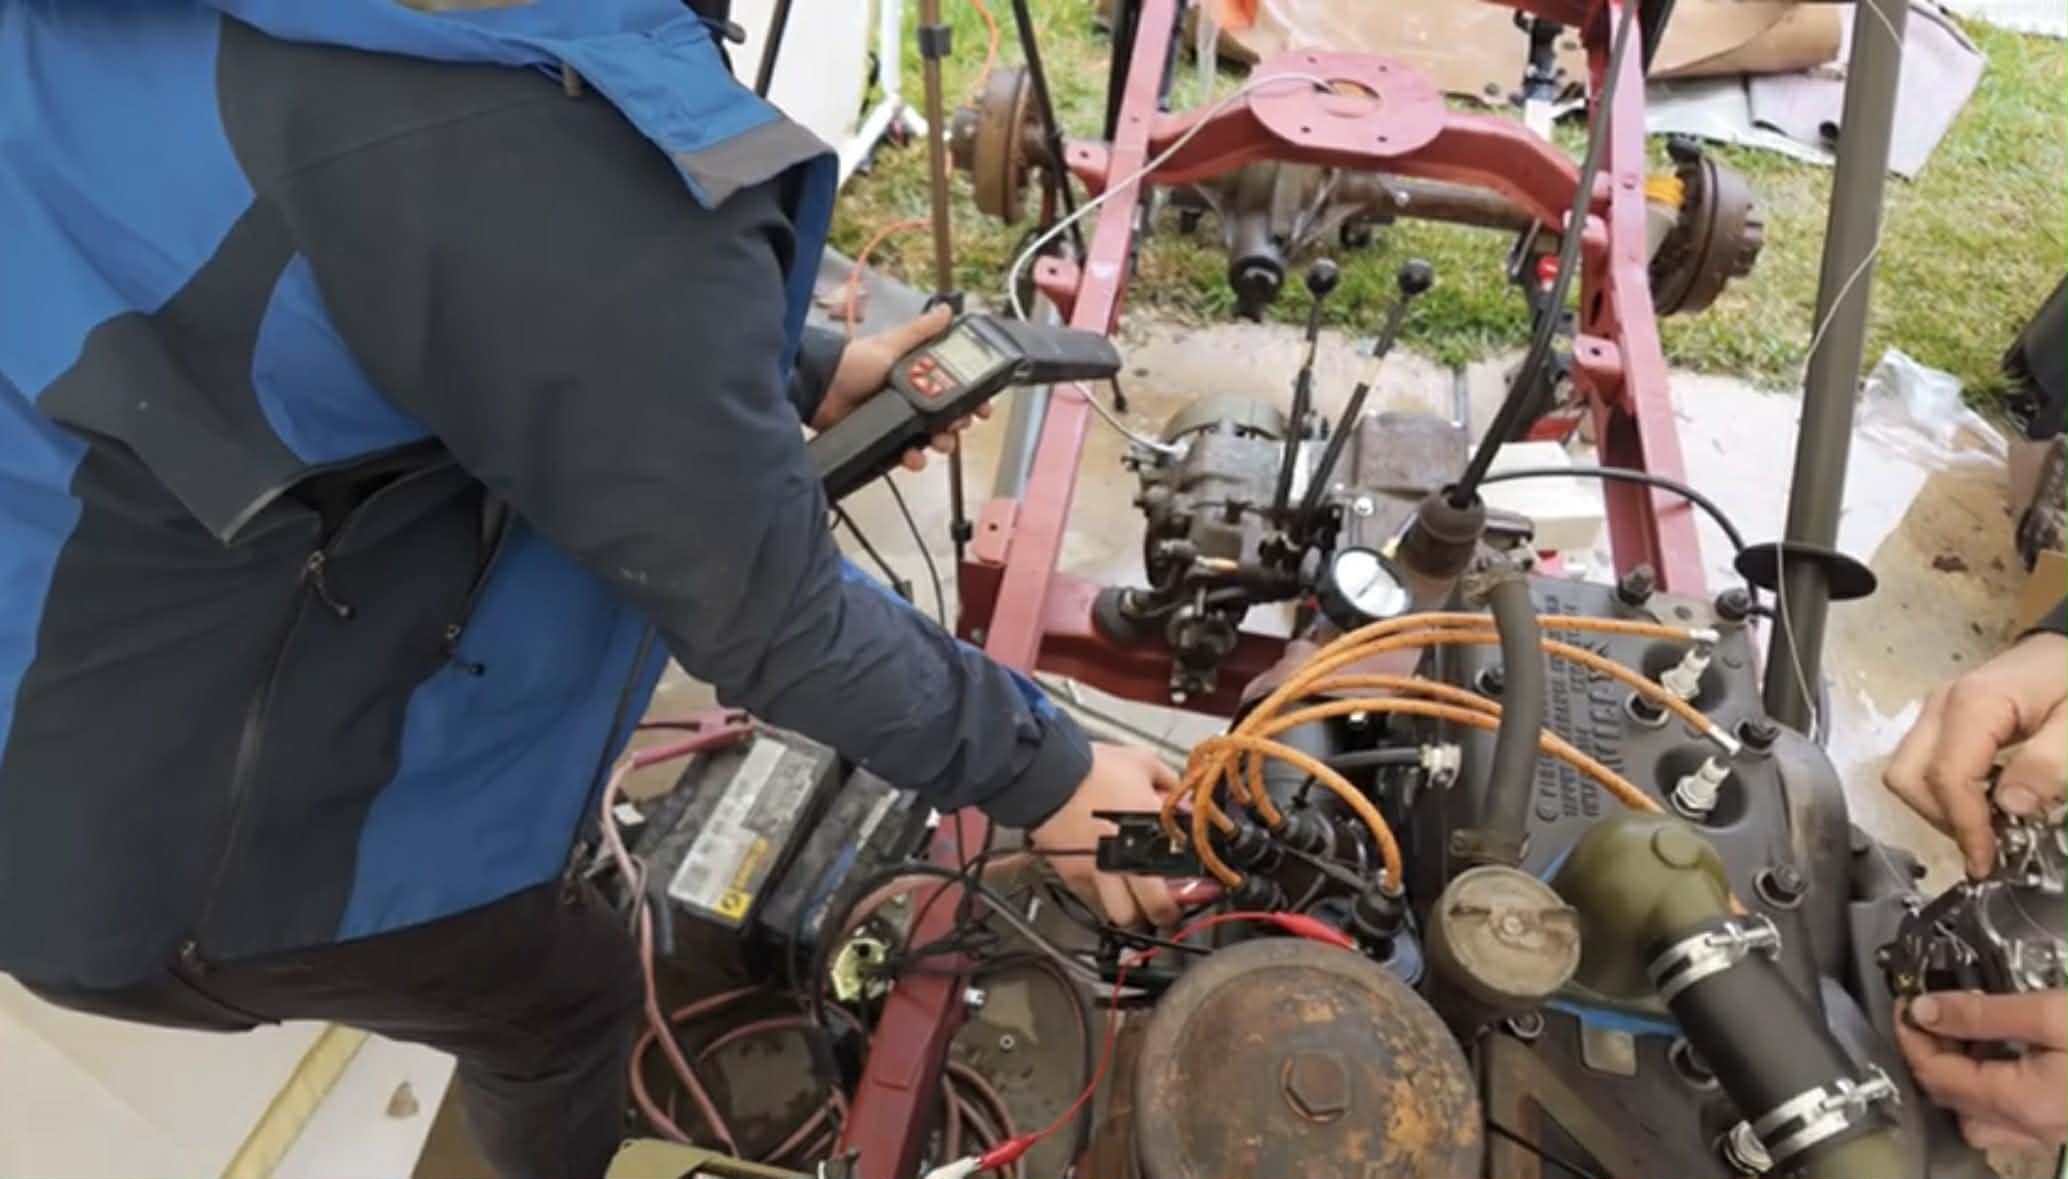
I had run out of time. It was March 25th, and I had to leave for Moab, like, now, as the Easter Jeep Safari was in just a few days. The issue was that, though my Jeep ran, something seemed severely wrong. My engine’s vacuum gauge (see above) was reading way, way too low. And my compression test wasn’t much better:

Had I screwed something up? Was one of those lifters seized? Was there something wrong with the valve seats or camshaft? I had no idea, but 80 PSI of compression was below spec.

My spark plugs were all black, so I tried tuning my carburetor, but the engine continued to run poorly and struggle under load. Then I swapped the carburetor entirely for another one; no change.

Then I played with the ignition timing, but that did nothing. The engine still ran terribly and made far too little vacuum. I wasn’t sure what was going on, so I moved on to the transmission shifting problem.
I took the brand new, eBay-sourced shift lever out of the transmission cover and filed down its sharp edges, as I thought that those edges might be getting caught on a plate riveted to the transmission cover.

I installed the shifter back onto the transmission, and then had a bit of an epiphany. The distributor I had been rotating to adjust ignition timing was brand new, with all new ignition points inside. Had those been set properly by whomever had sold me that distributor?

I checked, only to be both embarrassed and excited. I was embarrassed because the ignition points are the obvious culprit when dealing with a fussy old motor; I had foolishly assumed that the points in the fresh, fancy new distributor had been set properly, but there was no points gap at all. I was excited because I knew that setting the right gap had the potential to significantly improve the way the engine ran.

I was also nervous, because this was literally the last lever I had to pull. If fixing the points didn’t get my engine to make power, then something else was wrong, and it wasn’t likely going to be something I could fix in a couple of days given the parts I had on hand.
I hopped behind the wheel, stepped on the starter switch, and prayed.
CRANK. CRANK. CRANK.
Then it came.
VROOM!!!!
For the first time ever, that brand new engine fired up with vigor. Instead of causing a stall, stepping on the gas pedal yielded an immediate response, and smooth, symphonic revs.

As I pumped the accelerator, and the motor’s revs climbed and fell, climbed and fell, perfectly in sync with my right foot. It would have been the greatest sound I have ever heard in my life if I hadn’t taken the Jeep on a drive around the block. That was the best sound of my life. The Jeep felt legitimately quick! It pulled away from stop lights with gusto, and, much to my delight, that shifter was now moving from first into second with no trouble at all; it “snicked” beautifully into gear, and then down into third as I pushed the Jeep to about 30 mph.
The sound of that motor going around the block in my neighborhood breathed the first bit of hope into this whole project. I had to leave in a couple of days, and though it wasn’t ideal that the trip itself was going to be the validation testing, at least I was going to be able to actually start the trip.
I Leave To Moab, And I’m Nervous
There was still a lot of work to do in just a couple of days. I had to install the gas tank, the headlights, the spare tire, all the seats, the gauges, and I had to better secure the exhaust, and on and on. Here I am doing the wiring the day before departure:

Here I am drilling the windshield for the cowl seal and installing the glass and wipers:


Here’s one of the taillights going in; you can see I’ve already drilled the body and installed the reflector. To figure out where to drill the holes for the reflector, seat frame, hood latch, and other parts, I paid a guy named Jon Rogers, who runs a well-known resource called Jeepdraw. He sent me tons and tons of amazing blueprints with all the measurements.
I installed the gauges:

I put in an ignition switch so I can shut off the motor in case of an emergency with the key (up until now, I’d been hotwiring the ignition switch). You’ll also see I’ve hooked up the choke:

I custom-fabbed an exhaust bracket to look like an original WWII one, and took it to a local muffler shop to have them weld it to the body tub:

And the last thing I did the night before departure was upholster the seats. This meant drilling holes into the seat frames, poking holes into my eBay-sourced seat cushion fabric, and then inserting sheetmetal screws:


Getting the driver’s side seat frame backrest to line up with the hole in the body wasn’t working (the seat frame was too high), so I just homebrewed a little offset-bracket, which looked a little janky but would be covered by the seat cushion, anyway:

It was Sunday, March 29th, and in order for me to make it on time to the Wednesday Easter Jeep Safari concept drive event put on by the Jeep brand, I had to leave now. I was nervous, and in truth, if you asked me what chance I had of getting the Jeep to Utah by the deadline, I’d have told you 5 percent.

Why? Because there wasn’t enough margin built into our schedule for any sort of significant holdup, and there was definitely going to be something, as I had done essentially zero validation testing after assembling an entire car from scratch.
It was very clear to me how ridiculous that was. I’d built a car from 1,000 parts from all over the globe — parts that had never worked together as a cohesive system. And though I had felt very comfortable with the safety of the Jeep, having double-checked the brakes, steering, and suspension components, in my head there were simply too many unknowns for me to feel comfortable with the Jeep’s reliability.
That new engine from France; was it any good? I had read so many horror stories about new Go-Devil castings; was this one going to leave me stranded? What about the transmission; was that synchro issue Brandon and I had been having when rebuilding the gearbox going to rear its ugly head? What about that rear axle whose pinion had made that light grinding noise when I spun it? I had filled the diff with some thick 85W140 oil, but was that rear end going to survive the trip?
What about that eBay carburetor I had just purchased and plopped onto my engine? Would that work under all conditions? How would my suspension hold up? What about that steering shaft I had bought from a random seller in India; was that any good (I had read some mixed reviews about a batch of bad shafts online)?
What about my handiwork? I had been very diligent in all of my repairs, but what if I had forgotten to torque something deep in that engine or transfer case?

From the wheel bearings to the kingpin bearings to the tie rod ends to the drag link to the exhaust and carburetor and every tiny component in that engine, my brain found itself overwhelmed thinking about the hundreds and hundreds of untested new parts and all the potential failure modes. My validation test was going to be a 900 mile road trip, and while this wasn’t ideal, I had a huge bag of tools, and my video manager, Griffin, was in a camera truck just ahead of me. I cracked my knuckles, kissed my wife and baby goodbye, and prepared for a wild, wrenching-filled road trip.

Ten miles in, the chaos began. A horrible burning smell emanated from under my hood, and Griffin claimed to have seen white smoke. I feared engine problems, so — after having put the first five miles on this brand new engine — I slowly removed the dipstick, praying I didn’t see remnants of a milkshake (which would indicate that coolant was getting in the oil). The oil looked perfectly golden.
I looked around the engine bay a bit and noticed a burning rubber smell. It wasn’t the belt, and it wasn’t the radiator hose; the smell seemed to get worse near the generator. “Can I just disconnect the thing?” I thought to myself. I didn’t have headlights anyway, and the ignition system doesn’t take that much juice to run. As long as I didn’t have to use the starter too many times, maybe the battery would be able to keep the engine running for a full day?
I really didn’t have a choice, as touching the generator all but confirmed that it was toast. I disconnected it from the electrical system, and hit the road with no charging system and a plan to just trickle-charge every night at my hotel.

The first 15 or so miles were actually ideal in that they were fairly low speed, flat suburban miles that let me test the vehicle in safe conditions. I drove through Monrovia along Route 66, watching my oil pressure and coolant temperature gauges like a hawk. I didn’t love what I was seeing, with the temperature sitting almost 40 degrees above the thermostat setpoint and oil pressure sitting at 8 PSI at idle. But 200F is within the acceptable range for an internal combustion engine, and for an old machine like this, the general philosophy on oil pressure tends to be: as long as you have about 10 psi per 1000 RPM, you should be fine. And I was idling somewhere around 650 RPM.
I knew, though, that if that oil pressure dropped during the trip, then my engine bearings were wearing away, indicating imminent failure. Hence why I looked at the oil gauge at least every 30 seconds.


I was worried, but now that I was actually on the road, it was a different kind of worry. This wasn’t a “I need to try harder and do better” type of worry, this was a “It’s in the car gods’ hands now” worry — the same worry you feel when you’re taking an exam or playing in a sports match. You’ve prepared as much as you could, and now the chips will fall as they will.

“I’m just holding this steering wheel,” I say in the YouTube video at the top of this article. And that’s how I felt. Yes, I was laser focused on the Jeep’s sounds and smells and gauge readings, but beyond that, I just focused on driving.

We left suburban LA and headed up a steep grade — the Jeep’s first experience dealing with high loads for a long duration. I didn’t like this, because if the Jeep was going to fail, I’d at least have liked getting out of the LA area, and this steep grade out of town was long and hot. To keep speeds over 35, I had to mash my right foot flat on the accelerator; the brand new Go-Devil sang a loud but beautiful tune underhood, as I waited for the shoe to drop.
Something, I was convinced, was going to let go up this ridiculously steep grade. There were just so many brand new parts that had never worked together; surely something was going to let me down. Or maybe my own repair-work would be what lets me down. I cringed as my foot squeezed that gas pedal against the floorboard and the loud Jeep broke a sweat as it climbed up the grade.
I waited for a failure of some sort. But none occurred.

The Jeep just climbed and climbed and climbed. The coolant temperature was a little all over the place, prompting me to stop on the shoulder, but otherwise the oil pressure remained healthy and the reproduction mechanical war-hero under me felt more powerful than I’d even imagined. The transmission that Brandon had helped me rebuild was shifting perfectly. That rear differential that had a bit of pinion noise when I spun it by hand? It was smooth and silent.
The engine, drivetrain, suspension, brakes, steering, and exhaust — it’s not just that they were working — they were humming. The Jeep’s steering was nice and tight, my tape-measure alignment job meant the Jeep was tracking straight as an arrow, the brakes were working fine, and the whole drivetrain was operating perfectly. There was no noise, there were no clunks, there was no smoke; it felt like I was driving a brand new Jeep that had just rolled off the line in Toledo, Ohio.

I stayed away from highways, as the Jeep’s top cruising speed was about 45 mph and I usually kept things closer to 40 (poor Griffin in the camera-truck!). One road closure on the aforementioned steep grade forced me to drive down a blocked-off road to avoid a freeway.
I figured that, regardless of why the road was closed, it was probably a safer route than the freeway. It seemed that the dirt and gravel road had been closed due to it being rather rough and washed out. This put my new leaf springs, shocks, and shackles to the test, and they worked great; the springs and shackles gave the solid axles great suspension articulation, the shocks damped the vehicle’s motion perfectly, the body felt tightly mounted to the frame —I was taking a bit of a beating in the driver’s seat, but the Jeep? The Jeep seemed to want more.

Once over the grade I found myself in the middle of the desert. It was flat, barren, and quiet, giving me time to reflect upon just how insane all this was. Two weeks ago, I was looking at a frame with a semi-running engine on it. Now I was in a vehicle road-tripping across the American southwest. No matter what happened now, I couldn’t fail in a disappointing or embarrassing way. The Jeep was already doing way, way more than anyone could have hoped given my constraints. I was now a hundred miles in and a few hours away from home, and as much as my paranoid self never would have said this out loud: The Jeep was showing zero signs of slowing down. It was crushing it.

I enjoyed my first fill-up. The WWII Jeep’s fuel tank is under the driver’s cushion. You lift the cushion up, take off the fuel cap at the top of the tank, and then yank the cap, which pulls a chain, which raises a funnel. It’s honestly quite clever, and makes filling it to the brim quite easy and splash-free.

After we’d traveled about 80 miles from the gas station, the Jeep crossed into Arizona and passed a “No fuel in 100 miles” sign; I received a call from Griffin up ahead. “Hey, did you see that sign?” he asked.
“I think we’re fine,” I replied, without thinking. We had places to be, and I didn’t want to stop.
Then the sun began to drop from the sky at what, from my seat at least, seemed like an alarming rate. As you can see, I was alarmed:

It’s possible all the sleepless nights, all the oil that had seeped into my body, and the bumpy ride had knocked a few screws loose, because on this now dark stretch of desert, I stopped worrying completely. Whatever was going to happen was out of my hands, and after all the stress of the build, it was time to just let go.

The bright browns around me turned gray and the orange ball in the sky was replaced with nothing but stars, the moon, and a pair of Ford F-150 Tremor taillights ahead. This was a bit of a stressful situation, but again, I had run out of worry. I held onto that giant new eBay-sourced steering wheel and enjoyed the beautiful night sky.

With no headlights, I was forced to strap flashlights onto the front of the Jeep, and though they were probably bright enough given my low speeds, and they were likely putting out more lumens than the vehicle’s headlights would have been, it’s not something I’d recommend.
Driving through the desert night for almost two hours in a WWII Jeep I’d built by hand was unforgettable. It was calming, in a strange way. The beauty of the barren desert, the bright night sky, and the mechanical orchestra playing a symphony just under me combined to create a snapshot that will never leave my mind.

Of course, all that calm was disrupted by an engine that began stumbling. “Oh boy,” I radioed up ahead to Griffin. “I think I’m out of gas.” I clutched in, popped the transmission into neutral, and coasted about a quarter mile, ultimately coming to a stop at the sign for the gas station. Griffin and I pushed the Jeep the final 100 yards, and I filled up with a big grin on my face. I think Griffin thought I was nuts.
View this post on Instagram
After spending $15 on two gallons of gas, we drove to the Travellodge hotel in Parker, Arizona.

I was dead-tired, but I had to unfasten my big 6-volt battery and carry it to my room for a trickle charge:

Day two wasn’t great. In an effort to try to get coolant temperatures down below 200, I stopped by a local shop called Lane’s Tire & AutoCare in Parker, AZ. They let me wrench right on top of their fluid pit, which allowed me to just yank my coolant hose and let all the green stuff drain right down into the grate.

I wasted a couple of hours flushing rust out of the block and radiator. As soon as I hit the road again, coolant temperatures climbed right back up to 200.
I stopped by an Auto Parts store and did an oil change in the parking lot, since my brand new engine was still breaking itself in. The 15W40 diesel oil I had been using looked extremely glittery as it exited my Jeep’s oil pan:

Normally, this would worry me, but like I said before, I was done worrying. This was a good thing, because my Jeep kept cutting out and then struggling to start. I noticed that the conditions that would cause this problem involved me stopping for a while, then trying to accelerate. Stopping led to a heat-soak condition, which meant my fuel pump and carb were struggling to pump liquid fuel since it was now hot, vaporized gas.

This condition, called vapor lock (made famous by The Simpsons), is a classic problem with some older cars. Some say me using rubber fuel lines instead of the factory metal ones didn’t help my situation, but I suspect my cooling system wasn’t helping. In any case, I did my best to mitigate the issue with some homemade heat shielding (and eventually a damp rag on the fuel pump):

As I hadn’t ever dealt with a vehicle with severe vaporlock, I wasn’t familiar with what I could do to avoid the problem, so at first, I found myself stalling out a lot and spending too much time popping the hood, pouring water onto the fuel pump and carb (it vaporized immediately), priming the fuel pump, and then restarting the motor.

I also struggled with fatigue, having to pull over frequently, and then almost immediately falling asleep in my seat.

On day two, my vaporlock and fatigue problems meant we traveled only a measly 110 miles, from Parker to an Air BnB in Wickenburg.

Despite having traveled such a short distance, we still managed to mistime nightfall, putting those flashlights to the test yet again.

Luckily, our AirBnB had a charger out front, so I didn’t have to haul that heavy battery inside:

Day three was the day we had to make up for lost time. It was already Tuesday, the Jeep event was the following day, and we still had 550 miles to go.

The truth is, day three was a total blur. We somehow managed to travel nearly 500 miles. At an average speed of 40 miles per hour, that’s over 12 hours of driving. There weren’t even 12 hours of daylight available, and what’s more, vaporlock persisted. Here you can see water immediately vaporizing when I poured it onto the intake manifold and carburetor:

Perhaps just as problematic to our progress were my narcoleptic tendencies:

Somewhere between all the vaporlocking and sleeping, the Jeep barreled down the road like an absolute boss. All systems remained a-go, and I marveled at how shockingly beautiful Arizona is.

Much of that beauty came from mountains that made that steep grade out of LA look like an ant hill. I loathed having to tackle these steep grades, because in order to remain at a reasonable speed I had to put the pedal to the floor and watch as the temperature gauge climbed.


A huge line of cars gathered behind me, and eventually I had no choice but to pull over out of courtesy. But idling the Jeep on the side of the road led to elevated underhood temperatures, so when I turned back onto the road to climb the grade, I didn’t make it far before the Jeep slowed down and stalled.

Shown above, this is the first time during this trip that made my heart rev up, as it wasn’t easy to see around those twisty roads, there was no shoulder, and I was completely stalled.
“GRIFFIN!” I yelled in the radio. “Wave down traffic!”
Griffin was far enough behind me to take a turn-off. He parked and stopped traffic so I could reverse down the mountain grade into that turn-off and let the engine cool down.


The rest of that day was relaxing and beautiful. Mountains became world-class vacation towns. Vacation towns became red rocks. And day became night.


Yet again, we’d miscalculated sundown, so — after an extremely long and productive day in which I had put my head down and crushed miles to make up for day two — we victoriously cruised into the town of Blanding, Utah with a flashlight strapped to my bumper. We were now only 75 miles from Moab.

I unhooked the Jeep’s battery and lugged it into the hotel for a recharge, then I went to sleep, knowing that I had to get up early to be in Moab at 8:45 to make the Jeep event.
Arriving In Moab, The Off-Road Holy Land
The next morning was wet and cold, but not miserable because nothing could faze me. I had a beautifully running WWII Jeep that had crushed over 800 miles with no major issues; now all I had was a two hour trot to complete the impossible.

I put on my warmest jacket, removed the access-hole for the Jeep’s brake master cylinder to let hot air from the engine bay run up my pant leg to act as a heater, pulled my choke out and fired up that French Go Devil. I released the park brake, shifted into first, slowly released the clutch, and pointed my mechanical creation north to the off-road holy land.

I had to use the manual wiper ahead of me; one hand on the wheel, one hand on the wiper — it really wasn’t as annoying as one might think.

Shivering, I found myself passing the familiar “Hole N The Rock” that, to me, has always represented the southern gateway into Moab, and within about 15 minutes I was there; I had made it to a place that had, for months and months, seemed like Mars — like an impossible destination clouded by 5 million tasks I still had to do.
But those tasks, somehow, were now all complete. I had done it. I had somehow done it!

I cruised into the parking lot Jeep had designated for members of the media, and I arrived in time to chat with other journalists, ask questions to my PR friends at Jeep, and to drive the brand’s concept vehicles:

But while the EJS concept drive had always been my deadline, it wasn’t the reason I was in Moab. I was there to off-road.
The eBay WWII Jeep Is An Absolute Off-Road Monster

On Thursday, I rested up, did a bit of off-roading (see above), and found that I wasn’t happy with my brakes. On a steep incline, vaporlock had stalled my engine, and I rolled backwards uncontrollably.
The next day, I attended the Flatfender Fun Run meetup, where dozens of old Willys Jeep fanatics meet each year:


There, I met up with Ron Fitzpatrick, the prolific eBay seller I had picked up a bunch of parts from in Oregon a few months prior. He and pretty much everyone at the event was fascinated by the machine I had built by hand.
Approximately 647,925 WWII Jeeps were built in the U.S. during the war, and I, over 80 years later, had built number 657,926.

The group went off-roading, but I stayed behind. I knew I had work to do on my brakes, and I wanted to drive a trail that has always been near and dear to my heart: 7 Mile Rim.

In my hotel parking lot, I dialed in my brakes, then took Griffin out to one of the greatest off-road trails on earth.
Nothing could prepare me for how the Jeep handled the rocks.

It was simply magnificent. The skinny nondirectional tires provided a far, far better ride on the rough rocks than I thought they would, and the traction was exceptional. The suspension yielded tons of articulation, keeping the rubber against the ground pretty much always. The Go-Devil’s torque was prolific, the vehicle’s small dimensions made maneuvering a breeze, and the Jeep just climbed and climbed and climbed whatever I pointed it to.
This machine, which just a few weeks prior was still a big assembly of parts, had conquered the open road and now was conquering this trail in a way that truly melted my mind. There is no way for me to describe the emotions I was feeling at that moment, at the culmination of so many months of backbreaking work, so allow me to just let the photos do the talking:


It was simply incredible.
It Was My Love For The Autopian That Fueled Me
After a few days of off-roading, Griffin and I returned home. On the drive I thought a lot about this project and what it all meant. Other than the fact that you can buy pretty much any WWII Jeep part in existence on eBay Motors, what was the takeaway from it all?
To me, on a personal level, this project was everything. I’ve been a Jeep fan since I was 12 years old; I was such a Jeep fan that I decided to study engineering with a goal to someday working for Jeep. Through hard work and serendipity, by age 22 I found myself as the lead designer of the Jeep Wrangler JL’s cooling system. To someone who has been this obsessed with Jeep (and with all cars) for so long, to then go on to build an automotive publication and to be able to support that publication by hand-building the greatest 4×4 of all time — I cannot possibly describe the joy I feel in my heart. With the help of some good friends, with the support of amazing readers, an amazing brand partner, and a great editorial team that picked up the slack while I was out, I can now say I have built the Jeep that jumpstarted the off-road world as we know it.
For a while, I wasn’t sure how I pulled this off. I have a totally different life than I had when I lived in Michigan. I am now married, with a small child who, for months, stood at a glass door that he banged to get my attention, only for me to wave and get back to work. Managing my role as the cofounder of The Autopian along with my family life and this build seemed impossible to me. There was too much to do, and I had no time.
And yet, here I sit with a brand new WWII Jeep that accomplished the impossible, and it’s clear how it happened: My love for this company and this amazing car community fueled me.
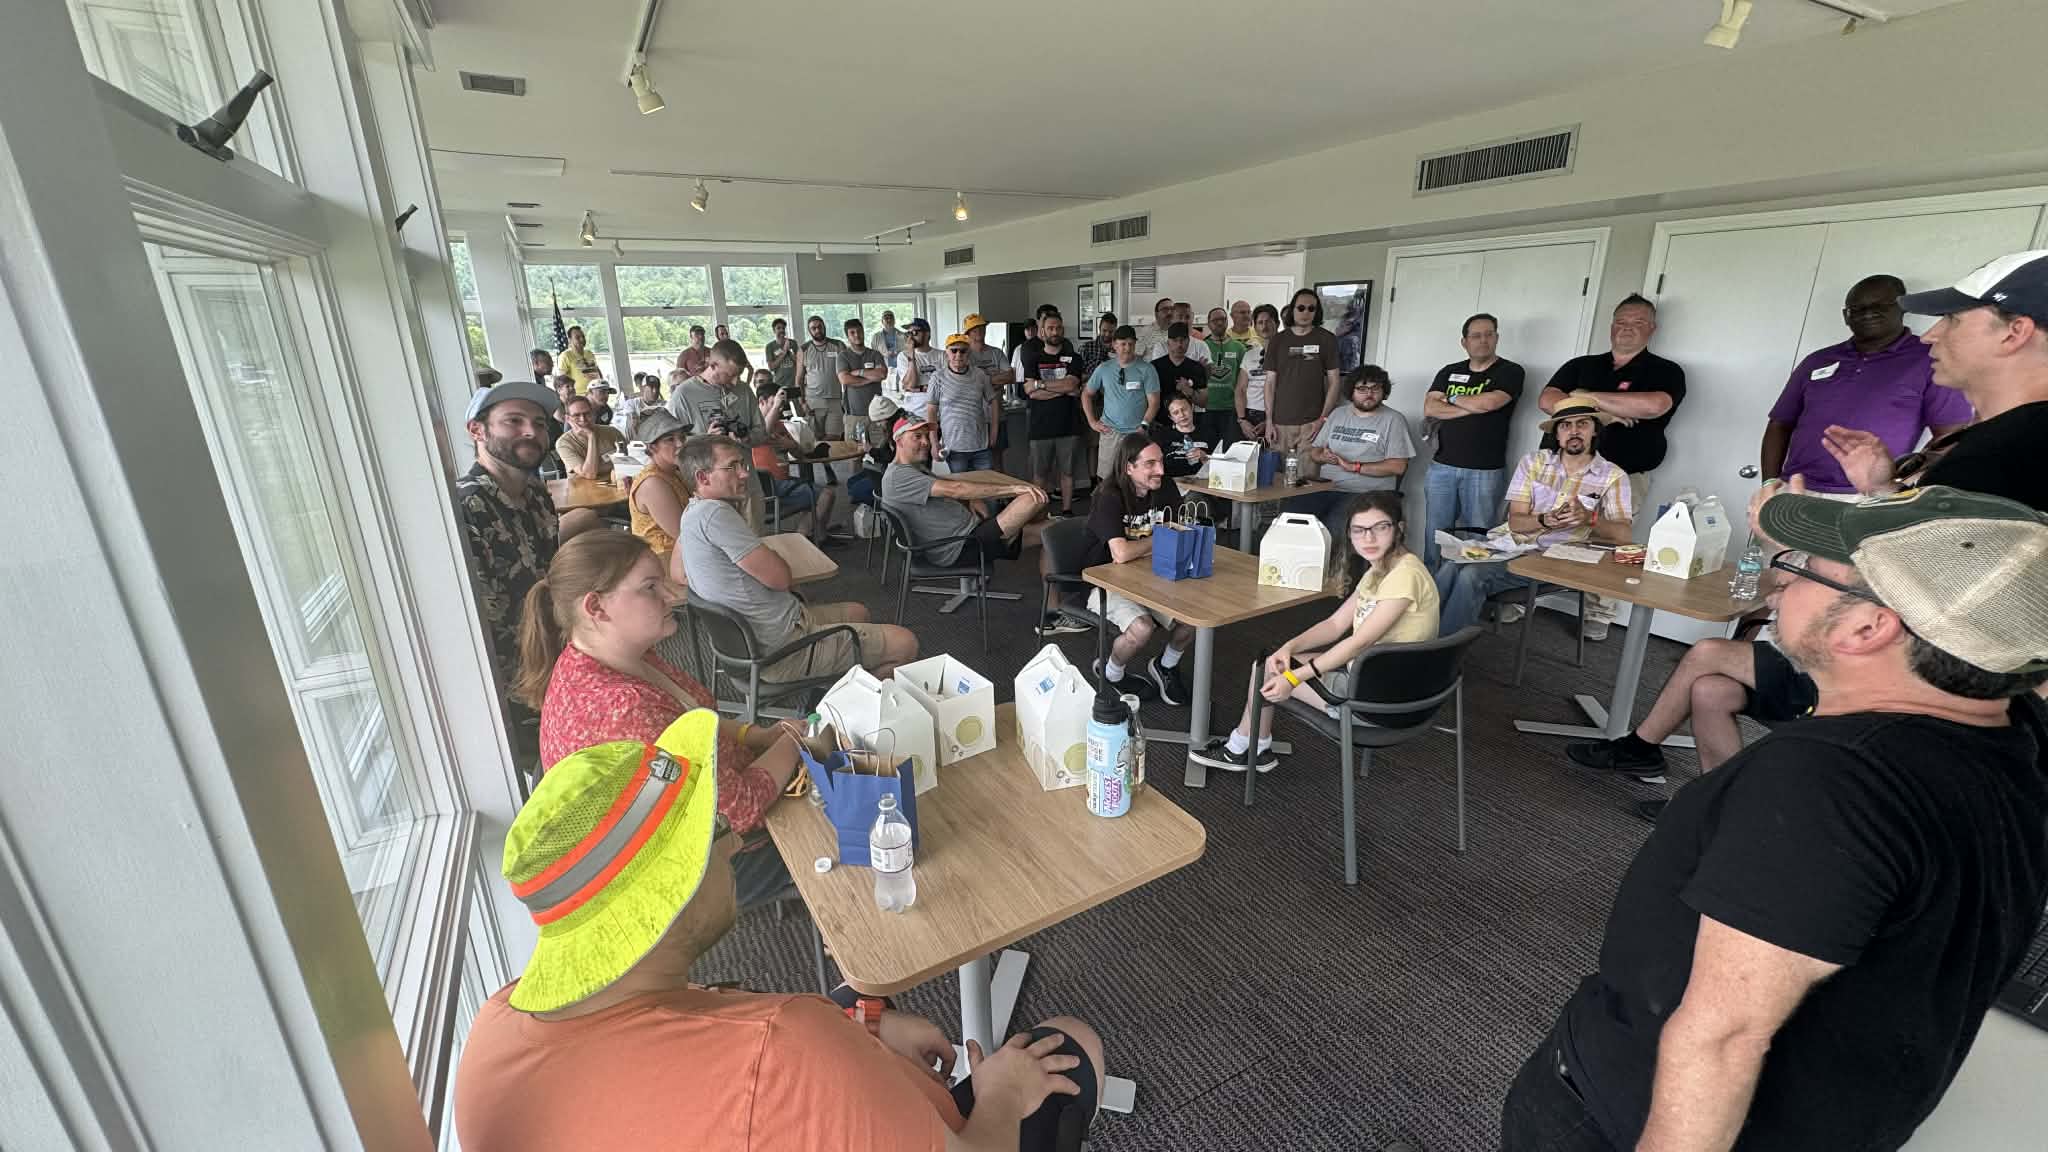
Day in and day out, I worked tirelessly to try to execute The Autopian’s biggest brand partnership to date because I knew it could be the start of something big. The Autopian just held a track-day meetup in New York (see above), and I met up with dozens of you readers who shook my hand and told me all about your love for what we do here at the site. The Autopian is bigger than me or any individual author. It’s bigger than one Jeep project. It’s bigger than any single story.
The Autopian is a movement. It is a group of people who proudly love all cars. I saw this at the track, when folks were showing up with everything from a Porsche 911 to a Renault 4 to a Grumman Diesel van that I was certain was going to tip over on the track. One reader even brought a grandfather clock so Jason could replicate a classic Citroen 2CV ad. Who brings a grandfather clock hundreds of miles to give to the author of a website?
An Autopian reader does. Because this place is special. You, dear readers, are the reason why it’s special, and I hope this story has shown that there’s no mountain I won’t move to make sure the magic of The Autopian endures for years to come.


You are the man, Travid Dacy!
Respect. You pulled it off – and I’m grateful for a fully detailed article so we can follow the journey! (Respect also to your wife who let you chase this dream.)
Also – can attest to my bench grinder and a box of bolts being two of the most helpful things when I built a Crosley from boxes of parts. At least my boxes mostly came from the same Crosley.
What an awesome, fun, entertaining article and adventure! Was eBay as happy with following this saga as your readers have been?