
My Australian friend Laurence had already flown back home after helping me build and install my 2026 World War II Jeep’s brand new engine and helping me test-fit the body. I had a running powertrain and complete drivetrain, leaving me with what I thought was a borderline-manageable workload given the Easter Jeep Safari was about a month away. I had to install the brake lines, replace the wheel bearings, install the brake shoes and hardware, install the driveshafts, replace the axle seals, and button up the steering. Once that was done, the Jeep should be able to drive. That should be easy, right? No.
You may recall a few months back that I put out a challenge. “LIVE BLOG: Guess What Time David Finishes This Huge List Of Tasks On His eBay Jeep Project, And You’ll Win A Prize.”
This challenge:

The idea was that, if I told you, dear readers, that I was going to spend the next 24 hours attacking a list of tasks, it would give me motivation to get it done. I was running out of time and, without Laurence, not getting nearly enough done. I hoped that this post would motivate me to spin wrenches. As I mentioned in that article:
My timeline for completing my eBay WWII Jeep project means I have no choice but to get the entire drivetrain and braking system done now; this means I’m wrenching through the night tonight in an all-out offensive attack on rusty bolts, greasy bearings, and stubborn press fits. To ensure that I complete this ambitious list of tasks, I’m risking embarrassment by telling all of you everything I plan to get done before the night is done, and to make it fun: I’m going to give a prize to whoever guesses what time tonight I complete all this work.
Here’s the list of tasks I hoped to get done that day:
- Rebuild all drum brakes
- Remove and replace all 8 outer wheel bearings
- Remove and replace all 4 inner axle seals
- Remove and replace rear pinion seal
- Install all new brake lines
- Install all new brake hoses
- Remove and replace all kingpin bearings (check drag with pull-scale and shim appropriately)
- Remove and replace all kingpin seals as well as any wheel bearing seals
- Install rear driveshaft
I barely got any of these done that day.
And it’s not because I’m not a wrenching machine, but because this project is just grueling. The amount of work needed to do even just the brakes was humbling. Just watch this:
Let’s back up a little.
I Was Now Alone With A (Sorta) Running Engine And A Drivetrain

The premise behind this build is that our excellent partner, eBay Motors, is sponsoring me assembling a brand new World War II Jeep in my backyard using my own tools. This is meant to highlight the absurd number of car parts (including the entire Jeep body!) available on the marketplace for the average, everyday dad wrenching in their driveway (or in my case, backyard).
Given my history of tackling daunting projects involving welding up rusty frames, tearing into 80 year-old motors, rebuilding transmissions, using a gas can on a wooden pole as a fuel pump, reviving a 250,000 mile diesel engine on another continent, and accomplishing the impossible in Australia with a crusty Chrysler Valiant ute, many thought this project might be easy.
“Oh, he doesn’t have to deal with rust? That should be no problem.”
It’s been a problem. A humongous one.
The World War II Jeep project has required me to acquire parts (through eBay) from all around the globe. I’ve had to study pages and pages of vintage repair and restoration guides to understand every single component needed to assemble a WWII Jeep. I’ve had to organize these parts, and make them fit despite being from various manufacturers and various decades of production, and as for rust and grime: There was plenty. And it was all on the axles.
The Axles Were A Nightmare

I cannot believe how much work went into solely getting the axles (which I drove all the way up to Washington to pick up from an eBay seller) sorted. But then when you think about all the functions of the axles — braking, steering, rolling, transferring torque (i.e. accelerating), articulating, etc. — it becomes obvious that as simple as those two metal sticks may look, they’re a handful.
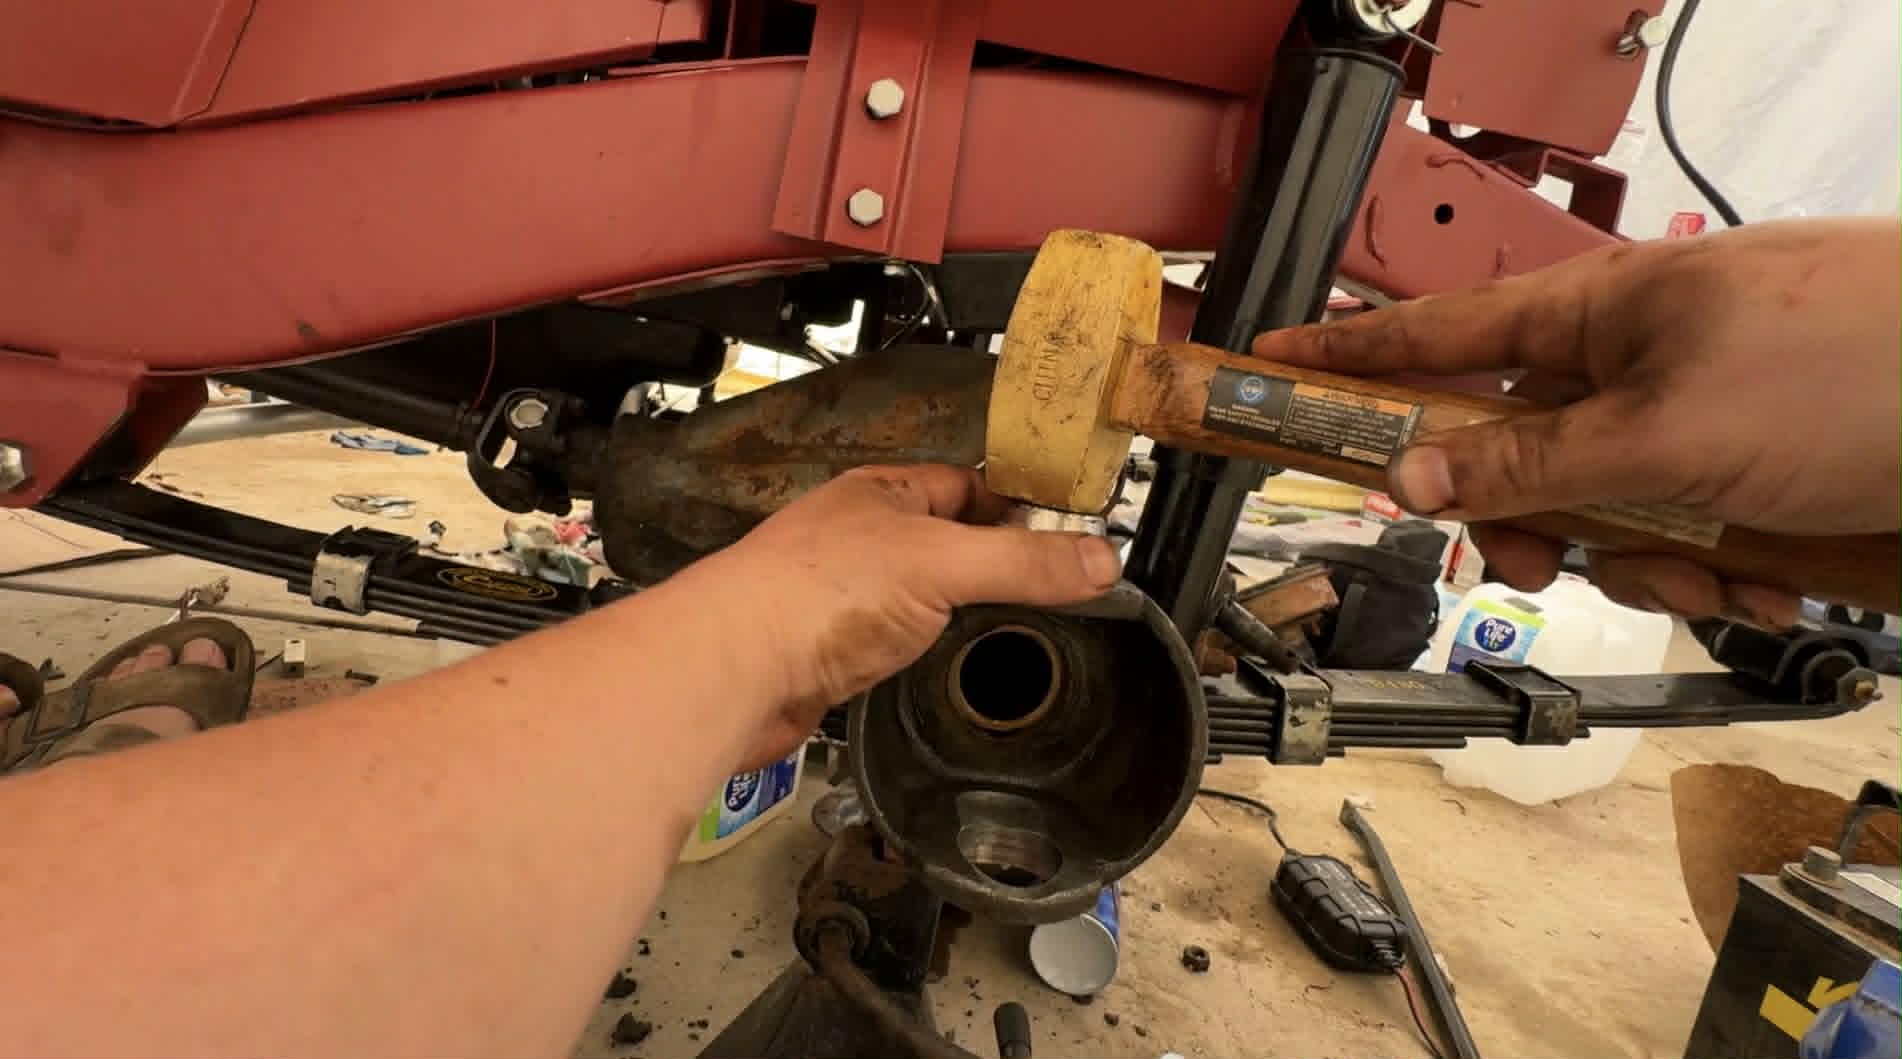
Disassembly Revealed Lots Of (C)rust

The problems with my whole “let me get this all done in 24 hours” concept arose immediately. Removing the brake drums was difficult enough, and required either lots of percussion with a hammer or a puller tool like the one shown above.
Once the drums were off, I had to remove an occasional seized bearing like the one above, and then I unbolted the entire drum brake system by just taking the whole brake backing plate off, revealing so much rust and grease and oil that I would have to spend hours trying to remove rusty eccentric bolts from the brake backing plates and cleaning everything.
And I don’t just mean “spraying it down with brake cleaner.” No, the grime in and around these brakes was caked on.
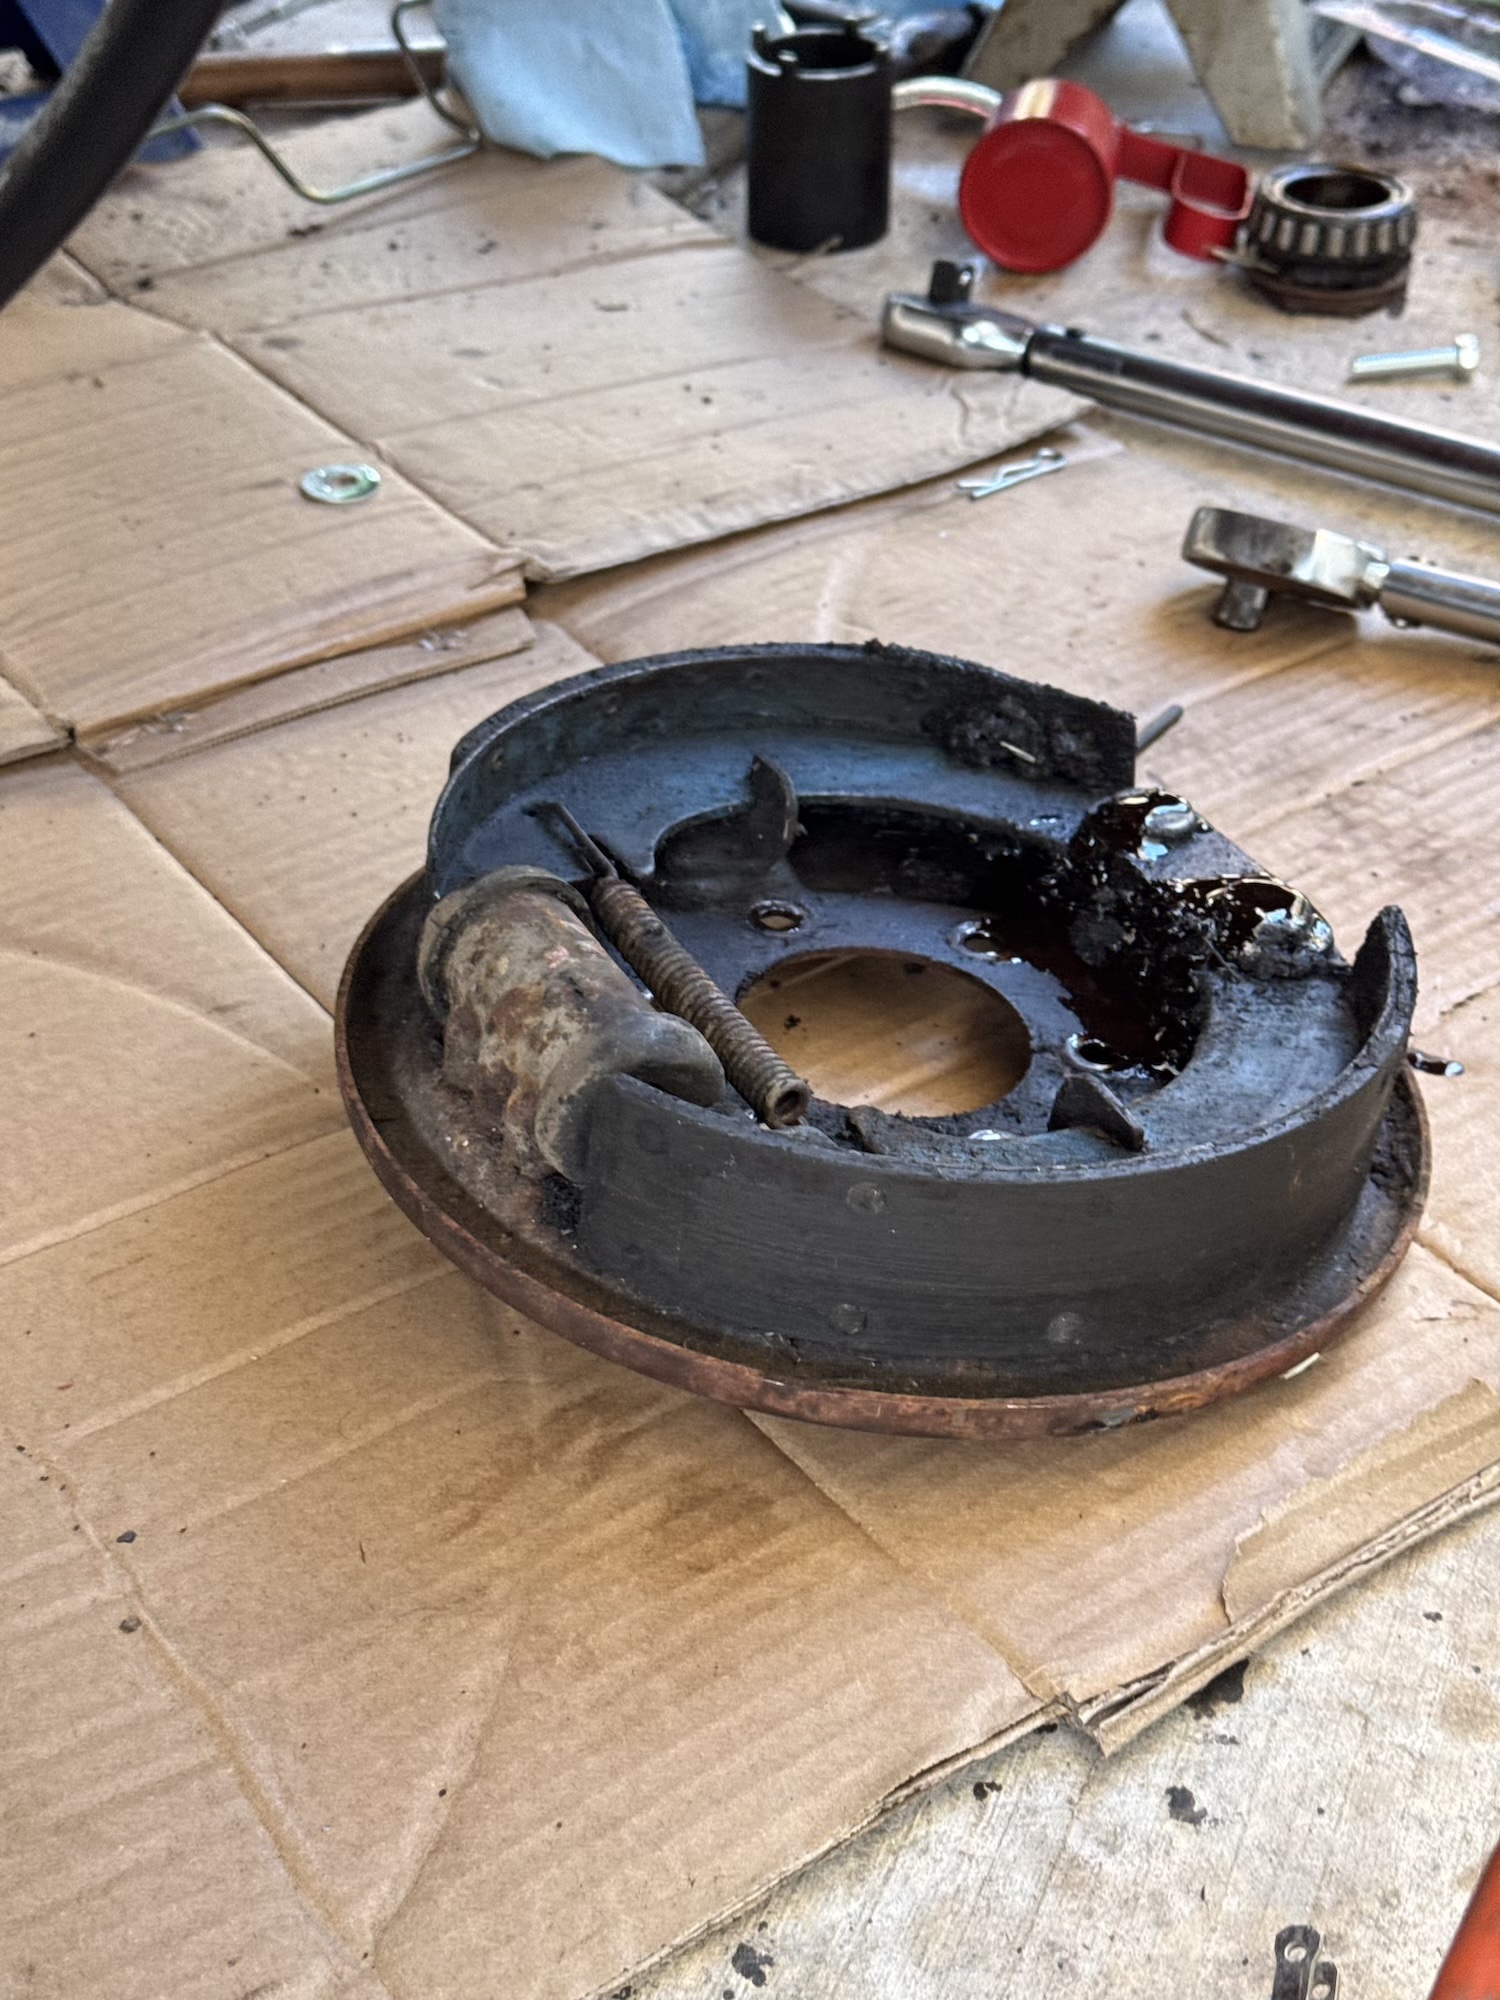
As you can see here, the brake backing plates were encrusted with a combination of oil and dirt, creating a concoction whose technical name is, I think, “grime”:

This is the type of stuff that you can just scrape off with a razor; it must be chiseled with a screwdriver and hammer: 
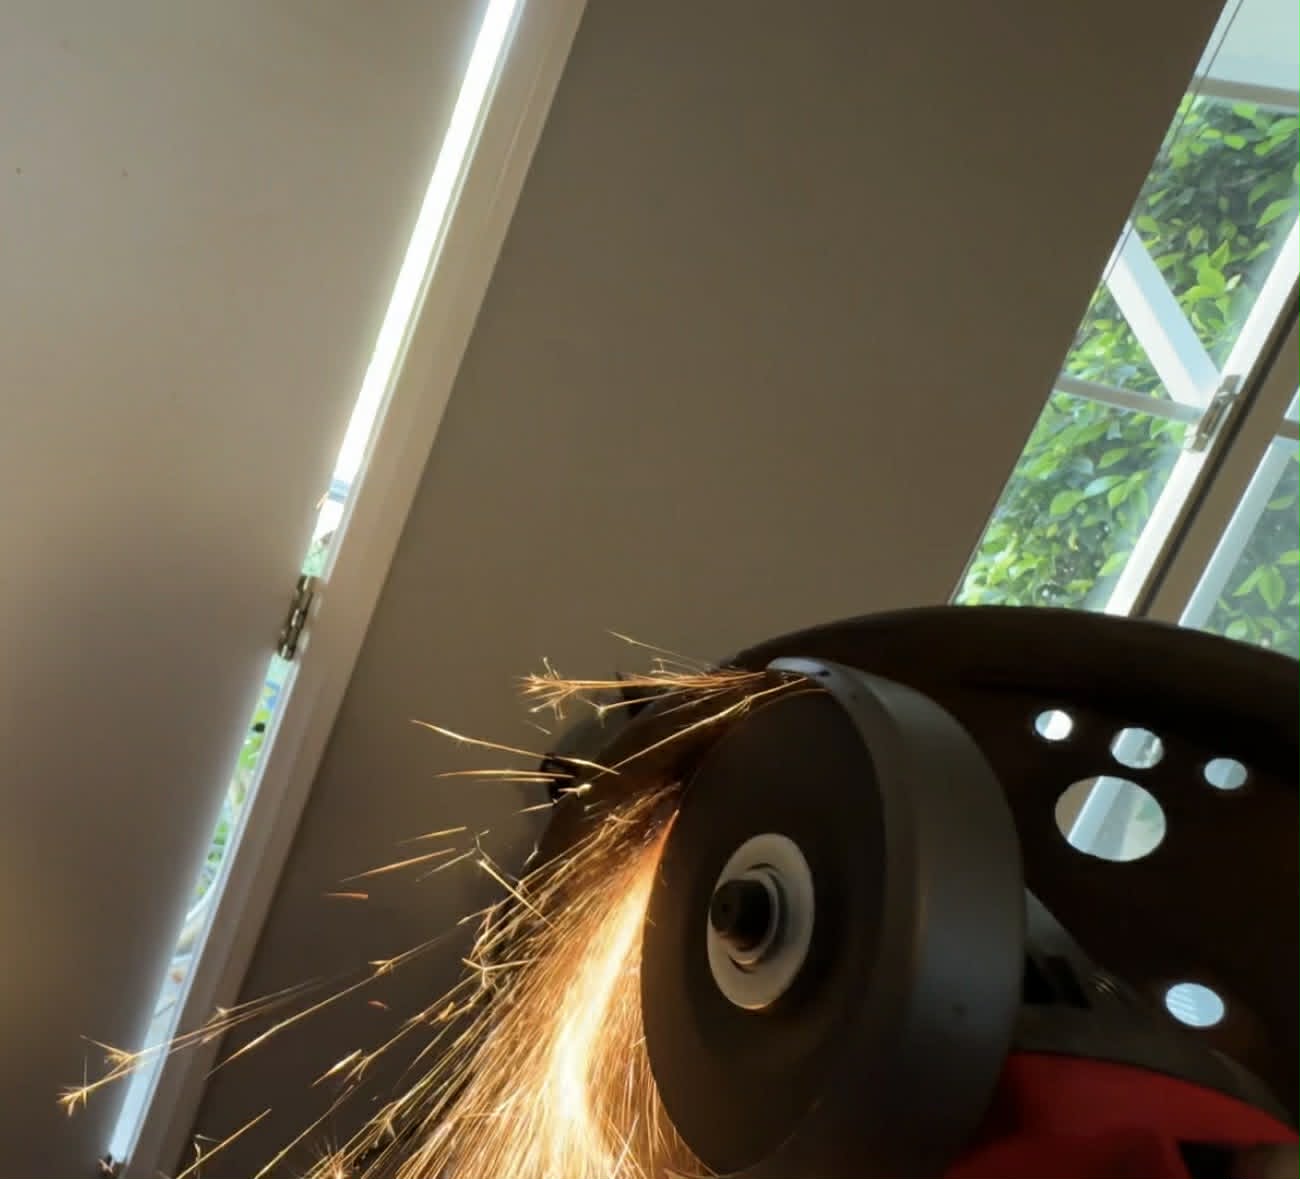
Of course, once that crud was off those adjuster screws, getting those out of the backing plate became a problem; since they had been exposed to so much dirt and moisture, they were seized. So out came the safety goggles and angle grinder:
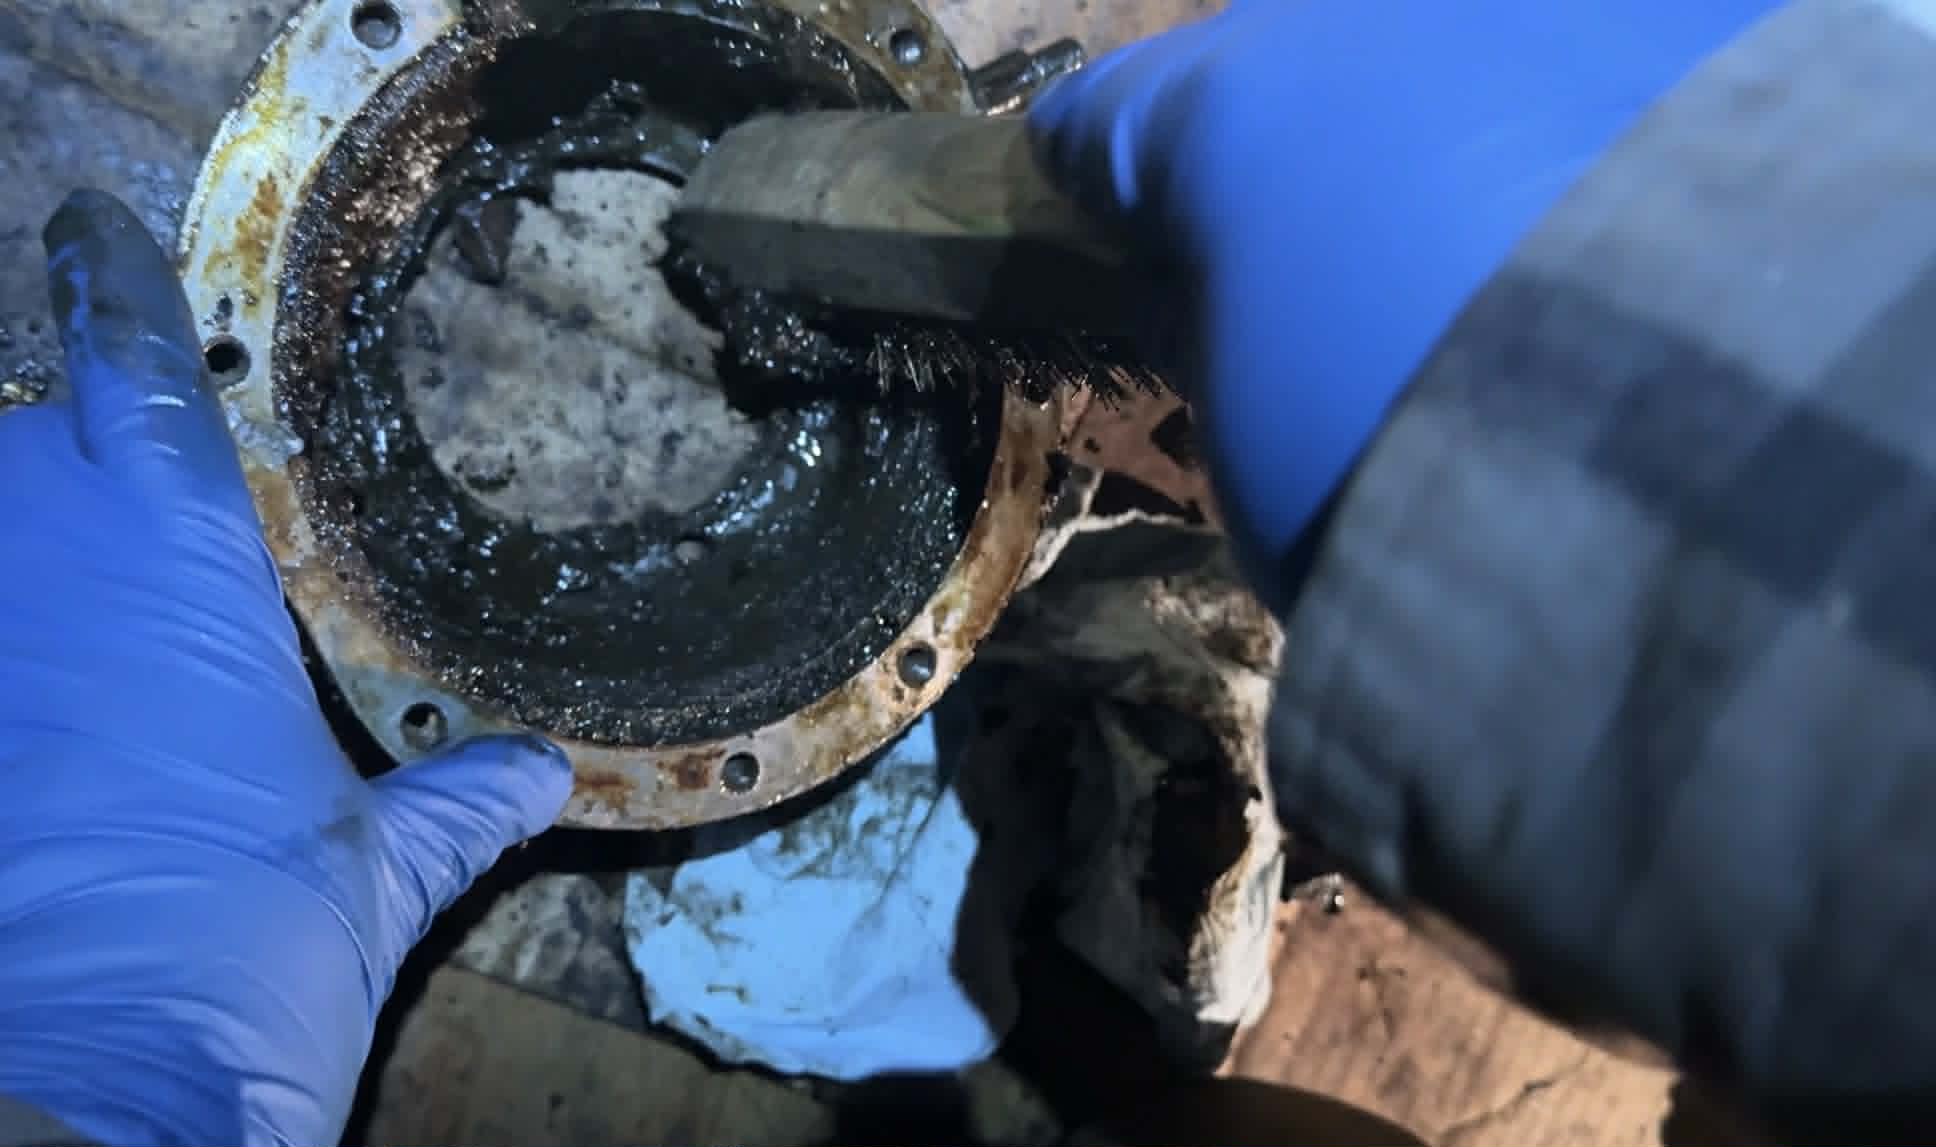
After I had all the adjusters cut off the backing plate, I hit the part with some degreaser and a brusher:

Then I finished it off with a pressure washer:

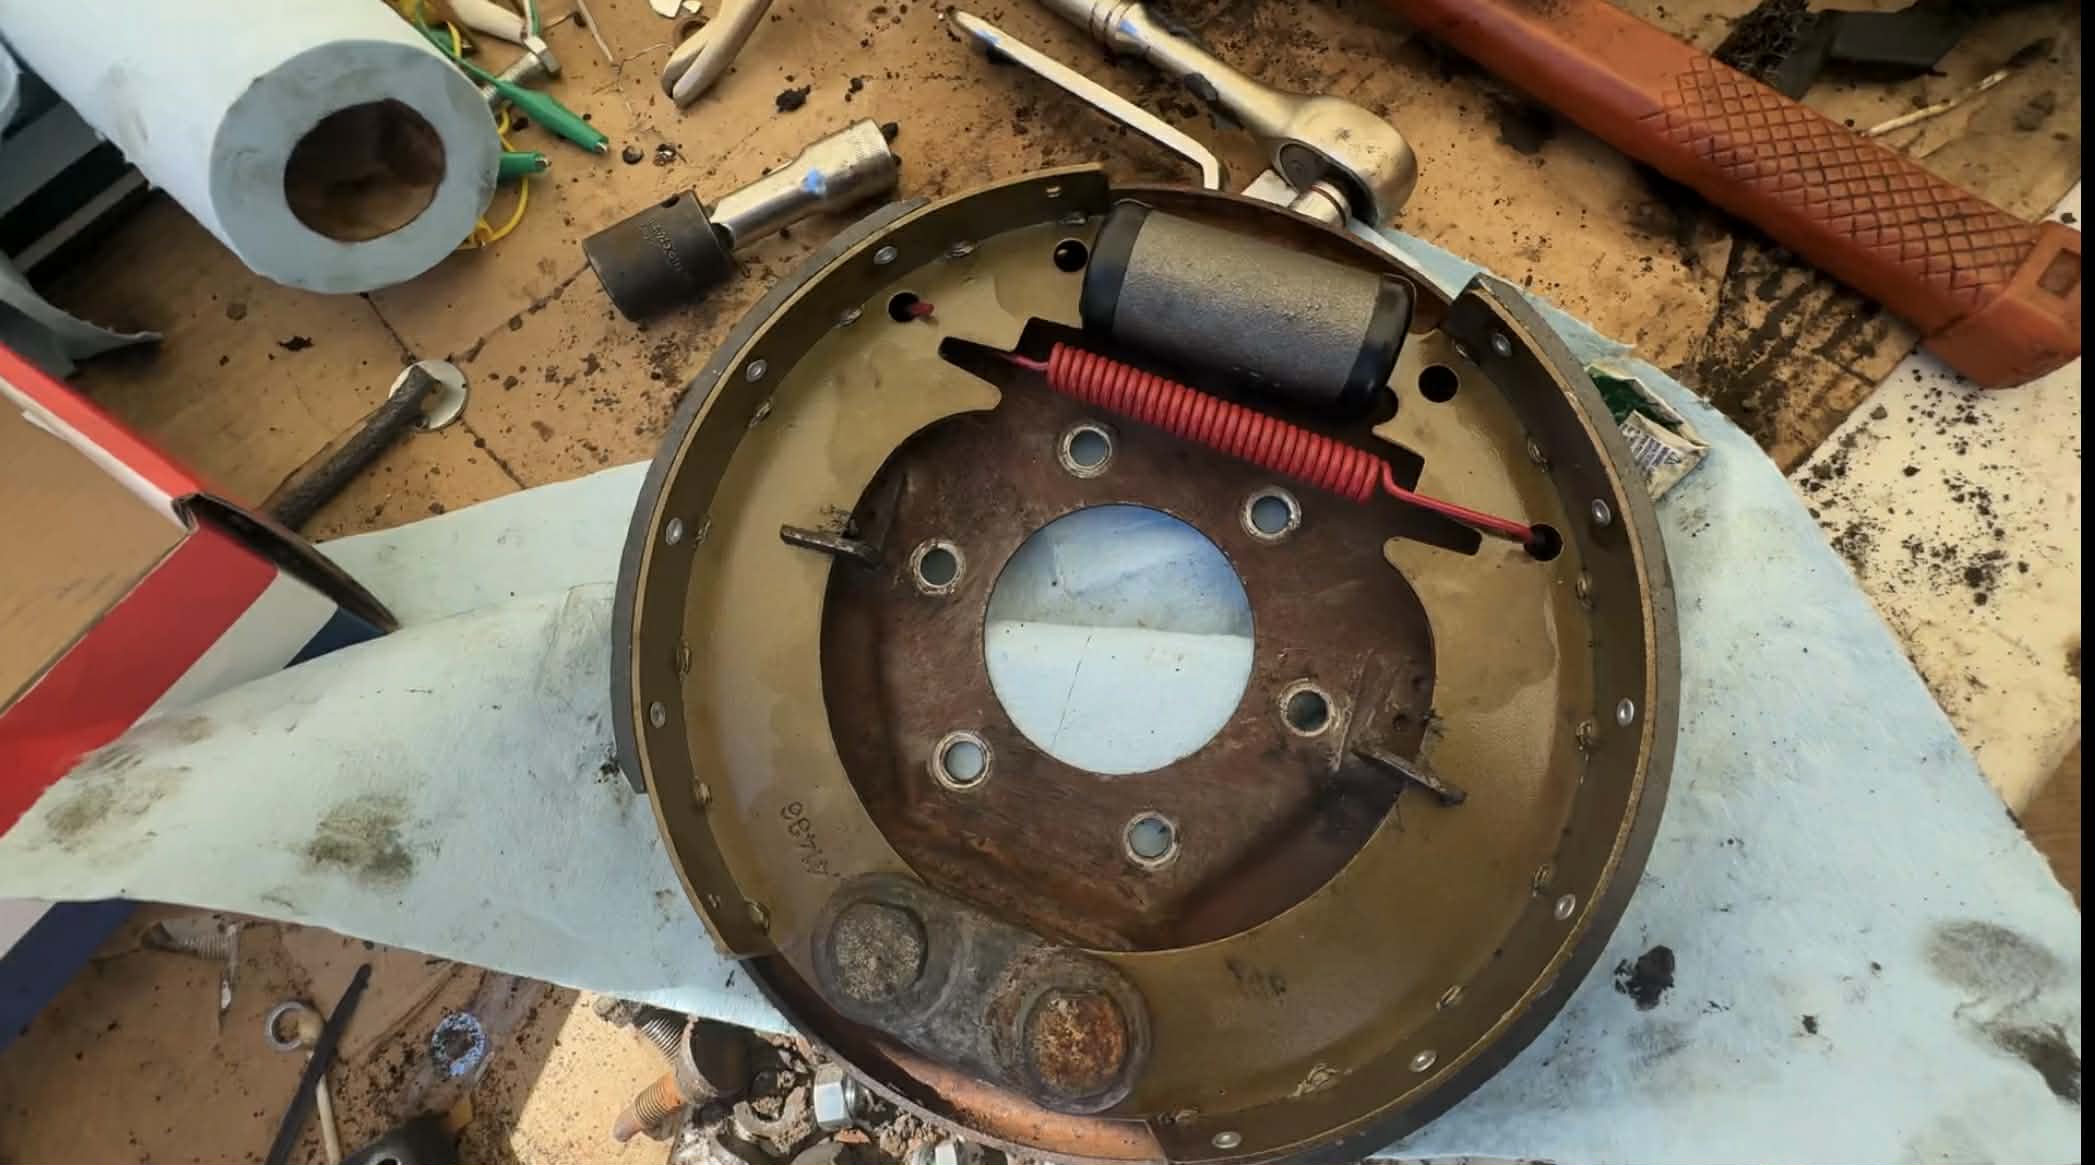
From there, I assembled the drum brake on the backing plate, but not before first having to file out the brake shoes to fit the “eccentric” cam that allows the adjuster screws to push the shoes out against the drum:

Only then — after all the cutting and scraping and power washing and degreasing and brushing and filing — could I put the drum brake together:
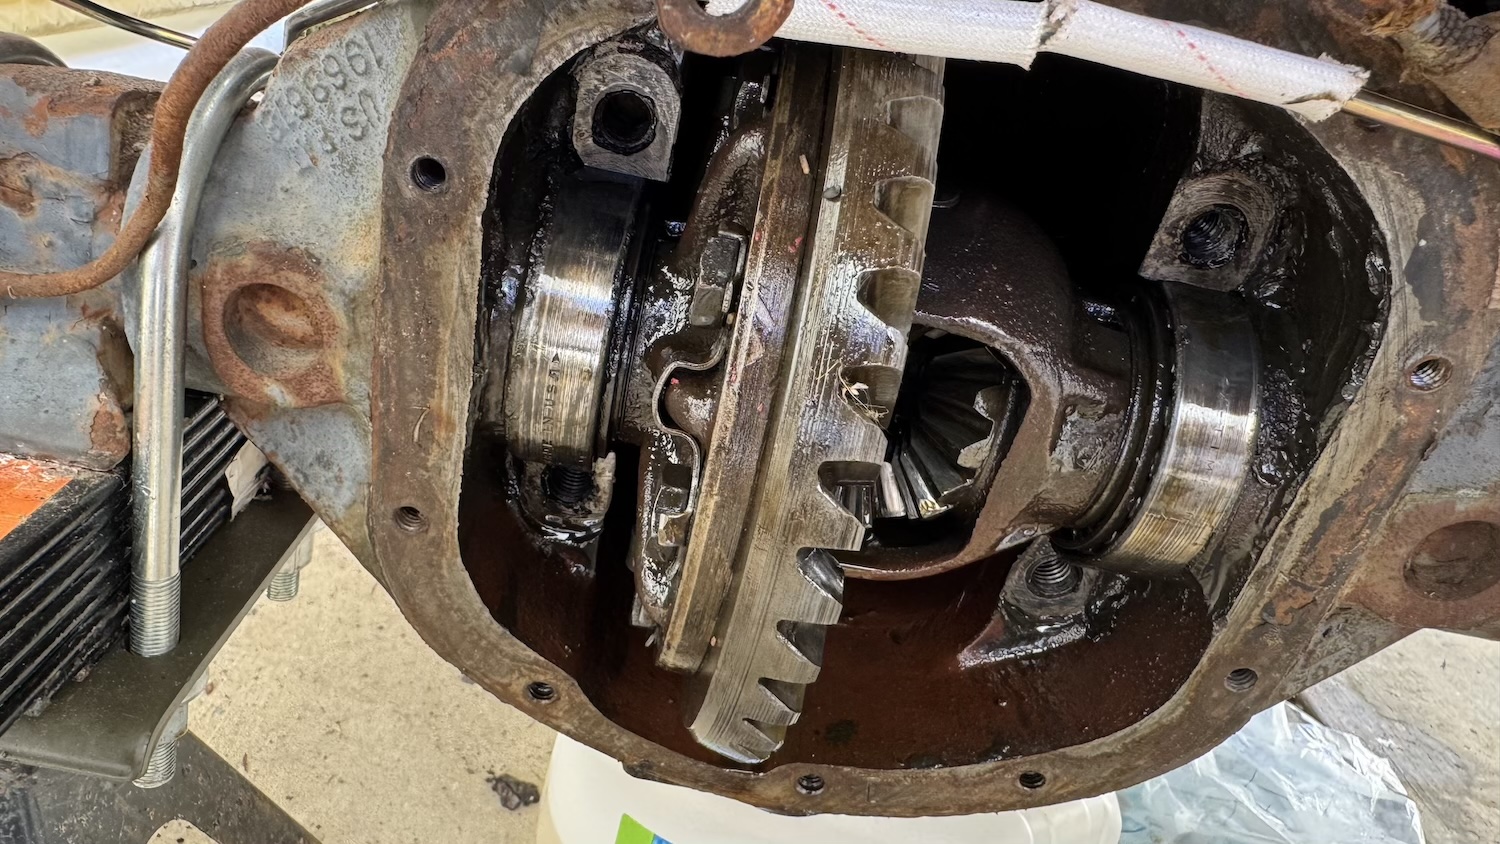
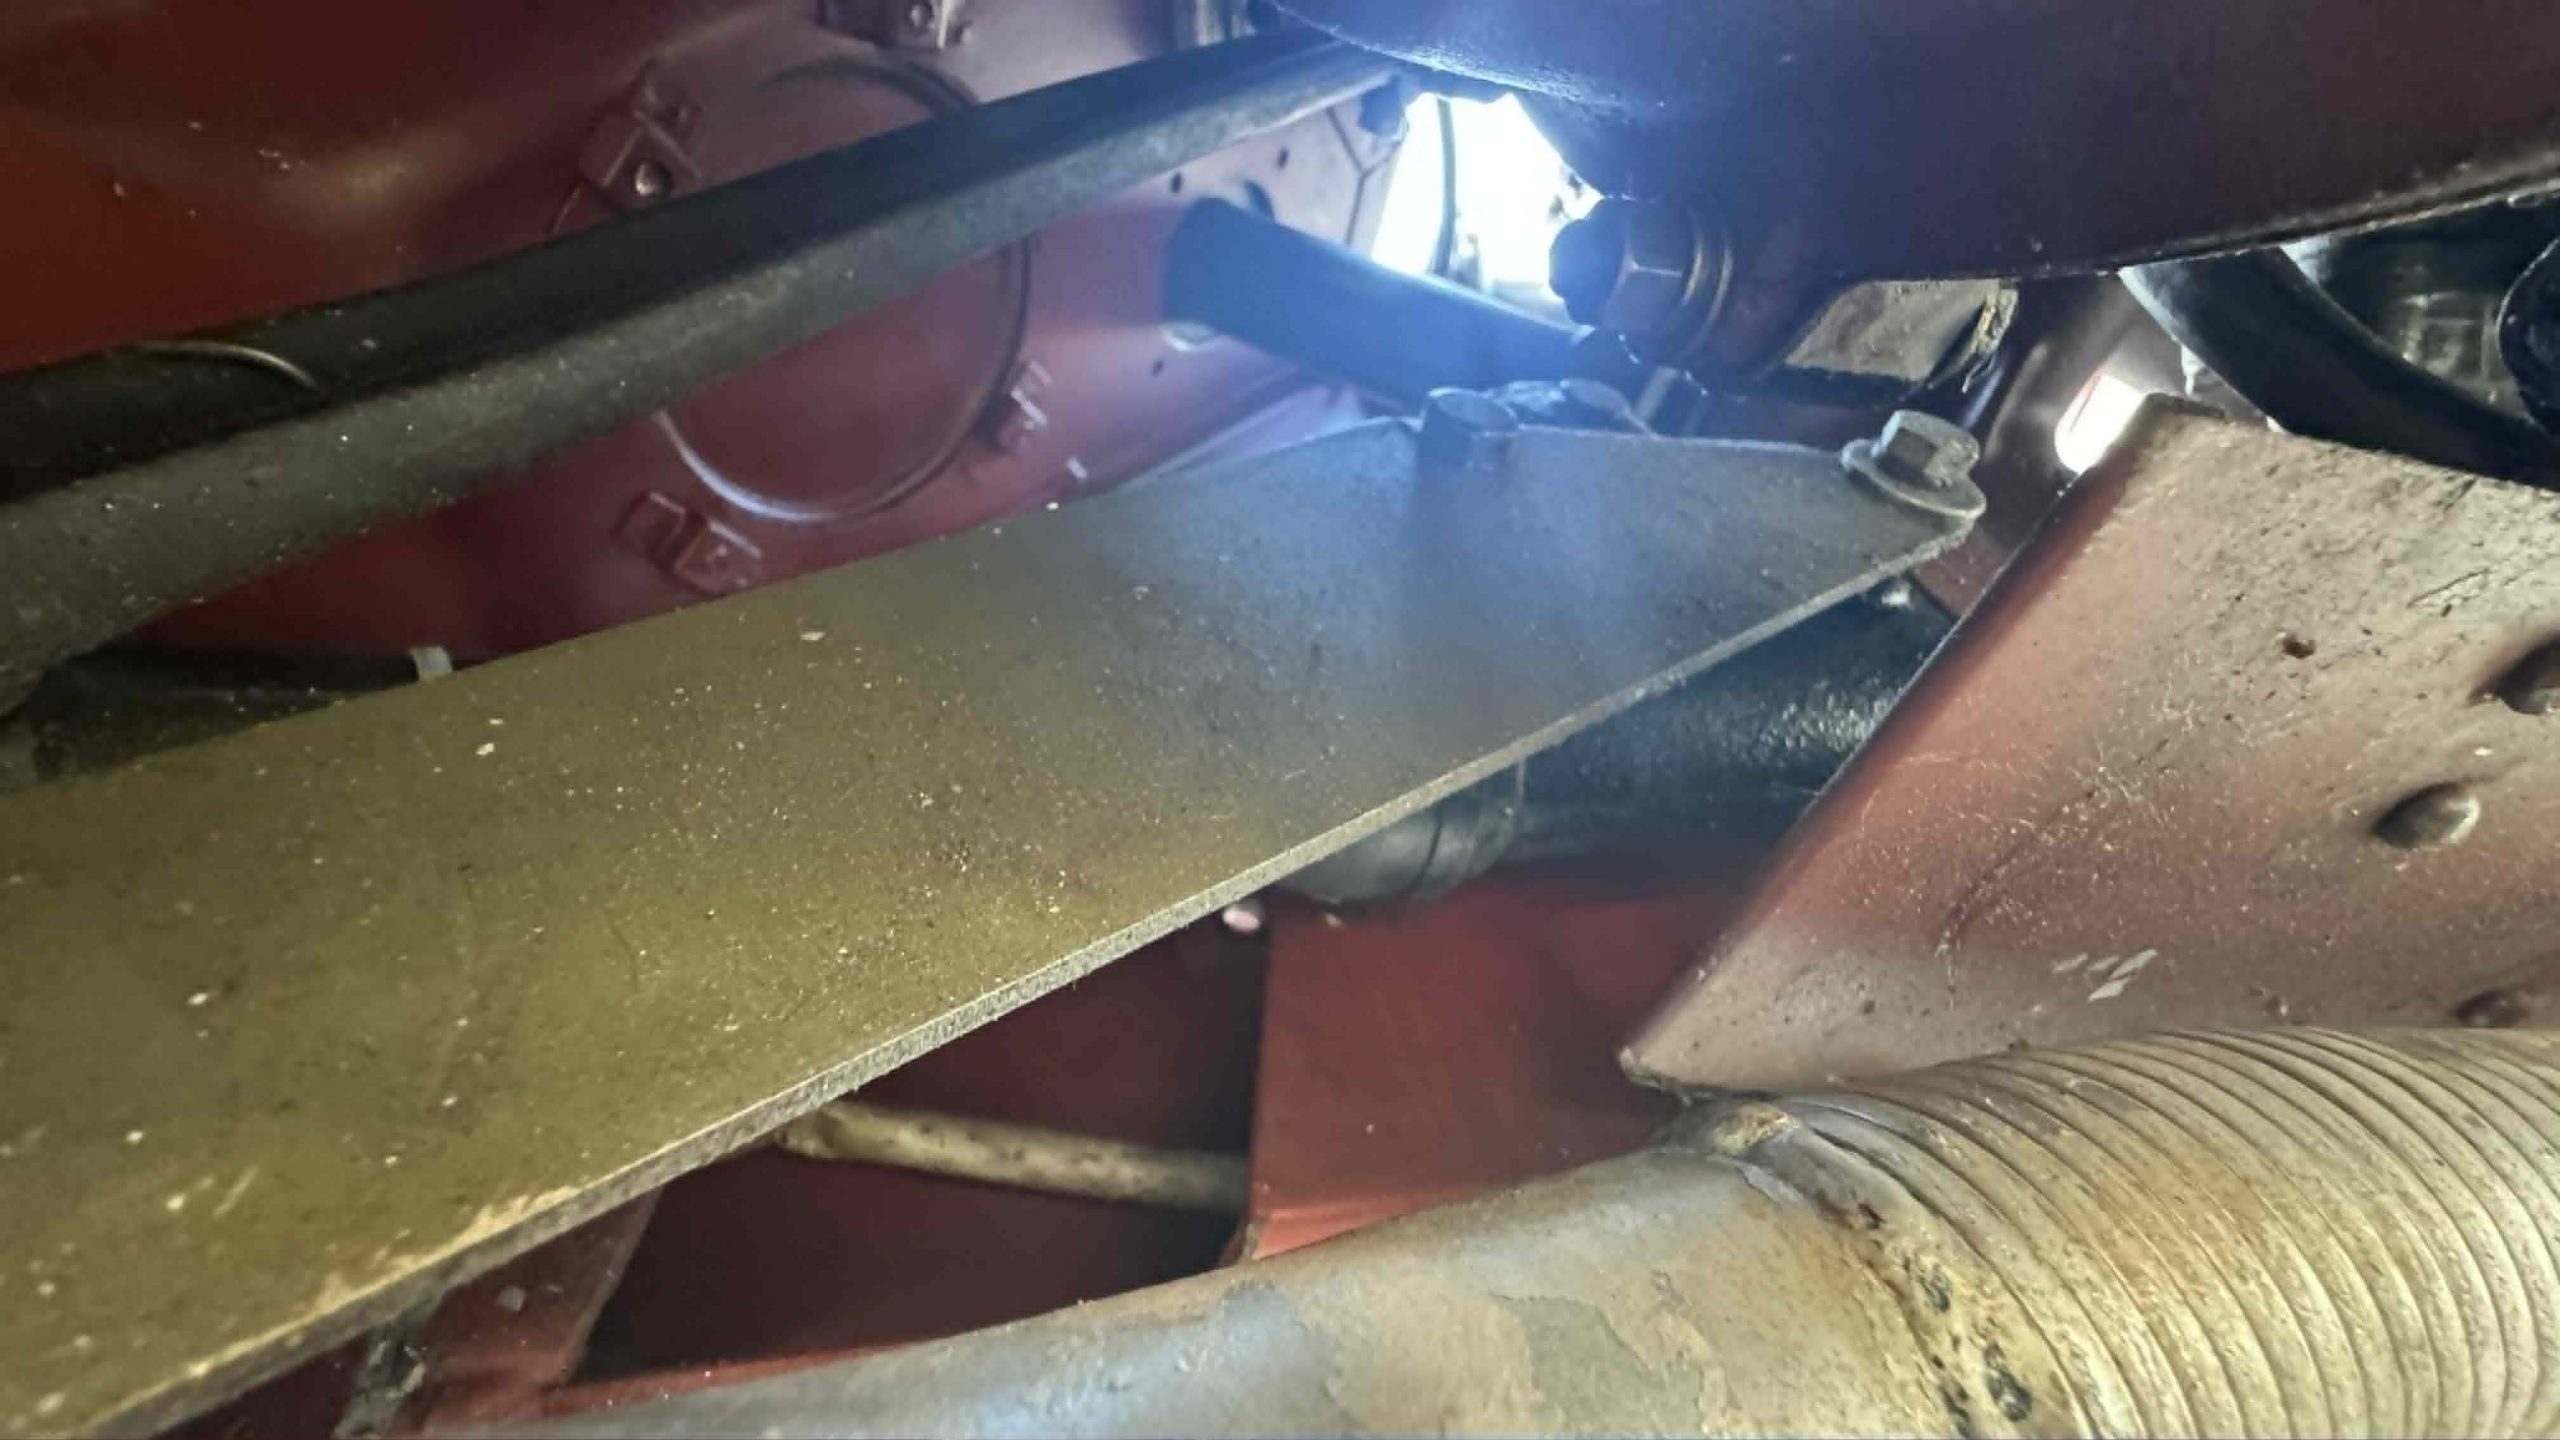
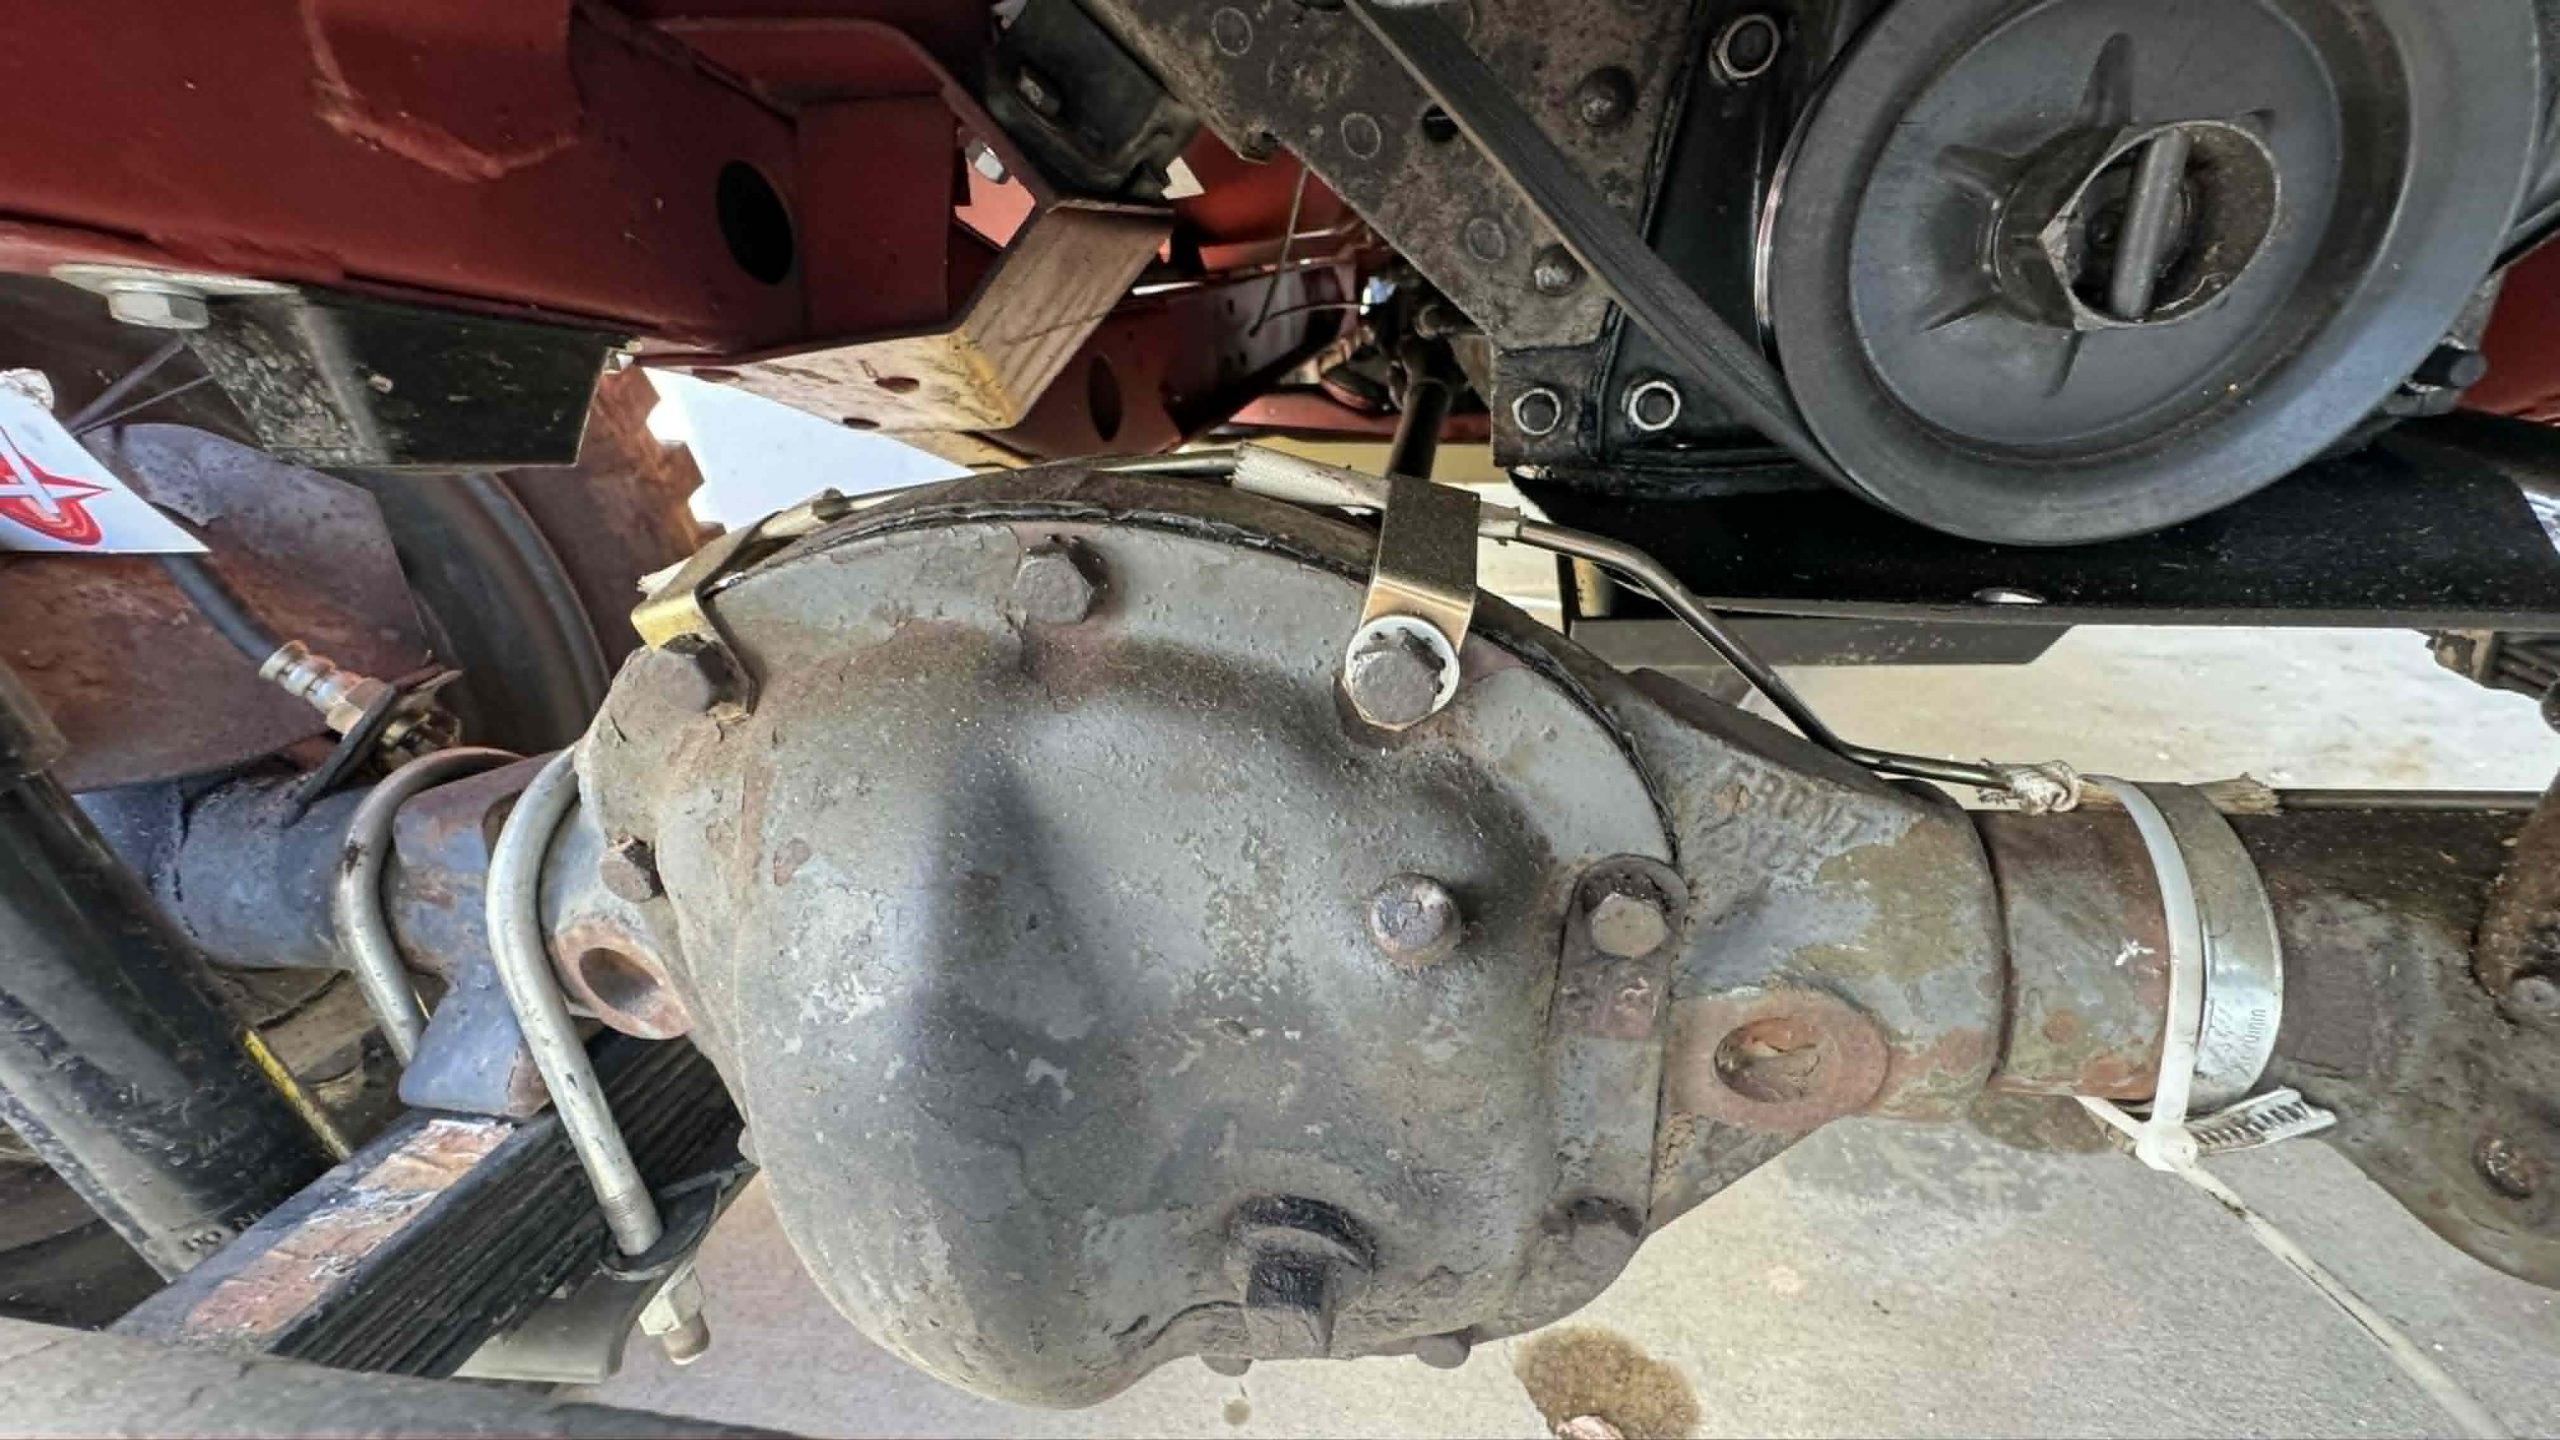
The rear axle was relatively easy to tackle compared to the front. I did have to remove the differential cover and replace the axle seals — something I did not enjoy in part because I installed the seals in backwards my first time around and in part because I destroyed so many seals during installation that I found myself in a situation where I had to install all four seals in the two axles perfectly or I’d have to wait for new parts (talk about pressure!):


By the way, when I was re-installing the rear axle’s bearing caps, I noticed that the previous person who had removed them had installed them completely wrong. This is a big deal, as the bearing caps are line-bored, meaning that specific bearing cap must go on that side of the axle tube to ensure a perfectly round bore for the carrier bearings.
On many Jeeps, the way to avoid making this mistake is to pay close attention to the stampings on the axle housing and on the bearing caps. There’s a number — in this case, the number 7 — in a certain orientation. The bearing cap’s “7” must be oriented in the same direction as the axle tube’s “7.” You can see what I mean in the image below (the right bearing cap “7” is a little hard to read, but it’s clear on the left):

The previous mechanic had also installed the drum brake shoes backwards.

On these Jeeps, the big shoe goes towards the front, so I made sure to get that right:

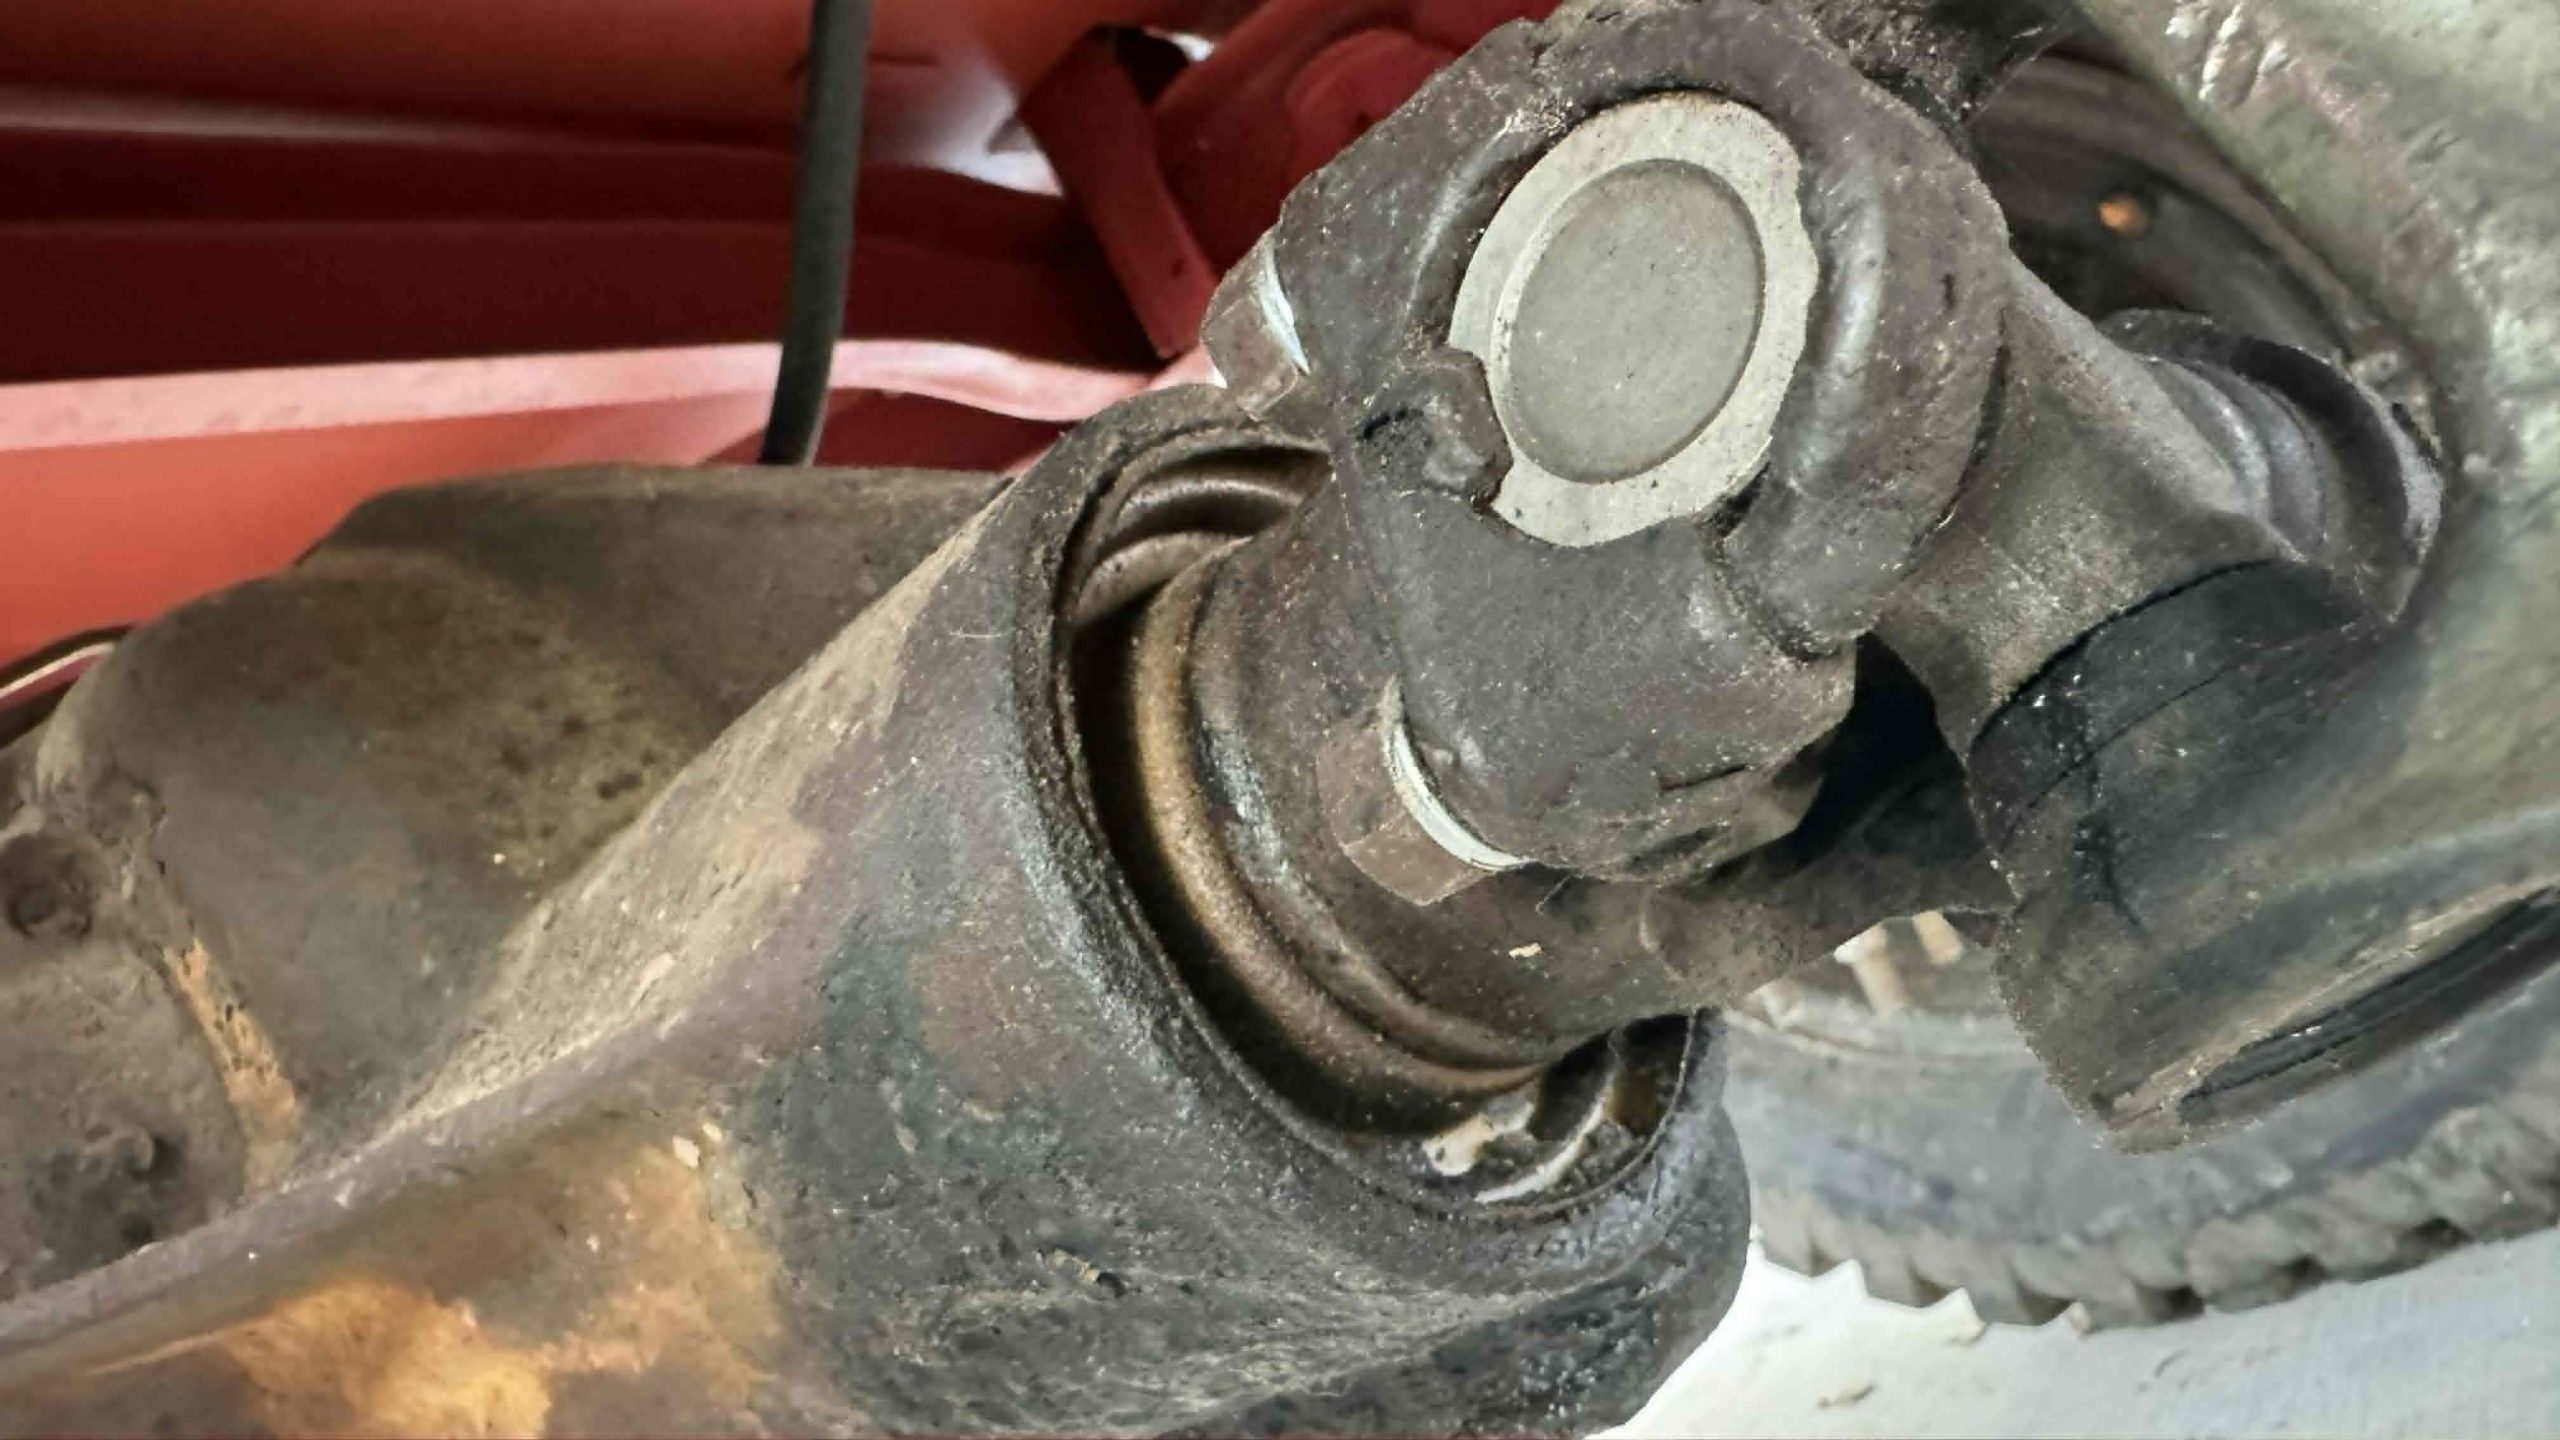
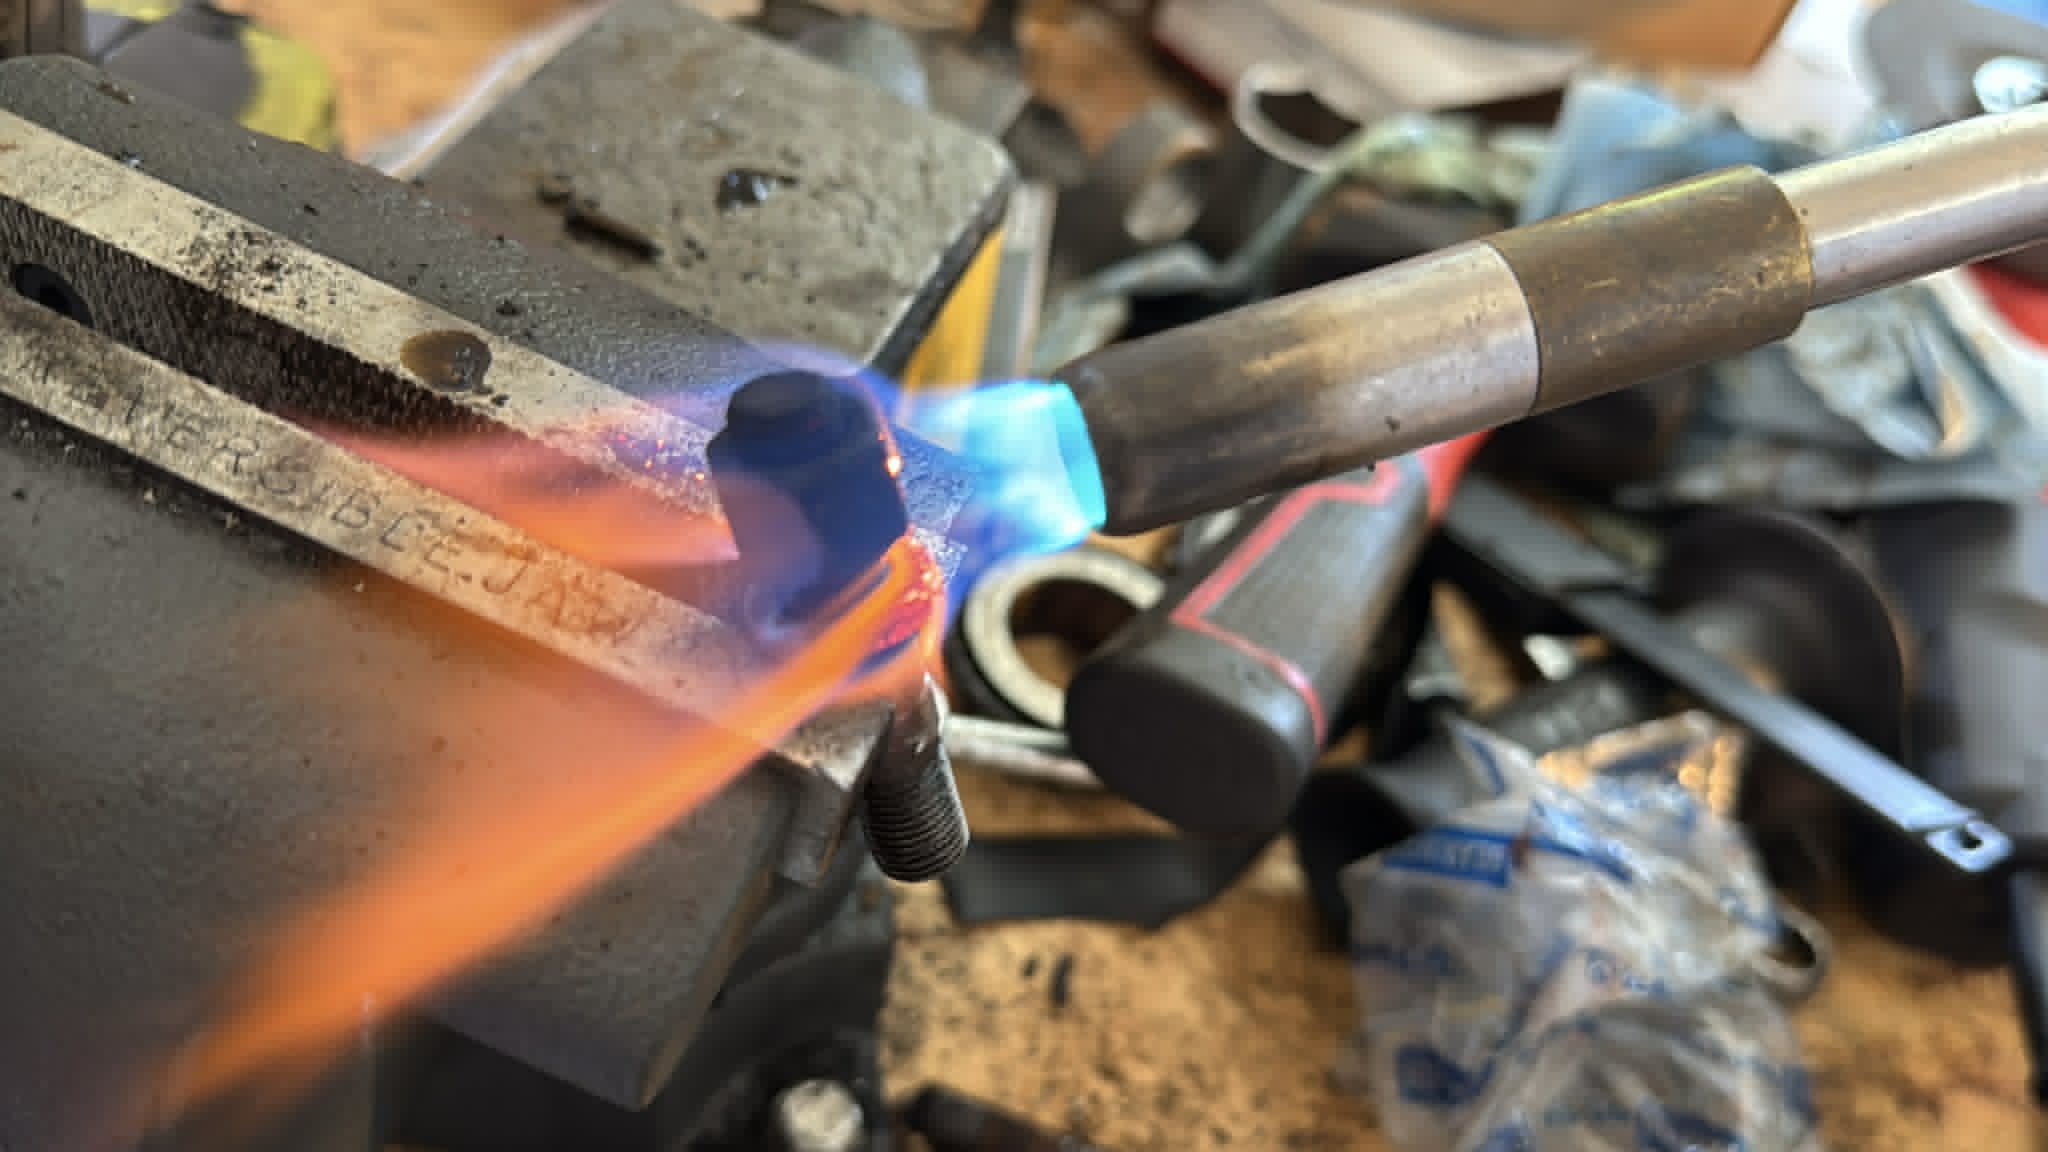
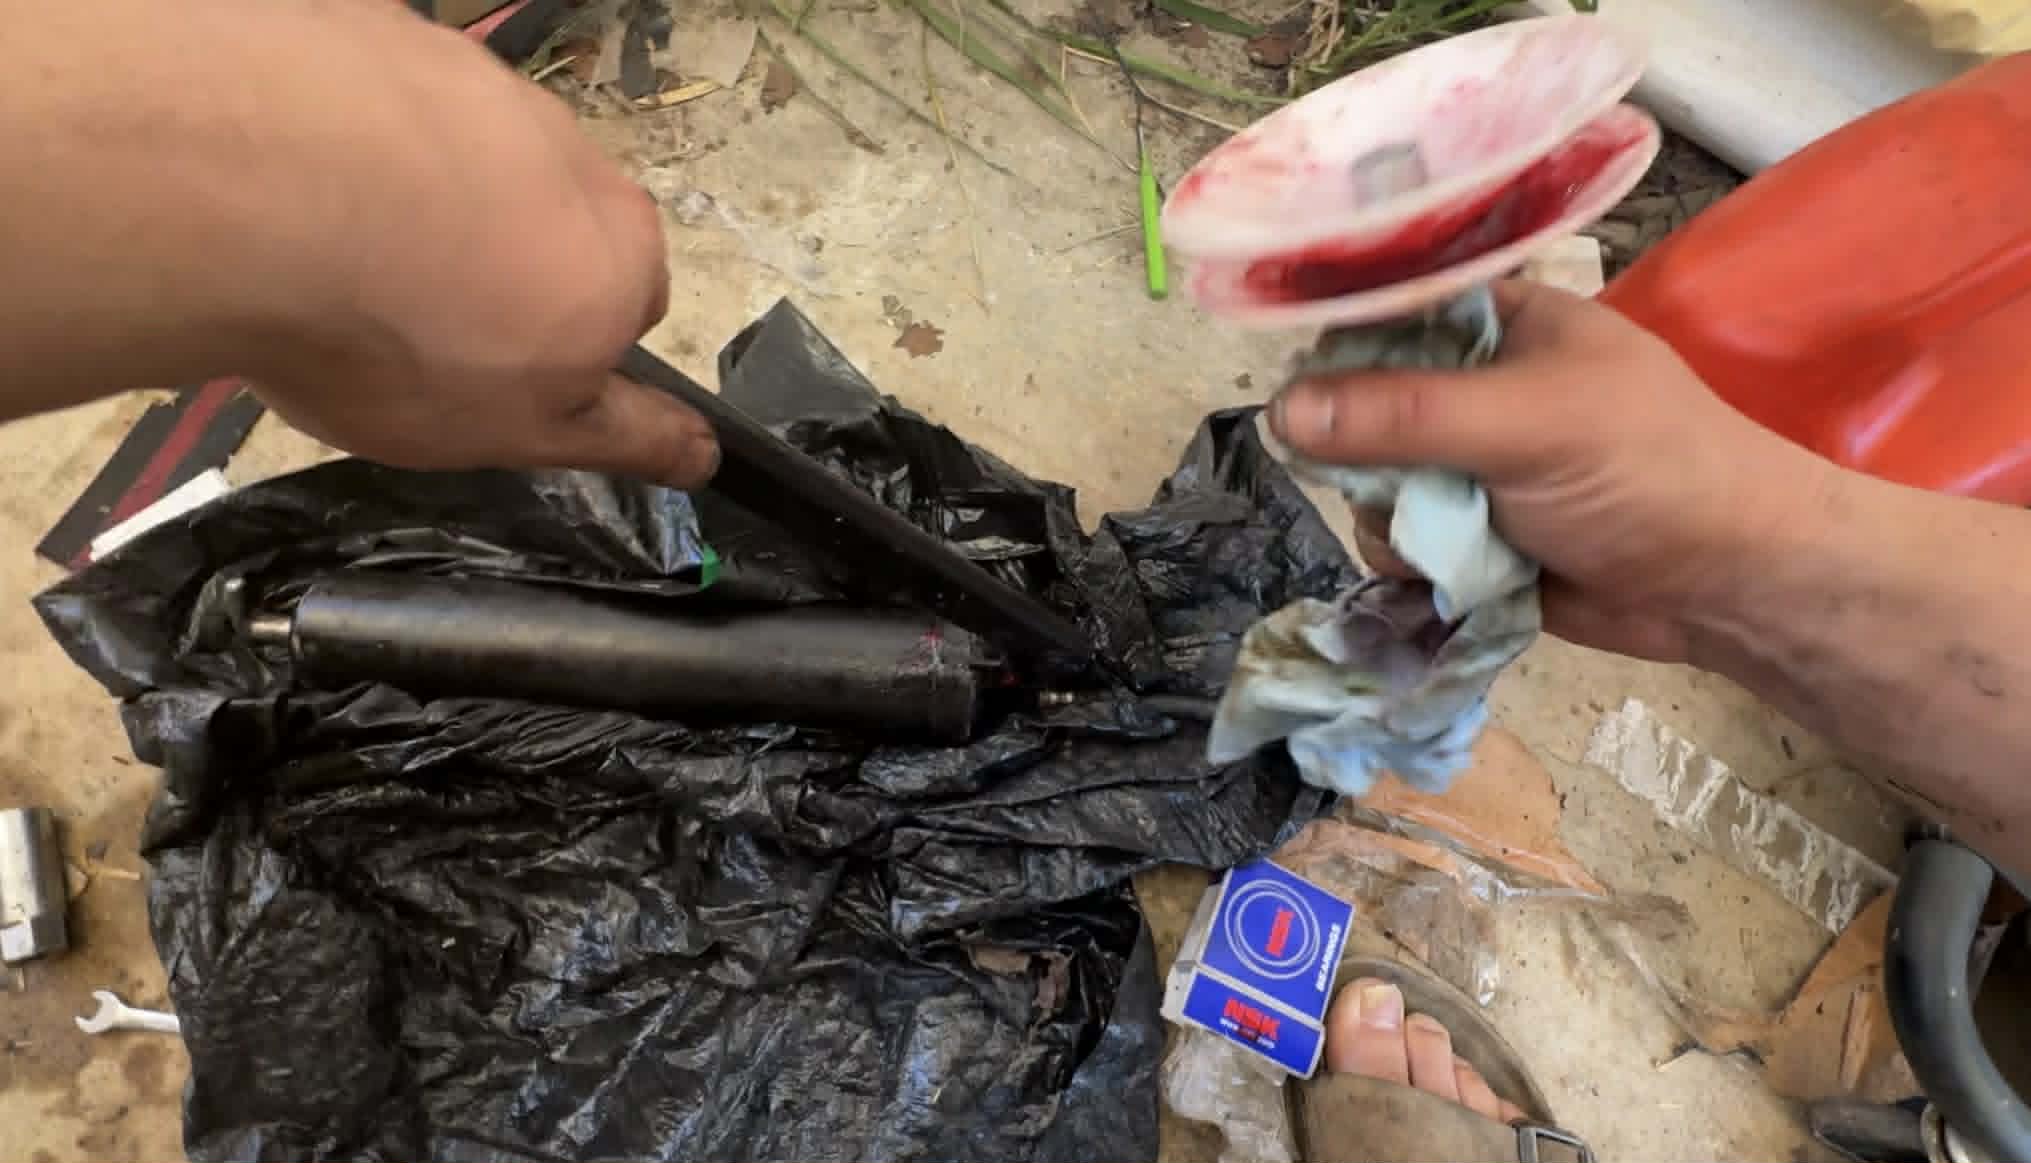
With new axle seals and correctly-oriented carrier bearing caps, I bolted the differential cover back up and then took care of the pinion seal on the differential. That job involved using a seal puller and then hammering a new seal on very carefully.

The way I wrote that just now makes it seem easy, but that pinion seal probably took an hour. It required scraping the crud off the nut so I could get a socket on it. Then loosening the nut, spending far too long trying to pull the yoke off the pinion, then removing the seal with a puller, then trying to use a socket but ultimately settling on two hammers to install the new seal with some RTV, then putting the yoke back on and torquing it to spec.
Every small job like this took an hour, minimum. And the brakes overall? Those took multiple days. Even buttoning up those rears could have been easier. Here’s a look at the drum brakes that go over the previously-shown brake shoes:

You can see a seal there and a bearing just below it. Here’s the bearing:

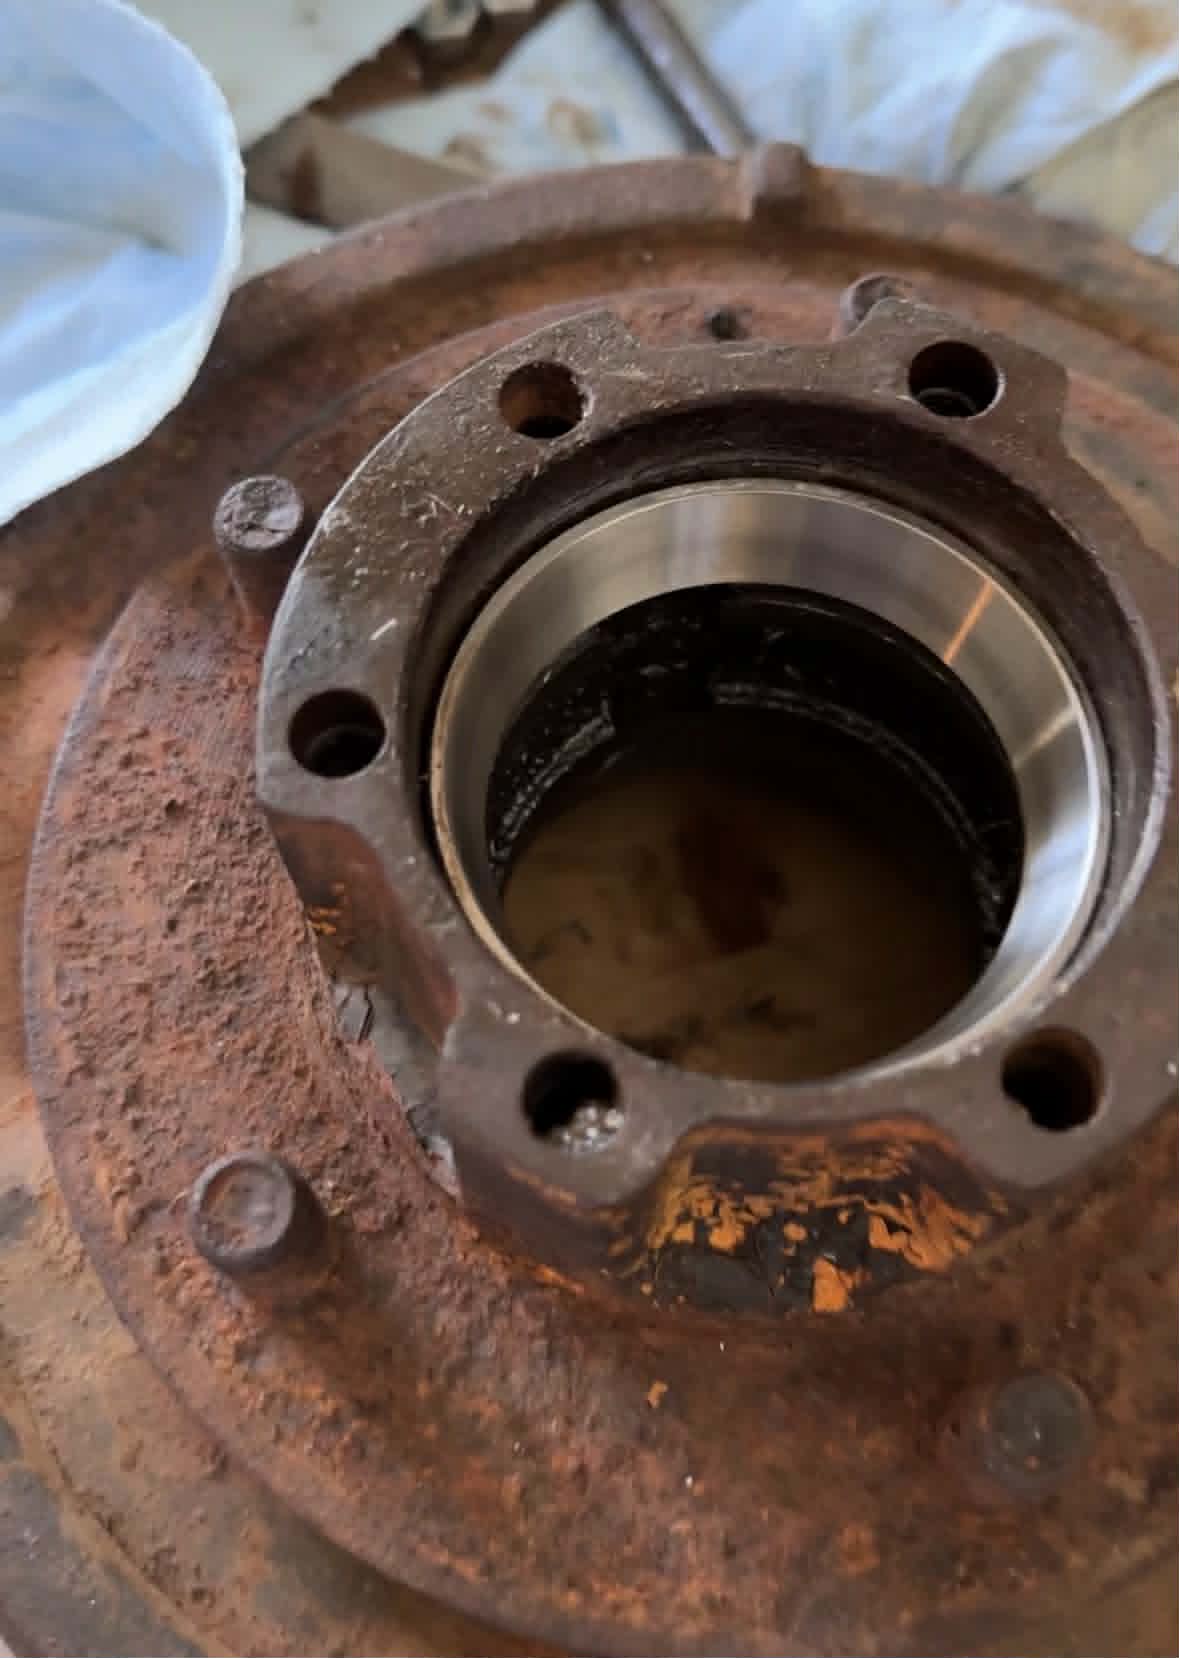
And at the front of the drum there is normally a second bearing in the center bore.

Each of those five studs you see in the image above had to be “thread chased” as they were so rusty the lug nuts meant to hold on the wheels would no longer thread on. Then I had to punch out all the wheel bearing races and hammer in new ones like the one shown below:
I won’t tell you the nightmare that was involved with pressing the bearing races into the drums, but it was bad. I hammered them in crooked, they created a groove, and then I realized the issue was that I had bought the cheapest bearings on earth and they were just too large, so I bought better ones, and those pressed in nicely.
Once the races were in, the tapered roller bearings had to be installed, but not before I packed them with grease using my bearing packing tool (basically two plastic cones that squish the bearing, and a grease fitting in the middle so you can pump grease into the middle and force the grease out of the bearing):

Here’s one of the wheel bearings sitting atop its bearing race:

And then on top of that I pressed in a wheel bearing seal using a hammer and a bearing installer tool I’d rented:


Each brake drum has two wheel bearings, meaning I had to press out two old bearing races and press in two new ones. I had to then pack two tapered rolling bearings, and install two seals. This is, of course, after thoroughly cleaning out the old grease with degreaser, a rag, and brake cleaner. Then once the rear drums were on, I had to fasten them to the axle via a bunch of nuts and washers; after that I installed the rear axle shafts right into the center of the drum, bolting them into place via six bolts:
The whole thing was a job. But even that didn’t hold a candle to the front axle.
The Front Axle Kicked My Butt

I’ll start with the easy part of the front axle job: replacing the axle seals in the differential:
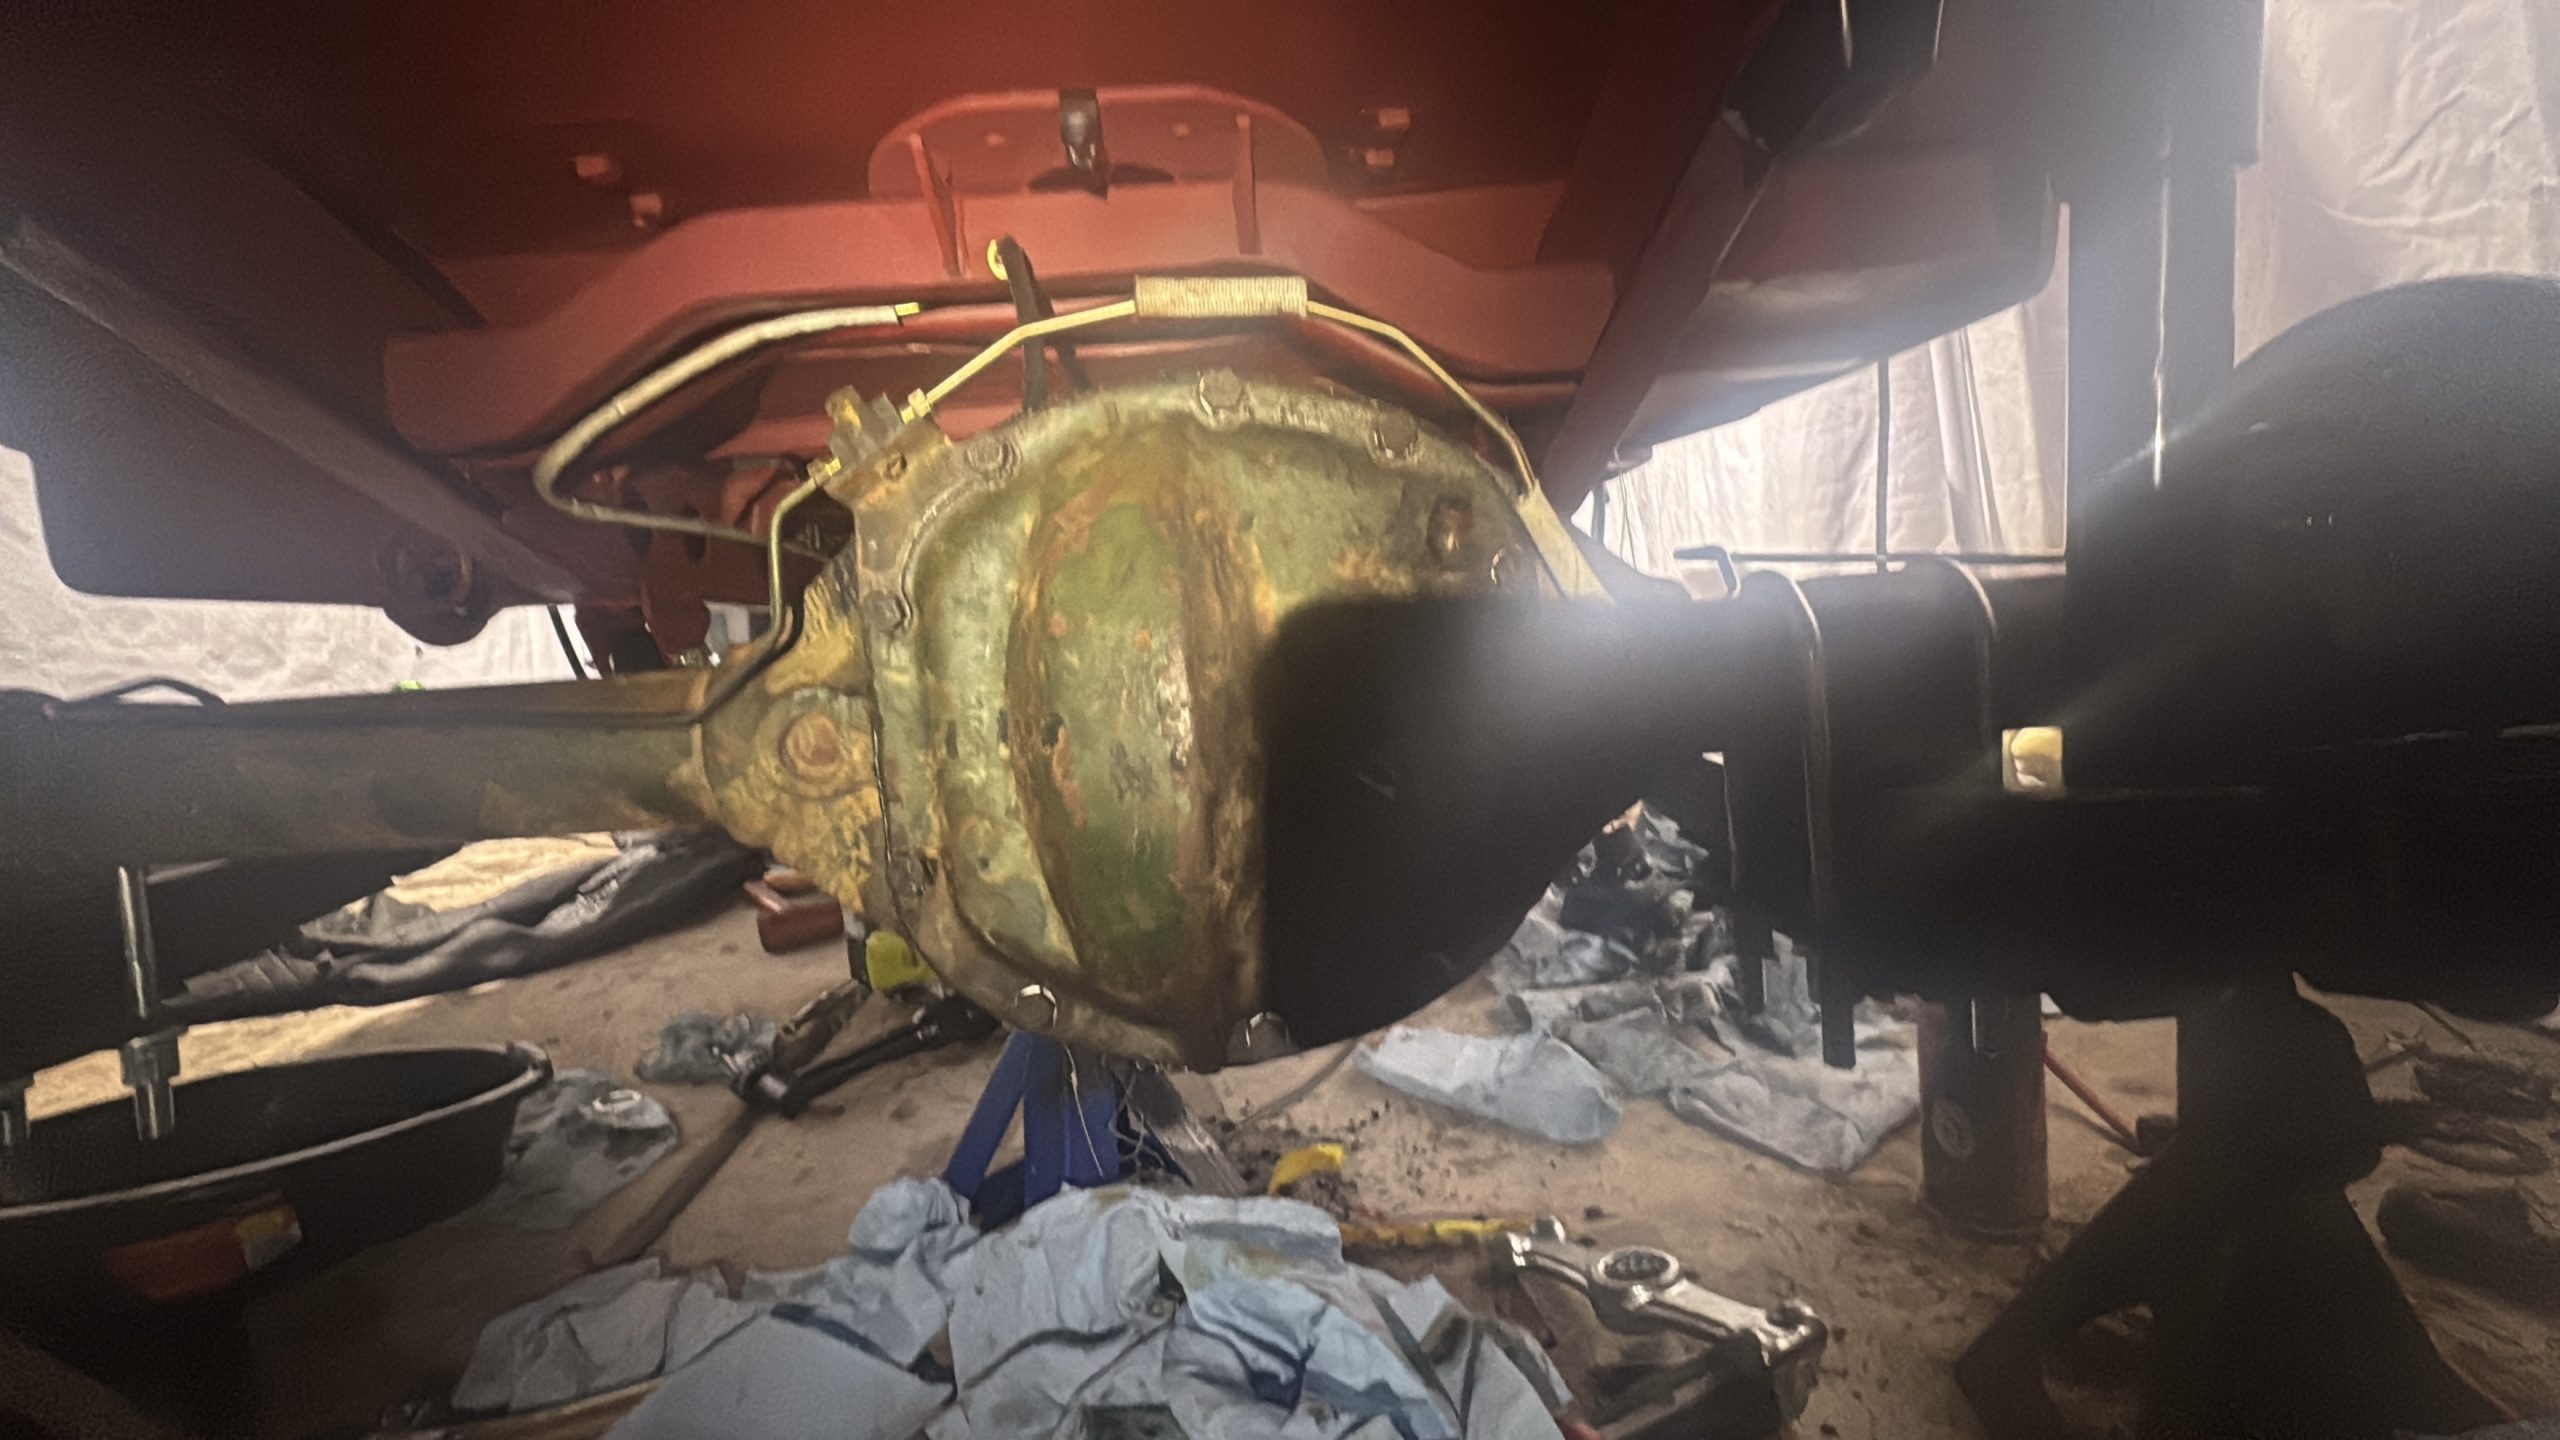
That went about the same as the rear, except I didn’t install the seals backwards and I found my carrier bearing caps to be on correctly. Unfortunately, what I also found was that all of the nuts holding my ring gear to the differential case were totally loose.
Back when I was preparing a 1948 Willys CJ-2A Jeep for a trip to Moab from Michigan, I had noticed that these bolts had completely loosened to the point where they actually hit the axle housing and bent the whole differential case to the point where I had to shove little shims (copper crush washers, if I’m honest) between the diff case and the ring gear to get the ring gear to mesh right with the pinion. Anyway, I’m glad I checked this on this eBay Jeep, but it meant I had to remove the eight bolts and re-install them with loctite:
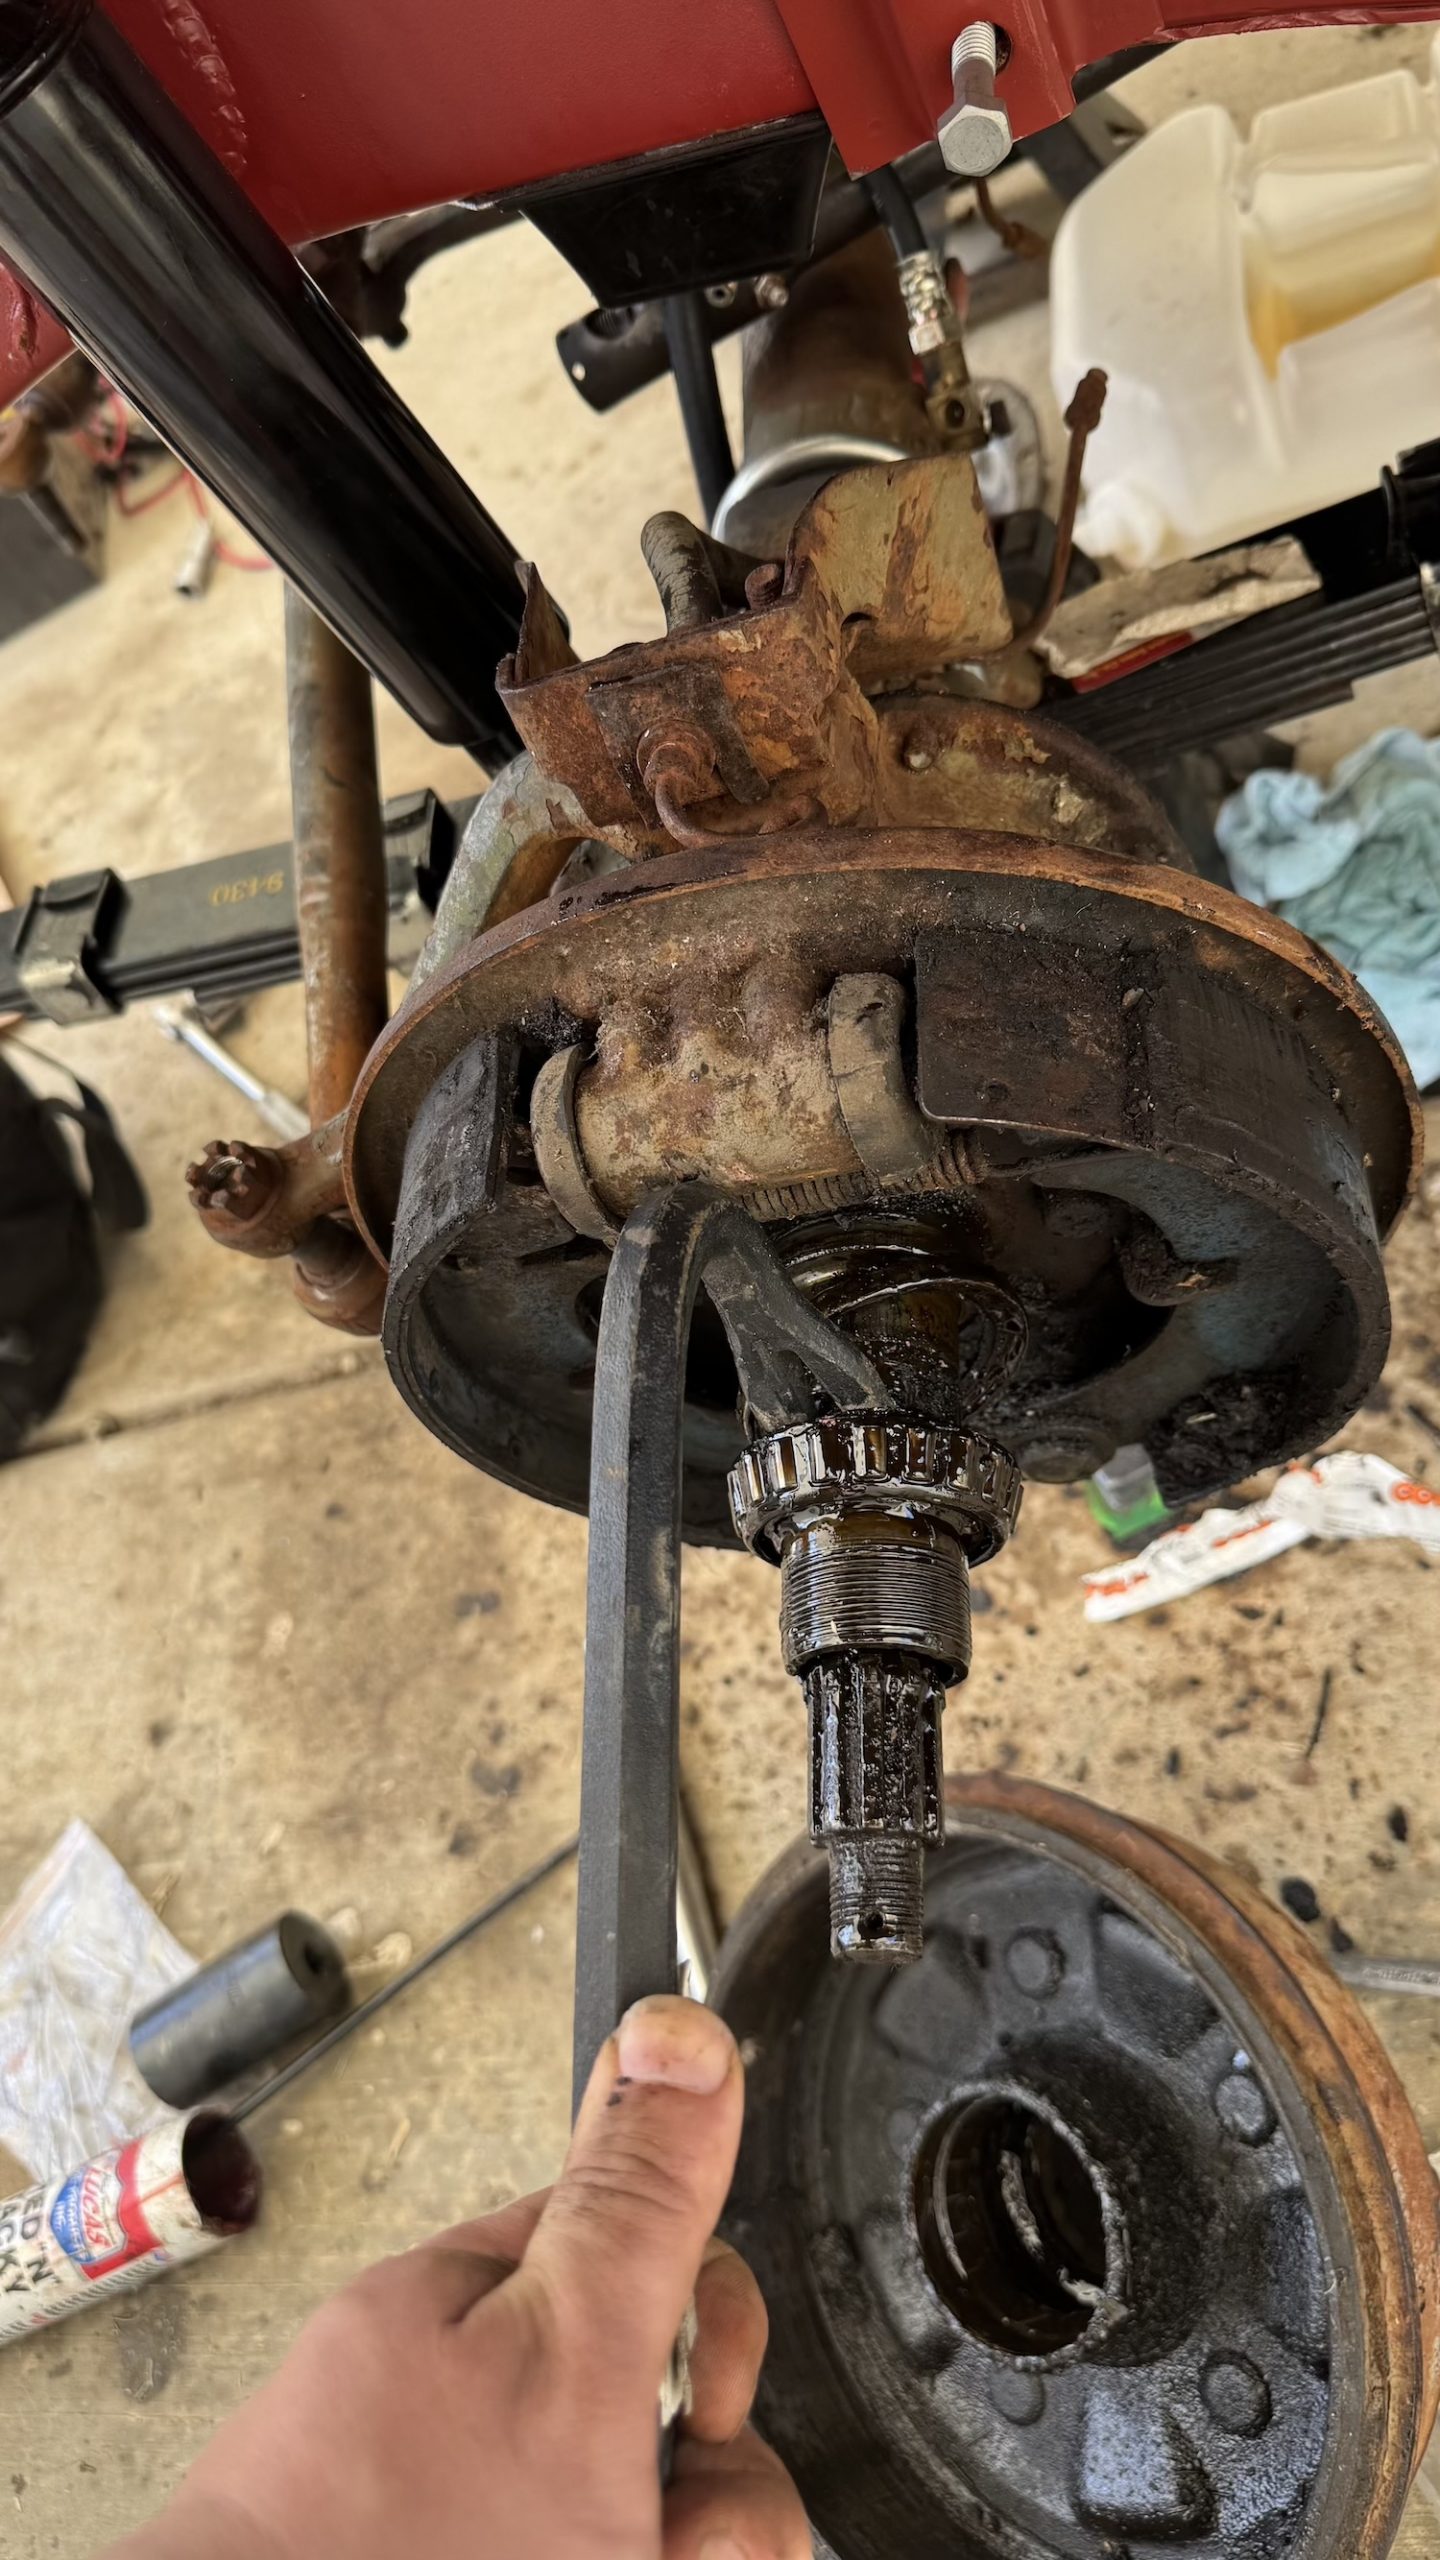
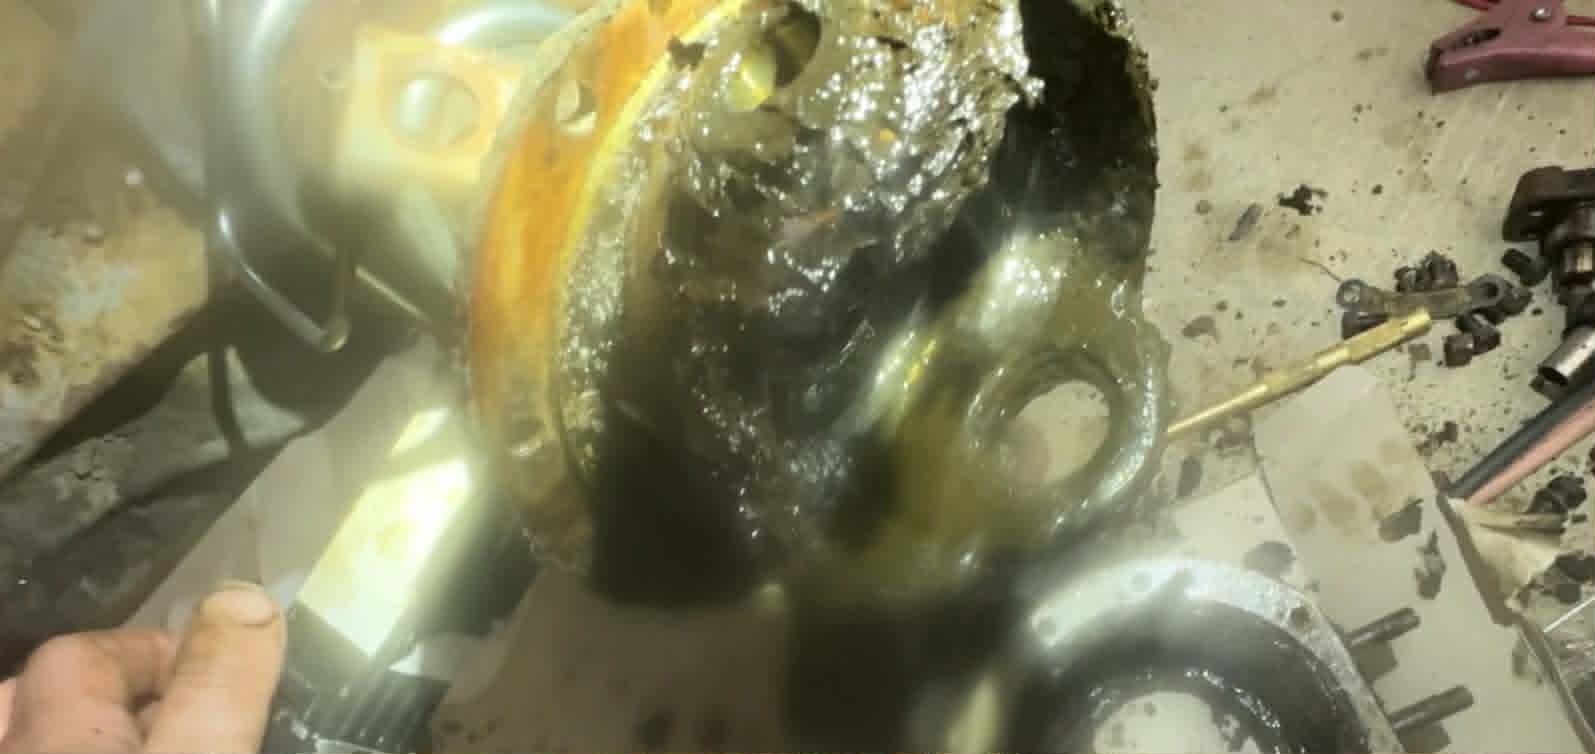
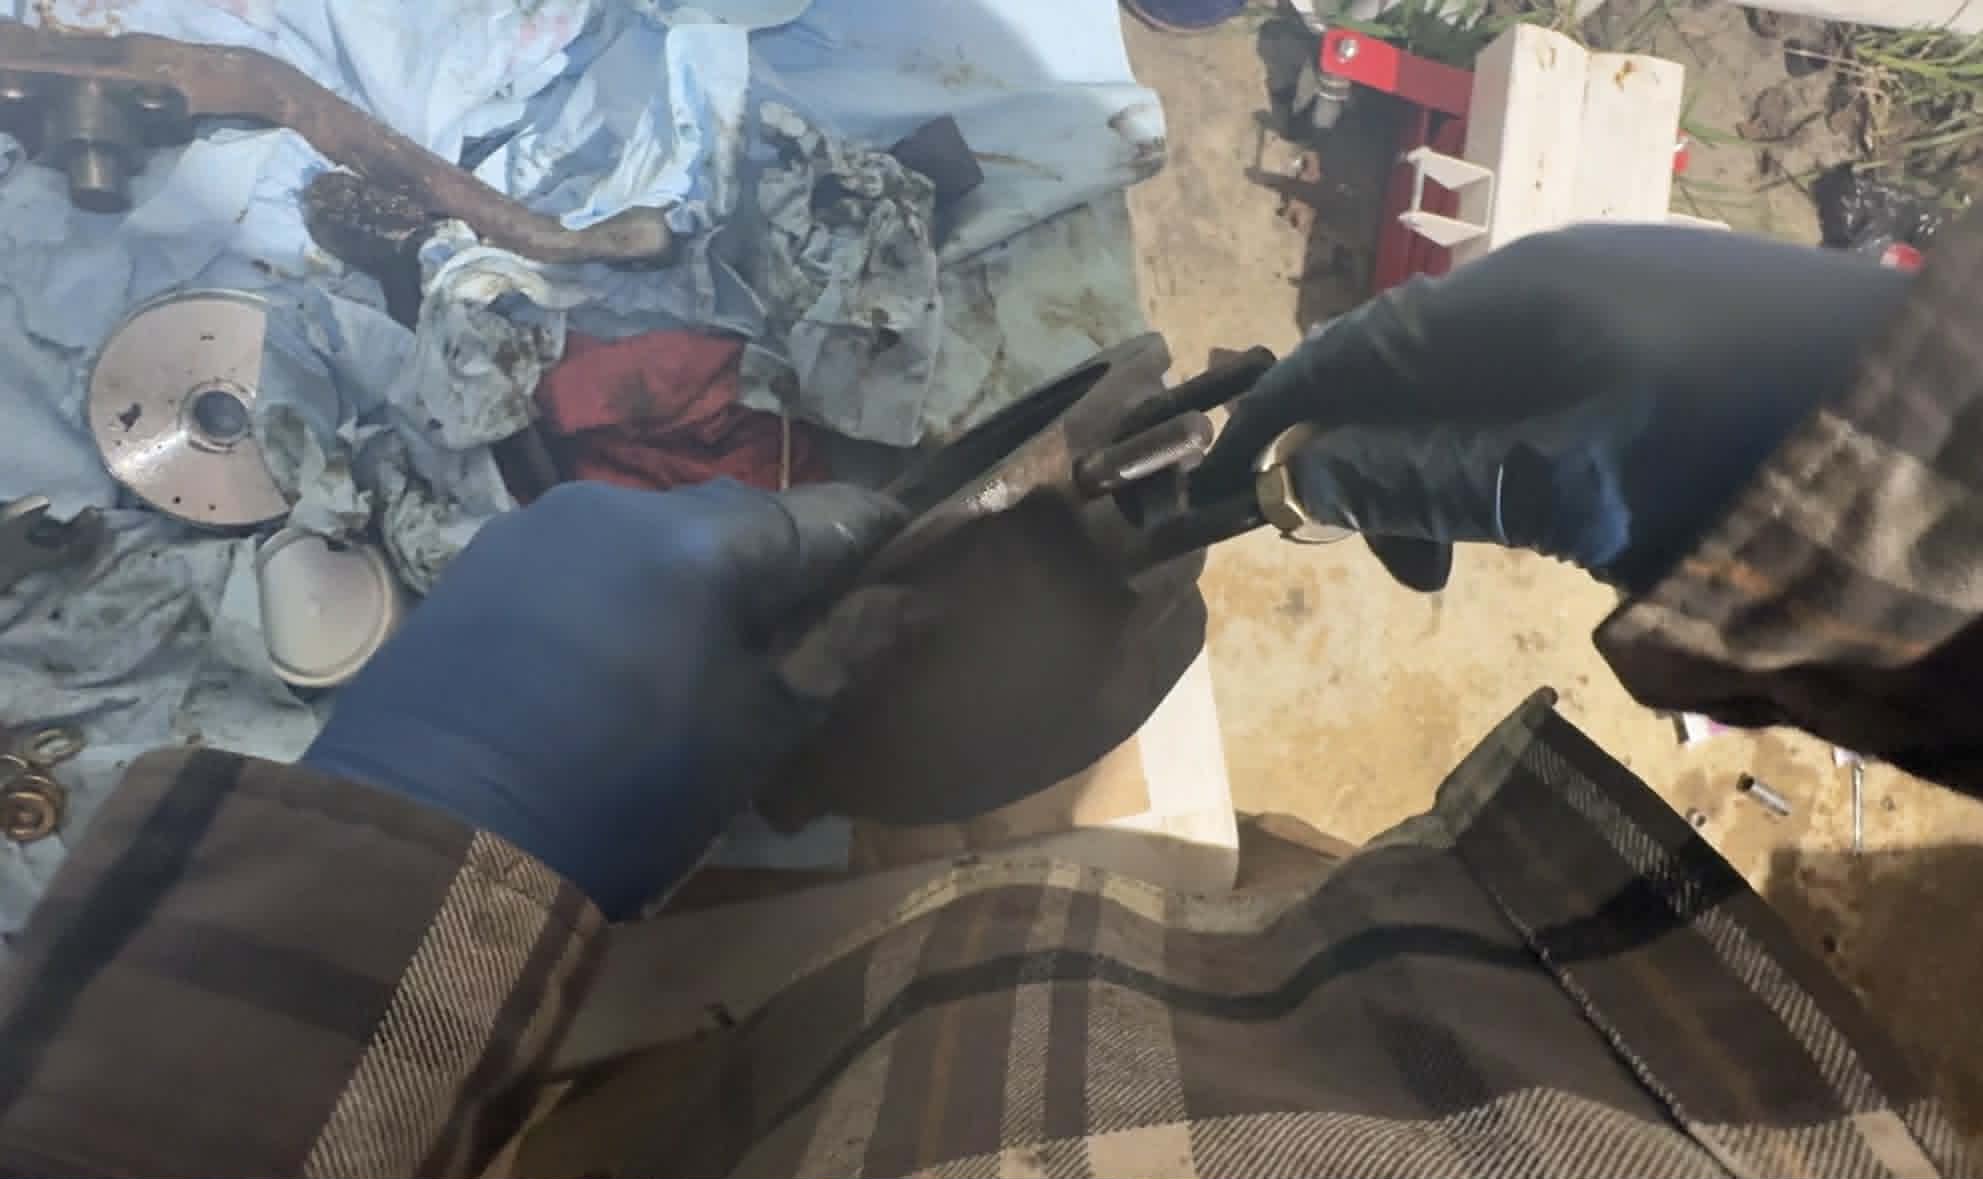
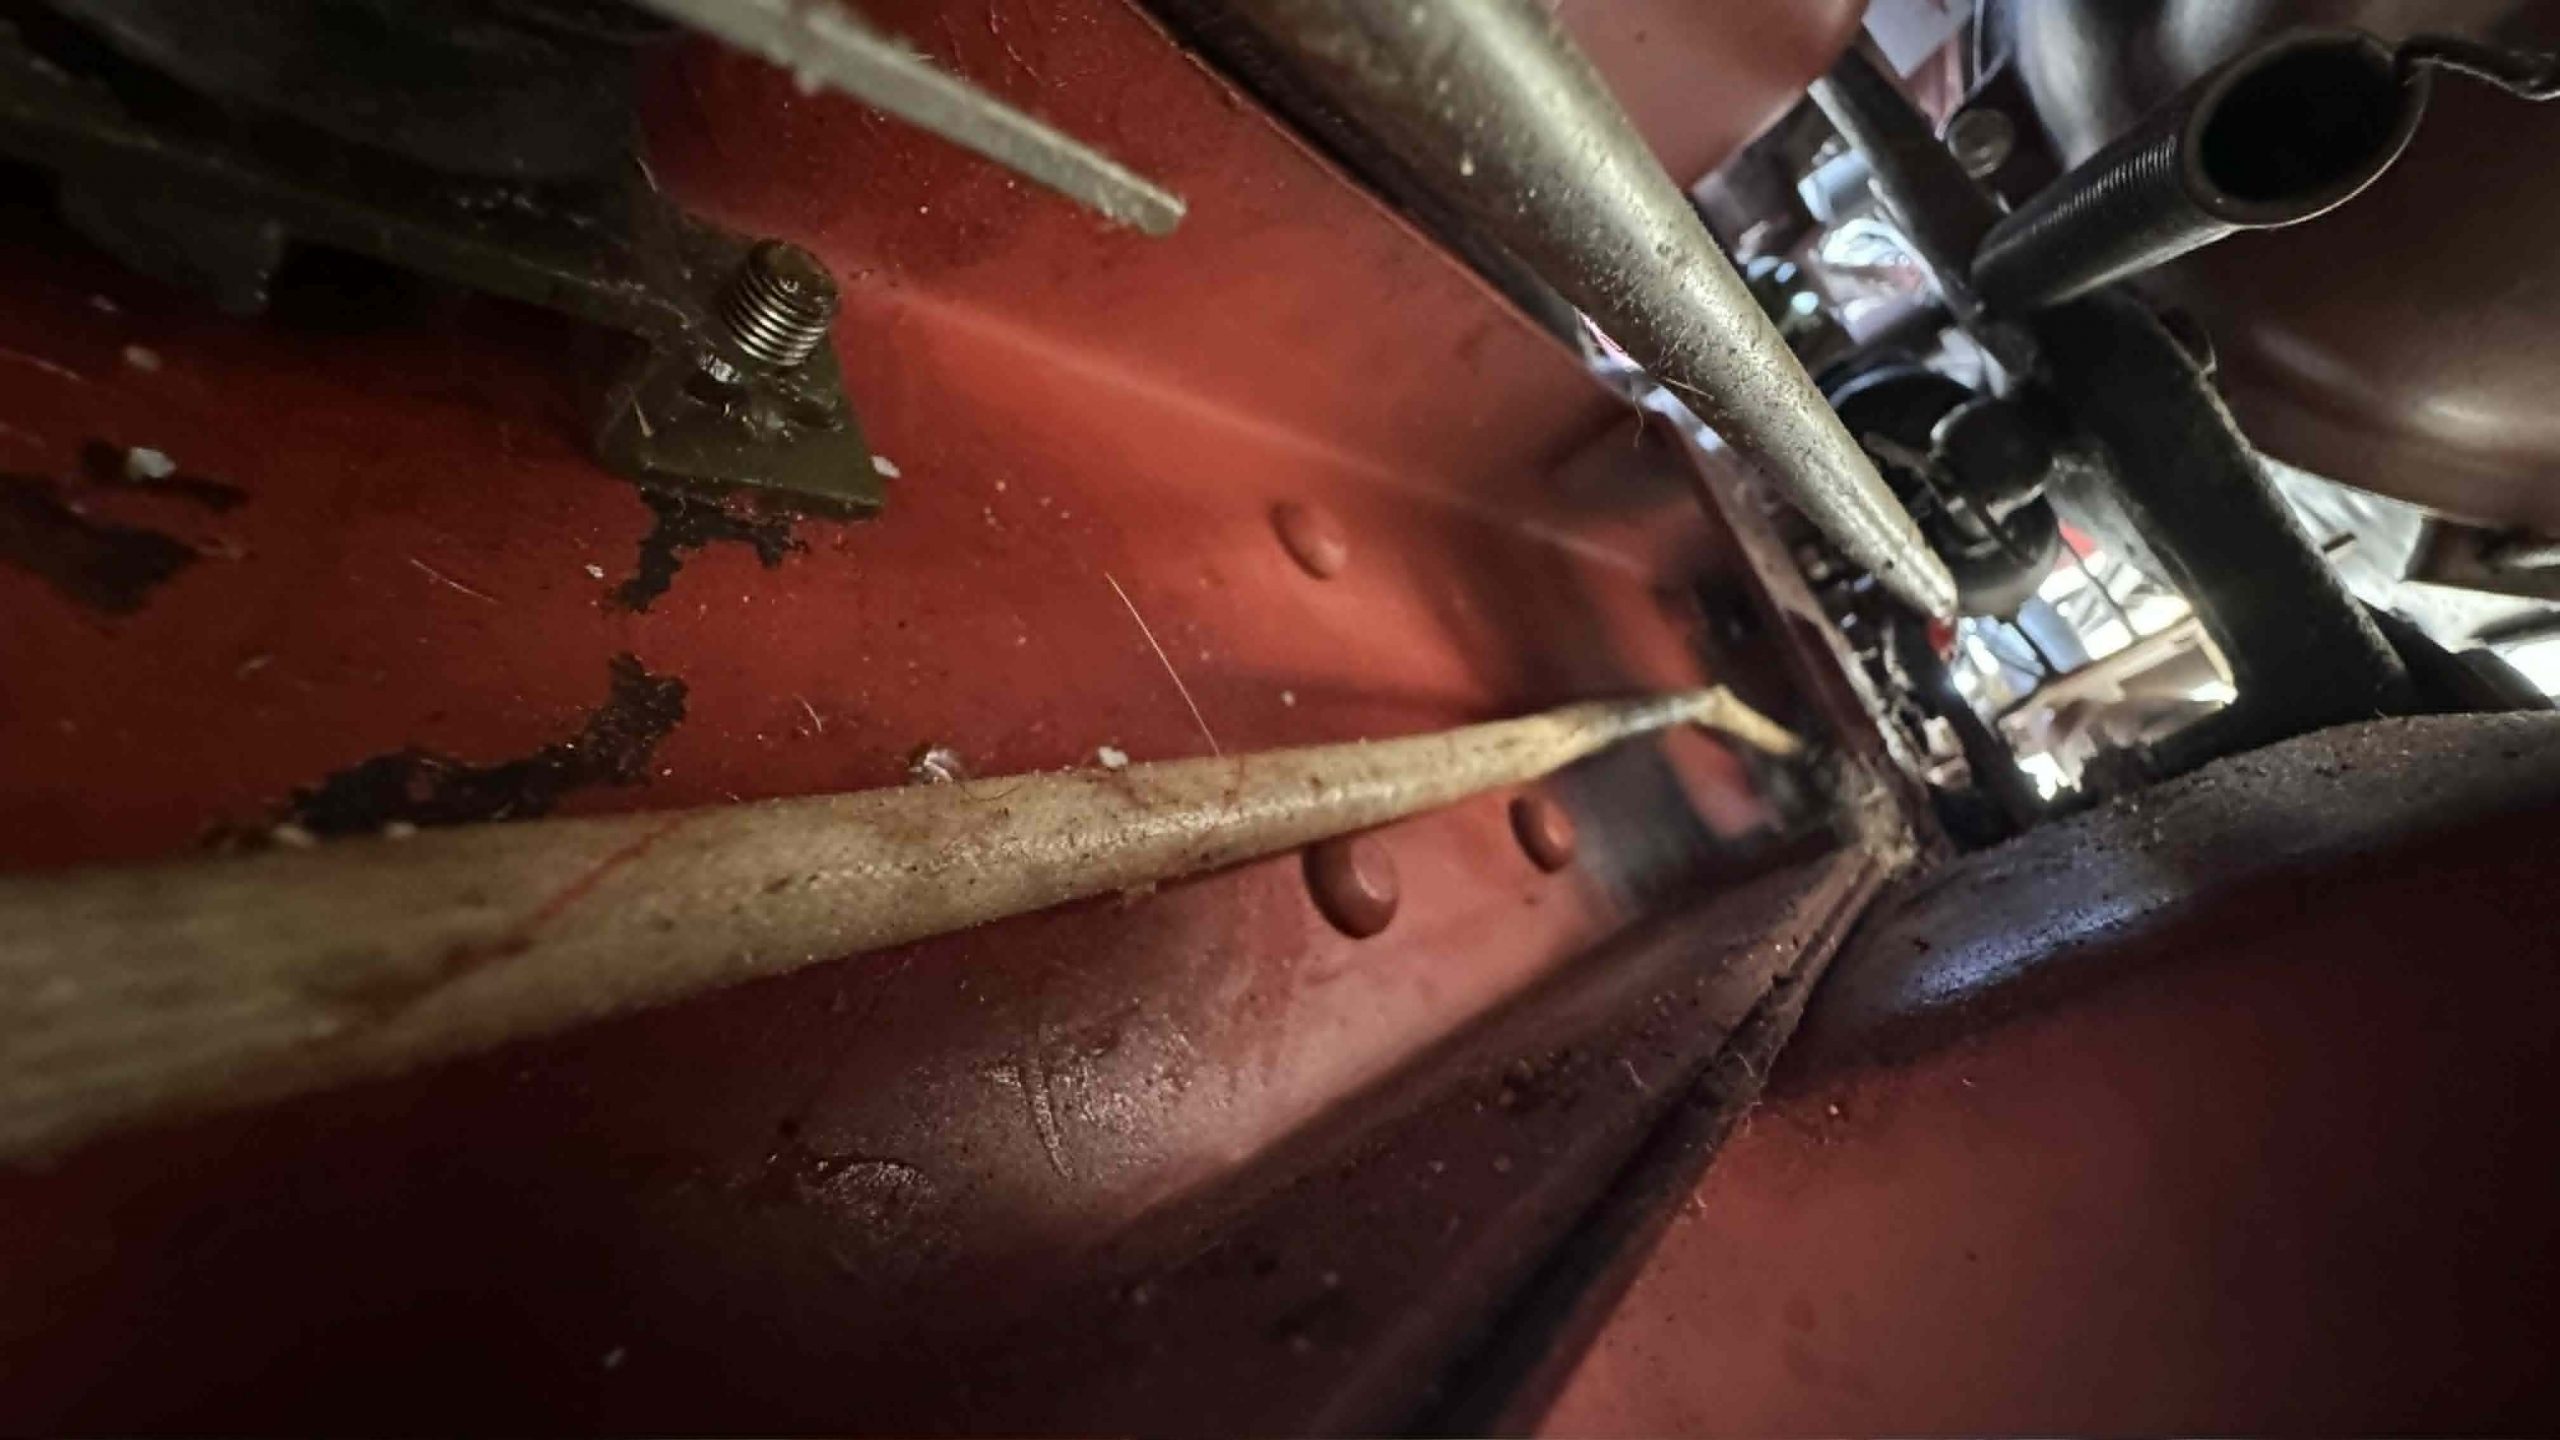
Moving outboard, the front brakes were extremely grimy:

Undoing the six bolts holding both the backing plate and the spindle onto the axle housing left me with this in my hand:

And this was left on the axle:

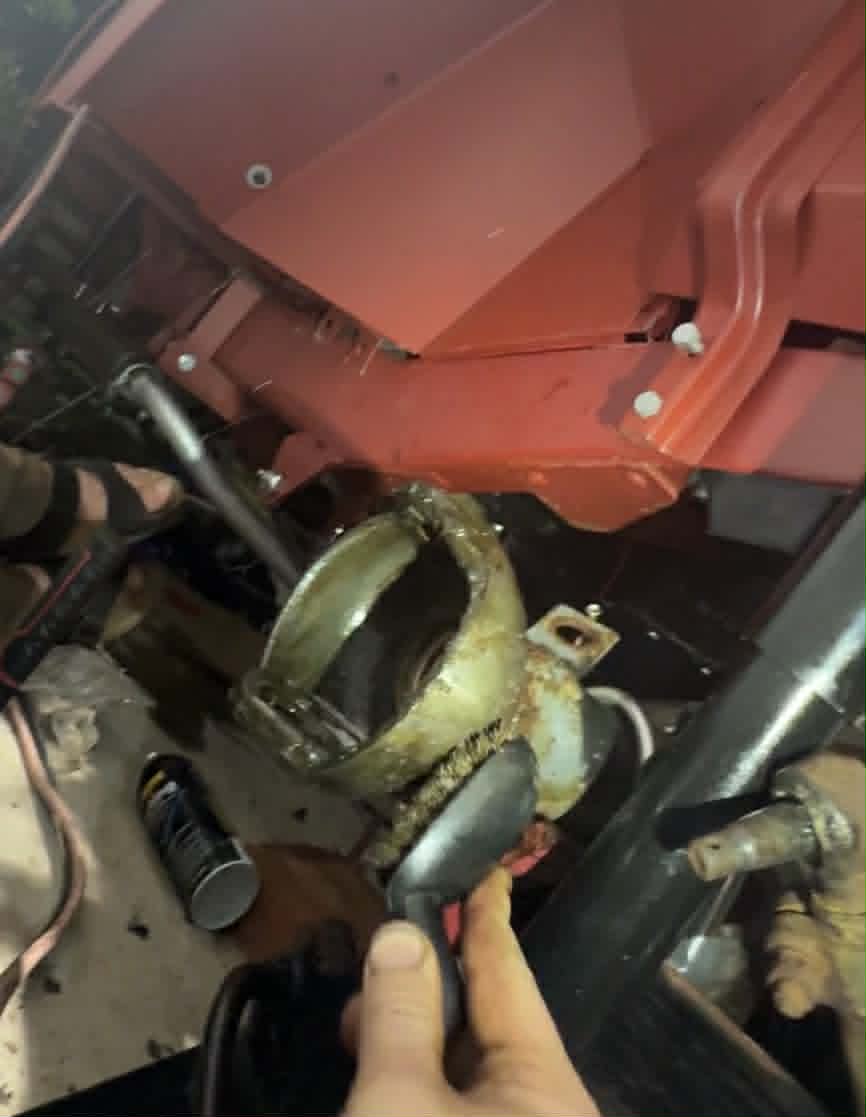
What you see there is called a closed knuckle, and while many off-roaders like this for its strength and serviceability, the reality is: It’s an absolute mess.
A typical modern vehicle will utilize what are called ball joints to allow the knuckle (and thus the wheels) to turn when you move the steering wheel, and axle shafts with enclosed CV joints (these joints are necessary to allow the axle send torque to the wheels when in 4wd while also being able to pivot when steering):

See how those ball joints are enclosed (and feature rubber boots to keep grease in)? And see how those CV joints are also enclosed, with those big rubber boots that also keep grease in?
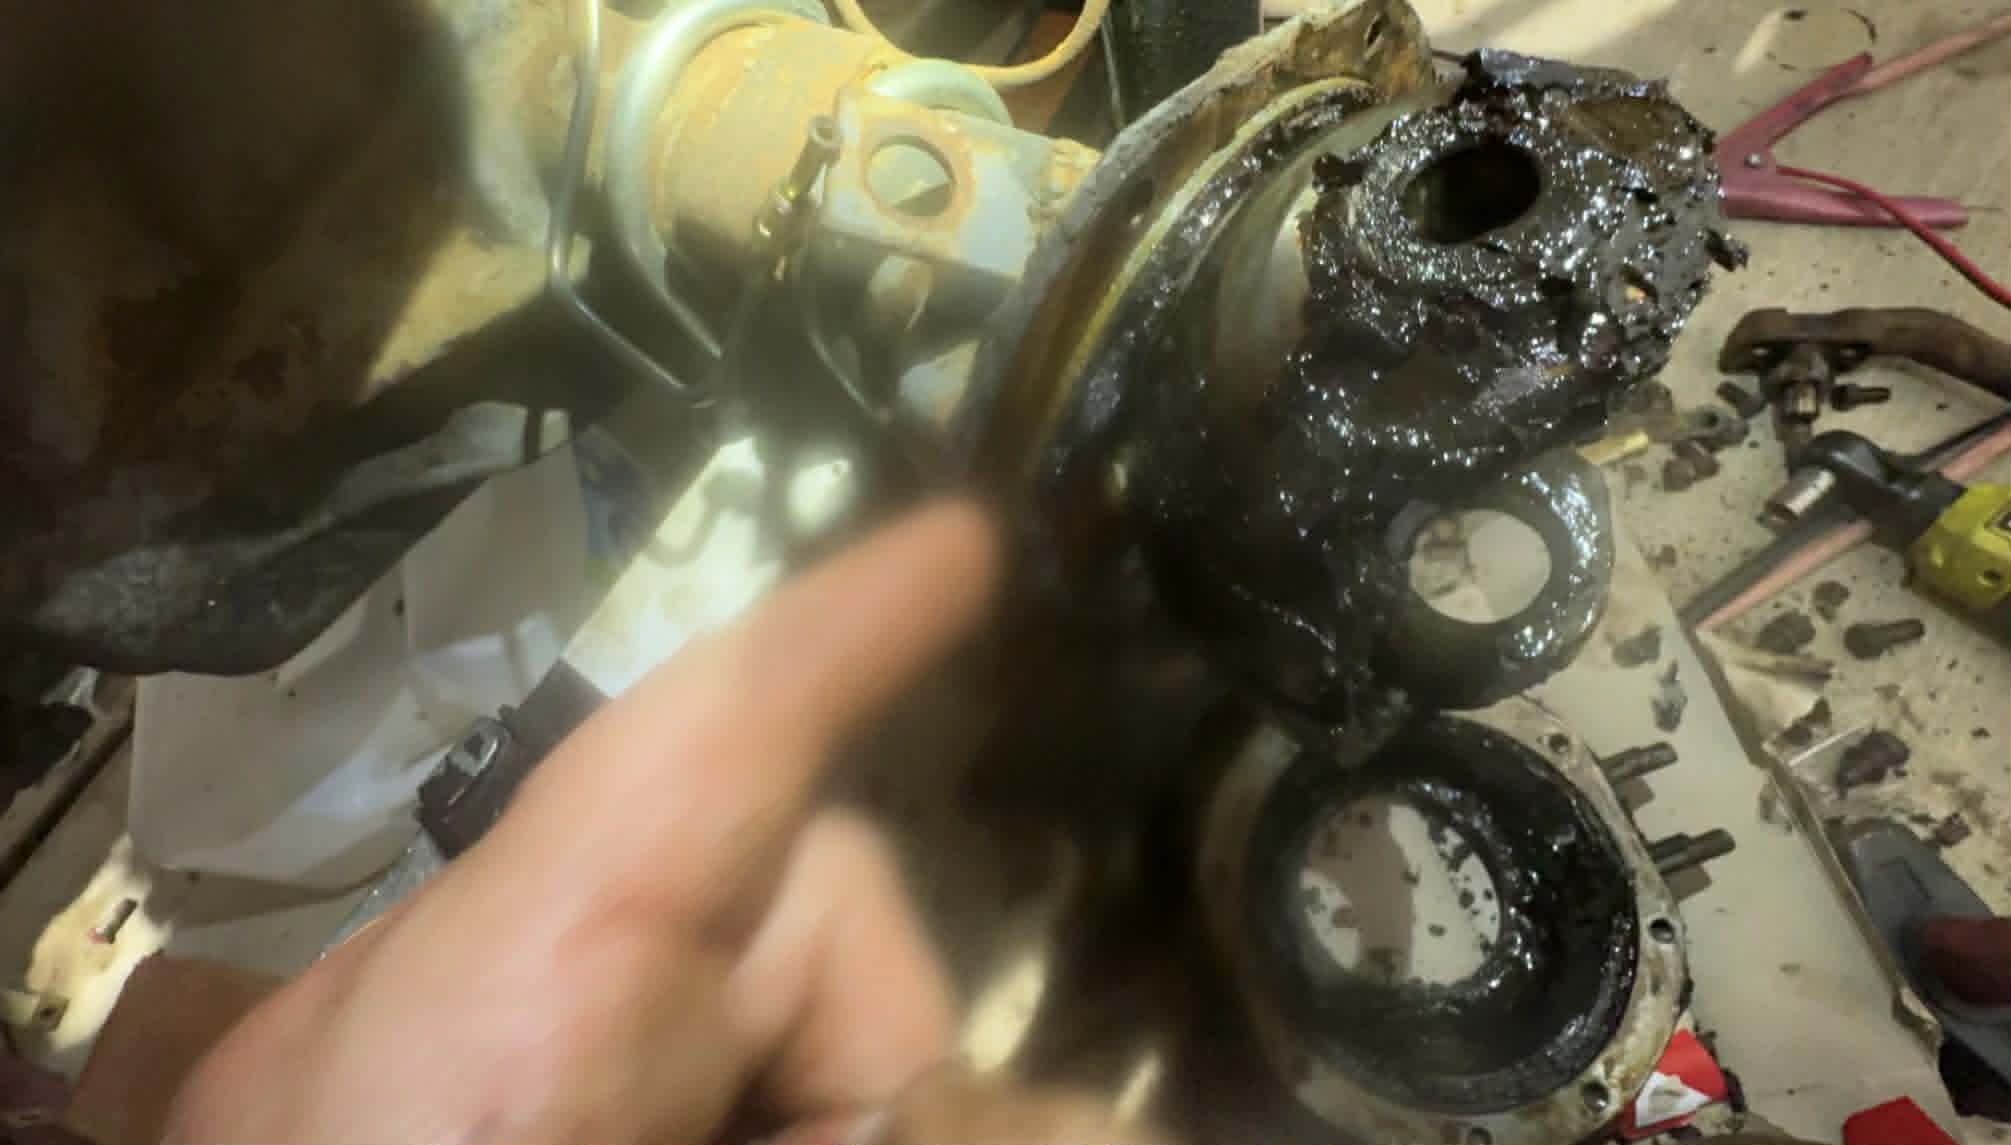
Well, a closed-knuckle design takes that whole space between the knuckle and the axle housing, closes it up, and fills it with the nastiest goop you’ve ever seen — goop whose job is to lubricate the axle shaft’s CV joint and the kingpin bearings (which take place of ball joints).
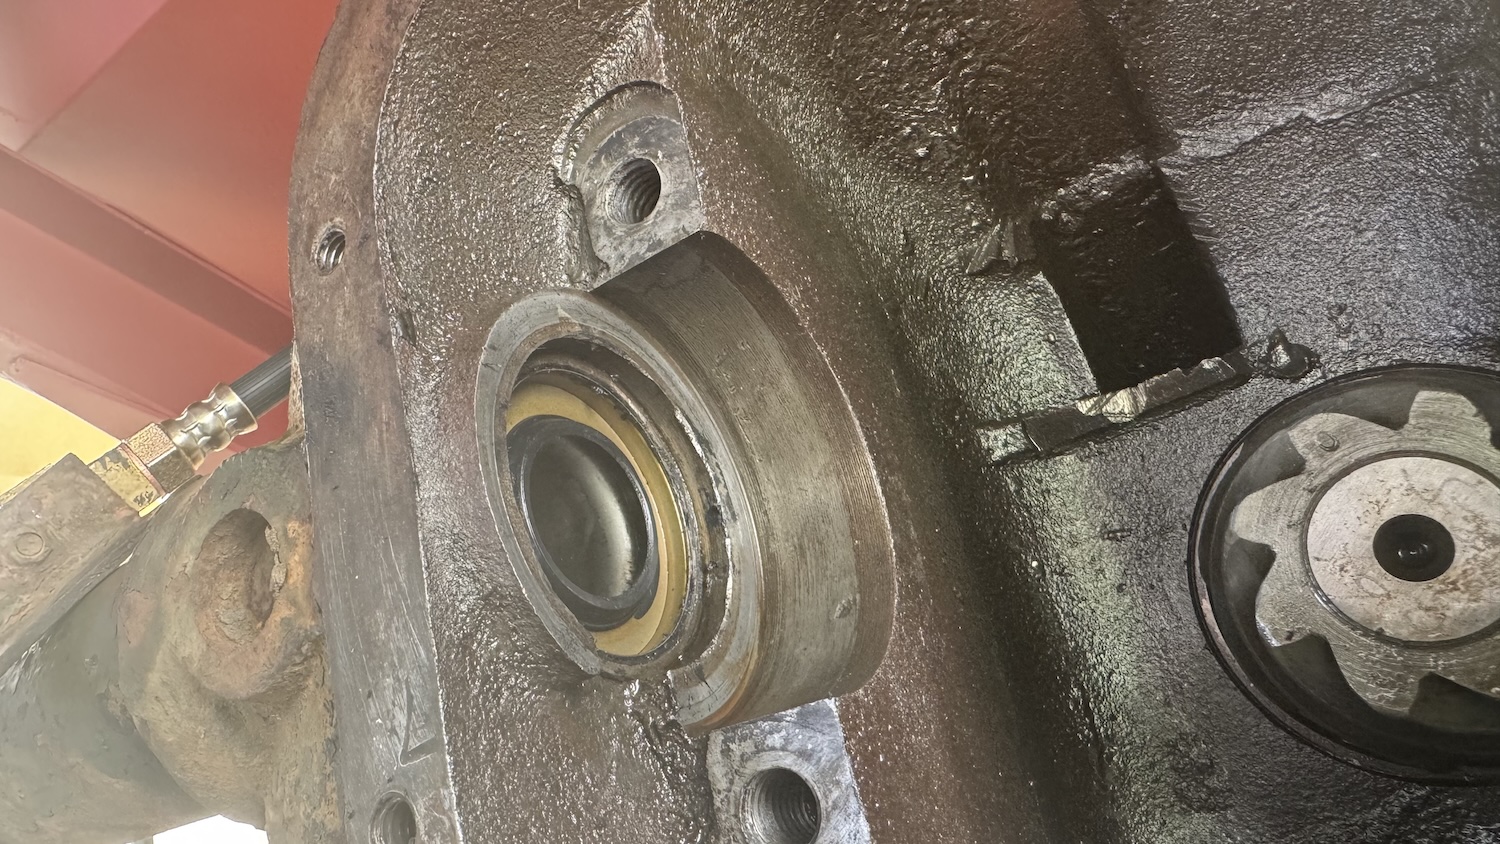
You can see the axle shaft CV joint (in my case it’s called a “Tracta joint” — the rarest of the three joints offered on WWII Jeep front axle shafts) in the photo two above. And here you can see some of the nasty goop in that closed knuckle:

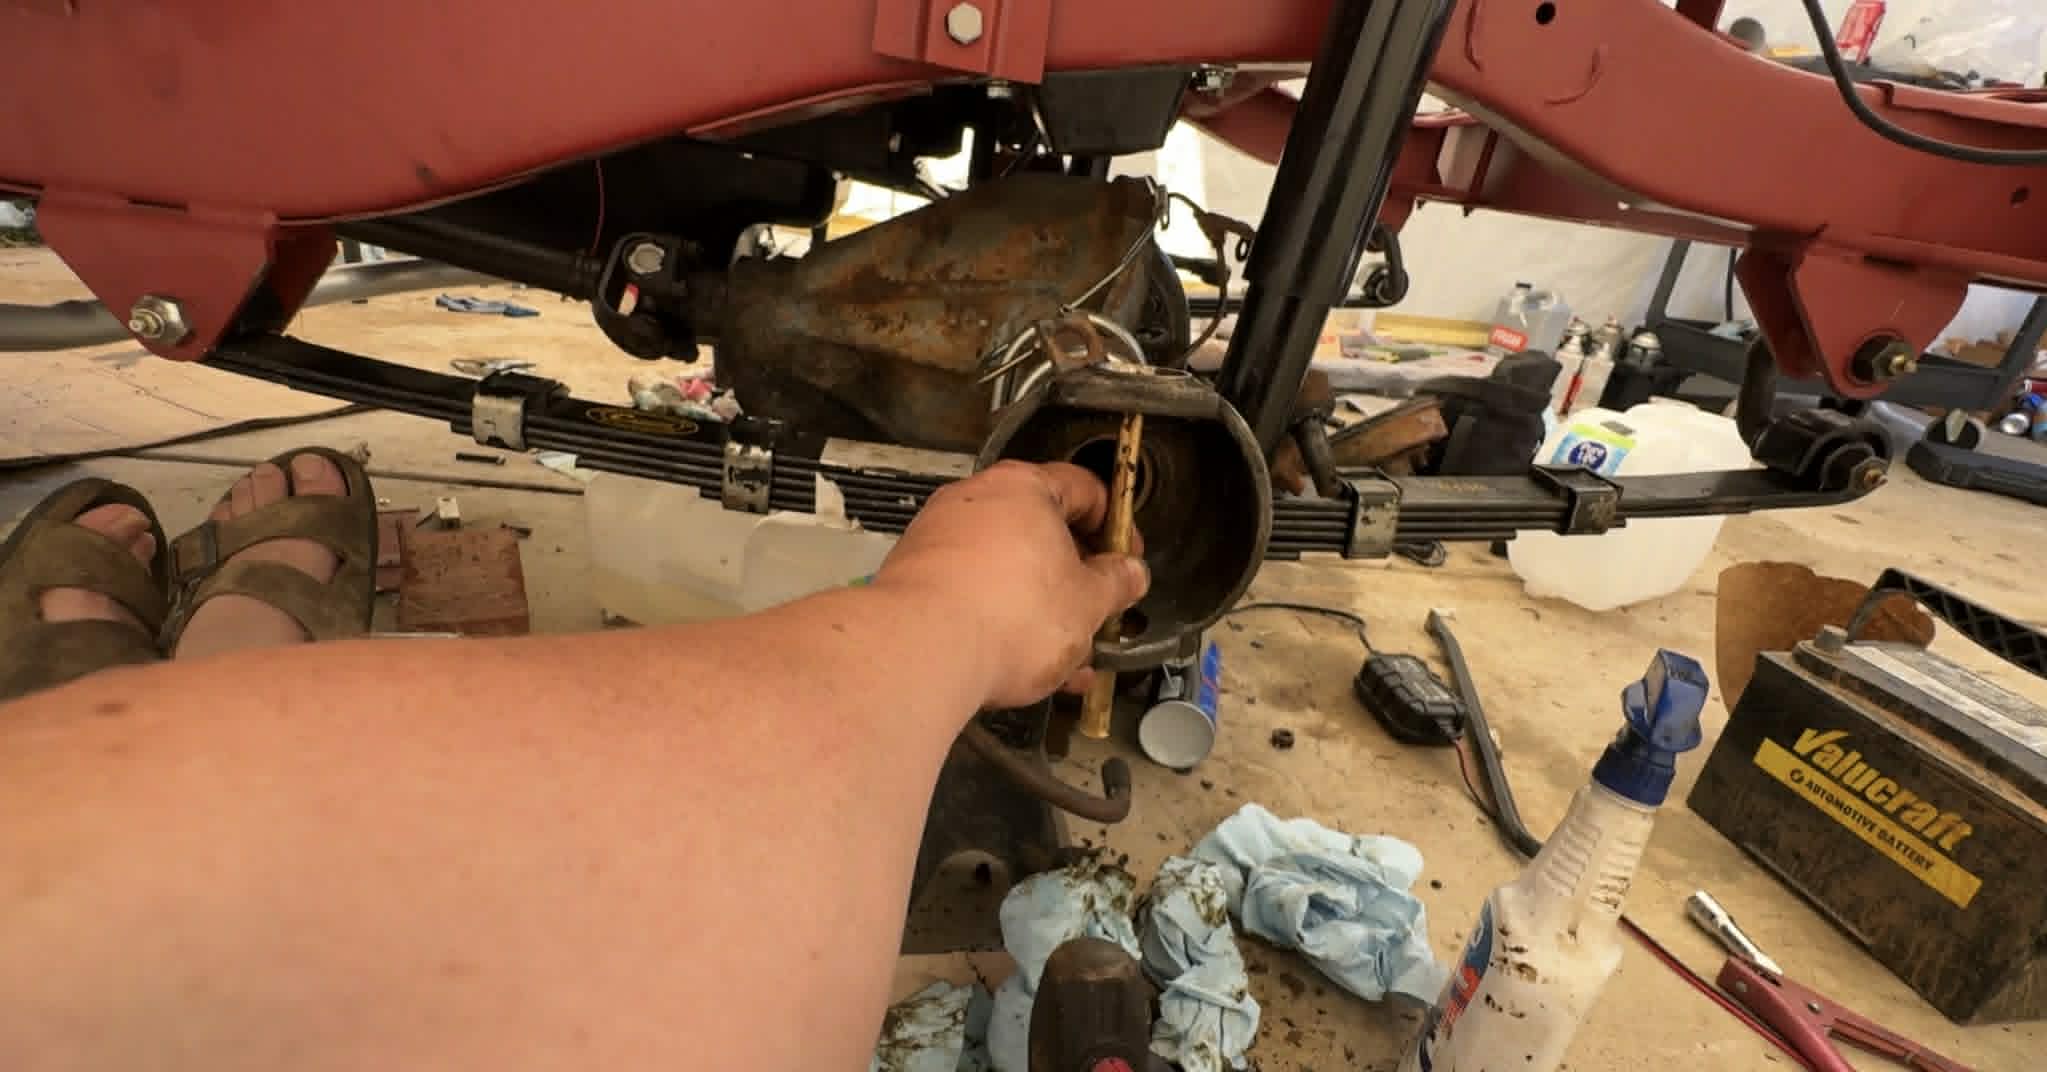
To get that knuckle off, I had to remove a felt/rubber seal on the back of the knuckle that keeps the grease in. This seal rubs up against the spherical outer section of the axle tube: 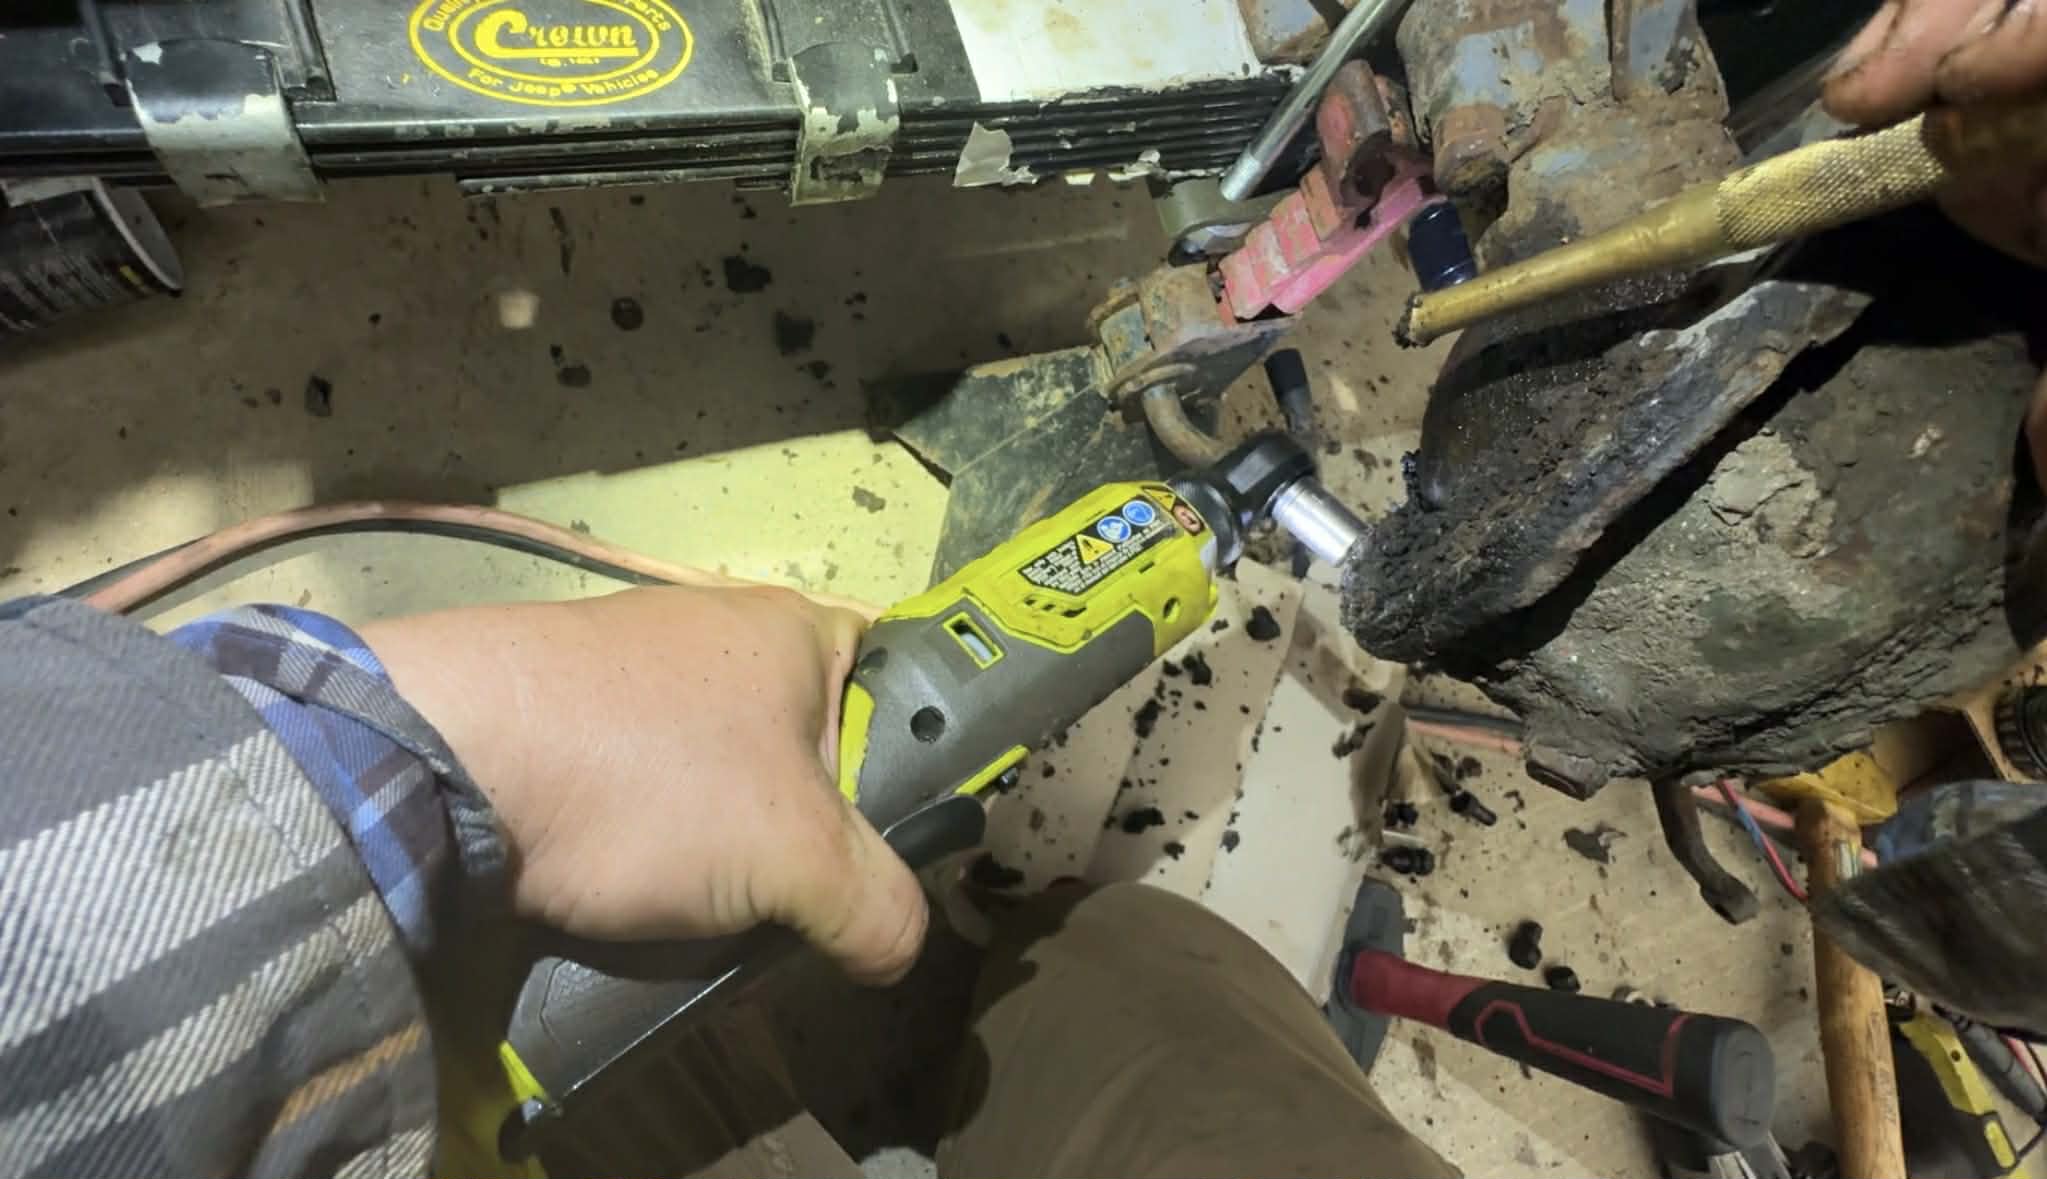
With the seal off, I could now remove the knuckle, revealing some true filth:
Cleaning each knuckle took what felt like an eternity — chiseling, spraying, brushing, power-washing, scrubbing. It was far from glamorous:

Ultimately, I got the knuckles looking nice enough, but I still had issues to resolve, namely that studs going into the knuckle had spun out since the nuts were seized in place:
I had to heat up the nuts and remove them, and then I had to thread-chase all the studs since they were rusty and grimy:
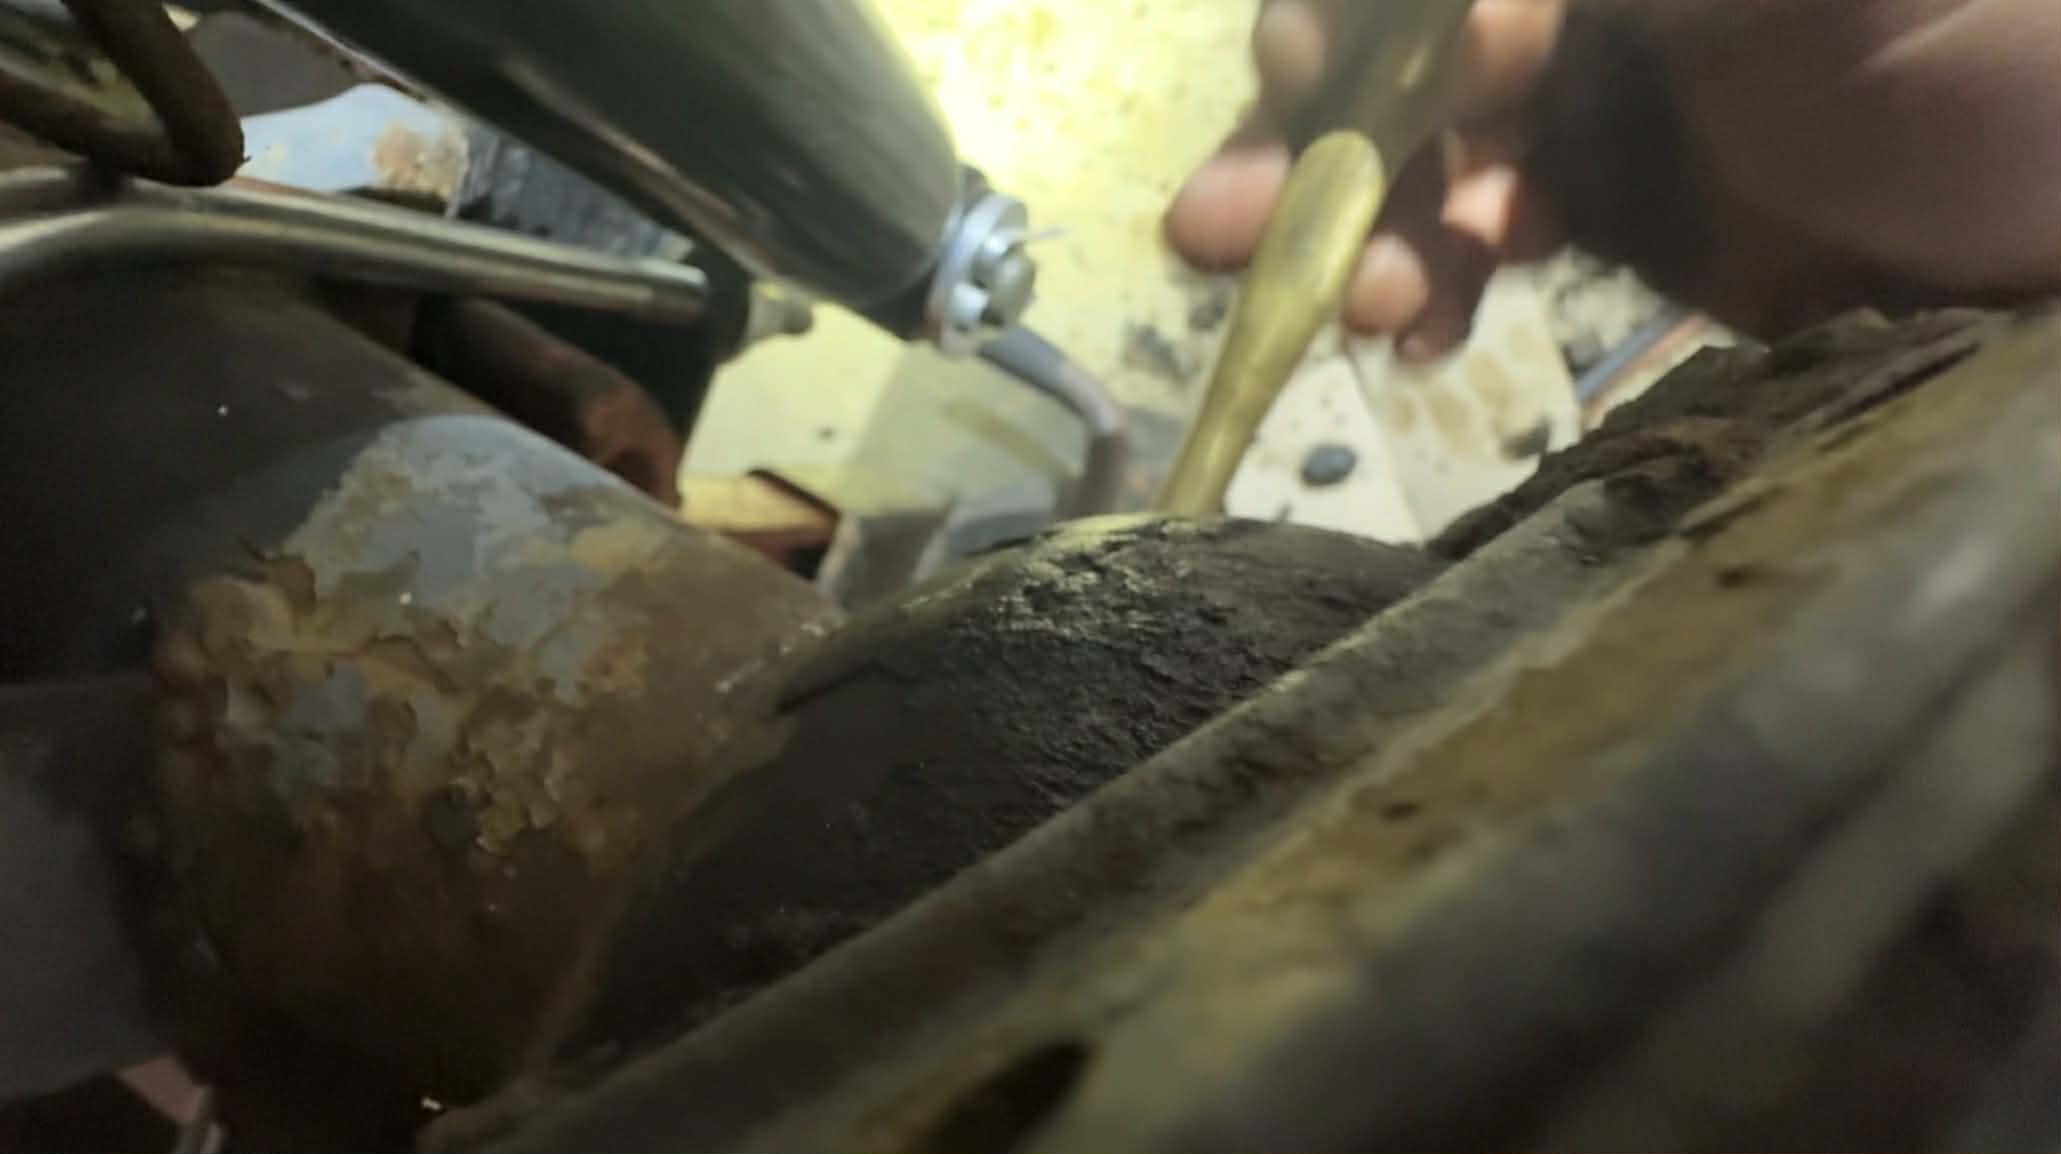
Cleaning the nasty axle tube was easier since it’s a smooth bearing surface, but I still had to break out the brush:

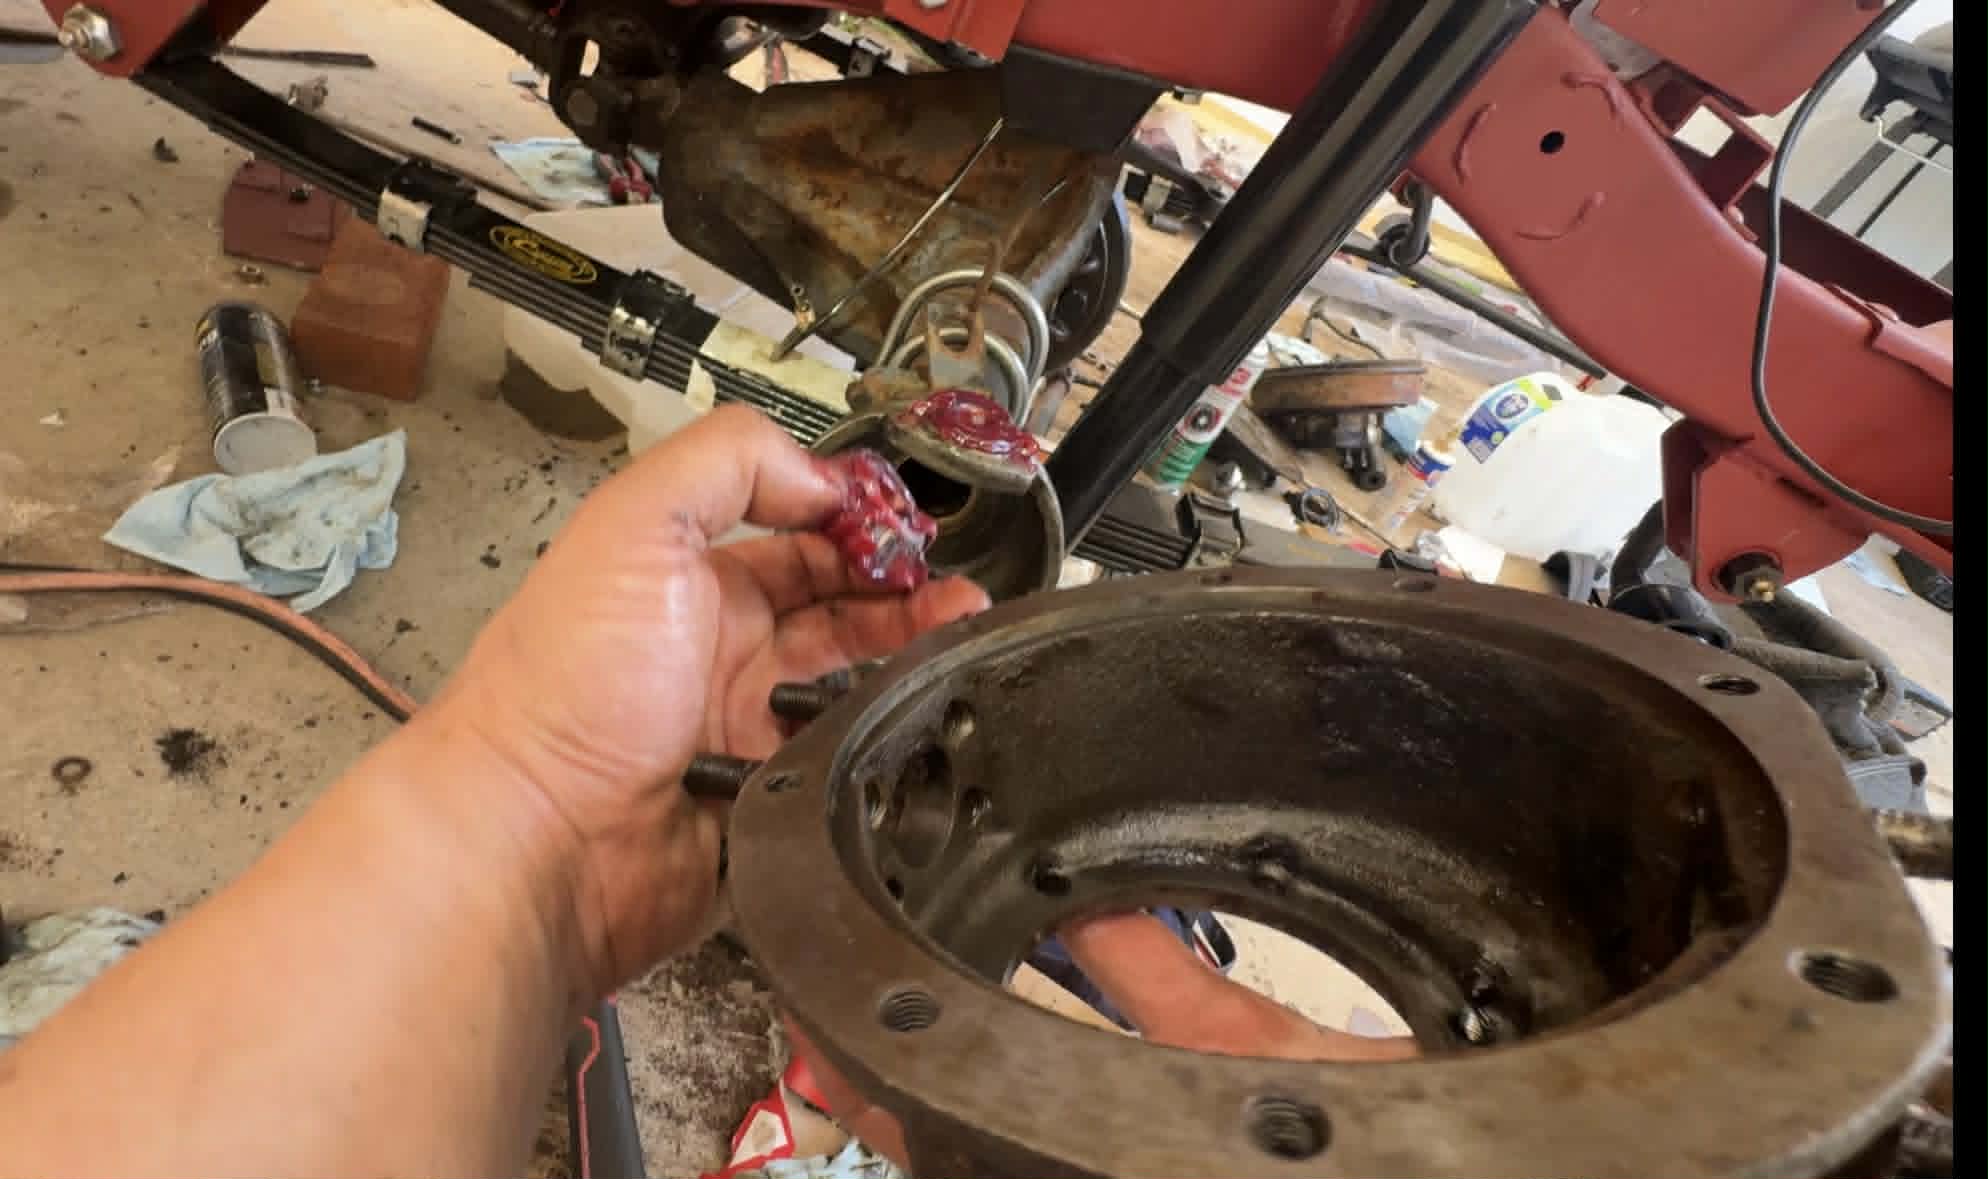
Once the axle tube was cleaned off, I punched out the upper and lower kingpin bearing races (the kingpins are the bearings about which the wheels tires turn when you move the steering wheel).

I then hammered in new kingpin bearing races:

Then I packed grease into my new kingpin tapered roller bearings. Here’s a look at what the tapered roller bearing/race set looks like:

And here’s me packing grease into a tapered roller bearing:
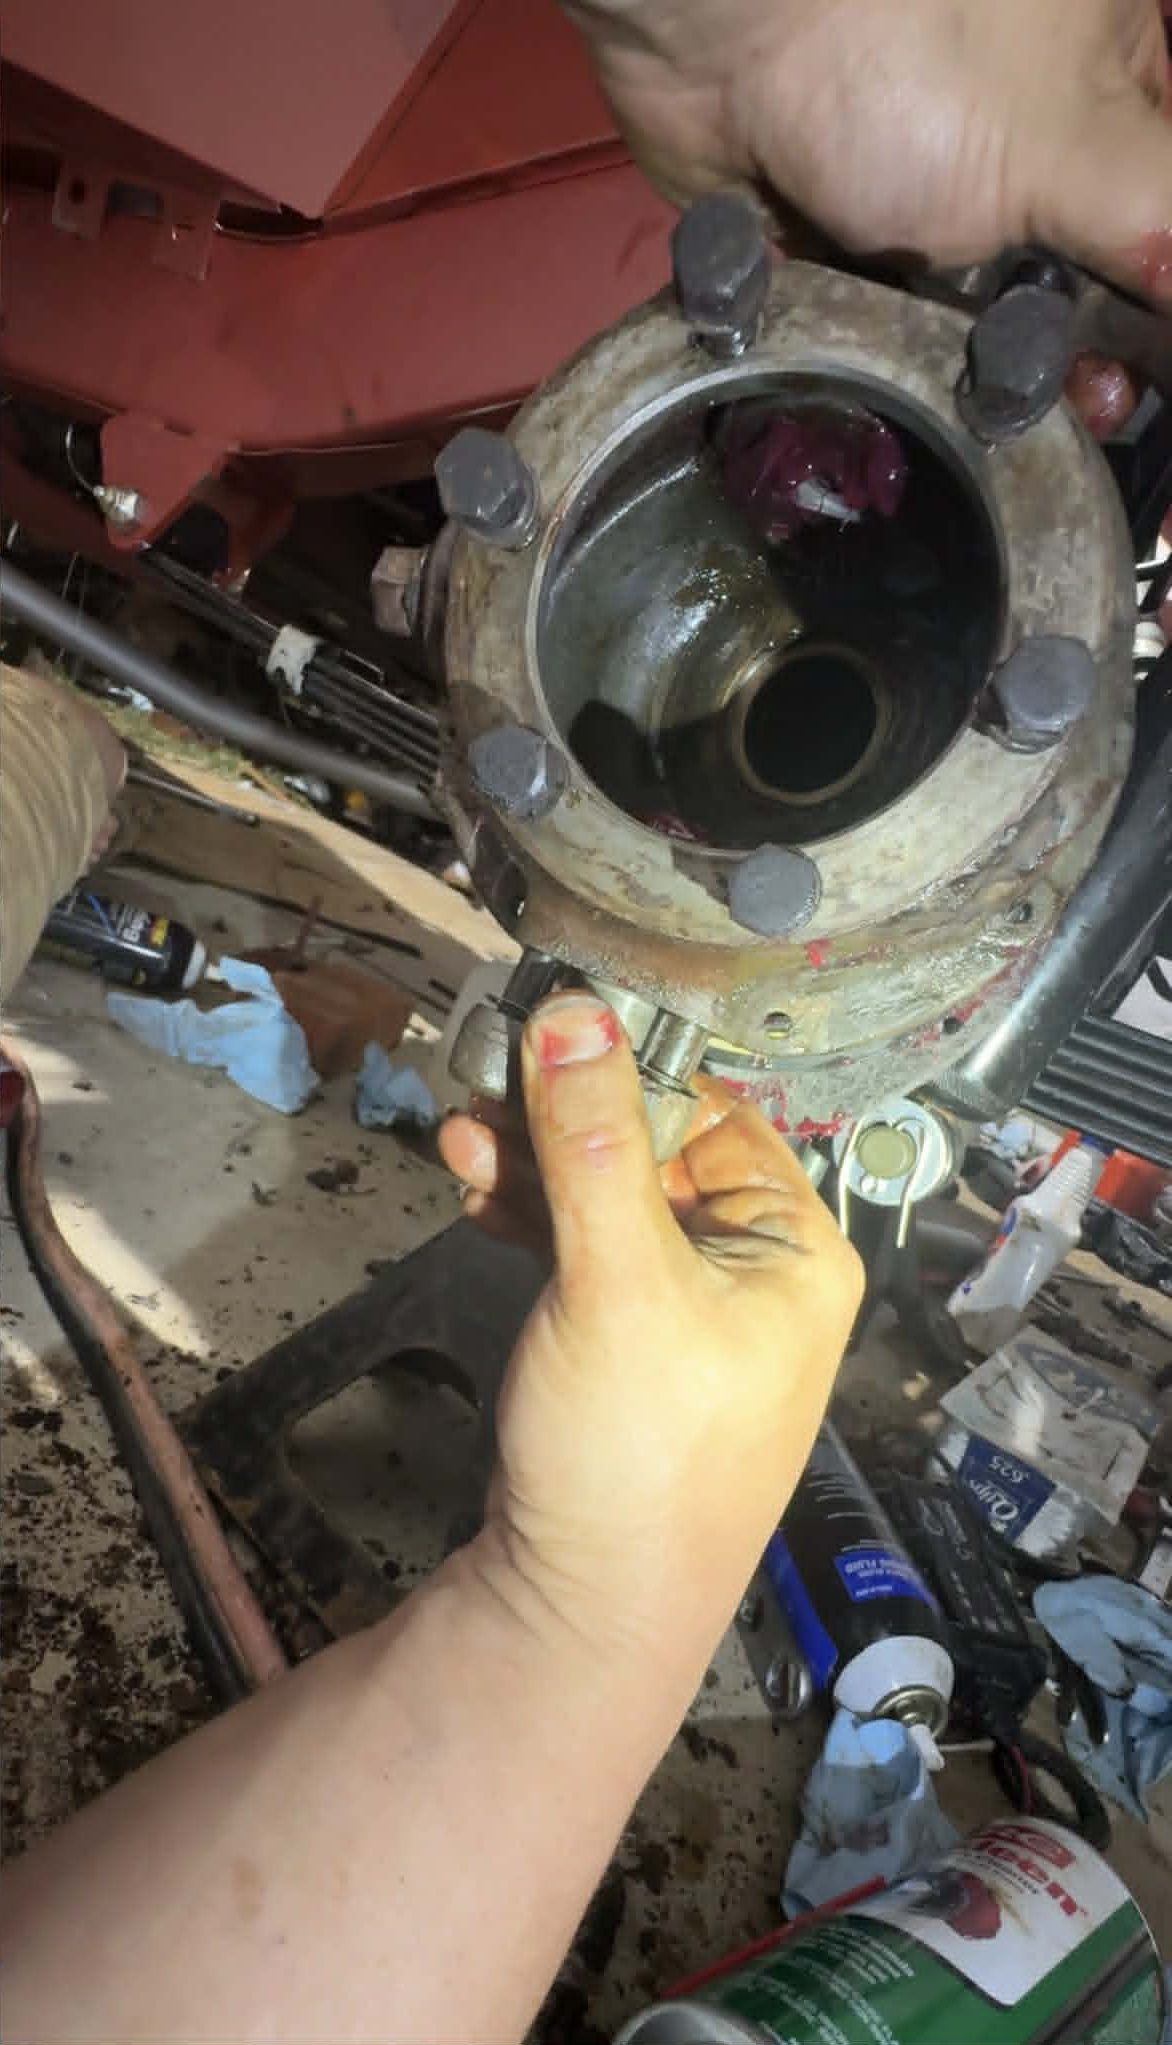
The photo below shows me having shoved a grease-packed bearing into the race that I’d pressed into the top of the axle. I have the lower bearing in my hand:
With the knuckle on, the bearing caps slide into the center of the bearings and push against the inner race, then they are fastened to the knuckle:
You may notice on that bottom bearing cap there’s a thin steel “shim” spacer. Those are these, which I had to buy from the UK since all of North America seems to be sold out:

These shims offset the bearing caps, which means they change how much those caps are squeezing the inside of the tapered roller bearing against the conical race pressed into the axle tub. Adjusting the shim stack changes how tight and loose the steering bearings feel — a process called setting the “preload.” Too tight or too loose, and the bearings will fail prematurely.
Setting kingpin bearing preload is an iterative process, and involves putting a stack of shims between the bearing caps and the knuckle, then tightening the kingpin bearing caps to spec using a torque wrench:

Then you use a “pull scale” on the knuckle’s steering arm to see how much drag is created when you try to steer the knuckle. Roughly 12 pounds is the spec, so once you hit that, you know you have the right shim stack.

Once I had my steering kingpin bearing caps tightened just right, I had to take the knuckle back off so I could install the seal on the back of the back. The seal comes in four pieces — two metal halves, a thick rubber circle with a break in it and then a giant round felt seal: 
Getting that seal onto the back of that knuckle was not fun. I had to gradually install the bolts from the bottom towards the top, first loose, then ever tighter. The goal was to try to get the ends of the rubber seal to mate and not leave a gap. This was quick on the driver’s side, but took me an hour on the passenger’s side:

Once I had tightened all the kingpin nuts on the knuckle, I then put on the spindle:

Then I bolted up the brake backing plate:

From there, I could slide on the brake drum:

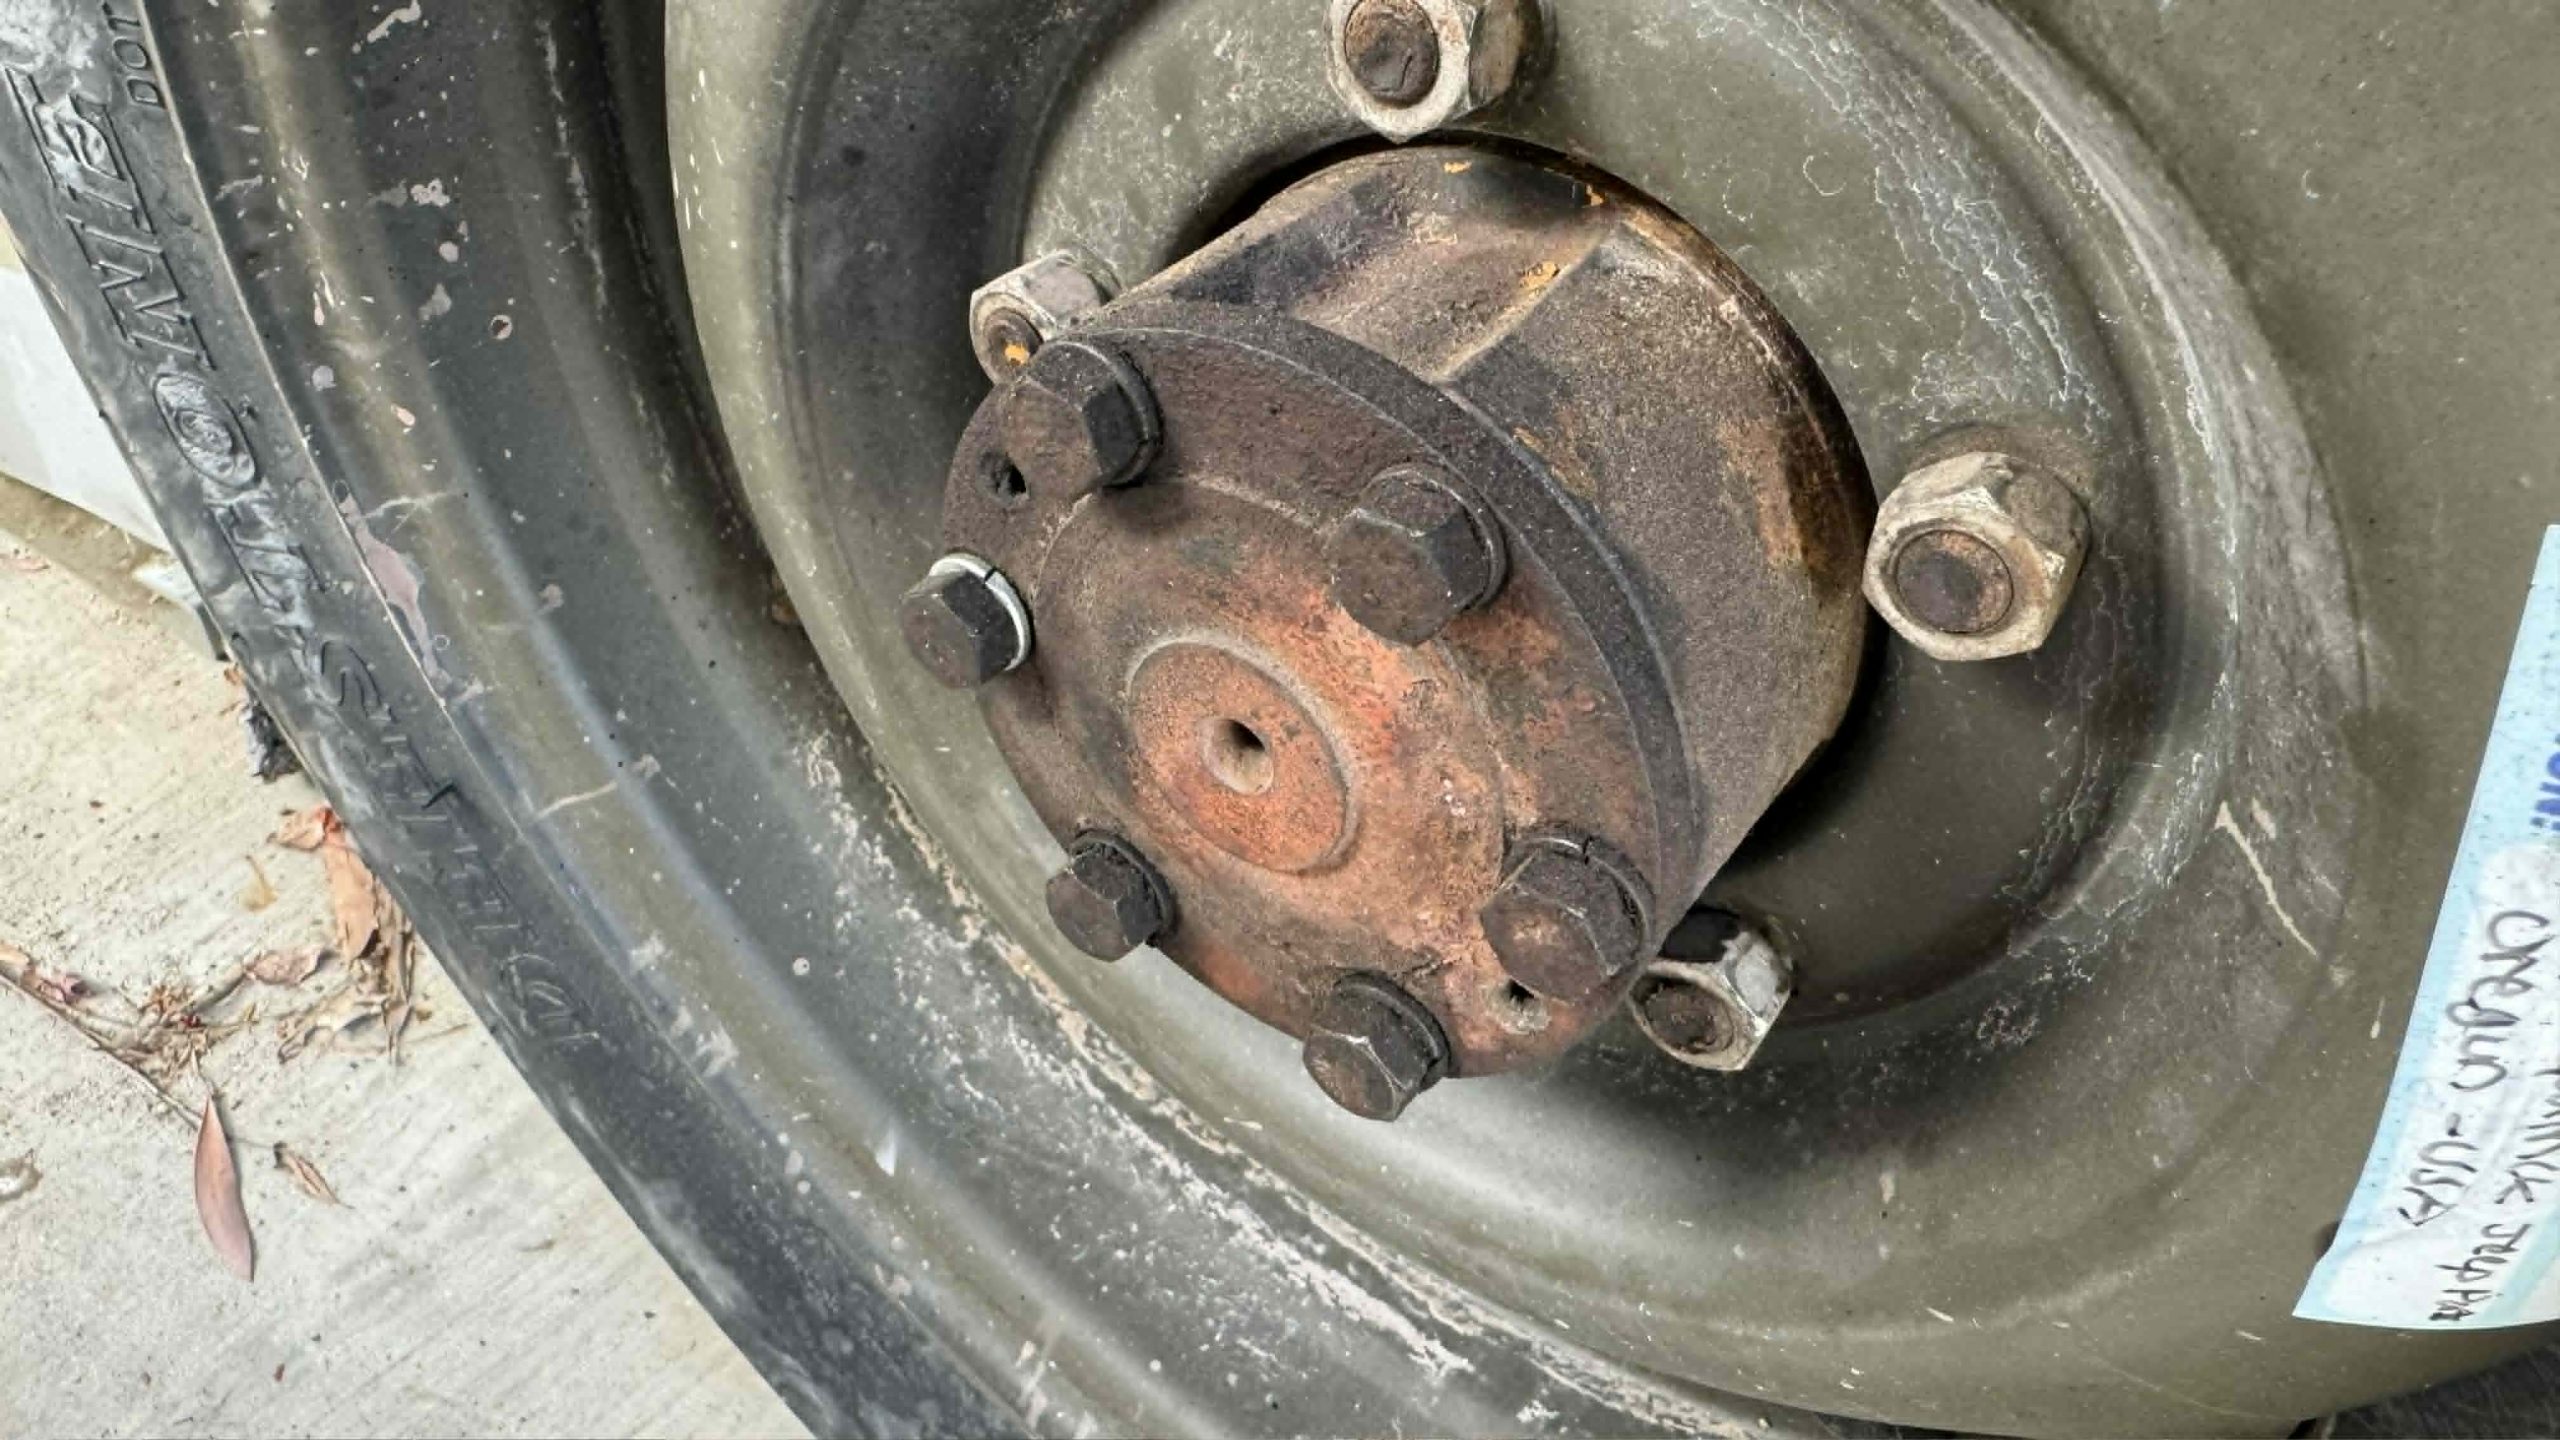
And finally, since I’d thread-chased the lug studs, I could install the wheels by easily threading on the lug nuts:

The Brake Lines Were Relatively Easy, By Which I Mean They Only Took 6 Hours

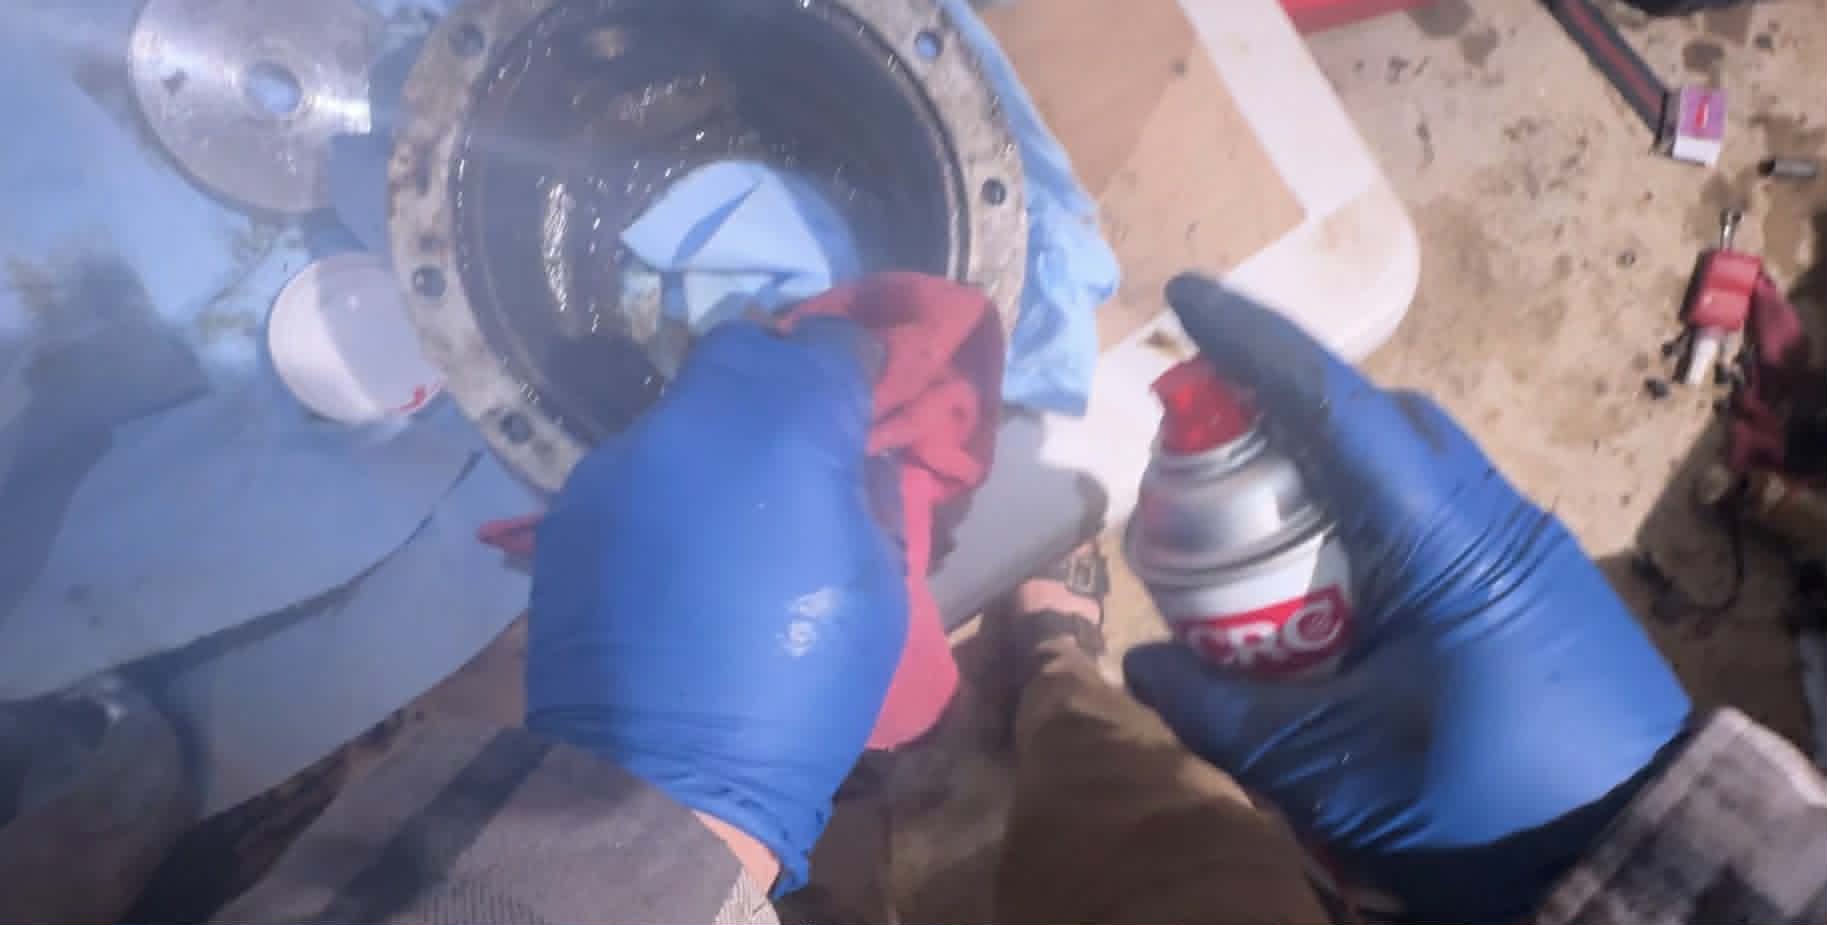
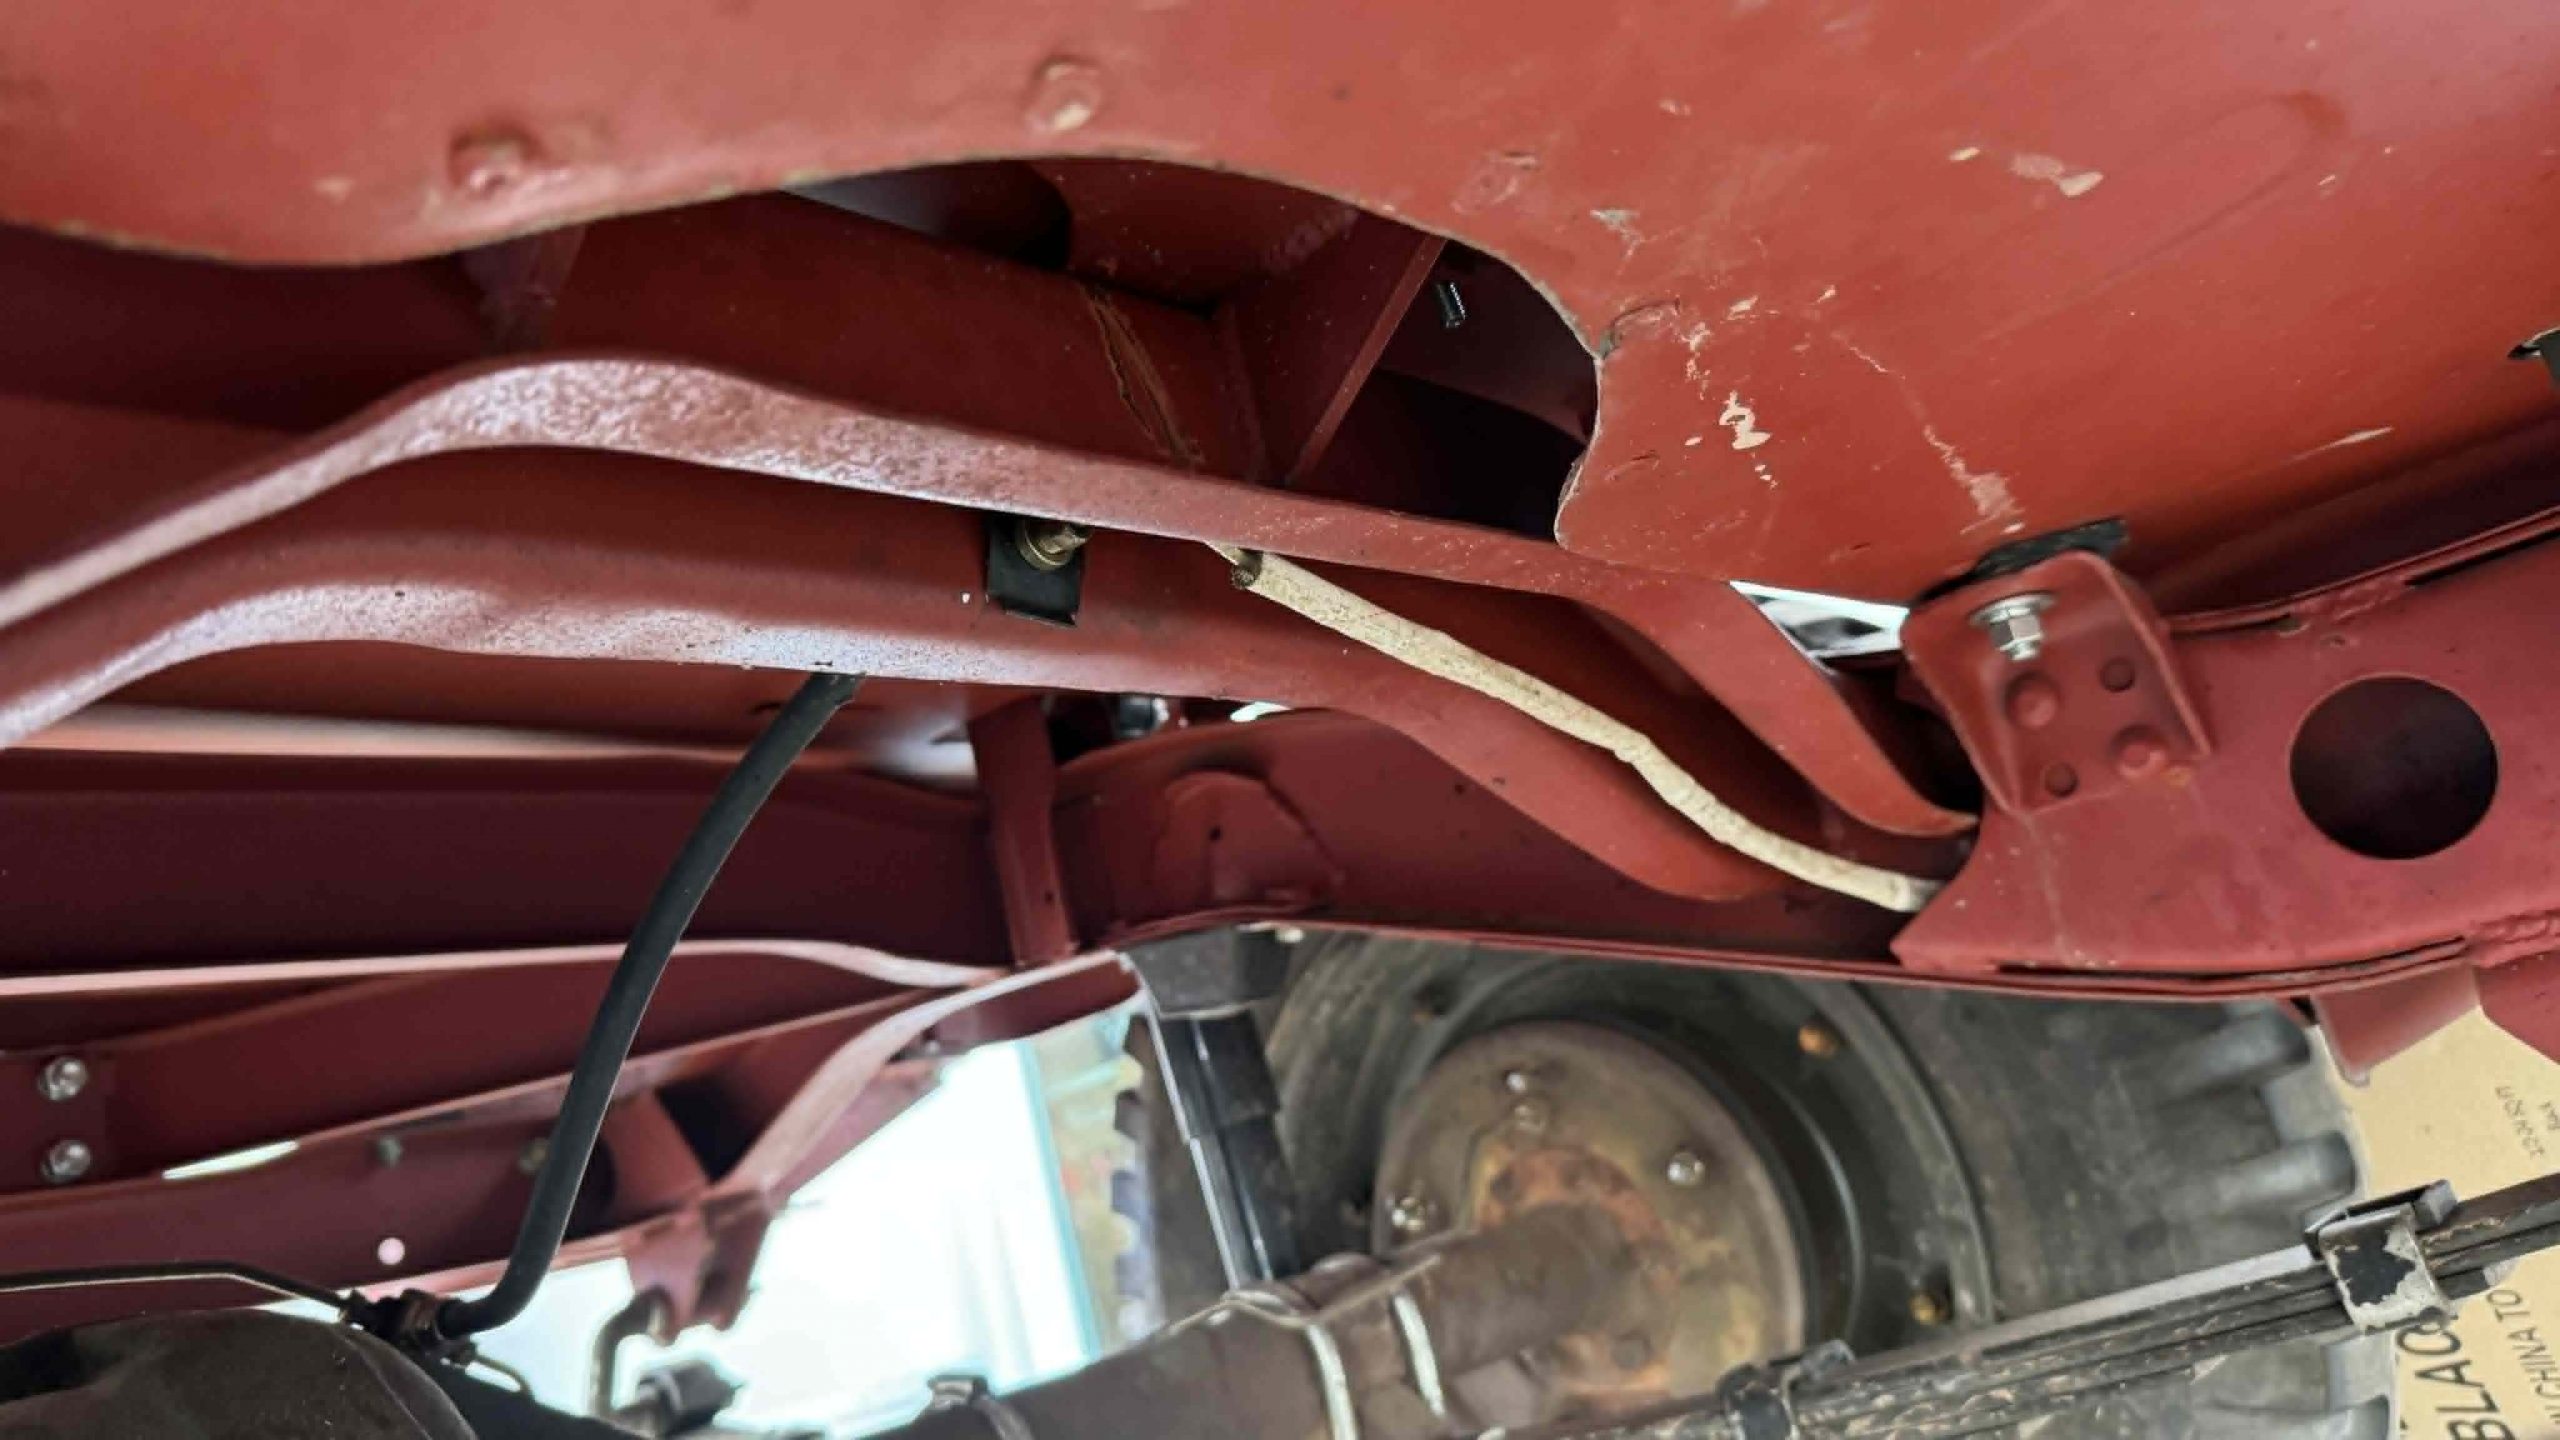
There was so much more involved with buttoning up these axles, but I don’t want to bore you with all the details. The brake lines I’d purchased from eBay were pre-bent and flared, and they fit remarkably well. That’s not to say installation was quick, because I had to reuse my old junction blocks, which required lots of cleaning.
Bending these lines to get them just right was tricky, and then hooking them to the brake master cylinder and trying to get the master cylinder (shown below) connected to the frame with the heat shield required trimming of the shield.
Nothing was easy. Nothing.
Bleeding the brakes could have been worse. There were a few leaks at some of the fittings, but snugging those down solved the issues.
Above you can see these brake lines and rubber hoses all nicely installed.
This Whole Job Was Brutal

Tick…tock. Tick…tock.
I had less than 30 days to turn this Jeep into something that could drive 900 miles. I hadn’t driven it an inch, and while I’d heard it run, it wasn’t idling. While I had rebuilt the transmission and transfer case and looked inside the differentials, I didn’t know how well they all worked, and there was always a chance I had screwed something up.
I had some hope, though, because part of the reason why the axles I described in this article took so long to complete is that I was doing everything exactly by the book and with only the best parts. If there’s one thing I understood about this eBay WWII Jeep build it was that there are thousands of moving parts associated with assembling a car from scratch, and so many potential failure modes. I had to make sure that every single step of the way I worked with precision and took no short cuts; only then could I fire up this engine, put the transmission into gear, and have any prayer of driving 900 miles without incident.
I had one pitch to swing at, and I was going to be prepared for it.

Did the kingpin bearings that I removed look OK? Sure. Were some of the wheel bearings OK? Sure. Could that transmission that I’d purchased have shifted just fine without a rebuild? Maybe. But with so much at stake and so little time, I decided the right answer, given all the potential failure modes, was to break out the feeler gauges and dial indicators and calipers, replace every bearing, and follow the repair manuals to the tee. If I wanted any chance of getting this Jeep to Moab, Utah by the Easter Jeep Safari, I had to be 100% focused at all times. I had to do my best work.
And I did. As I sat covered in grease, night after night, all by myself, it was hard not to get demoralized. There was so much work, and it all took so much time and focus. It was brutal, but you readers, our partner eBay Motors, and my company was relying on me, and I had no contingency plan.
I had to pull this off. I just had to.


Sorry but I can’t help myself from laughing about the fact I could drive an hour from my job and buy an authentic WWII Jeep for far less than what you spent on the project. Butler Pa and Bantam Jeep are having their yearly celebration and there will be so many jeeps DT would have a stroke. Maybe next time just buy an authentic complete jeep on EBAY.
However that would not be anything near as enjoyable to read. But advice from the original experts instead of other people might be a better idea.
Bravo, you mad bastard!
You really should publish this as an e-book complete with vendors/part numbers as a ‘2026 status/addendum’ to all of the extant literature. ‘Buy this/not that’ etc.
David you either have the patience of a saint or you censor/sanitize your work diaries exceptionally well. If I had a fraction of the challenges you have on these builds, I’d throw in the towel and probably be institutionalized in a fit of blind rage.
Oh, I yell some choice words every now and then. It’s a requirement for any significant wrenching project.
But as I imagine you using choice words it is always fudge, darn, drats, or darn it. I just can’t imagine you actually being crass. You seem to nice a person
A small shop press makes new races go in so quickly used with the right diameter disc and a solid set of arbor plates. $170 well spent for a 12 ton one and inch thick steel arbor plates. Plus then it’s a press that can be used for anything that needs concentrated pressure. Welding on the face of the old ones makes them fall out. Even flux core booger welding will do the trick.
Not to be that guy, but … David. I see gloves in some of these photos, which means you own gloves, which makes the photos without them so much worse. You have PPE. It’s right there. You’re choosing chaos.
And the sandals. THE SANDALS. You’re rebuilding 80-year-old drum brakes, manhandling wheel bearings, and pressing kingpins in footwear that wouldn’t pass muster at a Wendy’s. One dropped brake drum away from a broken foot, and believe me, broken bones in the foot suck.
I get it, you’re in the zone, you’re fighting the jeep, you don’t have time for “safety.” But you live in California. Half the stuff you’re bare-handing is known to the State of California to cause cancer, and for once in its miserable regulatory life, California might actually be right. Brake dust, anti-seize, penetrating oil, whatever cursed mystery paste is packed into those bearings … your skin is absorbing a chemistry set that would make a Prop 65 label file for emotional distress. Your hands look like you lost a fight with a grease gun, and that stuff doesn’t wash off. It bioaccumulates.
A $7 box of nitrile gloves. Splurge and get the 9mil ones! Some closed-toe shoes. You already own the gloves! Just. Keep. Them. On.
It could have been worse. It could have been sandals with socks.
David is half-German, after all.
Yes, this! For us cheap folks, $18.99 plus tax gets 400 nitrile gloves from Costco delivered to your door. Get a nifty magnetic glove box holder from Harbor Freight or Amazon or wherever in your favorite color to keep them handy. Great for greasy dirty jobs or changing the cat litter, picking up after the dog, etc. Or get the nice thick gloves, Harbor Freight has those as well, all the way up to 9mil thick ones. There’s one right in Pasadena.
Alas, while Birkenstock does make actual shoes and boots in addition to sandals, I don’t find any steel toe versions. Plastic closed toe ones though.
There are add on things for foot protection, for example, Grainger has them under “Safety-Toe Overshoes, Toe Caps, & Metatarsal Guards”.
At least some sort of closed toe footwear when lugging heavy bits around you can drop on your foot. Heck, you can’t even get into Pick-N-Pull unless you have closed toe shoes.
Your future self will be happier.
I wasn’t a big fan of rubber gloves for car repair but they are great for eating chicken wings
I’d like to see David wearing some toe caps on top of his Birkenstocks.
David has totally moved to California and adopted the footwear as well as the lifestyle.
Nitrile gloves are AWESOME for chopping chili peppers. No more surprises when you touch your eye half an hour later and realize you didn’t quiiite get all the capsaicin off your hands.
Oh yeah! My wife has a tale of taking her turn at making the dinner for geology camp, chopping up jalapenos and then absentmindedly rubbing her eyes, thereby becoming blinded for some minutes while alone in camp. Not fun! Never did that again…
Pretty sure he is using new. You can’t buy old parts not clean up. And he is experienced at rust far more than you. And forget California science that state is just a phenomenal fucked up ignorant mess
I build model cars and whenever I’m airbrushing or using spray cans, especially lacquers or 2k clear, I make sure I’m wearing gloves and a good respirator. The gloves go on before I start mixing paint and don’t come off until the airbrush is cleaned. The sandals, especially the pics where David’s piggies are pretty much directly below a precariously perched rusty brake drum, had me cringing the entire time. At least with closed-toe shoes if you drop something sharp on your foot you probably won’t have to go looking under the workbench for your big toe.
You just need 15,000 workers and an assembly line! It’s amazing that during peak production (1941-1945), the Toledo Willys-Overland plant alone produced a completed Jeep about every 3 to 5 minutes. Some sources state every 2 minutes.
No what DT is experiencing is making a copy from a copy over generations. The allowance is all messed up. Never lose your original to make copies from.
Good reminder of why I hate drum brakes.
Still better than having a teenager playing drums in a band practicing in your garage.
While reading this I was wondering if it was possible for him to switch to disc brakes somehow. I guess it wouldn’t be authentic.
I d be in the insane asylum by now.
You mean you aren’t? Did you escape?
Doing things right is hard. Well done man!
The old saying is true: building cars is hard. 🙂
Oh yeah, not glamorous, but it’s great to drive something where you’ve really gone through it intimately, and know every aspect well. Everybody likes seeing shiny paint or fresh parts, but sometimes you just gotta slog on and do all this little stuff first, so that the end results isn’t constantly fixing failing systems.
There is an old Groucho Marx saying I would never be a member of a club that would have me as a member. In this situation I would never drive a car the had me as a builder. The only thing worse would be building an airplane. I want an expert to build my vehicle.
“I’m going to give a prize to whoever guesses what time tonight I complete all this work.”
So I’m guessing we all got shafted out of winning a prize.
Also, “As you can see here, the brake backing plates were encrusted with a combination of oil and dirt, creating a concoction whose technical name is, I think, ‘grime‘”
A.K.A. “Crud”.
Yeah, I always wondered about that “prize”…I’m guessing they just sent it “anonymously” which then…it should have gone to YOU! “Anonymous Person” Ha ha
I actually guessed 2:30am because of DT’s joke:
When is the best time to go to the dentist?
2:30… because your tooth hurty!
Of course I didn’t win…
I’m happy to send you something!
Honestly David, just keep doing all the automotive stuff you do and writing about it so we can all keep living vicariously through all of your adventures.
If you’re really serious, you could maybe send a writer/contributor or even a member to cover Elcofest in Elkhart, Indiana on August 1st in case you’d like more content for this site.
I personally have nothing to do with that show, other than driving my El Camino 600 miles and showing up last year, having a great time, and receiving a small trophy. I just want it to continue being a successful show.
We have a ’47 CJ-2A in a complete state of disrepair. I realize it’s not the point of what you’re doing, but I am *definitely* doing a 4-wheel disc conversion when we have some time to wrench on it again.
Totally empathize with “while I have it apart, I’d better do this the right way.” I currently have our lawn tractor nearly back together in my shop, which needs to be spic and also span for an open studio at 10:00 tomorrow. Presently, I’m looking for the second new headlamp bulb since I have it apart instead of firing it up and moving it out. It’ll just be another minute, right?
Dude your backyard is a superfund site now
Oh, you ain’t seen nothing!
I say it’s a superFUN site…just like TheAutopian.com!
Just in time for the “crawling/toddling around putting random things in his mouth” phase
Do you mean Delmar or David?
Yes.
Wow, I need a 3 day weekend just to recover from reading this!
That’s tough grimy work. Nice work, but I don’t envy you one bit. It makes me incredibly thankful that I hardly have to deal with drum brakes or tapered bearing wheel hubs anymore. That said, I’m collecting parts to do a Mustang spindle and 4 wheel disc brake conversion to my ’79 Fairmont, which is a job I’m not really looking forward to for a lot of the reasons you mentioned.
It’s crazy a 2009 Corolla Sport that was recently given to me still has rear brake drums. Sport indeed…
I only ever take apart one side at a time and take lots of pics as there are so many wrong ways to put them back together.
The rear disc e-brakes can be a pain but I still prefer that to messing with drums.
Then there’s the combo—rear discs with inner drum for parking.
Yeah my 04 Impala and old Grand Cherokee had set ups like that and they didn’t work that great, maybe because they’re so small.
To pass inspection here the ebrake has to hold the car at 1200 – 1300 rpm in drive or first gear. Even with fresh shoes I had to do a lot of fussing to get them passable.
My Legacy only had an issue once the cables stretched from so many handbrake turns (FWD, so no center diff to screw up). For state inspection, the place I went to even back in the early ’00s didn’t have anyone who could drive a manual, so they’d have me drive it in and I would only engage the clutch during the parking brake test enough to have the car strain slightly against the brake to make sure it passed. It did hold the car even on hills (though I always put it in gear, anyway), but I was glad not to have to take a chance. The drum portion was pretty simple and I preferred it to the method of having the parking brake using the caliper, requiring the piston clamp to rotate the cylinder while compressing.
I am saving this article to read later, but the headline is scaring me because I need to do the drum brakes on my ’64 Buick and I’ve never done drum brakes before.
If it makes you feel any better, I’ve been working with air drum brakes for 20 years, to the point I could rebuild the wheel end with my eyes closed.
I was defeated by my Mini’s rear drums last weekend (the drum won’t fit over the shoes no matter what I do. I suspect a faulty new wheel cylinder)
That does NOT make me feel better. LOL.
I’m really dreading this job. Maybe one more summer with these brakes before I am forced to do them.
Honestly, it’s fine. Just remember to only do one side at a time so you can use the other side as a reference.
Don’t worrrrry… If TheDrunkenWrench with all his experience gets defeated, I’m totally sure that’s not a Bad Omen for you.
No sir.
You won’t lose your mind! Nor will you put it back together, go for a drive and suddenly realize you have no brakes because you missed one little thing… which leads to Fiery Death.
I’m Totally Sure that won’t happen.
Nothing to worry about at all.
No sireee!
As long as the car is fine!
Probably a dumb suggestion you know very well, so at the risk of coming across as an IT help guy (“Is it plugged in?”), could the adjuster need to be pulled in?
Adjuster is all the way in! I triple checked cause I was getting suuuper frustrated.
You just need a bigger hammer.
My 8lb sledge may be overkill.
You’ll never know if you don’t try.
I’ve split enough semi truck drums with that hammer to know there’s a limit, hah.
Just take lots of photos of what everything looked like when it was together and it’ll be fine, if a bit unpleasant. I rebuilt the drum brakes in my ’72 Beetle when I was a teen and had to open it all up again for wheel bearings a few years back. It wasn’t terrible, but I got lucky and didn’t need a drum puller. Just a hammer.
“I promise that’s my knee on the right and not my gut.” I literally laughed out loud because I saw the photo and was like “David is hardcore rebuilding drum brakes with no shirt on.”
How else is he going to get his required dosage of rust and grime? It must be applied directly to the skin. All over.
Silence of the Axles: “It puts the grease on its skin or else it gets the hose again. Yes, Precious, he’s gonna get the hose.”
Dear Mr./Mrs. The Autopian,
Please include trigger warnings on posts like this. You can’t just put drum brakes in the listing image without… without… <deep shuddering sigh> I need a moment to compose myself.
Thank you for your consideration in this matter.
Apologies.
One thing I’ve always wondered: Why did drum brakes come before discs? Discs seem like the simpler, more obvious answer. Was it a manufacturing limitation?
Sounds like a good article? I know some wagons had brakes that were effectively a drum brake pushing directly on the wagon’s axle or wheel. Evolved from that?
It might be safe to say that discs appear simpler due to hydraulics, I can only imagine the horrors that would come from cable activated disc brakes.
Agreed on this idea. From what I’m reading, (Wikipedia, take that for what it’s worth) early discs appeared in the early 1900s but didn’t become common until just before WWII, and mainly on aircraft until Jaguar ran them at Le Mans. The wagon brake theory, as well as railway brakes basically being the inverse of drums might have contributed to a sort of mechanical familiarity?
I had cable-actuated disc brakes on my bike for a good 12 years (before a useless waste of carbon stole it), and they were wonderful. Simple to work on, no need to bleed them, and provided plenty of reliable braking force for a bike + person-sized load.
I’m going to guess and say it was the more logical evolution of the spoon brake.
A lot of designs make more sense in hindsight, but evolution doesn’t follow that path.
I was literally thinking about this again just yesterday. Drum brakes are just so damn complex, fiddly, particular and peculiar.
As others have pointed out in reply in the meantime, elegance isn’t always the first stop in evolution, but… man. Drum brakes are hard to reconcile as a worthwhile stop at all.
Of course, this is all well and good and easy to say decades after the fact – I’m sure I’d not have a clean sheet design for discological brakeamajigs tomorrow if they didn’t already exist – but I like to think working with drums would have lit a fire under me to at least try to do better.
I won’t repeat what others have mentioned, but I’ll add that drum brakes were also similar to band brakes that were commonly used on driveshafts in the TOC era. I also think it’s related to mechanical operation at the time. Drums can pull the shoes into themselves, increasing their braking power without additional effort from the driver. Fading wouldn’t be much of an issue on typical roads and traffic conditions, either, other than descending mountains. Manufacturers kept with it because they kept improving them to keep pace with traction ability and braking needs of the time and I’m sure a bit of institutional inertia. Cable operated discs, though? No thanks.
Probably an evolution of adapting what trains used on automobiles.
Drums keep out water better so maybe it was because of the limitations of early friction lining material?
I think it was a logical follow on to the external contracting brakes that the earliest of cars used on the rear wheels or a drum at the end of the transmission. Also, disks are much easier to do with hydraulics, and the first cars were all mechanical linkages.
I admire your steel toe Birkenstocks!
Safety minute.
At least wear safety Crocs for some spongey toe protection.
And wear gloves when fooling with grease.
It’s fine, his toes are doing the safety squints.
I was once down for 2 days due to drum brakes. I hate them with a passion.
If you haven’t, you seriously need to invest in the largest ultrasonic cleaner you can fit in your work space. With the proper grease fighting surfectant it frees you up to do more work while it cleans your parts.
Also, I don’t know you near as well as I’d like to, but this writing feels a lot more stressed than normal. Pre-LA move, clearing out the house, type stuff. Hope you’re doin ok and the stress isn’t eating you
Well done. Working on old stuff can suck.
Does Elise (not her name) allow you to come into the house after work like this, or does she take the pressure washer to you first?
It’s tough, because Delmar crawls to me and wants me to pick him up, but I have to walk away because i’ve got grease from head to toe. He cries. I feel bad.
You need an outside shower or at least sink so that you can provide at least some attention when you first come in. Maybe just take a bucket with soapy water water when you first go out so you briefly wash up before going in.
Or just throw some baby wipes from Costco* and a fresh tshirt in that tent. Do a quick wipe down of hands/arms and throw on the shirt, and Delmar should be able to get some hugs before a shower is needed.
*seriously, those things are magic. We haven’t had a kid in diapers in 6 years, but still stock them at home. They clean up any wet or dry mess, are great on stainless steel and quartz counters, and are much more convenient than getting a combination of paper towel + soap + water.
[notes to buy some of these]
Your are in possession of a near toddler. Ask Elise(nhrn) to toss you a pack of wet wipes for the tent.
And they are great for camping also.
I still keep a pack in each car at all times.
Don’t forget the neck, baby hugs involve a lot of neck contact.
They’re even made of Tencel (at least they are in Canada) which is biodegradable.
Given David’s interests, Delmar’s impending toddlerhood, and LA’s warm climate, an outdoor shower is a great idea. So many toddler situations are improved by kid, parent, or kid+parent immediately getting in the shower.
And because it’s near the grill Laurence used in an earlier article, David can branch out from shower spaghetti to shower ribs and shower kebabs.
I don’t have anything on topic, but that’s an incredible username.
It’s like this scene from Pulp Fiction:
https://youtu.be/HdrMEy3ctko?si=KKVNA9VY4uMKnS_7
Drum brakes are awful in every aspect
Except for cost and maintenance intervals.
They’re cheap as dirt and rarely require servicing since all moving components are protected from the elements.
It seems to me that David’s trials essentially relate to “old and crusty,” not “drum vs disc.”
It’s a good thing that your hobby and day-job overlap that you can get (quasi) paid to do this.
It can’t quasi be enough, if you ask me.