
The worst part of fixing up an old car is not repairing rusted out body panels, unsticking fasteners that have welded themselves into place, or even troubleshooting a carburetor that refuses to be tuned right. As hair-pullingly frustrating as all of those can be, they are arguably what some people call Type II fun. [Editor’s Note: I thought that was a VW Bus reference but it isn’t. – JT] Despite all the pain and suffering that comes with any of those tasks, in the end, you get to feel good about what you accomplished.
What never feels good though is getting nickel and dimed as you round up all the fiddly little replacement parts that an old car inevitably ends up requiring. A car you thought you got a great deal on looks a lot less financially wise when you start realizing you’re going to need a $60 turn signal lever, a $20 dome light cover, two $80 tail light lenses, a piece of door trim for $120, and a couple dozen other things.
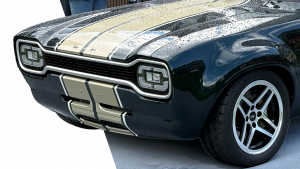
My current money pit/labor of love is a 1982 Toyota pickup that I bought from my parents in February. It’s not the most exciting 40-year-old vehicle around, but they bought it brand new, and it holds a lot of memories for me. I learned to drive stick shift in it. I had the worst camping trip of my life in Death Valley in it. When I found out my parents were going sell it, I had to buy it.
Fortunately, it’s in pretty good shape. It spent its whole life here in LA, so it has virtually no rust, and my dad is a responsible car owner, so it’s been well cared for. Still, it needs a bunch of those nagging little things.
While working on it recently, I noticed that one of the little bulbs for the rear side marker lights was dangling by its wires from under the truck. When I unscrewed the two fasteners that were supposed to hold the housing to the body, the entire thing (minus the lens) crumbled into a rotted plastic powder. The marker light on the other side was the same way. A quick glance at the front marker lights suggested they were also going to be trouble.

I went looking online for replacements and I found them, but at roughly $40 each, they aren’t cheap. I wasn’t planning on spending $160 on marker lights and I resolved that I wouldn’t.
[Editor’s Note: Part of why I’m running this – other than I think Emily is great and has a lot of great skills I’m delighted to show you – is that my goal is to make our site the go-to side marker lamp location on the internet. Side markers are the most underappreciated automotive lighting category, and this is part of my personal mission to change that. – JT]
3-D Printing to the rescue
Of my many, many hobbies, most of which have absolutely no practical applications (building sculptures from animal bones etc.), 3-D printing actually has some uses around the house and in the workshop.
Three-D printing isn’t a new technology anymore and it’s been widely adopted enough that I think I can skip explaining it in depth, and just say it allows the average person to print objects at home. A lot of 3D printing enthusiasts use their printers to churn out busts of Thanos, low-poly Pokémon, and little planters for desk succulents, but I mostly use my printer for solving problems. Think: making brackets, clamps, knobs for electronics, and even a hard-to-find drive belt for a cassette player.
So, in an effort to save myself from spending $160 on lights for the truck, I got to work with some CAD software and my 3D printer.
Designing the part
Since the entire housing for the marker light had disintegrated, including the socket the held the light bulb, I wasn’t going to get out of this without making any purchases. To get started, I went to my local auto parts store and found some little light bulb sockets that are somehow meant to fit Ford and GM vehicles manufactured between 1953 and 1999. It didn’t matter which vehicles they were meant for though, because I was going to be printing my own adapters to fit them to my truck, and at $4.99 each, they weren’t a bad bargain.

With those in hand, I began actually designing my parts. On one end, the printed piece would need to fit the socket. On the other end, it needed to act as a gasket between the marker light’s lens and the truck’s body. The socket end was easy. My calipers told me I needed a hole 14mm in diameter. Simple enough. The lens end was harder. The lens isn’t just a rectangle that I could measure and recreate in CAD software. It has sweeping curves and tapers that can’t be easily captured with simple measuring tools. Sure, I could approximate it as a rectangle, but that would look like shit, and if I’m going to work on my truck, I want the results to look nice.

Fortunately, I’ve learned a trick for this kind of thing. If you have a relatively flat part with complex curves, you can do a pretty good job capturing its silhouette by laying it on a piece of graph paper and taking a photo of it. Because lenses distort the image they’re capturing to some extent, you want to take the photo from as far away as possible while still having the object clearly visible. The graph paper provides reference lines you can use later to see and fix any distortions that still occurred.

After I took the photo, I imported it into photo-editing software, cleaned it up a bit, fixed the little bit of distortion in the image, and then exported it to Adobe Illustrator, which would allow me to trace the outline of the lens and turn it into a file that CAD software understands.

Then I started designing. The part isn’t complicated. The gasket between the lens in the body has the same outline as the lens itself, except bigger by 1/16th of an inch. It’s got two holes for the mounting screws to pass through, and in the center, it lofts up into a little housing for the bulb and socket.

After designing the part, I set it up to print (a process called ‘slicing’) and printed in thermoplastic polyurethane (TPU), a tough, rubbery plastic.

TPU was ideal for this part because it holds its shape at higher temperatures than some other plastics used in 3D printers, and it’s flexible, which allows it to conform tightly to the body panels of the truck. Each housing only took 90 minute to print, which is pretty darn quick if you consider that some people have prints that take over 24 hours.

The housings printed cleanly and the sockets mated nicely with the 14mm opening I left for them. I printed them in black TPU so the portion exposed on the outside of the truck would match the appearance of the original part. Black isn’t known for being reflective, so I painted the inside of the housings with some silver nail polish, and the parts were done.

A quick test with my benchtop power supply showed that they lit up very nicely, so all that was left was to wire them up and install them on the truck:

Conclusions
Often when I find myself trying to avoid spending money on a project, I’m trading money for time. Maybe I saved $50, but at the cost of a few wasted afternoons. This was not one of those situations. Yes, I spent more time on these lights than I would have if I had just bought them online, but it didn’t take that long. This might sound like rationalization, and maybe it kind of is, but maybe it’s not.
I spent about an hour designing the parts, and my printer did basically all the rest of the work. My materials cost was about $20 and change, which is $140 cheaper than buying new marker lights. And I had fun doing it, so I’ll call that a win.
(You can find more of Emily’s DIY projects on her Twitter!)


That’s awesome! Also, super cool little truck!
Excellent article. You choose an actual obtainable goal, made some plastic thing, used it, fixed someting. Sweet! ……and you didn’t have to fly across the globe and make a car out of dry grass and sand.
Great article.
I feel this is the inevitable destination for my tinkering as well. Having a project car from the 80’s that has decent but niche aftermarket support means that I can find whatever parts i want. . . .but many cost 3 figures because they’re made by one person who churns out like 100 a year or something.
As much as I like having an excuse to buy more tools (I 3D print things quite often) I can’t justify buying my own printer. For what I do, the quality that I need ends up being a machine I can’t justify buying. I find that using a company that I submit my models online and have them mail the final print to me is the best option. I don’t have to spend thousands on great equipment and the final product just shows up at my door. Many let you sell your products afterwards. I have a store that sells things for me after I design them for myself.
I haven’t printed with TPU before, what particular filament did you use? There are lots of variations on flexible filament.
My dad would have reassembled all the tiny bits and used epoxy to glue them together and then carve it back into shape with a dremel complete with used dental bits. My epoxy acheivement is usually putting the wrong lid on the tube and never being able to open it again
Google is by and by paying $27485 to $29658 consistently for taking a shot at the web from home. I have joined this action 2 months back and I have earned $31547 in my first month from this action. I can say my life is improved completely! Take a gander at it what I do…..
For more detail visit the given link……….>>
nice one
good
Yes! EVERY car i own has some 3d printing in it. with the right materials and process, they’re just as durable as anything you buy. PETG works well, but ABS will be better. I’ve modeled everything from simple brackets to radio bezels. Another thing that can be indispensable is a 3d printing pen, if you have cracked or broken plastic bits you can effectively weld and reinforce them. I 3D-pen fixed both my steering column cover and my fuel filler door latch on my fiat 500.
Also, Welcome!
Great job! I’m not so sure that fingernail polish on a less that ultra smooth surface is doing as a reflector. Certainly better than the black TPU. How about some of the aluminum foil tape instead? I’m pretty sure that would stick reasonably well to the TPU and since you already have the CAD you could print an outline of the shape of each plane on a piece of paper and use that as a cutting guide. If the adheasive on the tape doesn’t stick to the TPU well another option is to use sheet aluminum and make it all one piece and include the key way for the bulb holder. One potential metal source a good old aluminum can. It can cut with a sharp utility knife and if desired you could do a high polish on it, of course protecting it with clear coat when done. Does it really need that no but if you really want them to pop it could be worth a try.
One of the first cases I personally know of using a 3d printer to make a car part was one of my Son’s friends back when they were still in HS. His friend had spent the night and parked his car on the street. The car had a remote fuel door release and uncharacteristically for our neighborhood some decided to steal some gas from him. So to get the gas they pried open the door, breaking the plastic latch pin in the process. The broken piece was found on the ground to determine the proper length, a little time in CAD and a few cents worth of material and it was working right again. Now this was a relatively new Toyota and I’m sure parts could be found in the wrecking yard. However that’s at least an hour by the time you get back home with the part, so doing the CAD saved time in addition to saving money.
Yes! Foil tape is inexpensive, highly reflective, and can be polished for even more reflection, and then clear coated if you like, to make it stay shiny longer.
I used foil tape and sheet plastic and cardboard to make custom flash reflectors when I was into photography as a hobby. It was a lot of fun making different shapes and seeing them reflected in the subject images.
Sheet aluminum origami would work, too, but I’d try the tape first.
Aluminum tape would have been more reflective than silver nail polish, but I didn’t have any. I did, however, have silver nail polish and it increased the reflectivity a lot, so I was happy with it
There is probably a market for an internet specialty store to catalog CAD files on common parts that fail on classic cars, and then either 3D print them and sell them on the internet, or sell the CAD file itself. People aren’t going to stop restoring ICE vehicles just because everything is going electric. But parts houses are unlikely to keep stocking parts for them forever.
With some effort, it could even be a source of revenue for this website. Set the repository here, take a small cut of each sale. Or use affiliate links to an existing 3D printer design site.
So you can call these Maker Lights? Well done.
Out of interest, what CAD program(s) did you use to model this?
I tend to either use Tinkercad for really simple parts, or OpenSCAD for more complex stuff, and I really need to find something in between the two in terms of ease-of-use.
I use OnShape with a free license. It’s very solidworks-esque
How much does the 3d printer and modeling software cost? If they’re something I can use repeatedly that could amortize the investment but if it’s a one off thing like these parts I’d rather not pay a lot for something that’ll sit doing nothing 99% of the time. Seems kind of like something I’d pay someone else to do if necessary. Since I don’t find this sort of thing attractive as a hobby nor does my business have any need for the equipment it’s hard to calculate an ROI for personal use even with figures.
How often will a plastic part of my car, under a certain size and of a certain composition, fail with a replacement either being unobtainable or ridiculously expensive? Probably not often especially as I have no vehicles I intend to keep for life or anything. This sort of technology seems better for a custom shop, a dedicated hobbyist or someone with disposable income and a fleet of unusual vehicles.
Decent-ish 3D printers start at about $200. As for CAD software, there’s plenty of free options available. The ‘slicer’ software that takes your 3D model and turns it into code for the printer is almost always free and included with the printer.
If you’re lucky, someone else will have already done the hard work of modelling the part you need, so you just have to print it.
As absolutely cool as I think it would be to have a 3d printer, I am old enough to know I wouldn’t use it for anything useful.
A company I used to work for invested in some very advanced rapid prototyping machines, including some that could print in different materials including flexible materials that could be printed ‘fused’ to stiffer materials. These machines could print fully functional pumps with diaphragms and valves, or housings with integrated sealing gaskets, etc. Our engineers had even used these machines to produce tooling for injection molding machines which worked (briefly) and allowed for some approximate testing of mold designs before sending them off for hard tooling.
As much as I’d love to be the guy running the 3d printer farm, I am not. If I needed something like this done, I’d prepare the file and find a maker community with someone willing to print out the physical item for me. This technology progresses so quickly that I’m not willing to invest in equipment that will be terribly outdated by the time I use it for anything important.
Yep. I have been holding off on buying a printer since circa 2014. It seems that we are near the point now, though – prices aren’t dropping that fast any longer and capabilities are high enough that any further incremental improvements shouldn’t make me regret things a year from now.
I’m on my 3rd 3d printer since 2014. But, my current printer a prusa mk3, I’ve had since 2017. It’s had 2 revisions and prusa has made the plastic part upgrades available to print and offers the hardware ( sensors, wiring, and other parts) available for a minimal cost $20 or so. So my 5 y/o printer is up to date with what is state of the art today. Prusa has update kits for all of their printers back to 2014, that you can update to the current model.
I certainly wouldn’t buy a 3D printer just for working on my car. I have a 3D printer that I use for many things, and it just made itself handy again in this situation.
This is just my thought process to prevent myself from buying tools I don’t need. Got to damp down the enthusiasm somehow or you end up with an expensive thing that takes up space and is never used. Again.
Do you know if there are any 3d printers that can do ultra high density plastics? Some of those can be used for gears and such if the power is low enough so that might be interesting. And maybe the only way to fix old power windows and similar systems. Materials like that could really widen the range of projects these tools would be useful on.
Yep, if you are not already creating 3D files for fun or other purposes then this is not for you. There are also printing services that will print things for those of us who don’t own printers, but there are fees and shipping and at some point the cost becomes higher than just buying the parts.
There’s SLS printing for metal if you need strength. Might be better off sending it to be printed commercially though.
Not sure about your area, but our local public libraries have 3D printers. You can either send them a file to print($2.00 set up fee, plus material) or you can do everything yourself by booking a computer. They also offer classes and onsite assistance if you are new to the technology.
Problem solved
It is one of those things that you don’t know what all you “need” it for until you have it. You will see all kinds of applications for it once you start playing around with it. I think you can get started for $300 or so for a cheaper printer and the software is free to make stuff. There are all kinds of parts that people share online to make thousands of things. That might be a good place to start – check out what kinds of things people are printing and see if that interests you.
Right now I think micro center has some on sale half off @$99 fair an ender 3.
Software is anywhere from expensive to free ( in shape, Tinkercad)
For cars I’ve made clips, phone mounts, dashcam mounts, color coordinated dash pockets, go to Tinkercad search your vehicle and see what’s available without even learning how to create parts. Then imagine what you could do.
Very interesting. But how can you say there’s no practical application for building sculptures from animal bones? Is there another way to curse your enemies? Asking for a friend.
Bone curses are supposed to follow the cursed even past death. Blood curses last at least as long as the cursed lives, but if combined with another family artifact, can follow a family for generations.
Or so I’ve read. You could probably consult a brujo in Matamoros for more details.
This isn’t a joke.
Great writeup on DIY 3D printing for the car enthusiast! Can we hear more from Emily, please?
Welcome to Autopian 🙂
there is a set if them on Rockauto for 47 bucks
fresh lenses and wires included
This is a great application for a 3D printer!
Check to see if you have a local Makerspace or library that has 3D printing equipment. They love to help people learn everything needed to 3D print stuff, especially beginners. Some of them, like ours (The Curious Forge) also have a 3D scanner so you can copy an existing part, even if it has been cobbled back together with chewing gum, lashing wire, and bandaids.
Sadly, LA, where I live, is deficient in makerspaces. There aren’t any much closer to me than an hour away
So, nothing within 5 miles?
yes yes more wanton 3d printing of car parts. You wouldn’t download a car? Send me the STL m8
Flex time: Carbon-filled nylon turbo intake adapter. Known good tested to 15 psi of boost from twin turbos.
https://www.instagram.com/p/CWMplAoL24-/?utm_source=ig_web_copy_link
That is astounding!
Not gonna lie, I’m likely going to make my own custom intake elbows for the final production using TPU filament instead of spending like $30-40 each for those silicone ones. The whole gist of this turbo project so far is “how can I upset the most car people unintentionally”
Excellent nerdery. Moar plz
JT, of course you did the right thing by publishing this article that combines automotive DIY, technology, a (beloved) shitbox, and most importantly, side marker lights. I’d be happy to see more from Emily on the site!
This is awesome! I once modeled and printed a replacement rocker mechanism or my ado16 Austin 1100 indicator stalk because after ~45 years of use, the edges had worn down and the exact replacement wasn’t available. It worked awesome!